Vector Graphics
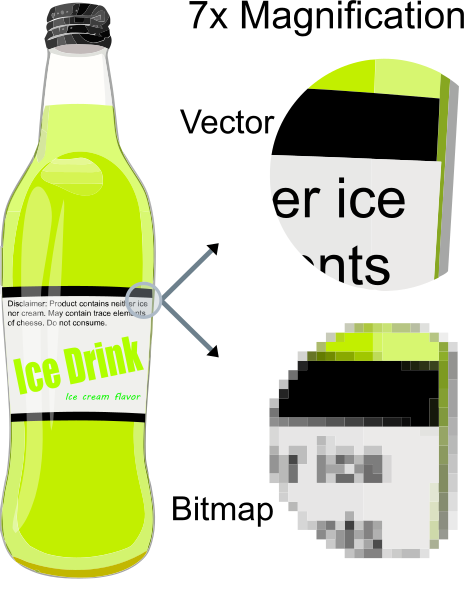
Up to this point, we’ve been discussing raster graphics, which are represented by a grid of pixels. In contrast, vector graphics are stored as a series of instructions to re-create the graphic. For most vector approaches, these instructions look similar to those we issued to our JavaScript rendering context when working with the <canvas> element - including the idea of paths, stroke, and fill.
The vector approach has its own benefits and drawbacks when compared to raster graphics.
- More Computation Before a vector graphic can be displayed, it has to be rendered into a raster form, much like we had to instruct our context to render into a
<canvas>. This requires some computation, whereas rendering a raster graphic simply requires copying its bits from one buffer to another (assuming we aren’t scaling it). - Better Scaling Perhaps the biggest benefit is that the problems we see when scaling a raster graphic don’t happen with vector graphics. If we want to make the graphic ten times larger, then when we convert it into a raster, we can scale up the drawing instructions to ten times the normal size.
- Less Photorealistic Vector graphics are best suited for images with well-defined shapes with little shading - things like clipart and cartoon characters. To approach photorealism requires a lot of small shapes drawn in different colors, and will require both more memory and computation. In contrast, a raster graphic is excellent at photorealism. Digital cameras actually create a raster graphic from a grid of color sensors behind the lens.
Because of the scaling benefits, vector graphics are used for commonly used for fonts, icons, and logos, and other images that may be presented at vastly different scales.
