Web Hosting
Hosting
Providing your Website to the World
Providing your Website to the World
Earlier, when we looked at HTTP in Chapter 2, we discussed how HTTP connects the client (typically a web browser) to a server, a specialized program running on a computer connected to the internet that serves web pages (and other files) in response to a HTTP request. This server is what makes your webpages available on the World Wide Web.
Somewhat confusingly, web developers and IT professionals commonly refer to both the program serving HTTP requests and the hardware it runs on as a server. To help avoid this confusion in this chapter, we’ll refer to the computer running the server as the server hardware and the software program serving HTTP requests as the server program.
In this chapter, we will look at exactly what a server (both hardware and program) is, and how it is made accessible on the web. Then we’ll examine some of the most widely used of the server programs: Apache, Nginx, and IIS. We’ll also discuss setting up domain names and security certificates - all the steps necessary for hosting your own websites.
We will look at setting up these servers to serve static content - the kinds of HTML, CSS, and JavaScript files you’ve been writing in this class. However, it is important to understand that a web server can also dynamically create files to send as a response - as you see every time you use a search engine or an online store. In these cases, the HTML they send is created by the server in response to the requests made by you, the user. This kind of dynamic web content creation is the subject of the follow-on courses, CC 515 - Full Stack Web Development and CIS 526 - Web Application Development.
The server hardware is really nothing more than a computer - essentially the same as your desktop or laptop. It has a CPU, RAM, hard drives, and a network card, just like your PC - often they are exactly the same hardware as you might find in a PC. But in many cases, they may be designed for sustained repeated and heavy use - basically a more robust (and expensive) version of consumer hardware. They often also are designed to use less power and generate less heat. And they often have far more RAM and hard drives than a consumer PC.
Most server hardware is installed in racks instead of the more familiar PC case. This allows a lot of servers to be installed in a single room (often called a data center) and allows more air to flow around the hardware, keeping it cool. Remember, a computer consumes electricity as it runs and generates heat - if you put a bunch of them together in a data center you are using a lot of electricity and producing a lot of heat. Thus, data centers are designed to supply a lot of electricity, and have extremely powerful air conditioning systems to remove all of that waste heat. Many data centers also have an uninterrupted power supply (UPS) system or even a generator to provide backup power during a power outage.
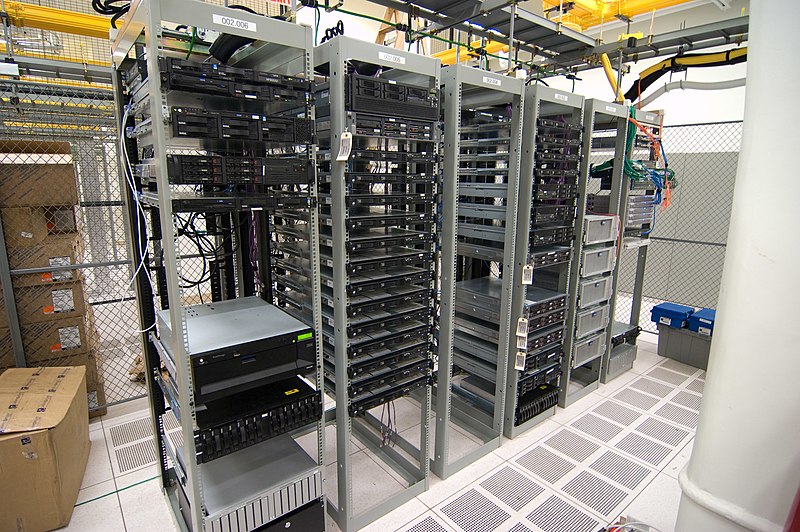
You may have noticed that data centers like the one pictured above don’t have a lot of computer monitors - because if the whole purpose of the computer is to serve responses to HTTP requests, you really don’t need to hook it up to a monitor very often. Instead, we typically connect to web server hardware through the network, from a regular laptop or PC.
This isn’t to say that you can’t run a web server from a normal PC or laptop and make it accessible on the web - you certainly can! However, to do so, you need one other thing - a static IP address - which we’ll discuss next.
You may remember from our discussion of URIs and URLs in Chapter 2 that a HTTP request must be made against a host. This host is specified either by a fully-qualified domain name, or by an Internet Protocol (IP) address. But what exactly is an IP address?
An IP address is an address of a specific computer on the internet. Without such an address, we would not be able to send HTTP requests or responses to a computer, because we would have no idea where to send it. This is much like a mailing addresses in the real world - you need to know where to send a letter for the post office to deliver it.
Now we get to the interesting part - unlike mailing addresses, there are a limited number of IP addresses because we represent them with a specific number of bits (32 bits for IPV4 addresses, and 128 for the new IPV6 addresses).


Because of this limit, internet providers don’t assign every customer a unique IP address. Instead, they use a pool of addresses. When your computer connects to the internet, they draw a currently unused IP address from the pool and assign it to your computer. This is your computer’s address until you disconnect. The next time you connect, you may get a different IP address. It’s kind of like parking in a parking garage - you probably won’t get the same space every time.
This makes hosting a website from a consumer internet account very difficult, because every time you get a new IP address, you’d need to update everyone about where to find your web server. Also, many consumer ISP agreements actually forbid you from hosting a website on your account - so read your agreements carefully.
In contrast, when you sign up with an ISP as a web host (often a feature of business plans), your ISP provides one or more IP address that your computer(s) will always be assigned. We call these static IP addresses because they don’t change. This means that even if your computer is disconnected from the internet temporarily, when you reconnect, you will still have the same IP address. These accounts also typically provide more upstream data (the data your computer sends out across the internet), which is important as a web server will send far more data upstream than a consumer browsing the internet will.
Thus, if you plan on hosting your own website, you want a static IP address provided by a hosting plan with your ISP.
A domain name is a human-readable name that can be used instead of an IP address when making HTTP requests. While not actually required for hosting a website, a domain name is definitely something you’ll want to have. After all, you don’t want people to have to memorize an IP address to reach your website.
Domain names are essentially leased (rented) from a domain registrar - a company that sells domain names. Some better-known registrars are:
A domain registrar works with the Internet Corporation for Assigned Names and Numbers (ICANN), as they “register” the domain with ICANN which oversees the domain name system (DNS). This includes a network of special web servers that respond to a query for a domain name with the corresponding IP address.
Once you own a domain name, you must also create name records within the DNS network to allow your domain name to be looked up by web browsers. These records are typically entered on a DNS server operated by your domain registrar, though some large institutions (like Kansas State University) operate their own DNS server. Name records have a standard syntax (they are basically text files), but typically are entered through a web interface that can look different depending on which registrar you are working with. You can read more about the specific name records in this article by Cloudflare.
Once you have your computer assigned a static ip address, and a domain name registered that points at that address, the next step is to ensure that the correct ports are open on your server hardware’s operating system.
As domain name to IP mappings are cached at multiple points along this network, as well as your ISP and web browser, changes to where a domain name point can take up to a day to percolate through this whole system. This delay often surprises new web developers, who are used to the “instant response” of most computing systems.
The term port is another that has multiple meanings in Computer Science and can lead to some confusion. It can refer to a physical port on the computer that you plug something into, i.e. a USB port or a CAT5e networking port. But it has another meaning for software running on a network (like the internet).
Your computer probably is running multiple programs that communicate across a network or the internet - i.e. you might be browsing the web with Chrome, checking your email with Outlook, and chatting with friends on Discord. Your computer and the network it is connected to need a way to route the messages intended for each of these separate applications to the right program. The solution that we use is that each program is assigned a unique port number, which is a 16-bit unsigned integer (thus, it can range from 0 to 65535).
A good analogy is to think of your computer as an apartment building. The apartment building itself has a street address that is common to all the apartments. This corresponds to the IP address. Then, each individual apartment has an apartment number. You need to provide both the street address and apartment number to send a letter to someone (a program) living in a particular apartment.
Each port can only be assigned to one program at a time, and this assignment is handled by the operating system (i.e. Windows or Linux). Certain common programs have a default port that we expect them to be assigned, for example:
Because of this, when you enter a url in your browser (i.e. https://ksu.edu), the browser will assume the address it is connecting to is the IP address mapped to ksu.edu with port 443 (as the secure http protocol was specified). If you want to run your server on a non-standard port, it must be included in the URL, i.e. https://ksu.edu:3000 would connect to the IP address mapped to ksu.edu with port 3000. This is not recommended for the same reasons we use domain names - port numbers are difficult for many users to understand and remember.
Each port represents an opportunity for the outside world to connect to your computer. With that opportunity comes risk - and the potential for cyber attacks against your computer. To lessen this risk, most operating systems use a firewall - a program that limits which ports are open (allowed to accept incoming messages from the network). By default, nearly all your ports are closed by a firewall, including port 80 and 443. In order to make your web server program accessible, you must open these ports by changing your firewall settings. The exact details of this process differ depending on what firewall and operating system you are using.
Once you have your static IP address, your domain name, and your firewall configured, you are ready to start responding to HTTP requests. This process is handled by a server program - it accepts incoming HTTP an HTTPS requests by determining and sending a response. In the simplest form, a web server program simply responds with static files that are saved in a particular location - often a folder named public_html, html, or www. Thus, a request for http://mysite.com/mypage.html might serve the file www/mypage.html. This is exactly how many web server programs operate.
When webserver programs are used to serve files from a directory like this, there is an open question of what to do when a directory rather than a file is requested, i.e. https://mysite.com or https://mysite.com/pictures. Most webserver programs configured to serve files will generate a HTML page listing the contents of the directory. For example, if your www folder contained mypage.html, mypage.css, and the directory pictures, it might generate a page like this:
<!doctype>
<html lang="en">
  <head>
    <title>Index of /</title>
  </head>
  <body>
    <h1>Index of /</h1>
    <ul>
      <li><a href="/pictures">pictures/</a></li>
      <li><a href="/mypage.html">mypage.html</a></li>
      <li><a href="/mypage.css">mypage.css</a></li>
    </ul>
  </body>
</html>
As the web grew more popular, many developers wanted to serve a specific webpage when a directory was requested rather than have the web server program generate this kind of index. The widely-adopted solution is that if the directory contains a file named index.html, that is served instead of a generated index. Further, most web server programs can be configured to serve a 404 instead of generating an index.
Three of the best-known web server programs used today are Apache, Nginx, and IIS. Apache is one of the earliest widely-adopted web servers. It is free and open-source, and because of this, it was used for the bulk of web hosting during the period of rapid growth after the world-wide-web became available to the general public in the 1990s and into the 2000s. As of December 2022, Apache is used by 32% of the websites on the Internet 1. Nginx was developed as a potential successor to Apache. Also an open-source server, it focuses on being fast and lightweight. As of December 2022, it is used by 34% of the websites on the internet 2. While both Apache and Nginx can be installed on multiple operating systems, but for production web servers they are almost exclusively installed on the Linux Operating System (which is also free and open-source). In contrast, Microsoft’s IIS runs exclusively on Windows Server, and has a much more limited market share, used by only 5.8% of all websites on the internet3. Setting up these three webservers to serve content is one of the subjects covered in the CC 510 and CIS 527 courses.
Apache, Nginx, and IIS are only a fraction of the many web server programs that are commercially available. In addition, many web server programs (including Apache, Nginx, and IIS) also allow you to write some form of program scripts to generate web pages in addition to serving files. Or, you can even write your own web server programs in just about any programming language. This is covered in the CIS 526 and CC 515 courses.
According to data gathered by w3techs.com ↩︎
According to data gathered by w3techs.com ↩︎
According to data gathered by w3techs.com ↩︎
Now that you have a more nuanced understanding of what it takes to host a website, we can explore options for making the process easier, and potentially more reliable. It is important to understand that few web developers actually tackle every step of the process. Instead, most turn to some form of managed hosting - allowing a business whose primary role is hosting web servers to do some of the work.
Just how much you want to do yourself, versus have a hosting company do is one of the decisions you must make. At the extreme end, you can put together your server hardware, install and configure your server software, and manage it all out of your own business or home. At the other extreme, there are companies that will provide you with a location you can upload your website files to (via secure ftp or other means), and your code will then be hosted via Apache or Nginx at a domain name you specify. Some of the most common include companies like Word Press and Squarespace. For our purposes, we are going to explore a middle-ground, or semi-managed hosting service, GitHub Pages.
There are endless number of website hosting options out there with varying ranges of prices and effort to maintain. For now, we are going to go with a middle ground option with GitHub Pages. GitHub pages offers an easy way of hosting static websites (static websites have no back-end server logic, like databases, users, etc.). You can host one public facing website for free with a basic account and more if you have a pro account. Here, we are going to walk through how to get a webpage setup on GitHub Pages.
Getting an account on GitHub is pretty easy. To sign up, follow this link: https://github.com/signup. If you still have a few years left before you graduate, I highly recommend you use your K-State email address for your account so you can get the free student developer pack https://education.github.com/pack which has lots of free goodies. If you already have an account, you should be able to change your email address to take advantage of this perk.
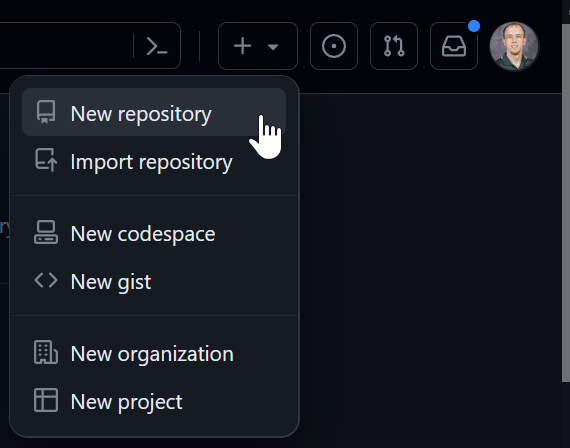
To get starting making our webpage, we need a repository. Repositories are quite similar to file folders in Cloud Storage like OneDrive or Google Drive, they are a central storage location where people can collaborate, track changes, and develop software (among other things). The git version control system is developed with programming in mind and is a much better storage solution compared to your standard cloud storage built for documents and other types of data. You wont become a git pro in this chapter, but you can at least get an idea for what it is.
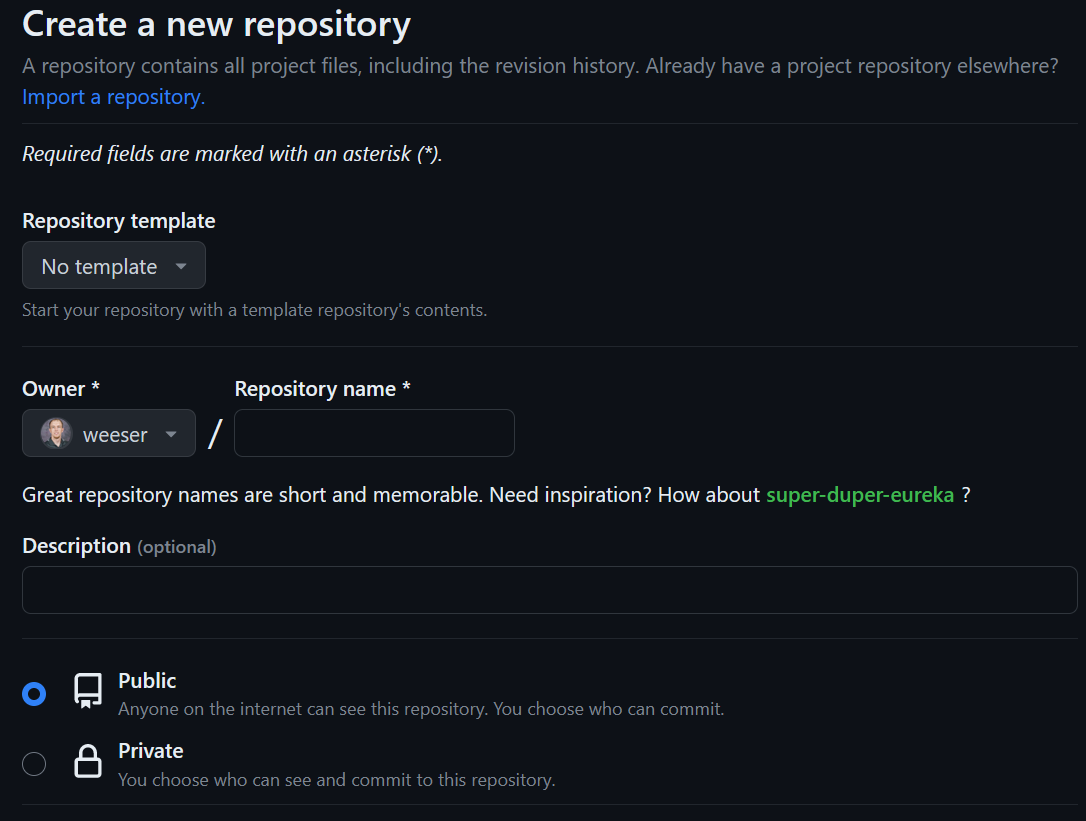
<user> is your GitHub username. For example, mine is named “weeser.github.io”. For settings, leave the repository as “Public” and also check the “Add a README File” box. Then you can click the “Create repository” button at the bottom.Before we make any of our web pages, we need to configure a few things on our repository because GitHub pages are not enabled by default.
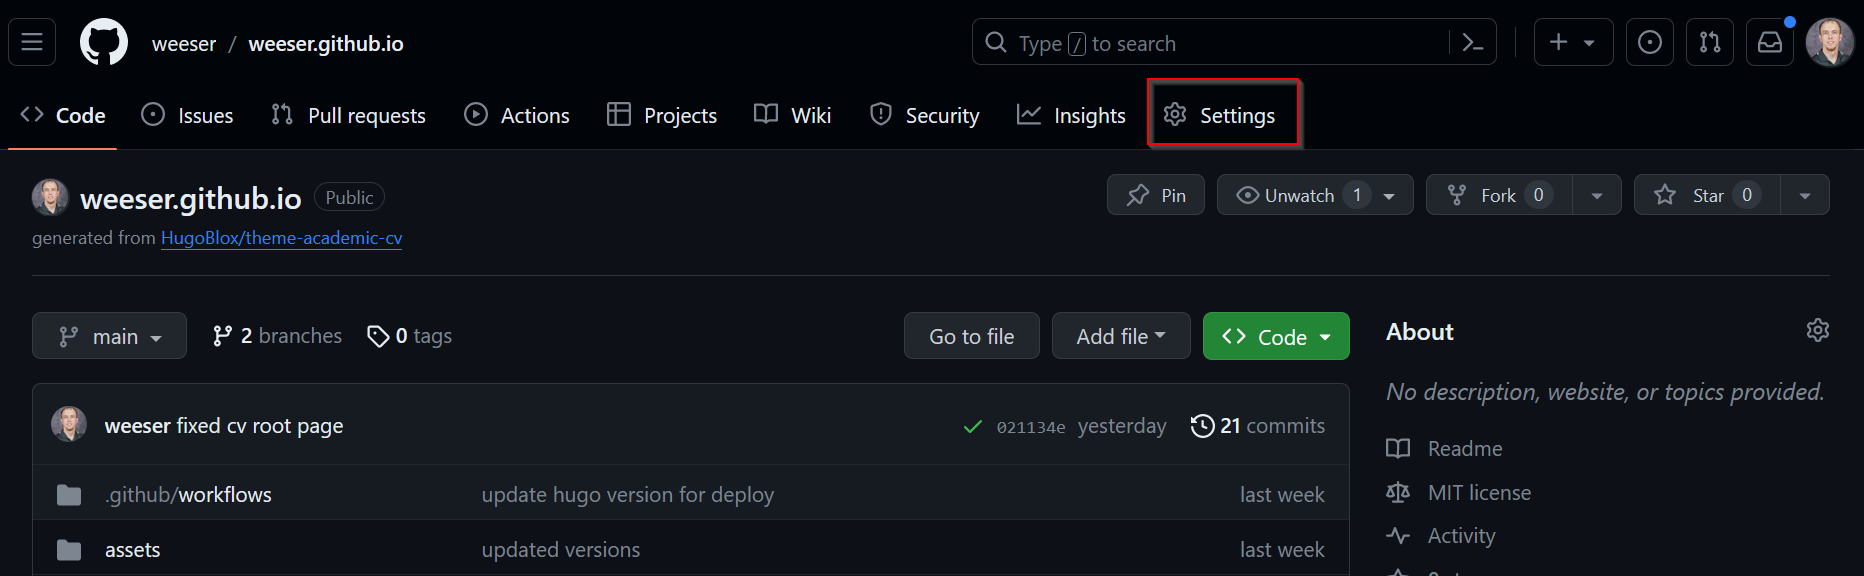
Open your repo’s settings. The link to these can be found under your repository name. If you do not see the “Settings” tab, click the … to reveal the drop down menu.
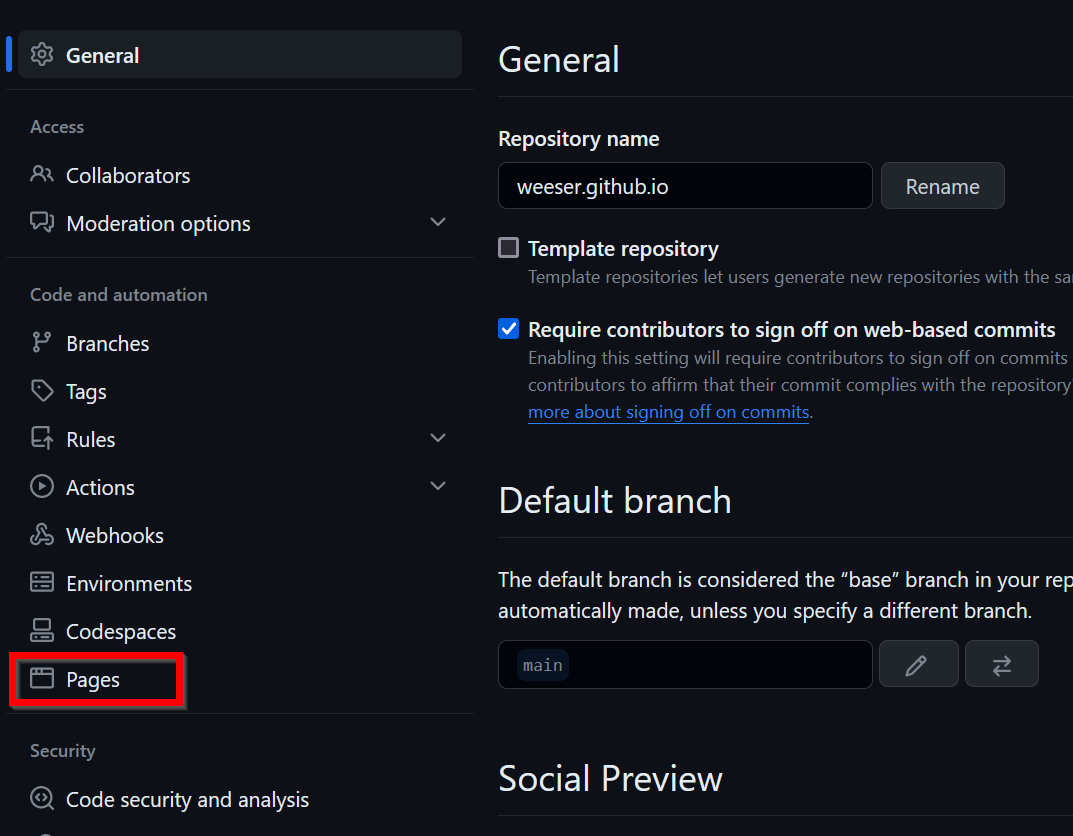
On the settings page, there should be a menu on the left. Under the “Code and automation” section, click on “Pages”
Now, under “Build and deployment”, under “Source” select the “Deploy from a branch” option.
You can now use the branch dropdown menu to select a publishing source. For this example, select the “main” branch.

You do not need to select a folder for your publishing source. It should, by default, be “/(root)” Make sure you click the “Save button though.

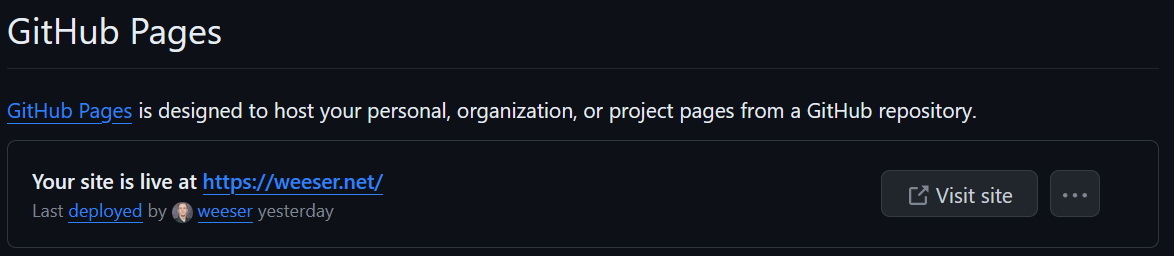
That’s it for now as far as settings go! You should see something like the following when looking at the “Page” settings, you should see something like the following…though note that your url will look quite different than mine since I use a custom domain. Yours should be something like “http://<user>.github.io”. You might have to refresh your page if you don’t see the webpage url. But you should be able to visit your site now, but there won’t be any content there yet.
If you still don’t see a URL for your page being “live” yet, try to complete the next step in adding content. You might also try editing and committing the content a couple times (adding a space or something) to force GitHub to recompile your website. Then go back and refresh your page settings to see if the link shows. Sometimes GitHub may take a few minutes to compile your site.
Info
There are a lot of ways to work on adding content to your repository. You can upload files or create new ones right in your web browser. For our purposes, we will choose to create one inside our browser. If you want to work locally on your computer, you can choose to upload files instead, or you can watch this tutorial https://youtu.be/RGOj5yH7evk?si=t-eH2zMQGiF8kUiX on how to use git.
<!DOCTYPE html>
<html>
    <head>
        <title>Home Page</title>
    </head>

    <body>
        <h1>Hello World!</h1>
    </body>
</html>You are now off to the races! After this course, you will be able to use this repository to host any static website that you want. It is a great place to host a portfolio or CV to share with employers when interviewing and applying for jobs. We really only scratched the surface on what is possible with GitHub pages. If you want to learn more, you can explore their documentation https://docs.github.com/en/pages or check out more tutorials over on YouTube.