Now that we’ve added terminal entry to our tool set, let’s look at how we can use each of these looping constructs in Java. First, here is the general syntax for a While loop in Java:
while(<Loop Condition>){
  <loop code block>
}
As expected, Java will first evaluate the <Loop Condition> to a single Boolean value. If that value is true, it will execute the instructions in the <loop code block>, which can be one or more lines of code, or even additional constructs. Once the <loop code block> execution is complete, the program will return to the top of the loop and evaluate the <Loop Condition> again. It will repeat this process until the expression evaluates to false. Of course, if the expression is false initially, the code in the <loop code block> will not be executed at all.
It is very important to remember that the Loop Condition is enclosed by parentheses ( ), while the block of code that should be executed if that expression is true is enclosed by curly braces { }, just like in an If statement, class body or method body
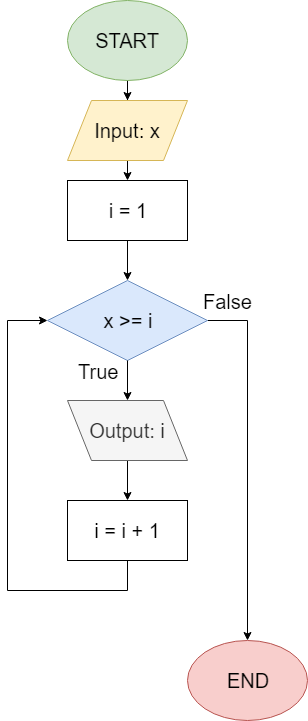
Let’s take a look at a quick example, just to see how this construct works in practice. First, let’s consider the program represented by this flowchart from earlier in the chapter:
This flowchart corresponds to the following code in Java. In this case, we’ll assume x is hard-coded for now:
int x = 8;
int i = 1;
while(x >= i){
  System.out.println(i);
  i = i + 1;
}
By walking through the execution of this program, we see that it will output all integers from $ 1 $ through $ 8 $. If the user inputs a number less than $ 1 $, the program will not produce any output at all.
