Running Tests
Tests are usually run with a test runner, a program that will execute the test code against the code to be tested. The exact mechanism involved depends on the testing framework.
The xUnit framework is offered as a set of Nuget packages:
- The
xunitpackage contains the library code defining theAssertionclass as well as the[Fact]and[Test]attributes. - The
xunit.runner.visualstudiopackage contains the actual test runner
As with other aspects of the .NET framework, the tools can be used at either the command line, or through Visual Studio integrations. The xunit documentation describes the command line approach thoroughly, so we won’t belabor it here. But be aware, if you want to do development in a Linux or Unix environment, you must use the command line, as there is no version of Visual Studio available for those platforms (there is however, a version available for the Mac OS).
When building tests with Visual Studio, you will typically begin by adding an xUnit Test Project to your existing solution. Using the wizard will automatically incorporate the necessary Nuget packages into the project. However, you will need to add the project to be tested to the Dependencies list of the test project to give it access to the assembly to be tested. You do this by right-clicking the ‘Dependencies’ entry under the Test Project in Visual Studio, choosing “Add Project Reference”, and in the dialog that pops up, checking the checkbox next to the name of the project you are testing:
To explore and run your tests, you can open the Test Explorer from the “Test” menu. If no tests appear, you may need to build the test project. This can be done by right-clicking the test project in the Solution Explorer and selecting “Build”, or by clicking the “Run All” button in the Test Explorer. The “Run All” button will run every test in the suite. Alternatively, you can run individual tests by clicking on them, and clicking the “Run” button.
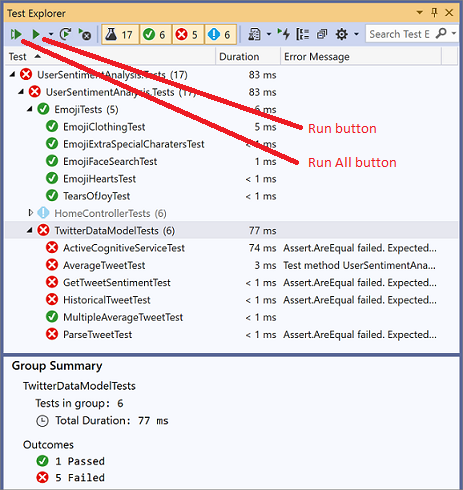
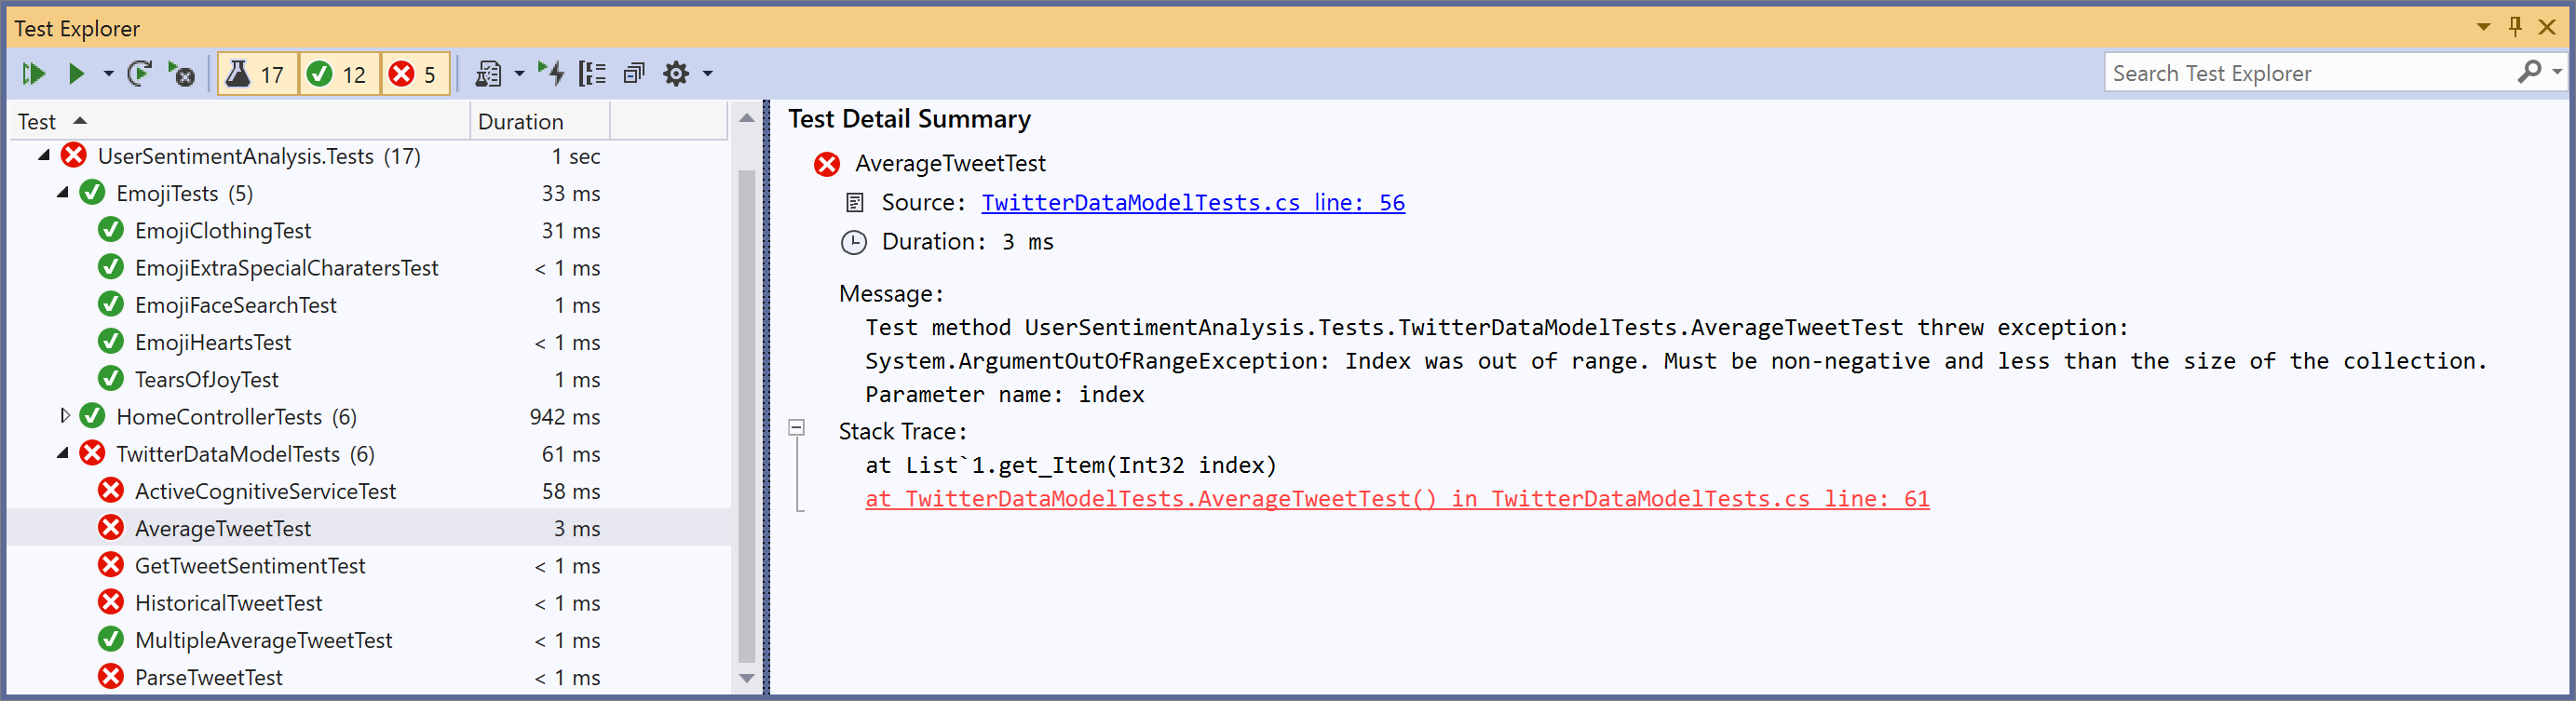
As tests complete, they will report their status - pass or fail - indicated by a green checkmark or red x next to the test name, as well as the time it took to run the test. There will also be a summary available with details about any failures that can be accessed by clicking the test name.
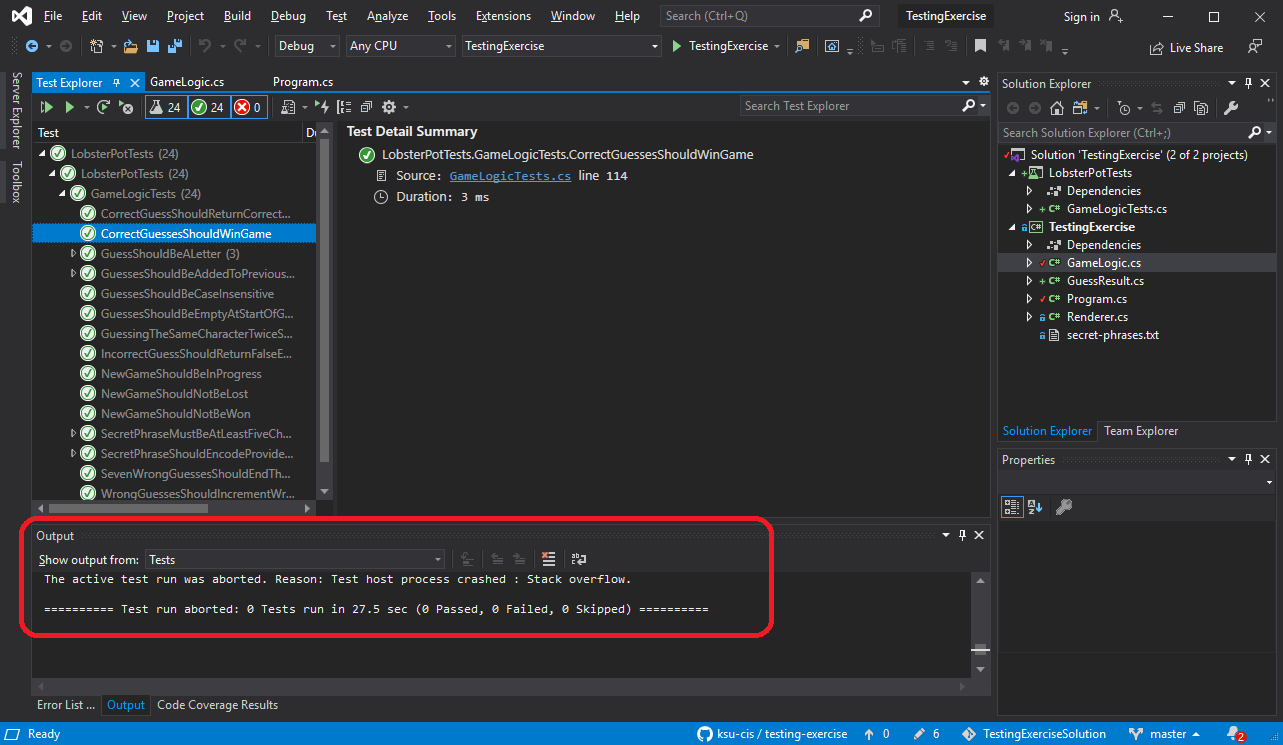
Occasionally, your tests may not seem to finish, but get stuck running. If this happens, check the output panel, switching it from “build” to “tests”. Most likely your test process crashed because of an error in your test code, and the output reporting that error will be reported there.
It is a good idea to run tests you’ve written previously as you add to or refactor your code. This practice is known as regression testing, and can help you identify errors your changes introduce that break what had previously been working code. This is also one of the strongest arguments for writing test code rather than performing ad-hoc testing; automated tests are easy to repeat.