Editing WPF Controls
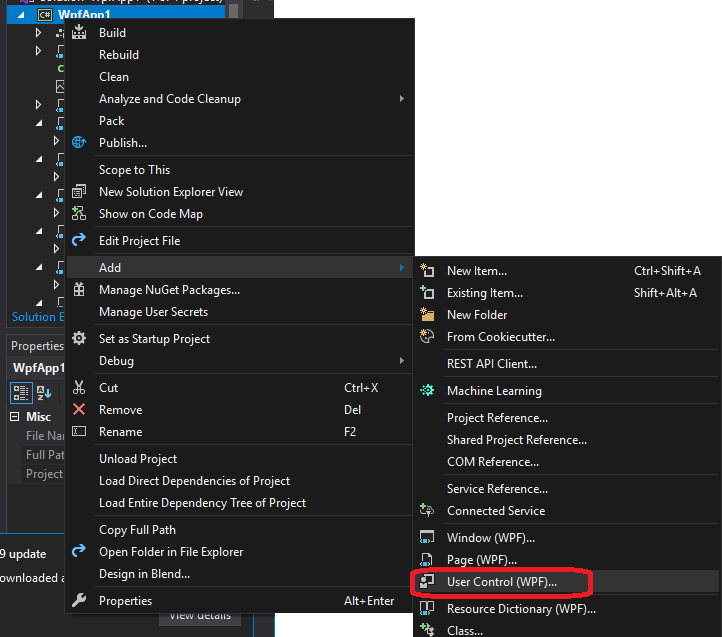
To create a new WPF control from within Visual Studio, we usually choose “Add > User Control (WPF…)” from the solution context menu.
This creates two files, the [filename].xaml:
<UserControl x:Class="WpfApp1.UserControl1"
             xmlns="http://schemas.microsoft.com/winfx/2006/xaml/presentation"
             xmlns:x="http://schemas.microsoft.com/winfx/2006/xaml"
             xmlns:mc="http://schemas.openxmlformats.org/markup-compatibility/2006"
             xmlns:d="http://schemas.microsoft.com/expression/blend/2008"
             xmlns:local="clr-namespace:WpfApp1"
             mc:Ignorable="d"
             d:DesignHeight="100" d:DesignWidth="400">
    <Grid>
    </Grid>
</UserControl>
and the codebehind for that XAML file, [filename].xaml.cs (where [filename] is the name you supplied):
using System;
using System.Collections.Generic;
using System.Collections.ObjectModel;
using System.Text;
using System.Windows;
using System.Windows.Controls;
using System.Windows.Data;
using System.Windows.Documents;
using System.Windows.Input;
using System.Windows.Media;
using System.Windows.Media.Imaging;
using System.Windows.Navigation;
using System.Windows.Shapes;

namespace WpfApp1
{
    /// <summary>
    /// Interaction logic for UserControl1.xaml
    /// </summary>
    public partial class UserControl1 : UserControl
    {
        public UserControl1()
        {
            InitializeComponent();
        }
    }

}
As was mentioned previously, the InitializeComponent() call in the constructor is what builds the structure specified in the XAML file to the object, so it should not be removed, nor should any manipulation of that structure be done before this method invocation.
Tip
Most custom controls are subclasses of the UserControl class, and choosing this option has Visual Studio create the boilerplate for us. However, if you need to extend a specific control, i.e. a ListView, it is often easiest to start with a UserControl made this way, and then change the base class to ListView in the [filename].xaml.cs file, as well as changing the <UserControl> element to a <ListView> element in the [filename].xaml.
Namespaces and Assemblies
Also, notice how the attributes of the control in the XAML file contain a local namespace:
xmlns:local="clr-namespace:WpfApp1"This is the equivalent of a using statement for XAML; it creates the local namespace and ties it to the project’s primary namespace. We can then create an element corresponding to any class in that namespace. Let’s say we have another custom control, ThingAMaJig that we want to utilize in this control. We can use the element notation to add it to our grid:
    <Grid>
      <local:ThingAMaJig>
    </Grid>
Note that we must preface the class name in the element with the local namespace, with a colon (:) separating the two.
We can also add additional namespace statements. For example:
xmlns:system="clr-namespace:System;assembly=mscorlib"This brings in the System namespace, so now we can use the classes and types defined there, i.e String:
<system:String>Hello World!</system:String>Note that for the namespace attribute, we also included the assembly information. This is necessary for any assemblies that are not defined by this project (i.e. exist in their own DLL files).
The WPF Editor
In Visual Studio, opening a WPF XAML file will open a special editor that provides a side-by-side visual and XAML code editors for the control:
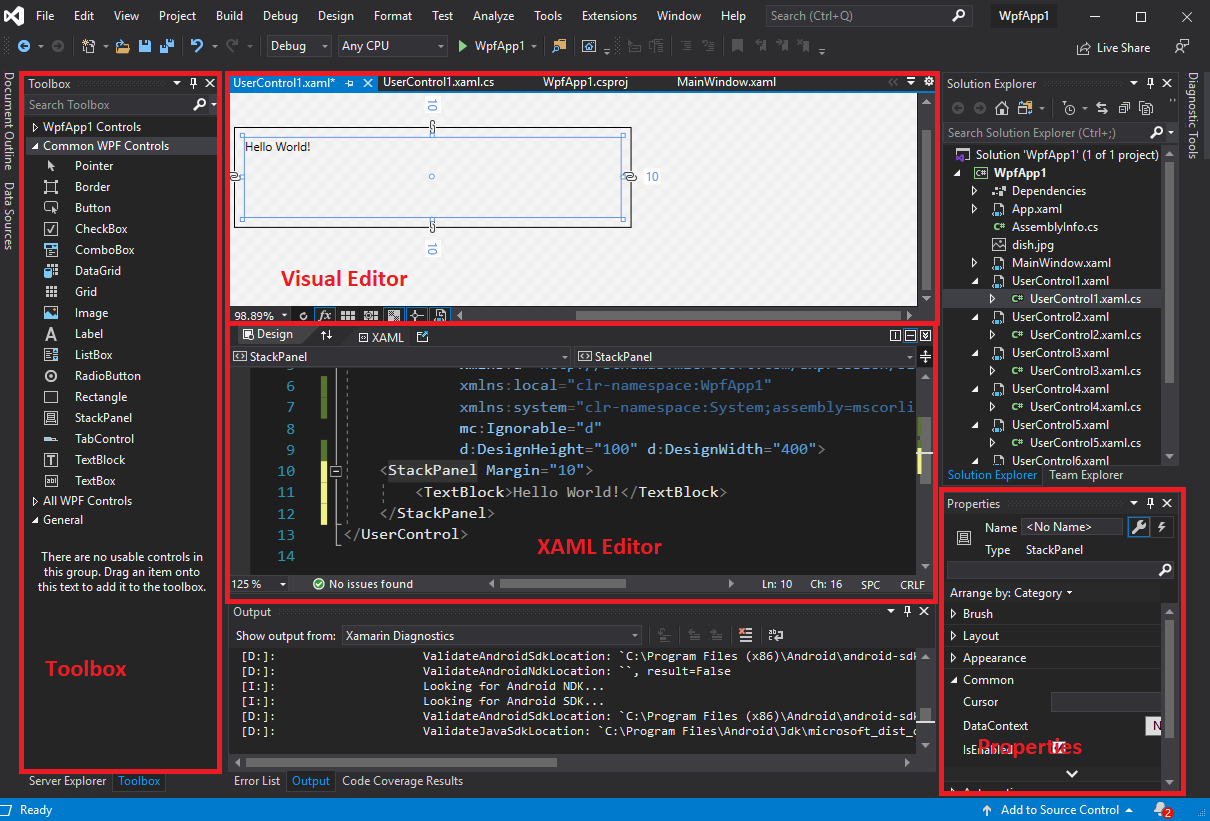
As you edit the XAML, it also updates the visualization in the visual editor. Also, many element properties can be edited from the visual editor or the properties pane - and these changes are automatically applied to the XAML. And, just like with Windows Forms, you can drag controls from the toolbox into the visualization to add them to the layout.
However, you will likely find yourselves often directly editing the XAML. This is often the fastest and most foolproof way of editing WPF controls. Remember that in WPF controls resize to fit the available space, and are not positioned by coordinates. For this reason, the visual editor will actually apply margins instead of positioning elements, which can cause unexpected results if your application is viewed at a different resolution (including some controls being inaccessible as they are covered by other controls).
A couple of buttons in the editor deserve some closer attention:

- The zoom factor in the design editor
- Refreshes the design editor - sometimes it hangs on re-rendering, and you need to click this.
- Toggles rendering effects (These use the graphics hardware, and can be computationally involved. Turning them off can improve performance on weaker machines)
- Toggles the snap grid (provides grid lines for easier layout)
- Toggles snap-to-grid
- Toggles the artboard background (which provides a checkered background to make it easier to judge what is transparent)
- Toggles snapping to snap lines (those lines that appear between controls to help you align them)
- Toggles showing platform-only vs. all controls (for when targeting multiple platforms)

- Switches to a vertical split between the design editor and XAML editor
- Switches to a horizontal split between the design editor and XAML editor
- Switches to showing only the design editor or XAML editor