Adding Documentation Files
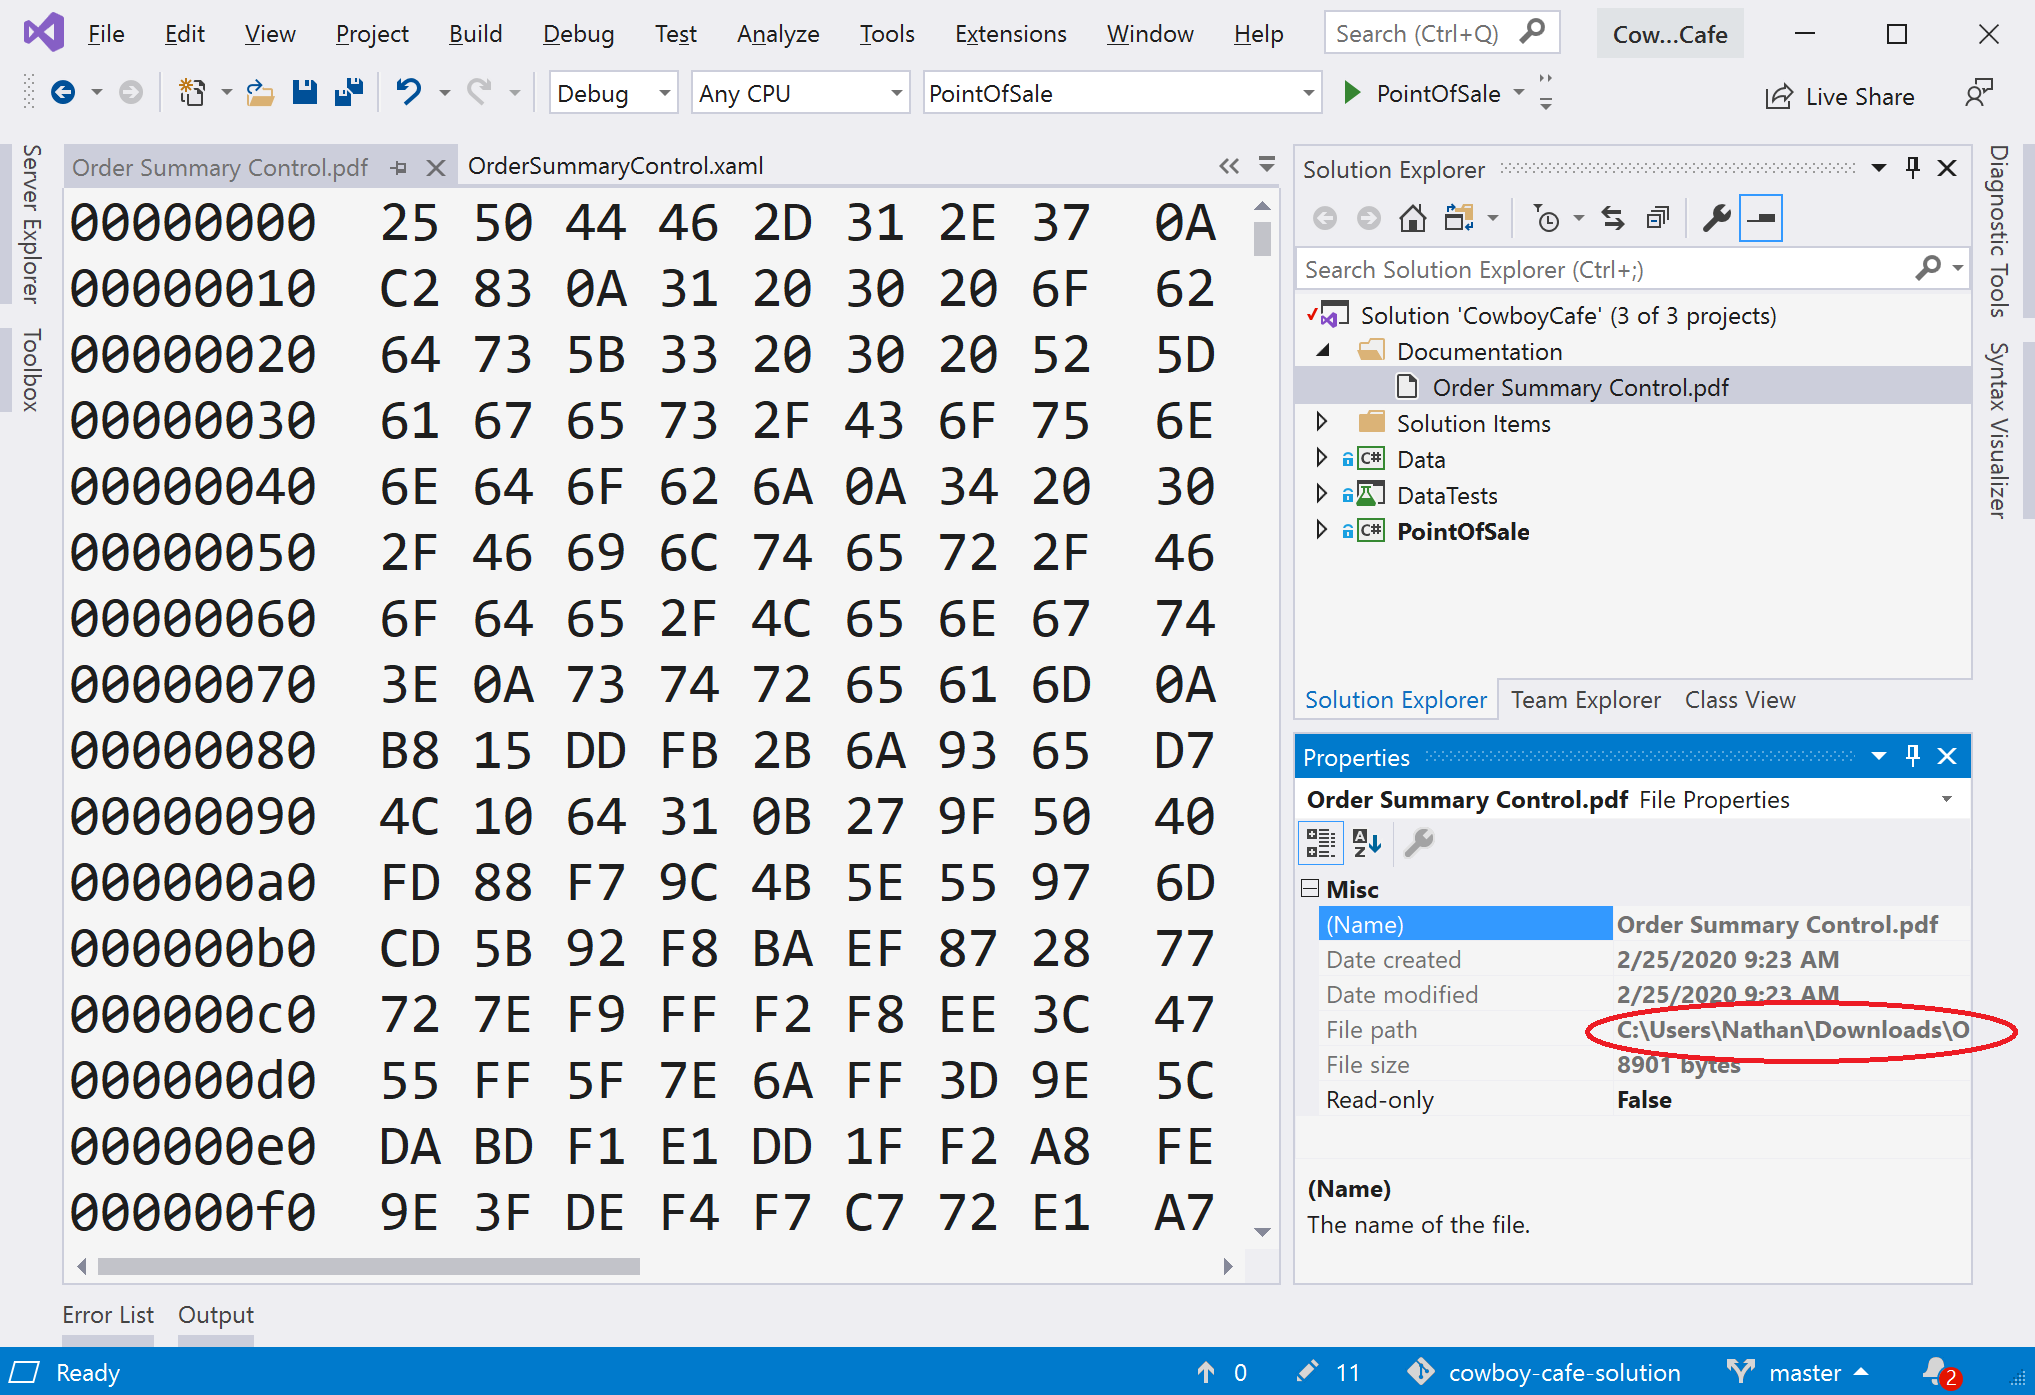
When adding existing documentation files (i.e. UML documents) to your project, you may think adding them through Visual Studio’s Solution Explorer would be the way to go. However, this can lead to an unexpected issue. Look closely at the example below:
We can see the PDF has been added to the solution file in the Solution Explorer, and we can see its raw data open in the editing pane. But take a close look at the Properties. The file is located in the Downloads folder! Since the file is not present in a folder managed by Git, IT WILL NOT BE COMMITTED!
The ONLY way to get Git to track a file is to PUT IT INTO A DIRECTORY TRACKED BY GIT. Visual Studio’s Solution Explorer does NOT copy existing PDF files, it simply creates a virtual representation of the file within the solution that points to where that file exists on your filesystem.
Open the Solution in File Explorer
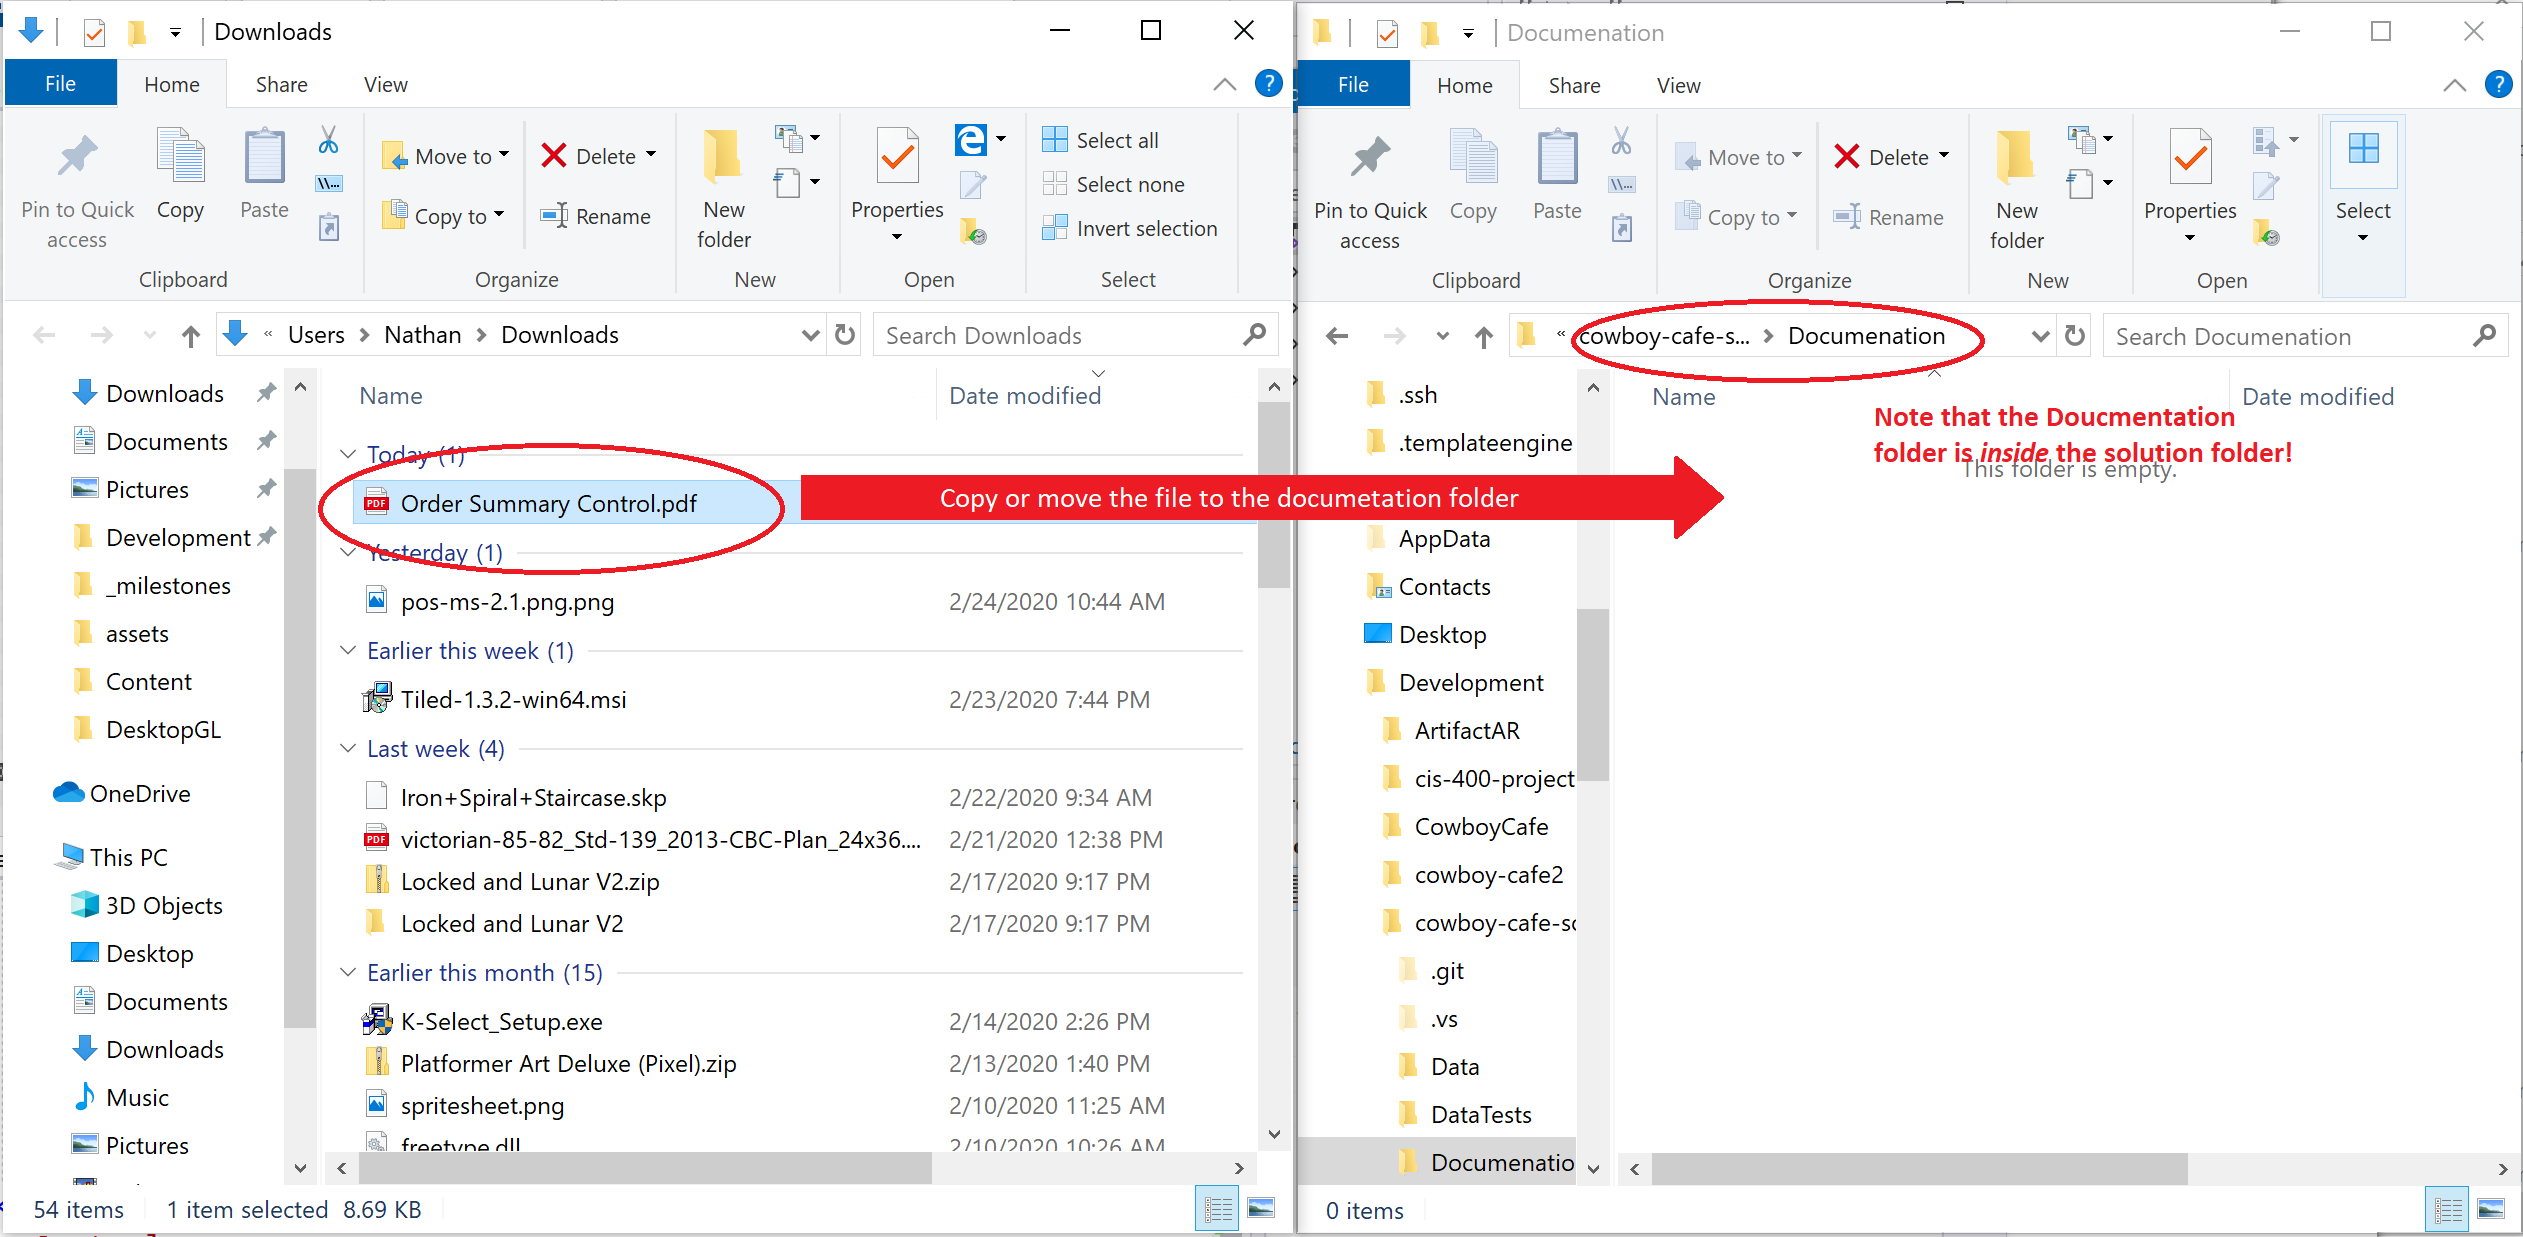
To summarize, you must move or copy the file you want to share into the solution directory using your operating system’s file system, NOT VISUAL STUDIO. Visual Studio typically places your projects in the directory C:/Users/%username%/source/repos/%solutionname%/ where %username% is your Windows username and %solutionname% is your solution’s name. If you asked Visual Studio to save your files in another location, you need to look there.
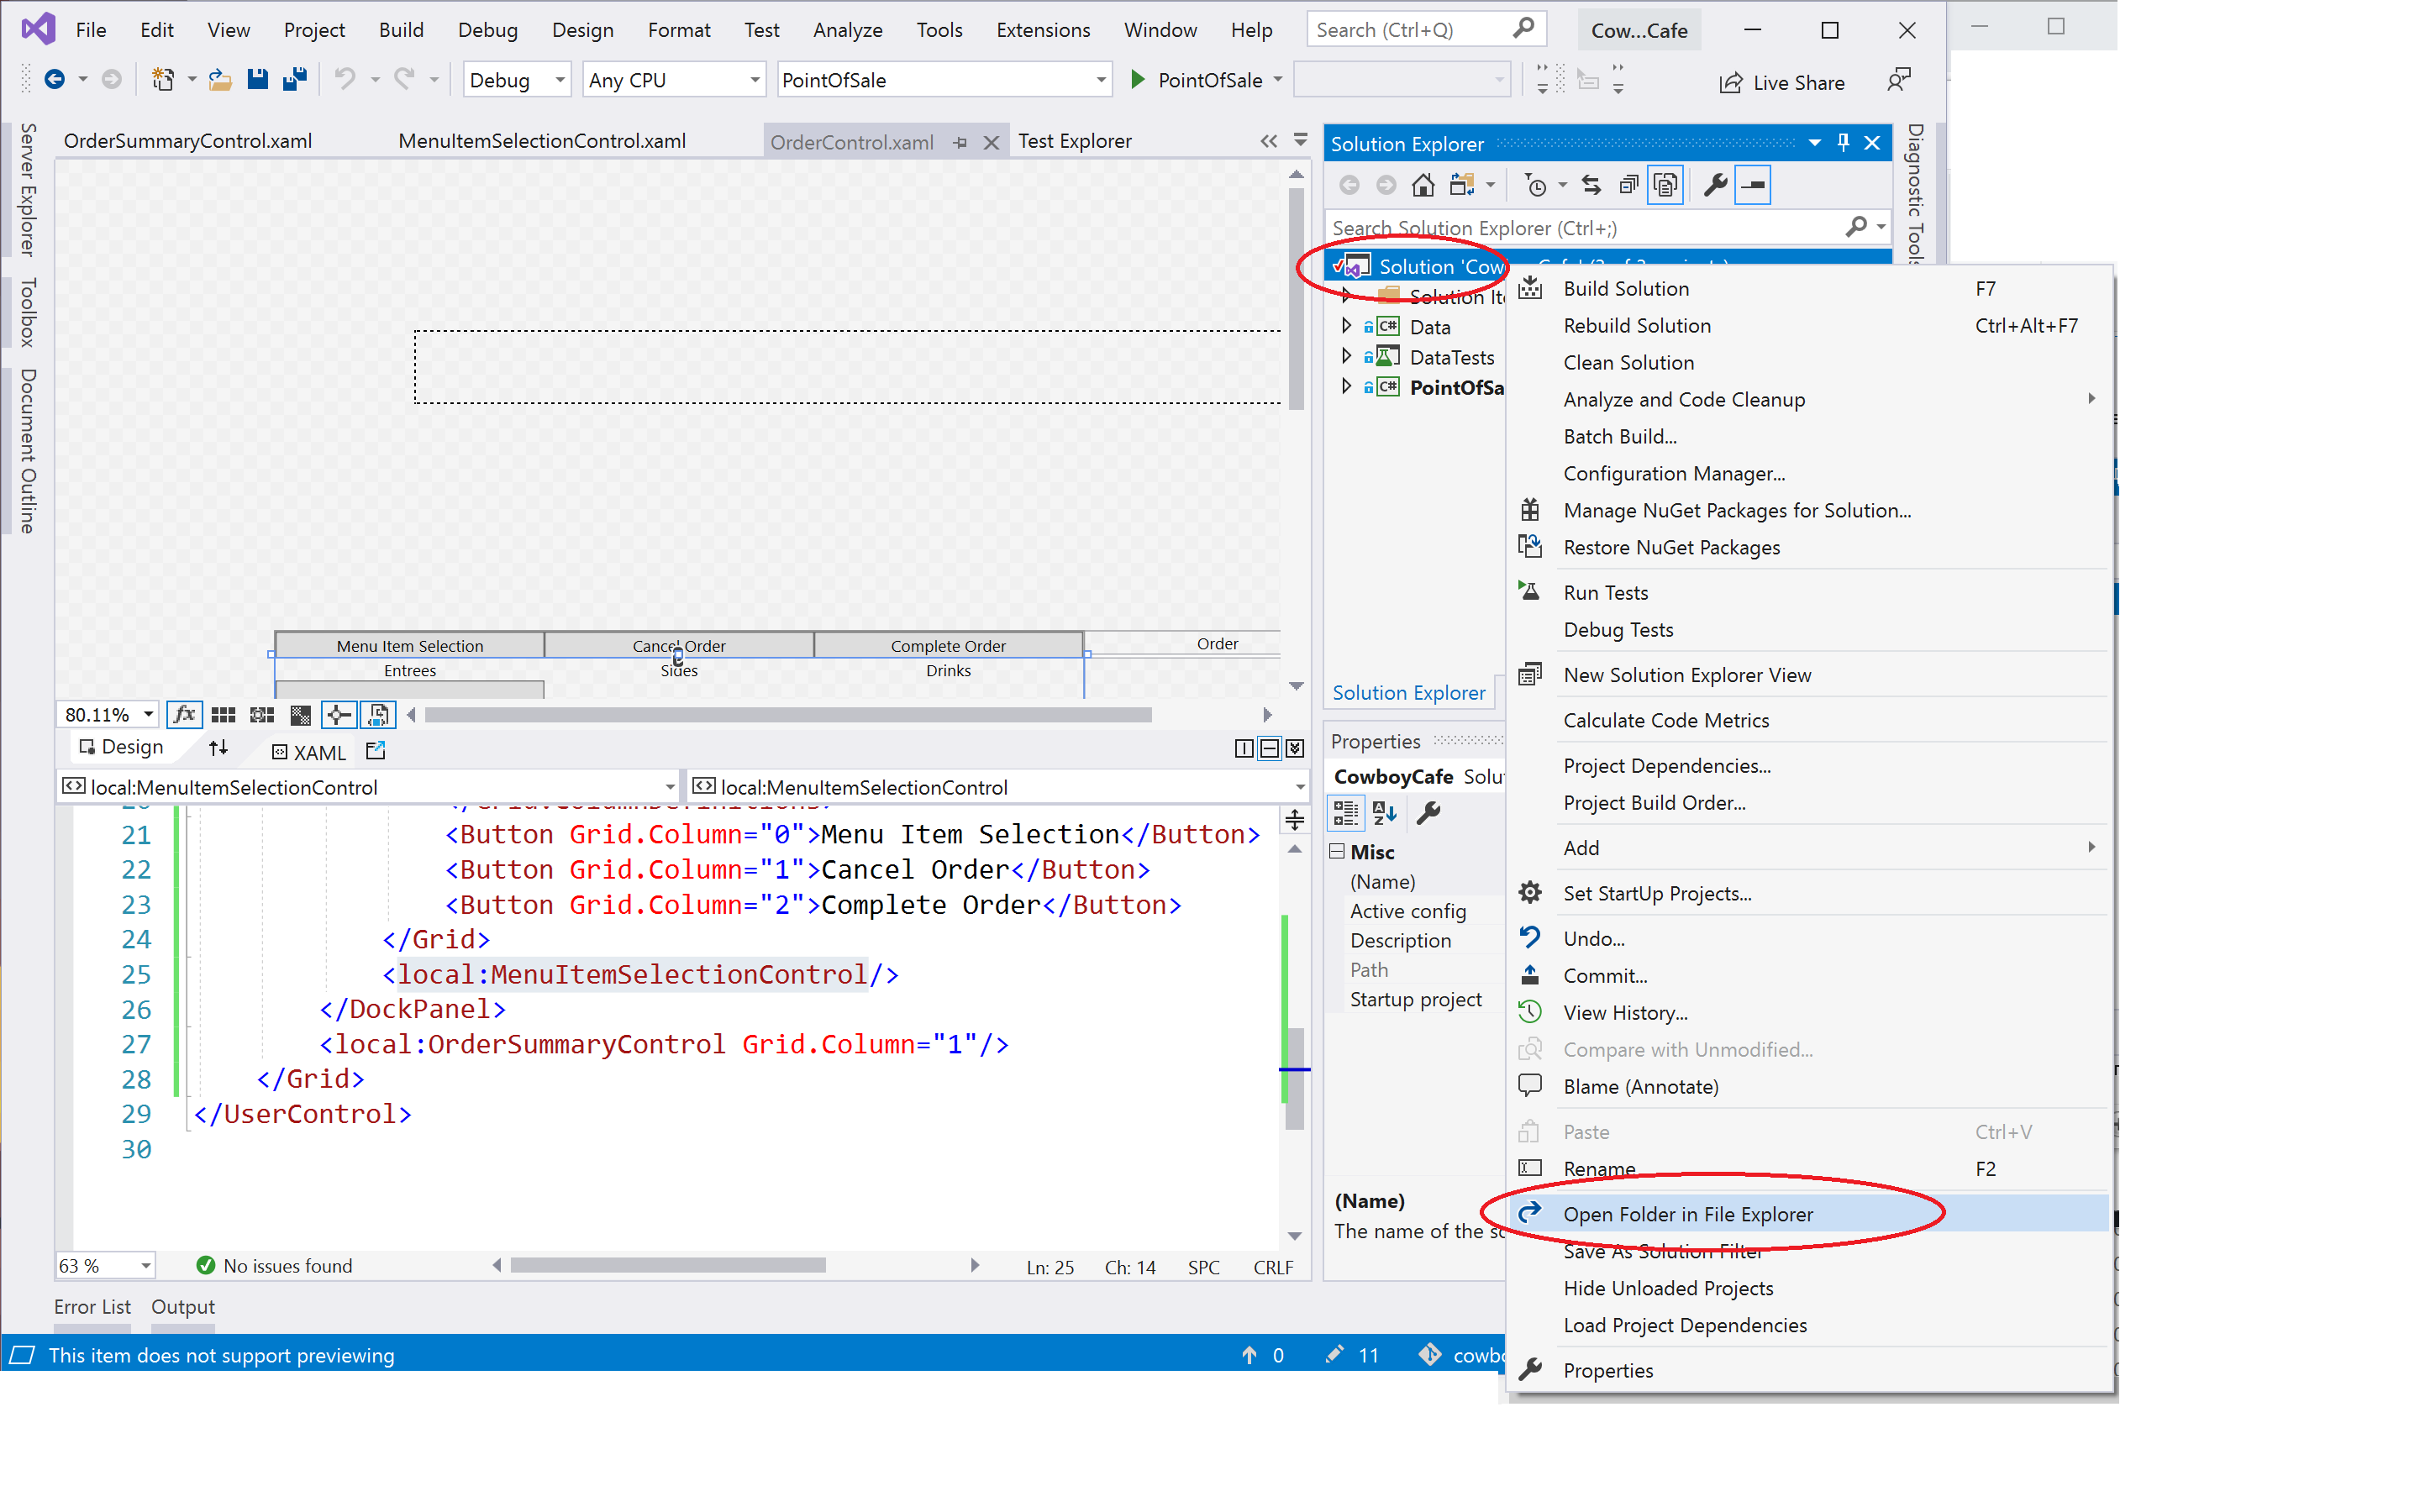
However, there is a quick way to open the exact solution folder from within Visual Studio. Right-click the solution in the Solution Explorer and choose Open Folder in File Explorer from the context menu:
Then you can use File Explorer to create your Documentation folder and place your documents:
Once the document is in place, you will need to commit your changes and push them to GitHub


