Razor Pages Exercise
Now that you know how to create Razor pages, let’s see what makes them useful for creating dynamic web pages.
Initial Project
We’ll start with a simple ASP.NET web app using Razor Pages to display a database of movies. This app consists of a single page, Index that will be used to display the details of the movies in the database. It also contains classes representing an individual movie (Movie) and the movie database (MovieDatabase).
You can clone the starting project from the GitHub Classroom url provided in the Canvas Assignment (for students in the CIS 400 course), or directly from the GitHub repo (for other readers).
Movie Class
Here is the starting point of a class representing a movie:
    /// <summary>
    /// A class representing a Movie
    /// </summary>
    public class Movie
    {
        /// <summary>
        /// Gets and sets the title of the movie
        /// </summary>
        public string Title { get; set; }

        /// <summary>
        /// Gets and sets the Motion Picture Association of America Rating
        /// </summary>
        public string MPAARating { get; set; }

        /// <summary>
        /// Gets and sets the primary genre of the movie
        /// </summary>
        public string MajorGenre { get; set; }

        /// <summary>
        /// Gets and sets the Internet Movie Database rating of the movie
        /// </summary>
        public float? IMDBRating { get; set; }

        /// <summary>
        /// Gets and sets the Rotten Tomatoes rating of the movie
        /// </summary>
        public float? RottenTomatoesRating { get; set; }
    }
As you can see, it’s a pretty simple data class.
However, we do have one new thing we haven’t seen before - a new use of the question mark symbol (?) in float?. This indicates a nullable type, i.e. in addition to the possible float values, the variable can also be null.
Remember, a float is a value type, and normally you cannot set a value type to null. By making it a nullable type, we effectively have wrapped it in an object (technically, a Nullable<T> object). So instead of RottenTomatoesRating referencing the memory where the value of the float is stored, it is now storing a reference to that location in memory. This reference can itself be null if it isn’t pointing anywhere.
We need all of these properties to have the possibility to be null, as the data we are working with does not have values for all of them. Let’s look at that data next.
Serialized Movie Data
The movies.json file contains data in a JSON format. JSON stands for Javascript Serialization Object Notation. As the name suggests, it is a serialization format - a way of expressing the state of a data object in text. While it originates with JavaScript, JSON has become a popular format for exchanging data in many programming languages. Let’s take a closer look at this file’s structure.
The first movie in the file is The Land Girls:
[
  {
    "Title": "The Land Girls",
    "USGross": 146083,
    "WorldWideGross": 146083,
    "USDVDSales": null,
    "ProductionBudget": 8000000,
    "ReleaseDate": "Jun 12 1998",
    "MPAARating": "R",
    "RunningTime": null,
    "Distributor": "Gramercy",
    "Source": null,
    "MajorGenre": null,
    "CreativeType": null,
    "Director": null,
    "RottenTomatoesRating": null,
    "IMDBRating": 6.1,
    "IMDBVotes": 1071
  },
  ...
]
The outer square brackets ([, ]) indicate that the file contents represent an array. The curly braces ({, }) indicate an object - thus the file represents an array of objects. Each object consists of key/value pairs, i.e. "Title": "The Land Girls" indicates the title of the film. We’re using a library to deserialize these JSON objects into our C# Movie object structure, so we need the keys to match the property names in that structure.
As you can see with this entry, many of the values are null. This is why we needed to introduce nullables into our data object - otherwise when we deserialized this object in our C# code, our program would crash when it tried to set one of the value properties to null.
The MovieDatabase Class
Now let’s look at the MovieDatabase class:
    /// <summary>
    /// A class representing a database of movies
    /// </summary>
    public static class MovieDatabase
    {
        private static List<Movie> movies = new List<Movie>();

        /// <summary>
        /// Loads the movie database from the JSON file
        /// </summary>
        static MovieDatabase() {

            using (StreamReader file = System.IO.File.OpenText("movies.json"))
            {
                string json = file.ReadToEnd();
                movies = JsonConvert.DeserializeObject<List<Movie>>(json);
            }
        }

        /// <summary>
        /// Gets all movies in the database
        /// </summary>
        public static IEnumerable<Movie> All { get { return movies; } }
    }
}
There are a couple of interesting features. First, the class is static, which means we cannot construct an instance of it - there will only ever be one instance, and we’ll reference it directly from its class name, MovieDatabase. As a static class, all of its fields, methods, and properties must likewise be declared static. If these are public, then we can access them directly from the class name, i.e. to access the All property, we would invoke MovieDatabase.All.
Notice that we have declared a static constructor for the class. This will be invoked the first time the class is used in the program, and only that one time (as after that, the one static instance of the class exists). Since we cannot construct a static class directly, there is no reason to add an access modifier (public, protected, or private).
The usual reason to have a static constructor is to do some kind of initialization, and that is what we are doing here. We are loading the JSON file, and using the JsonConvert.DeserializeObject<T>() method to convert the JSON into a List<Movie>. This method is part of the JSON.net library from Newtonsoft - which is provided to us through a Nuget package. If you look under the Dependencies entry in the solution explorer, you can find a Packages list that contains Newtonsoft.JSON, this library.
Nuget is a package manager that allows developers to publish .NET libraries they have created for other developers to use. It is a source of many useful libraries, and if you become a professional .NET developer, it is probably a resource you will find yourself using often.
Displaying a list of Movie Titles
Okay, now that we’re familiar with the starter code, let’s turn our attention to the task at hand - we’d like to display all the movies in our database on the Index razor page.
Refactoring Index.cshtml
Let’s start by looking at our Page class, Index.cshtml:
@page
@model IndexModel
@{
    ViewData["Title"] = "Home page";
}

<h1>Hello World</h1>
Let’s change the header Hello World to say Movies. And below that, let’s declare an unordered list of movie titles, and put the first few titles in list items:
<h1>Movies</h1>
<ul>
    <li>The Land Girls</li>
    <li>First Love, Last Rites</li>
    <li>I Married a Strange Person</li>
</ul>
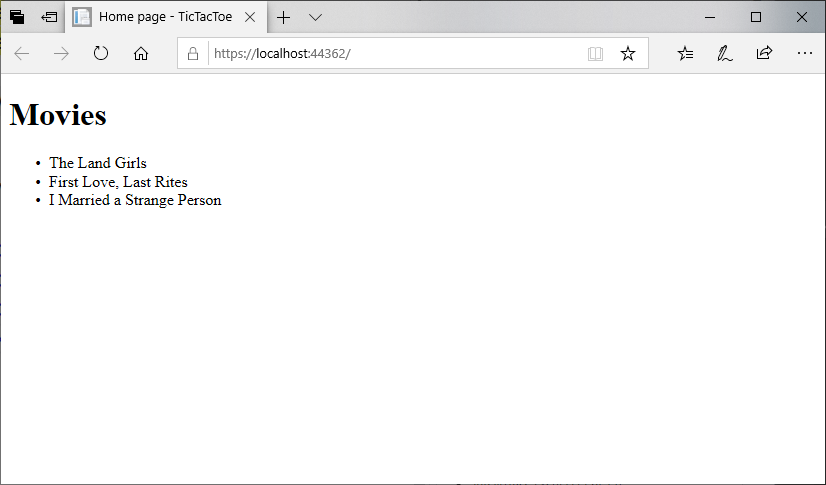
Go ahead and run your program. Your page should look like:
This approach would work fine, but there are 3,201 entries in our database - do you really want to do that by hand?
Instead, let’s leverage the power of Razor templates, and use some C# code to iterate through each entry in the database. We can do this with a foreach loop, just like you might do in a regular C# class:
<h1>Movies</h1>
<ul>
    @foreach(Movie movie in MovieDatabase.All)
    {
        <li>@movie.Title</li>
    }
</ul>
Notice that inside the body of the foreach loop, we use regular HTML to declare a list item element (<li>). But for the content of that element, we are using the movie.Title property. As this is prefaced with an at symbol (@), the Razor template engine evaluates it as a C# expression, and concatenates the result (the movie’s title) into the list item. Thus, for the first item in the database, <li>The Land Girls</li>.
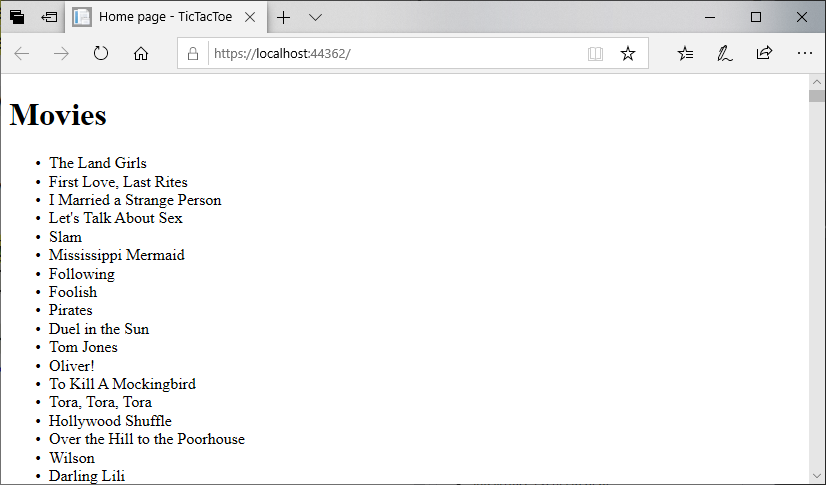
Each of these is in turn concatenated into the page as the foreach loop is processed, resulting in a list of all the movie titles in the database. Run the program and see for yourself:
They’re all there. You can scroll all the way to the bottom.
Adding Some Detail
It might be interesting to see more information about the movies than just the title. Let’s take advantage of the details in our Movie class by expanding what is shown:
<h1>Movies</h1>
<ul>
    @foreach(Movie movie in MovieDatabase.All)
    {
        <li>
            <h3>@movie.Title</h3>
            <div>@movie.MPAARating</div>
            <div>@movie.MajorGenre</div>
        </li>
    }
</ul>
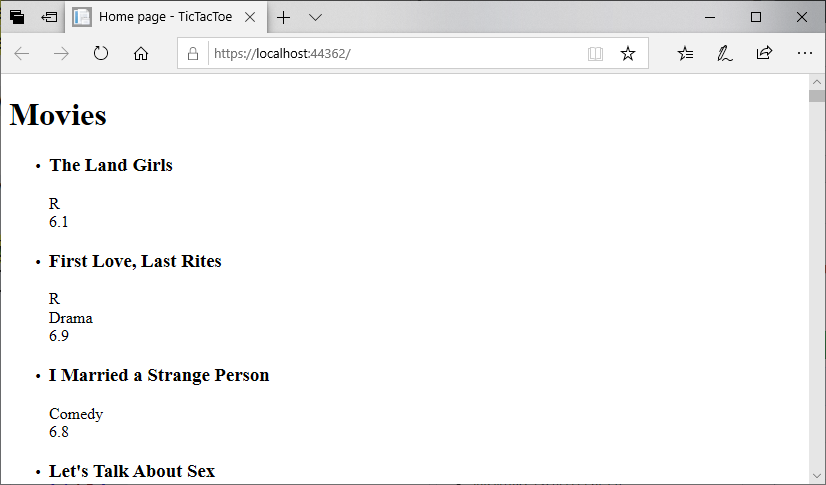
Notice that unlike our WPF XAML, we can nest as many children in an HTML element as we want! If we run the program now:
Well, it works, but it’s also underwhelming (and a bit difficult to interpret). Notice that our first few movies don’t have all the rating properties, so there are large blank spaces.
Let’s take advantage of Razor’s ability to use conditionals to leave those blanks out:
<h1>Movies</h1>
<ul class="movie-list">
    @foreach(Movie movie in MovieDatabase.All)
    {
        <li>
            <h3 class="title">@movie.Title</h3>
            @if (movie.MPAARating != null)
            {
                <div class="mpaa">
                    Rated @movie.MPAARating
                </div>
            }
            @if (movie.MajorGenre != null)
            {
                <div class="genre">
                    @movie.MajorGenre
                </div>
            }
        </li>
    }
</ul>
We’ve also added the text “Rated” before our MPAARating, so the entry will now read “Rated R” for an R-rated movie, “Rated G” for a g-rated movie, and so on.
We also added class attributes to the <h3> and each <div>, as well as the movie list itself. We’ll use these to style our elements.
Adding Some Style
We can find our CSS rules for the project in wwwroot/css/site.js.
Let’s start with the unordered list itself. We can select it with the ul.movie-list selector. We’ll remove any padding and margins, and add a solid line above it:
ul.movie-list {
    padding: 0;
    margin: 0;
    border-top: 1px solid gray;
}
We’ll then select each list item that is a child of that list with ul.movie-list > li. We’ll remove the bullet, add a lighter border at the bottom to separate our items, and put a 10-pixel margin all the way around:
ul.movie-list > li {
    list-style-type: none;
    border-bottom: 1px solid lightgray;
    margin: 10px;
}
You might wonder why we put the list in an unordered list at all, if we’re just going to change all its default styles. Remember, HTML provides the structure as well as the content. By putting the items in a list, we’re signifying that the items are a list. We are conveying semantic meaning with the structure we use.
Remember, it’s not just humans that read the internet. Many bots and algorithms do as well, and they typically won’t use the lens of CSS styling - they’ll be reading the raw HTML.
We’ll make our title headers a dark slate gray, have a slightly larger-then-normal text, and remove the margins so that there are no large space between the header and the text is directly above and beneath them:
.title {
    color: darkslategray;
    font-size: 1.2rem;
    margin: 0;
}
Finally, let’s lighten the color of the MPAA rating and genre:
.mpaa {
    color: slategray;
}

.genre {
    color: lightslategray;
}
Adding Some Ratings
While the MPAA ratings convey the age-appropriateness of a movie, the IMDB and Rotten Tomatoes ratings provide a sense of how much people enjoy the films. Since this probably information our readers might want to see to help them judge what films to look at, it might be nice to call attention to them in some way.
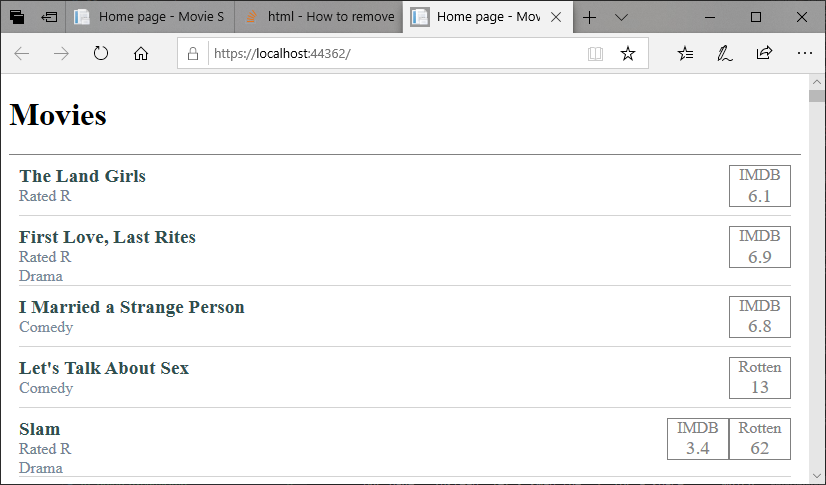
What if we put them into their own boxes, and position them on the right side of the screen, opposite the title? Something like:
There are many ways of accomplishing this look, including the float property or using a <table> element. But let’s turn to one of the newer and more powerful css layout features, the flexbox layout.
We’ll start by refactoring our HTML slightly, to divide our <li> into two <div>s, one containing our current details for the movie, and one for the viewer ratings:
      <li>
        <div class="details">
            <h3>@movie.Title</h3>
            @if (movie.MPAARating != null)
            {
                <div class="mpaa">
                    Rated @movie.MPAARating
                </div>
            }
            @if (movie.MajorGenre != null)
            {
                <div class="genre">
                    @movie.MajorGenre
                </div>
            }
        </div>
        <div class="ratings">
            @if (movie.IMDBRating != null)
            {
                <div class="imdb">
                    @movie.IMDBRating
                </div>
            }
            @if (movie.RottenTomatoesRating != null)
            {
                <div class="rotten-tomatoes">
                    @movie.RottenTomatoesRating
                </div>
            }
        </div>
    </li>
Now we’ll apply the flexbox properties and a minimum height to the list item:
ul.movie-list > li {
    display: flex;
    flex-direction: row;
    align-items: flex-start;
    justify-content: space-between;
    min-height: 50px;
}
These can be combined with our earlier rule block with the same selector, or they can be declared separately.
We’ll also use flexbox to make our ratings appear side-by-side:
.ratings {
    display: flex;
    flex-direction: row;
}
And use some styles to add the border, center the text, and use gray for the text and border colors:
.imdb, .rotten-tomatoes {
    color: gray;
    border: 1px solid gray;
    width: 60px;
    text-align: center;
    font-size: 1.2rem;
}
Notice that we can use the comma to allow more than one selector to share a rule.
It might be nice to label the two ratings, as Rotten Tomatoes is on a 100-point scale, and IMDB uses a 10-point scale. We could go back and apply this in the HTML, but it is a good opportunity to show off the ::before pseduo-selector, which allows us to create HTML elements using css:
.imdb::before {
    content: "IMDB";
    display: block;
    font-size: 1rem;
}

.rotten-tomatoes::before {
    content: "Rotten";
    display: block;
    font-size: 1rem;
}
If you run your code at this point, you may notice your <h3> styles have stopped applying. If we look at the selector, we’ll see why. It is currently: ul.movie-list > li > h3, which indicates the <h3> it applies to should be a direct child of the <li> tag. We could swap to using h3 instead, but this would apply to all <h3> tags on our page. Instead, let’s swap the > for a space , which indicates a descendant instead of a direct child. In fact, we could drop the li as well:
ul.movie-list  h3 {
    font-size: 1.2rem;
    margin-bottom: 0;
    color: darkslategray;
}
The end result is very close to our sketch:
Clearly, CSS is a powerful tool. It can be challenging to learn, but if you are going to be involved in web development, it is time well spent.
The MDN CSS documentation and the CSS-Tricks site are both excellent references for learning CSS.


