Deploying our Movie Site to Azure
Before you start this exercise, you should:
- Set up your Azure account (see the previous section).
- Sign into Visual Studio using the same account as you used for Azure
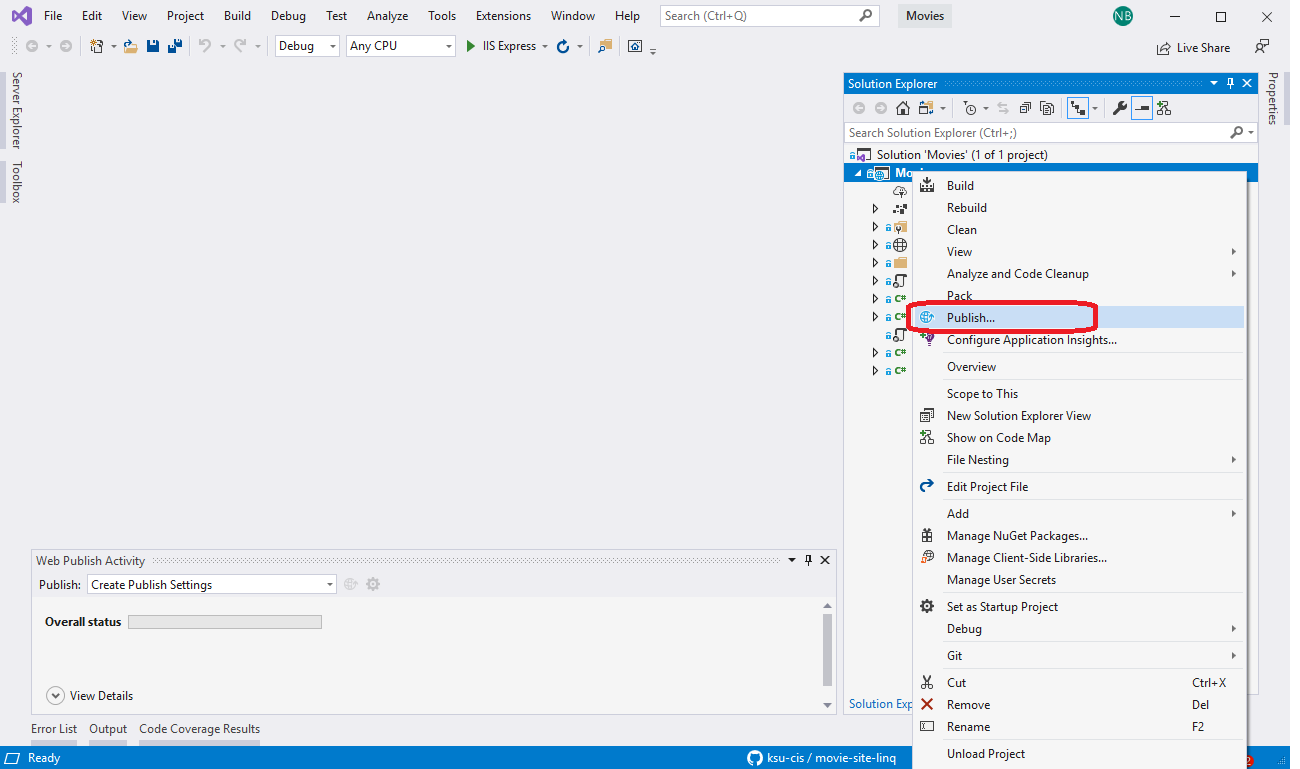
Open your Movie Site project from your previous web data exercises. If you right-click on the project name in the Solution Explorer, you can choose publish from the context menu:
The first time you choose this option in a project, it will launch a publish wizard. The first step is to choose your deployment target:
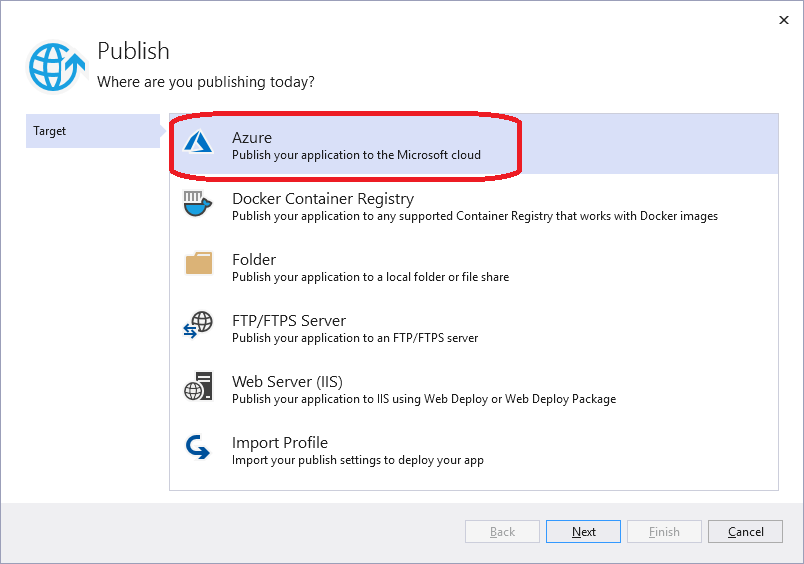
For this exercise, we’ll choose “Azure”, but feel free to explore the other options. Once you’ve chosen Azure and clicked the Next button, you’ll see the second step of the wizard, which seeks more detail on your deployment target:
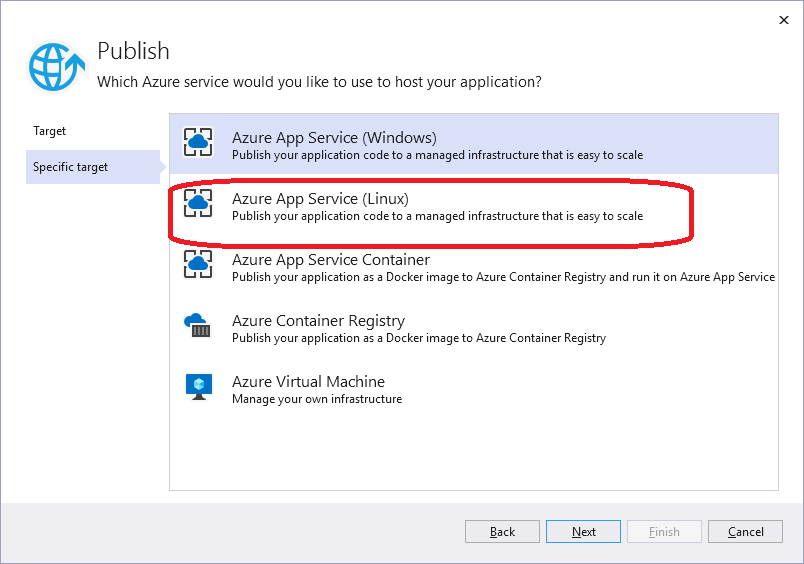
The options here include deploying to a Windows or Linux infrastructure, or as a Docker image, or as an Azure VM (in which case you would need to set up the OS and environment). Let’s choose the “Linux” option and click Next to reach the next step in the wizard.
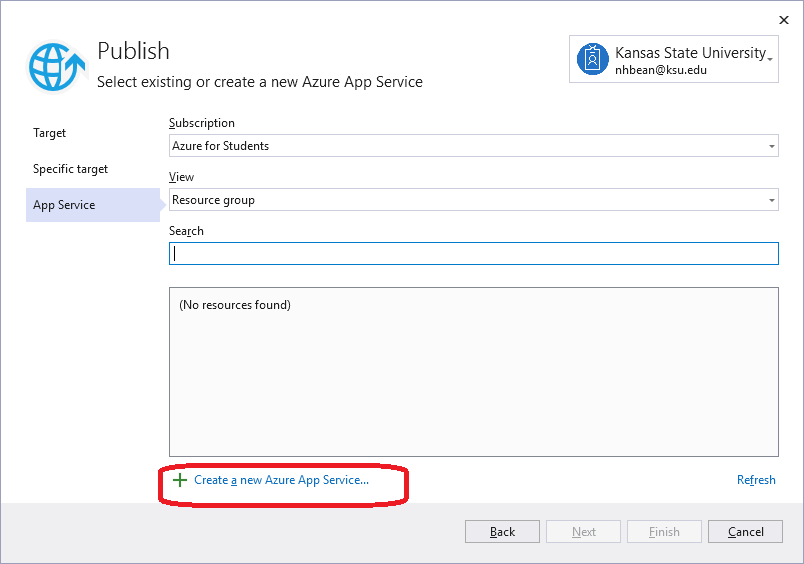
This step lists the subscription(s) available to your account, as well as any Resource Groups and App Services you have created. Most likely the latter two are empty, and your Subscription will be “Azure for Students” (this is the $100 of credit you receive as a K-State student). If you have used Azure previously, you may have additional options. For this project, choose the “Create a new Azure App Service…”
This launches another dialog, for creating a new App Service:
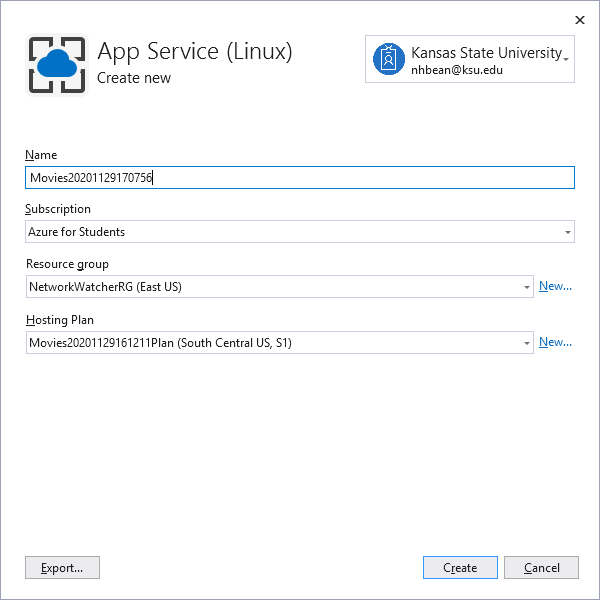
You may change the name to any available name (by default it will be your project name followed by a timestamp). When you’re happy with your name, click the Create button. It will take a few minutes to create your App Service, so please be patient. Once it finishes, you’ll be back in the Wizard with your new app service selected:
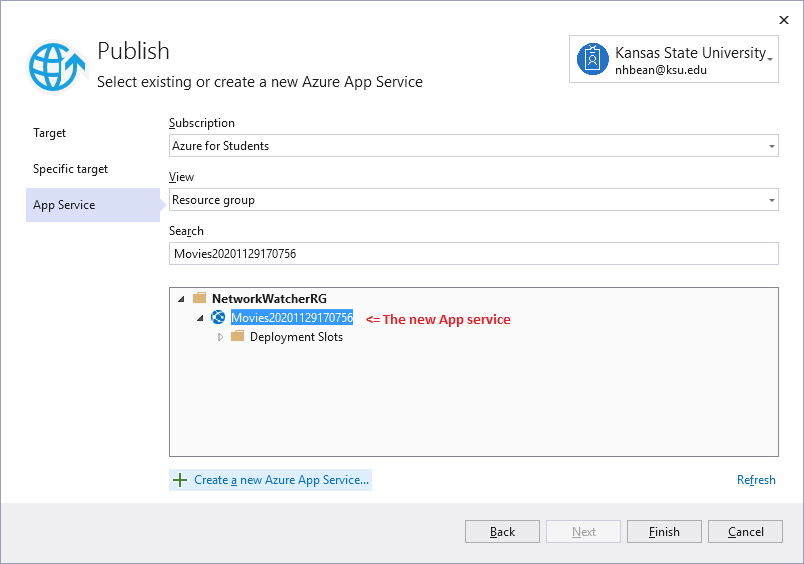
Go ahead and click the Finish button. This will close the wizard and return you to Visual Studio, where the Publish configuration screen is now visible:
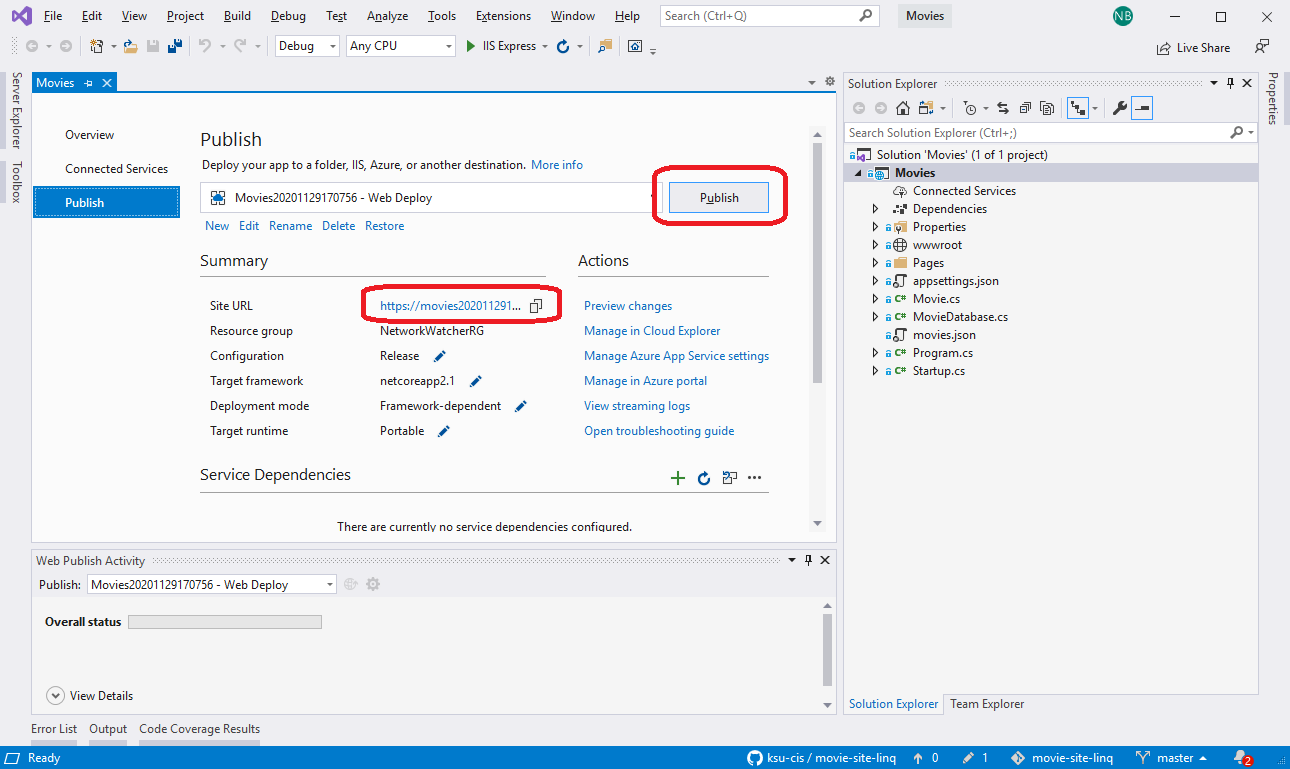
Two elements are important here - the Site URL is the URL where you will be able to visit your published web application (after you publish it), and the Publish button launches the publishing process. Go ahead and click the Publish button. It will take a few minutes, but you’ll see the project is built and deployed to the Azure service. When the process completes, it will open your site in the default web browser (or you can navigate there using the supplied URL).
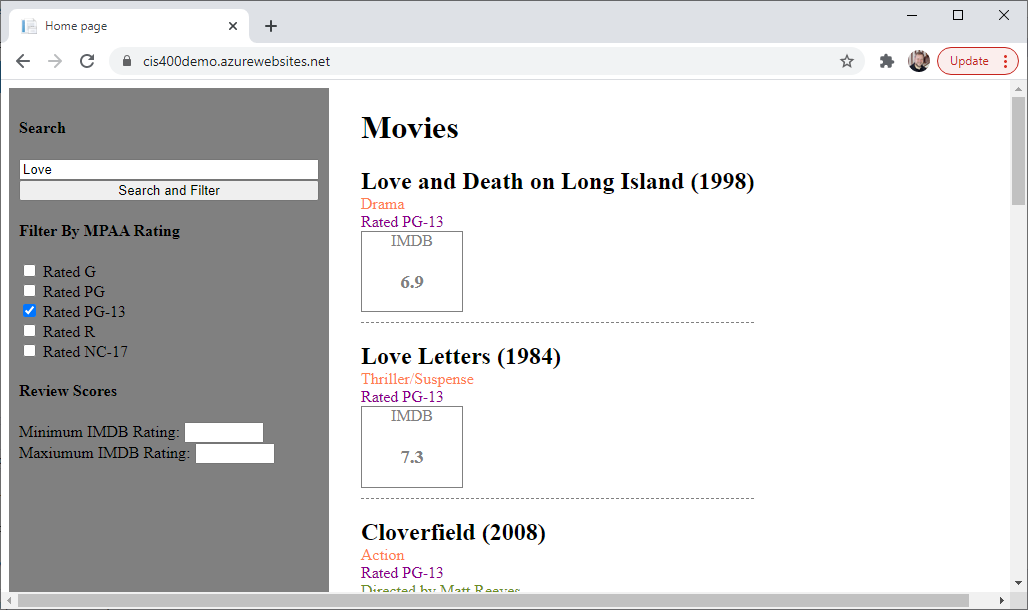
Your published website will now look something like this:
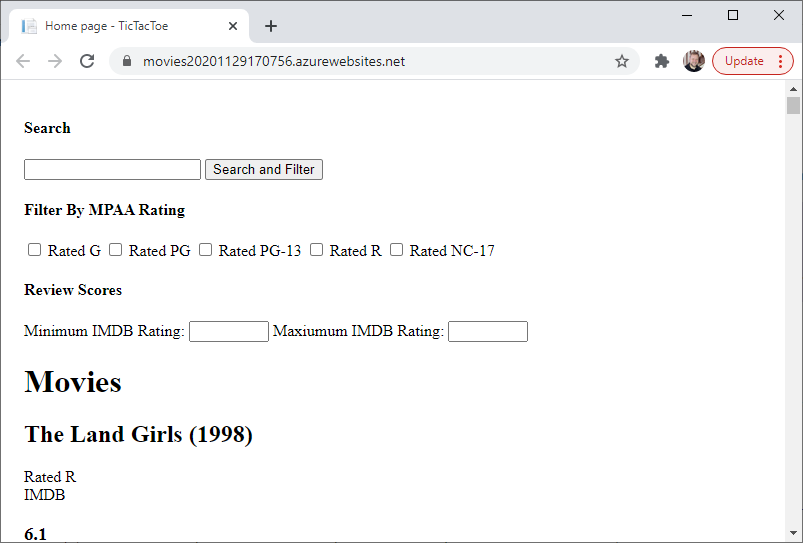
While the website is now loaded and functional, it does not look like our debug build - it seems to be missing all of our styles! If we inspect the CSS in the browser development tools, we’ll see that it is loading site.min.css, and this file contains the minified boilerplate CSS from the original site template, but none of the changes we made! If we examine our Layout.csthml template file, we can find the lines where the <link> element for the CSS is defined:
<environment include="Development">
    <link rel="stylesheet" href="~/css/site.css" asp-append-version="true" />
</environment>
<environment exclude="Development">
    <link rel="stylesheet" href="~/css/site.min.css" asp-append-version="true" />
</environment>
Notice the use of the ASP.NET-specific <environment> element? This conditionally includes its children based on the environment the web server is running in. Debug mode corresponds to our “Development” environment, so in debug we are including site.css. However, when we run it in “Production” mode, i.e. in our Azure service, we’re instead using site.min.css. This is intended to be a minified and bundled version of site.css. Minification is a transpiling process where we strip out unnecessary content, i.e. whitespace and comments. Bundling refers to gathering multiple files - i.e. multiple CSS files, and combining them into a single file (this is helpful if we like to keep our CSS rules separated according to what pages they correspond to).
The issue is that the site.min.css file is not currently being updated when we build our project - instead we’re still using the example file that came with the project template. We’ll need to install and configure a NuGet package within the Movie project to enable this extra building step. You can read more about bundling and minification within ASP.NET Core here.
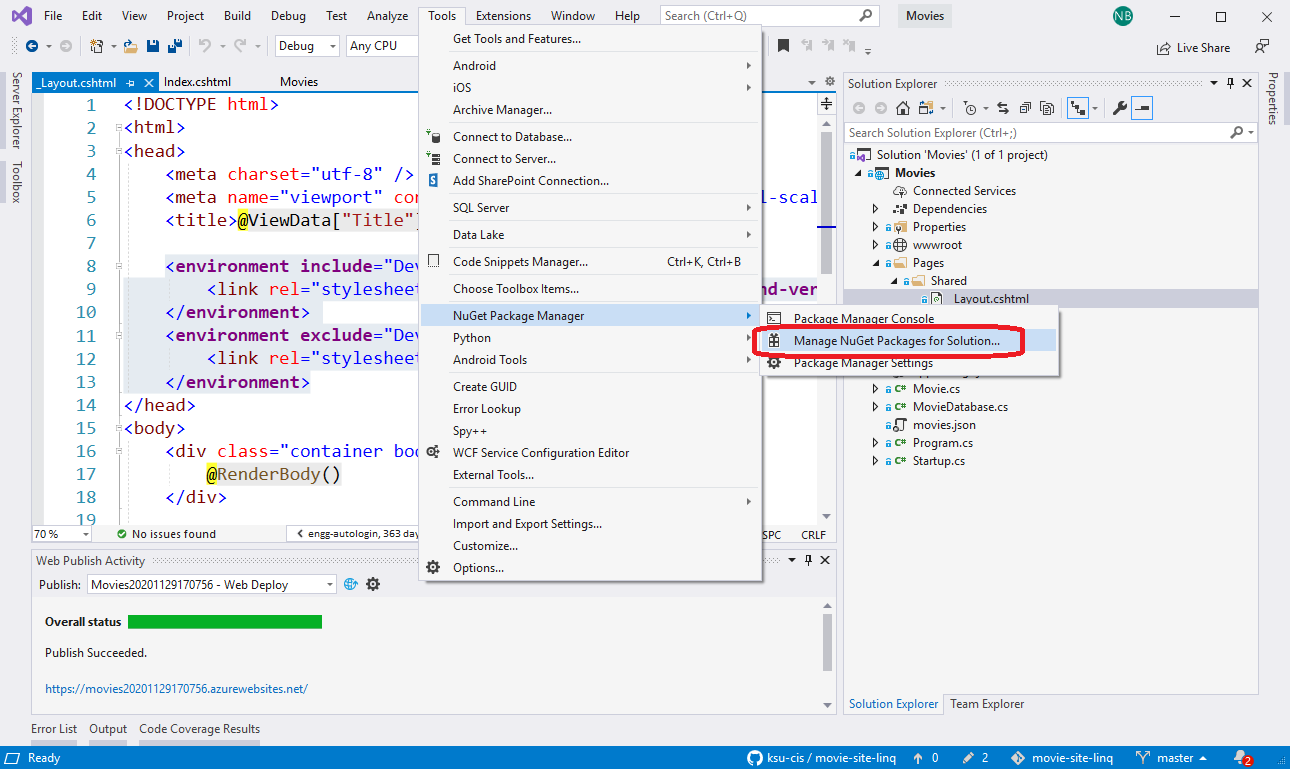
Start by selecting Tools > NuGet Package Manager > Mange Nuget Packages for Solution... from the Tools menu:
This loads the NuGet Package Manager, which allows us to install additional components into our project. By default it starts with the “Installed” tab, which shows which packages are currently installed. Not surprisingly, we have several Microsoft.NETCore packages - these contain the library code for .NETCore and for procesing Razor pages. We also have a third-party library, Newtonsoft.Json, which is used to parse the JSON database file. We’ll want to install a new package, so select the “Browse” tab:
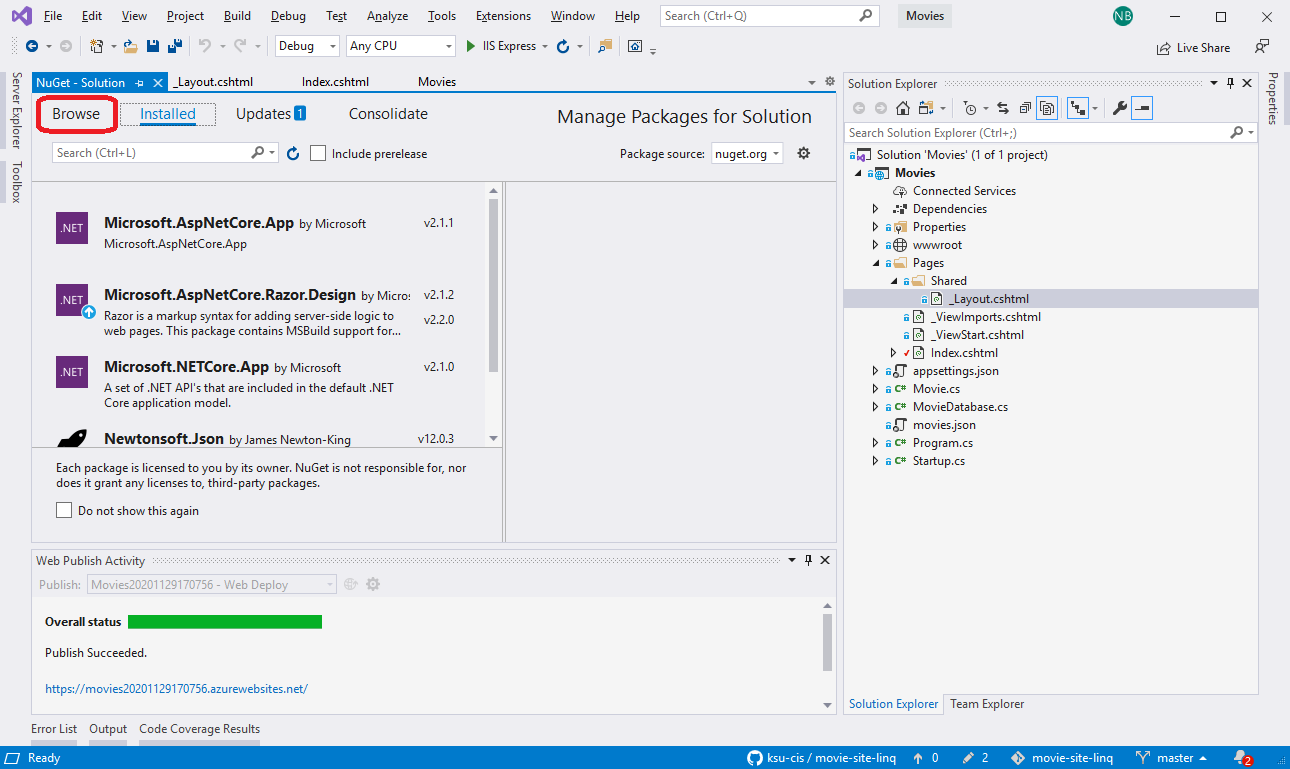
Then type into the search box “BuildBundlerMinifier”. The corresponding package should show up in the results below. This tool will add the bundling and minification step to the build process of Visual Studio. Clicking on the project will open a checklist allowing you to choose which projects you want to install the package into. Check the box next to the Movies project, and then click the Install button.

YOu will need to click Ok in the confirmation dialog, and then the package will be installed. Visual Studio will report that the bundleconfig.json files does not exist. This file configures the new package to create the minified bundle file - we’ll need to add it. It should be created at the root of the Move project, and it consists of a simple JSON structure:
[
  {
    "outputFileName": "wwwroot/css/site.min.css",
    "inputFiles": [
      "wwwroot/css/site.css"
    ]
  }
]
The "outputFileName" is the name of the file we want to write to (in this case, _site.min.css), and the "inputFiles" is an array containing file names of all the files we want to bundle (in this case, site.css). If we had additional CSS files in our project, we could also list those here as well, and all of the listed files would be combined into the single output file.
We can bundle and minify Javascript files the same way, by adding a second JSON object defining the "outputFileName" for the minified and bundled Javascript file (which we conventionally give the extension .min.js), and an "inputFiles" array consisting of all the JavaScript files we want to bundle.
With this change, now whenever we build our project, we will also rebuild the minified site.min.css file. Click the Publish button in the Publish screen again, and when the project finishes loading, you’ll now see the CSS rules being applied to your site:
That’s all there is to it! You now have a published ASP.NET Core Web Application that can be accessed from any internet-connected browser!
Turn in the URL to your published site. After it is graded, feel free to take down your Azure service.