Previous Versions
Previous Versions of this page:
Previous Versions of this page:
This textbook was authored for the CIS 400 - Object-Oriented Design, Implementation, and Testing course at Kansas State University. This section describes assignments specific to the Fall 2022 offering of that course.
For this milestone, you are creating your first feature branch and release. You will repeat this process for every future milestone, so get it down now!
You will need to:
The purpose of this assignment is to set up your local repository, practice working with feature branches, and learn how to create and turn in a release. These are all tasks that you will revisit with each milestone, so it pays to get comfortable with them now.
Unlike future milestones, this milestone should not take very long to complete, provided you follow the steps outlined. You’ll likely want to come back and revisit the feature branches as well as this page as you work on future assignments.
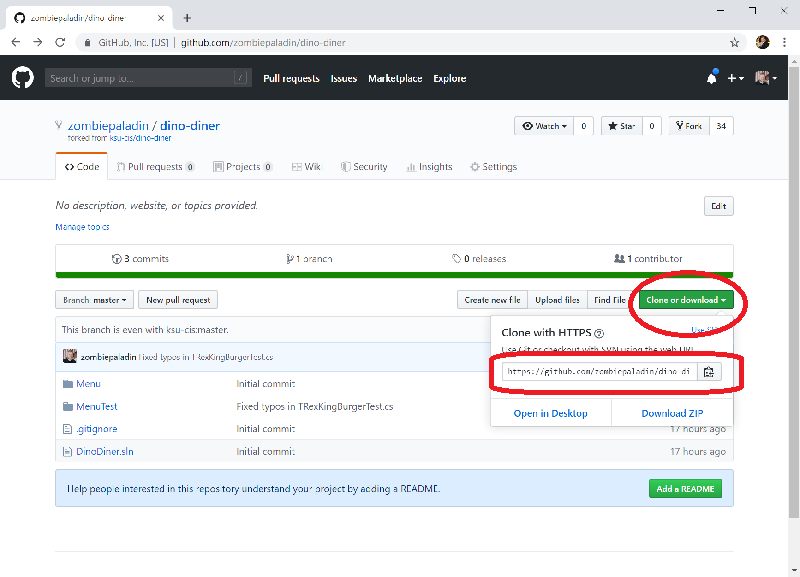
This part should be familiar from prior semesters. Accept the GitHub classroom assignment (You can find the link in the assignment on Canvas). Then clone the remote repository it creates to your development machine. You can do this from Visual Studio’s File > Clone Repository… option or from the command line with:
$ git clone [repoURL] It is common practice to indicate a terminal cursor with the $ - but it is not part of the command. You only need to type what comes after the $ - in this case git clone [repoURL]. Likewise [repoURL] should be replaced with your actual repository URL
Where [repoURL] is the clone repo from GitHub:
This task is covered in more detail in the section on remote repositories
Once you have cloned your project to a local repo and set up your webhook, you are ready to create your first feature branch, ms1 (for milestone 1). I recommend doing this from the command line. You can open a terminal in Visual Studio by visiting the View > Terminal menu option or by pressing the CTRL + backtick keys. Then you can create your branch with the command:
$ git branch ms1And check it out with the command:
$ git checkout ms1From this point until you check out a different branch, any commits you make will be made to the ms1 branch.
The change you will need to make is to add a get-only (that is, a property that only defines a get method, and not a set method) Name property of type string to the PrehistoricPBJ class. It should always have the value "Prehistoric PBJ".
Because you have made changes to the project, it is a good idea to run your tests and make sure you didn’t inadvertently break another feature (we’d normally also add new tests for what you added, but we’ll cover that later in the semester).
Once you have done so, you can commit your changes with:
$ git commit -a -m "Added the Name property to PrehistoricPBJ"It is a common workflow to run the command:
$ git add . Before committing files. This adds any newly-created files to tracking. Here, we had no new files, so we could skip this step.
Note that the Visual Studio GUI interface combines the two commands.
Finally, you want to push this commit to your remote branch, origin/ms1. You can do this with the command:
$ git push origin ms1The first time you do this, it will also create the origin/ms1 branch on GitHub.
If you need to pull this remote branch into another local repo (say you created the branch in the lab but now you are on your home computer), the process is covered in the previous section
Once you are happy with your code on your feature branch, it is time to merge it into the main branch and create a release. First, double-check that all changes have been committed by running the command:
$ git statusYou should see the message "nothing to commit, working tree clean". If you don’t add and commit any changes before moving on.
Then switch back to the main branch with:
$ git checkout mainAnd merge your ms1 branch changes into the main branch with:
$ git merge ms1After this, your main branch contains all the code changes from your ms1 branch.
Unless you have made changes to your main branch in the meantime, this should go smoothly. If you have changed main as well, it is possible that Git may encounter a section of code where changes have been made on both branches, and it is uncertain of how to merge them. In this case you will need to [resolve the merge conflicts]https://textbooks.cs.ksu.edu/cis400/b-git-and-github/11-merge-conflicts/ and create a new commit with the resolution before moving on.
Now you can push your main branch to GitHub:
$ git push origin mainNow create a release tagged v0.1.0 with name "Milestone 1". Copy the URL for the release page and submit it to the Canvas assignment.
This textbook was authored for the CIS 400 - Object-Oriented Design, Implementation, and Testing course at Kansas State University. This section describes assignments specific to the Fall 2022 offering of that course. If you are not enrolled in the course, please disregard this section.
For this milestone, you are creating your first feature branch and release. You will repeat this process for every future milestone, so get it down now!
You will need to:
The purpose of this assignment is to set up your local repository, practice working with feature branches, and learn how to create and turn in a release. These are all tasks that you will revisit with each milestone, so it pays to get comfortable with them now.
Unlike future milestones, this milestone should not take very long to complete, provided you follow the steps outlined. You’ll likely want to come back and revisit the feature branches as well as this page as you work on future assignments.
This part should be familiar from prior semesters. Accept the GitHub classroom assignment (You can find the link in the assignment on Canvas). Then clone the remote repository it creates to your development machine. You can do this from Visual Studio’s File > Clone Repository… option or from the command line with:
$ git clone [repoURL] It is common practice to indicate a terminal cursor with the $ - but it is not part of the command. You only need to type what comes after the $ - in this case git clone [repoURL]. Likewise [repoURL] should be replaced with your actual repository URL
Where [repoURL] is the clone repo from GitHub:
This task is covered in more detail in the section on remote repositories
Once you have cloned your project to a local repo and set up your webhook, you are ready to create your first feature branch, ms1 (for milestone 1). I recommend doing this from the command line. You can open a terminal in Visual Studio by visiting the View > Terminal menu option or by pressing the CTRL + backtick keys. Then you can create your branch with the command:
$ git branch ms1And check it out with the command:
$ git checkout ms1From this point until you check out a different branch, any commits you make will be made to the ms1 branch.
The change you will need to make is to add a get-only (that is, a property that only defines a get method, and not a set method) Name property of type string to the AppleFritters class. It should always have the value "Apple Fritters". Once you have done so, you can commit your changes with:
$ git commit -a -m "Added the Name property to AppleFritters"It is a common workflow to run the command:
$ git add . Before committing files. This adds any newly-created files to tracking. Here, we had no new files, so we could skip this step.
Note that the Visual Studio GUI interface combines the two commands.
Finally, you want to push this commit to your remote branch, origin/ms1. You can do this with the command:
$ git push origin ms1The first time you do this, it will also create the origin/ms1 branch on GitHub.
If you need to pull this remote branch into another local repo (say you created the branch in the lab but now you are on your home computer), the process is covered in the previous section
Once you are happy with your code on your feature branch, it is time to merge it into the main branch and create a release. First, double-check that all changes have been committed by running the command:
$ git statusYou should see the message "nothing to commit, working tree clean". If you don’t add and commit any changes before moving on.
Then switch back to the main branch with:
$ git checkout mainAnd merge your ms1 branch changes into the main branch with:
$ git merge ms1After this, your main branch contains all the code changes from your ms1 branch.
Unless you have made changes to your main branch in the meantime, this should go smoothly. If you have changed main as well, it is possible that Git may encounter a section of code where changes have been made on both branches, and it is uncertain of how to merge them. In this case you will need to [resolve the merge conflicts]https://textbooks.cs.ksu.edu/cis400/b-git-and-github/11-merge-conflicts/ and create a new commit with the resolution before moving on.
Now you can push your main branch to GitHub:
$ git push origin mainAnd create a release tagged v0.1.0 with name "Milestone 1". Copy the URL for the release page and submit it to the Canvas assignment.