Milestone 5 Requirements
For this milestone, you will be adding functionality to your Point-of-Sale system (POS). Specifically, we will be adding support for putting together an order and customizing the elements within it. To do this, we will be leveraging data binding.
General requirements:
You need to follow the style laid out in the C# Coding Conventions
All classes should be declared in their respective namespace (see below)
Document your classes using XML-Style comments
Create UML class diagrams to represent your project
Assignment requirements:
Implement the
INotifyPropertyChangedinterface on allIOrderItemimplementing classesImplement the
ICollection,INotifyPropertyChanged, andINotifyCollectionChangedinterface on theOrderclassBind an
Orderinstance to yourMainWindowCreate an event listener to cancel the order and tie it to the corresponding button
Create event listener(s) to add items to your bound
Orderand open the corresponding customization screen, binding the item to the customization screen’sDataContextAdd event listeners to customize the bound
IOrderItemin in the customization screenBind the
OrderSummaryControlUI controls to the correspondingOrderproperties to display the order detailsProvide a means for removing items from the order in your GUI
Update your UML Class Diagrams to reflect the current state of both projects:
- Data
- PointOfSale
(You don’t need to create a UML of your test project, though you can if you want)
Purpose:
This assignment is intended to familiarize you to Microsoft’s Windows Presentation Foundations’ approach to events and data binding. Data Binding allows you to tie a user interface element to an object that provides its data, and enable one- or two-way flow for updating that data.
Recommendations:
Get in the habit of reading the entire assignment before you start to code. Make sure you understand what is being asked of you. Please do not stub your toe and have to redo work because you did not read the entire assignment.
Accuracy is important. Your class, property, enumeration and other names, along with the descriptions must match the specification given here. Otherwise, your code is not correct. While typos may be a small issue in writing intended for human consumption, in computer code it is a big problem!
Remember that you must document your classes. This includes a general identity comment at the top of your files, i.e.:
/*
* Author: Nathan Bean
* Edited by: (Only include if you are not the original author)
* File name: Something.cs
* Purpose: To inform the students of the requirements for this milestone
*/
AND XML-Style comments above every public class, field, property, and method!
Implement INotifyPropertyChanged on your Order Items
In order for an object to support WPF data binding, it needs to implement the INotifyPropertyChanged interface from the System.ComponentModel namespace. This requires you to:
Add a
PropertyChangedevent to your classInvoke that
PropertyChangedevent any time a property of the class changes, specifying the property that changed by its exact name in the suppliedPropertyChangedEventArgs
Test the INotifyPropertyChanged functionality of your Order Items
To ensure that you’ve implemented the interface correctly, you should add unit tests to each of your order items to verify:
That the
INotifyPropertyChangedinterface is implemented, andThat all changing properties are notified.
The first can be accomplished with the Assert.IsAssignableFrom<T>(Object obj) assertion. The second can be done with Assert.PropertyChanged(Object obj, string propertyName, Action action). For example, to test that the CheddarCheese property notifies of a change, we could:
[Fact]
public void CheddarCheeseTriggersPropertyChanged()
{
  var dog = new Dog();
  // Since dog should have no cheddar cheese by default, we first set it to true
  Assert.propertyChanged(dog, "CheddarCheese", () => {
    // Inside the action, we make a change to the object that should trigger
    // the PropertyChanged event
    dog.CheddarCheese = true;
  });
  Assert.propertyChanged(dog, "CheddarCheese", () => {
    dog.CheddarCheese = false;
  });
}
Implement interfaces on the Order class
We will be using the Order class as a collection of IOrderItems. This means we should implement the ICollection<T> interface, so we can treat it as a collection similar to List, Dictionary, and the other collections you have worked with previously. We will also be data-binding to this list, which means it needs to implement the INotifyPropertyChanged interface to update the GUI properly, and also the INotifyCollectionChanged (as it is also a collection).
In addition to the interfaces, you will need to add a readonly Number property of type uint to your order. Its value should be set when the order is constructed, and not be changed after that. Each successive order created should use a different number (preferably increasing by one). This is most easily accomplished by declaring a private static variable to keep track of the next order number to use.
Implement the ICollection<T> interface on the Order class
The Order class will need to implement the ICollection<T> interface. This is a generic collection interface which specifies methods that all collections should have. It is also a generic interface (hence the <T>), and we can either implement our own generic collection on top of it, or (because we know we want a collection of IOrderItems) specify the collection type when we implement it, i.e.:
public class Order : ICollection<IOrderItem> {
  // TODO: Class definition here
}
Info
Alternatively, we can implement the ICollection<T> interface by inheriting from a class that already implements it, like List<T> or Collection<T>.
To implement the ICollection<T> interface, you will need to define the following properties and methods on the Order:
Count- a read-onlyintproperty that indicates how many items are in the orderIsReadOnly- a read-only boolean that indicates if the collection can be changed after it is created. As we want to add and remove items from the order, this will always befalse.Add(T)- a method that adds an item (in our case, this would be aIOrderItem) to the collection. You should already have written this method in the previous milestones.Remove(T)- a method that removes the specified item (in our case, anIOrderItem) from the collection. It returnstrueif the item was removed,falseotherwise. You should already have written this method in a previous milestone.Contains(T)- method that returnstrueif the specified item is in the collection,falseotherwise.CopyTo(T[], int)- Copies the number of items specified by theintthe from theOrderinto the suppliedIOrderItem[]array.GetEnumerator<T>()- TheICollection<T>interface also includes theIEnumerable<T>interface, so you will need to implement a method to get an Enumerator.GetEnumerator()- TheICollection<T>interface also includes theIEnumerableinterface, so you will need to implement a method to get an Enumerator.Optional: It might be useful to implement the bracket operator
[], which allows access to a specific item at a specific position in the collection. It is defined as an operator override, i.e.:
public IOrderItem this[int index] { get; set; }Note: You must provide implementations for get and set.
Hints
Many of these methods can be implemented as pass-through methods from the collection you are using internally to hold the order items (essentially, return the result of calling the same method on the collection).
Implement INotifyPropertyChanged on the Order class
Since you will be data binding the order, you will also need to implement the INotifyPropertyChanged interface on it. You should notify when any of the order properties change, which are:
Size- the count of items in the orderSubtotal- the total cost of items in the orderTax- the amount of tax to be charged in the orderTotal- the subtotal and tax together
If your DateTime and Number properties do not change, then there is no need to notify of them changing. But if you do allow it to change, you will also need to notify for it.
Note that if an item in the collection changes, i.e. a Dog in the order is modified to add additional ingredients, its price will change. Therefore the Subtotal, Tax, and Total order will change as well. Thus, when items are added to the collection you will need to listen to their PropertyChanged event from the Order class and trigger your own PropertyChanged for these dependent properties!
Hints
Attaching a PropertyChanged event listener to the IOrderItem in your Add() method and detaching it in the Remove() method can fulfil the last requirement and ensure you don’t have orphaned event listeners (and the corresponding memory leak).
Implement ICollectionChanged on the Order class
You will also need to implement the INotifyCollectionChanged interface in the System.Collections.Specialized namespace. This interface is similar to the INotifyPropertyChanged, but adds specific requirements for when a collection used as a data source changes, i.e when items are added or removed.
This interface requires you to implement one event, a NotifyCollectionChanged event:
public event NotifyCollectionChangedEventHandler CollectionChanged;As you might imagine, this is triggered any time the collection changes. It uses a corresponding event args, NotifyPropertyChangedEventArgs which has multiple constructors. You need to to utilize the appropriate one for the situation you are reporting:
Adding a single item:
new NotifyCollectionChangedEventArgs(CollectionChangedAction.Add, item)whereitemis the item addedRemoving a single item
new NotifyCollectionChangedEventArgs(CollectionChanged.Remove, item, index)whereitemis the item removed, andindexis an integer specifying the index it was located at.Changing the entire collection (i.e. on a clear):
new NotifyCollectionChangedEventArgs(CollectionChanged.Reset)
Using the appropriate event args allows the UI to update itself with the least amount of changes, making it more efficient.
Test the INotifyPropertyChanged, INotifyCollectionChanged, and ICollection functionality of your Order Items
You will need to write additional tests to ensure that your Order class’s new functionality behaves as expected. At a minimum, you should be testing:
That adding an item triggers a corresponding
CollectionChangedeventThat removing an item triggers a corresponding
CollectionChangedeventThat adding an item triggers
PropertyChangedevents for each property that is changing (i.e.Count,Subtotal,Tax, andTotal)That removing an item triggers
PropertyChangedevents for each property that is changing (i.e.Count,Subtotal,Tax, andTotal)That modifying an item in the order triggers
PropertyChangedevents for each property that is changing (i.e.Count,Subtotal,Tax, andTotal)That
Countaccurately reflects the number of items in the orderThat
IsReadOnlyisfalse
Bind an Order instance to your MainWindow
Since the Point-of-Sale only deals with one order at a time, you can bind an instance of Order to the MainWindow.DataContext property and use it in any controls that are children of the MainWindow (provided they or their ancestors don’t set their own DataContext property).
You can change this order at any time by replacing the current one with a new one, i.e.
DataContext = new Order();You should implement this functionality for the “Cancel Order” button by writing an event listener and attaching it to the button.
Add Items to the Order
You should also add items to the bound Order instance when the buttons corresponding to that item are clicked. You can do this with either a single event listener used by all menu item buttons, or have individual event listeners for each one.
As the DataContext of the MenuItemSelection control is received from the MainWindow, you can simply use it to access the order, i.e.:
var order = DataContext as Order;Note we have to cast the data context (as it is stored as an Object). If you are uncertain if the DataContext in this case is actually an order, you can use the pattern-match cast:
if(DataContext is Order order) {
  // Inside this body, `order` is the DataContext cast to be an order
}
If the DataContext is not an order instance, the true branch of this conditional statement is skipped.
If the item has a customization screen, this even listener should also display that control after the item is added to the order, to allow it to be customized.
Customizing the Order Items
For those customization screens, you want to bind the specific order item instance as the DataContext so that you can data-bind the controls directly to the order item. I.e. if our DataContext is a Dog class, we can bind a <CheckBox> control to its YellowMustard property with:
<CheckBox isChecked={Binding Path=YellowMustard}>Yellow Mustard</CheckBox>If your data binding is set up correctly, the checkbox will reflect the current state of the Dog.YellowMustard property, and clicking it will update that state.
All of your customization screens need to be data bound this way.
Hint
It is easiest to bind the order item at the same time you display the customization screen, i.e. in the button click listener of the MenuItemSelectionControl.
Radio buttons are easiest to handle by restyling a <List> to use the radiobutton template. Refer to the textbook section on Binding Enums for guidance on this process.
Displaying the Order Properties
Likewise, you will want to data-bind the Order properties to your OrderSummaryControl, including the Subtotal, Tax, Total, Number and DateTime. These would be one-way bindings (as you don’t want the user to be able to edit these values, as they are calculated from the order). If you do this correctly, the values in the UI will update automatically as you make changes to the order.
You will also want to bind the Order.Items property to your OrderSummaryControl’s <List>, so that the individual order items are displayed. However, if you use the default functionality the list will show the fully-qualified name of the class the item is, not the details we want. Thus, you will need to replace the <List>’s ItemTemplate to use a custom <DataTemplate> you define. This should display the item’s name, price, and its special instructions.
An example of what this might look like is displayed below:
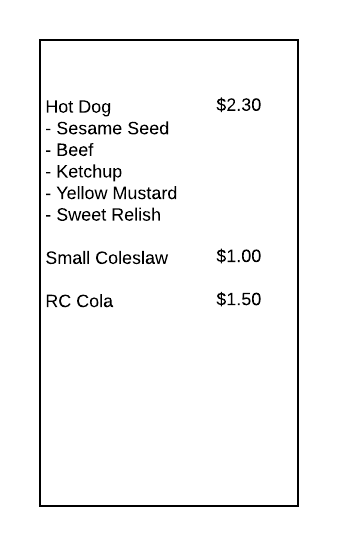
Refer to the textbook section on Binding Lists for guidance on this process.
Removing Items from the Order
You need to allow the user to remove an item from the order. The exact details of the implementation are left to you, but some possibilities are:
- Adding a “remove” button to the list of order items in the
OrderSummaryControl - Adding a “remove” button to the customization screen for each order item (note you may need to add additional customization screens)
- Adding a “remove selected” button to the
OrderSummaryControlthat removes the currently selected item from the displayed order list
XML Style Documentation
All public classes, properties, methods, fields, etc. in the Data and PointOfSale projects should be documented inline using UML-Style documentation, as covered in the [documentation chapter]{((<ref 03-documentation>))}.
UML Class Diagram
You will need to update the UML Class Diagram for the Data project and the PointOfSale project, which should follow the guidelines set out in the UML Chapter. This should be added to a documentation folder in your project, which must be added to source control. See (https://textbooks.cs.ksu.edu/cis400/b-git-and-github/13-adding-documentation-files/) for guidance on ensuring the files are correctly added. You may include either Visio, PDF, or an image file, but including a Visio file ensures you can continue to edit your UML to keep it up-to-date with changes you will make in future milestones.
Note that WPF controls define a single class in two parts (the .xaml file and the .xaml.cs file). Despite it being spread over two files, it is still a single class and should have only a single box in the UML diagram.
Submissions
Create a new release tag - Submit the release URL
If you do not remember how to do this, please revisit the Create a Release page
Keep in mind the version!!!