Object-Oriented Design, Implementation, and Testing
CIS 400 Course Textbook
Nathan Bean
Kansas State University
© 2020
This work is licensed under a Creative Commons Attribution-NonCommercial-ShareAlike 4.0 International License.
CIS 400 Course Textbook
Nathan Bean
Kansas State University
© 2020
This work is licensed under a Creative Commons Attribution-NonCommercial-ShareAlike 4.0 International License.
Getting Oriented
This textbook was authored for the CIS 400 - Object-Oriented Design, Implementation, and Testing course at Kansas State University. This front matter is specific to that course. If you are not enrolled in the course, please disregard this section.
Hello students, and welcome to CIS 400 - Object-Oriented Design, Implementation, and Testing. My name is Nathan Bean, and I will be your instructor for this course.
This textbook was authored for the CIS 400 - Object-Oriented Design, Implementation, and Testing course at Kansas State University. This front matter is specific to that course. If you are not enrolled in the course, please disregard this section.
This course is taught in the “flipped” style. This means you will be watching videos and working through tutorials before you come to class. Your class sessions will be used for asking questions, working on and getting help with your projects, and taking exams.
Online sections of the course will not have in-person meetings on campus (although you can come to in-person office hours if those work for you); instead we will hold office hours and appointments meet over Zoom. You should ensure that you have a working webcam, microphone, and adequate internet connection for teleconferencing. Exams for distance sections will be delivered online.
Up to this point, you’ve likely done a lot of what I like to call “Baby Projects” - programming projects that are useful to demonstrate a concept or technique, but really don’t do anything beyond that. In contrast, we’ll be building a large, multi-project software solution to meet a real-world problem - the software needed to run a fast-food franchise chain!
We’ll be building this software iteratively over the entire semester! Each week, you’ll turn in one milestone as a GitHub release, just like you might do as a professional software developer. Because each milestone builds upon your prior work, it is critical that you keep up. Falling behind will very quickly tank your grade and impact your ability to learn and develop strong programming skills.
The course is organized into modules focused on a specific topic, accessible from the Canvas modules menu. Each module introduces one or more topics, and 1) covers the vocabulary and concepts with assigned readings, 2) puts those concepts into practice with guided tutorials, and 3) tasks you with applying those techniques you just practiced in a weekly milestone.
For Fall and Spring semesters, each week will normally consist of two regular modules and the weekly milestone. The first module will be due by Monday, the second Wednesday, and the milestone on Friday. Each regular module will take several hours to complete, and milestones can often take ten hours or more. You should plan your learning schedule accordingly.
For the Summer semester, the regular 16-week course is compressed into 8 weeks. Multiple topics are grouped into a single weekly module. All module content is due by Friday of the assigned week, to allow for greater flexibility in when you complete the module. Be aware that these compressed modules take a lot of time to complete - you will want to schedule 15-20 hours a week to work on them at times when you are sharp!
The modules, and all of their associated assignments, are available through Canvas. You must complete each module item in order, and the prior week’s modules must be finished before you can move on to those in the next week. Be aware that if you procrastinate and don’t start until Friday, it is unlikely that you will finish. Which means you will fall behind. You can very quickly find yourself in a hole you cannot climb out of. So time management is a critical skill you need to be developing.
Remember that in the CS Professional Program, a grade of less than C in a professional program course (like CIS 400) results in a “Warning of Unsatisfactory Progress.” This warning sticks with you the rest of your time in Computer Science at K-State. If you earn a second, similar grade, you will be dismissed from the CS Professional Program!
This textbook was authored for the CIS 400 - Object-Oriented Design, Implementation, and Testing course at Kansas State University. This front matter is specific to that course. If you are not enrolled in the course, please disregard this section.
As you work on the materials in this course, you may run into questions or problems and need assistance.
As mentioned before, the course sessions are one of the best time to get help with your assignments - during this time the instructor and TAs are scheduled to be available and on-hand in the computer lab.
The online course sections do not have in-person class times. With that in mind, you should bring your questions directly to the Discord course channel where the instructor, TA, and possibly your peers can help!
For questions that crop up outside of class times, your first line of communication for this course is the departmental Discord server. If you have not yet signed into the course discord channel, or are not yet a Discord user, please visit https://discordbot.cs.ksu.edu. This assistant will link your K-State and Discord accounts and set your username for the server in accordance with K-State policy.
In addition to class channels, the Discord server hosts channels for student clubs, announcements, and general discussion. It is a good place to find information and socialize when you are unable to meet face-to-face.
Discord uses channels - the equivalent of chat rooms - to provide a place for related conversations. The channel for this course is #cis-400. It is the best place to go to get help with anything related to this course, from the tutorials and projects to issues with Visual Studio and Canvas. Before you post on Discord, use the search feature in the channel or scroll back in the chat history to make sure the question has not already been posted before. It will save everyone quite a bit of time.
Additionally, all course announcements will be made in the course channel (as well as through the Canvas announcements), so make a habit of checking the channel regularly.
Discord also supports direct messaging - you can use this when you have a procedural or grading question. Type the name or eid of the person you’d like to message into the search bar, and then select them from the results to start a direct message. Once you’ve started a direct message with a user, their name will also show up in your side menu.
However, for general questions, asking them in the course channel will give you the best chance of a fast answer, from the course instructors, TAs, or your fellow students. And if you help a fellow student, you might get bonus points!
The helping hand extra credit assignment provides bonus points for students who are caught helping other students in the class Discord channel.
Discord includes lots of useful features:
@
symbol with a username in a message to create a mention, which notifies that user immediately, i.e. @Nathan Bean (he/him) will alert me that you’ve made a post that mentions me.Shift
+Enter
for new lines in a multi-line message`var c = 4;`
) to enclose code snippets to format them as programming code, and triple backtick marks to enclose multiline code comments (```[multiline code]```
).Discord is the preferred communication medium for the course because 1) you will generally get a faster response than email, and 2) writing code in email is a terrible experience, both to write and to read. Discord’s support of markdown syntax makes including code comments much easier on both of us.
However, if you have issues with Discord, feel free to email one of the instructors directly if you are unable to post directly on Discord itself for some reason.
There are a few resources available to you that you should be aware of. First, if you have any issues working with K-State Canvas, K-State IT resources, or any other technology related to the delivery of the course, your first source of help is the K-State IT Helpdesk. They can easily be reached via email at helpdesk@ksu.edu. Beyond them, there are many online resources for using Canvas, all of which are linked in the resources section below the video. As a last resort, you may also want to post in Discord, but in most cases we may simply redirect you to the K-State helpdesk for assistance.
If you have issues with the technical content of the course, specifically related to completing the tutorials and projects, there are several resources available to you. First and foremost, make sure you consult the vast amount of material available in the course modules, including the links to resources. Usually, most answers you need can be found there.
If you are still stuck or unsure of where to go, the next best thing is to post your question on Discord, or review existing discussions for a possible answer. You can find the link to the left of this video. As discussed earlier, the instructors, TAs, and fellow students can all help answer your question quickly.
Of course, as another step you can always exercise your information-gathering skills and use online search tools such as Google to answer your question. While you are not allowed to search online for direct solutions to assignments or projects, you are more than welcome to use Google to access programming resources such as the Microsoft Developer Network, C# language documentation, WPF-tutorial.com, and other tutorials. I can definitely assure you that programmers working in industry are often using Google and other online resources to solve problems, so there is no reason why you shouldn’t start building that skill now.
Next, we have grading and administrative issues. This could include problems or mistakes in the grade you received on a project, missing course resources, or any concerns you have regarding the course and the conduct of myself and your peers. You’ll be interacting with us on a variety of online platforms and sometimes things happen that are inappropriate or offensive. There are lots of resources at K-State to help you with those situations. First and foremost, please DM me on Discord as soon as possible and let me know about your concern, if it is appropriate for me to be involved. If not, or if you’d rather talk with someone other than me about your issue, I encourage you to contact either your academic advisor, the CS department staff, College of Engineering Student Services, or the K-State Office of Student Life. Finally, if you have any concerns that you feel should be reported to K-State, you can do so at https://www.k-state.edu/report/. That site also has links to a large number of resources at K-State that you can use when you need help.
Finally, if you find any errors or omissions in the course content, or have suggestions for additional resources to include in the course, DM the instructors on Discord. There are some extra credit points available for helping to improve the course, so be on the lookout for anything that you feel could be changed or improved.
The Bug Bounty extra credit assignment gives points for finding errors in the course materials. Remember, your instructors are human, and do make mistakes! But we don’t want those occasional mistakes to trip you and your peers up in your learning efforts, so bringing them to our attention is appreciated.
So, in summary, Discord should always be your first stop when you have a question or run into a problem. For issues with Canvas or Visual Studio, you are also welcome to refer directly to the resources for those platforms. For questions specifically related to the projects, use Discord for sure. For grading questions and errors in the course content or any other issues, please DM the instructors on Discord for assistance.
Our goal in this program is to make sure that you have the resources available to you to be successful. Please don’t be afraid to take advantage of them and ask questions whenever you want.
This textbook was authored for the CIS 400 - Object-Oriented Design, Implementation, and Testing course at Kansas State University. This front matter is specific to that course. If you are not enrolled in the course, please disregard this section.
The following is an outline of the topics we will be covering and when.
Please be aware that this schedule and topic list will likely undergo some revision during the semester.
The summer offering of CIS 400 compresses the normally 16-week course into 8 weeks. Accordingly, for the summer course we double up on weekly modules.
Week 0
Week 1
Week 2
Week 3
Week 4
Week 5
Week 6
Week 7
Week 8
Week 9
Week 10
Week 11
Week 12
Week 13
Week 14
Week 15
Week 16
This textbook was authored for the CIS 400 - Object-Oriented Design, Implementation, and Testing course at Kansas State University. This front matter is specific to that course. If you are not enrolled in the course, please disregard this section.
This course does not have a required print textbook. The resources presented in the modules are also organized into an online textbook that can be accessed here: https://textbooks.cs.ksu.edu/cis400. You may find this a useful reference if you prefer a traditional textbook layout. Additionally, since the textbook exists outside of Canvas’ access control, you can continue to utilize it after the course ends.
Please note that the materials presented in Canvas have additional graded assignments and exercises worked into the reading order that do not appear in the online edition of the textbook. You are responsible for completing these!
The CIS 400 course textbook is only one of several textbooks authored by your instructors and made available on the departmental server. For example, your CIS 300 textbook is also available there for you to go back and review. You can access any of these textbooks at the site https://textbooks.cs.ksu.edu
If you are looking for additional resources to support your learning, a great resource that is available to Kansas State University students is the O’Riley For Higher Education digital library offered through the Kansas State University Library. These include electronic editions of thousands of popular textbooks as well as videos and tutorials. As of this writing, a search for object-orientation returns 13,237 results and C# returns 5,984 results. In particular, I would recommend these books:
There are likewise materials for other computer science topics you may have an interest in - it is a great resource for all your CS coursework. It costs you nothing (technically, your access was paid for by your tuition and fees), so you might as well make use of it!
This textbook was authored for the CIS 400 - Object-Oriented Design, Implementation, and Testing course at Kansas State University. This front matter is specific to that course. If you are not enrolled in the course, please disregard this section.
For this course, we will be using a number of software packages including:
These have been installed in the classroom lab, as well as all Engineering and Computer Science labs. It is strongly suggested that you install the same versions on your own development machines if you plan on working from home. Alternatively, you can remote desktop into a lab computer and use the installed software there.
To use a remote desktop, you must first install a remote desktop client on your computer. Microsoft supplies a client for most platforms, which you can find links to and information about here.
The remote desktop server is behind a network firewall, so when accessing it from off-campus, you must be using the K-State Virtual Private Network (VPN). It has its own client that also must be installed. You can learn about K-State’s VPN and download the client on the K-State VPN Page
For remote desktop servers, you can use either those maintained by The Department of Computer Science or the College of Engineering.
If you would prefer to install the software on your own development machine, you can obtain no-cost copies of Microsoft Visual Studio Professional Edition and Microsoft Visio through Microsoft’s Azure Portal and signing in with your K-State eid and password.
After signing in, click the “Software” option in the left menu, and browse the available software for what you need.
The Visual Studio Community Edition is also available as a free download here. While not as full-featured as the Professional edition you can download through Azure Portal, it will be sufficient for the needs of this class.
Discord can be used through its web app at https://discord.com/webapp or you can download a native app for Windows, Linux, Mac, iOS, or Android devices.
Xamarin Workbooks is a note-taking app with built-in C# processing (similar to the Jupyter notebooks you used in CIS 115). You can download the installer directly from GitHub, and scroll down to the Resources section of the README - there’s a link to “Download latest public release for Windows”.
This textbook was authored for the CIS 400 - Object-Oriented Design, Implementation, and Testing course at Kansas State University. This front matter is specific to that course. If you are not enrolled in the course, please disregard this section.
#cis400
channel, as this keeps a public history your classmates can review. More personal questions should be direct messaged to @Nathan Bean
.Students may enroll in CIS courses only if they have earned a grade of C or better for each prerequisite to these courses.
A study of concepts and techniques used to produce quality software programs. Object-oriented concepts, models, execution environments, design and testing techniques. Extensive application of these concepts and techniques to the development of non-trivial software programs.
This course is focused on helping you to learn the concepts and skills needed to develop high-quality software. Along the way you will have ample opportunities to practice these skills developing non-trivial software projects. These are not the “baby programs” of early CS coursework, but rather applications that could be used in a production environment.
Accordingly, our goal is not just to write software that compiles without errors, but to develop well-written and maintainable software. This goal demands extra attention to design, documentation, and testing. Additionally, we will explore some of the powerful features of the C# Language and the Visual Studio compiler, as well as other professional tools like Git and Visio.
By the end of this course, we expect each student to be able to:
A common axiom in learner-centered teaching is “(s)he who does the work does the learning.” What this really means is that students primarily learn through grappling with the concepts and skills of a course while attempting to apply them. Simply seeing a demonstration or hearing a lecture by itself doesn’t do much in terms of learning. This is not to say that they don’t serve an important role - as they set the stage for the learning to come, helping you to recognize the core ideas to focus on as you work. The work itself consists of applying ideas, practicing skills, and putting the concepts into your own words.
This course is built around learner-centered teaching and its recognition of the role and importance of these different aspects of learning. Most class periods will consist of short lectures interspersed with a variety of hands-on activities built around the concepts and skills we are seeking to master. In addition, we will be applying these ideas in iteratively building a series of related software applications over the course of the semester. Part of our class time will be reserved for working on these applications, giving you the chance to ask questions and receive feedback from your instructors, UTAs, and classmates.
There is no shortcut to becoming a great programmer. Only by doing the work will you develop the skills and knowledge to make your a successful computer scientist. This course is built around that principle, and gives you ample opportunity to do the work, with as much support as we can offer.
Each module will include many tutorial assignments that will take you step-by-step through using a particular concept or technique. The point is not simply to complete the tutorial, but to practice the technique and coding involved. You will be expected to implement these techniques on your own in the milestone assignment of the module - so this practice helps prepare you for those assignments.
Throughout the semester you will be building a non-trivial software project iteratively; every week a new milestone (a collection of features embodying a new version of a software application) will be due. Each milestone builds upon the prior milestone’s code base, so it is critical that you complete each milestone in a timely manner! This process also reflects the way software development is done in the real world - breaking large projects into more readily achievable milestones helps manage the development process.
Following along that real-world theme, programming assignments in this class will also be graded according to their conformance to coding style, documentation, and testing requirements. Each milestone’s rubric will include points assigned to each of these factors. It is not enough to simply write code that compiles and meets the specification; good code is readable, maintainable, efficient, and secure. The principles and practices of Object-Oriented programming that we will be learning in this course have been developed specifically to help address these concerns.
Over the course of the semester we will have a total of four exams. The primary purpose of these exams is formative; they are intended to help us (me as the instructor and you as the student) evaluate how you are learning the material. Thus, my testing policies may differ greatly from your prior courses.
These exams will cover the vocabulary and concepts we are learning and involve reasoning about object-oriented programming, including some code writing. The purpose of this style of assessment to assess your ability to recognize the problem and conceive an appropriate solution. Hence, you are encouraged to annotate your answers with comments, describing your reasoning as you tackle the problem. Additionally, I will include a “certainty scale” for each question, and would ask that you mark how confident you are in your answer. Doing these extra steps helps me know how well you are grasping the material, and helps both of us to know what concepts and skills may need more work.
The first exam is a pretest that is used to help establish your knowledge and readiness coming into the course. You will earn a 100% for completing this exam, regardless of your correct or incorrect responses.
The second two exams are midterms, which cover the content immediately proceeding them. You will have a chance to correct mistakes you have made in these exams, potentially earning back some lost points.
The final exam is comprehensive, and covers the most important topics and skills we have developed in the course. This is considered a summative test (one that measures your mastery of a subject). It will count for twice the number of points as the earlier exams, and you will not have a chance to correct mistakes made on it.
In theory, each student begins the course with an A. As you submit work, you can either maintain your A (for good work) or chip away at it (for less adequate or incomplete work). In practice, each student starts with 0 points in the gradebook and works upward toward a final point total out of the possible number of points. In this course, it is perfectly possible to get an A simply by completing all the software milestones in a satisfactory manner and attending and participating in class each day. In such a case, the examinations will simply reflect the learning you’ve been doing through that work. Each work category constitutes a portion of the final grade, as detailed below:
30% - Activities, Tutorials, and Quizzes (The lowest 2 scores are dropped)
44% - Programming Assignment Milestones (4% each, 12 milestones total; The single lowest assignment score will be dropped)
26% - Exams (5.2% each, with the final worth double at 10.4; 4 exams total)
Letter grades will be assigned following the standard scale: 90% - 100% - A; 80% - 89.99% - B; 70% - 79.99% - C; 60% - 69.99% - D; 00% - 59.99% - F
At the end of the semester, for students who have earned a borderline grade (i.e. a 89.98%, which is a B), I will bump their grade to the next highest letter grade based on the student’s completion of exam annotations and confidence ratings on exam questions. That is to say, if the example student regularly gives detailed annotations of their thought process, and rates their confidence in their answer, I will bump their 89.98% to an A. Students who do not provide annotations and confidence ratings will not be bumped, for any reason.
Collaboration is an important practice for both learning and software development. As such, you are encouraged to work with peers and seek out help from your instructors and UTAs. However, it is also critical to remember that (s)he who does the work, does the learning. Relying too much on your peers will deny you the opportunity to learn yourself. As the skills we are working on are the foundations on which all future computer science coursework relies, any skills you fail to develop in this course can have long-ranging effects on your future success, in both classes and the working world.
Determining where the line between good collaboration and over-reliance on others can be challenging, especially as a student. I offer a few guidelines that can help:
Read the late work policy very carefully! If you are unsure how to interpret it, please contact the instructor via email. Not understanding the policy does not mean that it won’t apply to you!
Every student should strive to turn in work on time. Late work will receive a penalty of 10% of the possible points for each day it is late. Missed class attendance cannot be made up, though as mentioned above some areas will drop the lowest two scores. If you are getting behind in the class, you are encouraged to speak to the instructor for options to make up missed work.
We will be using Visual Studio 2019 as our development environment. You can download a free copy of Visual Studio Community for your own machine at https://visualstudio.microsoft.com/downloads/. You should also be able to get a professional development license through your Azure Student Portal. See the CS support documentation for details: https://support.cs.ksu.edu/CISDocs/wiki/FAQ#MSDNAA
Additionally, we will create UML diagrams using Microsoft Visio, which can also be downloaded from the Azure Student Portal (see above).
We will use Xamarin workbooks to distribute some content. This free software can be downloaded from: https://docs.microsoft.com/en-us/xamarin/tools/workbooks/install
Discord also offers some free desktop and mobile clients that you may prefer over the web client. You may download them from: https://discord.com/download.
To participate in this course, students must have access to a modern web browser and broadband internet connection. All course materials will be provided via Canvas. Modules may also contain links to external resources for additional information, such as programming language documentation.
This course offers an instructor-written textbook, which is broken up into a specific reading order and interleaved with activities and quizzes in the modules. It can also be directly accessed at https://textbooks.cs.ksu.edu/cis400.
Students who would like additional textbooks should refer to resources available on the O’Riley For Higher Education digital library offered by the Kansas State University Library. These include electronic editions of popular textbooks as well as videos and tutorials.
The details in this syllabus are not set in stone. Due to the flexible nature of this class, adjustments may need to be made as the semester progresses, though they will be kept to a minimum. If any changes occur, the changes will be posted on the Canvas page for this course and emailed to all students.
Kansas State University has an Honor and Integrity System based on personal integrity, which is presumed to be sufficient assurance that, in academic matters, one’s work is performed honestly and without unauthorized assistance. Undergraduate and graduate students, by registration, acknowledge the jurisdiction of the Honor and Integrity System. The policies and procedures of the Honor and Integrity System apply to all full and part-time students enrolled in undergraduate and graduate courses on-campus, off-campus, and via distance learning. A component vital to the Honor and Integrity System is the inclusion of the Honor Pledge which applies to all assignments, examinations, or other course work undertaken by students. The Honor Pledge is implied, whether or not it is stated: “On my honor, as a student, I have neither given nor received unauthorized aid on this academic work.” A grade of XF can result from a breach of academic honesty. The F indicates failure in the course; the X indicates the reason is an Honor Pledge violation.
For this course, a violation of the Honor Pledge will result in sanctions such as a 0 on the assignment or an XF in the course, depending on severity. Actively seeking unauthorized aid, such as posting lab assignments on sites such as Chegg or StackOverflow or asking another person to complete your work, even if unsuccessful, will result in an immediate XF in the course.
Info
The statements below are standard syllabus statements from K-State and our program.
At K-State it is important that every student has access to course content and the means to demonstrate course mastery. Students with disabilities may benefit from services including accommodations provided by the Student Access Center. Disabilities can include physical, learning, executive functions, and mental health. You may register at the Student Access Center or to learn more contact:
Students already registered with the Student Access Center please request your Letters of Accommodation early in the semester to provide adequate time to arrange your approved academic accommodations. Once SAC approves your Letter of Accommodation it will be e-mailed to you, and your instructor(s) for this course. Please follow up with your instructor to discuss how best to implement the approved accommodations.
All student activities in the University, including this course, are governed by the Student Judicial Conduct Code as outlined in the Student Governing Association By Laws, Article V, Section 3, number 2. Students who engage in behavior that disrupts the learning environment may be asked to leave the class.
At K-State, faculty and staff are committed to creating and maintaining an inclusive and supportive learning environment for students from diverse backgrounds and perspectives. K-State courses, labs, and other virtual and physical learning spaces promote equitable opportunity to learn, participate, contribute, and succeed, regardless of age, race, color, ethnicity, nationality, genetic information, ancestry, disability, socioeconomic status, military or veteran status, immigration status, Indigenous identity, gender identity, gender expression, sexuality, religion, culture, as well as other social identities.
Faculty and staff are committed to promoting equity and believe the success of an inclusive learning environment relies on the participation, support, and understanding of all students. Students are encouraged to share their views and lived experiences as they relate to the course or their course experience, while recognizing they are doing so in a learning environment in which all are expected to engage with respect to honor the rights, safety, and dignity of others in keeping with the (K-State Principles of Community)[https://www.k-state.edu/about/values/community/].
If you feel uncomfortable because of comments or behavior encountered in this class, you may bring it to the attention of your instructor, advisors, and/or mentors. If you have questions about how to proceed with a confidential process to resolve concerns, please contact the Student Ombudsperson Office. Violations of the student code of conduct can be reported here. If you experience bias or discrimination, it can be reported here.
Info
This is our personal policy and not a required syllabus statement from K-State. It has been adapted from this statement from K-State Global Campus, and the Recurse Center Manual. We have adapted their ideas to fit this course.
Online communication is inherently different than in-person communication. When speaking in person, many times we can take advantage of the context and body language of the person speaking to better understand what the speaker means, not just what is said. This information is not present when communicating online, so we must be much more careful about what we say and how we say it in order to get our meaning across.
Here are a few general rules to help us all communicate online in this course, especially while using tools such as Canvas or Discord:
As a participant in course discussions, you should also strive to honor the diversity of your classmates by adhering to the K-State Principles of Community.
Kansas State University strongly encourages, but does not require, that everyone wear masks while indoors on university property, including while attending in-person classes. For additional information and the latest on K-State’s face covering policy, see this page.
Kansas State University is committed to maintaining academic, housing, and work environments that are free of discrimination, harassment, and sexual harassment. Instructors support the University’s commitment by creating a safe learning environment during this course, free of conduct that would interfere with your academic opportunities. Instructors also have a duty to report any behavior they become aware of that potentially violates the University’s policy prohibiting discrimination, harassment, and sexual harassment (PPM 3010).
If a student is subjected to discrimination, harassment, or sexual harassment, they are encouraged to make a non-confidential report to the University’s Office for Institutional Equity (OIE) using the online reporting form. Incident disclosure is not required to receive resources at K-State. Reports that include domestic and dating violence, sexual assault, or stalking, should be considered for reporting by the complainant to the Kansas State University Police Department or the Riley County Police Department. Reports made to law enforcement are separate from reports made to OIE. A complainant can choose to report to one or both entities. Confidential support and advocacy can be found with the K-State Center for Advocacy, Response, and Education (CARE). Confidential mental health services can be found with Lafene Counseling and Psychological Services (CAPS). Academic support can be found with the Office of Student Life (OSL). OSL is a non-confidential resource. A comprehensive list of resources is available here. If you have questions about non-confidential and confidential resources, please contact OIE at equity@ksu.edu or (785) 532–6220.
Kansas State University is a community of students, faculty, and staff who work together to discover new knowledge, create new ideas, and share the results of their scholarly inquiry with the wider public. Although new ideas or research results may be controversial or challenge established views, the health and growth of any society requires frank intellectual exchange. Academic freedom protects this type of free exchange and is thus essential to any university’s mission.
Moreover, academic freedom supports collaborative work in the pursuit of truth and the dissemination of knowledge in an environment of inquiry, respectful debate, and professionalism. Academic freedom is not limited to the classroom or to scientific and scholarly research, but extends to the life of the university as well as to larger social and political questions. It is the right and responsibility of the university community to engage with such issues.
Kansas State University is committed to providing a safe teaching and learning environment for student and faculty members. In order to enhance your safety in the unlikely case of a campus emergency make sure that you know where and how to quickly exit your classroom and how to follow any emergency directives. To view additional campus emergency information go to the University’s main page, www.k-state.edu, and click on the Emergency Information button, located at the bottom of the page.
K-State has many resources to help contribute to student success. These resources include accommodations for academics, paying for college, student life, health and safety, and others found at www.k-state.edu/onestop.
Student academic creations are subject to Kansas State University and Kansas Board of Regents Intellectual Property Policies. For courses in which students will be creating intellectual property, the K-State policy can be found at University Handbook, Appendix R: Intellectual Property Policy and Institutional Procedures (part I.E.). These policies address ownership and use of student academic creations.
Your mental health and good relationships are vital to your overall well-being. Symptoms of mental health issues may include excessive sadness or worry, thoughts of death or self-harm, inability to concentrate, lack of motivation, or substance abuse. Although problems can occur anytime for anyone, you should pay extra attention to your mental health if you are feeling academic or financial stress, discrimination, or have experienced a traumatic event, such as loss of a friend or family member, sexual assault or other physical or emotional abuse.
If you are struggling with these issues, do not wait to seek assistance.
For Kansas State Polytechnic Campus:
K-State has a University Excused Absence policy (Section F62). Class absence(s) will be handled between the instructor and the student unless there are other university offices involved. For university excused absences, instructors shall provide the student the opportunity to make up missed assignments, activities, and/or attendance specific points that contribute to the course grade, unless they decide to excuse those missed assignments from the student’s course grade. Please see the policy for a complete list of university excused absences and how to obtain one. Students are encouraged to contact their instructor regarding their absences.
©2021 The materials in this online course fall under the protection of all intellectual property, copyright and trademark laws of the U.S. The digital materials included here come with the legal permissions and releases of the copyright holders. These course materials should be used for educational purposes only; the contents should not be distributed electronically or otherwise beyond the confines of this online course. The URLs listed here do not suggest endorsement of either the site owners or the contents found at the sites. Likewise, mentioned brands (products and services) do not suggest endorsement. Students own copyright to what they create.
Original content in the course textbook at https://textbooks.cs.ksu.edu/cis400 is licensed under a Creative Commons BY-SA license by Nathan Bean unless otherwise stated.
Every object tells a story
Setting the Stage
Before we delve too deeply into how to reason about Object-Orientation and how to utilize it in your programming efforts, it would be useful to understand why object-orientation came to exist. This initial chapter seeks to explore the origins behind object-oriented programming.
Some key terms to learn in this chapter are:
By this point, you should be familiar enough with the history of computers to be aware of the evolution from the massive room-filling vacuum tube implementations of ENIAC, UNIVAC, and other first-generation computers to transistor-based mainframes like the PDP-1, and the eventual introduction of the microcomputer (desktop computers that are the basis of the modern PC) in the late 1970’s. Along with a declining size, each generation of these machines also cost less:
Machine | Release Year | Cost at Release | Adjusted for Inflation |
---|---|---|---|
ENIAC | 1945 | $400,000 | $5,288,143 |
UNIVAC | 1951 | $159,000 | $1,576,527 |
PDP-1 | 1963 | $120,000 | $1,010,968 |
Commodore PET | 1977 | $795 | $5,282 |
Apple II (4K RAM model) | 1977 | $1,298 | $8,624 |
IBM PC | 1981 | $1,565 | $4,438 |
Commodore 64 | 1982 | $595 | $1,589 |
This increase in affordability was also coupled with an increase in computational power. Consider the ENIAC, which computed at 100,000 cycles per second. In contrast, the relatively inexpensive Commodore 64 ran at 1,000,000 cycles per second, while the more pricy IBM PC ran 4,770,000 cycles per second.
Not surprisingly, governments, corporations, schools, and even individuals purchased computers in larger and larger quantities, and the demand for software to run on these platforms and meet these customers’ needs likewise grew. Moreover, the sophistication expected from this software also grew. Edsger Dijkstra described it in these terms:
The major cause of the software crisis is that the machines have become several orders of magnitude more powerful! To put it quite bluntly: as long as there were no machines, programming was no problem at all; when we had a few weak computers, programming became a mild problem, and now we have gigantic computers, programming has become an equally gigantic problem.Edsger Dijkstra, The Humble Programmer (EWD340), Communications of the ACM
Coupled with this rising demand for programs was a demand for skilled software developers, as reflected in the following table of graduation rates in programming-centric degrees (the dashed line represents the growth of all bachelor degrees, not just computer-related ones):
Unfortunately, this graduation rate often lagged far behind the demand for skilled graduates, and was marked by several periods of intense growth (the period from 1965 to 1985, 1995-2003, and the current surge beginning around 2010). During these surges, it was not uncommon to see students hired directly into the industry after only a course or two of learning programming (coding boot camps are a modern equivalent of this trend).
All of these trends contributed to what we now call the Software Crisis.
At the 1968 NATO Software Engineering Conference held in Garmisch Germany, the term “Software Crisis” was coined to describe the current state of the software development industry, where common problems included:
The software development industry sought to counter these problems through a variety of efforts:
This course will seek to instill many of these ideas and approaches into your programming practice through adopting them in our everyday work. It is important to understand that unless these practices are used, the same problems that defined the software crisis continue to occur!
In fact, some software engineering experts suggest the software crisis isn’t over, pointing to recent failures like the Denver Airport Baggage System in 1995, the Ariane 5 Rocket Explosion in 1996, the German Toll Collect system cancelled in 2003, the rocky healthcare.gov launch in 2013, and the massive vulnerabilities known as the Meltdown and Spectre exploits discovered in 2018.
One of the strategies that computer scientists employed to counter the software crisis was the development of new programing languages. These new languages would often 1) adopt new techniques intended to make errors harder to make while programming, and 2) remove problematic features that had existed in earlier languages.
Let’s take a look at a working (and in current use) program built using Fortran, one of the most popular programming languages at the onset of the software crisis. This software is the Environmental Policy Integrated Climate (EPIC) Model, created by researchers at Texas A&M:
Environmental Policy Integrated Climate (EPIC) model is a cropping systems model that was developed to estimate soil productivity as affected by erosion as part of the Soil and Water Resources Conservation Act analysis for 1980, which revealed a significant need for improving technology for evaluating the impacts of soil erosion on soil productivity. EPIC simulates approximately eighty crops with one crop growth model using unique parameter values for each crop. It predicts effects of management decisions on soil, water, nutrient and pesticide movements, and their combined impact on soil loss, water quality, and crop yields for areas with homogeneous soils and management. EPIC Homepage
You can download the raw source code and the accompanying documentation. Open and unzip the source code, and open a file at random using your favorite code editor. See if you can determine what it does, and how it fits into the overall application.
Try this with a few other files. What do you think of the organization? Would you be comfortable adding a new feature to this program?
You probably found the Fortran code in the example difficult to wrap your mind around - and that’s not surprising, as more recent languages have moved away from many of the practices employed in Fortran. Additionally, our computing environment has dramatically changed since this time.
One clear example is symbol names for variables and procedures (functions) - notice that in the Fortran code they are typically short and cryptic: RT
, HU
, IEVI
, HUSE
, and NFALL
, for example. You’ve been told since your first class that variable and function names should express clearly what the variable represents or a function does. Would rainFall
, dailyHeatUnits
, cropLeafAreaIndexDevelopment
, CalculateWaterAndNutrientUse()
, CalculateConversionOfStandingDeadCropResidueToFlatResidue()
be easier to decipher? (Hint: the documentation contains some of the variable notations in a list starting on page 70, and some in-code documentation of global variables occurs in MAIN_1102.f90.).
Believe it or not, there was an actual reason for short names in these early programs. A six character name would fit into a 36-bit register, allowing for fast dictionary lookups - accordingly, early version of FORTRAN enforced a limit of six characters for variable names1. However, it is easy to replace a symbol name with an automatically generated symbol during compilation, allowing for both fast lookup and human readability at a cost of some extra computation during compilation. This step is built into the compilation process of most current programming languages, allowing for arbitrary-length symbol names with no runtime performance penalty.
In addition to these less drastic changes, some evolutionary language changes had sweeping effects, changing the way we approach and think about how programs should be written and executed. These “big ideas” of how programming languages should work are often called paradigms. In the early days of computing, we had two common ones: imperative and functional.
At its core, imperative programming simply means the idea of writing a program as a sequence of commands, i.e. this Python script uses a sequence of commands to write to a file:
f = open("example.txt")
f.write("Hello from a file!")
f.close()
An imperative program would start executing the first line of code, and then continue executing line-by-line until the end of the file or a command to stop execution was reached. In addition to moving one line through the program code, imperative programs could jump to a specific spot in the code and continue execution from there, using a GOTO
statement. We’ll revisit that aspect shorty.
In contrast, functional programming consisted primarily of functions. One function was designated as the ‘main’ function that would start the execution of the program. It would then call one or more functions, which would in turn call more functions. Thus, the entire program consisted of function definitions. Consider this Python program:
def concatenateList(str, list):
if(len(list) == 0):
return str
elif(len(list) == 1):
head = list.pop(0)
return concatenateList(str + head, list)
else:
head = list.pop(0)
return concatenateList(str + head + ", ", list)
def printToFile(filename, body):
f = open(filename)
f.write(body)
def printListToFile(filename, list):
body = concatenateList("", list)
printToFile(filename, body)
def main():
printListToFile("list.txt", ["Dog", "Cat", "Mouse"])
main()
You probably see elements of your favorite higher-order programming language in both of these descriptions. That’s not surprising as modern languages often draw from multiple programming paradigms (after all, both the above examples were written in Python). This, too, is part of language evolution - language developers borrow good ideas as the find them.
But as languages continued to evolve and language creators sought ways to make programming easier, more reliable, and more secure to address the software crisis, new ideas emerged that were large enough to be considered new paradigms. Two of the most impactful of these new paradigms these are structured programming and object orientation. We’ll talk about each next.
Weishart, Conrad (2010). “How Long Can a Data Name Be?” ↩︎
Another common change to programming languages was the removal of the GOTO
statement, which allowed the program execution to jump to an arbitrary point in the code (much like a choose-your-own adventure book will direct you to jump to a page). The GOTO came to be considered too primitive, and too easy for a programmer to misuse 1.
While the GOTO
statement is absent from most modern programming languages the actual functionality remains, abstracted into control-flow structures like conditionals, loops, and switch statements. This is the basis of structured programming, a paradigm adopted by all modern higher-order programming languages.
Each of these control-flow structures can be represented by careful use of GOTO
statements (and, in fact the resulting assembly code from compiling these languages does just that). The benefit of using structured programming is it promotes “reliability, correctness, and organizational clarity” by clearly defining the circumstances and effects of code jumps 2.
You probably aren’t very familiar with GOTO statements because the structured programming paradigm has become so dominant. Before we move on, let’s see how some familiar structured programming patterns were originally implemented using GOTOs:
In C#, you are probably used to writing if statements with a true branch:
int x = 4;
if(x < 5)
{
x = x * 2;
}
Console.WriteLine("The value is:" + x);
With GOTOs, it would look something like:
int x = 4;
if(x < 5) goto TrueBranch;
AfterElse:
Console.WriteLine("The value is:" + x);
Environment.Exit(0);
TrueBranch:
x = x * 2;
goto AfterElse
Similarly, a C# if statement with an else branch:
int x = 4;
if(x < 5)
{
x = x * 2;
}
else
{
x = 7;
}
Console.WriteLine("The value is:" + x);
And using GOTOs:
int x = 4;
if(x < 5) goto TrueBranch;
goto FalseBranch;
AfterElse:
Console.WriteLine("The value is:" + x);
Environment.Exit(0);
TrueBranch:
x = x * 2;
goto AfterElse;
FalseBranch:
x = 7;
goto AfterElse;
Note that with the goto, we must tell the program to stop running explicitly with Environment.Exit(0)
or it will continue on to execute the labeled code (we could also place the TrueBranch and FalseBranch before the main program, and use a goto to jump to the main program).
Loops were also originally constructed entirely from GOTOs, so the familiar while loop:
int times = 5;
while(times > 0)
{
Console.WriteLine("Counting Down: " + times);
times = times - 1;
}
Can be written:
int times = 5;
Test:
if(times > 0) goto Loop;
Environment.Exit(0);
Loop:
Console.WriteLine("Counting Down: " + times);
times = times - 1;
goto Test;
The do while
and for
loops are implemented similarly. As you can probably imagine, as more control flow is added to a program, using GOTOs and corresponding labels to jump to becomes very hard to follow.
Interestingly, the C# language does have a goto statement (Java does not). Likely this is because C# was designed to compile to intermediate language like Visual Basic, which is an evolution of BASIC which was old enough to have a goto.
Accordingly, the above examples with the goto
statements are valid C# code. You can even compile and run them. However, you should avoid using goto
statements in your code.
Dijkstra, Edgar (1968). “Go To Statement Considered Harmful” ↩︎
Wirth, Nicklaus (1974). “On the Composition of Well-Structured Programs” ↩︎
The object-orientation paradigm was similarly developed to make programming large projects easier and less error-prone.
The term “Object Orientation” was coined by Alan Kay while he was a graduate student in the late 60’s. Alan Kay, Dan Ingalls, Adele Goldberg, and others created the first object-oriented language, Smalltalk, which became a very influential language from which many ideas were borrowed. To Alan, the essential core of object-orientation was three properties a language could possess: 1
Let’s break down each of these ideas, and see how they helped address some of the problems we’ve identified in this chapter.
Encapsulation refers to breaking programs into smaller units that are easier to read and reason about. In an object-oriented language these units are classes and objects, and the data contained in this units is protected from being changed by code outside the unit through information hiding.
Message Passing allows us to send well-defined messages between objects. This gives us a well-defined and controlled method for accessing and potentially changing the data contained in an encapsulated unit. In an object oriented language, calling a method on an object is a form of message passing, as are events.
Dynamic Binding means we can have more than one possible way to handle messages and the appropriate one can be determined at run-time. This is the basis for polymorphism, an important idea in many object-oriented languages.
Remember these terms and pay attention to how they are implemented in the languages you are learning. They can help you understand the ideas that inspired the features of these languages.
We’ll take a deeper look at each of these in the next few chapters. But before we do, you might want to see how language popularity has fared since the onset of the software crisis, and how new languages have appeared and grown in popularity in this animated chart from Data is Beautiful:
Interestingly, the four top languages in 2019 (Python, JavaScript, Java, and C#) all adopt the object-oriented paradigm - though the exact details of how they implement it vary dramatically.
Eric Elliot, “The Forgotten History of Object-Oriented Programming,” Medium, Oct. 31, 2018. ↩︎
In this chapter, we’ve discussed the environment in which object-orientation emerged. Early computers were limited in their computational power, and languages and programming techniques had to work around these limitations. Similarly, these computers were very expensive, so their purchasers were very concerned about getting the largest possible return on their investment. In the words of Niklaus Wirth:
Tricks were necessary at this time, simply because machines were built with limitations imposed by a technology in its early development stage, and because even problems that would be termed "simple" nowadays could not be handled in a straightforward way. It was the programmers' very task to push computers to their limits by whatever means available.
As computers became more powerful and less expensive, the demand for programs (and therefore programmers) grew faster than universities could train new programmers. Unskilled programmers, unwieldy programming languages, and programming approaches developed to address the problems of older technology led to what became known as the “software crisis” where many projects failed or floundered.
This led to the development of new programming techniques, languages, and paradigms to make the process of programming easier and less error-prone. Among the many new programming paradigms was structured programming paradigm, which introduced control-flow structures into programming languages to help programmers reason about the order of program execution in a clear and consistent manner.
Also developed during this time was the object-oriented paradigm, which brings together four big ideas: encapsulation & information hiding, message passing, and dynamic binding. We will be studying this paradigm, its ideas, and implementation in the C# language throughout this course.
Getting Object Oriented
A signature aspect of object-oriented languages is (as you might expect from the name), the existence of objects within the language. In this chapter, we take a deep look at objects, exploring why they were created, what they are at both a theoretical and practical level, and how they are used.
Some key terms to learn in this chapter are:
Encapsulation
Information Hiding
Message Passing
State
Class
Object
Field
Method
Constructor
Parameterless Constructor
Property
Public
Private
Static
To begin, we’ll examine the term encapsulation.
The first criteria that Alan Kay set for an object-oriented language was encapsulation. In computer science, the term encapsulation refers to organizing code into units. This provides a mechanism for organizing complex software
A second related idea is information hiding, which provides mechanisms for controlling access to encapsulated data and how it can be changed.
Think back to the FORTRAN EPIC model we introduced earlier. All of the variables in that program were declared globally, and there were thousands. How easy was it to find where a variable was declared? Initialized? Used? Are you sure you found all the spots it was used?
Also, how easy was it to determine what part of the system a particular block of code belonged to? If I told you the program involved modeling hydrology (how water moves through the soils), weather, erosion, plant growth, plant residue decomposition, soil chemistry, planting, harvesting, and chemical applications, would you be able to find the code for each of those processes?
Remember from our discussion on the growth of computing the idea that as computers grew more powerful, we wanted to use them in more powerful ways? The EPIC project grew from that desire - what if we could model all the aspects influencing how well a crop grows? Then we could use that model to help us make better decisions in agriculture. Or, what if we could model all the processes involved in weather? If we could do so, we could help save lives by predicting dangerous storms! A century ago, you knew a tornado was coming when you heard its roaring winds approaching your home. Now we have warnings that conditions are favorable to produce one hours in advance. This is all thanks to using computers to model some very complex systems.
But how do we go about writing those complex systems? I don’t know about you, but I wouldn’t want to write a model the way the EPIC programmers did. And neither did most software developers at the time - so computer scientists set out to define better ways to write programs. David Parnas formalized some of the best ideas emerging from those efforts in his 1972 paper “On the Criteria To Be Used in Decomposing Systems into Modules”. 1
A data structure, its internal linkings, accessing procedures and modifying procedures are part of a single module.
Here he suggests organizing code into modules that group related variables and the procedures that operate upon them. For the EPIC module, this might mean all the code related to weather modeling would be moved into its own module. That meant that if we needed to understand how weather was being modeled, we only had to look at the weather module.
They are not shared by many modules as is conventionally done.
Here he is laying the foundations for the concept we now call scope - the idea of where a specific symbol (a variable or function name) is accessible within a program’s code. By limiting access to variables to the scope of a particular module, only code in that module can change the value. That way, we can’t accidentally change a variable declared in the weather module from the soil chemistry module (which would be a very hard error to find, as if the weather module doesn’t seem to be working, that’s what we would probably focus on trying to fix).
Programmers of the time referred to this practice as information hiding, as we ‘hid’ parts of the program from other parts of the program. Parnas and his peers pushed for not just hiding the data, but also how the data was manipulated. By hiding these implementation details, they could prevent programmers who were used to the globally accessible variables of early programming languages from looking into our code and using a variable that we might change in the future.
The sequence of instructions necessary to call a given routine and the routine itself are part of the same module.
As the actual implementation of the code is hidden from other parts of the program, a mechanism for sharing controlled access to some part of that module in order to use it needed to be made. An interface, if you will, that describes how the other parts of the program might trigger some behavior or access some value.
D. L. Parnas, “On the criteria to be used in decomposing systems into modules” Communications of the ACM, Dec. 1972. ↩︎
Let’s start by focusing on encapsulation’s benefits to organizing our code by exploring some examples of encapsulation you may already be familiar with.
The C# libraries are organized into discrete units called namespaces. The primary purpose of this is to separate code units that potentially use the same name, which causes name collisions where the interpreter isn’t sure which of the possibilities you mean in your program. This means you can use the same name to refer to two different things in your program, provided they are in different namespaces.
For example, there are two definitions for a Point Struct in the .NET core libraries: System.Drawing.Point and System.Windows.Point. The two have a very different internal structures (the former uses integers and the latter doubles), and we would not want to mix them up. If we needed to create an instance of both in our program, we would use their fully-quantified name to help the interpreter know which we mean:
System.Drawing.Point pointA = new System.Drawing.Point(500, 500);
System.Windows.Point pointB = new System.Windows.Point(300.0, 200.0);
The using directive allows you reference the type without quantification, i.e.:
using System.Drawing;
Point pointC = new Point(400, 400);
You can also create an alias with the using directive, providing an alternative (and usually abbreviated) name for the type:
using WinPoint = System.Windows.Point;
WinPoint pointD = new WinPoint(100.0, 100.0);
We can also declare our own namespaces, allowing us to use namespaces to organize our own code just as Microsoft has done with its .NET libraries.
Encapsulating code within a namespace helps ensure that the types defined within are only accessible with a fully qualified name, or when the using directive is employed. In either case, the intended type is clear, and knowing the namespace can help other programmers find the type’s definition.
In the discussion of namespaces, we used a struct. A C# struct is what computer scientists refer to as a compound type, a type composed from other types. This too, is a form of encapsulation, as it allows us to collect several values into a single data structure. Consider the concept of a vector from mathematics - if we wanted to store three-dimensional vectors in a program, we could do so in several ways. Perhaps the easiest would be as an array:
double[] vectorA = {3, 4, 5};
However, other than the variable name, there is no indication to other programmers that this is intended to be a three-element vector. And, if we were to accept it in a function, say a dot product:
public double DotProduct(double[] a, double[] b) {
if(a.Length < 3 || b.Length < 3) throw new ArgumentException();
return a[0] * b[0] + a[1] * b[1] + a[2] * b[2];
}
We would need to check that both arrays were of length three… A struct provides a much cleaner option, by allowing us to define a type that is composed of exactly three doubles:
/// <summary>
/// A 3-element vector
/// </summary>
public struct Vector3 {
public double x;
public double y;
public double z;
public Vector3(double x, double y, double z) {
this.x = x;
this.y = y;
this.z = z;
}
}
Then, our DotProduct can take two arguments of the Vector3 struct:
public double DotProduct(Vector3 a, Vector3 b) {
return a.x * b.x + a.y * b.y + a.z * b.z;
}
There is no longer any concern about having the wrong number of elements in our vectors - it will always be three. We also get the benefit of having unique names for these fields (in this case, x, y, and z).
Thus, a struct allows us to create structure to represent multiple values in one variable, encapsulating the related values into a single data structure. Variables, and compound data types, represent the state of a program. We’ll examine this concept in detail next.
You might think that the kind of modules that Parnas was describing don’t exist in C#, but they actually do - we just don’t call them ‘modules’. Consider how you would raise a number by a power, say 10 to the 8th power:
Math.Pow(10, 8);
The Math
class in this example is actually used just like a module! We can’t see the underlying implementation of the Pow()
method, it provides to us a well-defined interface (i.e. you call it with the symbol Pow
and two doubles for parameters), and this method and other related math functions (Sin()
, Abs()
, Floor()
, etc.) are encapsulated within the Math
class.
We can define our own module-like classes by using the static
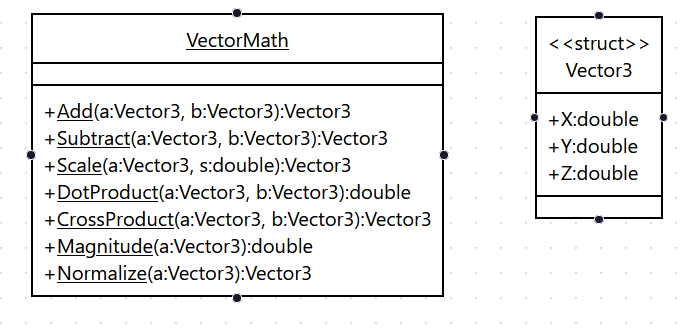
keyword, i.e. we could group our vector math functions into a static VectorMath
class:
/// <summary>
/// A library of vector math functions
/// </summary>
public static class VectorMath() {
/// <summary>
/// Computes the dot product of two vectors
/// </summary>
public static double DotProduct(Vector3 a, Vector3 b) {
return a.x * b.x + a.y * b.y + a.z * b.z;
}
/// <summary>
/// Computes the magnitude of a vector
/// </summary>
public static double Magnitude(Vector3 a) {
return Math.Sqrt(Math.Pow(a.x, 2) + Math.Pow(a.y, 2) + Math.Pow(a.z, 2));
}
}
To duplicate the module behavior with C#, we must declare both the class and its methods static
.
But what most distinguishes C# is that it is an object-oriented language, and as such, it’s primary form of encapsulation is classes and objects. The key idea behind encapsulation in an object-oriented language is that we encapsulate both state and behavior in the class definition. Let’s explore that idea more deeply in the next section.
The data stored in a program at any given moment (in the form of variables, objects, etc.) is the state of the program. Consider a variable:
int a = 5;
The state of the variable a after this line is 5. If we then run:
a = a * 3;
The state is now 15. Consider the Vector3 struct we defined in the last section:
public struct Vector3 {
public double x;
public double y;
public double z;
// constructor
public Vector3(double x, double y, double z) {
this.x = x;
this.y = y;
this.z = z;
}
}
If we create an instance of that struct in the variable b
:
Vector3 b = new Vector3(1.2, 3.7, 5.6);
The state of our variable b
is
$\{1.2, 3.7, 5.6\}$. If we change one of b
’s fields:
b.x = 6.0;
The state of our variable b
is now
$\{6.0, 3.7, 5.6\}$.
We can also think about the state of the program, which would be something like: $\{a: 5, b: \{x: 6.0, y: 3.7, z: 5.6\}\}$, or a state vector like: $|5, 6.0, 3.7, 5.6|$. We can therefore think of a program as a state machine. We can in fact, draw our entire program as a state table listing all possible legal states (combinations of variable values) and the transitions between those states. Techniques like this can be used to reason about our programs and even prove them correct!
This way of reasoning about programs is the heart of Automata Theory, a subject you may choose to learn more about if you pursue graduate studies in computer science.
What causes our program to transition between states? If we look at our earlier examples, it is clear that assignment is a strong culprit. Expressions clearly have a role to play, as do control-flow structures decide which transformations take place. In fact, we can say that our program code is what drives state changes - the behavior of the program.
Thus, programs are composed of both state (the values stored in memory at a particular moment in time) and behavior (the instructions to change that state).
Now, can you imagine trying to draw the state table for a large program? Something on the order of EPIC?
On the other hand, with encapsulation we can reason about state and behavior on a much smaller scale. Consider this function working with our Vector3
struct:
/// <summary>
/// Returns the the supplied vector scaled by the provided scalar
/// </summary>
public static Vector3 Scale(Vector3 vec, double scale) {
double x = vec.x * scale;
double y = vec.y * scale;
double z = vec.z * scale;
return new Vector3(x, y, z);
}
If this method was invoked with a vector $\langle4.0, 1.0, 3.4\rangle$ and a scalar $2.0$ our state table would look something like:
step | vec.x | vec.y | vec.z | scale | x | y | z | return.x | return.y | return.z |
---|---|---|---|---|---|---|---|---|---|---|
0 | 4.0 | 1.0 | 3.4 | 2.0 | 0.0 | 0.0 | 0.0 | 0.0 | 0.0 | 0.0 |
1 | 4.0 | 1.0 | 3.4 | 2.0 | 8.0 | 0.0 | 0.0 | 0.0 | 0.0 | 0.0 |
2 | 4.0 | 1.0 | 3.4 | 2.0 | 8.0 | 2.0 | 0.0 | 0.0 | 0.0 | 0.0 |
3 | 4.0 | 1.0 | 3.4 | 2.0 | 8.0 | 2.0 | 6.8 | 0.0 | 0.0 | 0.0 |
4 | 4.0 | 1.0 | 3.4 | 2.0 | 8.0 | 2.0 | 6.8 | 8.0 | 2.0 | 6.8 |
Because the parameters vec
and scale
, as well as the variables x
, y
, z
, and the unnamed Vector3
we return are all defined only within the scope of the method, we can reason about them and the associated state changes independently of the rest of the program. Essentially, we have encapsulated a portion of the program state in our Vector3
struct, and encapsulated a portion of the program behavior in the static Vector3
library. This greatly simplifies both writing and debugging programs.
However, we really will only use the Vector3
library in conjunction with Vector3
structures, so it makes a certain amount of sense to define them in the same place. This is where classes and objects come into the picture, which we’ll discuss next.
The module-based encapsulation suggested by Parnas and his contemporaries grouped state and behavior together into smaller, self-contained units. Alan Kay and his co-developers took this concept a step farther. Alan Kay was heavily influenced by ideas from biology, and saw this encapsulation in similar terms to cells.
Biological cells are also encapsulated - the complex structures of the cell and the functions they perform are all within a cell wall. This wall is only bridged in carefully-controlled ways, i.e. cellular pumps that move resources into the cell and waste out. While single-celled organisms do exist, far more complex forms of life are made possible by many similar cells working together.
This idea became embodied in object-orientation in the form of classes and objects. An object is like a specific cell. You can create many, very similar objects that all function identically, but each have their own individual and different state. The class is therefore a definition of that type of object’s structure and behavior. It defines the shape of the object’s state, and how that state can change. But each individual instance of the class (an object) has its own current state.
Let’s re-write our Vector3
struct as a class using this concept:
/// <summary>A class representing a 3-element vector</summary>
public class Vector3 {
/// <summary>The X component of the vector</summary>
public double X;
/// <summary>The Y component of the vector</summary>
public double Y;
/// <summary>The Z component of the vector</summary>
public double Z;
/// <summary>Constructs a new vector</summary>
/// <param name="x">The value of the vector's x component</param>
/// <param name="y">The value of the vector's y component</param>
/// <param name="z">The value of the vector's z component</param>
public Vector3(double x, double y, double z) {
X = x;
Y = y;
Z = z;
}
/// <summary>Computes the dot product of this and <paramref name="other"/> vector</summary>
/// <param name="other">The other vector to compute with</param>
/// <returns>The dot product</returns>
public double DotProduct(Vector3 other) {
return X * other.X + Y * other.Y + Z * other.Z;
}
/// <summary>Scales this vector by <paramref name="scalar"/></summary>
/// <paramref name="scalar">The value to scale by</paramref>
public void Scale(double scalar) {
X *= scalar;
Y *= scalar;
Z *= scalar;
}
}
Here we have defined:
X
, Y
, and Z
Vector3()
constructor that takes a value for the object’s initial stateScale()
methodWe can create as many objects from this class definition as we might want:
Vector3 one = new Vector3(1.0, 1.0, 1.0);
Vector3 up = new Vector3(0.0, 1.0, 0.0);
Vector3 a = new Vector3(5.4, -21.4, 3.11);
Conceptually, what we are doing is not that different from using a compound data type like a struct and a module of functions that work upon that struct. But practically, it means all the code for working with Vectors appears in one place. This arguably makes it much easier to find all the pertinent parts of working with vectors, and makes the resulting code better organized and easier to maintain and add features to.
Classes also provide additional benefits over structs in the form of polymorphism, which we’ll discuss in Chapter 2.
Now let’s return to the concept of information hiding, and how it applies in object-oriented languages.
Unanticipated changes in state are a major source of errors in programs. Again, think back to the EPIC source code we looked at earlier. It may have seemed unusual now, but it used a common pattern from the early days of programming, where all the variables the program used were declared in one spot, and were global in scope (i.e. any part of the program could reassign any of those variables).
If we consider the program as a state machine, that means that any part of the program code could change any part of the program state. Provided those changes were intended, everything works fine. But if the wrong part of the state was changed problems would ensue.
For example, if you were to make a typo in the part of the program dealing with water run-off in a field which ends up assigning a new value to a variable that was supposed to be used for crop growth, you’ve just introduced a very subtle and difficult-to-find error. When the crop growth modeling functionality fails to work properly, we’ll probably spend serious time and effort looking for a problem in the crop growth portion of the code… but the problem doesn’t lie there at all!
There are several techniques involved in data hiding in an object-oriented language. One of these is access modifiers, which determine what parts of the program code can access a particular class, field, property, or method. Consider a class representing a student:
public class Student {
private string first;
private string last;
private uint wid;
public Student(string first, string last, uint wid) {
this.first = first;
this.last = last;
this.wid = wid;
}
}
By using the access modifier private
, we have indicated that our fields first
, last
, and wid
cannot be accessed (seen or assigned to) outside of the code that makes up the Student
class. If we were to create a specific student:
Student willie = new Student("Willie", "Wildcat", 888888888);
We would not be able to change his name, i.e. willie.first = "Bob"
would fail, because the field first
is private. In fact, we cannot even see his name, so Console.WriteLine(willie.first);
would also fail.
If we want to allow a field or method to be accessible outside of the object, we must declare it public
. While we can declare fields public, this violates the core principles of encapsulation, as any outside code can modify our object’s state in uncontrolled ways.
Instead, in a true object-oriented approach we would write public accessor methods, a.k.a. getters and setters (so called because they get or set the value of a field). These methods allow us to see and change field values in a controlled way. Adding accessors to our Student class might look like:
/// <summary>A class representing a K-State student</summary>
public class Student
{
private string _first;
private string _last;
private uint _wid;
/// <summary>Constructs a new student object</summary>
/// <param name="first">The new student's first name</param>
/// <param name="last">The new student's last name</param>
/// <param wid="wid">The new student's Wildcat ID number</param>
public Student(string first, string last, uint wid)
{
_first = first;
_last = last;
_wid = wid;
}
/// <summary>Gets the first name of the student</summary>
/// <returns>The student's first name</returns>
public string GetFirst()
{
return _first;
}
/// <summary>Sets the first name of the student</summary>
public void SetFirst(string value)
{
if (value.Length > 0) _first = value;
}
/// <summary>Gets the last name of the student</summary>
/// <returns>The student's last name</returns>
public string GetLast()
{
return _last;
}
/// <summary>Sets the last name of the student</summary>
/// <param name="value">The new name</summary>
/// <remarks>The <paramref name="value"/> must be a non-empty string</remarks>
public void SetLast(string value)
{
if (value.Length > 0) _last = value;
}
/// <summary>Gets the student's Wildcat ID Number</summary>
/// <returns>The student's Wildcat ID Number</returns>
public uint GetWid()
{
return _wid;
}
/// <summary>Gets the full name of the student</summary>
/// <returns>The first and last name of the student as a string</returns>
public string GetFullName()
{
return $"{_first} {_last}"
}
}
Notice how the SetFirst()
and SetLast()
method check that the provided name has at least one character? We can use setters to make sure that we never allow the object state to be set to something that makes no sense.
Also, notice that the wid
field only has a getter. This effectively means once a student’s Wid is set by the constructor, it cannot be changed. This allows us to share data without allowing it to be changed outside of the class.
Finally, the GetFullName()
is also a getter method, but it does not have its own private backing field. Instead it derives its value from the class state. We sometimes call this a derived getter for that reason.
While accessor methods provide a powerful control mechanism in object-oriented languages, they also require a lot of typing the same code syntax over and over (we often call this boilerplate). Many languages therefore introduce a mechanism for quickly defining basic accessors. In C#, we have Properties. Let’s rewrite our Student class with Properties:
public class Student {
private string _first;
/// <summary>The student's first name</summary>
public string First {
get { return _first; }
set { if(value.Length > 0) _first = value;}
}
private string _last;
/// <summary>The student's last name</summary>
public string Last {
get { return _last; }
set { if(value.Length > 0) _last = value; }
}
private uint _wid;
/// <summary>The student's Wildcat ID number</summary>
public uint Wid {
get { return this.wid; }
}
/// <summary>The student's full name</summary>
public string FullName
{
get
{
return $"{First} {Last}"
}
}
/// <summary>Constructs a new student object</summary>
/// <param name="first">The new student's first name</param>
/// <param name="last">The new student's last name</param>
/// <param wid="wid">The new student's Wildcat ID number</param>
public Student(string first, string last, uint wid) {
_first = first;
_last = last;
_wid = wid;
}
}
If you compare this example to the previous one, you will note that the code contained in bodies of the get
and set
are identical to the corresponding getter and setter methods. Essentially, C# properties are shorthand for writing out the accessor methods. In fact, when you compile a C# program it transforms the get
and set
back into methods, i.e. the get
in first is used to generate a method named get_First()
.
While properties are methods, the syntax for working with them in code is identical to that of fields, i.e. if we were to create and then print a Student
’s identifying information, we’d do something like:
Student willie = new Student("Willie", "Wildcat", 99999999);
Console.Write("Hello, ")
Console.WriteLine(willie.FullName);
Console.Write("Your WID is:");
Console.WriteLine(willie.Wid);
Note too that we can declare properties with only a get
or a set
body, and that properties can be derived from other state rather than having a private backing field.
While C# properties are used like fields, i.e. Console.WriteLine(willie.Wid)
or willie.First = "William"
, they are actually methods. As such, they do not add structure to hold state, hence the need for a backing variable.
The Nickname
property in the example above is special syntax for an implicit backing field - the C# compiler creates the necessary space to hold the value. But we can only access the value stored through that property. If you need direct access to it, you must create a backing variable.
However, we don’t always need a backing variable for a Property getter if the value of a property can be calculated from the current state of the class, i.e., we could add a property FullName
to our Student
class:
public string FullName {
get {
return first + " " + last;
}
}
Here we’re effectively generating the value of the FullName
property from the first
and last
backing variables every time the FullName
property is requested. This does cause a bit more computation, but we also know that it will always reflect the current state of the first and last names.
Not all properties need to do extra logic in the get
or set
body. Consider our Vector3
class we discussed earlier. We used public fields to represent the X
, Y
, and Z
components, i.e.:
public double X = 0;
If we wanted to switch to using properties, the X
property would end up like this:
private double _x = 0;
public double X
{
get
{
return _x;
}
set
{
_x = value;
}
}
Which seems like a lot more work for the same effect. To counter this perception and encourage programmers to use properties even in cases like this, C# also supports auto-property syntax. An auto-property is written like:
public double X {get; set;} = 0;
Note the addition of the {get, set}
- this is what tells the compiler we want a property and not a field. When compiled, this code is transformed into a full getter and setter whose bodies match the basic get
and set
in the example above. The compiler even creates a private backing field (but we cannot access it in our code, because it is only created at compile time). Any time you don’t need to do any additional logic in a get or set, you can use this syntax.
Note that in the example above, we set a default value of 0
. You can omit setting a default value. You can also define a get-only autoproperty that always returns the default value (remember, you cannot access the compiler-generated backing field, so it can never be changed):
public double Pi {get} = 3.14;
In practice, this is effectively a constant field, so consider carefully if it is more appropriate to use that instead:
public const PI = 3.14;
While it is possible to create a set-only auto-property, you will not be able access its value, so it is of limited use.
Later versions of C# introduced a concise way of writing functions common to functional languages known as lambda syntax, which C# calls Expression-Bodied Members.
Properties can be written using this concise syntax. For example, our FullName
get-only derived property in the Student
written as an expression-bodied read-only property would be:
public FullName => $"{FirstName} {LastName}"
Note the use of the arrow formed by an equals and greater than symbol =>
. Properties with both a getter and setter can also be written as expression-bodied properties. For example, our FirstName
property could be rewritten:
public FirstName
{
get => _first;
set => if(value.Length > 0) _first = value;
}
This syntax works well if your property bodies are a single expression. However, if you need multiple lines, you should use the regular property syntax instead (you can also mix and match, i.e. use an expression-bodied get
with a regular set
).
It is possible to declare your property as public
and give a different access level to one of the accessors, i.e. if we wanted to add a GPA property ot our student:
public double GPA { get; private set; } = 4.0;
In this case, we can access the value of the GPA outside of the student class, but we can only set it from code inside the class. This approach works with all ways of defining a property.
C# 9.0 introduced a third accessor, init
. This also sets the value of the property, but can only be used when the class is being initialized, and it can only be used once. This allows us to have some properties that are immutable (unable to be changed).
Our student example treats the Wid
as immutable, but we can use the init
keyword with an auto-property for a more concise representation:
public uint Wid {get; init;}
And in the constructor, replace setting the backing field (_wid = wid
) with setting the property (Wid = wid
). This approach is similar to the public property/private setter, but won’t allow the property to ever change once declared.
The above video and below textbook content cover the same ideas (but are not identical). Feel free to pick one or the other.
Before we move on to our next concept, it is helpful to explore how programs uses memory. Remember that modern computers are stored program computers, which means the program as well as the data are stored in the computer’s memory. A Universal Turing Machine, the standard example of stored program computer, reads the program from the same paper tape that it reads its inputs to and writes its output to. In contrast, to load a program in the ENIAC, the first electronic computer in the United States, programmers had to physically rewire the computer (it was later modified to be a stored-program computer).
When a program is run, the operating system allocates part of the computer’s memory (RAM) for the program to use. This memory is divided into three parts - the static memory, the stack, and the heap.
The program code itself is copied into the static section of that memory, along with any literals (1
, "Foo"
). Additionally, the space to hold any variables that are declared static
is allocated here. The reason this memory space is called static is that it is allocated when the program begins, and remains allocated for as long as the program is running. It does not grow or shrink (though the value of static
variables may change).
The stack is where the space for scoped variables is allocated. We often call it the stack because functionally it is used like the stack data structure. The space for global variables is allocated first, at the “bottom” of the stack. Then, every time the program enters a new scope (i.e. a new function, a new loop body, etc.) the variables declared there are allocated on the stack. When the program exits that scope (i.e. the function returns, the loop ends), the memory that had been reserved for those values is released (like the stack pop operation).
Thus, the stack grows and shrinks over the life of the program. The base of the stack is against the static memory section, and it grows towards the heap. If it grows too much, it runs out of space. This is the root cause of the nefarious stack overflow exception. The stack has run out of memory, most often because an infinite recursion or infinite loop.
Finally, the heap is where dynamically allocated memory comes from - memory the programmer specifically reserved for a purpose. In C programming, you use the calloc()
, malloc()
, or realloc()
to allocate space manually. In Object-Oriented languages, the data for individual objects are stored here. Calling a constructor with the new
keyword allocates memory on the heap, the constructor then initializes that memory, and then the address of that memory is returned. We’ll explore this process in more depth shortly.
This is also where the difference between a value type and a reference type comes into play. Value types include numeric objects like integers, floating point numbers, and also booleans. Reference types include strings and classes. When you create a variable that represents a value type, the memory to hold its value is created in the stack. When you create a variable to hold a reference type, it also has memory in the stack - but this memory holds a pointer to where the object’s actual data is allocated in the heap. Hence the term reference type, as the variable doesn’t hold the object’s data directly - instead it holds a reference to where that object exists in the heap!
This is also where null
comes from - a value of null
means that a reference variable is not pointing at anything.
The objects in the heap are not limited to a scope like the variables stored in the stack. Some may exist for the entire running time of the program. Others may be released almost immediately. Accordingly, as this memory is released, it leaves “holes” that can be re-used for other objects (provided they fit). Many modern programming languages use a garbage collector to monitor how fragmented the heap is becoming, and will occasionally reorganize the data in the heap to make more contiguous space available.
We often talk about the class as a blueprint for an object. This is because classes define what properties and methods an object should have, in the form of the class definition. An object is created from this blueprint by invoking the class’ constructor. Consider this class representing a planet:
/// <summary>
/// A class representing a planet
// </summary>
public class Planet {
/// <summary>
/// The planet's mass in Earth Mass units (~5.9722 x 10^24kg)
/// </summary>
private double mass;
public double Mass
{
get { return mass; }
}
/// <summary>
/// The planet's radius in Earth Radius units (~6.738 x 10^6m)
/// </summary>
private double radius;
public double Radius
{
get { return radius; }
}
/// <summary>
/// Constructs a new planet
/// <param name="mass">The planet's mass</param>
/// <param name="radius">The planet's radius</param>
public Planet(double mass, double radius)
{
this.mass = mass;
this.radius = radius;
}
}
It describes a planet as having a mass and a radius. But a class does more than just labeling the properties and fields and providing methods to mutate the state they contain. It also specifies how memory needs to be allocated to hold those values as the program runs. In memory, we would need to hold both the mass and radius values. These are stored side-by-side, as a series of bits that are on or off. You probably remember from CIS 115 that a double
is stored as a sign bit, mantissa and exponent. This is also the case here - a C# double
requires 64 bits to hold these three parts, and we can represent it with a memory diagram:
We can create a specific planet by invoking its constructor, i.e.:
new Planet(1, 1);
This allocates (sets aside) the memory to hold the planet, and populates the mass and radius with the supplied values. We can represent this with a memory diagram:
With memory diagrams, we typically write the values of variables in their human-readable form. Technically the values we are storing are in binary, and would each be 0000000000010000000000000000000000000000000000000000000000000001
, so our overall object would be the bits: 00000000000100000000000000000000000000000000000000000000000000010000000000010000000000000000000000000000000000000000000000000001
.
And this is exactly how it is stored in memory! The nice boxes we drew in our memory diagram are a tool for us to reason about the memory, not something that actually exists in memory. Instead, the compiler determines the starting point for each double
by looking at the structure defined in our class
, i.e. the first field defined is mass
, so it will be the first 64 bits of the object in memory. The second field is radius
, so it starts 65 bits into the object and consists of the next (and final) 64 bits.
If we assign the created Planet
object to a variable, we allocate memory for that variable:
Planet earth = new Planet(1, 1);
Unlike our double
and other primitive values, this allocated memory holds a reference (an starting address of the memory where the object was allocated). We indicate this with a box and arrow connecting the variable and object in our memory diagram:
A reference is either 32 bits (on a computer with a 32-bit CPU) or 64 bits (on a computer with a 64-bit CPU), and essentially is an offset from the memory address $0$ indicating where the object will be located in memory (in the computer’s RAM). You’ll see this in far more detail in CIS 450 - Computer Architecture and Operations, but the important idea for now is the variable stores where the object is located in memory not the object’s data itself. This is also why if we define a class variable but don’t assign it an object, i.e.:
Planet mars;
The value of this variable will be null
. It’s because it doesn’t point anywhere!
Returning to our Earth example, earth
is an instance of the class Planet
. We can create other instances, i.e.
Planet mars = new Planet(0.107, 0.53);
We can even create a Planet instance to represent one of the exoplanets discovered by NASA’s TESS:
Planet hd21749b = new Planet(23.20, 2.836);
Let’s think more deeply about the idea of a class as a blueprint. A blueprint for what, exactly? For one thing, it serves to describe the state of the object, and helps us label that state. If we were to check our variable mars’ radius, we do so based on the property Radius defined in our class:
mars.Radius
This would follow the mars
reference to the Planet
object it represents, and access the second group of 64 bits stored there, interpreting them as a double
(basically it adds 64 to the reference
address and then reads the next 64 bits)
Incidentally, this is why we start counting at 0 in computer science. The mass
bits start at the start of our Planet
object, referenced by mars
i.e. if mars
holds the reference address $5234$, then the bits of mass
also begin at $5234$, or $5234+0$. And the radius
bits start at $5234 + 64$.
State and memory are clearly related - the current state is what data is stored in memory. It is possible to take that memory’s current state, write it to persistent storage (like the hard drive), and then read it back out at a later point in time and restore the program to exactly the state we left it with. This is actually what Windows does when you put it into hibernation mode.
The process of writing out the state is known as serialization, and it’s a topic we’ll revisit later.
You might have wondered how the static
modifier plays into objects. Essentially, the static
keyword indicates the field or method it modifies exists in only one memory location. I.e. a static field references the same memory location for all objects that possess it. Hence, if we had a simple class like:
public class Simple {
public static int A;
public int B;
public Simple(int a, int b) {
this.A = a;
this.B = b;
}
}
And created a couple of instances:
Simple first = new Simple(10, 12);
Simple second = new Simple(8, 5);
The value of first.A
would be 8 - because first.A
and second.A
reference the same memory location, and second.A
was set after first.A
. If we changed it again:
first.A = 3;
Then both first.A
and second.A
would have the value 3, as they share the same memory. first.B
would still be 12, and second.B
would be 5.
Another way to think about static
is that it means the field or method we are modifying belongs to the class and not the individual object. Hence, each object shares a static
variable, because it belongs to their class. Used on a method, static
indicates that the method belongs to the class definition, not the object instance. Hence, we must invoke it from the class, not an object instance: i.e. Math.Pow()
, not Math m = new Math(); m.Pow();
.
Finally, when used with a class, static
indicates we can’t create objects from the class - the class definition exists on its own. Hence, the Math m = new Math();
is actually an error, as the Math
class is declared static.
With our broader understanding of objects in memory, let’s re-examine something you’ve been working with already, how the values in that memory are initialized (set to their initial values). In C#, there are four primary ways a value is initialized:
This also happens to be the order in which these operations occur - i.e. the default value can be overridden by code in the constructor. Only after all of these steps are completed is the initialized object returned from the constructor.
This step is actually done for you - it is a feature of the C# language. Remember, allocated memory is simply a series of bits. Those bits have likely been used previously to represent something else, so they will already be set to 0s or 1s. Once you treat it as a variable, it will have a specific meaning. Consider this statement:
int foo;
That statement allocates the space to hold the value of foo
. But what is that value? In many older languages, it would be whatever is specified by how the bits were set previously - i.e. it could be any integer within the available range. And each time you ran the program, it would probably be a different value! This is why it is always a good idea to assign a value to a variable immediately after you declare it.
The creators of C# wanted to avoid this potential problem, so in C# any memory that is allocated by a variable declaration is also zeroed (all bits are set to 0). Exactly what this means depends on the variable’s type. Essentially, for numerics (integers, floating points, etc) the value would be 0
, for booleans it would be false
. And for reference types, the value would be null
.
A second way a field’s value can be set is by assigning a default value after it is declared. Thus, if we have a private backing _count
in our CardDeck
class, we could set it to have a default value of 52:
public class CardDeck
{
private int _count = 52;
public int Count
{
get
{
return _count;
}
set
{
_count = value;
}
}
}
This ensures that _count
starts with a value of 52, instead of 0.
We can also set a default value when using auto-property syntax:
public class CardDeck
{
public int Count {get; set;} = 52;
}
It is important to understand that the default value is assigned as the memory is allocated, which means the object doesn’t exist yet. Basically, we cannot use methods, fields, or properties of the class to set a default value. For example:
public class CardDeck
{
public int Count {get; set;} = 52;
public int PricePerCard {get;} = 5m / Count;
}
Won’t compile, because we don’t have access to the Count
property when setting the default for PricePerCard
.
This brings us to the constructor, the standard way for an object-oriented program to initialize the state of the object as it is created. In C#, the constructor always has the same name as the class it constructs and has no return type. For example, if we defined a class Square
, we might type:
public class Square {
public float length;
public Square(float length) {
this.length = length;
}
public float Area() {
return length * length;
}
}
Note that unlike the regular method, Area()
, our constructor Square()
does not have a return type. In the constructor, we set the length
field of the newly constructed object to the value supplied as the parameter length
. Note too that we use the this
keyword to distinguish between the field length
and the parameter length
. Since both have the same name, the C# compiler assumes we mean the parameter, unless we use this.length
to indicate the field that belongs to this
- i.e. this object.
A parameterless constructor is one that does not have any parameters. For example:
public class Ball {
private int x;
private int y;
public Ball() {
x = 50;
y = 10;
}
}
Notice how no parameters are defined for Ball()
- the parentheses are empty.
If we don’t provide a constructor for a class the C# compiler automatically creates a parameterless constructor for us, i.e. the class Bat
:
public class Bat {
private bool wood = true;
}
Can be created by invoking new Bat()
, even though we did not define a constructor for the class. If we define any constructors, parameterless or otherwise, then the C# compiler will not create an automatic parameterless constructor.
Finally, C# introduces some special syntax for setting initial values after the constructor code has run, but before initialization is completed - Object initializers. For example, if we have a class representing a rectangle:
public class Rectangle
{
public int Width {get; set;}
public int Height {get; set;}
}
We could initialize it with:
Rectangle r = new Rectangle() {
Width = 20,
Height = 10
};
The resulting rectangle would have its width and height set to 20 and 10 respectively before it was assigned to the variable r
.
In addition to the get
and set
accessor, C# has an init
operator that works like the set
operator but can only be used during object initialization.
The second criteria Alan Kay set for object-oriented languages was message passing. Message passing is a way to request a unit of code engage in a behavior, i.e. changing its state, or sharing some aspect of its state.
Consider the real-world analogue of a letter sent via the postal service. Such a message consists of: an address the message needs to be sent to, a return address, the message itself (the letter), and any data that needs to accompany the letter (the enclosures). A specific letter might be a wedding invitation. The message includes the details of the wedding (the host, the location, the time), an enclosure might be a refrigerator magnet with these details duplicated. The recipient should (per custom) send a response to the host addressed to the return address letting them know if they will be attending.
In an object-oriented language, message passing primarily take the form of methods. Let’s revisit our example Vector3
class:
public class Vector3 {
public double X {get; set;}
public double Y {get; set;}
public double Z {get; set;}
/// <summary>
/// Creates a new Vector3 object
/// </summary>
public Vector3(double x, double y, double z) {
this.X = x;
this.Y = y;
this.Z = z;
}
/// <summary>
/// Computes the dot product of this vector and another one
/// </summary>
/// <param name="other">The other vector</param>
public double DotProduct(Vector3 other) {
return this.X * other.X + this.Y * other.Y + this.Z * other.Z;
}
}
And let’s use its DotProduct()
method:
Vector3 a = new Vector3(1, 1, 2);
Vector3 b = new Vector3(4, 2, 1);
double c = a.DotProduct(b);
Consider the invocation of a.DotProduct(b)
above. The method name, DotProduct
provides the details of what the message is intended to accomplish (the letter). Invoking it on a specific variable, i.e. a
, tells us who the message is being sent to (the recipient address). The return type indicates what we need to send back to the recipient (the invoking code), and the parameters provide any data needed by the class to address the task (the enclosures).
Let’s define a new method for our Vector3 class that emphasizes the role message passing plays in mutating object state:
public class Vector3 {
public double X {get; set;}
public double Y {get; set;}
public double Z {get; set;}
/// <summary>
/// Creates a new Vector3 object
/// </summary>
public Vector3(double x, double y, double z) {
this.X = x;
this.Y = y;
this.Z = z;
}
public void Normalize() {
var magnitude = Math.Sqrt(Math.pow(this.X, 2) + Math.Pow(this.Y, 2) + Math.Pow(this.Z, 2));
this.X /= magnitude;
this.Y /= magnitude;
this.Z /= magnitude;
}
}
We can now invoke the Normalize()
method on a Vector3 to mutate its state, shortening the magnitude of the vector to length 1.
Vector3 f = new Vector3(9.0, 3.0, 2.0);
f.Normalize();
Note how here, f
is the object receiving the message Normalize
. There is no additional data needed, so there are no parameters being passed in. Our earlier DotProduct()
method took a second vector as its argument, and used that vector’s values to mutate its state.
Message passing therefore acts like those special molecular pumps and other gate mechanisms of a cell that control what crosses the cell wall. The methods defined on a class determine how outside code can interact with the object. An extra benefit of this approach is that a method becomes an abstraction for the behavior of the code, and the associated state changes it embodies. As a programmer using the method, we don’t need to know the exact implementation of that behavior - just what data we need to provide, and what it should return or how it will alter the program state. This makes it far easier to reason about our program, and also means we can change the internal details of a class (perhaps to make it run faster) without impacting the other aspects of the program.
This is also the reason we want to use getters and setters (or properties in C#) instead of public fields in an object-oriented language. Getters, setters, and C# properties are all methods, and therefore are a form of message passing, and they ensure that outside code is not modifying the state of the object (rather, the outside code is requesting the object to change its state). It is a fine distinction, but one that can be very important.
You probably have noticed that in many programming languages we speak of functions, but in C# and other object-oriented languages, we’ll often speak of methods. You might be wondering just what is the difference?
Both are forms of message passing, and share many of the same characteristics. Broadly speaking though, methods are functions defined as part of an object. Therefore, their bodies can access the state of the object. In fact, that’s what the this
keyword in C# means - it refers to this object, i.e. the instance of the class that the method is currently executing for. For non-object-oriented languages, there is no concept of this
(or self
as it appears in some other languages).
In this chapter, we looked at how Object-Orientation adopted the concept of encapsulation to combine related state and behavior within a single unit of code, known as a class. We also discussed the three key features found in the implementation of classes and objects in Object-Oriented languages:
We explored how objects are instances of a class created through invoking a constructor method, and how each object has its own independent state but shares behavior definitions with other objects constructed from the same class. We discussed several different ways of looking at and reasoning about objects - as a state machine, and as structured data stored in memory. We saw how the constructor creates the memory to hold the object state and initializes its values. We saw how access modifiers and accessor methods can be used to limit and control access to the internal state of an object through message passing.
Finally, we explored how all of these concepts are implemented in the C# language.
It’s a shapshifter!
The term polymorphism means many forms. In computer science, it refers to the ability of a single symbol (i.e. a function or class name) to represent multiple types. Some form of polymorphism can be found in nearly all programming languages.
While encapsulation of state and behavior into objects is the most central theoretical idea of object-oriented languages, polymorphism - specifically in the form of inheritance is a close second. In this chapter we’ll look at how polymorphism is commonly implemented in object-oriented languages.
Some key terms to learn in this chapter are:
C# Keywords:
Interface
protected
abstract
virtual
override
sealed
as
is
dyanamic
Before we can discuss polymorphism in detail, we must first understand the concept of types. In computer science, a type is a way of categorizing a variable by its storage strategy, i.e., how it is represented in the computer’s memory.
You’ve already used types extensively in your programming up to this point. Consider the declaration:
int number = 5;
The variable number is declared to have the type int. This lets the .NET interpreter know that the value of number will be stored using a specific scheme. This scheme will use 32 bits and contain the number in Two’s compliment binary form. This form, and the number of bytes, allows us to represent numbers in the range -2,147,483,648 to 2,147,483,647. If we need to store larger values, we might instead use a long which uses 64 bits of storage. Or, if we only need positive numbers, we might instead use a uint, which uses 32 bits and stores the number in regular base 2 (binary) form.
This is why languages like C# provide multiple integral and float types. Each provides a different representation, representing a tradeoff between memory required to store the variable and the range or precision that variable can represent.
In addition to integral and float types, most programming languages include types for booleans, characters, arrays, and often strings. C# is no exception - you can read about its built-in value types in the documentation.
In addition to built-in types, most programming languages support user-defined types, that is, new types defined by the programmer. For example, if we were to define a C# enum:
public enum Grade {
A,
B,
C,
D,
F
}
Defines the type Grade. We can then create variables with that type:
Grade courseGrade = Grade.A;
Similarly, structs provide a way of creating user-defined compound data types.
In an object-oriented programming language, a Class also defines a new type. As we discussed in the previous chapter, the Class defines the structure for the state (what is represented) and memory (how it is represented) for objects implementing that type. Consider the C# class Student:
public class Student {
// backing variables
private uint creditPoints = 0;
private uint creditHours = 0;
/// <summary>
/// Gets and sets first name.
/// </summary>
public string First { get; set; }
/// <summary>
/// Gets and sets last name.
/// </summary>
public string Last { get; set; }
/// <summary>
/// Gets the student's GPA
/// </summary>
public float GPA {
get {
return creditPoints / creditHours;
}
}
/// <summary>
/// Adds a final grade for a course to the
// student's GPA.
/// </summary>
/// <param name="grade">The student's final letter grade in the course</param>
/// <param name="hours">The course's credit hours</param>
public void AddCourseGrade(Grade grade, uint hours) {
this.creditHours += hours;
switch(grade) {
case Grade.A:
this.creditPoints += 4.0 * hours;
break;
case Grade.B:
this.creditPoints += 3.0 * hours;
break;
case Grade.C:
this.creditPoints += 2.0 * hours;
break;
case Grade.D:
this.creditPoints += 1.0 * hours;
break;
case Grade.F:
this.creditPoints += 0.0 * hours;
break;
}
}
}
If we want to create a new student, we would create an instance of the class Student which is an object of type Student:
Student willie = new Student("Willie", "Wildcat");
Hence, the type of an object is the class it is an instance of. This is a staple across all object-oriented languages.
A final note on types. You may hear languages being referred to as statically or dynamically typed. A statically typed language is one where the type is set by the code itself, either explicitly:
int foo = 5;
or implicitly (where the complier determines the type based on the assigned value):
var bar = 6;
In a statically typed language, a variable cannot be assigned a value of a different type, i.e.:
foo = 8.3;
Will fail with an error, as a float is a different type than an int. Similarly, because bar has an implied type of int, this code will fail:
bar = 4.3;
However, we can cast the value to a new type (changing how it is represented), i.e.:
foo = (int)8.9;
For this to work, the language must know how to perform the cast. The cast may also lose some information - in the above example, the resulting value of foo is 8 (the fractional part is discarded).
In contrast, in a dynamically typed language the type of the variable changes when a value of a different type is assigned to it. For example, in JavaScript, this expression is legal:
var a = 5;
a = "foo";
and the type of a changes from int (at the first assignment) to string (at the second assignment).
C#, Java, C, C++, and Kotlin are all statically typed languages, while Python, JavaScript, and Ruby are dynamically typed languages.
If we think back to the concept of message passing in object-oriented languages, it can be useful to think of the collection of public methods available in a class as an interface, i.e., a list of messages you can dispatch to an object created from that class. When you were first learning a language (and probably even now), you find yourself referring to these kinds of lists, either in the language documentation, or via Intellisense in Visual Studio.
Essentially, programmers use these ‘interfaces’ to determine what methods can be invoked on an object. In other words, which messages can be passed to the object. This ‘interface’ (note the lowercase i) is determined by the class definition, specifically what methods it contains.
In dynamically typed programming languages, like Python, JavaScript, and Ruby, if two classes accept the same message, you can treat them interchangeably, i.e. the Kangaroo
class and Car
class both define a jump()
method, you could populate a list with both, and call the jump()
method on each:
var jumpables = [new Kangaroo(), new Car(), new Kangaroo()];
for(int i = 0; i < jumpables.length; i++) {
jumpables[i].jump();
}
This is sometimes called duck typing, from the sense that “if it walks like a duck, and quacks like a duck, it might as well be a duck.”
However, for statically typed languages we must explicitly indicate that two types both possess the same message definition, by making the interface explicit. We do this by declaring an Interface
. I.e., the Interface for classes that possess a parameter-less jump method might be:
/// <summary>
/// An interface indicating an object's ability to jump
/// </summary>
public Interface IJumpable {
/// <summary>
/// A method that causes the object to jump
/// </summary>
void Jump();
}
In C#, it is common practice to preface Interface names with the character I
. The Interface
declaration defines an ‘interface’ - the shape of the messages that can be passed to an object implementing the interface - in the form of a method signature. Note that this signature does not include a body, but instead ends in a semicolon (;
). An interface simply indicates the message to be sent, not the behavior it will cause! We can specify as many methods in an Interface
declaration as we want.
Also note that the method signatures in an Interface
declaration do not have access modifiers. This is because the whole purpose of defining an interface is to signify methods that can be used by other code. In other words, public
access is implied by including the method signature in the Interface
declaration.
This Interface
can then be implemented by other classes by listing it after the class name, after a colon :
. Any Class
declaration implementing the interface must define public methods whose signatures match those were specified by the interface:
/// <summary>A class representing a kangaroo</summary>
public class Kangaroo : IJumpable
{
/// <summary>Causes the Kangaroo to jump into the air</summary>
public void Jump() {
// TODO: Implement jumping...
}
}
/// <summary>A class representing an automobile</summary>
public class Car : IJumpable
{
/// <summary>Helps a stalled car to start by providing electricity from another car's battery</summary>
public void Jump() {
// TODO: Implement jumping a car...
}
/// <summary>Starts the car</summary>
public void Start() {
// TODO: Implement starting a car...
}
}
We can then treat these two disparate classes as though they shared the same type, defined by the IJumpable
interface:
List<IJumpable> jumpables = new List<IJumpable>() {new Kangaroo(), new Car(), new Kangaroo()};
for(int i = 0; i < jumpables.Count; i++)
{
jumpables[i].Jump();
}
Note that while we are treating the Kangaroo and Car instances as IJumpable
instances, we can only invoke the methods defined in the IJumpable
interface, even if these objects have other methods. Essentially, the interface represents a new type that can be shared amongst disparate objects in a statically-typed language. The Interface definition serves to assure the static type checker that the objects implementing it can be treated as this new type - i.e. the Interface
provides a mechanism for implementing polymorphism.
We often describe the relationship between the interface and the class that implements it as a is-a relationship, i.e. a Kangaroo is an IJumpable (i.e. a Kangaroo is a thing that can jump). We further distinguish this from a related polymorphic mechanism, inheritance, by the strength of the relationship. We consider the relationship between interfaces and classes implementing them to be weak is-a connections. For example, other than the shared interface, a Kangaroo and a Car don’t have much to do with one another.
A C# class can implement as many interfaces as we want, they just need to be separated by commas, i.e.:
public class Frog : IJumpable, ICroakable, ICatchFlies
{
// TODO: Implement frog class...
}
Next we’ll look at inheritance, which represents a strong is-a relationship.
In an object-oriented language, inheritance is a mechanism for deriving part of a class definition from another existing class definition. This allows the programmer to “share” code between classes, reducing the amount of code that must be written.
Consider a Student class:
/// <summary>
/// A class representing a student
/// </summary>
public class Student {
// private backing variables
private double hours;
private double points;
/// <summary>
/// Gets the students' GPA
/// </summary>
public double GPA {
get {
return points / hours;
}
}
/// <summary>
/// Gets or sets the first name
/// </summary>
public string First { get; set; }
/// <summary>
/// Gets or sets the last name
/// </summary>
public string Last { get; set; }
/// <summary>
/// Constructs a new instance of Student
/// </summary>
/// <param name="first">The student's first name </param>
/// <param name="last">The student's last name</param>
public Student(string first, string last) {
this.First = first;
this.Last = last;
}
/// <summary>
/// Adds a new course grade to the student's record.
/// </summary>
/// <param name="creditHours">The number of credit hours in the course </param>
/// <param name="finalGrade">The final grade earned in the course</param>
///
public AddCourseGrade(uint creditHours, Grade finalGrade) {
this.hours += creditHours;
switch(finalGrade) {
case Grade.A:
this.credits += 4 * creditHours;
break;
case Grade.B:
this.credits += 3 * creditHours;
break;
case Grade.C:
this.credits += 2 * creditHours;
break;
case Grade.D:
this.credits += 1 * creditHours;
break;
}
}
}
This would work well for representing a student. But what if we are representing multiple kinds of students, like undergraduate and graduate students? We’d need separate classes for each, but both would still have names and calculate their GPA the same way. So it would be handy if we could say “an undergraduate is a student, and has all the properties and methods a student has” and “a graduate student is a student, and has all the properties and methods a student has.” This is exactly what inheritance does for us, and we often describe it as a is a relationship. We distinguish this from the Interface mechanism we looked at earlier by saying it is a strong is a relationship, as an Undergraduate
student is, for all purposes, also a Student
.
Let’s define an undergraduate student class:
/// <summary>
/// A class representing an undergraduate student
/// </summary>
public class UndergraduateStudent : Student {
/// <summary>
/// Constructs a new instance of UndergraduateStudent
/// </summary>
/// <param name="first">The student's first name </param>
/// <param name="last">The student's last name</param>
public UndergraduateStudent(string first, string last) : base(first, last) {
}
}
In C#, the :
indicates inheritance - so public class UndergraduateStudent : Student
indicates that UndergraduateStudent
inherits from (is a) Student
. Thus, it has properties First
, Last
, and GPA
that are inherited from Student
. Similarly, it inherits the AddCourseGrade()
method.
In fact, the only method we need to define in our UndergraduateStudent
class is the constructor - and we only need to define this because the base class has a defined constructor taking two parameters, first
and last
names. This Student
constructor must be invoked by the UndergraduateStudent
constructor - that’s what the :base(first, last)
portion does - it invokes the Student
constructor with the first
and last
parameters passed into the UndergraduateStudent
constructor.
Let’s define a GraduateStudent
class as well. This will look much like an UndergraduateStudent
, but all graduates have a bachelor’s degree:
/// <summary>
/// A class representing an undergraduate student
/// </summary>
public class GraduateStudent : Student {
/// <summary>
/// Gets the student's bachelor degree
/// </summary>
public string BachelorDegree {
get; private set;
}
/// <summary>
/// Constructs a new instance of UndergraduateStudent
/// </summary>
/// <param name="first">The student's first name </param>
/// <param name="last">The student's last name</param>
/// <param name="degree">The student's bachelor degree</param>
public GraduateStudent(string first, string last, string degree) : base(first, last) {
BachelorDegree = degree;
}
}
Here we add a property for BachelorDegree
. Since it’s setter is marked as private
, it can only be written to by the class, as is done in the constructor. To the outside world, it is treated as read-only.
Thus, the GraduateStudent
has all the state and behavior encapsulated in Student
, plus the additional state of the bachelor’s degree title.
protected
KeywordWhat you might not expect is that any fields declared private
in the base class are inaccessible in the derived class. Thus, the private fields points
and hours
cannot be used in a method defined in GraduateStudent
. This is again part of the encapsulation and data hiding ideals - we’ve encapsulated and hid those variables within the base class, and any code outside that assembly, even in a derived class, is not allowed to mess with it.
However, we often will want to allow access to such variables in a derived class. C# uses the access modifier protected
to allow for this access in derived classes, but not the wider world.
What happens when we construct an instance of GraduateStudent
? First, we invoke the constructor of the GraduateStudent
class:
GraduateStudent bobby = new GraduateStudent("Bobby", "TwoSocks", "Economics");
This constructor then invokes the constructor of the base class, Student
, with the arguments "Bobby"
and "Twosocks"
. Thus, we allocate space to hold the state of a student, and populate it with the values set by the constructor. Finally, execution returns to the derived class of GraduateStudent
, which allocates the additional memory for the reference to the BachelorDegree
property. Thus, the memory space of the GraduateStudent
contains an instance of the Student
, somewhat like nesting dolls.
Because of this, we can treat a GraduateStudent
object as a Student
object. For example, we can store it in a list of type Student
, along with UndergraduateStudent
objects:
List<Student> students = new List<Student>();
students.Add(bobby);
students.Add(new UndergraduateStudent("Mary", "Contrary"));
Because of their relationship through inheritance, both GraduateStudent
class instances and UndergraduateStudent
class instances are considered to be of type Student
, as well as their supertypes.
We can go as deep as we like with inheritance - each base type can be a superclass of another base type, and has all the state and behavior of all the inherited base classes.
This said, having too many levels of inheritance can make it difficult to reason about an object. In practice, a good guideline is to limit nested inheritance to two or three levels of depth.
If we have a base class that only exists to inherit from (like our Student
class in the example), we can mark it as abstract with the abstract
keyword. An abstract class cannot be instantiated (that is, we cannot create an instance of it using the new
keyword). It can still define fields and methods, but you can’t construct it. If we were to re-write our Student
class as an abstract class:
/// <summary>
/// A class representing a student
/// </summary>
public abstract class Student {
// private backing variables
private double hours;
private double points;
/// <summary>
/// Gets the students' GPA
/// </summary>
public double GPA {
get {
return points / hours;
}
}
/// <summary>
/// Gets or sets the first name
/// </summary>
public string First { get; set; }
/// <summary>
/// Gets or sets the last name
/// </summary>
public string Last { get; set; }
/// <summary>
/// Constructs a new instance of Student
/// </summary>
/// <param name="first">The student's first name </param>
/// <param name="last">The student's last name</param>
public Student(string first, string last) {
this.First = first;
this.Last = last;
}
/// <summary>
/// Adds a new course grade to the student's record.
/// </summary>
/// <param name="creditHours">The number of credit hours in the course </param>
/// <param name="finalGrade">The final grade earned in the course</param>
///
public AddCourseGrade(uint creditHours, Grade finalGrade) {
this.hours += creditHours;
switch(finalGrade) {
case Grade.A:
this.credits += 4 * creditHours;
break;
case Grade.B:
this.credits += 3 * creditHours;
break;
case Grade.C:
this.credits += 2 * creditHours;
break;
case Grade.D:
this.credits += 1 * creditHours;
break;
}
}
}
Now with Student
as an abstract class, attempting to create a Student
instance i.e. Student mark = new Student("Mark", "Guy")
would fail with an exception. However, we can still create instances of the derived classes GraduateStudent
and UndergraduateStudent
, and treat them as Student
instances. It is best practice to make any class that serves only as a base class for derived classes and will never be created directly abstract.
Conversely, C# also offers the sealed
keyword, which can be used to indicate that a class should not be inheritable. For example:
/// <summary>
/// A class that cannot be inherited from
/// </summary>
public sealed class DoNotDerive {
}
Derived classes can also be sealed. I.e., we could seal our UndergraduateStudent
class to prevent further derivation:
/// <summary>
/// A sealed version of the class representing an undergraduate student
/// </summary>
public sealed class UndergraduateStudent : Student {
/// <summary>
/// Constructs a new instance of UndergraduateStudent
/// </summary>
/// <param name="first">The student's first name </param>
/// <param name="last">The student's last name</param>
public UndergraduateStudent(string first, string last) : base(first, last) {
}
}
Many of the library classes provided with the C# installation are sealed. This helps prevent developers from making changes to well-known classes that would make their code harder to maintain. It is good practice to seal classes that you expect will never be inherited from.
A class can use both inheritance and interfaces. In C#, a class can only inherit one base class, and it should always be the first after the colon (:
). Following that we can have as many interfaces as we want, all separated from each other and the base class by commas (,
):
public class UndergraduateStudent : Student, ITeachable, IEmailable
{
// TODO: Implement student class
}
You have probably used casting to convert numeric values from one type to another, i.e.:
int a = 5;
double b = a;
And
int c = (int)b;
What you are actually doing when you cast is transforming a value from one type to another. In the first case, you are taking the value of a
(5), and converting it to the equivalent double (5.0). If you consider the internal representation of an integer (a 2’s complement binary number) to a double (an IEEE 754 standard representation), we are actually applying a conversion algorithm to the binary representations.
We call the first operation an implicit cast, as we don’t expressly tell the compiler to perform the cast. In contrast, the second assignment is an explicit cast, as we signify the cast by wrapping the type we are casting to in parenthesis before the variable we are casting. We have to perform an explicit cast in the second case, as the conversion has the possibility of losing some precision (i.e. if we cast 7.2 to an integer, it would be truncated to 7). In any case where the conversion may lose precision or possibly throw an error, an explicit cast is required.
We can actually extend the C# language to add additional conversions to provide additional casting operations. Consider if we had Rectangle
and Square
structs:
/// <summary>A struct representing a rectangle</summary>
public struct Rectangle {
/// <summary>The length of the short side of the rectangle</summary>
public int ShortSideLength;
/// <summary>The length of the long side of the rectangle</summary>
public int LongSideLength;
/// <summary>Constructs a new rectangle</summary>
/// <param name="shortSideLength">The length of the shorter sides of the rectangle</param>
/// <param name="longSideLength">The length of the longer sides of the rectangle</param>
public Rectangle(int shortSideLength, int longSideLength){
ShortSideLength = shortSideLength;
LongSideLength = longSideLength;
}
}
/// <summary>A struct representing a square</summary>
public struct Square {
/// <summary> The length of the square's sides</summary>
public int SideLength;
/// <summary>Constructs a new square</summary>
/// <param name="sideLength">The length of the square's sides</param>
public Square(int sideLength){
SideLength = sideLength;
}
}
Since we know that a square is a special case of a rectangle (where all sides are the same length), we might define an implicit casting operator to convert it into a Rectangle
(this would be placed inside the Square
struct definition):
/// <summary>Casts the <paramref name="square"/> into a Rectangle</summary>
/// <param name="square">The square to cast</param>
public static implicit operator Rectangle(Square square)
{
return new Rectangle(square.SideLength, square.SideLength);
}
Similarly, we might create a cast operator to convert a rectangle to a square. But as this can only happen when the sides of the rectangle are all the same size, it would need to be an explicit cast operator , and throw an exception when that condition is not met (this method is placed in the Rectangle
struct definition):
/// <summary>Casts the <paramref name="rectangle"/> into a Square</summary>
/// <param name="rectangle">The rectangle to cast</param>
/// <exception cref="System.InvalidCastOperation">The rectangle sides must be equal to cast to a square</exception>
public static explicit operator Square(Rectangle rectangle){
if(rectangle.LongSideLength != rectangle.ShortSideLength) throw new InvalidCastException("The sides of a square must be of equal lengths");
return new Square(rectangle.LongSideLength);
}
Casting becomes a bit more involved when we consider inheritance. As you saw in the previous discussion of inheritance, we can treat derived classes as the base class, i.e. the code:
Student sam = new UndergraduateStudent("Sam", "Malone");
Is actually implicitly casting the undergraduate student “Sam Malone” into a student class. Because an UndergraduateStudent
is a Student
, this cast can be implicit. Moreover, we don’t need to define a casting operator - we can always implicitly cast a class to one of its ancestor classes, it’s built into the inheritance mechanism of C#.
Going the other way requires an explicit cast as there is a chance that the Student
we are casting isn’t an undergraduate, i.e.:
UndergraduateStudent u = (UndergraduateStudent)sam;
If we tried to cast sam
into a graduate student:
GraduateStudent g = (GraduateStudent)sam;
The program would throw an InvalidCastException
when run.
Casting interacts similarly with interfaces. A class can be implicitly cast to an interface it implements:
IJumpable roo = new Kangaroo();
But must be explicitly cast to convert it back into the class that implemented it:
Kangaroo k = (Kangaroo)roo;
And if that cast is illegal, we’ll throw an InvalidCastException
:
Car c = (Car)roo;
as
OperatorWhen we are casting reference and nullable types, we have an additional casting option - the as
casting operator.
The as
operator performs the cast, or evaluates to null
if the cast fails (instead of throwing an InvalidCastException
), i.e.:
UndergraduateStudent u = sam as UndergraduateStudent; // evaluates to an UndergraduateStudent
GraduateStudent g = sam as GraduateStudent; // evaluates to null
Kangaroo k = roo as Kangaroo; // evaluates to a Kangaroo
Car c = roo as Kangaroo; // evaluates to null
is
OperatorRather than performing a cast and catching the exception (or performing a null check when using the as
operator), it is often useful to know if a cast is possible. This can be checked for with the is
operator. It evaluates to a boolean, true
if the cast is possible, false
if not:
sam is UndergraduateStudent; // evaluates to true
sam is GraduateStudent; // evaluates to false
roo is Kangaroo; // evaluates to true
roo is Car; // evaluates to false
The is
operator does not work with user-defined casting operators, i.e. when used with the Rectangle/Square cast we defined above:
Square s = new Square(10);
bool test = s is Rectangle;
The value of test
will be false
, even though we have a user-defined implicit cast that works.
The is
operator is commonly used to determine if a cast will succeed before performing it, i.e.:
if(sam is UndergraduateStudent)
{
Undergraduate samAsUGrad = sam as UndergraduateStudent;
// TODO: Do something undergraduat-ey with samAsUGrad
}
This pattern was so commonly employed, it led to the addition of the is type pattern matching expression in C# version 7.0:
if(sam is UndergraduateStudent samAsUGrad)
{
// TODO: Do something undergraduate-y with samAsUGrad
}
If the cast is possible, it is performed and the result assigned to the provided variable name (in this case, samAsUGrad
). This is another example of syntactic sugar.
The term dispatch refers to how a language decides which polymorphic operation (a method or function) a message should trigger.
Consider polymorphic functions in C# (aka Method Overloading, where multiple methods use the same name but have different parameters) like this one for calculating the rounded sum of an array of numbers:
int RoundedSum(int[] a) {
int sum = 0;
foreach(int i in a) {
sum += i;
}
return sum;
}
int RoundedSum(float[] a) {
double sum = 0;
foreach(int i in a) {
sum += i;
}
return (int)Math.Round(sum);
}
How does the interpreter know which version to invoke at runtime? It should not be a surprise that it is determined by the arguments - if an integer array is passed, the first is invoked, if a float array is passed, the second.
However, inheritance can cause some challenges in selecting the appropriate polymorphic form. Consider the following fruit implementations that feature a Blend() method:
/// <summary>
/// A base class representing fruit
/// </summary>
public class Fruit
{
/// <summary>
/// Blends the fruit
/// </summary>
/// <returns>The result of blending</returns>
public string Blend() {
return "A pulpy mess, I guess";
}
}
/// <summary>
/// A class representing a banana
/// </summary>
public class Banana : Fruit
{
/// <summary>
/// Blends the banana
/// </summary>
/// <returns>The result of blending the banana</returns>
public string Blend()
{
return "yellow mush";
}
}
/// <summary>
/// A class representing a Strawberry
/// </summary>
public class Strawberry : Fruit
{
/// <summary>
/// Blends the strawberry
/// </summary>
/// <returns>The result of blending a strawberry</returns>
public string Blend()
{
return "Gooey Red Sweetness";
}
}
Let’s add fruit instances to a list, and invoke their Blend()
methods:
List<Fruit> toBlend = List<Fruit>();
toBlend.Add(new Banana());
toBlend.Add(new Strawberry());
forEach(Fruit item in toBlend) {
Console.WriteLine(item.Blend());
}
You might expect this code to produce the lines:
yellow mush
Gooey Red Sweetness
As these are the return values for the Blend()
methods for the Banana
and Strawberry
classes, respectively. However, we will get:
A pulpy mess, I guess?
Which is the return values for the Fruit
base class Blend()
implementation. The line forEach(Fruit item in toBlend)
explicitly tells the interpreter to treat the item
as a Fruit
instance, so of the two available methods (the base or super class implementation), the Fruit
base class one is selected.
C# 4.0 introduced a new keyword, dynamic to allow variables like item
to be dynamically typed at runtime. Hence, changing the loop to this:
forEach(dynamic item in toBlend) {
Console.WriteLine(item.Blend());
}
Will give us the first set of results we discussed.
Of course, part of the issue in the above example is that we actually have two implementations for Blend()
available to each fruit. If we wanted all bananas to use the Banana
class’s Blend()
method, even when the banana was being treated as a Fruit
, we need to override the base method instead of creating a new one that hides it (in fact, in Visual Studio we should get a warning that our new method hides the base implementation, and be prompted to add the new
keyword if that was our intent).
To override a base class method, we first must mark it as abstract
or virtual
. The first keyword, abstract
, indicates that the method does not have an implementation (a body). The second, virtual
, indicates that the base class does provide an implementation. We should use abstract
when each derived class will define its own implementation, and virtual
when some derived classes will want to use a common base implementation. Then, we must mark the method in the derived class with the override
key word.
Considering our Fruit
class, since we’re providing a unique implementation of Blend()
in each derived class, the abstract
keyword is more appropriate:
/// <summary>
/// A base class representing fruit
/// </summary>
public abstract class Fruit : IBlendable
{
/// <summary>
/// Blends the fruit
/// </summary>
/// <returns>The result of blending</returns>
public abstract string Blend();
}
As you can see above, the Blend()
method does not have a body, only the method signature.
Also, note that if we use an abstract method in a class, the class itself must also be declared abstract. The reason should be clear - an abstract method cannot be called, so we should not create an object that only has the abstract method. The virtual keyword can be used in both abstract and regular classes.
Now we can override the Blend()
method in Banana class:
/// <summary>
/// A class representing a banana
/// </summary>
public class Banana : Fruit
{
/// <summary>
/// Blends the banana
/// </summary>
/// <returns>The result of blending the banana</returns>
public override string Blend()
{
return "yellow mush";
}
}
Now, even if we go back to our non-dynamic loop that treats our fruit as Fruit
instances, we’ll get the result of the Banana
class’s Blend()
method.
We can override any method marked abstract
, virtual
, or override
(this last will only occur in a derived class whose base class is also derived, as it is overriding an already-overridden method).
We can also apply the sealed
keyword to overridden methods, which prevents them from being overridden further. Let’s apply this to the Strawberry class:
/// <summary>
/// A class representing a Strawberry
/// </summary>
public class Strawberry : Fruit
{
/// <summary>
/// Blends the strawberry
/// </summary>
/// <returns>The result of blending a strawberry</returns>
public sealed override string Blend()
{
return "Gooey Red Sweetness";
}
}
Now, any class inheriting from Strawberry will not be allowed to override the Blend() method.
Collections in C# are a great example of polymorphism in action. Many collections utilize https://textbooks.cs.ksu.edu/cis400/1-object-orientation/06-advanced-csharp/05-generics/ to allow the collection to hold an arbitrary type. For example, the List<T>
can be used to hold strings, integers, or even specific objects:
List<string> strings = new List<string>();
List<int> ints = new List<int>();
List<Person> persons = new List<Person>();
We can also use an interface as the type, as we did with the IJumpable
interface as we discussed in the https://textbooks.cs.ksu.edu/cis400/1-object-orientation/06-advanced-csharp/05-generics/, i.e.:
List<IJumpable> jumpables = new List<IJumpable>();
jumpables.Add(new Kangaroo());
jumpables.Add(new Car());
jumpables.Add(new Kangaroo());
The C# language and system libraries also define a number of interfaces that apply to custom collections. Implementing these interfaces allows different kinds of data structures to be utilized in a standardized way.
The first of these is the IEnumerable<T>
interface, which requires the collection to implement one method:
public IEnumerator<T> GetEnumerator()
Implementing this interface allows the collection to be used in a foreach
loop.
C# Collections also typically implement the ICollection<T>
interface, which extends the IEnumerable<T>
interface and adds additional methods:
public void Add<T>(T item)
adds item
to the collectionpublic void Clear()
empties the collectionpublic bool Contains(T item)
returns true
if item
is in the collection, false
if not.public void CopyTo(T[] array, int arrayIndex)
copies the collection contents into array
, starting at arrayIndex
.public bool Remove(T item)
removes item
from the collection, returning true
if item was removed, false
otherwiseAdditionally, the collection must implement the following properties:
int Count
the number of items in the collectionbool IsReadOnly
the collection is read-only (can’t be added to or removed from)Finally, collections that have an implied order and are intended to be accessed by a specific index should probably implement the IList<T>
interface, which extends ICollection<T>
and IEnumerable<T>
. This interface adds these additional methods:
public int IndexOf(T item)
returns the index of item
in the list, or -1 if not foundpublic void Insert(int index, T item)
Inserts item
into the list at position index
public void RemoveAt(int index)
Removes the item from the list at position index
The interface also adds the property:
Item[int index]
which gets or sets the item at index
.When writing a C# collection, there are three general strategies you can follow to ensure you implement the corresponding interfaces:
Writing collections from scratch was the strategy you utilized in CIS 300 - Data Structures and Algorithms. While this strategy gives you the most control, it is also the most time-consuming.
The pass-through strategy involves creating a system library collection, such as a List<T>
, as a private field in your collection class. Then, when you implement the necessary interface methods, you simply pass through the call to the private collection. I.e.:
public class PassThroughList<T> : IList<T>
{
private List<T> _list = new List<T>;
public IEnumerator<T> GetEnumerator()
{
return _list.GetEnumerator();
}
// TODO: Implement remaining methods and properties...
}
Using this approach, you can add whatever additional logic your collection needs into your pass-through methods without needing to re-implement the basic collection functionality.
Using inheritance gives your derived class all of the methods of the base class, so if you extend a class that already implements the collection interfaces, you’ve already got all the methods!
public class InheritedList<T> : List<T>
{
// All IList<T>, ICollection<T>, and IEnumerable<T> methods
// from List<T> are already defined on InheritedList<T>
}
However, most system collection class methods are not declared as virtual
, so you cannot override them to add custom functionality.
In this chapter, we explored the concept of types and discussed how variables are specific types that can be explicitly or implicitly declared. We saw how in a statically-typed language (like C#), variables are not allowed to change types (though they can do so in a dynamically-typed language). We also discussed how casting can convert a value stored in a variable into a different type. Implicit casts can happen automatically, but explicit casts must be indicated by the programmer using a cast operator, as the cast could result in loss of precision or the throwing of an exception.
We explored how class declarations and interface declarations create new types. We saw how polymorphic mechanisms like interface implementation and inheritance allow object to be treated as (and cast to) different types. We also introduced the as
and is
casting operators, which can be used to cast or test the ability to cast, respectively. We saw that if the as
cast operator fails, it evaluates to null instead of throwing an exception. We also saw the is
type pattern expression, which simplifies a casting test and casting operation into a single expression.
Finally, we looked at how C# collections leverage the use of interfaces, inheritance, and generic types to quickly and easily make custom collection objects that interact with the C# language in well-defined ways.
Finally, we explored how messages are dispatched when polymorphism is involved. We saw that the method invoked depends on what Type we are currently treating the object as. We saw how the C# modifiers protected
, abstract
, virtual
, override
, and sealed
interacted with this message dispatch processes. We also saw how the dynamic
type could delay determining an object’s type until runtime.
Coding for Humans
As part of the strategy for tackling the challenges of the software crisis, good programming practice came to include writing clear documentation to support both the end-users who will utilize your programs, as well as other programmers (and yourself) in understanding what that code is doing so that it is easy to maintain and improve.
Some key terms to learn in this chapter are:
The key skill to learn in this chapter is how to use C# XML code comments to document the C# code you write.
Documentation refers to the written materials that accompany program code. Documentation plays multiple, and often critical roles. Broadly speaking, we split documentation into two categories based on the intended audience:
As you might expect, the goals for these two styles of documentation are very different. User documentation instructs the user on how to use the software. Developer documentation helps orient the developer so that they can effectively create, maintain, and expand the software.
Historically, documentation was printed separately from the software. This was largely due to the limited memory available on most systems. For example, the EPIC software we discussed had two publications associated with it: a User Manual, which explains how to use it, and Model Documentation which presents the mathematic models that programmers adapted to create the software. There are a few very obvious downsides to printed manuals: they take substantial resources to produce and update, and they are easily misplaced.
As memory became more accessible, it became commonplace to provide digital documentation to the users. For example, with Unix (and Linux) systems, it became commonplace to distribute digital documentation alongside the software it documented. This documentation came to be known as man pages based on the man
command (short for manual) that would open the documentation for reading. For example, to learn more about the linux search tool grep
, you would type the command:
$ man grep
Which would open the documentation distributed with the grep
tool. Man pages are written in a specific format; you can read more about it here.
While a staple of the Unix/Linux filesystem, there was no equivalent to man pages in the DOS ecosystem (the foundations of Windows) until Powershell was introduced, which has the Get-Help
tool. You can read more about it here.
However, once software began to be written with graphical user interfaces (GUIs), it became commonplace to incorporate the user documentation directly into the GUI, usually under a “Help” menu. This served a similar purpose to man pages of ensuring user documentation was always available with the software. Of course, one of the core goals of software design is to make the software so intuitive that users don’t need to reference the documentation. It is equally clear that developers often fall short of that mark, as there is a thriving market for books to teach certain software.
Not to mention the thousands of YouTube channels devoted to teaching specific programs!
Developer documentation underwent a similar transformation. Early developer documentation was often printed and placed in a three-ring binder, as Neal Stephenson describes in his novel Snow Crash: 1
Fisheye has taken what appears to be an instruction manual from the heavy black suitcase. It is a miniature three-ring binder with pages of laser-printed text. The binder is just a cheap unmarked one bought from a stationery store. In these respects, it is perfectly familiar to Him: it bears the earmarks of a high-tech product that is still under development. All technical devices require documentation of a sort, but this stuff can only be written by the techies who are doing the actual product development, and they absolutely hate it, always put the dox question off to the very last minute. Then they type up some material on a word processor, run it off on the laser printer, send the departmental secretary out for a cheap binder, and that's that.
Shortly after the time this novel was written, the internet became available to the general public, and the tools it spawned would change how software was documented forever. Increasingly, web-based tools are used to create and distribute developer documentation. Wikis, bug trackers, and autodocumentation tools quickly replaced the use of lengthy, and infrequently updated word processor files.
Neal Stephenson, “Snow Crash.” Bantam Books, 1992. ↩︎
Developer documentation often faces a challenge not present in other kinds of documents - the need to be able to display snippets of code. Ideally, we want code to be formatted in a way that preserves indentation. We also don’t want code snippets to be subject to spelling- and grammar-checks, especially auto-correct versions of these algorithms, as they will alter the snippets. Ideally, we might also apply syntax highlighting to these snippets. Accordingly, a number of textual formats have been developed to support writing text with embedded program code, and these are regularly used to present developer documentation. Let’s take a look at several of the most common.
Since its inception, HTML has been uniquely suited for developer documentation. It requires nothing more than a browser to view - a tool that nearly every computer is equipped with (in fact, most have two or three installed). And the <code>
element provides a way of styling code snippets to appear differently from the embedded text, and <pre>
can be used to preserve the snippet’s formatting. Thus:
<p>This algorithm reverses the contents of the array, <code>nums</code></p>
<pre>
<code>
for(int i = 0; i < nums.Length/2; i++) {
int tmp = nums[i];
nums[i] = nums[nums.Length - 1 - i];
nums[nums.Length - 1 - i] = tmp;
}
</code>
</pre>
Will render in a browser as:
This algorithm reverses the contents of the array, nums
for(int i = 0; i < nums.Length/2; i++) {
int tmp = nums[i];
nums[i] = nums[nums.Length - 1 - i];
nums[nums.Length - 1 - i] = tmp;
}
JavaScript and CSS libraries like highlight.js, prism, and others can provide syntax highlighting functionality without much extra work.
Of course, one of the strongest benefits of HTML is the ability to create hyperlinks between pages. This can be invaluable in documenting software, where the documentation about a particular method could include links to documentation about the classes being supplied as parameters, or being returned from the method. This allows developers to quickly navigate and find the information they need as they work with your code.
However, there is a significant amount of boilerplate involved in writing a webpage (i.e. each page needs a minimum of elements not specific to the documentation to set up the structure of the page). The extensive use of HTML elements also makes it more time-consuming to write and harder for people to read in its raw form. Markdown is a markup language developed to counter these issues. Markdown is written as plain text, with a few special formatting annotations, which indicate how it should be transformed to HTML. Some of the most common annotations are:
#
) indicates it should be a <h1>
element, two hashes (##
) indicates a <h2>
, and so on…_
) or asterisks (*
) indicates it should be wrapped in a <i>
element__
) or double asterisks (**
) indicates it should be wrapped in a <b>
element[link text](url)
, which is transformed to <a href="url">link text</a>

, which is transformed to <img alt="alt text" src="url"/>
Code snippets are indicated with backtick marks (`
). Inline code is written surrounded with single backtick marks, i.e. `int a = 1`
and in the generated HTML is wrapped in a <code>
element. Code blocks are wrapped in triple backtick marks, and in the generated HTML are enclosed in both <pre>
and <code>
elements. Thus, to generate the above HTML example, we would use:
This algorithm reverses the contents of the array, `nums`
```
for(int i = 0; i < nums.Count/2; i++) {
int tmp = nums[i];
nums[i] = nums[nums.Count - 1 - i];
nums[nums.Count - 1 - i] = tmp;
}
```
Most markdown compilers also support specifying the language (for language-specific syntax highlighting) by following the first three backticks with the language name, i.e.:
```csharp
List = new List;
```
Nearly every programming language features at least one open-source library for converting Markdown to HTML. Microsoft even includes a C# one in the Windows Community Toolkit. In addition to being faster to write than HTML, and avoiding the necessity to write boilerplate code, Markdown offers some security benefits. Because it generates only a limited set of HTML elements, which specifically excludes some most commonly employed in web-based exploits (like using <script>
elements for script injection attacks), it is often safer to allow users to contribute markdown-based content than HTML-based content. Note: this protection is dependent on the settings provided to your HTML generator - most markdown converters can be configured to allow or escape HTML elements in the markdown text
In fact, this book was written using Markdown, and then converted to HTML using the Hugo framework, a static website generator built using the Go programming language.
Additionally, chat servers like RocketChat and Discord support using markdown in posts!
GitHub even incorporates a markdown compiler into its repository displays. If your file ends in a .md
extension, GitHub will evaluate it as Markdown and display it as HTML when you navigate your repo. If your repository contains a README.md file at the top level of your project, it will also be displayed as the front page of your repository. GitHub uses an expanded list of annotations known as GitHub-flavored markdown that adds support for tables, task item lists, strikethroughs, and others.
It is best practice to include a README.md file at the top level of a project. This document provides an overview of the project, as well as helpful instructions on how it is to be used and where to go for more information. For open-source projects, you should also include a LICENSE file that contains the terms of the license the software is released under.
Extensible Markup Language (XML) is a close relative of HTML - they share the same ancestor, Standard Generalized Markup Language (SGML). It allows developers to develop their own custom markup languages based on the XML approach, i.e. the use of elements expressed via tags and attributes. XML-based languages are usually used as a data serialization format. For example, this snippet represents a serialized fictional student:
<student>
<firstName>Willie</firstName>
<lastName>Wildcat</lastName>
<wid>8888888</wid>
<degreeProgram>BCS</degreeProgram>
</student>
While XML is most known for representing data, it is one of Microsoft’s go-to tools. For example, they have used it as the basis of Extensible Application Markup Language (XAML), which is used in Windows Presentation Foundation as well as cross-platform Xamrin development. So it shouldn’t be a surprise that Microsoft also adopted it for their autodocumentation code commenting strategy. We’ll take a look at this next.
One of the biggest innovations in documenting software was the development of autodocumentation tools. These were programs that would read source code files, and combine information parsed from the code itself and information contained in code comments to generate documentation in an easy-to-distribute form (often HTML). One of the earliest examples of this approach came from the programming language Java, whose API specification was generated from the language source files using JavaDoc.
This approach meant that the language of the documentation was embedded within the source code itself, making it far easier to update the documentation as the source code was refactored. Then, every time a release of the software was built (in this case, the Java language), the documentation could be regenerated from the updated comments and source code. This made it far more likely developer documentation would be kept up-to-date.
Microsoft adopted a similar strategy for the .NET languages, known as XML comments. This approach was based on embedding XML tags into comments above classes, methods, fields, properties, structs, enums, and other code objects. These comments are set off with a triple forward slash (///
) to indicate the intent of being used for autodoc generation. Comments using double slashes (//
) and slash-asterisk notation (/* */
) are ignored in this autodoc scheme.
For example, to document an Enum, we would write:
/// <summary>
/// An enumeration of fruits used in pies
/// </summary>
public enum Fruit {
Cherry,
Apple,
Blueberry,
Peach
}
At a bare minimum, comments should include a <summary>
element containing a description of the code structure being described.
Let’s turn our attention to documenting a class:
public class Vector2 {
public float X {get; set;}
public float Y {get; set;}
public Vector2(float x, float y) {
X = x;
Y = y;
}
public void Scale(float scalar) {
X *= scalar;
Y *= scalar;
}
public float DotProduct(Vector2 other) {
return this.X * other.X + this.Y * other.Y;
}
public float Normalize() {
float magnitude = Math.Sqrt(Math.Pow(this.X, 2), Math.Pow(this.Y, 2));
if(magnitude == 0) throw new DivideByZeroException();
X /= magnitude;
Y /= magnitude;
}
}
We would want to add a <summary>
element just above the class declaration, i.e.:
/// <summary>
/// A class representing a two-element vector composed of floats
/// </summary>
Properties should be described using the <summary>
element, i.e.:
/// <summary>
/// The x component of the vector
/// </summary>
And methods should use <summary>
, plus <param>
elements to describe parameters. It has an attribute of name
that should be set to match the parameter it describes:
/// <summary>
/// Constructs a new two-element vector
/// </summary>
/// <param name="x">The X component of the new vector</param>
/// <param name="y">The Y component of the new vector</param>
The <paramref>
can be used to reference a parameter in the <summary>
:
/// <summary>
/// Scales the Vector2 by the provided <paramref name="scalar"/>
/// </summary>
/// <param name="scalar">The value to scale the vector by</param>
If a method returns a value, this should be indicated with the <returns>
element:
/// <summary>
/// Computes the dot product of this and an <paramref name="other"> vector
/// </summary>
/// <param name="other">The vector to compute a dot product with</param>
/// <returns>The dot product</returns>
And, if a method might throw an exception, this should be also indicated with the <exception>
element, which uses the cref
attribute to indicate the specific exception:
/// <summary>
/// Normalizes the vector
/// </summary>
/// <remarks>
/// This changes the length of the vector to one unit. The direction remains unchanged
/// </remarks>
/// <exception cref="System.DivideByZeroException">
/// Thrown when the length of the vector is 0.
/// </exception>
Note too, the use of the <remarks>
element in the above example to add supplemental information. The <example>
element can also be used to provide examples of using the class, method, or other code construct. There are more elements available, like <see>
and <seealso>
that generate links to other documentation, <para>
, and <list>
which are used to format text, and so on.
Of especial interest are the <code>
and <c>
elements, which format code blocks and inline code, respectively.
See the official documentation for a complete list and discussion.
Thus, our completely documented class would be:
/// <summary>
/// A class representing a two-element vector composed of floats
/// </summary>
public class Vector2 {
/// <summary>
/// The x component of the vector
/// </summary>
public float X {get; set;}
/// <summary>
/// The y component of the vector
/// </summary>
public float Y {get; set;}
/// <summary>
/// Constructs a new two-element vector
/// </summary>
/// <param name="x">The X component of the new vector</param>
/// <param name="y">The Y component of the new vector</param>
public Vector2(float x, float y) {
X = x;
Y = y;
}
/// <summary>
/// Scales the Vector2 by the provided <paramref name="scalar"/>
/// </summary>
/// <param name="scalar">The value to scale the vector by</param>
public void Scale(float scalar) {
X *= scalar;
Y *= scalar;
}
/// <summary>
/// Computes the dot product of this and an <paramref name="other"> vector
/// </summary>
/// <param name="other">The vector to compute a dot product with</param>
/// <returns>The dot product</returns>
public float DotProduct(Vector2 other) {
return this.X * other.X + this.Y * other.Y;
}
/// <summary>
/// Normalizes the vector
/// </summary>
/// <remarks>
/// This changes the length of the vector to one unit. The direction remains unchanged
/// </remarks>
/// <exception cref="System.DivideByZeroException">
/// Thrown when the length of the vector is 0.
/// </exception>
public float Normalize() {
float magnitude = Math.Sqrt(Math.Pow(this.X, 2), Math.Pow(this.Y, 2));
if(magnitude == 0) throw new DivideByZeroException();
X /= magnitude;
Y /= magnitude;
}
}
With the exception of the <remarks>
, the XML documentation elements used in the above code should be considered the minimum for best practices. That is, every Class
, Struct
, and Enum
should have a <summary>
. Every property should have a <summary>
. And every method should have a <summary>
, a <param>
for every parameter, a <returns>
if it returns a value (this can be omitted for void
) and an <exception>
for every exception it might throw.
There are multiple autodoc programs that generate documentation from XML comments embedded in C# code, including open-source Sandcastle Help File Builder and the simple Docu, as well as multiple commercial products.
However, the perhaps more important consumer of XML comments is Visual Studio, which uses these comments to power its Intellisense features, displaying text from the comments as tooltips as you edit code. This intellisense data is automatically built into DLLs built from Visual Studio, making it available in projects that utilize compiled DLLs as well.
In this chapter, we examined the need for software documentation aimed at both end-users and developers (user documentation and developer documentation respectively). We also examined some formats this documentation can be presented in: HTML, Markdown, and XML. We also discussed autodocumentation tools, which generate developer documentation from specially-formatted comments in our code files.
We examined the C# approach to autodocumentation, using Microsoft’s XML code comments formatting strategy. We explored how this data is used by Visual Studio to power its Intellisense features, and provide useful information to programmers as they work with constructs like classes, properties, and methods. For this reason, as well as the ability to produce HTML-based documentation using an autodocumentation tool, it is best practice to use XML code comments in all your C# programs.
Is it Working Yet?
A critical part of the software development process is ensuring the software works! We mentioned earlier that it is possible to logically prove that software works by constructing a state transition table for the program, but once a program reaches a certain size this strategy becomes less feasible. Similarly, it is possible to model a program mathematically and construct a theorem that proves it will perform as intended. But in practice, most software is validated through some form of testing. This chapter will discuss the process of testing object-oriented systems.
Some key terms to learn in this chapter are:
The key skill to learn in this chapter is how to write C# unit test code using xUnit and the Visual Studio Test Explorer.
As you’ve developed programs, you’ve probably run them, supplied input, and observed if what happened was what you wanted. This process is known as informal testing. It’s informal, because you don’t have a set procedure you follow, i.e. what specific inputs to use, and what results to expect. Formal testing adds that structure. In a formal test, you would have a written procedure to follow, which specifies exactly what inputs to supply, and what results should be expected. This written procedure is known as a test plan.
Historically, the test plan was often developed at the same time as the design for the software (but before the actual programming). The programmers would then build the software to match the design, and the completed software and the test plan would be passed onto a testing team that would follow the step-by-step testing procedures laid out in the testing plan. When a test failed, they would make a detailed record of the failure, and the software would be sent back to the programmers to fix.
This model of software development has often been referred to as the ‘waterfall model’ as each task depends on the one before it:
Unfortunately, as this model is often implemented, the programmers responsible for writing the software are reassigned to other projects as the software moves into the testing phase. Rather than employ valuable programmers as testers, most companies will hire less expensive workers to carry out the testing. So either a skeleton crew of programmers is left to fix any errors that are found during the tests, or these are passed back to programmers already deeply involved in a new project.
The costs involved in fixing software errors also grow larger the longer the error exists in the software. The table below comes from a NASA report of software error costs throughout the project life cycle: 1
It is clear from the graph and the paper that the cost to fix a software error grows exponentially if the fix is delayed. You probably have instances in your own experience that also speak to this - have you ever had a bug in a program you didn’t realize was there until your project was nearly complete? How hard was it to fix, compared to an error you found and fixed right away?
It was realizations like these, along with growing computing power that led to the development of automated testing, which we’ll discuss next.
Jonette M. Stecklein, Jim Dabney, Brandon Dick, Bill Haskins, Randy Lovell, and Gregory Maroney. “Error Cost Escalation Through the Project Life Cycle”, NASA, June 19, 2014. ↩︎
Automated testing is the practice of using a program to test another program. Much as a compiler is a program that translates a program from a higher-order language into a lower-level form, a test program executes a test plan against the program being tested. And much like you must supply the program to be compiled, for automated testing you must supply the tests that need to be executed. In many ways the process of writing automated tests is like writing a manual test plan - you are writing instructions of what to try, and what the results should be. The difference is with a manual test plan, you are writing these instructions for a human. With an automated test plan, you are writing them for a program.
Automated tests are typically categorized as unit, integration, and system tests:
The complexity of writing tests scales with each of these categories. Emphasis is usually put on writing unit tests, especially as the classes they test are written. By testing these classes early, errors can be located and fixed quickly.
Writing tests is in many ways just as challenging and creative an endeavor as writing programs. Tests usually consist of invoking some portion of program code, and then using assertions to determine that the actual results match the expected results. The result of these assertions are typically reported on a per-test basis, which makes it easy to see where your program is not behaving as expected.
Consider a class that is a software control system for a kitchen stove. It might have properties for four burners, which correspond to what heat output they are currently set to. Let’s assume this is as an integer between 0 (off) and 5 (high). When we first construct this class, we’d probably expect them all to be off! A test to verify that expectation would be:
public class StoveTests {
[Fact]
public void BurnersShouldBeOffAtInitialization() {
Stove stove = new Stove();
Assert.Equal(0, stove.BurnerOne);
Assert.Equal(0, stove.BurnerTwo);
Assert.Equal(0, stove.BurnerThree);
Assert.Equal(0, stove.BurnerFour);
}
}
Here we’ve written the test using the C# xUnit test framework, which is being adopted by Microsoft as their preferred framework, replacing the nUnit test framework (there are many other C# test frameworks, but these two are the most used).
Notice that the test is simply a method, defined in a class. This is very common for test frameworks, which tend to be written using the same programming language the programs they test are written in (which makes it easier for one programmer to write both the code unit and the code to test it). Above the class appears an attribute - [Fact]
. Attributes are a way of supplying metadata within C# code. This metadata can be used by the compiler and other programs to determine how it works with your code. In this case, it indicates to the xUnit test runner that this method is a test.
Inside the method, we create an instance of stove, and then use the Assert.Equal<T>(T expected, T actual)
method to determine that the actual and expected values match. If they do, the assertion is marked as passing, and the test runner will display this pass. If it fails, the test runner will report the failure, along with details to help find and fix the problem (what value was expected, what it actually was, and which test contained the assertion).
The xUnit framework provides for two kinds of tests, Facts, which are written as functions that have no parameters, and Theories, which do have parameters. The values for these parameters are supplied with another attribute, typically [InlineData]
. For example, we might test that when we set a burner to a setting within the valid 0-5 range, it is set to that value:
[Theory]
[InlineData(0)]
[InlineData(1)]
[InlineData(2)]
[InlineData(3)]
[InlineData(4)]
[InlineData(5)]
public void ShouldBeAbleToSetBurnerOneToValidRange(int setting) {
Stove stove = new Stove();
stove.BurnerOne = setting;
Assert.Equal(setting, stove.BurnerOne);
}
The values in the parentheses of the InlineData
are the values supplied to the parameter list of the theory method. Thus, this test is actually six tests; each test makes sure that one of the settings is working. We could have done all six as separate assignments and assertions within a single fact, but using a theory means that if only one of these settings doesn’t work, we will see that one test fail while the others pass. This level of specificity can be very helpful in finding errors.
So far our tests cover the expected behavior of our stove. But where tests really prove their worth is with the edge cases - those things we as programmers don’t anticipate. For example, what happens if we try setting our range to a setting above 5? Should it simply clamp at 5? Should it not change from its current setting? Or should it shut itself off entirely because its user is clearly a pyromaniac bent on burning down their house? If the specification for our program doesn’t say, it is up to us to decide. Let’s say we expect it to be clamped at 5:
[Theory]
[InlineData(6)]
[InlineData(18)]
[InlineData(1000000)]
public void BurnerOneShouldNotExceedASettingOfFive(int setting) {
Stove stove = new Stove();
stove.BurnerOne = setting;
Assert.Equal(5, stove.BurnerOne);
}
Note that we don’t need to exhaustively test all numbers above 5 - it is sufficient to provide a representative sample, ideally the first value past 5 (6), and a few others. Also, now that we have defined our expected behavior, we should make sure the documentation of our BurnerOne property matches it:
/// <summary>
/// The setting of burner one
/// </summary>
/// <value>
/// An integer between 0 (off) and 5 (high)
/// </value>
/// <remarks>
/// If a value higher than 5 is attempted, the burner will be set to 5
/// </remarks>
public int BurnerOne {get; set;}
This way, other programmers (and ourselves, if we visit this code years later) will know what the expected behavior is. We’d also want to test the other edge cases: i.e. when the burner is set to a negative number.
Recognizing and testing for edge cases is a critical aspect of test writing. But it is also a difficult skill to develop, as we have a tendency to focus on expected values and expected use-cases for our software. But most serious errors occur when values outside these expectations are introduced. Also, remember special values, like double.PositiveInfinity
, double.NegativeInfinity
, and double.NaN
.
Like most testing frameworks, the xUnit framework provides a host of specialized assertions.
For example, xUnit provides two boolean assertions:
Assert.True(bool actual)
, asserts that the value supplied to the actual
parameter is true
.Assert.False(bool actual)
, asserts that the value supplied to the actual
parameter is false
.While it may be tempting to use Assert.True()
for all tests, i.e. Assert.True(stove.BurnerOne == 0)
, it is better practice to use the specialized assertion that best matches the situation, in this case Assert.Equal<T>(T expected, T actual)
as a failing test will supply more details.
The Assert.Equal<T>(T expected, T actual)
is the workhorse of the assertion library. Notice it is a template method, so it can be used with any type that is comparable (which is pretty much everything possible in C#). It also has an override, Assert.Equal<T>(T expected, T actual, int precision)
which allows you to specify the precision for floating-point numbers. Remember that floating point error can cause two calculated values to be slightly different than one another; specifying a precision allows you to say just how close the expected an actual value needs to be to be considered ’equal’ for the purposes of the test.
Like most assertions, it is paired with an opposite, Assert.NotEqual<T>(T expected, T actual)
, which also has an override for supplying precision.
With numeric values, it can be handy to determine if the value falls within a range:
Assert.InRange<T>(T actual, T low, T high)
asserts actual
falls between low
and high
(inclusive), andAssert.NotInRange<T>(T actual, T low, T high)
asserts actual
does not fall between low
and high
(inclusive)There are special assertions to deal with null references:
Assert.Null(object object)
asserts the supplied object
is null, andAssert.NotNull(object object)
asserts the supplied object
is not nullIn addition, two objects may be considered equal, but may or may not the same object (i.e. not referencing the same memory). This can be asserted with:
Assert.Same(object expected, object actual)
asserts the expected
and actual
object references are to the same object, whileAssert.NotSame(object expected, object actual)
asserts the expected
and actual
object references are not the same objectAt times, you may want to assure it is possible to cast an object to a specific type. This can be done with:
Assert.IsAssignableFrom<T>(object obj)
Where T
is the type to cast into.At other times, you may want to assert that the object is exactly the type you expect (.e. T
is not an interface or base class of obj
). That can be done with:
Assert.IsType<T>(object obj)
There are a host of assertions for working with collections:
Assert.Empty(IEnumerable collection)
asserts that the collection is empty, whileAssert.NotEmpty(IEnumerable collection)
asserts that it is not emptyAssert.Contains<T>(T expected, IEnumerable<T> collection)
asserts that the expected
item is found in the collection
, whileAssert.DoesNotContain<T>(T expected, IEnumerable<T> collection)
asserts the expected
item is not found in the collection
In addition to the simple equality check form of Assert.Contains<T>()
and Assert.DoesNotContain<T>()
, there is a version that takes a filter expression (an expression that evaluates to true
or false
indicating that an item was found) written as a lambda expression. For example, to determine if a list of Fruit
contains an Orange
we could use:
List<Fruit> fruits = new List<Fruit>() {
new Orange(),
new Apple(),
new Grape(),
new Banana() {Overripe = true}
};
Assert.Contains(fruits, item => item is Orange);
The expression item is Orange
is run on each item in fruits
until it evaluates to true
or we run out of fruit to check. We can also supply curly braces with a return statement if we need to perform more complex logic:
Assert.Contains(fruits, item => {
if(item is Banana banana) {
if(banana.Overripe) return true;
}
return false;
});
Here we only return true
for overripe bananas. Using Assert.Contains()
with a filter expression can be useful for checking that expected items are in a collection. To check that the collection also does not contain unexpected items, we can test the length of the collection against the expected number of values, i.e.:
Assert.True(fruits.Count == 4, $"Expected 4 items but found {fruits.Count}");
Here we use the Assert.True()
overload that allows a custom message when the test fails.
Finally, Assert.Collection<T>(IEnumerable<T> collection, Action<T>[] inspectors)
can apply specific inspectors against each item in a collection. Using the same fruits list as above:
Assert.Collection(fruits,
item => Assert.IsType<Orange>(item),
item => Assert.IsType<Apple>(item),
item => Assert.IsType<Grape>(item),
item => {
Assert.IsType<Banana>(item);
Assert.True(((Banana)item).Overripe);
}
);
Here we use an Action<T> delegate to map each item in the collection to an assertion. These actions are written using [lambda expressions], which are conceptually functions.
The number of actions should correspond to the expected size of the collection, and the items supplied to the actions must be in the same order as they appear in the collection. Thus, the Assert.Collection()
is a good choice when the collection is expected to always be in the same order, while the Assert.Contains()
approach allows for variation in the ordering.
Error assertions also use Action<T> delegate, in this case to execute code that is expected to throw an exception, i.e. we could test for System.DivideByZeroException
with:
[Fact]
public void DivisionByZeroShouldThrowException() {
Assert.Throws(System.DivideByZeroException, () => {
var tmp = 10.0/0.0;
});
}
Note how we place the code that is expected to throw the exception inside the body of the Action? This allows the assertion to wrap it in a try/catch
internally. The exception-related assertions are:
Assert.Throws(System.Exception expectedException, Action testCode)
asserts the supplied expectedException
is thrown when testCode
is executedAssert.Throws<T>(Action testCode) where T : System.Exception
the templated version of the aboveAssert.ThrowsAny<T>(Action testCode) where T: System.Exception
asserts that any exception will be thrown by the testCode
when executedThere are also similar assertions for exceptions being thrown in asynchronous code. These operate nearly identically, except instead of supplying an Action, we supply a Task:
Assert.ThrowsAsync<T>(Task testCode) where T : System.Exception
asserts the supplied exception type T
is thrown when testCode
is executedAssert.ThrowsAnyAsync<T>(Task testCode) where T: System.Exception
is the asynchronous version of the previous assertion, asserts the supplied exception type T
will be thrown some point after testCode
is executed.Asserting that events will be thrown also involves Action<T> delegate, and is a bit more involved as it requires three. The first delegate is for attaching the assertion-supplied event handler to the listener, the second for detaching it, and the third is for triggering the event with the actual code involved.
For example, assume we have a class, Emailer
, with a method SendEmail(string address, string body)
that should have an event handler EmailSent
whose event args are EmailSentEventArgs
. We could test that this class was actually raising this event with:
[Fact]
public void EmailerShouldRaiseEmailSentWhenSendingEmails()
{
string address = "test@test.com";
string body = "this is a test";
Emailer emailer = new Emailer();
Assert.Raises<EmailSentEventArgs>(
listener => emailer += listener, // This action attaches the listener
listener => emailer -= listener, // This action detaches the listener
() => {
emailer.SendEmail(address, body);
}
)
}
The various event assertions are:
Assert.Raises<T>(Action attach, Action detach, Action testCode)
Assert.RaisesAny<T>(Action attach, Action detach, Action testCode)
There are also similar assertions for events being raised by asynchronous code. These operate nearly identically, except instead of supplying an Action, we supply a Task:
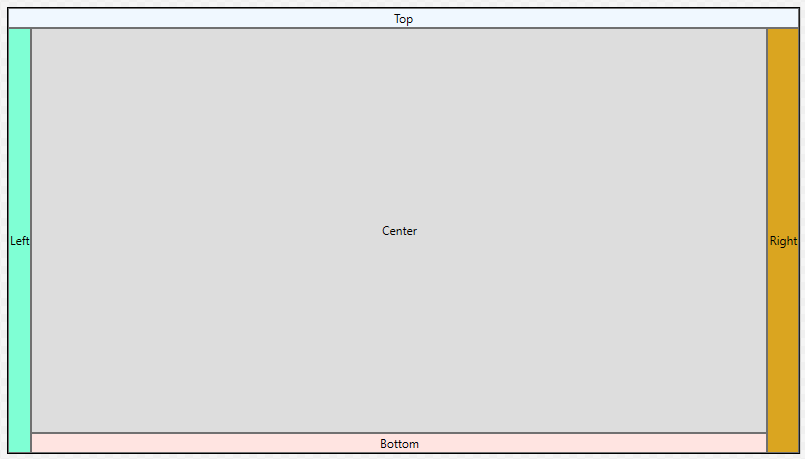
Assert.RaisesAsync<T>(Action attach, Action detach, Task testCode)
Assert.RaisesAnyAsync<T>(Action attach, Action detach, Task testCode)
For examples of these assertions, see section 2.3.10
XUnit does not directly support old-style events - those with a named event handler like CollectionChangedEventHandler
, only those that use the templated form: EventHandler<CustomEventArgs>
(with the exception of the PropertyChanged
event, discussed below). For strategies to handle the older-style events, see section 2.3.11
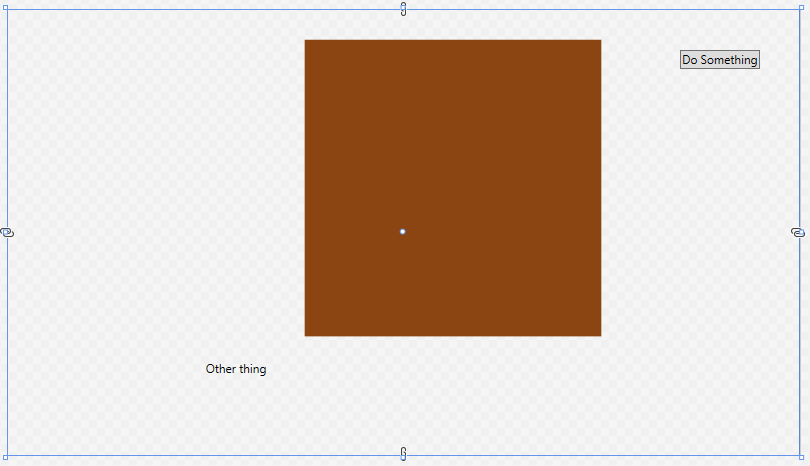
Because C# has deeply integrated the idea of ‘Property Change’ notifications as part of its GUI frameworks (which we’ll cover in a later chapter), it makes sense to have a special assertion to deal with this notification. Hence, the Assert.PropertyChanged(INotifyPropertyChanged @object, string propertyName, Action testCode)
. Using it is simple - supply the object that implements the INotifyPropertyChanged
interface as the first argument, the name of the property that will be changing as the second, and the Action delegate that will trigger the change as the third.
For example, if we had a Profile
object with a StatusMessage
property that we knew should trigger a notification when it changes, we could write our test as:
[Fact]
public void ProfileShouldNotifyOfStatusMessageChanges() {
Profile testProfile = new Profile();
Assert.PropertyChanged(testProfile, "StatusMessage", () => testProfile.StatusMessage = "Hard at work");
}
There is also a similar assertion for testing if a property is changed in asynchronous code. This operates nearly identically, except instead of supplying an Action, we supply a Task:
Assert.PropertyChangedAsync(INotifyPropertyChanged @object, string propertyName, Task testCode)
One of the most important ideas behind unit testing is the idea that you are testing an object in isolation from other objects (This is in direct contrast to integration testing, where you are interested in how objects are working together).
But how do we test a class that has a strong dependency on another class? Let’s consider the case of an Automated Teller Machine (ATM). If we designed its control system using an object-oriented language, one natural architecture would be to have classes representing the cash dispenser, card reader, keyboard, display, and user’s bank accounts. Coordinating each of these we might have a central object, representing the entire ATM:
Unit testing most of these classes is straightforward, but how do we unit test the ATM class? It has dependencies on each of the other classes. If we used normal instances of those, we’d have no idea if the test was failing due to the ATM class or its dependency. This is where mock objects come into play.
We start by replacing each of the dependencies with an interface using the same method signatures, and we pass the dependencies through the ATM constructor. We make sure our existing classes implement the interface, and pass them into the ATM when we create it. Thus, this step doesn’t change much about how our program operates - we’re still using the same classes to do the same things.
But in our unit tests for the ATM
class, we can create new classes that implement the interfaces and pass them into the ATM instance we are testing. These are our mock classes, because they “fill in” for the real classes. Typically, a mock class is much simpler than a real class, and exposes information we might need in our test. For example, a MockDisplay
class might look like:
internal class MockDisplay :IDisplay
{
public string LastTextDisplayed {get; set;}
public void DisplayText(string text)
{
LastTextDisplayed = text;
}
}
Note that our mock class implements the required method, DisplayText
, but in a very different way than a real display would - it just holds onto the string and makes it accessible with a public property. That way, we could check its value in a test:
[fact]
public void ShouldDisplayGreetingOnStartup()
{
MockDisplay md = new MockDisplay();
MockKeyboard mk = new MockKeyboard();
MockCardReader mcr= new MockCardReader();
MockCashDispenser mcd = new MockCashDispenser();
Atm atm = new Atm(md, mk, mcr, mcd);
Assert.Equal("Hello ATM!", md.LastTextDisplayed);
}
Given our knowledge of C#, the only way md.LastTextDisplayed
would be the string specified was if the Atm
class asked it to display the message when it was constructed. Thus, we know it will do the same with the real DisplayScreen
class. And if we have also thoroughly unit tested the DisplayScreen
class, then we have a strong basis for believing our system is built correctly.
This approach also allows us to test things that would normally be very difficult to - for example, we can write a method to have our MockCardReader
trigger a CardInserted
event:
internal class MockCardReader : ICardReader
{
public event EventHandler<CardInsertedEventArgs> CardInserted;
public void TriggerCardInserted()
{
CardInserted.Invoke(this, new CardInsertedEventArgs());
}
}
Which allows us to check that the ATM prompts a user for a PIN once a card is inserted:
[Fact]
public void ShouldPromptForPinOnCardInsert()
{
MockDisplay md = new MockDisplay();
MockKeyboard mk = new MockKeyboard();
MockCardReader mcr= new MockCardReader();
MockCashDispenser mcd = new MockCashDispenser();
Atm atm = new Atm(md, mk, mcr, mcd);
mcr.TriggerCardInserted();
Assert.Equal("Please enter your PIN:", md.LastTextDisplayed);
}
Using mock objects like this can greatly simplify the test-writing process, and improve the quality and robustness of your unit tests.
Tests are usually run with a test runner, a program that will execute the test code against the code to be tested. The exact mechanism involved depends on the testing framework.
The xUnit framework is offered as a set of Nuget packages:
xunit
package contains the library code defining the Assertion
class as well as the [Fact]
and [Test]
attributes.xunit.runner.visualstudio
package contains the actual test runnerAs with other aspects of the .NET framework, the tools can be used at either the command line, or though Visual Studio integrations. The xunit documentation describes the command line approach thoroughly, so we won’t belabor it here. But be aware, if you want to do development in a Linux or Unix environment, you must use the command line, as there is no version of Visual Studio available for those platforms (there is however, a version available for the Mac OS).
When building tests with Visual Studio, you will typically begin by adding an xUnit Test Project to your existing solution. Using the wizard will automatically incorporate the necessary Nuget packages into the project. However, you will need to add the project to be tested to the Dependencies list of the test project to give it access to the assembly to be tested. You do this by right-clicking the ‘Dependencies’ entry under the Test Project in Visual Studio, choosing “Add Project Reference”, and in the dialog that pops up, checking the checkbox next to the name of the project you are testing:
To explore and run your tests, you can open the Test Explorer from the “Test” menu. If no tests appear, you may need to build the test project. This can be done by right-clicking the test project in the Solution Explorer and selecting “Build”, or by clicking the “Run All” button in the Test Explorer. The “Run All” button will run every test in the suite. Alternatively, you can run individual tests by clicking on them, and clicking the “Run” button.
As tests complete, the will report their status - pass or fail - indicated by a green checkmark or red x next to the test name, as well as the time it took to run the test. There will also be a summary available with details about any failures that can be accessed by clicking the test name.
Occasionally, your tests may not seem to finish, but get stuck running. If this happens, check the output panel, switching it from “build” to “tests”. Most likely your test process crashed because of an error in your test code, and the output reporting that error will be reported there.
It is a good idea to run tests you’ve written previously as you add to or refactor your code. This practice is known as regression testing, and can help you identify errors your changes introduce that break what had previously been working code. This is also one of the strongest arguments for writing test code rather than performing ad-hoc testing; automated tests are easy to repeat.
In this chapter we learned about testing, both manually using test plans and automatically using a testing framework. We saw how the cost of fixing errors rises exponentially with how long they go undiscovered. We discussed how writing automated tests during the programming phase can help uncover these errors earlier, and how regression testing can help us find new errors introduced while adding to our programs.
We learned how to use xUnit and Visual Studio’s Test Explorer to write and run tests on .NET programs. We explored a good chunk of xUnit’s assertion library. We saw how to get Visual Studio to analyze our tests for code coverage, discussed this metric’s value to evaluate our tests. We also explored mutation testing, and saw how it can help improve our tests.
As you move forward as a software developer, you’ll want to incorporate testing into your code-writing efforts.
The term test code coverage refers to how much of your program’s code is executed as your tests run. It is a useful metric for evaluating the depth of your test, if not necessarily the quality. Basically, if your code is not executed in the test framework, it is not tested in any way. If it is executed, then at least some tests are looking at it. So aiming for a high code coverage is a good starting point for writing tests.
Much like Visual Studio provides a Test Explorer for running tests, it provides support for analyzing test coverage. We can access this from the “Test” menu, where we select the “Analyze Code Coverage for All Tests”.
This will build and run all our tests, and as they run it will collect data about how many blocks of code are or are not executed. The results appear in the Code Coverage Results panel:
Be aware that there will always be some blocks that are not picked up in this analysis, so it is typical to shoot for a high percentage.
While test code coverage is a good starting point for evaluating your tests, it is simply a measure of quantity, not quality. It is easily possible for you to have all of your code covered by tests, but still miss errors. You need to carefully consider the edge cases - those unexpected and unanticipated ways your code might end up being used.
At this point you may be asking how to determine if your tests are good. Mutation testing is one way of evaluating the quality of your tests. Effectively, mutation testing is a strategy that mutates your program, and then runs your tests. If the test fails against the mutated code, this suggests your test is good.
As a simplistic example, take this extremely simple class:
public void Doll
{
public string Name {get;} = "Molly";
}
A mutation might change it to:
public void Doll
{
public string Name {get;} = "Mollycoddle";
}
We would expect that the test TheDollsNameIsAlwaysMolly
would fail due to this mutation. If it doesn’t, we probably need to revisit our test. Here is an example of a test that would both normally pass, and pass with this mutation. See if you can spot the problem:
[Fact]
public void TheDollsNameIsAlwaysMolly()
{
Doll doll = new Doll();
Assert.Contains(doll.Name, "Molly");
}
Mutation testing is done by a special testing tool that uses reflection to understand and alter the classes being tested in your unit tests. In C#, we use Stryker.NET.
As with code coverage, mutation testing can’t provide all the answers. But it does help ensure that our programs and the tests we write of them are more robust.
The Standard Model of Object-Orientation
As software systems became more complex, it became harder to talk and reason about them. Unified Modeling Language (UML) attempted to correct for this by providing a visual, diagrammatic approach to communicate the structure and function of a program. If a picture is worth a thousand words, a UML diagram might be worth a thousand lines of code…
Some key terms to learn in this chapter are:
The key skill to learn in this chapter is how to draw UML class diagrams.
Unified Modeling Language (UML) was introduced to create a standardized way of visualizing a software system design. It was developed by Grady Booch, Ivar Jacobson, and James Rumbah at Rational Software in the mid-nineties. It was adopted as a standard by the Object Management Group in 1997, and also by the International Organization for Standardization (ISO) as an approved ISO standard in 2005.
The UML standard actually provides many different kinds of diagrams for describing a software system - both structure and behavior:
The full UML specification is 754 pages long, so there is a lot of information packed into it. For the purposes of this class, we’re focusing on a single kind of diagram - the class diagram.
UML class diagrams are largely composed of boxes - basically a rectangular border containing text. UML class diagrams use boxes to represent units of code - i.e. classes, structs, and enumerations. These boxes are broken into compartments. For example, an Enum
is broken into two compartments:
UML is intended to be language-agnostic. But we often find ourselves in situations where we want to convey language-specific ideas, and the UML specification leaves room for this with stereotypes. Stereotypes consist of text enclosed in double less than and greater than symbols. In the example above, we indicate the box represents an enumeration with the $ \texttt{<<enum>>}$ stereotype.
A second basic building block for UML diagrams is a typed element. Typed elements (as you might expect from the name) have a type. Fields and parameters are typed elements, as are method parameters and return values.
The pattern for defining a typed element is:
$$ \texttt{[visibility] element : type [constraint]} $$The optional $\texttt{[visibility]}$ indicates the visibility of the element, the $\texttt{element}$ is the name of the typed element, and the $\texttt{type}$ is its type, and the $\texttt{[constraint]}$ is an optional constraint.
In UML visibility (what we would call access level in C#) is indicated with symbols, i.e.:
public
private
protected
I.e. the field:
protected int Size;
Would be expressed:
$$ \texttt{# Size : int} $$A typed element can include a constraint indicating some restriction for the element. The constraints are contained in a pair of curly braces after the typed element, and follow the pattern:
$$ \texttt{ {element: boolean expression} } $$For example:
$$ \texttt{- age: int {age: >= 0}} $$Indicates the private variable age
must be greater than or equal to 0.
In a UML class diagram, individual classes are represented with a box divided into three compartments, each of which is for displaying specific information:
The first compartment identifies the class - it contains the name of the class. The second compartment holds the attributes of the class (in C#, these are the fields and properties). And the third compartment holds the operations of the class (in C#, these are the methods).
In the diagram above, we can see the Fruit
class modeled on the right side.
The attributes in UML represent the state of an object. For C#, this would correspond to the fields and properties of the class.
We indicate fields with a typed element, i.e. in the example above, the blended
field is represented with:
Indicating it should be declared private
with the type bool
.
For properties, we add a stereotype containing either get
, set
, or both. I.e. if we were to expose the private field bool with a public accessor, we would add a line to our class diagram with:
In C#, properties are technically methods. But we use the same syntax to utilize them as we do fields, and they serve the same role - to expose aspects of the class state. So for the purposes of this class we’ll classify them as attributes.
The operators in UML represent the behavior of the object, i.e. the methods we can invoke upon it. These are declared using the pattern:
$$ \texttt{visibility name([parameter list])[:return type]} $$The $\texttt{[visibility]}$ uses the same symbols as typed elements, with the same correspondences. The $\texttt{name}$ is the name of the method, and the $\texttt{[parameter list]}$ is a comma-separated list of typed elements, corresponding to the parameters. The $\texttt{[:return type]}$ indicates the return type for the method (it can be omitted for void).
Thus, in the example above, the protected method Blend
has no parameters and returns a string. Similarly, the method:
public int Add(int a, int b)
{
return a + b;
}
Would be expressed:
$$ \texttt{+Add(a:int, b:int):int} $$In UML, we indicate a class is static by underlining its name in the first compartment of the class diagram. We can similarly indicate static operators and methods is static by underlining the entire line referring to them.
To indicate a class is abstract, we italicize its name. Abstract methods are also indicated by italicizing the entire line referring to them.
Class diagrams also express the associations between classes by drawing lines between the boxes representing them.
There are two basic types of associations we model with UML: has-a and is-a associations. We break these into two further categories, based on the strength of the association, which is either strong or weak. These associations are:
Association Name | Association Type |
---|---|
Realization | weak is-a |
Generalization | strong is-a |
Aggregation | weak has-a |
Composition | strong has-a |
Is-a associations indicate a relationship where one class is a instance of another class. Thus, these associations represent polymorphism, where a class can be treated as another class, i.e. it has both its own, and the associated classes’ types.
Realization refers to making an interface “real” by implementing the methods it defines. For C#, this corresponds to a class that is implementing an Interface
. We call this a is-a relationship, because the class is treated as being the type of the Interface
. It is also a weak relationship as the same interface can be implemented by otherwise unrelated classes. In UML, realization is indicated by a dashed arrow in the direction of implementation:
Generalization refers to extracting the shared parts from different classes to make a general base class of what they have in common. For C# this corresponds to inheritance. We call this a strong is-a relationship, because the class has all the same state and behavior as the base class. In UML, realization is indicated by a solid arrow in the direction of inheritance:
Also notice that we show that Fruit
and its Blend()
method are abstract by italicizing them.
Has-a associations indicates that a class holds one or more references to instances of another class. In C#, this corresponds to having a variable or collection with the type of the associated class. This is true for both kinds of has-a associations. The difference between the two is how strong the association is.
Aggregation refers to collecting references to other classes. As the aggregating class has references to the other classes, we call this a has-a relationship. It is considered weak because the aggregated classes are only collected by the aggregating class, and can exist on their own. It is indicated in UML by a solid line from the aggregating class to the one it aggregates, with an open diamond “fletching” on the opposite site of the arrow (the arrowhead is optional).
Composition refers to assembling a class from other classes, “composing” it. As the composed class has references to the other classes, we call this a has-a relationship. However, the composing class typically creates the instances of the classes composing it, and they are likewise destroyed when the composing class is destroyed. For this reason, we call it a strong relationship. It is indicated in UML by a solid line from the composing class to those it is composed of, with a solid diamond “fletching” on the opposite side of the arrow (the arrowhead is optional).
Aggregation and composition are commonly confused, especially given they both are defined by holding a variable or collection of another class type. An analogy I like to use to help students reason about the difference is this:
Aggregation is like a shopping cart. When you go shopping, you place groceries into the shopping cart, and it holds them as you push it around the store. Thus, a ShoppingCart
class might have a List<Grocery>
named Contents
, and you would add the items to it. When you reach the checkout, you would then take the items back out. The individual Grocery
objects existed before they were aggregated by the ShoppingCart
, and also after they were removed from it.
In contrast, Composition is like an organism. Say we create a class representing a Dog
. It might be composed of classes like Tongue
, Ear
, Leg
, and Tail
. We would probably construct these in the Dog
class’s constructor, and when we dispose of the Dog
object, we wouldn’t expect these component classes to stick around.
With aggregation and composition, we may also place numbers on either end of the association, indicating the number of objects involved. We call these numbers the multiplicity of the association.
For example, the Frog
class in the composition example has two instances of front and rear legs, so we indicate that each Frog
instance (by a 1
on the Frog side of the association) has exactly two (by the 2
on the leg side of the association) legs. The tongue has a 1
to 1
multiplicity as each frog has one tongue.
Multiplicities can also be represented as a range (indicated by the start and end of the range separated by ..
). We see this in the ShoppingCart
example above, where the count of GroceryItems
in the cart ranges from 0 to infinity (infinity is indicated by an asterisk *
).
Generalization and realization are always one-to-one multiplicities, so multiplicities are typically omitted for these associations.
One of the many tools we can use to create UML diagrams is Microsoft Visio. For Kansas State University Computer Science students, this can be downloaded through your Azure Student Portal.
Visio is a vector graphics editor for creating flowcharts and diagrams. it comes preloaded with a UML class diagram template, which can be selected when creating a new file:
Class diagrams are built by dragging shapes from the shape toolbox onto the drawing surface. Notice that the shapes include classes, interfaces, enumerations, and all the associations we have discussed. Once in the drawing surface, these can be resized and edited.
Right-clicking on an association will open a context menu, allowing you to turn on multiplicities. These can be edited by double-clicking on them. Unneeded multiplicities can be deleted.
To export a Visio project in PDF or other form, choose the “Export” option from the file menu.
In this section, we learned about UML class diagrams, a language-agnostic approach to visualizing the structure of an object-oriented software system. We saw how individual classes are represented by boxes divided into three compartments; the first for the identity of the class, the second for its attributes, and the third for its operators. We learned that italics are used to indicate abstract classes and operators, and underlining static classes, attributes, and operators.
We also saw how associations between classes can be represented by arrows with specific characteristics, and examined four of these in detail: aggregation, composition, generalization, and realization. We also learned how multiplicities can show the number of instances involved in these associations.
Finally, we saw how C# classes, interfaces, and enumerations are modeled using UML. We saw how the stereotype can be used to indicate language-specific features like C# properties. We also looked at creating UML Class diagrams using Microsoft Visio.
For a Sharper Language
Throughout the earlier chapters, we’ve focused on the theoretical aspects of Object-Orientation, and discussed how those are embodied in the C# language. Before we close this section though, it would be a good idea to recognize that C# is not just an object-oriented language, but actually draws upon many ideas and syntax approaches that are not very object-oriented at all!
In this chapter, we’ll examine many aspects of C# that fall outside of the object-oriented mold. Understanding how and why these constructs have entered C# will help make you a better .NET programmer, and hopefully alleviate any confusion you might have.
Some key terms to learn in this chapter are:
static
keywordIt is important to understand that C# is a production language - i.e. one intended to be used to create real-world software. To support this goal, the developers of the C# language have made many efforts to make C# code easier to write, read, and reason about. Each new version of C# has added additional syntax and features to make the language more powerful and easier to use. In some cases, these are entirely new things the language couldn’t do previously, and in others they are syntactic sugar - a kind of abbreviation of an existing syntax. Consider the following if
statement:
if(someTestFlag)
{
DoThing();
}
else
{
DoOtherThing();
}
As the branches only execute a single expression each, this can be abbreviated as:
if(someTestFlag) DoThing();
else DoOtherThing();
Similarly, Visual Studio has evolved side-by-side with the language. For example, you have probably come to like Intellisense - Visual Studio’s ability to offer descriptions of classes and methods as you type them, as well as code completion, where it offers to complete the statement you have been typing with a likely target. As we mentioned in our section on learning programming, these powerful features can be great for a professional, but can interfere with a novice programmer’s learning.
Let’s take a look at some of the features of C# that we haven’t examined in detail yet.
To start, let’s revisit one more keyword that causes a lot of confusion for new programmers, static
. We mentioned it briefly when talking about encapsulation and modules, and said we could mimic a module in C# with a static class. We offered this example:
/// <summary>
/// A library of vector math functions
/// </summary>
public static class VectorMath
{
/// <summary>
/// Computes the dot product of two vectors
/// </summary>
public static double DotProduct(Vector3 a, Vector3 b) {
return a.x * b.x + a.y * b.y + a.z * b.z;
}
/// <summary>
/// Computes the magnitude of a vector
/// </summary>
public static double Magnitude(Vector3 a) {
return Math.Sqrt(Math.Pow(a.x, 2) + Math.Pow(a.y, 2) + Math.Pow(a.z, 2));
}
}
You’ve probably worked with the C# Math
class before, which is declared the same way - as a static class containing static methods. For example, to compute 8 cubed, you might have used:
Math.Pow(8, 3);
Notice how we didn’t construct an object from the Math
class? In C# we cannot construct static classes - they simply exist as a container for static fields and methods. If you’re thinking that doesn’t sound very object-oriented, you’re absolutely right. The static
keyword allows for some very non-object-oriented behavior more in line with imperative languages like C. Bringing the idea of static
classes into C# let programmers with an imperative background use similar techniques to what they were used to, which is why static
classes have been a part of C# from the beginning.
You can also create static
methods within a non-static class. For example, we could refactor our Vector3
class to add a static DotProduct()
within it:
public struct Vector3 {
public double X {get; set;}
public double Y {get; set;}
public double Z {get; set;}
/// <summary>
/// Creates a new Vector3 object
/// </summary>
public Vector3(double x, double y, double z) {
this.X = x;
this.Y = y;
this.Z = z;
}
/// <summary>
/// Computes the dot product of this vector and another one
/// </summary>
/// <param name="other">The other vector</param>
public double DotProduct(Vector3 other) {
return this.X * other.X + this.Y * other.Y + this.Z * other.Z;
}
/// <summary>
/// Computes the dot product of two vectors
/// </summary>
/// <param name="a">The first vector<param>
/// <param name="b">The second vector</param>
public static DotProduct(Vector3 a, Vector3 b)
{
return a.DotProduct(b);
}
}
This method would be invoked like any other static
method, i.e.:
Vector3 a = new Vector3(1,3,4);
Vector3 b = new Vector3(4,3,1);
Vector3.DotProduct(a, b);
You can see we’re doing the same thing as the instance method DotProduct(Vector3 other)
, but in a library-like way.
We can also declare fields as static
, which has a meaning slightly different than static methods. Specifically, the field is shared amongst all instances of the class. Consider the following class:
public class Tribble
{
private static int count = 1;
public Tribble()
{
count *= 2;
}
public int TotalTribbles
{
get
{
return count;
}
}
}
If we create a single Tribble, and then ask how many total Tribbles there are:
var t = new Tribble();
t.TotalTribbles; // expect this to be 2
We would expect the value to be 2, as count
was initialized to 1
and then multiplied by 2
in the Tribble constructor. But if we construct two Tribbles:
var t = new Tribble();
var u = new Tribble();
t.TotalTribbles; // will be 4
u.TotalTribbles; // will be 4
This is because all instances of Tribble share the count
field. So it is initialized to 1
, multiplied by 2
when tribble a
was constructed, and multiplied by 2
again when tribble b
was constructed. Hence $1 * 2 * 2 = 4$. Every additional Tribble we construct will double the total population (which is the trouble with Tribbles).
Which brings us to a point of confusion for most students, why call this static? After all, doesn’t the word static indicate unchanging?
The answer lies in how memory is allocated in a program. Sometimes we know in advance how much memory we need to hold a variable, i.e. a double
in C# requires 64 bits of memory. We call these types value types in C#, as the value is stored directly in memory where our variable is allocated. Other types, i.e. a List<T>
, we may not know exactly how much memory will be required. We call these reference types. Instead of the variable holding a binary value, it holds a binary address to another location in memory where the list data is stored (hence, it is a reference).
When your program runs, it gets assigned a big chunk of memory from the operating system. Your program is loaded into the first part of this memory, and the remaining memory is used to hold variable values as the program runs. If you imagine that memory as a long shelf, we put the program instructions and any literal values to the far left of this shelf. Then, as the program runs and we need to create space for variables, we either put them on the left side or right side of the remaining shelf space. Value types, which we know will only exist for the duration of their scope (i.e. the method they are defined in) go to the left, and once we’ve ended that scope we remove them. Similarly, the references we create (holding the address of memory of reference types) go on the left. The data of the reference types however, go on the right, because we don’t know when we’ll be done with them.
We call the kind of memory allocation that happens on the left static, as we know it should exist as long as the variable is in scope. Hence, the static
keyword. In lower-level languages like C, we have to manually allocate space for our reference types (hence, not static). C# is a memory managed language in that we don’t need to manually allocate and deallocate space for reference types, but we do allocate space every time we use the new
keyword, and the garbage collector frees any space it decides we’re done with (because we no longer have references pointing at it). So pointers do exist in C#, they are just “under the hood”.
By the way, the left side of the shelf we call the Stack, and the right the Heap. This is the source of the name for a Stack Overflow Exception - it means your program used up all the available space in the Stack, but still needs more. This is why it typically happens with infinite loops or recursion - they keep allocating variables on the stack until they run out of space.
Memory allocation and pointers is covered in detail in CIS 308 - C Language Lab, and you’ll learn more about how programs run and the heap and stack in CIS 450 - Computer Architecture and Operations.
C# allows you to override most of the language’s operators to provide class-specific functionality. The user-defined casts we discussed earlier are one example of this.
Perhaps the most obvious of these are the arithmetic operators, i.e. +
, -
, \
, *
. Consider our Vector3
class we defined earlier. If we wanted to overload the +
operator to allow for vector addition, we could add it to the class definition:
/// <summary>
/// A class representing a 3-element vector
/// </summary>
public class Vector3
{
/// <summary>The x-coordinate</summary>
public double X { get; set;}
/// <summary>The y-coordinate</summary>
public double Y { get; set;}
/// <summary>The z-coordinate</summary>
public double Z { get; set;}
/// <summary>
/// Constructs a new vector
/// </summary>
public Vector3(double x, double y, double z)
{
X = x;
Y = y;
Z = z;
}
/// Adds two vectors using vector addition
public static Vector3 operator +(Vector3 v1, Vector3 v2)
{
return new Vector3(v1.X + v2.X, v1.Y + v2.Y, v1.Z + v2.Z);
}
}
Note that we have to make the method static
, and include the operator
keyword, along with the symbol of the operation. This vector addition we are performing here is also a binary operation (meaning it takes two parameters). We can also define unary operations, like negation:
/// Negates a vector
public static Vector3 operator -(Vector3 v)
{
return new Vector3(-v.X, -v.Y, -v.Z);
}
The full list of overloadable operators is found in the C# documentation
Generics expand the type system of C# by allowing classes and structs to be defined with a generic type parameter, which will be instantiated when it is used in code. This avoids the necessity of writing similar specialized classes that each work with a different data type. You’ve used examples of this extensively in your CIS 300 - Data Structures course.
For example, the generic List<T>
can be used to create a list of any type. If we want a list of integers, we declare it using List<int>
, and if we want a list of booleans we declare it using List<bool>
. Both use the same generic list class.
You can declare your own generics as well. Say you need a binary tree, but want to be able to support different types. We can declare a generic BinaryTreeNode<T>
class:
/// <summary>
/// A class representing a node in a binary tree
/// <summary>
/// <typeparam name="T">The type to hold in the tree</typeparam>
public class BinaryTreeNode<T>
{
/// <summary>
/// The value held in this node of the tree
/// </summary>
public T Value { get; set; }
/// <summary>
/// The left branch of this node
/// </summary>
public BinaryTreeNode<T> Left { get; set; }
/// <summary>
/// The right branch of this node
/// </summary>
public BinaryTreeNode<T> Right { get; set; }
}
Note the use of <typeparam>
in the XML comments. You should always document your generic type parameters when using them.
Returning to the distinction between value and reference types, a value type stores its value directly in the variable, while a reference type stores an address to another location in memory that has been allocated to hold the value. This is why reference types can be null
- this indicates they aren’t pointing at anything. In contrast, value types cannot be null - they always contain a value. However, there are times it would be convenient to have a value type be allowed to be null.
For these circumstances, we can use the Nullable<T> generic type, which allows the variable to represent the same values as before, plus null
. It does this by wrapping the value in a simple structure that stores the value in its Value
property, and also has a boolean property for HasValue
. More importantly, it supports explicit casting into the template type, so we can still use it in expressions, i.e.:
Nullable<int> a = 5;
int b = 6;
int c = (int)a + b;
// This evaluates to 11.
However, if the value is null
, we’ll get an InvalidOperationException
with the message “Nullable object must have a value”.
There is also syntactic sugar for declaring nullable types. We can follow the type with a question mark (?
), i.e.:
int? a = 5;
Which works the same as Nullable<int> a = 5;
, but is less typing.
Another new addition to C# is anonymous types. These are read-only objects whose type is created by the compiler rather than being defined in code. They are created using syntax very similar to object initializer syntax.
For example, the line:
var name = new { First="Jack", Last="Sprat" };
Creates an anonymous object with properties First
and Last
and assigns it to the variable name. Note we have to use var
, because the object does not have a defined type. Anonymous types are primarily used with LINQ, which we’ll cover in the future.
The next topic we’ll cover is lambda syntax. You may remember from CIS 115 the Turing Machine, which was Alan Turing’s theoretical computer he used to prove a lot of theoretical computer science ideas. Another mathematician of the day, Alan Church, created his own equivalent of the Turing machine expressed as a formal logic system, Lambda calculus. Broadly speaking, the two approaches do the same thing, but are expressed very differently - the Turing machine is an (imaginary) hardware-based system, while Lambda Calculus is a formal symbolic system grounded in mathematical logic. Computer scientists develop familiarity with both conceptions, and some of the most important work in our field is the result of putting them together.
But they do represent two different perspectives, which influenced different programming language paradigms. The Turing machine you worked with in CIS 115 is very similar to assembly language, and the imperative programming paradigm draws strongly upon this approach. In contrast, the logical and functional programming paradigms were more influenced by Lambda calculus. This difference in perspective also appears in how functions are commonly written in these different paradigms. A imperative language tends to define functions something like:
Add(param1, param2)
{
return param1 + param2;
}
While a functional language might express the same idea as:
(param1, param2) => param1 + param2
This “arrow” or “lambda” syntax has since been adopted as an alternative way of writing functions in many modern languages, including C#. In C#, it is primarily used as syntactic sugar, to replace what would otherwise be a lot of typing to express a simple idea.
Consider the case where we want to search a List<string> AnimalList
for a string containing the substring "kitten"
. The List.Find()
takes a predicate - a static method that can be invoked to find an item in the list. We have to define a static method, i.e.:
private static bool FindKittenSubstring(string fullString)
{
return fullString.Contains("kitten");
}
From this method, we create a predicate:
Predicate<string> findKittenPredicate = FindKittenSubstring;
Then we can pass that predicate into our Find
:
bool containsKitten = AnimalList.Find(findKittenPredicate);
This is quite a lot of work to express a simple idea. C# introduced lambda syntax as a way to streamline it. The same operation using lambda syntax is:
bool containsKitten = AnimalList.Find((fullString) => fullString.Contains("kitten"));
Much cleaner to write. The C# compiler is converting this lambda expression into a predicate as it compiles, but we no longer have to write it! You’ve seen this syntax in your XUnit tests, and you’ll also see it when we cover LINQ. It has also been adapted to simplify writing getters and setters. Consider this case:
public class Person
{
public string LastName { get; set; }
public string FirstName { get; set; }
public string FullName
{
get
{
return FirstName + " " + LastName;
}
}
}
We could instead express this as:
public class Person
{
public string LastName { get; set; }
public string FirstName { get; set; }
public string FullName => FirstName + " " + LastName;
}
In fact, all methods that return the result of a single expression can be written this way:
public class VectorMath
{
public double Add(Vector a, Vector b) => new Vector(a.X + b.X, a.Y + b.Y, a.Z + b.Z);
}
Pattern matching is another idea common to functional languages that has gradually crept into C#. Pattern matching refers to extracting information from structured data by matching the shape of that data.
We’ve already seen the pattern-matching is operator in our discussion of casting. This allows us to extract the cast version of a variable and assign it to a new one:
if(oldVariable is SpecificType newVariable)
{
// within this block newVariable is (SpecificType)oldVariable
}
The switch
statement is also an example of pattern matching. The traditional version only matched constant values, i.e.:
switch(choice)
{
case "1":
// Do something
break;
case "2":
// Do something else
break;
case "3":
// Do a third thing
break;
default:
// Do a default action
break;
}
However, in C# version 7.0, this has been expanded to also match patterns. For example, given a Square
, Circle
, and Rectangle
class that all extend a Shape
class, we can write a method to find the area using a switch:
public static double ComputeCircumference(Shape shape)
{
switch(shape)
{
case Square s:
return 4 * s.Side;
case Circle c:
return c.Radius * 2 * Math.PI;
case Rectangle r:
return 2 * r.Length + 2 * r.Height;
default:
throw new ArgumentException(
message: "shape is not a recognized shape",
paramName: nameof(shape)
);
}
}
Note that here we match the type of the shape
and cast it to that type making it available in the provided variable, i.e. case Square s:
matches if shape
can be cast to a Square
, and s
is the result of that cast operation.
This is further expanded upon with the use of when
clauses, i.e. we could add a special case for a circle or square with a circumference of 0:
public static double ComputeCircumference(Shape shape)
{
switch(shape)
{
case Square s when s.Side == 0:
case Circle c when c.Radius == 0:
return 0;
case Square s:
return 4 * s.Side;
case Circle c:
return c.Radius * 2 * Math.PI;
case Rectangle r:
return 2 * r.Length + 2 * r.Height;
default:
throw new ArgumentException(
message: "shape is not a recognized shape",
paramName: nameof(shape)
);
}
}
The when
applies conditions to the match that only allow a match when the corresponding condition is true.
C# 8.0, which is currently in preview, has expanded greatly upon pattern matching, adding exciting new features, such as the switch expression, tuples, and deconstruction operator.
In this chapter we looked at some of the features of C# that aren’t directly related to object-orientation, including many drawn from imperative or functional paradigms. Some have been with the language since the beginning, such as the static
keyword, while others have recently been added, like pattern matching.
Each addition has greatly expanded the power and usability of C# - consider generics, whose introduction brought entirely new (and much more performant) library collections like List<T>
, Dictionary<T>
, and HashSet<T>
. Others have lead to simpler and cleaner code, like the use of Lambda expressions. Perhaps most important is the realization that programming languages often continue to evolve beyond their original conceptions.
Objects Go to Work
Some clever statement…
Windows Presentation Foundation (WPF) is a open-source system for rendering Windows application user interfaces. It was released as part of the .NET framework in 2006. In many ways, it is intended to be a successor to Windows Forms. This chapter will examine the basics of working with WPF in detail.
Some key terms to learn in this chapter are:
The key skill to learn in this chapter is how to use C# and XAML to develop WPF user interfaces that adapt to device screen dimensions.
Windows Presentation Foundation is a library and toolkit for creating Graphical User Interfaces - a user interface that is presented as a combination of interactive graphical and text elements commonly including buttons, menus, and various flavors of editors and inputs. GUIs represent a major step forward in usability from earlier programs that were interacted with by typing commands into a text-based terminal (the EPIC software we looked at in the beginning of this textbook is an example of this earlier form of user interface).
You might be wondering why Microsoft introduced WPF when it already had support for creating GUIs in its earlier Windows Forms product. In part, this decision was driven by the evolution of computing technology.
No doubt you are used to having a wide variety of screen resolutions available across a plethora of devices. But this was not always the case. Computer monitors once came in very specific, standardized resolutions, and only gradually were these replaced by newer, higher-resolution monitors. The table below summarizes this time, indicating the approximate period each resolution dominated the market.
Standard | Size | Peak Years |
---|---|---|
VGA | 640x480 | 1987-1990 |
SVGA | 800x600 | 1990-2003 |
XGA | 1024x768 | 2007-2015 |
Windows Forms was introduced in the early 2000’s, at a time where the most popular screen resolution in the United States was transitioning from SVGA to XGA, and screen resolutions (especially for business computers running Windows) had remained remarkably consistent for long periods. Moreover, these resolutions were all using the 4:3 aspect ratio (the ratio of width to height of the screen). Hence, the developers of Windows forms did not consider the need to support vastly different screen resolutions and aspect ratios. Contrast that with trends since that time:
There is no longer a clearly dominating resolution, nor even an aspect ratio! Thus, it has become increasingly important for Windows applications to adapt to different screen resolutions. Windows Forms does not do this easily - each element in a Windows Forms application has a statically defined width and height, as well as its position in the window. Altering these values in response to different screen resolution requires significant calculations to resize and reposition the elements, and the code to perform these calculations must be written by the programmer.
In contrast, WPF adopts a multi-pass layout mechanism similar to that of a web browser, where it calculates the necessary space for each element within the GUI, then adapts the layout based on the actual space. With careful design, the need for writing code to position and size elements is eliminated, and the resulting GUIs adapt well to the wide range of available screen sizes.
Another major technology shift was the widespread adoption of hardware-accelerated 3D graphics. In the 1990’s this technology was limited to computers built specifically for playing video games, 3D modeling, video composition, or other graphics-intensive tasks. But by 2006, this hardware had become so widely accepted that with Windows Vista, Microsoft redesigned the Windows kernel to leverage this technology to take on the task of rendering windows applications.
WPF leveraged this decision and offloads much of the rendering work to the graphics hardware. This meant that WPF controls could be vector-based, instead of the raster-based approach adopted by Windows Forms. Vector-based rendering means the image to be drawn on-screen is created from instructions as needed, rather than copied from a bitmap. This allows controls to look as sharp when scaled to different screen resolutions or enhanced by software intended to support low-vision users. Raster graphics scaled the same way will look pixelated and jagged.
Leveraging the power of hardware accelerated graphics also allowed for the use of more powerful animations and transitions, as well as freeing up the CPU for other tasks. It also simplifies the use of 3D graphics in windows applications. WPF also leveraged this power to provide a rich storyboarding and animation system as well as inbuilt support for multimedia. In contrast, Windows Forms applications are completely rendered using the CPU and offer only limited support for animations and multimedia resources.
One additional shift is that Windows forms leverage controls built around graphical representations provided directly by the hosting Windows operating system. This helped keep windows applications looking and feeling like the operating system they were deployed on, but limits the customizability of the controls. A commonly attempted feature - placing an image on a button - becomes an onerous task within Windows Forms. Attempting to customize controls often required the programmer to take over the rendering work entirely, providing the commands to render the raw shapes of the control directly onto the control’s canvas. Unsurprisingly, an entire secondary market for pre-developed custom controls emerged to help counter this issue.
In contrast, WPF separated control rendering from windows subsystems, and implemented a declarative style of defining user interfaces using Extensible Application Markup Language (XAML). This provides the programmer complete control over how controls are rendered, and multiple mechanisms of increasing complexity to accomplish this. Style properties can be set on individual controls, or bundled into “stylesheets” and applied en-masse. Further, each control’s default style is determined by a template that can be replaced with a custom implementation, completely altering the appearance of a control.
This is just the tip of the iceberg - WPF also features a new and robust approach to data binding that will be subject of its own chapter, and allows for UI to be completely separated from logic, allowing for more thorough unit testing of application code.
Windows Presentation Foundation builds upon Extensible Application Markup Language (XAML), an extension of the XML language we’ve discussed previously. Just like XML, it consists of elements defined by opening and closing tags.
For example, a button is represented by:
<Button></Button>
Which, because it has no children, could also be expressed with a self-closing tag:
<Button/>
In addition, elements can have attributes, i.e we could add a height, width, and content to our button:
<Button Height="30" Width="120" Content="Click Me!"/>
XAML also offers an expanded property syntax that is an alternative to attributes. For example, we could re-write the above button as:
<Button>
<Button.Height>30</Button.Height>
<Button.Width>120</Button.Width>
<Button.Content>Click Me!</Button.Content>
</Button>
Note how we repeat the tag name (Button
) and append the attribute name (Height
, Width
, and Content
to it with a period between the two). This differentiates the expanded property from nested elements, i.e. in this XAML code:
<Grid>
<Grid.ColumnDefinitions>
<ColumnDefinition Width="200"/>
</Grid.ColumnDefinitions>
<Grid.RowDefinitions>
<RowDefinition/>
<RowDefinition/>
</Grid.RowDefinitions>
<Button Height="30" Width="120" Content="Click Me!"/>
</Grid>
<Grid.ColumnDefinitions>
and <Grid.RowDefinitions>
are attributes of the <Grid>
, while <Button Height="30" Width="120" Content="Click Me!"/>
is a child element of the <Grid>
element.
Because XAML is an extension of XML, we can add comments the same way, by enclosing the comment within a <!--
and -->
:
<!-- I am a comment -->
What makes XAML different from vanilla XML is that it defines objects. The XAML used for Windows Presentation Foundation is drawn from the http://schemas.microsoft.com/winfx/2006/xaml/presentation namespace. This namespace defines exactly what elements exist in this flavor of XAML, and they correspond to specific classes defined in the WPF namespaces.
For example, the <Button>
class corresponds to the WPF Button class. This class has a Content
property which defines the text or other content displayed on the button. Additionally, it has a Width
and Height
property. Thus the XAML:
<Button Height="30" Width="120" Content="Click Me!"/>
Effectively says construct an instance of the Button
class with its Height
property set to 30, its Width
property set to 120, and its Content
property set to the string "Click Me!"
. Were we to write the corresponding C# code, it would look like:
var button = new Button();
button.Height = 30;
button.Width = 120;
button.Content = "Click Me!";
This is why XAML stands for Extensible Application Markup Language - it’s effectively another way of writing programs! You can find the documentation for all the controls declared in the xaml/presentation namespace on docs.microsoft.com.
In addition to being used to define objects, XAML can also be used to define part of a class. Consider this MainWindow
XAML code, which is generated by the Visual Studio WPF Project Template:
<Window x:Class="WpfApp1.MainWindow"
xmlns="http://schemas.microsoft.com/winfx/2006/xaml/presentation"
xmlns:x="http://schemas.microsoft.com/winfx/2006/xaml"
xmlns:d="http://schemas.microsoft.com/expression/blend/2008"
xmlns:mc="http://schemas.openxmlformats.org/markup-compatibility/2006"
xmlns:local="clr-namespace:WpfApp1"
mc:Ignorable="d"
Title="MainWindow" Height="450" Width="800">
<Grid>
</Grid>
</Window>
And its corresponding C# file:
namespace WpfApp1
{
/// <summary>
/// Interaction logic for MainWindow.xaml
/// </summary>
public partial class MainWindow : Window
{
public MainWindow()
{
InitializeComponent();
}
}
}
Notice the use of the partial
modifier in the C# code? This indicates that the MainWindow
class is only partially defined in this file (MainWindow.xaml.cs) - the rest of the definition exists in another file. That’s the previously referenced XAML file (MainWindow.xaml). Notice in the XAML that the <Window>
element has the attribute x:Class="WpfApp1.MainWindow"
? That indicates that it defines part of the class MainWindow
defined in the WpfApp1
namespace - it’s the other part of our file!
When we compile this project, the XAML is actually transformed into a temporary C# file as part of the build process, and that C# file is joined with the other C# file. This temporary file defines the InitializeComponent()
method, which would look something like this:
void InitializeComponent()
{
this.Title = "MainWindow";
this.Height = "450";
this.Width = "800";
var grid = new Grid();
this.Content = grid();
}
Notice how it sets the properties corresponding to the attributes defined on the <MainWindow>
element? Further, it assigns the child of that element (a <Grid>
element) as the Content
property of the Window
. Nested XAML elements are typically assigned to either Content
or Children
properties, depending on if the element in question is a container element or not (container elements can have multiple children, all other elements are limited to a single child).
Any structure defined in our XAML is set up during this InitializeComponent()
call. This means you should never remove the InitializeComponent();
invocation from a WPF class, or your XAML-defined content will not be added. Similarly, you should not manipulate that structure until the InitializeComponent();
method has been invoked, or the structure will not exist!
This strategy of splitting GUI code into two files is known in Microsoft parlance as codebehind, and it allows the GUI’s visual aspect to be created independently of the code that provides its logic. This approach has been a staple of both Windows Forms and Windows Presentation Foundation. This separation also allows for graphic designers to create the GUI look-and-feel without ever needing to write a line of code. There is a companion application to Visual Studio called Blend that can be used to write the XAML files for a project without needing the full weight and useability of Visual Studio.
Occasionally, Visual Studio will encounter a problem while building the temporary file from the XAML definition, and the resulting temporary file may become corrupted. When this happens, your changes to the XAML are no longer incorporated into the program when you compile, because the process can’t overwrite the corrupted temporary file. Instead, the corrupted temporary file is used - resulting in weird and unexpected behavior. If this happens to you, just run the “Build > Clean” menu option on the project to delete all the temporary files.
Partial classes weren’t a WPF-specific innovation - Windows Forms used them first. In Windows Forms, when you create a form, Visual Studio actually creates two C# files. One of these is the one intended for you to edit, and the other is used by the drag-and-drop editor, which fills it with auto-generated C# code. If you ever make the mistake of editing this file, it will cause all kinds of problems for the drag-and-drop editor (and you)! In contrast, the drag-and-drop editor for WPF actually modifies the same XAML file you do - allowing you to use the editor, manually edit the XAML, or any combination of the two.
Windows Presentation Foundation provides a number of container elements that fulfill the specialized purpose of layouts. Unlike most WPF controls, they can have multiple children, which they organize on-screen. And unlike Windows Forms, these layouts adjust to the available space.
Let’s examine each of five layouts in turn:
The default layout is the Grid, which lays out its children elements in a grid pattern. A <Grid>
is composed of columns and rows, the number and characteristics of which are defined by the grid’s ColumnDefinitions
and RowDefinitions
properties. These consist of a collection of ColumnDefinition
and <RowDefinition/>
elements. Each <ColumnDefinition/>
is typically given a Width
property value, while each <RowDefinition/>
is given a Height
property value.
Thus, you might expect the code:
<Grid>
<Grid.ColumnDefinitions>
<ColumnDefinition Width="200"/>
</Grid.ColumnDefinitions>
<Grid.RowDefinitions>
<RowDefinition Height="100"/>
</Grid.RowDefinitions>
<Button Height="30" Width="120" Content="Click Me!"/>
</Grid>
Creates a grid with three columns, each 200 logical units wide, and two rows, each 100 logical units high. However, it will actually create a grid like this:
Remember, all WPF containers will fill the available space - so the grid stretches the last column and row to fill the remaining space. Also, any element declared as a child of the grid (in this case, our button), will be placed in the first grid cell - [0,0] (counted from the top-left corner).
When declaring measurements in WPF, integer values correspond to logical units, which are 1/96th of an inch. We can also use relative values, by following a measurement with a *
. This indicates the ratio of remaining space a column or row should take up after the elements with an exact size are positioned. I.e. a column with a width of 2*
will be twice as wide as one with a width of 1*
.
Thus, to create a 3x3 grid centered in the available space to represent a game of Tic-Tac-Toe we might use:
<Grid>
<Grid.ColumnDefinitions>
<ColumnDefinition Width="1*"/>
<ColumnDefinition Width="100"/>
<ColumnDefinition Width="1*"/>
</Grid.ColumnDefinitions>
<Grid.RowDefinitions>
<RowDefinition Height="1*"/>
<RowDefinition Height="100"/>
<RowDefinition Height="1*"/>
</Grid.RowDefinitions>
<TextBlock Grid.Column="1" Grid.Row="1" FontSize="100" VerticalAlignment="Center" HorizontalAlignment="Center">X</TextBlock>
<TextBlock Grid.Column="1" Grid.Row="2" FontSize="100" VerticalAlignment="Center" HorizontalAlignment="Center">O</TextBlock>
<TextBlock Grid.Column="2" Grid.Row="1" FontSize="100" VerticalAlignment="Center" HorizontalAlignment="Center">X</TextBlock>
</Grid>
Which would create:
Note too that we use the properties Grid.Column
and Grid.Row
in the <TextBlock>
elements to assign them to cells in the grid. The row and column indices start at 0 in the upper-left corner of the grid, and increase to the right and down.
The StackPanel arranges content into a single row or column (defaults to vertical). For example, this XAML:
<StackPanel>
<Button>Banana</Button>
<Button>Orange</Button>
<Button>Mango</Button>
<Button>Strawberry</Button>
<Button>Blackberry</Button>
<Button>Peach</Button>
<Button>Watermelon</Button>
</StackPanel>
Creates this layout:
The StackPanel can be set to a horizontal orientation by setting its Orientation
property to Horizontal
:
<StackPanel Orientation="Horizontal">
<Button>Banana</Button>
<Button>Orange</Button>
<Button>Mango</Button>
<Button>Strawberry</Button>
<Button>Blackberry</Button>
<Button>Peach</Button>
<Button>Watermelon</Button>
</StackPanel>
The WrapPanel layout is like the <StackPanel>
, with the additional caveat that if there is not enough space for its contents, it will wrap to an additional line. For example, this XAML code:
<WrapPanel>
<Button>Banana</Button>
<Button>Orange</Button>
<Button>Mango</Button>
<Button>Strawberry</Button>
<Button>Blackberry</Button>
<Button>Peach</Button>
<Button>Watermelon</Button>
</WrapPanel>
Produces this layout when there is ample room:
And this one when things get tighter:
The DockPanel layout should be familiar to you - it’s what Visual Studio uses. Its content items can be ‘docked’ to one of the sides, as defined by the Dock
enum: Bottom
, Top
, Left
, or Right
by setting the DockPanel.Dock
property on that item. The last item specified will also fill the central space. If more than one child is specified for a particular side, it will be stacked with that side.
Thus, this XAML:
<DockPanel>
<Button DockPanel.Dock="Top">Top</Button>
<Button DockPanel.Dock="Left">Left</Button>
<Button DockPanel.Dock="Right">Right</Button>
<Button DockPanel.Dock="Bottom">Bottom</Button>
<Button>Center</Button>
</DockPanel>
Generates this layout:
Finally, the Canvas lays its content out strictly by their position within the <Canvas>
, much like Windows Forms. This approach provides precise placement and size control, at the expense of the ability to automatically adjust to other screen resolutions. For example, the code:
<Canvas>
<Button Canvas.Top="40" Canvas.Right="40">Do Something</Button>
<TextBlock Canvas.Left="200" Canvas.Bottom="80">Other thing</TextBlock>
<Canvas Canvas.Top="30" Canvas.Left="300" Width="300" Height="300" Background="SaddleBrown"/>
</Canvas>
Creates this layout:
If there is a chance the <Canvas>
might be resized, it is a good idea to anchor all elements in the canvas relative to the same corner (i.e. top right) so that they all are moved the same amount.
In addition to the layout controls, WPF provides a number of useful (and often familiar) controls that we can use to compose our applications. Let’s take a look at some of the most commonly used.
A Border is a control that draws a border around its contents. The properties specific to a border include BorderBrush
(which sets the color of the border, see the discussion of brushes on the next page), BorderThickness
the number of units thick the border should be drawn, CornerRadius
, which adds rounded corners, and Padding
which adds space between the border and its contents.
<Border BorderBrush="Green" BorderThickness="5" CornerRadius="5" Padding="10">
<Button>Do Something</Button>
</Border>
A Button is a control that draws a button. This button can be interacted with by the mouse, and clicking on it triggers any Click
event handlers that have been attached to it. Unlike Windows Forms buttons, it can contain any other WPF control, including images and layouts. Thus, a button featuring an image might be created with:
<Button Click="TriggerBroadcast">
<StackPanel Orientation="Horizontal">
<Image Source="dish.jpg" Width="100"/>
<TextBlock FontSize="25" VerticalAlignment="Center">Broadcast</TextBlock>
</StackPanel>
</Button>
The event handler for the button needs to be declared in the corresponding .xaml.cs file, and will take two parameters, an object
and RoutedEventArgs
:
/// <summary>
/// An event handler that triggers a broadcast
/// </summary>
/// <param name="sender">The object sending this message</param>
/// <param name="args">The event data</param>
void TriggerBroadcast(object sender, RoutedEventArgs args) {
// TODO: Send Broadcast
}
We’ll be discussing events in more detail soon.
A CheckBox provides a checkable box corresponding to a boolean value. The IsChecked
property reflects the checked or unchecked state of the checkbox. A checkbox also exposes Checked
and Unchecked
event handlers.
<CheckBox IsChecked="True">
The sky is blue
</CheckBox>
A ComboBox provides a drop-down selection list. The selected value can be accessed through the SelectedItem
property, and the IsEditable
boolean property determines if the combo box can be typed into, or simply selected from. It exposes a SelectionChanged
event. The items in the ComboBox
can be set declaratively:
<ComboBox>
<ComboBoxItem>Apple</ComboBoxItem>
<ComboBoxItem>Orange</ComboBoxItem>
<ComboBoxItem>Peach</ComboBoxItem>
<ComboBoxItem>Pear</ComboBoxItem>
</ComboBox>
Note that the ComboBox dropdown doesn’t work in the editor - it only operates while the application is running.
Alternatively, you can expose the ComboBox
in the codebehind .xaml.cs
file by giving it a Name
property.
<ComboBox Name="FruitSelection" Text="Fruits" SelectedValue="Apple">
</ComboBox>
Then, after the combo box has been initialized, use the ItemsSource
to specify a collection declared in the corresponding .xaml.cs
file.
/// <summary>
/// Interaction logic for UserControl1.xaml
/// </summary>
public partial class UserControl1 : UserControl
{
public UserControl1()
{
InitializeComponent();
FruitSelection.ItemsSource = new List<string>
{
"Apple",
"Orange",
"Peach",
"Pear"
};
}
}
We could also leverage data binding to bind the item collection dynamically. We’ll discuss this approach later.
The Image control displays an image. The image to display is determined by the Source
property. If the image is not exactly the same size as the <Image>
control, the Stretch
property determines how to handle this case. Its possible values are:
"None"
(the default) - the image is displayed at its original size"Fill"
- the image is resized to the element’s size. This will result in stretching if the aspect ratios are not the same"Uniform"
- the image is resized to fit into the element. If the aspect ratios are different, there will be blank areas in the element (letterboxing)"UniformToFill"
- the image is resized to fill the element. If the aspect ratios are different, part of the image will be cropped outThe stretch values effects are captured by this graphic:
The stretching behavior can be further customized by the StretchDirection property.
Images can also be used for Background
or Foreground
properties, as discussed on the next page.
A Label displays text on a form, and can be as simple as:
<Label>First Name:</Label>
What distinguishes it from other text controls is that it can also be associated with a specific control specified by the Target
parameter, whose value should be bound to the name of the control. It can then provide an access key (aka a mnemonic) that will transfer focus to that control when a the corresponding key is pressed. The access key is indicated by proceeding the corresponding character in the text with an underscore:
<StackPanel>
<Label Target="{Binding ElementName=firstNameTextBox}">
<AccessText>_First Name:</AccessText>
</Label>
<TextBox Name="firstNameTextBox"/>
</StackPanel>
Now when the program is running, the user can press ALT + F
to shift focus to the textbox, so they can begin typing (Note the character “F” is underlined in the GUI). Good use of access keys means users can navigate forms completely with the keyboard.
A ListBox displays a list of items that can be selected. The SelectionMode
property can be set to either "Single"
or "Multiple"
, and the "SelectedItems"
read-only property provides those selected items. The ItemsSource
property can be set declaratively using <ListBoxItem>
contents. It also exposes a SelectionChanged
event handler:
<ListBox>
<ListBoxItem>Apple</ListBoxItem>
<ListBoxItem>Orange</ListBoxItem>
<ListBoxItem>Peach</ListBoxItem>
<ListBoxItem>Pear</ListBoxItem>
</ListBox>
A group of RadioButton elements is used to present multiple options where only one can be selected. To group radio buttons, specify a shared GroupName
property. Like other buttons, radio buttons have a Click
event handler, and also a Checked
and Unchecked
event handler:
<StackPanel>
<RadioButton GroupName="Fruit">Apple</RadioButton>
<RadioButton GroupName="Fruit">Orange</RadioButton>
<RadioButton GroupName="Fruit">Peach</RadioButton>
<RadioButton GroupName="Fruit">Pear</RadioButton>
</StackPanel>
A TextBlock can be used to display arbitrary text. It also makes available a TextChanged
event that is triggered when its text changes.
<TextBlock>Hi, I have something important to say. I'm a text block.</TextBlock>
And a TextBox is an editable text box. It’s text can be accessed through the Text
property:
<TextBox Text="And I'm a textbox!"/>
Finally, a ToggleButton is a button that is either turned on or off. This can be determined from its IsChecked
property. It also has event handlers for Checked
and Unchecked
events:
<ToggleButton>On or Off</ToggleButton>
Off looks like:
And on looks like:
This is just a sampling of some of the most used controls. You can also reference the System.Windows.Controls namespace documentation, or the TutorialsPoint WPF Controls reference.
All WPF controls (including the layout controls we’ve already seen) derive from common base classes, i.e. UIElement and FrameworkElement, which means they all inherit common properties. Some of the most commonly used are described here.
Perhaps the most important of the control properties are those that control sizing and placement. Let’s take a look at the most important of these.
WPF controls use three properties to determine the height of the element. These are MinHeight
, Height
, and MaxHeight
. They are doubles expressed in device-independent units (measuring 1/96 of an inch). The rendering algorithm treats Height
as a suggestion, but limits the calculated height to fall in the range between MinHeight
and MaxHeight
. The height determined by the algorithm can be accessed from the ActualHeight
read-only property. Similar values exist for width: MinWidth
, Width
, MaxWidth
, and ActualWidth
.
Property | Default Value | Description |
---|---|---|
MinHeight | 0.0 | The minimum element height |
Height | NaN |
The suggested element height |
MaxHeight | PositiveInfinity |
The maximum element height |
MinWidth | 0.0 | The minimum element width |
Width | NaN |
The suggested element width |
MaxWidth | PositiveInfinity |
The maximum element width |
In addition to the size of the element, we can set margins around the element, adding empty space between this and other elements. The Margin
property is actually of type Thickness
, a structure with four properties: left, top, right, and bottom. We can set the Margin
property in several ways using XAML.
To set all margins to be the same size, we just supply a single value:
<Button Margin="3">Do something</Button>
To set different values for the horizontal and vertical margins, use two comma-separated values (horizontal comes first):
<Button Margin="10, 20">Do Something</Button>
And finally, they can all be set separately as a comma-separated list (the order is left, top, right, and then bottom).
<Button Margin="10, 20, 30, 50">Do Something</Button>
You can also align the elements within the space allocated for them using the VerticalAlignment
and HorizontalAlignment
properties. Similarly, you can align the contents of an element with the VerticalContentAlignment
and HorizontalContentAlignment
properties.
For most controls, these are "Stretch"
by default, which means the control or its contents will expand to fill the available space. Additional values include "Bottom"
, "Center"
, and "Top"
for vertical, and "Left"
, "Center"
, and "Right"
for horizontal. These options do not fill the available space - the control is sized in that dimension based on its suggested size.
HorizontalAlignment | |
---|---|
Option | Description |
Stretch | Control fills the available horizontal space |
Left | Control is aligned along the left of the available space |
Center | Control is centered in the available horizontal space |
Right | Control is aligned along the right of the available space |
VerticalAlignment | |
Option | Description |
Stretch | Control fills the available vertical space |
Top | Control is aligned along the top side of the available space |
Center | Control is centered in the available vertical space |
Bottom | Control is aligned along the bottom side of the available space |
As most controls prominently feature text, it is important to discuss the properties that effect how this text is presented.
The FontFamily property sets the font used by the control. This font needs to be installed on the machine. You can supply a single font, i.e.:
<TextBlock FontFamily="Arial">
Or a list of font families to supply fallback options if the requested font is not available:
<TextBlock FontFamily="Arial, Century Gothic">
The FontSize property determines the size of the font used in the control.
The FontStyle property sets the style of the font used. This can include "Normal"
, "Italic"
, or "Oblique"
. Italic is typically defined in the font itself (and created by the font creator), while Oblique is created from the normal font by applying a mathematical rendering transformation, and can be used for fonts that do not have a defined italic style.
The FontWeight
refers to how thick a stroke is used to draw the font. It can be set to values like "Light"
, "Normal"
, "Bold"
, or "Ultra Bold"
. A list of all available options can be found here.
The TextAlignment
property defines how the text is aligned within its element. Possible values are "Left"
(the default), "Center"
, "Justify"
, and "Right"
, and behave just like these options in your favorite text editor.
There is no corresponding vertical alignment option - instead use VerticalContentAlignment
discussed above.
There are often times in working with a GUI where you might want to disable or even hide a control. WPF controls provide several properties that affect the rendering and interaction of controls.
The IsEnabled
property is a boolean that indicates if this control is currently enabled. It defaults to true
. Exactly what ’enabled’ means for a control is specific to that kind of control, but usually means the control cannot be interacted with. For example, a button with IsEnabled=false
cannot be clicked on, and will be rendered grayed out, i.e.:
<Grid>
<Grid.ColumnDefinitions>
<ColumnDefinition/>
<ColumnDefinition/>
</Grid.ColumnDefinitions>
<Button IsEnabled="False" Margin="10">I'm Disabled</Button>
<Button Grid.Column="1" Margin="10">I'm Enabled</Button>
</Grid>
A similar effect can be obtained by changing an element’s Opacity
property, a double that ranges from 0.0 (completely transparent) to 1.0 (completely solid). Below you can see two <TextBlock>
elements, with the one on the left set to an opacity of 0.40:
<Grid>
<Grid.ColumnDefinitions>
<ColumnDefinition/>
<ColumnDefinition/>
</Grid.ColumnDefinitions>
<TextBlock Opacity="0.4" Foreground="Purple" VerticalAlignment="Center" HorizontalAlignment="Center">
I'm semi-translucent!
</TextBlock>
<TextBlock Grid.Column="1" Foreground="Purple" VerticalAlignment="Center" HorizontalAlignment="Center">
I'm solid!
</TextBlock>
</Grid>
Alerting an elements’ opacity does not have any effect on its functionality, i.e. a completely transparent button can still be clicked.
Finally, the Visible property alters how the element is considered in the WPF rendering algorithm. It has three possible values: "Visible"
, "Hidden"
, and "Collapsed"
. The default value is "Visible"
, and the element renders normally, as “Button One” does in the example below:
<StackPanel>
<Button Visibility="Visible" Margin="10">Button One</Button>
<Button Margin="10">Button Two</Button>
</StackPanel>
The "Hidden"
value will hide the element, but preserve its place in the layout. A hidden element cannot be interacted with, so this is similar to setting the Opacity
to 0 and IsEnabled
to false:
<StackPanel>
<Button Visibility="Hidden" Margin="10">Button One</Button>
<Button Margin="10">Button Two</Button>
</StackPanel>
Finally, the "Collapsed"
value will leave the element out of the layout calculations, as though it were not a part of the control at all. A hidden element cannot be interacted with. Note that in the example below, “Button Two” has been rendered in the space previously occupied by “Button One”:
<StackPanel>
<Button Visibility="Collapsed" Margin="10">Button One</Button>
<Button Margin="10">Button Two</Button>
</StackPanel>
You may have noticed the previous examples that colors can be accomplished through the Background
and Foreground
properties - where the Background
determines the color of the element, and Foreground
determines the color of text and other foreground elements. While this is true, it is also just the beginning of what is possible. Both of these properties have the type Brush
, which deserves a deeper look.
Simply put, a brush determines how to paint graphical objects. This can be as simple as painting a solid color, or as complex as panting an image. The effect used is determined by the type of brush - the Brush
class itself serving as a base class for several specific types brush.
What we’ve been using up to this point have been SolidColorBrush objects. This is the simplest of the brush classes, and simply paints with a solid color, i.e.:
<TextBlock Foreground="BlueViolet" Background="DarkSeaGreen" FontSize="25">
Look, Ma! I'm in color!
</TextBlock>
The simplest way to set the color in XAML is to use a value from the predefined brush name list, like the "BlueViolet"
and "DarkSeaGreen"
in the example.
Alternatively, you can use a hexadecimal number defining the red, green, and blue channels in that order, i.e. to use K-State purple and white (as defined in the K-State Brand Guide) we’d use:
<TextBlock Foreground="#FFFFFF" Background="#512888" FontSize="25">
Look, Ma! I'm in color!
</TextBlock>
The various formats the hex values can be given are detailed here
Gradient brushes gradually transition between colors. There are two kinds of gradient brushes in WPF: with a LinearGradientBrush the brush gradually changes along a line. With a RadialGradientBrush, the color changes radially from a center point.
In both cases, the gradient is defined in terms of <GradientStops>
- a distance along the line (or from the center) where the expected color value is defined. In the spaces between gradient stops, the color value is interpolated between the two stops on either side of the point. The gradient stop needs both an Offset
value (a double indicating the percentage of how far along the line or from the center this stop falls, between 0.0 and 1.0) and a Color
value (which can be defined as with solid color brushes).
For example, the XAML:
<TextBlock Foreground="#FFFFFF" FontSize="25">
<TextBlock.Background>
<LinearGradientBrush>
<LinearGradientBrush.GradientStops>
<GradientStop Color="Red" Offset="0.0"/>
<GradientStop Color="Yellow" Offset="0.25"/>
<GradientStop Color="Green" Offset="0.50"/>
<GradientStop Color="Blue" Offset="0.75"/>
<GradientStop Color="Violet" Offset="1.0"/>
</LinearGradientBrush.GradientStops>
</LinearGradientBrush>
</TextBlock.Background>
Look, Ma! I'm in color!
</TextBlock>
Produces this rainbow gradient:
Further, the line along which the linear gradient is created is defined by the StartPoint
and EndPoint
properties of the <LinearGradientBrush>
. These points are relative to the area the brush is covering (i.e. the space occupied by the element), and fall in the range of [0.0 .. 1.0]. The default (as seen above) is a diagonal line from the upper left corner (0,0) to the lower right corner (1.0, 1.0).
To make the above gradient fall in the center half of the element, and be horizontal, we could tweak the gradient definition:
<TextBlock Foreground="#FFFFFF" FontSize="25">
<TextBlock.Background>
<LinearGradientBrush StartPoint="0.25, 0.5" EndPoint="0.75, 0.5">
<LinearGradientBrush.GradientStops>
<GradientStop Color="Red" Offset="0.0"/>
<GradientStop Color="Yellow" Offset="0.25"/>
<GradientStop Color="Green" Offset="0.50"/>
<GradientStop Color="Blue" Offset="0.75"/>
<GradientStop Color="Violet" Offset="1.0"/>
</LinearGradientBrush.GradientStops>
</LinearGradientBrush>
</TextBlock.Background>
Look, Ma! I'm in color!
</TextBlock>
A <RadialGradientBrush>
is defined similarly through the use of GradientStops
, only this time they are in relation to the center around which the gradient radiates:
<TextBlock Foreground="#FFFFFF" FontSize="25">
<TextBlock.Background>
<RadialGradientBrush>
<RadialGradientBrush.GradientStops>
<GradientStop Color="Red" Offset="0.0"/>
<GradientStop Color="Yellow" Offset="0.25"/>
<GradientStop Color="Green" Offset="0.50"/>
<GradientStop Color="Blue" Offset="0.75"/>
<GradientStop Color="Violet" Offset="1.0"/>
</RadialGradientBrush.GradientStops>
</RadialGradientBrush>
</TextBlock.Background>
Look, Ma! I'm in color!
</TextBlock>
The gradient fills an ellipse defined by the Center
property and the RadiusX
and RadiusY
properties. By default these values are (0.5. 0.5), 0.5, and 0.5 respectively. Like other gradient properties, they are doubles between 0.0 and 1.0. Finally, the gradient emanates from the GradientOrigin
, also a point with values defined by this coordinate system.
To center the above gradient in the left half of the block, we would therefore use:
<TextBlock.Background>
<RadialGradientBrush Center="0.25, 0.5" RadiusX="0.25" RadiusY="0.5" GradientOrigin="0.25, 0.5">
<RadialGradientBrush.GradientStops>
<GradientStop Color="Red" Offset="0.0"/>
<GradientStop Color="Yellow" Offset="0.25"/>
<GradientStop Color="Green" Offset="0.50"/>
<GradientStop Color="Blue" Offset="0.75"/>
<GradientStop Color="Violet" Offset="1.0"/>
</RadialGradientBrush.GradientStops>
</RadialGradientBrush>
</TextBlock.Background>
And of course, we can use a gradient for a Foreground
property as well:
<TextBlock Background="White" FontSize="40">
<TextBlock.Foreground>
<LinearGradientBrush>
<LinearGradientBrush.GradientStops>
<GradientStop Color="Red" Offset="0.0"/>
<GradientStop Color="Yellow" Offset="0.25"/>
<GradientStop Color="Green" Offset="0.50"/>
<GradientStop Color="Blue" Offset="0.75"/>
<GradientStop Color="Violet" Offset="1.0"/>
</LinearGradientBrush.GradientStops>
</LinearGradientBrush>
</TextBlock.Foreground>
Look, Ma! I'm in color!
</TextBlock>
To draw a saved image, we use an ImageBrush, setting its ImageSource
property to the image we want to use. In XAML, that can be as simple as:
<Button Margin="40" Foreground="White" FontSize="30">
<Button.Background>
<ImageBrush ImageSource="Dish.jpg"/>
</Button.Background>
Broadcast
</Button>
We can apply image brushes to any WPF control, allowing for some interesting layering effects, i.e.:
<Grid>
<Grid.Background>
<ImageBrush ImageSource="watering-can.jpg"/>
</Grid.Background>
<Grid.ColumnDefinitions>
<ColumnDefinition/>
<ColumnDefinition/>
<ColumnDefinition/>
</Grid.ColumnDefinitions>
<Grid.RowDefinitions>
<RowDefinition/>
<RowDefinition/>
<RowDefinition/>
</Grid.RowDefinitions>
<Button Margin="40" Foreground="White" FontSize="30">
<Button.Background>
<ImageBrush ImageSource="Dish.jpg"/>
</Button.Background>
Broadcast
</Button>
</Grid>
You probably notice that the dish image on the button is distorted. We can correct this by changing the Stretch property. The possible values are: "None"
, "Fill"
, "Uniform"
, and "UniformToFill"
. This graphic from the documentation visual shows these properties:
The ImageBrush
extends the TileBrush
, so the image can actually be tiled if the tile size is set to be smaller than the element that it is painting. The TileBrush Overview provides a detailed breakdown of applying tiling.
When using images with Visual Studio, it is important to understand how those are used and distributed. You should make sure the images are physically located within the project folder (so that they are included in your source control). Additionally, you want to mark the property “Copy to Output Directory” to either “Copy Always” or “Copy if Newer.” When distributing your project, these files will also need to be distributed, or the image will be unavailable to your executable.
To create a new WPF control from within Visual Studio, we usually choose “Add > User Control (WPF…)” from the solution context menu.
This creates two files, the [filename].xaml:
<UserControl x:Class="WpfApp1.UserControl1"
xmlns="http://schemas.microsoft.com/winfx/2006/xaml/presentation"
xmlns:x="http://schemas.microsoft.com/winfx/2006/xaml"
xmlns:mc="http://schemas.openxmlformats.org/markup-compatibility/2006"
xmlns:d="http://schemas.microsoft.com/expression/blend/2008"
xmlns:local="clr-namespace:WpfApp1"
mc:Ignorable="d"
d:DesignHeight="100" d:DesignWidth="400">
<Grid>
</Grid>
</UserControl>
and the codebehind for that XAML file, [filename].xaml.cs (where [filename] is the name you supplied):
using System;
using System.Collections.Generic;
using System.Collections.ObjectModel;
using System.Text;
using System.Windows;
using System.Windows.Controls;
using System.Windows.Data;
using System.Windows.Documents;
using System.Windows.Input;
using System.Windows.Media;
using System.Windows.Media.Imaging;
using System.Windows.Navigation;
using System.Windows.Shapes;
namespace WpfApp1
{
/// <summary>
/// Interaction logic for UserControl1.xaml
/// </summary>
public partial class UserControl1 : UserControl
{
public UserControl1()
{
InitializeComponent();
}
}
}
As was mentioned previously, the InitializeComponent()
call in the constructor is what builds the structure specified in the XAML file to the object, so it should not be removed, nor should any manipulation of that structure be done before this method invocation.
Most custom controls are subclasses of the UserControl
class, and choosing this option has Visual Studio create the boilerplate for us. However, if you need to extend a specific control, i.e. a ListView
, it is often easiest to start with a UserControl
made this way, and then change the base class to ListView
in the [filename].xaml.cs file, as well as changing the <UserControl>
element to a <ListView>
element in the [filename].xaml.
Also, notice how the attributes of the control in the XAML file contain a local namespace:
xmlns:local="clr-namespace:WpfApp1"
This is the equivalent of a using
statement for XAML; it creates the local
namespace and ties it to the project’s primary namespace. We can then create an element corresponding to any class in that namespace. Let’s say we have another custom control, ThingAMaJig
that we want to utilize in this control. We can use the element notation to add it to our grid:
<Grid>
<local:ThingAMaJig>
</Grid>
Note that we must preface the class name in the element with the local
namespace, with a colon (:
) separating the two.
We can also add additional namespace statements. For example:
xmlns:system="clr-namespace:System;assembly=mscorlib"
This brings in the System
namespace, so now we can use the classes and types defined there, i.e String
:
<system:String>Hello World!</system:String>
Note that for the namespace attribute, we also included the assembly information. This is necessary for any assemblies that are not defined by this project (i.e. exist in their own DLL files).
In Visual Studio, opening a WPF XAML file will open a special editor that provides a side-by-side visual and XAML code editors for the control:
As you edit the XAML, it also updates the visualization in the visual editor. Also, many element properties can be edited from the visual editor or the properties pane - and these changes are automatically applied to the XAML. And, just like with Windows Forms, you can drag controls from the toolbox into the visualization to add them to the layout.
However, you will likely find yourselves often directly editing the XAML. This is often the fastest and most foolproof way of editing WPF controls. Remember that in WPF controls resize to fit the available space, and are not positioned by coordinates. For this reason, the visual editor will actually apply margins instead of positioning elements, which can cause unexpected results if your application is viewed at a different resolution (including some controls being inaccessible as they are covered by other controls).
A couple of buttons in the editor deserve some closer attention:
WPF and XAML lend themselves to a design approach known as Component-Based Design or Component-Based Development, which rather than focusing on developing the entire GUI in one go, focuses on decomposing user experiences (UX) into individual, focused, and potentially reusable components. These can, in turn, be used to build larger components, and eventually, the entire GUI[^Jayati2019].
Let’s dig deeper by focusing on a specific example. Let’s say we want to build an application for keeping track of multiple shopping lists. So our core component is a displayed list, plus a mechanism for adding to it. Let’s create a UserComponent
to represent this.
For laying out the component, let’s say at the very top, we place the text “Shopping List For”, and directly below that we have an editable text box where the user can enter a store name. On the bottom, we’ll have a text box to enter a new item, and a button to add that item to the list. And in the space between, we’ll show the list in its current form. This sounds like an ideal fit for the DockPanel
:
<UserControl x:Class="ShopEasy.ShoppingList"
xmlns="http://schemas.microsoft.com/winfx/2006/xaml/presentation"
xmlns:x="http://schemas.microsoft.com/winfx/2006/xaml"
xmlns:mc="http://schemas.openxmlformats.org/markup-compatibility/2006"
xmlns:d="http://schemas.microsoft.com/expression/blend/2008"
xmlns:local="clr-namespace:ShopEasy"
mc:Ignorable="d"
d:DesignHeight="450" d:DesignWidth="200">
<DockPanel>
<TextBlock DockPanel.Dock="Top" FontWeight="Bold" TextAlignment="Center">
Shopping List For:
</TextBlock>
<TextBox DockPanel.Dock="Top" FontWeight="Bold" TextAlignment="Center" />
<Button DockPanel.Dock="Bottom" Click="AddItemToList">Add Item To List</Button>
<TextBox Name="itemTextBox" DockPanel.Dock="Bottom"/>
<ListView Name="itemsListView" />
</DockPanel>
</UserControl>
Now in our codebehind, we’ll need to define the AddItemToList
event handler:
using System.Windows;
using System.Windows.Controls;
namespace ShopEasy
{
/// <summary>
/// Interaction logic for ShoppingList.xaml
/// </summary>
public partial class ShoppingList : UserControl
{
/// <summary>
/// Constructs a new ShoppingList
/// </summary>
public ShoppingList()
{
InitializeComponent();
}
/// <summary>
/// Adds the item in the itemTextBox to the itemsListView
/// </summary>
/// <param name="sender">The object sending the event</param>
/// <param name="e">The events describing the event</param>
void AddItemToList(object sender, RoutedEventArgs e)
{
// Make sure there's an item to add
if (itemTextBox.Text.Length == 0) return;
// Add the item to the list
itemsListView.Items.Add(itemTextBox.Text);
// Clear the text box
itemTextBox.Clear();
}
}
}
This particular component is pretty much self-contained. We can use it in other components that need a shopping list. In our case, we’ll add it to a collection of shopping lists we can flip through with a couple of buttons, as well as create new lists in. Let’s call this control ListSwitcher
.
This time, let’s use a Grid
layout and divide the available space into three columns and two rows. The columns we’ll leave with the default width ("1*"
), but the bottom row we’ll set as 100 units high, leaving the top row to expand to fill the remaining space. Along the bottom we’ll create three buttons to navigate between shopping lists. On the top, we’ll use the Grid.ColumnSpan
property on a Border
to span the three columns, creating a container where we’ll display the current ShoppingList
:
<UserControl x:Class="ShopEasy.ListSwitcher"
xmlns="http://schemas.microsoft.com/winfx/2006/xaml/presentation"
xmlns:x="http://schemas.microsoft.com/winfx/2006/xaml"
xmlns:mc="http://schemas.openxmlformats.org/markup-compatibility/2006"
xmlns:d="http://schemas.microsoft.com/expression/blend/2008"
xmlns:local="clr-namespace:ShopEasy"
mc:Ignorable="d"
d:DesignHeight="450" d:DesignWidth="200">
<Grid>
<Grid.ColumnDefinitions>
<ColumnDefinition/>
<ColumnDefinition/>
<ColumnDefinition/>
</Grid.ColumnDefinitions>
<Grid.RowDefinitions>
<RowDefinition/>
<RowDefinition Height="50"/>
</Grid.RowDefinitions>
<Border Name="listContainer" Grid.ColumnSpan="3">
</Border>
<Button Grid.Row="1" Click="OnPriorList">
< Prior List
</Button>
<Button Grid.Row="1" Grid.Column="1" Click="OnNewList">
New List
</Button>
<Button Grid.Row="1" Grid.Column="2" Click="OnNextList">
Next List >
</Button>
</Grid>
</UserControl>
Now we’ll implement the three button Click
event handlers in the codebehind, as well as creating a List<ShoppingList>
to store all of our lists:
using System.Collections.Generic;
using System.Windows;
using System.Windows.Controls;
namespace ShopEasy
{
/// <summary>
/// Interaction logic for ListSwitcher.xaml
/// </summary>
public partial class ListSwitcher : UserControl
{
/// <summary>
/// The list of shopping lists managed by this control
/// </summary>
List<ShoppingList> lists = new List<ShoppingList>();
/// <summary>
/// The index of the currently displayed shopping list
/// </summary>
int currentListIndex = 0;
/// <summary>
/// Constructs a new ListSwitcher
/// </summary>
public ListSwitcher()
{
InitializeComponent();
}
/// <summary>
/// Creates a new ShoppingList and displays it
/// </summary>
/// <param name="sender">What triggered this event</param>
/// <param name="e">The parameters of this event</param>
void OnNewList(object sender, RoutedEventArgs e)
{
// Create a new shopping list
var list = new ShoppingList();
// The current count of lists will be the index of the next list added
currentListIndex = lists.Count;
// Add the list to the list of shopping lists
lists.Add(list);
// Display the list on the control
listContainer.Child = list;
}
/// <summary>
/// Displays the prior shopping list
/// </summary>
/// <param name="sender">What triggered this event</param>
/// <param name="e">The parameters of this event</param>
void OnPriorList(object sender, RoutedEventArgs e)
{
// don't try to access an empty list
if (lists.Count == 0) return;
// decrement the currentListIndex
currentListIndex--;
// make sure we don't go below the first index in the list (0)
if (currentListIndex < 0) currentListIndex = 0;
// display the indexed list
listContainer.Child = lists[currentListIndex];
}
/// <summary>
/// Displays the next shopping list
/// </summary>
/// <param name="sender">What triggered this event</param>
/// <param name="e">The parameters of this event</param>
void OnNextList(object sender, RoutedEventArgs e)
{
// don't try to access an empty list
if (lists.Count == 0) return;
// increment the currentListIndex
currentListIndex++;
// make sure we don't go above the last index in the list (Count - 1)
if (currentListIndex > lists.Count - 1) currentListIndex = lists.Count - 1;
// display the indexed list
listContainer.Child = lists[currentListIndex];
}
}
}
And finally, we’ll modify our MainWindow
XAML to display a ListSwitcher
:
<Window x:Class="ShopEasy.MainWindow"
xmlns="http://schemas.microsoft.com/winfx/2006/xaml/presentation"
xmlns:x="http://schemas.microsoft.com/winfx/2006/xaml"
xmlns:d="http://schemas.microsoft.com/expression/blend/2008"
xmlns:mc="http://schemas.openxmlformats.org/markup-compatibility/2006"
xmlns:local="clr-namespace:ShopEasy"
mc:Ignorable="d"
Title="MainWindow" Height="450" Width="200">
<Grid>
<local:ListSwitcher/>
</Grid>
</Window>
The resulting app allows us to create multiple shopping lists, and swap between them using the buttons:
Much like we can use objects to break program functionality into smaller, more focused units, we can use component-based design to break GUIs into smaller, more focused units. Both reflect one of the principles of good programming practice - the Single Responsibility Principle. This principle suggests each unit of code should focus on a single responsibility, and more complex behaviors be achieved by using multiple units together. As we see here, this principle extends across multiple programming paradigms.
In this chapter, we introduced a new desktop application programming framework - Windows Presentation Foundation (WPF). We explored how WPF uses XAML to define partial classes, allowing for a graphical design editor with regular C# codebehind. We explored XAML syntax and many of the controls found in WPF. We also compared WPF with Windows Forms, which you have previously explored in prior classes. Finally, we discussed an approach to developing GUIs, Component-Based Design, which applies the Single Responsibility Principle to controls, and builds more complex controls through composition of these simpler controls.
Our application is a tree?
In the previous chapter, we introduced Windows Presentation Foundation and XAML, and discussed common layouts and controls, as well as some of the most common features of each of them. We also saw the concept of component-based design and explored its use. In this chapter, we’ll take a deeper dive into how WPF and XAML structure GUIs into an elements tree, and some different ways we can leverage these features for greater control and customization in our programs.
<Style>
<Setter>
StaticResource
In this chapter, you should learn how to navigate the elements tree, declare styles to simplify styling your applications, and declare resources that can be bound to properties of controls.
Consider the ShoppingList
class we developed in the last chapter:
<UserControl x:Class="ShopEasy.ShoppingList"
xmlns="http://schemas.microsoft.com/winfx/2006/xaml/presentation"
xmlns:x="http://schemas.microsoft.com/winfx/2006/xaml"
xmlns:mc="http://schemas.openxmlformats.org/markup-compatibility/2006"
xmlns:d="http://schemas.microsoft.com/expression/blend/2008"
xmlns:local="clr-namespace:ShopEasy"
mc:Ignorable="d"
d:DesignHeight="450" d:DesignWidth="200">
<DockPanel>
<TextBlock DockPanel.Dock="Top" FontWeight="Bold" TextAlignment="Center">
Shopping List For:
</TextBlock>
<TextBox DockPanel.Dock="Top" FontWeight="Bold" TextAlignment="Center" />
<Button DockPanel.Dock="Bottom" Click="AddItemToList">Add Item To List</Button>
<TextBox Name="itemTextBox" DockPanel.Dock="Bottom"/>
<ListView Name="itemsListView" />
</DockPanel>
</UserControl>
Each element in this XAML corresponds to a object of a specific Type, and the nesting of the elements implies a tree-like structure we call the <em>element tree</em>. We can draw this out as an actual tree:
The relationships in the tree are also embodied in the code. Each element has either a Child
or Children
property depending on if it can have just one or multiple children, and these are populated by the elements defined in the XAML. Thus, because the <DockPanel>
has nested within it, a <TextBlock>
, <TextBox>
, <Button>
, <TextBox>
, and <ListView>
, these are all contained in its Children
Property. In turn, the <Button>
element has text as a child, which is implemented as another <TextBlock>
. Also, each component has a Parent
property, which references the control that is its immediate parent.
In other words, all the WPF controls are effectively nodes in a tree data structure. We can modify this data structure by adding or removing nodes. This is exactly what happens in the ListSwitcher
control - when you click the “New List” button, or the “Prior” or “Next” button, you are swapping the subtree that is the child of its <Border>
element:
In fact, the entire application is one large tree of elements, with the <Application>
as its root:
When you first learned about trees, you also learned about tree traversal algorithms. This is one reason that WPF is organized into a tree - the rendering process actually uses a tree traversal algorithm to determine how large to make each control!
You can also traverse the tree yourself, by exploring Child
, Children
, or Parent
properties. For example, if we needed to gain access to the ListSwitcher
from the ShoppingList
in the previous example, you could reach it by invoking:
ListSwitcher switcher = this.Parent.Parent.Parent as ListSwitcher;
In this example, this
is our ShoppingList
, the first Parent
is the Border
containing the ShoppingList
, the second Parent
is the Grid
containing that Border
, and the third Parent
is the actual ListSwitcher
. We have to cast it to be a ListSwitcher
because the type of the Parent
property is a DependencyObject
(a common base class of all controls).
Of course, this is a rather brittle way of finding an ancestor, because if we add any nodes to the element tree (perhaps move the Grid
within a DockPanel
), we’ll need to rewrite it. It would be better to use a loop to iteratively climb the tree until we find the control we’re looking for. This is greatly aided by the <code>LogicalTreeHelper</code> library, which provides standardized static methods for accessing parents and children in the elements tree:
// Start climbing the tree from this node
DependencyObject parent = this;
do
{
// Get this node's parent
parent = LogicalTreeHelper.GetParent(parent);
}
// Invariant: there is a parent element, and it is not a ListSwitcher
while(!(parent is null || parent is ListSwitcher));
// If we get to this point, parent is either null, or the ListSwitcher we're looking for
Searching the ancestors is a relatively easy task, as each node in the tree has only one parent. Searching the descendants takes more work, as each node may have many children, with children of their own.
This approach works well for complex applications with complex GUIs, where it is infeasible to keep references around. However, for our simple application here, it might make more sense to refactor the ShoppingList
class to keep track of the ListSwitcher
that created it, i.e.:
using System.Windows;
using System.Windows.Controls;
namespace ShopEasy
{
/// <summary>
/// Interaction logic for ShoppingList.xaml
/// </summary>
public partial class ShoppingList : UserControl
{
/// <summary>
/// The ListSwitcher that created this list
/// </summary>
private ListSwitcher listSwitcher;
/// <summary>
/// Constructs a new ShoppingList
/// </summary>
public ShoppingList(ListSwitcher listSwitcher)
{
InitializeComponent();
this.listSwitcher = listSwitcher;
}
/// <summary>
/// Adds the item in the itemTextBox to the itemsListView
/// </summary>
/// <param name="sender">The object sending the event</param>
/// <param name="e">The events describing the event</param>
void AddItemToList(object sender, RoutedEventArgs e)
{
// Make sure there's an item to add
if (itemTextBox.Text.Length == 0) return;
// Add the item to the list
itemsListView.Items.Add(itemTextBox.Text);
// Clear the text box
itemTextBox.Clear();
}
}
}
However, this approach now tightly couples the ListSwitcher
and ShoppingList
- we can no longer use the ShoppingList
for other contexts without a ListSwitcher
.
If we instead employed the the traversal algorithm detailed above:
using System.Windows;
using System.Windows.Controls;
namespace ShopEasy
{
/// <summary>
/// Interaction logic for ShoppingList.xaml
/// </summary>
public partial class ShoppingList : UserControl
{
/// <summary>
/// The ListSwitcher that created this list
/// </summary>
private ListSwitcher listSwitcher {
get {
DependencyObject parent = this;
do
{
// Get this node's parent
parent = LogicalTreeHelper.GetParent(parent);
}
// Invariant: there is a parent element, and it is not a ListSwitcher
while(!(parent is null || parent is ListSwitcher));
return parent;
}
}
/// <summary>
/// Constructs a new ShoppingList
/// </summary>
public ShoppingList()
{
InitializeComponent();
}
/// <summary>
/// Adds the item in the itemTextBox to the itemsListView
/// </summary>
/// <param name="sender">The object sending the event</param>
/// <param name="e">The events describing the event</param>
void AddItemToList(object sender, RoutedEventArgs e)
{
// Make sure there's an item to add
if (itemTextBox.Text.Length == 0) return;
// Add the item to the list
itemsListView.Items.Add(itemTextBox.Text);
// Clear the text box
itemTextBox.Clear();
}
}
}
We could invoke the listSwitcher
property to get the ancestor ListSwitcher
. If this control is being used without one, the value will be Null
.
Windows Presentation Foundation takes advantage of the elements tree in other ways. One of the big ones is for styling related elements. Let’s say we are creating a calculator GUI:
<UserControl x:Class="Calculator.Calculator"
xmlns="http://schemas.microsoft.com/winfx/2006/xaml/presentation"
xmlns:x="http://schemas.microsoft.com/winfx/2006/xaml"
xmlns:d="http://schemas.microsoft.com/expression/blend/2008"
xmlns:mc="http://schemas.openxmlformats.org/markup-compatibility/2006"
xmlns:local="clr-namespace:Calculator"
mc:Ignorable="d"
d:DesignWidth="450" d:DesignHeight="450">
<Grid>
<Grid.ColumnDefinitions>
<ColumnDefinition/>
<ColumnDefinition/>
<ColumnDefinition/>
<ColumnDefinition/>
</Grid.ColumnDefinitions>
<Grid.RowDefinitions>
<RowDefinition/>
<RowDefinition/>
<RowDefinition/>
<RowDefinition/>
<RowDefinition/>
</Grid.RowDefinitions>
<Button Grid.Column="0" Grid.Row="1">7</Button>
<Button Grid.Column="1" Grid.Row="1">8</Button>
<Button Grid.Column="2" Grid.Row="1">9</Button>
<Button Grid.Column="0" Grid.Row="2">4</Button>
<Button Grid.Column="1" Grid.Row="2">5</Button>
<Button Grid.Column="2" Grid.Row="2">6</Button>
<Button Grid.Column="0" Grid.Row="3">7</Button>
<Button Grid.Column="1" Grid.Row="3">8</Button>
<Button Grid.Column="2" Grid.Row="3">8</Button>
<Button Grid.Column="0" Grid.Row="4" Grid.ColumnSpan="3">0</Button>
<Button Grid.Column="3" Grid.Row="1">-</Button>
<Button Grid.Column="3" Grid.Row="2">-</Button>
<Button Grid.Column="3" Grid.Row="3">*</Button>
<Button Grid.Column="3" Grid.Row="4">/</Button>
</Grid>
</Window>
Once we have the elements laid out, we realize the text of the buttons is too small. Fixing this would mean setting the FontSize
property of each <Button>
. That’s a lot of repetitive coding.
Thankfully, the XAML developers anticipated this kind of situation, and allow us to attach a <Style>
resource to the control. We typically would do this above the controls we want to style - in this case, either on the <Grid>
or the <UserControl>
. If we were to attach it to the <Grid>
, we’d declare a <Grid.Resources>
property, and inside it, a <Style>
:
<Grid.Resources>
<Style>
</Style>
</Grid.Resources>
The <Style>
element allows us to specify a TargetType
property, which is the Type we want the style to apply to - in this case "Button"
. Inside the <Style>
element, we declare <Setter>
elements, which need Property
and Value
attribute. As you might guess from the names, the <Setter>
will set the specified property to the specified value on each element of the target type.
Therefore, if we use:
<Grid.Resources>
<Style TargetType="Button">
<Setter Property="FontSize" Value="40"/>
</Style>
</Grid.Resources>
The result will be that all buttons that are children of the <Grid>
will have their FontSize
set to 40
device-independent pixels. We don’t need to add a separate FontSize="40"
to each one! However, if we add FontSize="50"
to a single button, that button alone will have a slightly larger font.
We can declare as many <Setters>
as we want in a <Style>
element, and as many <Style>
elements as we want in a <.Resources>
element. Moreover, styles apply to all children in the elements tree. Closer setters override those farther up the tree, and setting the property directly on an element always gives the final say.
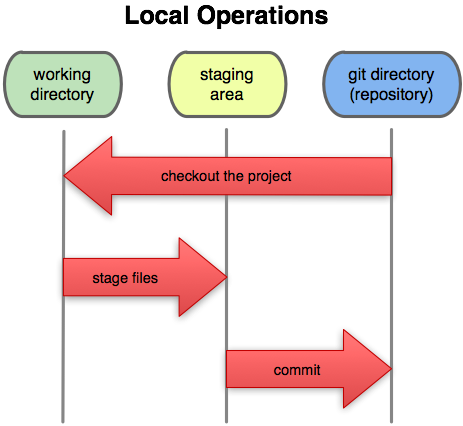
Thus, we might put application-wide styles directly in our MainWindow
using <Window.Resources>
, and override those further down the elements tree when we want a different behavior.
You may notice some similarities between <Style>
elements and the cascading style sheets (css) of web technologies. This is not surprising, as the styling approach used in WPF was inspired by CSS, much as XAML drew inspiration from HTML. However, the implementation details are necessarily different, as XAML is effectively declaring C# objects. Hence, the use of ‘setters’ to set ‘properties’ to a specific ‘value’.
The <Style>
element represents just one kind of resource. We can provide other kinds of resources, like raw data. Say we want to provide a string to display in our program, but want that string declared somewhere easy to find and change (perhaps our customers change their mind frequently). We could declare the string in the Application
resources:
<Application x:Class="WpfTutorialSamples.App"
xmlns="http://schemas.microsoft.com/winfx/2006/xaml/presentation"
xmlns:x="http://schemas.microsoft.com/winfx/2006/xaml"
xmlns:sys="clr-namespace:System;assembly=mscorlib"
StartupUri="WPF application/ExtendedResourceSample.xaml">
<Application.Resources>
<sys:String x:Key="StringToDisplay">Hello World!</sys:String>
</Application.Resources>
</Application>
Then, in our actual control we can use that string as a static resource:
<TextBlock Text="{StaticResource StringToDisplay}">
As long as that element is a descendant of the element the resource is declared on, it will be used in the property. In this case, we’ll display the string “Hello World!” in the TextBlock
. Note that we have to use the x:Key
property to identify the resource, and repeat the key in the "{StaticResource StringToDisplay}"
. The curly braces and the StaticResource
both need to be there (technically, they are setting up a data binding, which we’ll talk about in a future chapter).
We can declare any kind of type as a resource and make it available in our XAML this way.
For example, we could create a LinearGradientBrush
:
<Application x:Class="WpfTutorialSamples.App"
xmlns="http://schemas.microsoft.com/winfx/2006/xaml/presentation"
xmlns:x="http://schemas.microsoft.com/winfx/2006/xaml"
xmlns:sys="clr-namespace:System;assembly=mscorlib"
StartupUri="WPF application/ExtendedResourceSample.xaml">
<Application.Resources>
<LinearGradientBrush x:Key="Rainbow">
<LinearGradientBrush.GradientStops>
<GradientStop Color="Red" Offset="0.0"/>
<GradientStop Color="Yellow" Offset="0.25"/>
<GradientStop Color="Green" Offset="0.50"/>
<GradientStop Color="Blue" Offset="0.75"/>
<GradientStop Color="Violet" Offset="1.0"/>
</LinearGradientBrush.GradientStops>
</LinearGradientBrush>
</Application.Resources>
</Application>
And then use it as a Background
or Foreground
property in our controls:
<Grid Background="{StaticResource Rainbow}">
Since it is only defined in one place, it is now easier to reuse, and if we ever need to change it, we only need to change it in one location.
Finally, we can create static resources from images and other media. First, we have to set its build action to “Resource” in the “Properties” window after adding it to our project:
Then we can declare a <BitmapImage>
resource using a UriSource
property that matches the path to the image within our project:
<Application x:Class="WpfTutorialSamples.App"
xmlns="http://schemas.microsoft.com/winfx/2006/xaml/presentation"
xmlns:x="http://schemas.microsoft.com/winfx/2006/xaml"
xmlns:sys="clr-namespace:System;assembly=mscorlib"
StartupUri="WPF application/ExtendedResourceSample.xaml">
<Application.Resources>
<BitmapImage x:Key="MountainImage" UriSource="Images/mountains.jpg"/>
</Applicaton.Resources>
</Application>
And then we can use this as the ImageSource
for an ImageBrush
:
<Grid>
<Grid.Background>
<ImageBrush ImageSource="{StaticResource MountainImage}"/>
</Grid.Background>
</Grid>
The benefit of using images and other media as resources is that they are compiled into the binary assembly (the .dll or .exe file). This means they don’t need to be copied separately when we distribute our application.
Most WPF controls are themselves composed of multiple, simpler, controls. For example, a <Button>
is composed of a <Border>
and whatever content you place inside the button. A simplified version of this structure appears below (I removed the styling information and the VisualState
components responsible for presenting the button differently when it is enabled, disabled, hovered on, or clicked):
<Border TextBlock.Foreground="{TemplateBinding Foreground}"
x:Name="Border"
CornerRadius="2"
BorderThickness="1">
<Border.BorderBrush>
<LinearGradientBrush StartPoint="0,0"
EndPoint="0,1">
<LinearGradientBrush.GradientStops>
<GradientStopCollection>
<GradientStop Color="{DynamicResource BorderLightColor}"
Offset="0.0" />
<GradientStop Color="{DynamicResource BorderDarkColor}"
Offset="1.0" />
</GradientStopCollection>
</LinearGradientBrush.GradientStops>
</LinearGradientBrush>
</Border.BorderBrush>
<Border.Background>
<LinearGradientBrush EndPoint="0.5,1"
StartPoint="0.5,0">
<GradientStop Color="{DynamicResource ControlLightColor}"
Offset="0" />
<GradientStop Color="{DynamicResource ControlMediumColor}"
Offset="1" />
</LinearGradientBrush>
</Border.Background>
<ContentPresenter Margin="2"
HorizontalAlignment="Center"
VerticalAlignment="Center"
RecognizesAccessKey="True" />
</Border>
This has some implications for working with the control - for example, if you wanted to add rounded corners to the <Button>
, they would actually need to be added to the <Border>
inside the button. This can be done by nesting styles, i.e.:
<Grid>
<Grid.Resources>
<Style TargetType="Button">
<Style.Resources>
<Style TargetType="Border">
<Setter Property="CornerRadius" Value="25"/>
</Style>
</Style.Resources>
</Style>
</Grid.Resources>
<Button>I have rounded corners now!</Button>
</Grid>
Note how the <Style>
targeting the <Border>
is nested inside the Resources
of the <Style>
targeting the <Button>
? This means that the style rules for the <Border>
will only be applied to <Border>
elements that are part of a <Button>
.
Above I listed a simplified version of the XAML used to create a button. The full listing can be found in the Microsoft Documentation
What’s more, you can replace this standard rendering in your controls by replacing the Template
property. For example, we could replace our button with a super-simple rounded <Border>
that nested a <TextBlock>
that does word-wrapping of the button content:
<Button>
<Button.Template>
<ControlTemplate>
<Border CornerRadius="25">
<TextBlock TextWrapping="Wrap">
<ContentPresenter Margin="2"
HorizontalAlignment="Center"
VerticalAlignment="Center"
RecognizesAccessKey="True" />
</TextBlock>
</Border>
</ControlTemplate>
</Button.ControlTemplate>
This is a simple button!
</Button>
The <ContentPresenter>
is what presents the content nested inside the button - in this case, the text This is a simple button!
. Of course, this super-simple button will not change its appearance when you hover over it or click it, or when it is disabled. But it helps convey the idea of a <ControlTemplate>
. As with any other property, you can also set the Template
property of a control using a <Setter>
within a <Style>
targeting that element.
If you only need a simple tweak - like applying word-wrapping to the text of a button, it often makes more sense to supply as content a control that will do so, i.e.:
<Button>
<TextBlock TextWrapping="Wrap">
I also wrap text!
</TextBlock>
</Button>
This allows the <Button>
to continue to use the default ControlTemplate
while providing the desired word-wrapping with a minimum of extra code.
A similar idea appears with <DataTemplate>
, which allows you to customize how bound data is displayed in a control. For example, we often want to display the items in a <ListBox>
in a different way than the default (a <TextBlock>
with minimal styling). We’ll visit this in the upcoming binding lists section.
In this chapter, we saw how WPF applications are organized into a tree of controls. Moreover, we discussed how WPF uses this tree to perform its layout and rendering calculations. We also saw how we can traverse this tree in our programs to find parent or child elements of a specific type.
In addition, we saw how declaring resources at a specific point in the tree makes them available to all elements descended from that node. The resources we looked at included <Style>
elements, which allow us to declare setters for properties of a specific type of element, to apply consistent styling rules.
We also saw how we could declare resources with a x:Key
property, and bind them as static resources to use in our controls - including strings and other common types. Building on that idea, we saw how we could embed images and other media files as resources.
We also explored how <ControlTemplates>
are used to compose complex controls from simpler controls, and make it possible to swap out that implementation for a custom one. We also briefly discussed when it may make more sense to compose the content of a control differently to get the same effect.
When we explore events and data binding in later chapters, we will see how these concepts also interact with the element tree in novel ways.
I Fight for the Users!
Event-Driven programming is a programming paradigm where the program primarily responds to events - typically generated by a user, but also potentially from sensors, network connections, or other sources. We cover it here because event-driven programming is a staple of graphical user interfaces. These typically display a fairly static screen until the user interacts with the program in some meaningful way - moving or clicking the mouse, hitting a key, or the like.
As you might suspect, event-driven programming is often used alongside other programming paradigms, including structured programming and object-orientation. We’ll be exploring how event-driven programming is implemented in C# in this chapter, especially how it interacts with Windows Presentation Foundation.
event
EventArgs
+=
-=
?.
The key skills to learn in this chapter are how to write event listeners, attach event listeners to event handlers, and how to define custom event handlers.
At the heart of every Windows program (and most operating systems), is an infinitely repeating loop we call the message loop and a data structure we call an message queue (some languages/operating systems use the term event instead of message). The message queue is managed by the operating system - it adds new events that the GUI needs to know about (i.e. a mouse click that occurred within the GUI) to this queue. The message loop is often embedded in the main function of the program, and continuously checks for new messages in the queue. When it finds one, it processes the message. Once the message is processed, the message loop again checks for a new message. The basic code for such a loop looks something like this:
function main
initialize()
while message != quit
message := get_next_message()
process_message(message)
end while
end function
This approach works well for most GUIs as once the program is drawn initially (during the initialize()
function), the appearance of the GUI will not change until it responds to some user action.
In a WPF or Windows Forms application, this loop is buried in the <code>Application</code> class that the App
inherits from. Instead of writing the code to process these system messages directly, this class converts these messages into C# events, which are then consumed by the event listeners the programmer provides. We’ll look at these next.
In C#, we use event handlers (sometimes called event listeners in other languages) to register the behavior we want to happen in response to specific events. You’ve probably already used these, i.e. declaring a handler:
private void OnEvent(object sender, EventArgs e) {
// TODO: Respond to the event
}
Most event handlers follow the same pattern. They do not have a return value (their return type is void
), and take two parameters. The first is always an object
, and it is the source of the event (hence “sender”). The second is an EventArgs
object, or a class descended from EventArgs
, which provides details about the event.
For example, the various events dealing with mouse input (MouseMove
, MouseDown
, MouseUp
) supply a <code>MouseEventArgs</code> object. This object includes properties defining the mouse location, number of clicks, mouse wheel rotations, and which button was involved in the event.
You’ve probably attached event handlers using the “Properties” panel in Visual Studio, but you can also attach them in code:
Button button = new Button();
button.Click += OnClick;
Note you don’t include parenthesis after the name of the event handler. You aren’t invoking the event handler, you’re attaching it (so it can be invoked in the future when the event happens). Also, note that we use the +=
operator to signify attaching an event handler.
This syntax is a deliberate choice to help reinforce the idea that we can attach multiple event handlers in C#, i.e.:
Button button = new Button();
button.Click += onClick1;
button.Click += onClick2;
In this case, both onClick1
and onClick2
will be invoked when the button is clicked. This is also one reason to attach event handlers programmatically rather than through the “Properties” window (it can only attach one).
We can also remove an event handler if we no longer want it to be invoked when the event happens. We do this with the -=
operator:
button.Click -= onClick1;
Again, note we use the handler’s name without parenthesis.
Up to this point, you’ve probably only used events that were defined on library objects, like the Button’s Click event. However, you can also declare events in your own classes, and even create new event types.
In order to attach an event handler to an object in C#, we must first declare that that object has the corresponding event. To do so, we need both a name for the event, and a delegate.
In C# a Delegate, a special type that represents a method with a specific method signature and return type. A delegate allows us to associate the delegate any method that matches that signature and return type. For example, the Click
event handler we discussed earlier is a delegate which matches a method that takes two arguments: an object
and an EventArgs
, and returns void. Any event listener that we write that matches this specification can be attached to the button.Click
. In a way, a Delegate
is like an Interface
, only for methods instead of objects.
Consider a class representing an egg. What if we wanted to define an event to represent when it hatched? We’d need a delegate for that event, which can be declared a couple of ways. The traditional method would be:
public delegate void HatchHandler(object sender, EventArgs args);
And then in our class we’d declare the corresponding event. In C#, these are written much like a field, but with the addition of the event
keyword:
public event HatchHandler Hatch;
Like a field declaration, an event declaration can have an access modifier (public
, private
, or protected
), a name (in this case Hatch
), and a type (the delegate). It also gets marked with the event
keyword.
When C# introduced generics, it became possible to use a generic delegate as well, EventHandler<T>
, where the T
is the type for the event arguments. This simplifies writing an event, because we no longer need to define the delegate ourselves. So instead of the two lines above, we can just use:
public event EventHandler<EventArgs> Hatch;
The second form is increasingly preferred, as it makes testing our code much easier (we’ll see this soon), and it’s less code to write.
We might also want to create our own custom event arguments to accompany the event. Perhaps we want to provide a reference to an object representing the baby chick that hatched. To do so we can create a new class that inherits from EventArgs
:
/// <summary>
/// A class representing the hatching of a chick
/// </summary>
public class HatchEventArgs : EventArgs
{
/// <summary>
/// The chick that hatched
/// </summary>
public Chick Chick { get; protected set; }
/// <summary>
/// Constructs a new HachEventArgs
/// </summary>
/// <param name="chick">The chick that hatched</param>
public HatchEventArgs(Chick chick)
{
this.Chick = chick;
}
}
And we use this custom event args in our event declaration as the type for the generic EventHandler<T>
generic:
public event EventHandler<HatchEvent> Hatch;
Now let’s say we set up our Egg
constructor to start a timer to determine when the egg will hatch:
public Egg()
{
// Set a timer to go off in 20 days
// (ms = 20 days * 24 hours/day * 60 minutes/hour * 60 seconds/minute * 1000 milliseconds/seconds)
var timer = new System.Timers.Timer(20 * 24 * 60 * 60 * 1000);
timer.Elapsed += StartHatching;
}
In the event handler startHatching
, we’ll want to create our new baby chick, and then trigger the Hatch
event. To do this, we need to raise the event to pass to any attached handlers with Hatch.Invoke()
, passing in both the event arguments and the source of the event (our egg):
private void StartHatching(object source, ElapsedEventArgs e)
{
var chick = new Chick();
var args = new HatchEventArgs(chick);
Hatch.Invoke(this, args);
}
However we might have the case where there are no registered event handlers, in which case Hatch
evaluates to null
, and attempting to call Invoke()
will cause an error. We can prevent this by wrapping our Invoke()
within a conditional:
if(Hatch != null) {
Hatch.Invoke(this, args);
}
However, there is a handy shorthand form for doing this (more syntactic sugar):
Hatch?.Invoke(this, args);
Using the question mark (?
) before the method invocation is known as the Null-condition operator. We use this to avoid calling the Invoke()
method if PropertyChanged
is null (which is the case if no event handlers have been assigned to it). It tests the object to see if it is null. If it is null, the method is not invoked.
You might be wondering why an event with no assigned event handlers is Null
instead of some form of empty collection. The answer is rooted in efficiency - remember that each object (even empty collection) requires a certain amount of memory to hold its details. Now think about all the possible events we might want to listen for in a GUI. The System.Windows.Controls.Control Class (a base class for all WPF controls) defines around 100 events. Now multiply that by all the controls used in a single GUI, and you’ll see that small amount of memory consumption adds up quickly. By leaving unused events null, C# saves significant memory!
Thus, our complete egg class would be:
/// <summary>
/// A class representing an egg
/// </summary>
public class Egg
{
/// <summary>
/// An event triggered when the egg hatches
/// </summary>
public event EventHandler<HatchEventArgs> Hatch;
/// <summary>
/// Constructs a new Egg instance
/// </summary>
public Egg()
{
// Set a timer to go off in 20 days
// (ms = 20 days * 24 hours/day * 60 minutes/hour * 60 seconds/minute * 1000 milliseconds/seconds)
var timer = new System.Timers.Timer(20 * 24 * 60 * 60 * 1000);
timer.Elapsed += StartHatching;
}
/// <summary>
/// Handles the end of the incubation period
/// by triggering a Hatch event
/// </summary>
private void StartHatching(object source, ElapsedEventArgs e)
{
var chick = new Chick();
var args = new HatchEventArgs(chick);
Hatch?.Invoke(this, args);
}
}
It might be coming clear that in many ways, events are another form of message passing, much like methods are. In fact, they are processed much the same way: the Invoke()
method of the event calls each attached event handler in turn.
Regular event invocation in C# is synchronous, just as is method calling - invoking an event passes execution to the event handlers one at a time the same way calling a method hands program execution to the method. Once they have finished executing, program execution continues back in the code that invoked the event. Let’s see a practical example based on our discussion of the Hatch event. If we were to give our chick a name:
private void StartHatching(object source, ElapsedEventArgs e)
{
var chick = new Chick();
var args = new HatchEventArgs(chick);
Hatch?.Invoke(this, args);
chick.Name = "Cluckzilla";
}
And in our event handler, we tried to print that name:
private void OnHatch(object sender, HatchEventArgs e)
{
Console.WriteLine($"Welcome to the world, {e.Chick.Name}!");
}
The OnHatch
event handler would be triggered by the Hatch?.Invoke()
line before the name was set, so the Chick.Name
property would be null! We would need to move the name assignment to before the Invoke()
call for it to be available in any attached event handlers.
The EventArgs
define what the message contains, the sender
specifies which object is sending the event, and the objects defining the event handlers are the ones receiving it.
That last bit is the biggest difference between using an event to pass a message and using a method to pass the same message. With a method, we always have one object sending and one object receiving. In contrast, an event can have no objects receiving, one object receiving, or many objects receiving.
An event is therefore more flexible and open-ended. We can determine which object(s) should receive the message at any point - even at runtime. In contrast, with a method we need to know what object we are sending the message to (i.e invoking the method of) as we write the code to do so.
Let’s look at a concrete example of where this can come into play.
We often have classes which encapsulate data we might need to look at. For example, we might have a “Smart” dog dish, which keeps track of the amount of food it contains in ounces. So it exposes a Weight
property.
Now let’s assume we have a few possible add-on products that can be combined with that smart bowl. One is a “dinner bell”, which makes noises when the bowl is filled (ostensibly to attract the dog, but mostly just to annoy your neighbors). Another is a wireless device that sends texts to your phone to let you know when the bowl is empty.
How can the software running on these devices determine when the bowl is empty or full? One possibility would be to check the bowl’s weight constantly, or at a set interval. We call this strategy polling:
/// <summary>
/// The run button for the Dinner Bell add-on
/// </summary>
public void Run()
{
while(bowl.Weight != 0) {
// Do nothing
}
// If we reach here, the bowl is empty!
sendEmptyText();
}
The problem with this approach is that it means our program is running full-bore all the time. If this is a battery-operated device, those batteries will drain quickly. It might be better if we let the smart bowl notify the Dinner Bell, but if we did this using methods, the Smart Bowl would need a reference to that dinner bell… and any other accessories we plug in.
This was a common problem in GUI design - sometimes we need to know when a property changes because we are displaying that property’s value in the GUI, possibly in multiple places. But if that property is not part of a GUI display, we may not care when it changes.
The standard answer to this dilemma in .NET is the INotifyPropertyChanged
interface - an interface defined in the System.ComponentModel
namespace that requires you to implement a single event PropertyChanged
on the class that is changing. You can define this event as:
public event PropertyChangedEventHandler PropertyChanged;
This sets up the PropertyChanged
event handler on your class. Let’s first look at writing event listeners to take advantage of this event.
In our example, we would do this with the smart dog bowl, and add listeners to the dinner bell and empty notification tools. The PropertyChangedEventArgs
includes the name of the property that is changing (PropertyName
) - so we can check that 1) the property changing is the weight, and 2) that the weight meets our criteria, i.e.:
/// <summary>
/// A SmartBowl accessory that sends text notifications when the SmartBowl is empty
/// </summary>
public class EmptyTexter
{
/// <summary>
/// Constructs a new EmptyTexter object
/// </summary>
/// <param Name="bowl">The SmartBowl to listen to</param>
public EmptyTexter(SmartBowl bowl)
{
bowl.PropertyChanged += onBowlPropertyChanged;
}
/// <summary>
/// Responds to changes in the Weight property of the bowl
/// </summary>
/// <param Name="Sender">The bowl sending the event</param>
/// <param Name="e">The event arguments (specifying which property changed)</param>
private void onBowlPropertyChanged(object sender, PropertyChangedEventArgs e)
{
// Only move forward if the property changing is the weight
if (e.PropertyName == "Weight")
{
if (sender is SmartBowl)
{
var bowl = sender as SmartBowl;
if (bowl.Weight == 0) textBowlIsEmpty();
}
}
}
/// <summary>
/// Helper method to notify bowl is empty
/// </summary>
private void textBowlIsEmpty()
{
// TODO: Implement texting
}
}
Note that in our event listener, we need to check the specific property that is changing is the one we care about - the Weight
. We also cast the source of the event back into a SmartBowl
, but only after checking the cast is possible. Alternatively, we could have stored the SmartBowl
instance in a class variable rather than casting.
Or, we can use the new is type pattern expression:
if(sender is SmartBowl bowl) {
// Inside this body, bowl is the sender cast as a SmartBowl
// TODO: logic goes here
}
This is syntactic sugar for:
if(sender is SmartBowl) {
var bowl = sender as SmartBowl;
// TODO: logic goes here
}
Notice how the is type pattern expression merges the if test and variable assignment?
Also, notice that the only extra information supplied by our PropertyChangedEventArgs
is the name of the property - not its prior value, or any other info. This helps keep the event lightweight, but it does mean if we need to keep track of prior values, we must implement that ourselves, as we do in the DinnerBell
implementation:
/// <summary>
/// A SmartBowl accessory that makes noise when the bowl is filled
/// </summary>
public class DinnerBell
{
/// <summary>
/// Caches the previous weight measurement
/// </summary>
private double lastWeight;
/// <summary>
/// Constructs a new DinnerBell object
/// </summary>
/// <param Name="bowl">The SmartBowl to listen to</param>
public DinnerBell(SmartBowl bowl)
{
lastWeight = bowl.Weight;
bowl.PropertyChanged += onBowlPropertyChanged;
}
/// <summary>
/// Responds to changes in the Weight property of the bowl
/// </summary>
/// <param Name="Sender">The bowl sending the event</param>
/// <param Name="e">The event arguments (specifying which property changed)</param>
private void onBowlPropertyChanged(object sender, PropertyChangedEventArgs e)
{
// Only move forward if the property changing is the weight
if (e.PropertyName == "Weight")
{
// Cast the sender to a smart bowl using the is type expression
if (sender is SmartBowl bowl)
{
// Ring the dinner bell if the bowl is now heavier
// (i.e. food has been added)
if (bowl.Weight > lastWeight) ringTheBell();
// Cache the new weight
lastWeight = bowl.Weight;
}
}
}
/// <summary>
/// Helper method to make noise
/// </summary>
private void ringTheBell()
{
// TODO: Implement noisemaking
}
}
For the event listeners to work as expected, we need to implement the PropertyChanged
event in our SmartBowl
class with:
public event PropertyChangedEventHandler PropertyChanged;
Which makes it available for the event handlers to attach to. But this is only part of the process, we also need to invoke this event when it happens. This is done with the Invoke(object sender, EventArgs e)
method defined for every event handler. It takes two parameters, an object
which is the source of the event, and the EventArgs
defining the event. The specific kind of EventArgs
corresponds to the event declaration - in our case, PropertyChangedEventArgs
.
Let’s start with a straightforward example. Assume we have a Name
property in the SmartBowl
that is a customizable string, allowing us to identify the bowl, i.e. “Water” or “Food”. When we change it, we need to invoke the PropertyChanged
event, i.e.:
private string name = "Bowl";
public string Name {
get {return name;}
set
{
name = value;
PropertyChanged?.Invoke(this, new PropertyChangedEventArgs("Name"));
}
}
Notice how we use the setter for Name
to invoke the PropertyChanged
event handler, after the change to the property has been made. This invocation needs to be done after the change, or the responding event listener may grab the old value (remember, event listeners are triggered synchronously).
Also note that we use the null-conditional operator <code>?.</code> to avoid calling the Invoke()
method if PropertyChanged
is null (which is the case if no event listeners have been assigned).
Now let’s tackle a more complex example. Since our SmartBowl
uses a sensor to measure the weight of its contents, we might be able to read the sensor data - probably through a driver or a class representing the sensor. Rather than doing this constantly, let’s set a polling interval of 1 minute:
/// <summary>
/// A class representing a "smart" dog bowl.
/// </summary>
public class SmartBowl : INotifyPropertyChanged
{
/// <summary>
/// Event triggered when a property changes
/// </summary>
public event PropertyChangedEventHandler PropertyChanged;
/// <summary>
/// The weight sensor installed in the bowl
/// </summary>
Sensor sensor;
private string name = "Bowl";
/// <summary>
/// The name of this bowl
/// </summary>
public string Name
{
get { return name; }
set
{
name = value;
PropertyChanged?.Invoke(this, new PropertyChangedEventArgs("Name"));
}
}
private double weight;
/// <summary>
/// The weight of the bowl contents, measured in ounces
/// </summary>
public double Weight
{
get { return weight; }
set
{
// We only want to treat the weight as changing
// if the change is more than a 16th of an ounce
if (Math.Abs(weight - value) > 1 / 16)
{
weight = value;
// Notify of the property changing
PropertyChanged?.Invoke(this, new PropertyChangedEventArgs("Weight"));
}
}
}
/// <summary>
/// Constructs a new SmartBowl
/// </summary>
/// <param Name="sensor">the weight sensor</param>
public SmartBowl(Sensor sensor)
{
this.sensor = sensor;
// Set the initial weight
weight = sensor.Value;
// Set a timer to go off in 1 minute
// (ms = 60 seconds/minute * 1000 milliseconds/seconds)
var timer = new System.Timers.Timer(60 * 1000);
// Set the timer to reset when it goes off
timer.AutoReset = true;
// Trigger a sensor read each time the timer elapses
timer.Elapsed += readSensor;
}
/// <summary>
/// Handles the elapsing of the polling timer by updating the weight
/// </summary>
private void readSensor(object Sender, System.Timers.ElapsedEventArgs e)
{
this.Weight = sensor.Value;
}
}
Notice in this code, we use the setter of the Weight
property to trigger the PropertyChanged
event. Because we’re dealing with a real-world sensor that may have slight variations in the readings, we also only treat changes of more than 1/16th of an ounce as significant enough to change the property.
With the INotifyPropertyChanged
interface, the only aspect Visual Studio checks is that the PropertyChanged
event is declared. There is no built-in check that the programmer is using it as expected. Therefore it is upon you, the programmer, to ensure that you meet the expectation that comes with implementing this interface: that any public or protected property that changes will invoke the PropertyChanged
event.
Finally, we should write unit tests to confirm that our PropertyChanged
event works as expected:
public class SmartBowlUnitTests {
/// <summary>
/// A mock sensor that increases its reading by one ounce
/// every time its Value property is invoked.
/// </summary>
class MockChangingWeightSensor : Sensor
{
double value = 0.0;
public double Value {
get {
value += 1;
return value;
}
}
}
[Fact]
public void NameChangeShouldTriggerPropertyChanged()
{
var bowl = new SmartBowl(new MockChangingWeightSensor());
Assert.PropertyChanged(bowl, "Name", () => {
bowl.Name = "New Name";
});
}
[Fact]
public void WeightChangeShouldTriggerPropertyChanged()
{
var bowl = new SmartBowl(new MockChangingWeightSensor());
Assert.PropertyChangedAsync(bowl, "Weight", () => {
return Task.Delay(2 * 60 * 1000);
});
}
}
The PropertyChanged
interface is so common in C# programming that we have two assertions dealing with it. The first we use to test the Name
property:
[Fact]
public void NameChangeShouldTriggerPropertyChanged()
{
var bowl = new SmartBowl(new MockChangingWeightSensor());
Assert.PropertyChanged(bowl, "Name", () => {
bowl.Name = "New Name";
});
}
Notice that Assert.PropertyChanged(@object ojb, string propertyName, Action action)
takes three arguments - first the object with the property that should be changing, second the name of the property we expect to change, and third an action that should trigger the event. In this case, we change the name property.
The second is a bit more involved, as we have an event that happens based on a timer. To test it therefore, we have to wait for the timer to have had an opportunity to trigger. We do this with an asynchronous action, so we use the Assert.PropertyChangedAsync(@object obj, string propertyName, Func<Task> action)
. The first two arguments are the same, but the last one is a Func
(a function) that returns an asynchronous Task
object. The simplest one to use here is Task.Delay
, which delays for the supplied period of time (in our case, two minutes). Since our property should change on one-minute intervals, we’ll know if there was a problem if it doesn’t change after two minutes.
Considering that C# was developed as an object-oriented language from the ground up, you would expect that events would be inheritable just like properties, fields, and methods. Unfortunately this is not the case. Remember, the C# language is compiled into intermediate language to run on the .NET Runtime, and this Runtime proceeded C# (it is also used to compile Visual Basic), and the way events are implemented in intermediate language does not lend itself to inheritance patterns.
This has some important implications for writing C# events:
virtual
and override
keywords used with events do not actually create an overridden event - you instead end up with two separate implementations.The standard way programmers have adopted to this issue is to:
protected
helper method to that base class that will invoke the event, taking whatever parameters are neededFor example, the PropertyChanged
event we discussed previously is often invoked from a helper method named OnPropertyChanged()
that is defined like this:
protected virtual void OnPropertyChanged(string propertyName)
{
this.PropertyChanged?.Invoke(this, new PropertyChangedEventArgs(propertyName));
}
In derived classes, you can indicate a property is changing by calling this event, and passing in the property name, i.e.:
private object _tag = null;
/// <summary>
/// An object to represent whatever you need
/// </summary>
public object Tag {
get => _obj;
set
{
if(value != _obj)
{
_obj = value;
OnPropertyChanged(nameof(this.Tag));
}
}
}
Note the call to OnPropertyChanged()
- this will trigger the PropertyChanged
event handler on the base class.
You might have noticed the use of nameof(this.Tag)
in the example code above. The nameof expression returns the name of a property as a string. This approach is preferred over just writing the string, as it makes it less likely a typo will result in your code not working as expected.
While events exist in Windows Forms, Windows Presentation Foundation adds a twist with their concept of routed events. Routed events are similar to regular C# events, but provide additional functionality. One of the most important of these is the ability of the routed event to “bubble” up the elements tree. Essentially, the event will be passed up each successive WPF element until one chooses to “handle” it, or the top of the tree is reached (in which case the event is ignored).
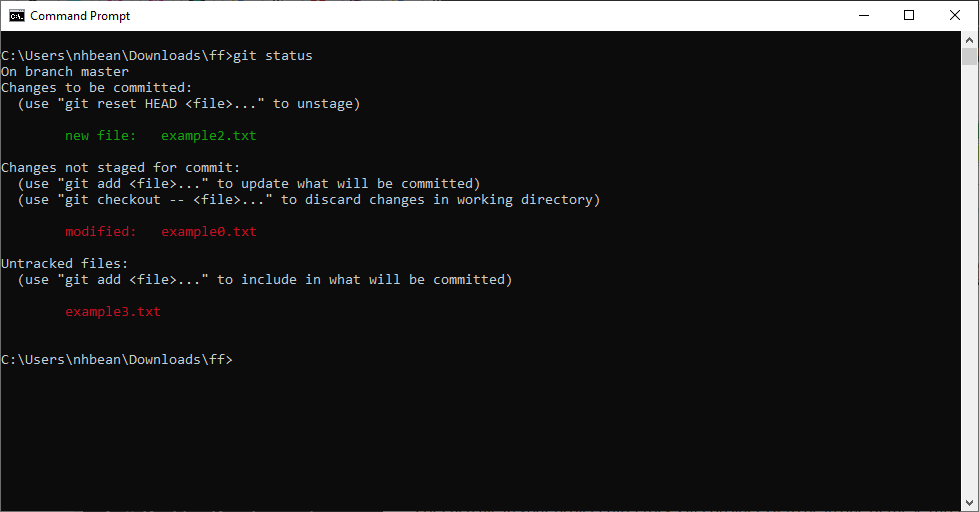
Consider a Click event handler for a button. In Windows Forms, we have to attach our listener directly to the button, i.e:
namespace WindowsFormsApp1
{
public partial class Form1 : Form
{
public Form1()
{
InitializeComponent();
IncrementButton.Click += HandleClick;
}
private void HandleClick(object sender, EventArgs e)
{
// TODO: Handle our click
}
}
}
With WPF we can also attach an event listener directly to the button, but we can also attach an event listener to an ancestor of the button (a component further up the element tree). The click event will “bubble” up the element tree, and each successive parent will have the opportunity to handle it. I.e. we can define a button in the ChildControl
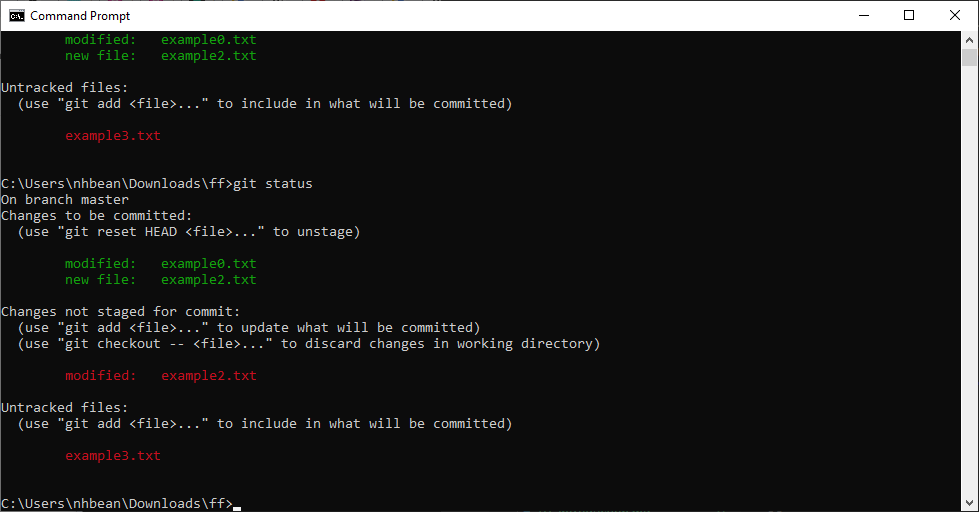
:
<UserControl x:Class="WpfApp1.ChildControl"
xmlns="http://schemas.microsoft.com/winfx/2006/xaml/presentation"
xmlns:x="http://schemas.microsoft.com/winfx/2006/xaml"
xmlns:mc="http://schemas.openxmlformats.org/markup-compatibility/2006"
xmlns:d="http://schemas.microsoft.com/expression/blend/2008"
xmlns:local="clr-namespace:WpfApp1"
mc:Ignorable="d"
d:DesignHeight="450" d:DesignWidth="800">
<Grid>
<Button Name="IncrementButton">Count</Button>
</Grid>
</UserControl>
And add an instance of ChildControl
to our MainWindow
:
<Window x:Class="WpfApp1.MainWindow"
xmlns="http://schemas.microsoft.com/winfx/2006/xaml/presentation"
xmlns:x="http://schemas.microsoft.com/winfx/2006/xaml"
xmlns:d="http://schemas.microsoft.com/expression/blend/2008"
xmlns:mc="http://schemas.openxmlformats.org/markup-compatibility/2006"
xmlns:local="clr-namespace:WpfApp1"
mc:Ignorable="d"
Title="MainWindow" Height="450" Width="800">
<Grid Button.Click="HandleClick">
<local:ChildControl/>
</Grid>
</Window>
Note that in our <Grid>
we attached a Button.Click
handler? The attached listener, HandleClick
, will be invoked for all Click
events arising from Buttons
that are nested under the <Grid>
in the elements tree. We can then write this event handler in the codebehind of our MainWindow
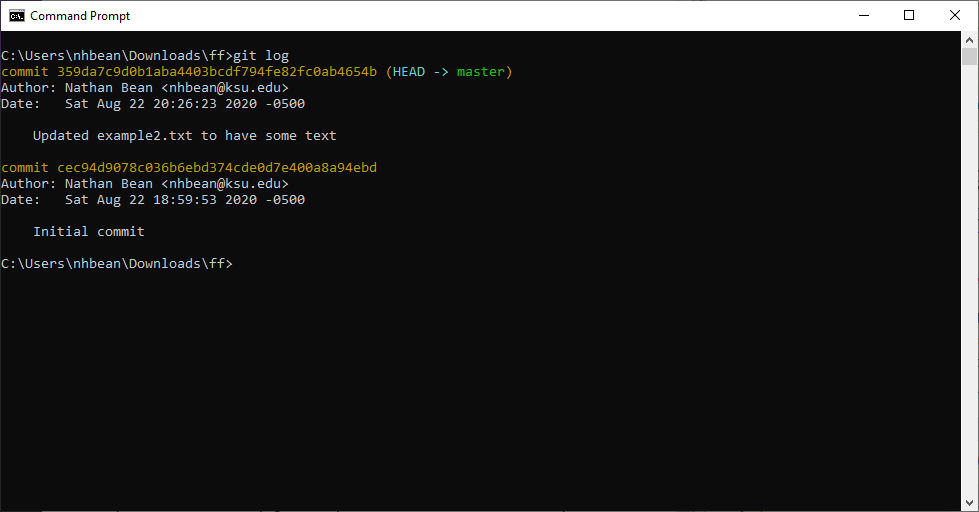
:
namespace WpfApp1
{
/// <summary>
/// Interaction logic for MainWindow.xaml
/// </summary>
public partial class MainWindow : Window
{
public MainWindow()
{
InitializeComponent();
}
private void HandleClick(Object sender, RoutedEventArgs e)
{
if(e.OriginalSource is Button button && button.Name == "IncrementButton")
{
// TODO: Handle increment;
e.Handled = true;
}
}
}
}
Note that because this event listener will be triggered for all buttons, we need to make sure it’s a button we care about - so we cast the OriginalSource
of the event to be a button and check its Name
property. We use the RoutedEventArgs.OriginalSource
because the sender
won’t necessarily be the specific control the event originated in - in this case it actually is the Grid
containing the button. Also, note that we mark e.Handled
as true
. This tells WPF it can stop “bubbling” the event, as we have taken care of it.
We’ll cover routed events in more detail in the upcoming Dependency Objects chapter, but for now you need to know that the GUI events you know from Windows Forms (Click, Select, Focus, Blur), are all routed events in WPF, and therefore take a RoutedEventArgs
object instead of the event arguments you may be used to.
The PropertyChanged
event notifies us when a property of an object changes, which covers most of our GUI notification needs. However, there are some concepts that aren’t covered by it - specifically, when an item is added or removed from a collection. We use a different event, NotifyCollectionChanged
to convey when this occurs.
The INotifyCollectionChanged
interface defined in the System.Collections.Specialized
namespace indicates the collection implements the NotifyCollectionChangedEventHandler
, i.e.:
public event NotifyCollectionChangedEventHandler NotifyCollectionChanged;
And, as you would expect, this event is triggered any time the collection’s contents change, much like the PropertyChanged
event we discussed earlier was triggered when a property changed. However, the NotifyCollectionChangedEventArgs
provides a lot more information than we saw with the PropertyChangedEventArgs
,as you can see in the UML diagram below:
With PropertyChangedEventArgs
we simply provide the name of the property that is changing. But with NotifyCollectionChangedEventArgs
, we are describing both what the change is (i.e. an Add, Remove, Replace, Move, or Reset), and what item(s) we affected. So if the action was adding an item, the NotifyCollectionChangedEventArgs
will let us know what item was added to the collection, and possibly at what position it was added at.
When implementing the INotifyCollectionChanged
interface, you must supply a NotifyCollectionChangedEventArgs
object that describes the change to the collection. This class has multiple constructors, and you must select the correct one, or your code will cause a runtime error when the event is invoked.
You might be wondering why PropertyChangedEventArgs
contains so little information compared to NotifyCollectionChangedEventArgs
. Most notably, the old and new values of the property could have been included. I suspect the reason they were not is that there are many times where you don’t actually need to know what the property value is - just that it changed, and you can always retrieve that value once you know you need to.
In contrast, there are situations where a GUI displaying a collection may have hundreds of entries. Identifying exactly which ones have changed means that only those entries need to be modified in the GUI. If we didn’t have that information, we’d have to retrieve the entire collection and re-render it, which can be a very computationally expensive process.
But ultimately, the two interfaces were developed by different teams at different times, which probably accounts for most of the differences.
The only property of the NotifyCollectionChangedArgs
that will always be populated is the Action
property. The type of htis property is the NotifyCollectionChangedAction
enumeration, and its values (and what they represent) are:
NotifyCollectionChangedAction.Add
- one or more items were added to the collectionNotifyCollectionChangedAction.Move
- an item was moved in the collectionNotifyCollectionChangedAction.Remove
- one or more items were removed from the collectionNotifyCollectionChangedAction.Replace
- an item was replaced in the collectionNotifyCollectionChangedAction.Reset
- drastic changes were made to the collectionA second feature you probably noticed from the UML is that there are a lot of constructors for the NotifyCollectionChangedEventArgs
. Each represents a different situation, and you must pick the appropriate one.
For example, the NotifyCollectionChangedEventArgs(NotifyCollectionChangedAction)
constructor represents a NotifyCollectionChangedAction.Reset
change. This indicates the collection’s content changed dramatically, and the best recourse for a GUI is to ask for the full collection again and rebuild the display. You should only use this one-argument constructor for a Reset action.
In C#, there is no mechanism for limiting a constructor to specific argument values. So you actually can call the above constructor for a different kind of event, i.e.:
new NotifyCollectionChangedEventArgs(NotifyCollectionChangedAction.Add);
However, doing so will throw a InvalidArgumentException
when the code is actually executed.
In general, if you are adding or removing an object
, you need to provide the object
to the constructor. If you are adding or removing multiple objects, you will need to provide an IList
of the affected objects. And you may also need to provide the object’s index in the collection. You can read more about the available constructors and their uses in the Microsoft Documentation.
In the testing chapter, we introduced the XUnit assertion for testing events, Assert.Raises<T>
. Let’s imagine a doorbell class that raises a Ring
event when it is pressed, with information about the door, which can be used to do things like ring a physical bell, or send a text notification:
/// <summary>
/// A class representing details of a ring event
/// </summary>
public class RingEventArgs : EventArgs
{
private string _door;
/// <summary>
/// The identity of the door for which the doorbell was activated
public string Door => _door;
/// <summary>
/// Constructs a new RingEventArgs
/// </summary>
public RingEventArgs(string door)
{
_door = door;
}
}
/// <summary>
/// A class representing a doorbell
/// </summary>
public class Doorbell
{
/// <summary>
/// An event triggered when the doorbell rings
/// </summary>
public event EventHandler<RingEventArgs> Ring;
/// <summary>
/// The name of the door where this doorbell is mounted
/// </summary>
public string Identifier {get; set;}
/// <summary>
/// Handles the end of the incubation period
/// by triggering a Hatch event
/// </summary>
public void Push()
{
Ring?.Invoke(this, new RingEventArgs(Identifier));
}
}
To test this doorbell, we’d want to make sure that the Ring
event is invoked when the Push()
method is called. The Assert.Raises<T>
does exactly this:
[Fact]
public void PressingDoorbellShouldRaiseRingEvent
Doorbell db = new Doorbell();
Assert.Raises<RingEventArgs>(
handler => db.Ring += handler,
handler => db.Ring -= handler,
() => {
db.Push();
});
This code may be a bit confusing at first, so let’s step through it. The <T>
is the type of event arguments we expect to receive, in this case, RingEventArgs
. The first argument is a lambda expression that attaches an event handler handler
(provided by the Assert.Raises
method) to our object to test, db
. The second argument is a lambda expression that removes the event handler handler
. The third is an action (also written as a lambda expression) that should trigger the event if the code we are testing is correct.
This approach allows us to test events declared with the generic EventHandler<T>
, which is one of the reasons we prefer it. It will not work with custom event handlers though; for those we’ll need a different approach.
In the previous section, we discussed using XUnit’s Assert.Raises<T>
to test generic events (events declared with the EventHandler<T>
generic). However, this approach does not work with non-generic events, like PropertyChanged
and CollectionChanged
. That is why XUnit provides an Assert.PropertyChanged()
method. Unfortunately, it does not offer a corresponding test for CollectionChanged
. So to test for this expectation we will need to write our own assertions.
To do that, we need to understand how assertions in the XUnit framework work. Essentially, they test the truthfulness of what is being asserted (i.e. two values are equal, a collection contains an item, etc.). If the assertion is not true, then the code raises an exception - specifically, a XunitException
or a class derived from it. This class provides a UserMessage
(the message you get when the test fails) and a StackTrace
(the lines describing where the error was thrown). With this in mind, we can write our own assertion method. Let’s start with a simple example that asserts the value of a string is “Hello World”:
public static class MyAssert
{
public class HelloWorldAssertionException: XunitException
{
public HelloWorldAssertionException(string actual) : base($"Expected \"Hello World\" but instead saw \"{actual}\"") {}
}
public static void HelloWorld(string phrase)
{
if(phrase != "Hello World") throw new HelloWorldException(phrase);
}
}
Note that we use the base
keyword to execute the XunitException
constructor as part of the HelloWorldAssertionException
, and pass along the string
parameter actual
. Then the body of the XunitException
constructor does all the work of setting values, so the body of our constructor is empty.
Now we can use this assertion in our own tests:
[Theory]
[InlineData("Hello World")]
[InlineData("Hello Bob")]
public void ShouldBeHelloWorld(string phrase)
{
MyAssert.HelloWorld(phrase);
}
The first InlineData
will pass, and the second will fail with the report Expected "Hello World" but instead saw Hello Bob
.
This was of course, a silly example, but it shows the basic concepts. We would probably never use this in our own work, as Assert.Equal()
can do the same thing. Now let’s look at a more complex example that we would use.
As we discussed previously, the CollectionChanged
event cannot be tested with the Xunit Assert.Throws
. So this is a great candidate for custom assertions. To be thorough, we should test all the possible actions (and we would do this if expanding the Xunit library). But for how we plan to use it, we really only need two actions covered - adding and removing items one at a time from the collection. Let’s start with our exception definitions:
public static class MyAssert
{
public class NotifyCollectionChangedNotTriggeredException: XunitException
{
public NotifyCollectionChangedNotTriggeredException(NotifyCollectionChangedAction expectedAction) : base($"Expected a NotifyCollectionChanged event with an action of {expectedAction} to be invoked, but saw none.") {}
}
public class NotifyCollectionChangedWrongActionException: XunitException
{
public NotifyCollectionChangedWrongActionException(NotifyCollectionChangedAction expectedAction, NotifyCollectionChangedAction actualAction) : base($"Expected a NotifyCollectionChanged event with an action of {expectedAction} to be invoked, but saw {actualAction}") {}
}
public class NotifyCollectionChangedAddException: XunitException
{
public NotifyCollectionChangedAddException(object expected, object actual) : base($"Expected a NotifyCollectionChanged event with an action of Add and object {expected} but instead saw {actual}") {}
}
public class NotifyCollectionChangedRemoveException : XunitException
{
public NotifyCollectionChangedRemoveException(object expectedItem, int expectedIndex, object actualItem, int actualIndex) : base($"Expected a NotifyCollectionChanged event with an action of Remove and object {expectedItem} at index {expectedIndex} but instead saw {actualItem} at index {actualIndex}") {}
}
}
We have four different exceptions, each with a very specific message conveying what the failure was due to - no event being triggered, an event with the wrong action being triggered, or an event with the wrong information being triggered. We could also handle this with one exception class using multiple constructors (much like the NotifyCollectionChangedEventArgs
does).
Then we need to write our assertions, which are more involved than our previous example as 1) the event uses a generic type, so our assertion also must be a generic, and 2) we need to handle an event - so we need to attach an event handler, and trigger code that should make that event occur. Let’s start with defining the signature of the Add
method:
public static class MyAssert {
public static void NotifyCollectionChangedAdd<T>(INotifyCollectionChanged collection, T item, Action testCode)
{
// Assertion tests here.
}
}
We use the generic type T
to allow our assertion to be used with any kind of collection - and the second parameter item
is also this type. That is the object of we are trying to add to the collection
. Finally, the Action
is the code the test will execute that would, in theory, add item
to collection
. Let’s flesh out the method body now:
public static class MyAssert
{
public static void NotifyCollectionChangedAdd<T>(INotifyCollectionChanged collection, T newItem, Action testCode)
{
// A flag to indicate if the event triggered successfully
bool notifySucceeded = false;
// An event handler to attach to the INotifyCollectionChanged and be
// notified when the Add event occurs.
NotifyCollectionChangedEventHandler handler = (sender, args) =>
{
// Make sure the event is an Add event
if (args.Action != NotifyCollectionChangedAction.Add)
{
throw new NotifyCollectionChangedWrongActionException(NotifyCollectionChangedAction.Add, args.Action);
}
// Make sure we added just one item
if (args.NewItems?.Count != 1)
{
// We'll use the collection of added items as the second argument
throw new NotifyCollectionChangedAddException(newItem, args.NewItems);
}
// Make sure the added item is what we expected
if (!args.NewItems[0].Equals(newItem))
{
// Here we only have one item in the changed collection, so we'll report it directly
throw new NotifyCollectionChangedAddException(newItem, args.NewItems[0]);
}
// If we reach this point, the NotifyCollectionChanged event was triggered successfully
// and contains the correct item! We'll set the flag to true so we know.
notifySucceeded = true;
};
// Now we connect the event handler
collection.CollectionChanged += handler;
// And attempt to trigger the event by running the actionCode
// We place this in a try/catch to be able to utilize the finally
// clause, but don't actually catch any exceptions
try
{
testCode();
// After this code has been run, our handler should have
// triggered, and if all went well, the notifySucceed is true
if (!notifySucceeded)
{
// If notifySucceed is false, the event was not triggered
// We throw an exception denoting that
throw new NotifyCollectionChangedNotTriggeredException(NotifyCollectionChangedAction.Add);
}
}
// We don't actually want to catch an exception - we want it to
// bubble up and be reported as a failing test. So we don't
// have a catch () {} clause to this try/catch.
finally
{
// However, we *do* want to remove the event handler. We do
// this in a finally block so it will happen even if we do
// have an exception occur.
collection.CollectionChanged -= handler;
}
}
}
Now we can test this in our code. For example, if we had a collection of ShoppingList
objects named shoppingLists
that implemented INotifyCollectionChanged
, we could test adding a new Shopping list it with:
var newList = new ShoppingList();
MyAssert.NotifyCollectionChangedAdd(shoppingLists, newList, () => {
shoppingLists.Add(shoppingList);
});
Note that we didn’t need to explicitly state T
in this case is ShoppingList
- the compiler infers this from the arguments supplied to the method.
Our assertion method handles adding a single item. We can use method overloading providing another method of the same name with different arguments to handle when multiple items are added. For that case, the signature might look like:
public static void NotifyCollectionChangedAdd<T>(INotifyCollectionChanged collection, ICollection<T> items, Action testCode)
{
// Assertion tests here.
}
We’d also want to write assertion methods for handling removing items, and any other actions we might need to test. I’ll leave these as exercises for the reader.
In this chapter we discussed the Windows Message Loop and Queue, and how messages provided to this loop are transformed into C# events by the Application
class. We examined C#’s approach to events, which is a more flexible form of message passing. We learned how to write both C# event listeners and handlers, and how to invoke event handlers with Invoke()
. We also learned how to create and trigger our own custom events with custom event arguments.
In addition, we learned about the INotifyPropertyChanged
interface, and how it can be used to notify listeners that one of an Object’s properties have changed through a NotifyPropertyChanged
event handler. We also saw how to test our implementations of INotifyPropertyChanged
using xUnit. In our next chapter on Data Binding, we will see how this interface is used by Windows Presentation Foundation to update user interfaces automatically when bound data objects change.
We saw that Windows Presentation Foundation also uses Routed Events, which can bubble up the elements tree and be handled by any ancestor element. This approach replaces many of the familiar UI events from Windows Forms. We’ll take a deeper look at this approach, including defining our own Routed Events and alternative behaviors like “tunnelling” down the elements tree in the upcoming Dependency Objects chapter.
Finally, we discussed testing strategies for testing if our events work as expected. We revisited the Xunit Assert.Raises<t>()
and discussed how it works with generic event handlers. We also saw how for non-generic event handlers, we may have to author our own assertions, and even created one for the CollectionChanged
event.
Linking GUIs to Data
The term data binding refers to binding two objects together programmatically so that one has access to the data of the other. We most commonly see this with user interfaces and data objects - the user interface exposes some of the state of the data object to the user. As with many programming tasks, there are a number of ways to approach data binding. The Windows Presentation Foundation in C# has adopted an event and component-based approach that we will explore in this chapter.
Some key terms to learn in this chapter are:
Some key skills you need to develop in this chapter are:
INotifyPropertyChanged
interfaceDataContext
propertyData binding is a technique for synchronizing data between a provider and consumer, so that any time the data changes, the change is reflected in the bound elements. This strategy is commonly employed in graphical user interfaces (GUIs) to bind controls to data objects. Both Windows Forms and Windows Presentation Foundation employ data binding.
In WPF, the data object is essentially a normal C# object, which represents some data we want to display in a control. However, this object must implement the INotifyPropertyChanged
interface in order for changes in the data object to be automatically applied to the WPF control it is bound to. Implementing this interface comes with two requirements. First, the class will define a PropertyChanged
event:
public event PropertyChangedEventHandler PropertyChanged;
And second, it will invoke that PropertyChanged
event handler whenever one of its properties changes:
PropertyChanged?.Invoke(this, new PropertyChangedEventArgs("ThePropertyName"));
The string provided to the PropertyChangedEventArgs
constructor must match the property name exactly, including capitalization.
For example, this simple person implementation is ready to serve as a data object:
/// <summary>
/// A class representing a person
/// </summary>
public class Person : INotifyPropertyChanged
{
/// <summary>
/// An event triggered when a property changes
/// </summary>
public event PropertyChangedEventHandler PropertyChanged;
private string firstName = "";
/// <summary>
/// This person's first name
/// </summary>
public string FirstName
{
get { return firstName; }
set
{
firstName = value;
PropertyChanged?.Invoke(this, new PropertyChangedEventArgs("FirstName"));
PropertyChanged?.Invoke(this, new PropertyChangedEventArgs("FullName"));
}
}
private string lastName = "";
/// <summary>
/// This person's last name
/// </summary>
public string LastName
{
get { return lastName; }
set
{
lastName = value;
PropertyChanged?.Invoke(this, new PropertyChangedEventArgs("LastName"));
PropertyChanged?.Invoke(this, new PropertyChangedEventArgs("FullName"));
}
}
/// <summary>
/// This persons' full name
/// </summary>
public string FullName
{
get { return $"{firstName} {lastName}"; }
}
/// <summary>
/// Constructs a new person
/// </summary>
/// <param Name="first">The person's first name</param>
/// <param Name="last">The person's last name</param>
public Person(string first, string last)
{
this.firstName = first;
this.lastName = last;
}
}
There are several details to note here. As the FirstName
and LastName
properties have setters, we must invoke the PropertyChanged
event within them. Because of this extra logic, we can no longer use auto-property syntax. Similarly, as the value of FullName
is derived from these properties, we must also notify that "FullName"
changes when one of FirstName
or LastName
changes.
To accomplish the binding in XAML, we use a syntax similar to that we used for static resources. For example, to bind a <TextBlock>
element to the FullName
property, we would use:
<TextBlock Text="{Binding Path=FullName}" />
Just as with our static resource, we wrap the entire value in curly braces ({}
), and declare a Binding
. The Path
in the binding specifies the property we want to bind to - in this case, FullName
. This is considered a one-way binding, as the TextBlock
element only displays text - it is not editable. The corresponding control for editing a textual property is the <TextBox>
. A two-way binding is declared the same way i.e.:
<TextBox Text="{Binding Path=FirstName}" />
However, we cannot bind a read-only property (one that has no setter) to an editable control - only those with both accessible getters and setters. The XAML for a complete control for editing a person might look something like:
<UserControl x:Class="DataBindingExample.PersonControl"
xmlns="http://schemas.microsoft.com/winfx/2006/xaml/presentation"
xmlns:x="http://schemas.microsoft.com/winfx/2006/xaml"
xmlns:mc="http://schemas.openxmlformats.org/markup-compatibility/2006"
xmlns:d="http://schemas.microsoft.com/expression/blend/2008"
xmlns:local="clr-namespace:DataBindingExample"
xmlns:system="clr-namespace:System;assembly=mscorlib"
mc:Ignorable="d"
d:DesignHeight="450" d:DesignWidth="400">
<StackPanel>
<TextBlock Text="{Binding Path=FullName}"/>
<Label>First</Label>
<TextBox Text="{Binding Path=FirstName}"/>
<Label>Last</Label>
<TextBox Text="{Binding Path=LastName}"/>
</StackPanel>
</UserControl>
We also need to set the DataContext
property of the control. This property holds the specific data object whose properties are bound in the control. For example, we could pass a Person
object into the PersonControl
’s constructor and set it as the DataContext
in the codebehind:
namespace DataBindingExample
{
/// <summary>
/// Interaction logic for PersonControl.xaml
/// </summary>
public partial class PersonEntry : UserControl
{
/// <summary>
/// Constructs a new PersonControl control
/// </summary>
/// <param Name="person">The person object to data bind</param>
public PersonControl(Person person)
{
InitializeComponent();
this.DataContext = person;
}
}
}
However, this approach means we can no longer declare a <PersonControl>
in XAML (as objects declared this way must have a parameterless constructor). An alternative is to bind the DataContext
in the codebehind of an ancestor control; for example, a window containing the control:
<Window x:Class="DataContextExample.MainWindow"
xmlns="http://schemas.microsoft.com/winfx/2006/xaml/presentation"
xmlns:x="http://schemas.microsoft.com/winfx/2006/xaml"
xmlns:d="http://schemas.microsoft.com/expression/blend/2008"
xmlns:mc="http://schemas.openxmlformats.org/markup-compatibility/2006"
xmlns:local="clr-namespace:DataContextExample"
mc:Ignorable="d"
Title="MainWindow" Height="450" Width="800">
<Grid>
<local:PersonEntry x:Name="personEntry"/>
</Grid>
</Window>
namespace DataContextExample
{
/// <summary>
/// Interaction logic for MainWindow.xaml
/// </summary>
public partial class MainWindow : Window
{
public MainWindow()
{
InitializeComponent();
personControl.DataContext = new Person("Bugs", "Bunny");
}
}
}
Finally, the DataContext
has a very interesting relationship with the elements tree. If a control in this tree does not have its own DataContext
property directly set, it uses the DataContext
of the first ancestor where it has been set. I.e. were we to set the DataContext
of the window to a person:
namespace DataContextExample
{
/// <summary>
/// Interaction logic for MainWindow.xaml
/// </summary>
public partial class MainWindow : Window
{
public MainWindow()
{
InitializeComponent();
this.DataContext = new Person("Elmer", "Fudd");
}
}
}
And have a PersonElement
nested somewhere further down the elements tree:
<Window x:Class="DataBindingExample.MainWindow"
xmlns="http://schemas.microsoft.com/winfx/2006/xaml/presentation"
xmlns:x="http://schemas.microsoft.com/winfx/2006/xaml"
xmlns:d="http://schemas.microsoft.com/expression/blend/2008"
xmlns:mc="http://schemas.openxmlformats.org/markup-compatibility/2006"
xmlns:local="clr-namespace:DataBindingExample"
mc:Ignorable="d"
Title="MainWindow" Height="450" Width="800">
<Grid>
<Border>
<local:PersonEntry/>
</Border>
</Grid>
</Window>
The bound person (Elmer Fudd)’s information would be displayed in the <PersonEntry>
!
In Windows Presentation Foundation, data binding is accomplished by a binding object that sits between the binding target (the control) and the binding source (the data object):
It is this Binding object that we are defining the properties of in the XAML attribute with "{Binding}"
. Hence, Path
is a property defined on this binding.
As we mentioned before, bindings can be OneWay
or TwoWay
based on the direction the data flows. The binding mode is specified by the Binding
object’s Mode
property, which can also be set in XAML. There is actually a two additional options. The first is a OneWayToSource
that is basically a reversed one-way binding (the control updates the data object, but the data object does not update the control)
For example, we actually could use a <TextEditor>
with a read-only property, if we changed the binding mode:
<TextEditor Text="{Binding Path=FullName Mode=OneWay}" />
Though this might cause your user confusion because they would seem to be able to change the property, but the change would not actually be applied to the bound object. However, if you also set the IsEnabled
property to false to prevent the user from making changes:
<TextEditor Text="{Binding Path=FullName Mode=OneWay}" IsEnabled="False" />
The second binding mode is OneTime
which initializes the control with the property, but does not apply any subsequent changes. This is similar to the behavior you will see from a data object that does not implement the INotifyPropertyChanged
interface, as the Binding
object depends on it to
Generally, you’ll want to use a control meant to be used with the mode you intend to employ - editable controls default to TwoWay
and display controls to OneWay
.
One other property of the Binding
class that’s good to know is the Source
property. Normally this is determined by the DataContext
of the control, but you can override it in the XAML.
For list controls, i.e. ListView
and ListBox
, the appropriate binding is a collection implementing IEnumerable
, and we bind it to the ItemsSource
property. Let’s say we want to create a directory that displays information for a List<Person>
. We might write a custom DirectoryControl
like:
<UserControl x:Class="DataBindingExample.DirectoryControl"
xmlns="http://schemas.microsoft.com/winfx/2006/xaml/presentation"
xmlns:x="http://schemas.microsoft.com/winfx/2006/xaml"
xmlns:mc="http://schemas.openxmlformats.org/markup-compatibility/2006"
xmlns:d="http://schemas.microsoft.com/expression/blend/2008"
xmlns:local="clr-namespace:DataBindingExample"
mc:Ignorable="d"
d:DesignHeight="450" d:DesignWidth="800">
<Grid>
<ListBox ItemsSource="{Binding}"/>
</Grid>
</UserControl>
Notice that we didn’t supply a Path
with our binding. In this case, we’ll be binding directly to the DataContext
, which is a list of People
objects drawn from the 1996 classic “Space Jam”, i.e.:
<Window x:Class="DataBindingExample.MainWindow"
xmlns="http://schemas.microsoft.com/winfx/2006/xaml/presentation"
xmlns:x="http://schemas.microsoft.com/winfx/2006/xaml"
xmlns:d="http://schemas.microsoft.com/expression/blend/2008"
xmlns:mc="http://schemas.openxmlformats.org/markup-compatibility/2006"
xmlns:local="clr-namespace:DataBindingExample"
mc:Ignorable="d"
Title="MainWindow" Height="450" Width="800">
<Grid>
<local:DirectoryControl x:Name="directory"/>
</Grid>
</Window>
/// <summary>
/// Interaction logic for MainWindow.xaml
/// </summary>
public partial class MainWindow : Window
{
public MainWindow()
{
InitializeComponent();
ObservableCollection<Person> people = new ObservableCollection<Person>()
{
new Person("Bugs", "Bunny", true),
new Person("Daffy", "Duck", true),
new Person("Elmer", "Fudd", true),
new Person("Tazmanian", "Devil", true),
new Person("Tweety", "Bird", true),
new Person("Marvin", "Martian", true),
new Person("Michael", "Jordan"),
new Person("Charles", "Barkely"),
new Person("Patrick", "Ewing"),
new Person("Larry", "Johnson")
};
DataContext = people;
}
}
Instead of a List<Person>
, we’ll use an ObservableCollection<Person>
which is essentially a list that implements the INotifyPropertyChanged
interface.
When we run this code, our results will be:
This is because the ListBox
(and the ListView
) by default are composed of <TextBlock>
elements, so each Person
in the list is being bound to a <TextBlock>
’s Text
property. This invokes the ToString()
method on the Person
object, hence the DataBindingExample.Person
displayed for each entry.
We could, of course, override the ToString()
method on person. But we can also overwrite the DataTemplate
the list uses to display its contents. Instead of using the default <TextView>
, the list will use the DataContext
, and the bindings, we supply. For example, we could re-write the DirectoryControl
control as:
<UserControl x:Class="DataBindingExample.DirectoryControl"
xmlns="http://schemas.microsoft.com/winfx/2006/xaml/presentation"
xmlns:x="http://schemas.microsoft.com/winfx/2006/xaml"
xmlns:mc="http://schemas.openxmlformats.org/markup-compatibility/2006"
xmlns:d="http://schemas.microsoft.com/expression/blend/2008"
xmlns:local="clr-namespace:DataBindingExample"
mc:Ignorable="d"
d:DesignHeight="450" d:DesignWidth="800">
<Grid>
<ListBox ItemsSource="{Binding}">
<ListBox.ItemTemplate>
<DataTemplate>
<Border BorderBrush="Black" BorderThickness="2">
<StackPanel>
<TextBlock Text="{Binding Path=FullName}"/>
<CheckBox IsChecked="{Binding Path=IsCartoon}" IsEnabled="False">
Is a Looney Toon
</CheckBox>
</StackPanel>
</Border>
</DataTemplate>
</ListBox.ItemTemplate>
</ListBox>
</Grid>
</UserControl>
And the resulting application would display:
Note that in our DataTemplate
, we can bind to properties in the Person
object. This works because as the ListBox
processes its ItemsSource
property, it creates a new instance of its ItemTemplate
(in this case, our custom DataTemplate
) and assigns the item from the ItemSource
to its DataContext
.
Using custom DataTemplates
for XAML controls is a powerful feature to customize the appearance and behavior of your GUI.
Lists also can interact with other elements through bindings. Let’s refactor our window so that we have a <PersonRegistry>
side-by-side with our <PersonControl>
:
<Window x:Class="DataBindingExample.MainWindow"
xmlns="http://schemas.microsoft.com/winfx/2006/xaml/presentation"
xmlns:x="http://schemas.microsoft.com/winfx/2006/xaml"
xmlns:d="http://schemas.microsoft.com/expression/blend/2008"
xmlns:mc="http://schemas.openxmlformats.org/markup-compatibility/2006"
xmlns:local="clr-namespace:DataBindingExample"
mc:Ignorable="d"
Title="MainWindow" Height="450" Width="800">
<Grid>
<Grid.ColumnDefinitions>
<ColumnDefinition/>
<ColumnDefinition/>
</Grid.ColumnDefinitions>
<local:PersonControl Grid.Column="0" DataContext="{Binding Path=CurrentItem}"/>
<local:DirectoryControl Grid.Column="1"/>
</Grid>
</Window>
Note how we bind the <PersonControl>
’s DataContext
to the CurrentItem
of the ObservableCollection<Person>
. In our <RegistryControl>
’s ListBox
, we’ll also set its IsSynchronizedWithCurrentItem
property to true:
<UserControl x:Class="DataBindingExample.DirectoryControl"
xmlns="http://schemas.microsoft.com/winfx/2006/xaml/presentation"
xmlns:x="http://schemas.microsoft.com/winfx/2006/xaml"
xmlns:mc="http://schemas.openxmlformats.org/markup-compatibility/2006"
xmlns:d="http://schemas.microsoft.com/expression/blend/2008"
xmlns:local="clr-namespace:DataBindingExample"
mc:Ignorable="d"
d:DesignHeight="450" d:DesignWidth="800">
<Grid>
<ListBox ItemsSource="{Binding}" HorizontalContentAlignment="Stretch" IsSynchronizedWithCurrentItem="True">
<ListBox.ItemTemplate>
<DataTemplate>
<Border BorderBrush="Black" BorderThickness="1">
<StackPanel>
<TextBlock Text="{Binding Path=FullName}"/>
<CheckBox IsChecked="{Binding Path=IsCartoon, Mode=OneWay}" IsEnabled="False">Cartoon</CheckBox>
</StackPanel>
</Border>
</DataTemplate>
</ListBox.ItemTemplate>
</ListBox>
</Grid>
</UserControl>
With these changes, when we select a person in the <RegistryControl>
, their information will appear in the <PersonControl>
:
Now let’s delve into a more complex data binding examples - binding enumerations. For this discussion, we’ll use a simple enumeration of fruits:
/// <summary>
/// Possible fruits
/// </summary>
public enum Fruit
{
Apple,
Orange,
Peach,
Pear
}
And add a FavoriteFruit
property to our Person
class:
private Fruit favoriteFruit;
/// <summary>
/// The person' favorite fruit
/// </summary>
public Fruit FavoriteFruit
{
get { return favoriteFruit; }
set
{
favoriteFruit = value;
PropertyChanged?.Invoke(this, new PropertyChangedEventArgs("FavoriteFruit"));
}
}
For example, what if we wanted to use a ListBox
to select an item out of this enumeration? We’d actually need to bind two properties, the ItemSource
to get the enumeration values, and the SelectedItem
to mark the item being used. To accomplish this binding, we’d need to first make the fruits available for binding by creating a static resource to hold them using an ObjectDataProvider
:
<ObjectDataProvider x:Key="fruits" ObjectType="system:Enum" MethodName="GetValues">
<ObjectDataProvider.MethodParameters>
<x:Type TypeName="local:Fruit"/>
</ObjectDataProvider.MethodParameters>
</ObjectDataProvider>
The <code>ObjectDataProvider</code> is an object that can be used as a data source for WPF bindings, and wraps around an object and invokes a method to get the data - in this case the Enum
class, and its static method GetValues()
, which takes one parameter, the Type
of the enum we want to pull the values of (provided as the nested element, <x:Type>
).
Also, note that because the Enum
class is defined in the System namespace, we need to bring it into the XAML with an xml namespace mapped to it, with the attribute xmlns
defined on the UserControl, i.e.: xmlns:system="clr-namespace:System;assembly=mscorlib"
.
Now we can use the fruits
key as part of a data source for a listbox: <ListBox ItemsSource="{Binding Source={StaticResource fruits}}" SelectedItem="{Binding Path=FavoriteFruit}"/>
Notice that we use the Source
property of the Binding
class to bind the ItemsSource
to the enumeration values exposed in the static resource fruits
. Then we bind the SelectedItem
to the person’s FavoriteFruit
property. The entire control would be:
<UserControl x:Class="DataBindingExample.PersonControl"
xmlns="http://schemas.microsoft.com/winfx/2006/xaml/presentation"
xmlns:x="http://schemas.microsoft.com/winfx/2006/xaml"
xmlns:mc="http://schemas.openxmlformats.org/markup-compatibility/2006"
xmlns:d="http://schemas.microsoft.com/expression/blend/2008"
xmlns:local="clr-namespace:DataBindingExample"
xmlns:system="clr-namespace:System;assembly=mscorlib"
mc:Ignorable="d"
d:DesignHeight="450" d:DesignWidth="400">
<UserControl.Resources>
<ObjectDataProvider x:Key="fruits" MethodName="GetValues" ObjectType="{x:Type system:Enum}">
<ObjectDataProvider.MethodParameters>
<x:Type TypeName="local:Fruit"/>
</ObjectDataProvider.MethodParameters>
</ObjectDataProvider>
</UserControl.Resources>
<StackPanel>
<TextBlock Text="{Binding Path=FullName}"/>
<Label>First</Label>
<TextBox Text="{Binding Path=First}"/>
<Label>Last</Label>
<TextBox Text="{Binding Path=Last}"/>
<CheckBox IsChecked="{Binding Path=IsCartoon}">
Is a Looney Toon
</CheckBox>
<ListBox ItemsSource="{Binding Source={StaticResource fruits}}" SelectedItem="{Binding Path=FavoriteFruit}"/>
</StackPanel>
</UserControl>
Binding a <ComboBox>
is almost identical to the ListBox
example; we just swap a ComboBox
for a ListBox
:
<UserControl x:Class="DataBindingExample.PersonControl"
xmlns="http://schemas.microsoft.com/winfx/2006/xaml/presentation"
xmlns:x="http://schemas.microsoft.com/winfx/2006/xaml"
xmlns:mc="http://schemas.openxmlformats.org/markup-compatibility/2006"
xmlns:d="http://schemas.microsoft.com/expression/blend/2008"
xmlns:local="clr-namespace:DataBindingExample"
xmlns:system="clr-namespace:System;assembly=mscorlib"
mc:Ignorable="d"
d:DesignHeight="450" d:DesignWidth="400">
<UserControl.Resources>
<ObjectDataProvider x:Key="fruits" MethodName="GetValues" ObjectType="{x:Type system:Enum}">
<ObjectDataProvider.MethodParameters>
<x:Type TypeName="local:Fruit"/>
</ObjectDataProvider.MethodParameters>
</ObjectDataProvider>
</UserControl.Resources>
<StackPanel>
<TextBlock Text="{Binding Path=FullName}"/>
<Label>First</Label>
<TextBox Text="{Binding Path=First}"/>
<Label>Last</Label>
<TextBox Text="{Binding Path=Last}"/>
<CheckBox IsChecked="{Binding Path=IsCartoon}">
Is a Looney Toon
</CheckBox>
<ComboBox ItemsSource="{Binding Source={StaticResource fruits}}" SelectedItem="{Binding Path=FavoriteFruit}"/>
</StackPanel>
</UserControl>
Binding a <RadioButton>
requires a very different approach, as a radio button exposes an IsChecked
boolean property that determines if it is checked, much like a <CheckBox>
, but we want it bound to an enumeration property. There are a lot of attempts to do this by creating a custom content converter, but ultimately they all have flaws.
Instead, we can restyle a ListBox
to look like radio buttons, but still provide the same functionality by adding a <Style>
that applies to the ListBoxItem
contents of the ListBox
:
<Style TargetType="{x:Type ListBoxItem}">
<Setter Property="Template">
<Setter.Value>
<ControlTemplate>
<RadioButton Content="{TemplateBinding ContentPresenter.Content}" IsChecked="{Binding Path=IsSelected, RelativeSource={RelativeSource TemplatedParent}, Mode=TwoWay}"/>
</ControlTemplate>
</Setter.Value>
</Setter>
</Style>
This style can be used in conjunction with a ListBox
declared as we did above:
<UserControl x:Class="DataBindingExample.PersonControl"
xmlns="http://schemas.microsoft.com/winfx/2006/xaml/presentation"
xmlns:x="http://schemas.microsoft.com/winfx/2006/xaml"
xmlns:mc="http://schemas.openxmlformats.org/markup-compatibility/2006"
xmlns:d="http://schemas.microsoft.com/expression/blend/2008"
xmlns:local="clr-namespace:DataBindingExample"
xmlns:system="clr-namespace:System;assembly=mscorlib"
mc:Ignorable="d"
d:DesignHeight="450" d:DesignWidth="400">
<UserControl.Resources>
<ObjectDataProvider x:Key="fruits" MethodName="GetValues" ObjectType="{x:Type system:Enum}">
<ObjectDataProvider.MethodParameters>
<x:Type TypeName="local:Fruit"/>
</ObjectDataProvider.MethodParameters>
</ObjectDataProvider>
<Style TargetType="{x:Type ListBoxItem}">
<Setter Property="Template">
<Setter.Value>
<ControlTemplate>
<RadioButton Content="{TemplateBinding ContentPresenter.Content}" IsChecked="{Binding Path=IsSelected, RelativeSource={RelativeSource TemplatedParent}, Mode=TwoWay}"/>
</ControlTemplate>
</Setter.Value>
</Setter>
</Style>
</UserControl.Resources>
<StackPanel>
<TextBlock Text="{Binding Path=FullName}"/>
<Label>First</Label>
<TextBox Text="{Binding Path=First}"/>
<Label>Last</Label>
<TextBox Text="{Binding Path=Last}"/>
<CheckBox IsChecked="{Binding Path=IsCartoon}">
Is a Looney Toon
</CheckBox>
<ListBox ItemsSource="{Binding Source={StaticResource fruits}}" SelectedItem="{Binding Path=FavoriteFruit}"/>
</StackPanel>
</UserControl>
In this chapter we explored the concept of data binding and how it is employed in Windows Presentation Foundation. We saw how bound classes need to implement the INotifyPropertyChanged
interface for bound properties to automatically synchronize. We saw how the binding is managed by a Binding
class instance, and how we can customize its Path
, Mode
, and Source
properties in XAML to modify the binding behavior. We bound simple controls like <TextBlock>
and <CheckBox>
and more complex elements like <ListView>
and <ListBox>
. We also explored how to bind enumerations to controls. And we explored the use of templates like DataTemplate
and ControlTemplate
to modify WPF controls.
The full example project discussed in this chapter can be found at https://github.com/ksu-cis/DataBindingExample.
The Bedrock of WPF
You’ve now worked with a variety of WPF controls, laid out components using containers, traversed the elements tree, performed data binding,and worked with routed events. Each of these is made possible through the use of several classes: DependencyObject
, UIElement
, and FrameworkElement
, which serve as a base classes for all WPF controls. In this chapter we’ll dig deeper into how these base classes implement dependency properties and routed events.
Some key terms to learn in this chapter are:
Some key skills you need to develop in this chapter are:
Perhaps the most important aspect of the DependencyObject
is its support for hosting dependency properties. While these appear and can be used much like the C# properties we have previously worked with, internally they are managed very differently. Consider when we place a <TextBox>
in a <Grid>
:
<Grid>
<Grid.ColumnDefinitions>
<ColumnDefinition/>
<ColumnDefinition/>
</Grid.ColumnDefinitions>
<Grid.RowDefinitions>
<RowDefinition/>
<RowDefinition/>
</Grid.RowDefinitions>
<TextBox Name="textBox" Grid.Column="1" Grid.Row="1"/>
</Grid>
Where does the Column
and Row
properties come from? They aren’t defined on the TextBox
class - you can check the documentation. The answer is they are made available through the dependency property system.
At the heart of this system is a collection of key/value pairs much like the Dictionary
. When the XAML code Grid.Column="1"
is processed, this key and value are added to the TextBox
’s dependency properties collection, and is thereafter accessible by the WPF rendering algorithm.
The DependencyObject
exposes these stored values with the GetValue(DependencyProperty)
and SetValue(DependencyProperty, value)
methods. For example, we can set the Column
property to 2
with:
textBox.SetValue(Grid.ColumnProperty, 2);
We can also create new dependency properties on our own custom classes extending the DependencyObject
(which is also a base class for all WPF controls). Let’s say we are making a custom control for entering number values on a touch screen, which we’ll call NumberBox
. We can extend a UserControl
to create a textbox centered between two buttons, one to increase the value, and one to decrease it:
<UserControl x:Class="CustomDependencyObjectExample.NumberBox"
xmlns="http://schemas.microsoft.com/winfx/2006/xaml/presentation"
xmlns:x="http://schemas.microsoft.com/winfx/2006/xaml"
xmlns:mc="http://schemas.openxmlformats.org/markup-compatibility/2006"
xmlns:d="http://schemas.microsoft.com/expression/blend/2008"
xmlns:local="clr-namespace:CustomDependencyObjectExample"
mc:Ignorable="d"
d:DesignHeight="50" d:DesignWidth="200">
<Grid>
<Grid.ColumnDefinitions>
<ColumnDefinition/>
<ColumnDefinition Width="2*"/>
<ColumnDefinition/>
</Grid.ColumnDefinitions>
<Button Grid.Column="0">+</Button>
<TextBox Grid.Column="1" />
<Button Grid.Column="2">-</Button>
</Grid>
</UserControl>
Now, let’s assume we want to provide a property Step
of type double
, which is the amount the number should be incremented when the “+” or “-” button is pressed.
The first step is to register the dependency property by creating a DependencyProperty
instance. This will serve as the key to setting and retrieving the dependency property on a dependency object. We register new dependency properties with DependencyProperty.Register(string propertyName, Type propertyType, Type dependencyObjectType)
. The string is the name of the property, the first type is the type of the property, and the second is the class we want to associated this property with. So our Step
property would be registered with:
DependencyProperty.Register(nameof(Step), typeof(double), typeof(NumberBox));
There is an optional fourth property to DependencyProperty.Register()
which is a PropertyMetadata
. This is used to set the default value of the property. We probably should specify a default step, so let’s add a PropertyMetadata
object with a default value of 1:
DependencyProperty.Register(nameof(Step), typeof(double), typeof(NumberBox), new PropertyMetadata(1.0));
The DependencyProperty.Register()
method returns a registered DependencyObject
to serve as a key for accessing our new property. To make sure we can access this key from other classes, we define it as a field that is public
, static
, and readonly
. The naming convention for DependencyProperties
is to name this field by appending “Property” to the name of the property.
Thus, the complete registration, including saving the result to the public static field is:
/// <summary>
/// Identifies the NumberBox.Step XAML attached property
/// </summary>
public static readonly DependencyProperty StepProperty = DependencyProperty.Register(nameof(Step), typeof(double), typeof(NumberBox), new PropertyMetadata(1.0));
We also want to declare a traditional property with the name “Step”. But instead of declaring a backing field, we will use the key/value pair stored in our DependencyObject
using GetValue()
and SetValue()
:
/// <summary>
/// The amount each increment or decrement operation should change the value by
/// </summary>
public double Step
{
get { return (double)GetValue(StepProperty); }
set { SetValue(StepProperty, value); }
}
As dependency property values are stored as an object
, we need to cast the value to a the appropriate type when it is returned.
One of the great benefits of dependency properties is that they can be set using XAML. I.e. we could declare an instance of our <NumberBox>
and set its Step
using an attribute:
<StackPanel>
<NumberBox Step="3.0"/>
</StackPanel>
WPF controls are built on the foundation of dependency objects - the DependencyObject
is at the bottom of their inheritance chain. But they also add additional functionality on top of that through another common base class, FrameworkElement
. The FrameworkElement
is involved in the layout algorithm, as well as helping to define the elements tree. Let’s add a second dependency property to our <NumberBox>
, a Value
property that will represent the value the <NumberBox>
currently represents, which will be displayed in the <TextBox>
.
We register this dependency property in much the same way as our Step
. But instead of supplying the DependencyProperty.Register()
method a PropertyMetadata
, we’ll instead supply a FrameworkPropertyMetadata
, which extends PropertyMetadata
to include additional data about how the property interacts with the WPF rendering and layout algorithms. This additional data is in the form of a bitmask defined in FrameworkPropertyMetadataOptions enumeration.
Some of the possible options are:
FrameworkPropertyMetadataOptions.AffectsMeasure
- changes to the property may affect the size of the controlFrameworkPropertyMetadataOptions.AffectsArrange
- changes to the property may affect the layout of the controlFrameworkPropertyMetadataOptions.AffectsRender
- changes to the property may affect the appearance of the controlFrameworkPropertyMetadataOptions.BindsTowWayByDefault
- This property uses two-way bindings by default (i.e. the control is an editable control)FrameworkPropertyMetadataOptions.NotDataBindable
- This property does not allow data bindingIn this case, we want a two-way binding by default, so we’ll include that flag, and we also we’ll note that it affects the rendering process. Multiple flags can be combined with a bitwise OR. Constructing our FrameworkPropertyMetadata
object would then look like:
new FrameworkPropertyMetadata(0, FrameworkPropertyMetadataOptions.AffectsRender | FrameworkPropertyMetadataOptions.BindsTwoWayByDefault)
And registering the dependency property would be:
/// <summary>
/// Identifies the NumberBox.Value XAML attached property
/// </summary>
public static readonly DependencyProperty ValueProperty = DependencyProperty.Register(nameof(Value), typeof(double), typeof(NumberBox), new FrameworkPropertyMetadata(0, FrameworkPropertyMetadataOptions.AffectsRender | FrameworkPropertyMetadataOptions.BindsTwoWayByDefault));
As with the Step
, we also want to declare a traditional property with the name “Value”. But instead of declaring a backing field, we will use the key/value pair stored in our DependencyObject
using GetValue()
and SetValue()
:
/// <summary>
/// The NumberBox's displayed value
/// </summary>
public double Value {
get { return ( double)GetValue(ValueProperty); }
set { SetValue(ValueProperty, value); }
}
If we want to display the current value of Value
it in the textbox of our NumberBox
control, we’ll need to bind the <TextBox>
element’s Text
property. This is accomplished in a similar fashion to the other bindings we’ve done previously, only we need to specify a RelativeSource
. This is a source relative to the control in the elements tree. We’ll specify two properties on the RelativeSource
: the Mode
which we set to FindAncestor
to search up the tree, and the AncestorType
which we set to our NumberBox
. Thus, instead of binding to the DataContext
, we’ll bind to the NumberBox
the <TextBox>
is located within. The full declaration would be:
<TextBox Grid.Column="1" Text="{Binding Path=Value, RelativeSource={RelativeSource Mode=FindAncestor, AncestorType=local:NumberBox}}"/>
Now a two-way binding exists between the Value
of the <NumberBox>
and the Text
value of the textbox. Updating either one will update the other. We’ve in effect made an editable control!
Another aspect of WPF elements are routed events. Just as dependency properties are similar to regular C# properties, but add additional functionality, routed events are similar to regular C# events, but provide additional functionality. One of the most important of these is the ability of the routed event to “bubble” up the elements tree. Essentially, the event will be passed up each successive WPF element until one chooses to “handle” it, or the top of the tree is reached (in which case the event is ignored). This routed event functionality is managed by the <code>UIElement</code> base class, a third base class shared by all WPF elements.
Let’s consider the two buttons we declared in our <NumberBox>
. When clicked, these each trigger a Click
routed event. We could attach a handler to each button, but it is also possible to instead attach it to any other element up the tree; for example, our <Grid>
:
<UserControl x:Class="CustomDependencyObjectExample.NumberBox"
xmlns="http://schemas.microsoft.com/winfx/2006/xaml/presentation"
xmlns:x="http://schemas.microsoft.com/winfx/2006/xaml"
xmlns:mc="http://schemas.openxmlformats.org/markup-compatibility/2006"
xmlns:d="http://schemas.microsoft.com/expression/blend/2008"
xmlns:local="clr-namespace:CustomDependencyObjectExample"
mc:Ignorable="d"
d:DesignHeight="50" d:DesignWidth="200">
<Grid Button.Click="HandleButtonClick">
<Grid.ColumnDefinitions>
<ColumnDefinition/>
<ColumnDefinition Width="2*"/>
<ColumnDefinition/>
</Grid.ColumnDefinitions>
<Button Grid.Column="0" Name="Increment">+</Button>
<TextBox Grid.Column="1" Text="{Binding Path=Value, RelativeSource={RelativeSource Mode=FindAncestor, AncestorType=local:NumberBox}}"/>
<Button Grid.Column="2" Name="Decrement">-</Button>
</Grid>
</UserControl>
We’d need to define HandleButtonClick
in our codebehind:
/// <summary>
/// Handles the click of the increment or decrement button
/// </summary>
/// <param name="sender">The button clicked</param>
/// <param name="e">The event arguments</param>
void HandleButtonClick(object sender, RoutedEventArgs e)
{
if(sender is Button button)
{
switch(button.Name)
{
case "Increment":
Value += Step;
break;
case "Decrement":
Value -= Step;
break;
}
}
e.Handled = true;
}
When either button is clicked, it creates a Button.Click
event. As the buttons don’t handle it, the event bubbles to the next element in the elements tree - in this case, the <Grid>
. As the <Grid>
does attach a Button.Click
listener, the event is passed to HandleButtonClick
. In this method we use the button’s Name
property to decide the correct action to take. Also, note that we set the RoutedEventArgs.Handled
property to true
. This lets WPF know that we’ve taken care of the event, and it does not need to bubble up any farther (if we didn’t, we could process the event again further up the elements tree).
Much like dependency properties, we can declare our own routed events. These also use a Register()
method, but for events this is a static method of the EventHandler
class: EventManger.Register(string eventName, RoutingStrategy routing, Type eventHandlerType, Type controlType)
. The first argument is a string, which is the name of the event, the second is one of the values from the RoutingStrategy
enum, the third is the type of event handler, and the fourth is the type of the control it is declared in. This Register()
method returns a RoutedEvent
that is used as a key when registering event listeners, which we typically store in a public static readonly RoutedEvent
field.
The RoutingStrategy
options are
RoutingStrategy.Bubble
- which travels up the elements tree through ancestor nodesRoutingStrategy.Tunnel
- which travels down the elements tree through descendant nodesRoutingStrategy.Direct
- which can only be handled by the source elementLet’s create an example routed event for our NumberBox
. Let’s assume we define two more routed properties MinValue
and MaxValue
, and that any time we change the value of our NumberBox
it must fall within this range, or be clamped to one of those values. To make it easer for UI designers to provide user feedback, we’ll create a NumberBox.ValueClamped
event that will trigger in these circumstances. We need to register our new routed event:
/// <summary>
/// Identifies the NumberBox.ValueClamped event
/// </summary>
public static readonly RoutedEvent ValueClampedEvent = EventManager.RegisterRoutedEvent(nameof(ValueClamped), RoutingStrategy.Bubble, typeof(RoutedEventHandler), typeof(NumberBox));
Also like dependency properties also need to declare a corresponding C# property, routed events need to declare a corresponding C# event:
/// <summary>
/// Event that is triggered when the value of this NumberBox changes
/// </summary>
public event RoutedEventHandler ValueClamped
{
add { AddHandler(ValueClampedEvent, value); }
remove { RemoveHandler(ValueClampedEvent, value); }
}
Finally, we would want to raise this event whenever the value is clamped. This can be done with the RaiseEvent(RoutedEventArgs)
method defined on the UIElement
base class that we inherit in our custom controls. But where should we place this call?
You might think we would do this in the HandleButtonClick()
method, and we could, but that misses when a user types a number directly into the textbox, as well as when Value
is updated through a two-way binding. Instead, we’ll utilize the callback functionality available in the FrameworkPropertyMetadata
for the Value
property. Since the dependency property and its metadata are both static
, our callback also needs to be declared static
:
/// <summary>
/// Callback for the ValueProperty, which clamps the Value to the range
/// defined by MinValue and MaxValue
/// </summary>
/// <param name="sender">The NumberBox whose value is changing</param>
/// <param name="e">The event args</param>
static void HandleValueChanged(DependencyObject sender, DependencyPropertyChangedEventArgs e)
{
if(e.Property.Name == "Value" && sender is NumberBox box)
{
if(box.Value < box.MinValue)
{
box.Value = box.MinValue;
box.RaiseEvent(new RoutedEventArgs(ValueClampedEvent));
}
if(box.Value > box.MaxValue)
{
box.Value = box.MaxValue;
box.RaiseEvent(new RoutedEventArgs(ValueClampedEvent));
}
}
}
Note that since this method is static, we must get the instance of the NumberBox
by casting the sender
. We also double-check the property name, though this is not strictly necessary as the method is private and only we should be invoking it from within this class.
Now we need to refactor our Value
dependency property registration to use this callback:
/// <summary>
/// Identifies the NumberBox.Value XAML attached property
/// </summary>
public static readonly DependencyProperty ValueProperty = DependencyProperty.Register("Value", typeof(double), typeof(NumberBox), new FrameworkPropertyMetadata(0, FrameworkPropertyMetadataOptions.AffectsRender | FrameworkPropertyMetadataOptions.BindsTwoWayByDefault, HandleValueChanged));
By adding the callback to the dependency property, we ensure that any time it changes, regardless of the method the change occurs by, we will ensure the value is clamped to the specified range.
There are additional options for dependency property callbacks, including validation callbacks and the ability to coerce values. See the documentation for details.
You have probably noticed that as our use of WPF grows more sophisticated, our controls start getting large, and often filled with complex logic. You are not alone in noticing this trend. Microsoft architects Ken Cooper and Ted Peters also struggled with the idea, and introduced a new software architectural pattern to help alleviate it: Model-View-ViewModel. This approach splits the user interface code into two classes: the View (the XAML + codebehind), and a ViewModel, which applies any logic needed to format the data from the model object into a form more easily bound and consumed by the view.
There are several benefits to this pattern:
Essentially, this pattern is an application of the Single-Responsibility Principle (that each class in your project should bear a single responsibility).
In this chapter we examined how dependency properties and routed events are implemented in WPF. The DependencyObject
, which serves as a base class for WPF elements, provides a collection of key/value pairs, where the key is a DependencyProperty
and the value is the object it is set to. This collection can be accessed through the GetValue()
and SetValue()
methods, and is also used as a backing store for regular C# properties. We also saw that we can register callbacks on dependency properties to execute logic when the property is changed. The UIElement
, which also serves as a base class for WPF elements, provided similar functionality for registering routed event listeners, whose key is RoutedEvent
. We saw how these routed events could “bubble” up the elements tree, or “tunnel” down it, and how marking the event Handled
property would stop it. Finally, we discussed the MVVM architecture, which works well with WPF applications to keep our code manageable.
We also created an example control using these ideas. The full project can be found here.
How do we test this stuff?
Now that you’ve learned how to build a WPF application, how do you test that it is working? For that matter, how do you test any GUI-based application? In this chapter, we’ll explore some common techniques used to test GUIs. We’ll also explore the MVVM architecture developed in parallel with WPF to make unit-testing WPF apps easier.
Some key terms to learn in this chapter are:
Some key skills you need to develop in this chapter are:
Testing a GUI-based application presents some serious challenges. A GUI has a strong dependence on the environment it is running in - the operating system is ultimately responsible for displaying the GUI components, and this is also influenced by the hardware it runs on. As we noted in our discussion of WPF, screen resolution can vary dramatically. So how our GUI appears on one machine may be completely acceptable, but unusable on another.
For example, I once had an installer that used a fixed-size dialog that was so large, on my laptop the “accept” button was off-screen below the bottom of the screen - and there was no way to click it. This is clearly a problem, but the developer failed to recognize it because on their development machine (with nice large monitors) everything fit! So how do we test a GUI application in this uncertain environment?
One possibility is to fire the application up on as many different hardware platforms as we can, and check that each one performs acceptably. This, of course, requires a lot of different computers, so increasingly we see companies instead turning to virtual machines - a program that emulates the hardware of a different computer, possibly even running a different operating system! In either case, we need a way to go through a series of checks to ensure that on each platform, our application is usable.
How can we ensure rigor in this process? Ideally we’d like to automate it, just as we do with our Unit tests… and while there have been some steps in this direction, the honest truth is we’re just not there yet. Currently, there is no substitute for human eyes - and human judgement - on the problem. But humans are also notorious for loosing focus when doing the same thing repeatedly… which is exactly what this kind of testing is. Thus, we develop test plans to help with this process. We’ll take a look at those next.
A testing plan is simply a step-by-step guide for a human tester to follow when testing software. You may remember that we mentioned them back on our testing chapter’s discussion on manual testing. Indeed, we can use a test plan to test all aspects of software, not just the GUI. However, automated testing is usually cheaper and more effective in many aspects of software design, which is why we prefer it when possible. So what does a GUI application testing plan look like?
It usually consists of a description of the test to perform, broken down into tasks, and populated with annotated screenshots. Here is an example:
Launch the application
Select the “Cowpoke Chili” button from the “Entrees” menu
The app should switch to a customization screen that looks like this:
There should be a checkbox for “Cheese”, “Sour Cream”, “Green Onions”, and “Tortilla Strips”
Initial Test Item Cheese Sour Cream Green Onion Tortilla Strips A Cowpoke Chili entry should appear in the order, with a cost of $6.10
Initial Test Item Chili Entry in the order Price of $6.10
- Uncheck the checkboxes, and a corresponding “Hold” detail should appear in the order, i.e. un-checking cheese should cause the order to look like:
4. Click the "Menu Item Selection" Button. This should return you to the main menu screen, with the order still containing the details about the Cowpoke Chili:
Initial Test Item Cheese checkbox appears and functions Sour Cream checkbox appears and functions Green Onion checkbox appears and functions Tortilla Strips checkbox appears and functions
Initial Test Item Chili Entry in the order Price of $6.10 with "Hold Cheese" with "Hold Sour Cream" with "Hold Green Onion" with "Hold Tortilla Strips" If you encountered problems with this test, please describe:
The essential parts of the test plan are clear instructions of what the tester should do, and what they should see, and a mechanism for reporting issues. Note the tables in this testing plan, where the tester can initial next to each “passing” test, as well as the area for describing issues at the bottom. This reporting can either be integrated into the test document, or, it can be a separate form used with the test document (allowing the printed instructional part of the test documents to be reused). Additionally, some test documents are created in spreadsheet software or specialized testing documentation software for ease of collection and processing.
Test plans like this one are then executed by people (often titled “Tester” or “Software Tester”) by opening the application, following the steps outlined in the plan, and documenting the results. This documentation then goes back to the software developers so that they can address any issues found.
Taking screen shots of your running program is an easy way to quickly generate visuals for your testing documentation.
In Windows, CTRL + SHIFT + ALT + PRINT SCREEN
takes a screen shot and copies it to the clipboard (from which you can paste it into a text editor of your choice).
On a Mac, you can take a screenshot with COMMAND + SHIFT + 4
. This launches a utility that changes the mouse cursor and allows you to drag a rectangle across a section of the screen. When you release the mouse, a capture will be taken of the area, and saved as a picture to the desktop.
Compared to automated tests, using a testing plan with human testers is both slow and expensive. It should not be surprising then that Microsoft developers sought ways to shift as much of the testing burden for WPF projects to automated tests. Their solution was to develop a new architectural approach known as ModelView-View-Model.
This approach expands upon the usual Model-View relationship in a GUI. A Model class is a class that represents some data, i.e. a Student
, and the View is the GUI exposing that object’s data, i.e. a WPF <StudentControl>
. Thus, we might have our Student
class:
public class Student : INotifyPropertyChanged
{
/// <summary>Notifies when a property changes</summary>
public event PropertyChangedEventHandler? PropertyChanged;
/// <summary>The student's course-taking history</summary>
private List<CourseRecord> _courseRecords = new();
/// <summary>The student's first name</summary>
public string FirstName { get; init; }
/// <summary>The student's last name</summary>
public string LastName { get; init; }
/// <summary>The student's course records</summary>
/// <remarks>We return a copy of the course records to prevent modifications</remarks>
public IEnumerable<CourseRecord> CourseRecords => _courseRecords.ToArray();
/// <summary>The student's GPA</summary>
public double GPA
{
get
{
var points = 0.0;
var hours = 0.0;
foreach (var cr in CourseRecords)
{
points += (double)cr.Grade * cr.CreditHours;
hours += cr.CreditHours;
}
return points / hours;
}
}
/// <summary>
/// Adds <paramref name="cr"/> to the students' course history
/// </summary>
/// <param name="cr">The course record to add</param>
public void AddCourseRecord(CourseRecord cr)
{
_courseRecords.Add(cr);
PropertyChanged?.Invoke(this, new PropertyChangedEventArgs(nameof(CourseRecords)));
PropertyChanged?.Invoke(this, new PropertyChangedEventArgs(nameof(GPA)));
}
/// <summary>
/// Constructs the student object
/// </summary>
/// <param name="firstName">The student's first name</param>
/// <param name="lastName">The student's last name</param>
public Student(string firstName, string lastName)
{
FirstName = firstName;
LastName = lastName;
}
}
And our <ComputerScienceStudentControl>
:
<UserControl x:Class="MvvmExample.ComputerScienceStudentControl"
xmlns="http://schemas.microsoft.com/winfx/2006/xaml/presentation"
xmlns:x="http://schemas.microsoft.com/winfx/2006/xaml"
xmlns:mc="http://schemas.openxmlformats.org/markup-compatibility/2006"
xmlns:d="http://schemas.microsoft.com/expression/blend/2008"
xmlns:local="clr-namespace:MvvmExample"
mc:Ignorable="d"
d:DesignHeight="450" d:DesignWidth="300">
<StackPanel Orientation="Vertical">
<StackPanel Orientation="Horizontal">
<TextBlock FontWeight="Bold" Margin="0,0,10,0">Name</TextBlock>
<TextBlock Text="{Binding Path=FirstName}"/>
<TextBlock Text="{Binding Path=LastName}"/>
</StackPanel>
<StackPanel Orientation="Horizontal">
<TextBlock Margin="0,0,10,0" FontWeight="Bold">GPA</TextBlock>
<TextBlock Text="{Binding Path=GPA, StringFormat={}{0:N2}}"/>
</StackPanel>
<TextBlock FontWeight="Bold">Course History</TextBlock>
<ListView ItemsSource="{Binding Path=CourseRecords}" Margin="2,0,2,0"/>
</StackPanel>
</UserControl>
Now, this control is simply a thin layer using data binding to connect it to the model class. But what if we needed to add some complex logic? Let’s say we want to display the student’s GPA calculated for only their computer science courses. We could put this in the Student
class, but if every department in the university added their own custom logic and properties to that class, it would get very bloated very quickly. Instead, we might create a <ComputerScienceStudentControl>
that would be used for this purpose, and compute the Computer Science GPA in its codebehind, but now we have complex logic that we’d prefer to test using automated tests.
Instead, we could create two new classes, our <ComputerScienceStudentControl>
(a new View), and a ComputerScienceStudentViewModel
(a ViewModel), as well as our existing Student
(the Model).
Our ViewModel
can now incorporate the custom logic for calculating a students’ computer science GPA, as well holding a reference to the Student
class it is computed from:
public class ComputerScienceStudentViewModel : INotifyPropertyChanged
{
/// <summary>
/// The PropertyChanged event reports when properties change
/// </summary>
public event PropertyChangedEventHandler? PropertyChanged;
/// <summary>
/// The student this model represents
/// </summary>
/// <remarks>
/// We require the student to be set in the constructor, and use
/// the init accessor to prevent changing out the student object
/// </remarks>
public Student Student { get; init; }
/// <summary>
/// THe first name of the student
/// </summary>
public string FirstName => Student.FirstName;
/// <summary>
/// The last name of the student
/// </summary>
public string LastName => Student.LastName;
/// <summary>
/// The course history of the student
/// </summary>
public IEnumerable<CourseRecord> CourseRecords => Student.CourseRecords;
/// <summary>
/// The university GPA of the student
/// </summary>
public double GPA => Student.GPA;
/// <summary>
/// The student's Computer Science GPA
/// </summary>
public double ComputerScienceGPA
{
get
{
var points = 0.0;
var hours = 0.0;
foreach (var cr in Student.CourseRecords)
{
if (cr.CourseName.Contains("CIS"))
{
points += (double)cr.Grade * cr.CreditHours;
hours += cr.CreditHours;
}
}
return points / hours;
}
}
/// <summary>
/// An event handler for passing forward PropertyChanged events from the student object
/// </summary>
/// <param name="sender">The student object</param>
/// <param name="e">The eventargs describing the property that is changing</param>
private void HandleStudentPropertyChanged(object sender, PropertyChangedEventArgs e)
{
switch (e.PropertyName)
{
// Both first and last names map to properties of the same name,
// so we can reuse the PropertyChangedEventARgs
case nameof(FirstName):
case nameof(LastName):
PropertyChanged?.Invoke(this, e);
break;
// The Student.GPA maps to GPA, and changes to it may
// also signal a change to the CIS GPA
case nameof(Student.GPA):
PropertyChanged?.Invoke(this, e);
PropertyChanged?.Invoke(this, new PropertyChangedEventArgs(nameof(ComputerScienceGPA)));
break;
// We don't care about any other properites of the Student, as they
// are not present in this ViewModel, so ignore them
default:
break;
}
}
/// <summary>
/// Constructs a new ComputerScienceStudentViewModel, which wraps around the
/// <paramref name="student"/> object and provides some additional functionality.
/// </summary>
/// <param name="student">The student who is this view model</param>
public ComputerScienceStudentViewModel(Student student)
{
Student = student;
}
}
And a control to display it:
<UserControl x:Class="MvvmExample.StudentControl"
xmlns="http://schemas.microsoft.com/winfx/2006/xaml/presentation"
xmlns:x="http://schemas.microsoft.com/winfx/2006/xaml"
xmlns:mc="http://schemas.openxmlformats.org/markup-compatibility/2006"
xmlns:d="http://schemas.microsoft.com/expression/blend/2008"
xmlns:local="clr-namespace:MvvmExample"
mc:Ignorable="d"
d:DesignHeight="450" d:DesignWidth="300">
<StackPanel Orientation="Vertical">
<StackPanel Orientation="Horizontal">
<TextBlock FontWeight="Bold" Margin="0,0,10,0">Name</TextBlock>
<TextBlock Text="{Binding Path=FirstName}"/>
<TextBlock Text="{Binding Path=LastName}"/>
</StackPanel>
<StackPanel Orientation="Horizontal">
<TextBlock Margin="0,0,10,0" FontWeight="Bold">GPA</TextBlock>
<TextBlock Text="{Binding Path=GPA, StringFormat={}{0:N2}}"/>
</StackPanel>
<TextBlock FontWeight="Bold">Course History</TextBlock>
<ListView ItemsSource="{Binding Path=CourseRecords}" Margin="2,0,2,0"/>
</StackPanel>
</UserControl>
The ComputerScienceViewModel
can then be used interchangeably with the Student
model class, as both have the same properties (though the view model has one additional one). We could then either tweak the student control or create a new one that binds to this new property, i.e.:
<StackPanel Orientation="Horizontal">
<TextBlock Margin="0,0,10,0" FontWeight="Bold">Computer Science GPA</TextBlock>
<TextBlock Text="{Binding Path=ComputerScienceGPA, StringFormat={}{0:N2}}"/>
</StackPanel>
This represents just one of the ways a ViewModel can be used. A View Model can also be leveraged to combine multiple data classes into a single object that can serve as a DataContext
. One can also be utilized to create a wrapper object around a web-based API or other data source to provide the ability to data bind that source to GUI controls.
Finally, because a ViewModel is simply another data class, it can be unit tested just like any other. This helps make sure that complex logic which we want thoroughly tested is not embedded in a GUI component, and simplifies our testing strategies.
We’ve really only scratched the surface of the MVVM architecture as it is used in WPF applications. In addition to providing properties to bind to, a WPF MVVM can also define commands that decouple event handlers from their effects. When using commands, the GUI event handler simply signals the command, which is consumed by a ViewModel to perform the requested action.
Commands are outside the scope of this course, but you can refer to the Microsoft documentation and books from the O’Riley Learning Library if you would like to explore this concept in more depth.
In this chapter we looked at some of the challenges of testing GUIs, and saw why most GUI applications are still manually tested. We also explored the process of writing a test plan, a step-by-step process for a human tester to follow to provide rigor in the testing process.
We also explored the Model View ViewModel architecture in more depth, especially how it can allow us to move complex logic out of our GUI into a simple class that can be unit tested.
Taking Objects Online
The Big Three plus HTTP
The World-Wide-Web is a tool that you likely use every day - and it’s being used to deliver you this textbook. There are several core technologies that enable the web to work, and these are the focus of this chapter.
Some key terms to learn in this chapter are:
The World-Wide Web was the brainchild of Sir Tim Berners-Lee. It was conceived as a way to share information across the Internet; in Sir Berners-Lee’s own words describing the idea as he first conceived it:
This project is experimental and of course comes without any warranty whatsoever. However, it could start a revolution in information access.
Clearly that revolution has come to pass. The web has become part of our daily lives.
There were three key technologies that Sir Tim Berners-Lee proposed and developed. These remain the foundations upon which the web runs even today. Two are client-side, and determine how web pages are interpreted by browsers. These are:
They are joined with a third key client-side technology, which began as a scripting language developed by Brendan Eich to add interactivity to web pages in the Netscape Navigator.
You have already studied each of these core client-side web technologies in CIS 115, and used them to create your own personal web pages.
The other foundational web technology created by Sir Tim Berners-Lee is the communication protocol used to request and transmit web pages and other files across the Internet:
We will review each of these technologies briefly, before we see how ASP.NET builds upon them to deliver web applications.
Hyper-Text Markup Language (HTML), is one of the three core technologies of the world-wide-web, along with Cascading Style Sheets (CSS) and Javascript (JS). Each of these technologies has a specific role to play in delivering a website. HTML defines the structure and contents of the web page. It is a markup language, similar to XML and the XAML you have been working with (indeed, HTML is based on the SGML (Standardized General Markup Language) standard, which XML is also based on, and XAML is an extension of XML).
Thus, it uses the same kind of element structure, consisting of tags. For example, a button in HTML looks like this:
<button onclick="doSomething">
Do Something
</button>
You likely notice how similar this definition is to buttons in XAML. As with XAML elements, HTML elements have and opening and closing tag, and can have additional HTML content nested inside these tags. HTML tags can also be self-closing, as is the case with the line break tag:
<br/>
Let’s explore the parts of an HTML element in more detail.
The start tag is enclosed in angle brackets (<
and >
). The angle brackets differentiate the text inside them as being HTML elements, rather than text. This guides the browser to interpret them correctly.
Because angle brackets are interpreted as defining HTML tags, you cannot use those characters to represent greater than and less than signs. Instead, HTML defines escape character sequences to represent these and other special characters. Greater than is >
, less than is <
. A full list can be found on mdn.
Immediately after the <
is the tag name. In HTML, tag names like button
should be expressed in lowercase letters (unlike XAML where they are expressed in Pascal case - each word starting with a capital letter). This is a convention (as most browsers will happily accept any mixture of uppercase and lowercase letters), but is very important when using popular modern web technologies like Razor and React, as these use Pascal case tag names to differentiate between HTML and components they inject into the web page.
After the tag name come optional attributes, which are key-value pairs expressed as key="value"
. Attributes should be separated from each other and the tag name by whitespace characters (any whitespace will do, but traditionally spaces are used). As with XAML, different elements have different attributes available - and you can read up on what these are by visiting the MDN article about the specific element.
However, several attributes bear special mention:
The id
attribute is used to assign a unique id to an element, i.e. <button id="that-one-button">
. The element can thereafter be referenced by that id in both CSS and JavaScript code. An element ID must be unique in an HTML page, or unexpected behavior may result!
The class
attribute is also used to assign an identifier used by CSS and JavaScript. However, classes don’t need to be unique; many elements can have the same class. Further, each element can be assigned multiple classes, as a space-delimited string, i.e. <button class="large warning">
assigns both the classes “large” and “warning” to the button.
Also, some web technologies (like Angular) introduce new attributes specific to their framework, taking advantage of the fact that a browser will ignore any attributes it does not recognize.
The content nested inside the tag can be plain text, or another HTML element (or collection of elements). Unlike XAML elements, which usually can have only one child, HTML elements can have multiple children. Indentation should be used to keep your code legible by indenting any nested content, i.e.:
<div>
<h1>A Title</h1>
<p>This is a paragraph of text that is nested inside the div</p>
<p>And this is another paragraph of text</p>
</div>
The end tag is also enclosed in angle brackets (<
and >
). Immediately after the <
is a forward slash /
, and then the tag name. You do not include attributes in a end tag.
If the element has no content, the end tag can be combined with the start tag in a self-closing tag, i.e. the input tag is typically written as self-closing:
<input id="first-name" type="text" placeholder="Your first name"/>
Text in HTML works a bit differently than you might expect. Most notably, all white space is converted into a single space. Thus, the lines:
<blockquote>
If you can keep your head when all about you
Are losing theirs and blaming it on you,
If you can trust yourself when all men doubt you,
But make allowance for their doubting too;
If you can wait and not be tired by waiting,
Or being lied about, don’t deal in lies,
Or being hated, don’t give way to hating,
And yet don’t look too good, nor talk too wise:
<i>-Rudyard Kipling, excerpt from "If"</i>
</blockquote>
Would be rendered:
If you can keep your head when all about you Are losing theirs and blaming it on you, If you can trust yourself when all men doubt you, But make allowance for their doubting too; If you can wait and not be tired by waiting, Or being lied about, don’t deal in lies, Or being hated, don’t give way to hating, And yet don’t look too good, nor talk too wise: -Rudyard Kipling, excerpt from "If"
If, for some reason you need to maintain formatting of the included text, you can use the <pre> element (which indicates the text is preformatted):
<blockquote>
<pre>
If you can keep your head when all about you
Are losing theirs and blaming it on you,
If you can trust yourself when all men doubt you,
But make allowance for their doubting too;
If you can wait and not be tired by waiting,
Or being lied about, don’t deal in lies,
Or being hated, don’t give way to hating,
And yet don’t look too good, nor talk too wise:
</pre>
<i>-Rudyard Kipling, excerpt from "If"</i>
</blockquote>
Which would be rendered:
If you can keep your head when all about you Are losing theirs and blaming it on you, If you can trust yourself when all men doubt you, But make allowance for their doubting too; If you can wait and not be tired by waiting, Or being lied about, don’t deal in lies, Or being hated, don’t give way to hating, And yet don’t look too good, nor talk too wise:
-Rudyard Kipling, excerpt from "If"
Note that the <pre> preserves all formatting, so it is necessary not to indent its contents.
Alternatively, you can denote line breaks with <br/>
, and non-breaking spaces with
:
<blockquote>
If you can keep your head when all about you<br/>
Are losing theirs and blaming it on you,<br/>
If you can trust yourself when all men doubt you,<br/>
But make allowance for their doubting too;<br/>
If you can wait and not be tired by waiting,<br/>
Or being lied about, don’t deal in lies,<br/>
Or being hated, don’t give way to hating,<br/>
And yet don’t look too good, nor talk too wise:<br/>
<i>-Rudyard Kipling, excerpt from "If"</i>
</blockquote>
Which renders:
If you can keep your head when all about you
Are losing theirs and blaming it on you,
If you can trust yourself when all men doubt you,
But make allowance for their doubting too;
If you can wait and not be tired by waiting,
Or being lied about, don’t deal in lies,
Or being hated, don’t give way to hating,
And yet don’t look too good, nor talk too wise:
-Rudyard Kipling, excerpt from "If"
Additionally, as a program you may want to use the the code element in conjunction with the pre element to display preformatted code snippets in your pages.
HTML comments are identical to XAML comments (as both inherited from SGML). Comments start with the sequence <!--
and end with the sequence -->
, i.e.:
<!-- This is an example of a HTML comment -->
HTML5.0 (the current HTML standard) pages have an expected structure that you should follow. This is:
<!DOCTYPE html>
<html>
<head>
<title><!-- The title of your page goes here --></title>
<!-- other metadata about your page goes here -->
</head>
<body>
<!-- The contents of your page go here -->
</body>
</