CSS and the DOM
Cascading style sheets (CSS) also interact with the DOM. Consider this CSS code:
.banner {
border: 4px solid gold;
border-radius: 5rem;
background-color: goldenrod;
padding: 5rem;
color: #754907;
}
.banner > h1 {
font-style: italic;
}
.banner p {
text-decoration: line-through;
font-size: 1.2rem;
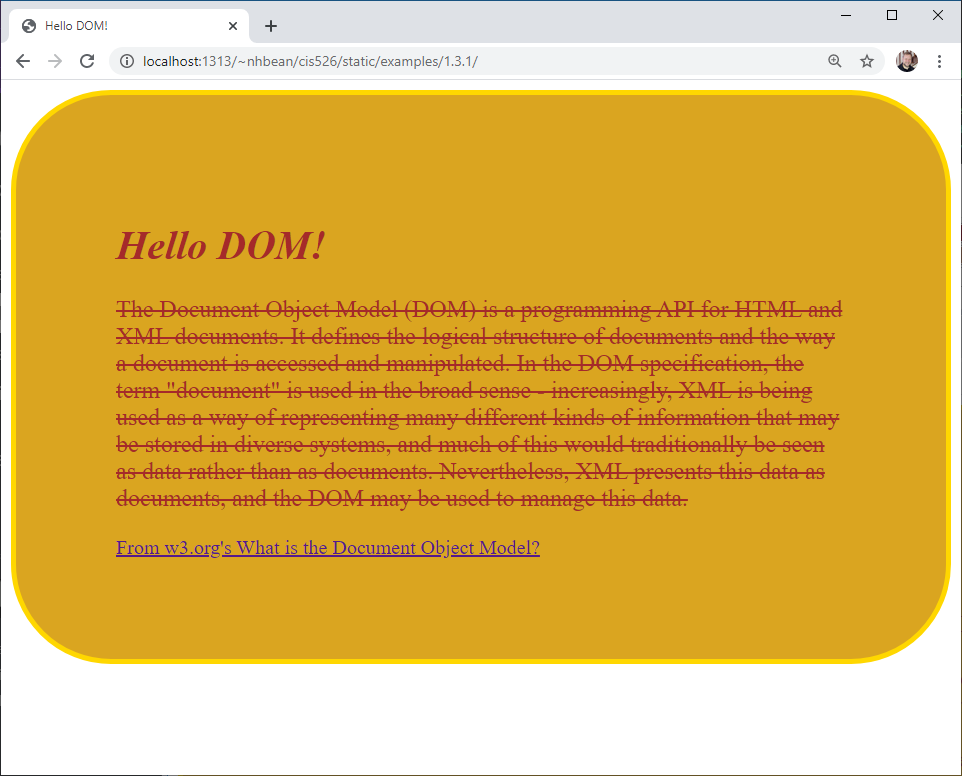
}When it is placed in the site.css file referenced by the HTML we discussed in the last section, the rules it defines are evaluated in terms of the DOM tree. The result is the page now looks like this:
Now let’s talk about how this CSS code and the DOM interact.
Consider the selector .banner. It looks for any element whose class attribute includes the string "banner". Hence, it matches the <div> element, adding a color, background color, border, and padding. This visualization of the DOM tree indicates the selected node in yellow:
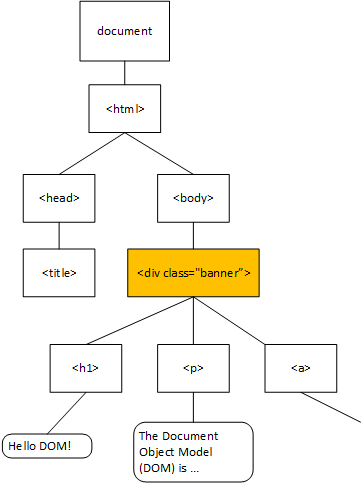
Notice how the text in both the <h1> element and the <p> element are a reddish color? That color is the one defined in the .banner rule: color: #754907. The rule applies not only to the selected node, but to all its descendants in the DOM tree. This is the ‘cascading’ part of cascading style sheets - the rules flow down the DOM tree until they are overridden by more specific css rules in descendant nodes.
The second way CSS interacts with the DOM tree is through the CSS selectors themselves.
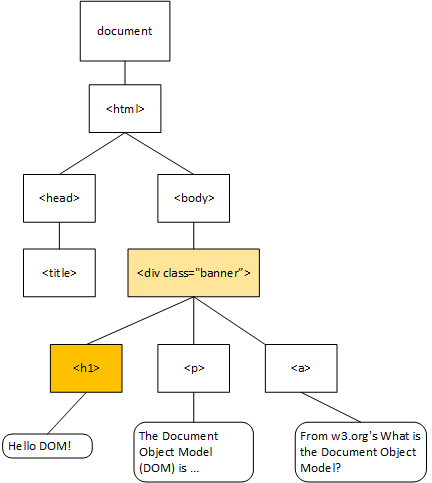
For example, the selector .banner > h1 uses the child combinator - the > symbol between .banner and h1. This indicates that the rule will be applied to any <h1> nodes that are direct children of the node with the class of "banner". As we can see from the DOM tree, the sole <h1> tag is a child of the <div.banner> node, so this rule is applied to it:
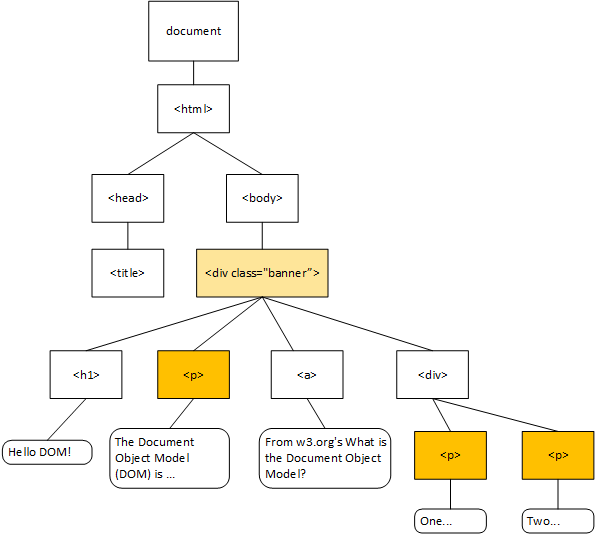
Similarly, the .banner p tag uses the descendant combinator - the space between the .banner and p. This indicates that the rule will be applied to any <p> nodes that are descended from the node with the class of "banner". This will apply no matter how far down the tree those nodes appear. Thus, if we added more <p> elements inside of a <div> that was a child of the <div.banner> node, it would apply to them as well.
You can see the example with the styling applied by following this link. Try adding the div and two paragraphs with the developer tools. See how the styles are automatically applied to the new nodes in the DOM tree?
CSS and Developer Tools
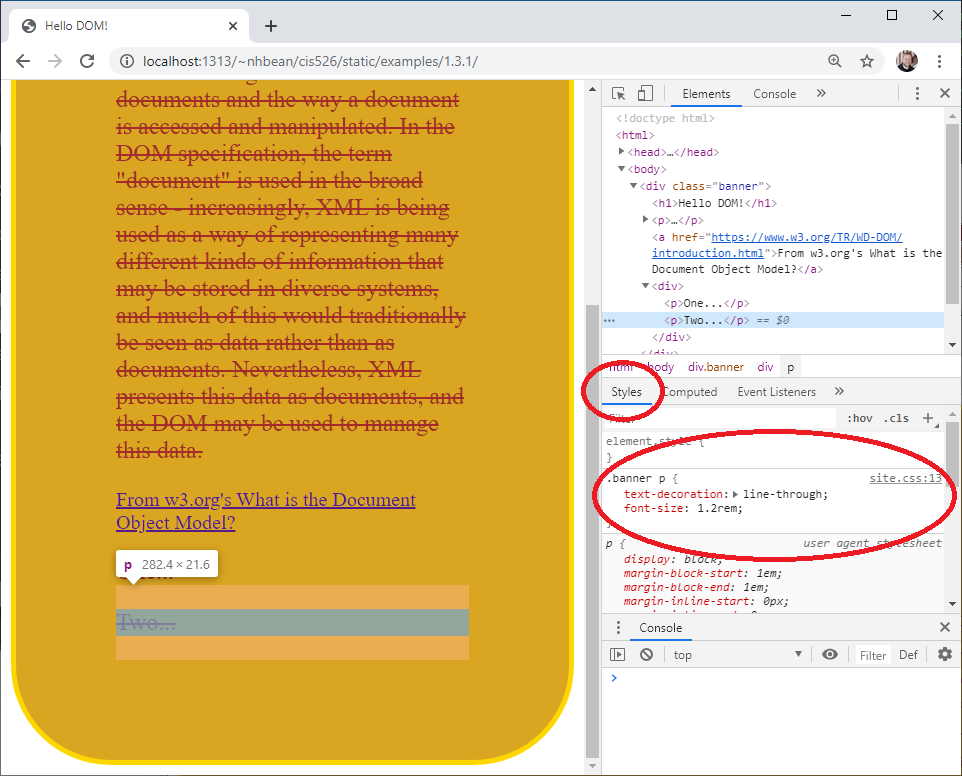
Speaking of developer tools, there is another handy tab that deals with CSS, the ‘Styles’ tab. It displays all the css rules applied to a specific node. Select one of your new <p> elements. Notice how the styles tab shows the css rule .banner p that we’ve been discussing? Moreover, it tells you which CSS file and which line in that file the rule is found on.
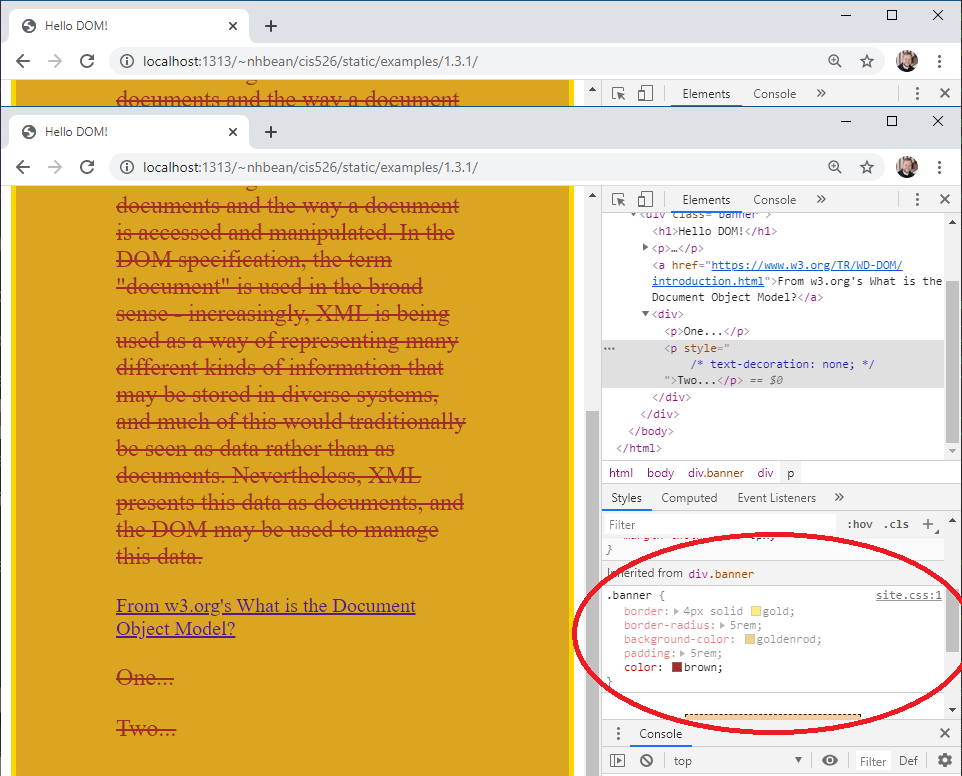
If you scroll down, it also shows you the rules inherited (cascaded) from the .banner rule:
If you scroll clear to the bottom, you will also see a visualization of the box model as it is applied to this element.
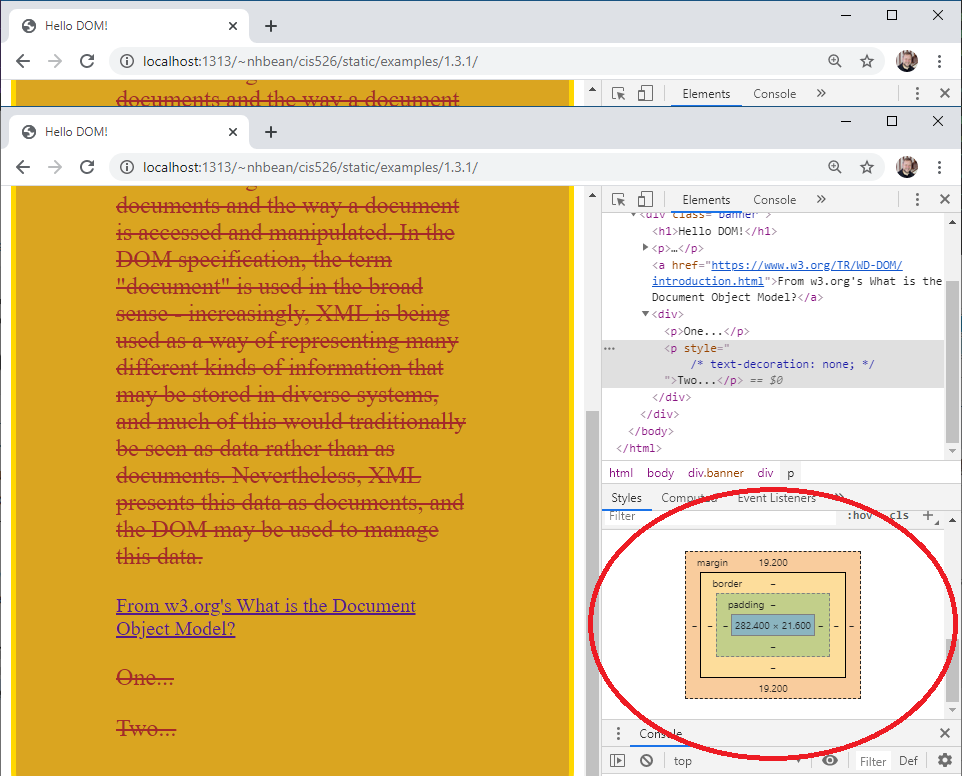
This can be very handy for debugging margin/padding/border issues.
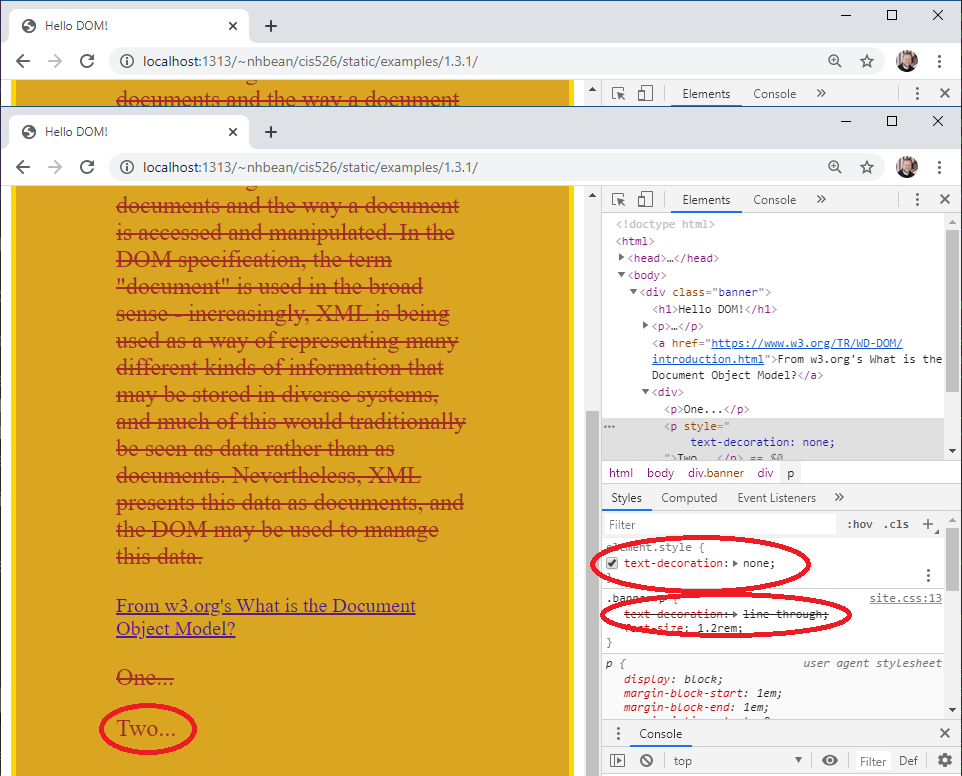
Now scroll back up to the top of the styles tab. Notice the element.style {} rule? This displays inline CSS on the element, and we can also add our own inline CSS directly from the developer tools. Add the property key/value pair text-decoration: none. Notice what happens to the paragraph’s text? Also, notice how the now overridden rule has been struck through in the rule below.
This can be very handy for quickly trying out different style combinations without needing to add them to the CSS file. Much like changes to the DOM, these are not saved - refresh the page and they are gone.
Finally, notice that when the mouse hovers over a CSS property key/value pair, a checkbox appears next to it? If you uncheck the box, the property ceases to be applied. This can also be very handy for debugging CSS problems.
Now that we’ve seen how CSS interacts with the DOM tree, it’s time to turn our attention to the third web technology - JavaScript.