JavaScript and the DOM
The DOM tree is also accessible from JavaScript running in the page. It is accessed through the global window object, i.e. window.document or document.
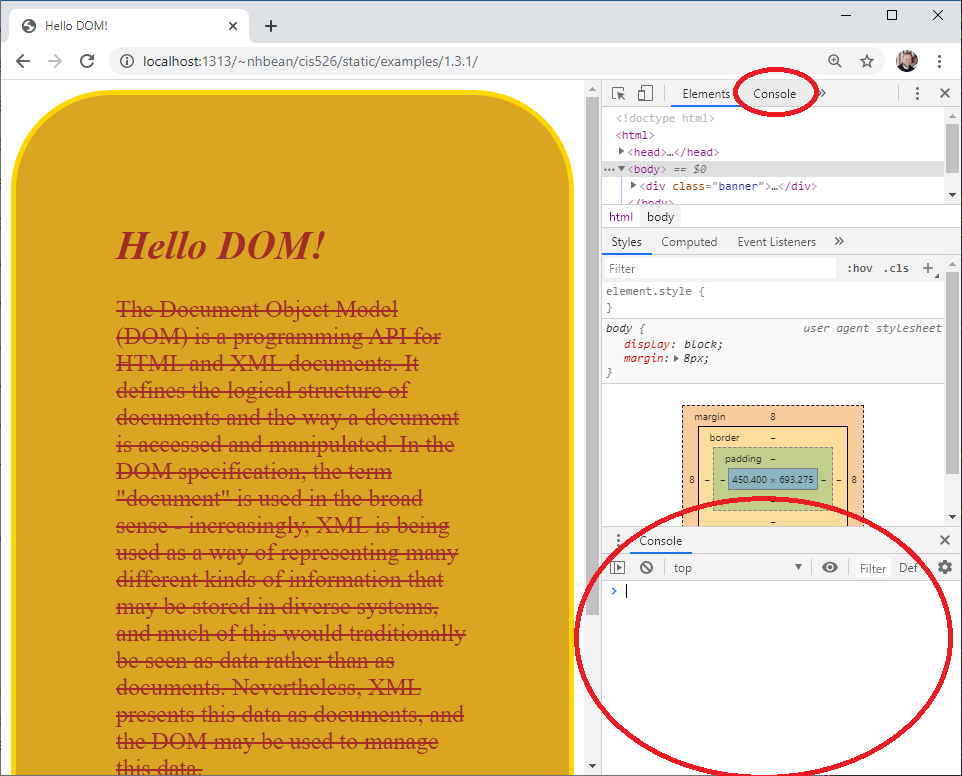
Let’s use the ‘Console’ tab of the developer tools to access this object. Open the previous example page again from this link. Click the console tab to open the expanded console, or use the console area in the bottom panel of the elements tab:
With the console open, type:
> documentInfo
When instructed to type something into the console, I will use the > symbol to represent the cursor prompt. You do not need to type it.
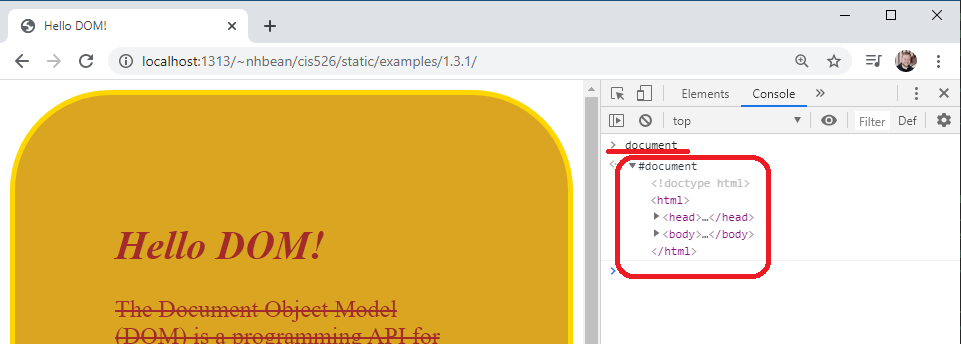
Once you hit the enter key, the console will report the value of the expression document, which exposes the document object. You can click the arrow next to the #document to expose its properties:
The document is an instance of the Document class. It is the entry point (and the root) of the DOM tree data structure. It also implements the Node and EventTarget interfaces, which we’ll discuss next.
The Node Interface
All nodes in the DOM tree implement the Node interface. This interface provides methods for traversing and manipulating the DOM tree. For example, each node has a property parentElement that references is parent in the DOM tree, a property childNodes that returns a NodeList of all the Node’s children, as well as properties referencing the firstChild, lastChild, previousSibling, and nextSibling.
Let’s try walking the tree manually. In the console, type:
> document.body.firstElementChild.firstElementChildThe body property of the document directly references the <body> element of the webpage, which also implements the Node interface. The firstElementChild references the first HTML element that is a child of the node, so in using that twice, we are drilling down to the <h1> element.
The EventTarget Interface
Each node in the DOM tree also implements the EventTarget interface. This allows arbitrary events to be attached to any element on the page. For example, we can add a click event to the <h1> element. In the console, type:
> document.body.firstElementChild.firstElementChild.addEventListener('click', function(e){
    console.log(e.target + ' clicked!');
});
The first argument to EventTarget.addEventListener is the event to listen for, and the second is a function to execute when the event happens. Here we’ll just log the event to the console.
Now try clicking on the Hello DOM! <h1> element. You should see the event being logged:
We can also remove event listeners with EventTarget.removeEventListener and trigger them programmatically with EventTarget.dispatchEvent.
Querying the DOM
While we can use the properties of a node to walk the DOM tree manually, this can result in some very ugly code. Instead, the Document object provides a number of methods that allow you to search the DOM tree for a specific value. For example:
- Document.getElementsByTagName returns a list of elements with a specific tag name, i.e.
document.getElementsByTagName('p')will return a list of all<p>elements in the DOM. - Document.getElementsByClassName returns a list of elements with a specific name listed in its class attribute, i.e.
document.getElementsByClassName('banner')will return a list containing the<div.banner>element. - Document.getElementById returns a single element with the specified id attribute.
In addition to those methods, the Document object also supplies two methods that take a CSS selector. These are:
- Document.querySelector which returns the first matching element in the DOM.
- Document.querySelectorAll which returns a list of all matching elements.
Let’s try selecting the <h1> tag using the querySelector method:
> var header = document.querySelector('h1');Much easier than document.body.firstElementChild.firstElementChild isn’t it?
Manipulating DOM Elements
All HTML elements in the DOM also implement the HTMLElement interface, which also provides access to the element’s attributes and styling. So when we retrieve an element from the DOM tree, we can modify these.
Let’s tweak the color of the <h1> element we saved a reference to in the header variable:
> header.style.color = 'blue';This will turn the header blue:
All of the CSS properties can be manipulated through the style property.
In addition, we can access the element’s classList property, which provides an add() and remove() methods that add/remove class names from the element. This way we can define a set of CSS properties for a specific class, and turn that class on and off for an element in the DOM tree, effectively applying all those properties at once.
Modifying the DOM
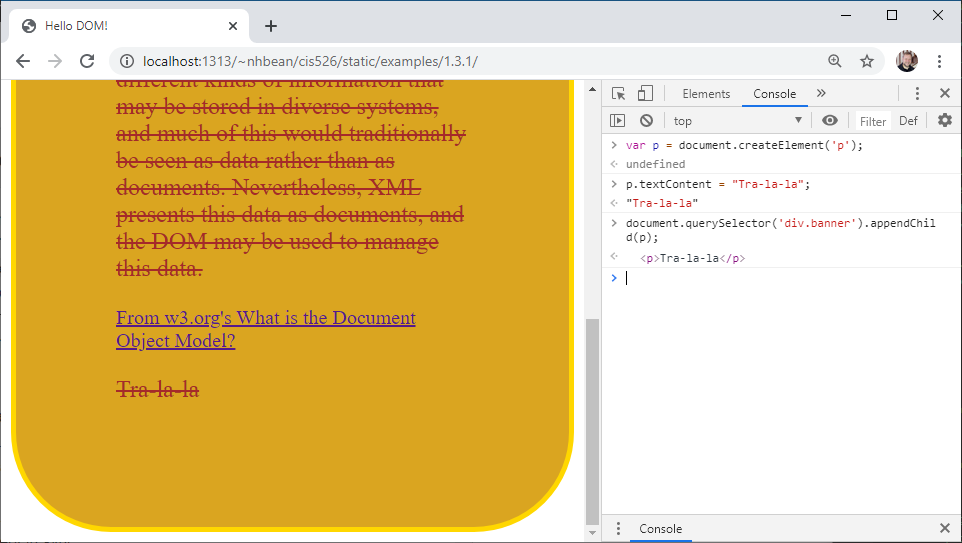
We can create new elements with the Document.createElement method. It takes the name of the new tag to create as a string, and an optional options map (a JavaScript object). Let’s create a new <p> tag. In the console:
> var p = document.createElement('p');Now let’s give it some text:
> p.textContent = "Tra-la-la";Up to this point, our new <p> tag isn’t rendered, because it isn’t part of the DOM tree. But we can use the Node.appendChild method to add it to an existing node in the tree. Let’s add it to the <div.banner> element. Type this command into the console:
document.querySelector('div.banner').appendChild(p);As soon as it is appended, it appears on the page:
Note too that the CSS rules already in place are automatically applied!
Info
The popular JQuery library was created primarily as a tool to make DOM querying and manipulation easier at a time when browsers were not all adopting the w3c standards consistently. It provided a simple interface that worked identically in all commonly used browsers.
The JQuery function (commonly aliased to $()) operates much like the querySelectorAll(), taking a CSS selector as an argument and returning a collection of matching elements wrapped in a JQuery helper object. The helper object provided methods to access and alter the attributes, style, events, and content of the element, each returning the updated object allowing for functions to be ‘chained’ into a single expression.
The above example, rewritten in JQuery, might be:
$('p').text('Tra-la-la').appendTo('div.banner');While modern browsers are much more consistent at supporting standardized JavaScript, JQuery remains a popular library and one you will likely encounter. Thus, while this text focuses on ‘vanilla’ JavaScript, we’ll also occasionally call out JQuery approaches in blocks like this one.


