Dynamic Web Servers
The Web Comes of Age
The Web Comes of Age
While the first generation of webservers was used to serve static content (i.e. files), it was not long before developers began to realize that a lot more potential existed in the technologies of the web. A key realization here is that the resources served by the web server don’t need to exist to be served.
Consider the directory listing from the previous chapter. It is not based on an existing file, but rather is dynamically created when requested by querying the file system of the server. This brings one clear benefit - if we add files to the directory, the next time we request the listing they will be included.
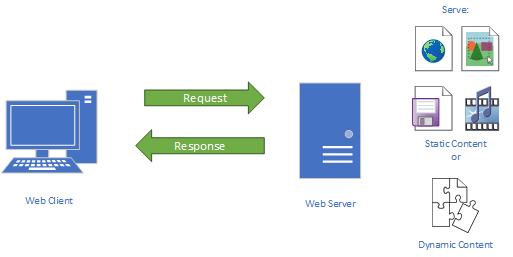
Thus, we can create resources dynamically in response to a request. This is the core concept of a dynamic web server, which really means any kind of web server that generates at least some of its content dynamically. In this chapter, we will explore this class of web server.
Before we dig too deeply into dynamic web servers, we should review our technologies used in the web. On the client side, we have HTML, CSS, and JavaScript. Managing communication between the client and server, we have HTTP. But on the server side of the equation, what standard web technologies do we use?
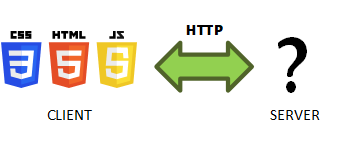
The answer is none. There is no standard server development language. In fact, web servers can be written in almost every programming language. This gives web application developers a tremendous amount of flexibility. Of course, that also means the choice of server-side technologies can quickly become overwhelming.
One technology that emerged to help manage some of this complexity was the Common Gateway Interface (CGI), a web standard that allowed a traditional static webserver to respond to some requests by running a command-line program and piping the output to the requesting client. The CGI standard defined what variables needed to be collected by the web server and how they would be provided to the script.
The script itself could be written in any language that could communicate using stdin and stdout, though in practice most CGI scripts were written using Perl or Bash script. This strategy was popular with the system admins responsible for deploying webservers like Apache, as these scripting languages and command-line programs were familiar tools. While CGI scripts can be used to build dynamic web pages, by far their most common use was to consume forms filled out by a user, often saving the results to a file or database or sending them via email.
CGI scripts are still used today, but they do have some important limitations. First, for each kind of request that needed handled, a new script would need to be written. The open-ended nature of CGI scripts meant that over time a web application become a patchwork of programs developed by different developers, often using different languages and organizational strategies. And since running a CGI script typically means starting a separate OS process for each request, the CGI approach does not scale well to web applications in high demand.
Thus, web developers began seeking new strategies for building cohesive web servers to provide rich dynamic experiences.
Your personal web space on the CS Departmental Server supports CGI scripts. So if you would like to try to develop one, you can deploy it there. More details can be found on the support Personal Web Pages entry.
The CGI scripting approach eventually evolved into a concept known as server pages and embodied in the technologies of PHP and Microsoft’s Active Server Pages (ASP), as well as Java Server Pages, and many other less-well-known technologies. While each of these use different scripting languages, the basic idea is the same: Take a traditional static webserver functionality, and couple it with a script interpreter. When most files are requested from the server, the file is served using the same techniques we used in the last chapter. But when a script file understood by our augmented server is requested, the script file is executed, and its output is sent as the response.
This may sound a lot like the CGI Scripts we discussed before, and it certainly is, except for two major innovations. The first of these was that the same interpreter, and therefore OS process, could be used for all requests. As server hardware adopted multiple CPUs and multi-core CPUs, additional interpreter processes were added, allowing incoming requests to be responded to concurrently on separate processors.
The second big innovation innovation was the idea of embedding script directly in HTML code. When the server page is interpreted, the embedded scripts would execute, and their output would be concatenated directly into the HTML that was being served.
For example, a PHP page might look like this:
<!DOCTYPE html>
<html>
  <head><title>PHP Example</title></head>
  <body>
    <h1>A PHP Example</h1>
    <?php
      echo date('D, d M Y H:i:s');
    ?>
  </body>
</html>
Notice everything except the <?php ... ?> is perfectly standard HTML. But when served by an Apache server with mod_php installed, the code within <?php ... ?> would be executed, and its output concatenated into the HTML that would then be served (the echo function prints output, and date() creates the current time in the specified format).
Similarly, an ASP page doing the same task would look like:
<!DOCTYPE html>
<html>
  <head><title>ASP Example</title></head>
  <body>
    <h1>An ASP Example</h1>
    <%
      Response.Write Now()
    %>
  </body>
</html>
These files would typically be saved with a special extension that the server would recognize, i.e. .php for PHP files, and .asp for ASP files. Allowing scripts to be directly embedded within HTML made web development with these tools far faster, and as IDEs were adapted to support syntax highlighting, code completion, and other assistive features with these file types also helped prevent syntax errors in both the HTML and script code.
Active Server Pages and PHP remain commonly used technologies today, and a large portion of legacy websites built using them are still in service. In fact, your personal web space on the CS department server is running in an Apache server set up to interpret PHP files - you could add a PHP script like the one above and and it would execute when you visited the page. You can visit the support Personal Web Pages entry for details on doing so.
While CGI Scripts and Server Pages offered ways to build dynamic websites using off-the shelf web server technologies (Apache, IIS), many programmers found these approaches limiting. Instead, they sought to build the entire web server as a custom program.
Node was actually developed for exactly this approach - it provides abstractions around the fundamental aspects of HTTP in its http library. This library handles the listening for HTTP requests, and parses the request and uses it to populate a http.ClientRequest object and provides a http.ServerResponse object to prepare and send the response. These are abstractions around the HTTP Request and Response we discussed in chapter 2.
The authors of Node took advantage of the functional nature of JavaScript to make writing servers easy - we just need to provide a function to the server that takes a request/response pair. This has been our handleRequest() method, and we can pack it with custom logic to determine the correct response for the incoming request.
We’ve already written a number of functions that take in a request and response object, and determine the correct response to send. This includes our serveFile(), and our listDirectory(). We can create dynamic pages in much the same way - by writing a custom function to serve the dynamic page.
For example, a very simple dynamic page could be created with this function:
function serveTime(req, res) {
    var html = `
        <!doctype html>
        <html>
          <head>
            <title>Server Time</title>
          </head>
          <body>
            <h1>Time on the server is ${new Date()}</h1>
          </body>
        </html>
    `;
    req.writeHead(200, {
        "Content-Type": "text/html",
        "Content-Length": html.length
    }).end(html);
}
But for a server to be dynamic, we typically want more than just the ability to render a page from code. We also want to interact with the user in some meaningful way - and that means receiving data from them. In the HTTP protocol there are several ways for the user to send data:
By the path of the request, i.e. when we request https://support.cs.ksu.edu/CISDocs/wiki/Main_Page the path CISDocs/wiki/Main_Page indicates the page we are requesting
By additional information contained in the URL, specifically the query string (the part of the URL that follows the ?) and the hash string (the part of hte URL that follows the #)
By information contained in the body of the request
We’ve already looked at the path portion of the URL in describing how we can implement a file server to serve files and directories. But what about the query string and body of the request? Let’s look at how those are handled in Node next.
Query strings (aka search strings) are the part of the URL that appear after the ? and before the optional #. The hash string is the portion of the url after the #. We’ve mentioned them a bit before, but as we dig into dynamic web servers it makes sense to do a deeper dive, as this is where they really come into play.
First, let’s briefly visit the hash string. It’s traditional use is to indicate a HTML element on the page the browser should scroll to when visiting the URL. When used this way, its value is the id attribute of the element. The browser will automatically scroll to a position that displays the element on-screen. Thus, the traditional use of the hash string is for “bookmarked” links that take you to an exact section of the page, like this one which takes you to a description of your personal CS web space: https://support.cs.ksu.edu/CISDocs/wiki/Personal_Web_Pages#Dynamic_Content.
With the advent of single-page apps, it has come to serve additional purposes; but we’ll talk about those when we visit that topic in a future chapter.
Now, the query string is a vital tool for dynamic web pages, as it conveys information beyond the specific resource being asked for to the server. Consider what a dynamic webserver does - it takes an incoming request, and sends a response. In many ways, this is similar to a function call - you invoke a function, and it returns a value. With this in mind, the path of the URL is like the function name, and the query string becomes its parameters.
Much like parameters have a name and a value, the query string is composed of key/value pairs. Between the key and value of each pair is a =, and between the pairs is a &. Because the = and & character now have a special meaning, any that appear in the key or value are swapped with a special percent value, i.e. & becomes %26 and = becomes %3D. Similarly, other characters that have special meanings in URLs are likewise swapped. This is known as URL or percent encoding, and you can see the swapped values in the table below:
':' | '/' | '?' | '#' | '[' | ']' | '@' | '!' | '$' | '&' | "'" | '(' | ')' | '*' | '+' | ',' | ';' | '=' | '%' | ' ' |
%3A | %2F | %3F | %23 | %5B | %5D | %40 | %21 | %24 | %26 | %27 | %28 | %29 | %2A | %2B | %2C | %3B | %3D | %25 | %20 or + |
In JavaScript, the encodeURIComponent() function can be used to apply percent encoding to a string, and the decodeURIComponent() can be used to reverse it.
Node offers the querystring library. It offers a querystring.parse() method which can parse a query string into a JavaScript object with the decoded key/value pairs transformed into properties and a querystring.stringify() method which can convert a JavaScript object into an encoded query string. In addition, these methods allow you to override what characters are used as delimiters, potentially allowing you to use alternative encoding schemes.
While we can type a URL with a query string manually, by far the most common way to produce a query string is with a <form> element. When a form is submitted (the user clicks on a <input> with type attribute of "submit"), it is serialized and submitted to the server. By default, it will be sent to the same URL it was served from, using a GET request, with the fields of the form serialized as the query string.
This is why one name for the query string is the search string, as it is commonly used to submit search requests. For example, Google’s search page contains a form similar to this (very simplified form):
<form>
    <input name="q" type="text">
    <input type="submit" value="Google Search">
</form>
Notice the form has one text input, named "q". If we type in search terms, say “k-state computer science” and click the search button, you’ll notice in the resulting url the query string contains q=k-state+computer+science (plus a lot of other key/value pairs). If you type "https://www.google.com/search?q=k-state+computer+science" into the address bar, you’ll get the same page.
Notice though, that google uses www.google.com/search as the URL to display search results at, instead of the original www.google.com page. We can have a form submit to a different URL than it was served on by setting its action attribute to that URL.
We can also change the HTTP method used to submit the form with the method attribute. By default it uses a GET request, but we can instead set it to a POST request. When a POST request is used, the form is no longer encoded in the query string - it is instead sent as the body of the POST request.
When a form is submitted as a POST request, its inputs are serialized according to the form’s encoding strategy. This value is also used as the Content-Type header of the request. The three form encoding values are:
application/x-www-form-urlencoded (the default)multipart/form-data (used for file uploads)text/plain (used for debugging)The <form> element’s enctype attribute can be set to any of these three possible values.
This serialization format consists of key/value pairs where the keys and values are url (percent) encoded, and between each key and value is a = and between each pair is a &. In other words, it is the same encoding that is used in the query string - the only difference is the query string begins with a ?.
Thus, the form:
<form method="post">
    <input type="text" name="first" placeholder="Your first name">
    <input type="text" name="middle" placeholder="Your middle initials">
    <input type="text" name="last" placeholder="Your last name">
    <input type="number" name="age" placeholder="Your age">
    <input type="submit" value="Save My Info">
</form>
When submitted by John Jacob Jingleheimer Schmidt would be encoded:
first=John&middle=J.+J.&last=Schmidt&age=30If we parsed this string with querystring.parse() the resulting JavaScript object would be:
{
    first: "John",
    middle: "J. J.",
    last: "Schmidt",
    age: "30"
}It is important to note that even though age started as a numerical value, it becomes a string in the conversion process. All values submitted in a form will be interpreted as strings on the server. If we need it to be a number again, we can always use parseInt() on it.
There is one limitation to the application/x-www-form-urlencoded encoding strategy - there is no way to include binary data, i.e. files. If you submit a form that includes an <input> of type file and encode it with application/x-www-form-urlencoded, the value supplied by the <input type="file"> will be the filename only. The actual body of the file will not be available. The reason is simple - there’s no easy way to put raw binary data into a text file.
The multipart/form-data solves this in a less-than easy way. It splits the body into blocks - one for each input. Between each block is a sequence of bytes used as a separator. These boundary bytes cannot be found in any of the file data (as if it were, that block would be split up). And each block has its own header section and body section. The header defines what the input is, and what its body contains. If it was a non-file input, it will be text, and if it was a file input, the content will be the raw bytes, encoded in base64.
When the server receives this body, it must use the boundary bytes to separate the blocks, and then parse each block. There are no built-in libraries in Node for doing this, though there are many npm packages that do. We’ll also write our own from scratch so that we get a good feel for it.
While many HTTP libraries will process the entire incoming request before passing control to the program, Node’s http module takes a different approach. It constructs and passes the http.IncomingMessage and http.ServerResponse objects as soon as it has received the header portion of the request. This means the body may still be being transmitted to the server as you start to process the request.
This is fine for GET requests, as they don’t have a body. But for requests that do have a body, it means you have to process the incoming data yourself.
To do so, there are three events made available in the http.IncomingMessage object: data, end, and error.
The data event occurs whenever a new chunk of the body is available, and that chunk is passed to the event listener. The end event occurs once all the chunks have been received. And the error event occurs when something goes wrong. The chunks are Buffer objects, and are always received in order.
Thus, we need to collect each chunk from each data event, and join them together into a single buffer at the end event. Thus, the basic scaffold for doing so is:
function loadBody(req, res) {
    var chunks = [];

    // listen for data events
    req.on('data', (chunk) => {
      chunks.push(chunk);
    });

    // listen for the end event
    req.on('end', () => {
        // Combine the chunks
        var data = Buffer.concat(chunks);

        // DO SOMETHING WITH DATA
    });

    // listen for error events
    req.on('error', (err) => {
        // RESPOND APPROPRIATELY TO ERROR
    });
}
Note that these events occur asynchronously, so this scaffold needs to be integrated into an appropriate asynchronous processing strategy.
You might wonder why the developers of Node chose to handle request bodies in this fashion. Most likely, it was for the degree of control it offers the programmer. Consider the case where you decide your program needs to be able to stop an upload - you can do so with http.IncomingMessage.destroy(), which immediately closes the socket connecting the client to the server, effectively terminating the upload.
This can prevent the server from doing unneeded work and consuming unnecessary bandwidth. Of course, the decision to stop an upload is highly situationally dependent - thus they leave it in your hands as the programmer.
In fact, a common Denial of Service attack known as an HTTP flood often takes advantage of POST requests to submit requests with large bodies to consume server resources. By giving the programmer the ability to stop uploads this way helps counter this kind of attack.
HTML was designed as a stateless protocol. This means that there is no expectation for the server to keep track of prior requests made to it. Each incoming HTTP request is effectively treated as if it is the first request ever made to the server.
This was an important consideration for making the web possible. Consider what would happen if our server needed to keep track of what every visitor did on the site - especially when you have thousands of unique visitors every second? You would need a lot of memory, and a mechanism to tell which user is which. That’s a lot of extra requirements to getting a web server working.
But at the same time, you probably recognize that many of the websites you use every day must be doing just that. If you use Office 365 or Google Docs, they manage to store your documents, and not serve you someone else’s when you log in. When you visit an online store and place products in your shopping basket, they remain there as you navigate around the site, loading new pages. So how are these websites providing state?
The answer that was adopted as a W3C standard - RFC 2695 is cookies. Cookies are nothing more than text that is sent along with HTTP Requests and Responses. A server can ask a client to store a cookie with a Set-Cookie header. From that point on, any request the client makes of that server will include a Cookie header with the cookie information.
It’s kind of like if your forgetful teacher gives you a note to show him the next time you come to office hours, to help remind him of what you talked about previously. This way, the server doesn’t have to track state for any visitor - it can ask the visitor’s client (their browser) to do it for them.
Let’s dig deeper into this idea and implementation of cookies.
Much like a web request or response, a cookie is nothing more than a stream of data. It gets passed between client and server through their headers. Specifically, the Set-Cookie header sends the cookie to the client, and the client will automatically return it in subsequent requests using the Cookie header.
Say we want to establish a session id, (SID), for every unique visitor to our site. We would have our server send the SID in a Set-Cookie header:
Set-Cookie: SID=234
The browser would store this value, and on subsequent requests to the same domain, include a corresponding Cookie header:
Cookie: SID=234
Unless the Domain cookie attribute is specified (see below), a cookie is only sent to the domain that it originated from. It will not be sent to subdomains, i.e. a cookie that came from ksu.edu will not be sent to the server with hostname cs.ksu.edu.
As you might have guessed from the example, the string of a cookie is a set of key/value pairs using the equals sign (=) to assign the value to the key. But we can also include multiple cookie pairs using a semicolon (;) to separate the cookie pairs, i.e.:
Set-Cookie: SID=234; lang=en-US
Both cookie pairs are sent back in a Cookie header:
Cookie: SID=234; lang=en-US
We can chain multiple pairs of cookie pairs. After the last cookie pair, we need another semicolon, then any cookie attributes, also separated by semicolons. For example:
Set-Cookie: SID=234; lang=en-US; EXPIRES=Wed, 04 April 2019 011:30:00 CST
adds a cookie attribute specifying an expiration date for the cookie. The legal cookie attributes are laid out in RFC6265, but we’ll reprint them here.
There are a limited number of defined cookie attributes, and each changes the nature of the cookie and how a browser will work with it in an important way. Let’s examine each in turn:
Expires As you might expect, this sets an expiration date for the cookie. After the date, the browser will throw away the cookie, removing it from its internal cache. It will also stop sending the cookie with requests. If you need to erase a value in a cookie you’ve already sent to a user, you can respond to their next request with a new Set-Cookie header with the Expires value set in the past. To avoid issues with time zones, the date supplied must conform to the HTTP-Date format set out in RFC1123.
Max-Age The Max-Age also sets an expiration date, but in terms of a number of seconds from the current time. A value of 0 or less (negative) will remove the cookie from the browser’s cache, and stop sending the cookie in future requests. IE 7, 8, and 9 do not support the Max-Age attribute; for all other browsers, Max-Age will take precedence over Expires.
Domain As described above, cookies are by default sent only to the domain from which they originated, and no subdomains. If the domain is explicitly set with the Domain attribute, subdomains are included.
Path The value of this attribute further limits what requests a cookie will be sent to. If the Path is specified, only requests whose url matches the value will be sent. This does include subpaths, i.e. Path=/documents will match the urls /documents/, /documents/1.doc, and /documents/recent/a.pdf.
Secure Cookies including this attribute (it does not need a value) will only be sent by the browser with HTTPS requests, not HTTP requests. Note that sending the cookie over HTTPS does not encrypt the cookie data - as a header, it is sent in the clear for both HTTP and HTTPS.
HttpOnly Cookies can normally be accessed by JavaScript on the client, from the Document.cookie property. Setting this attribute (it does not need a value) tells the browser not to make it accessible.
SameSite (in Draft) This new cookie attribute is intended to help a server assert that its cookies should not be sent with any cross-site requests originating from this page (i.e. <script> tags, <img> tags, etc. whose source is a different site, or AJAX requests against other sites). This is intended to help combat cross-site scripting attacks. As you might expect, this is only supported in the newest browser versions.
As with all web technologies, we need to consider the security implications. Cookies are received and returned by the client - and we know that anything the client is responsible for can be manipulated by an adversarial agent. Let’s think through the implications.
All cookies received by a browser and cached there. How long they are stored depends on the Max-Age and Expires attributes. Browsers are told to delete cookies older than their Max-Age, or whose Expires duration has passed. If neither of these are set, the cookie is considered a session cookie - it is deleted when the browser is closed (this is why you should always close a browser you use on a public computer).
While session cookies only exist in memory, cookies with expiration dates may be persisted as text files in the browser’s data directory. If this is the case, it is a simple matter for a knowledgeable adversary with access to the computer to retrieve them. Also remember access doesn’t necessarily mean physical access - malware running on your computer can effectively copy this data as well.
Moreover, cookies are just text - say for example you add the identity of your user with a cookie Set-Cookie: user-id=735. An adversary could sign up for a legitimate account with your application, and then manipulate their cookie to return Cookie: user-id:1. Since user ids are often incrementally generated primary keys in a database, it’s a good assumption that one or two low-numbered ones will belong to administrator accounts - and this adversary has just impersonated one!
So if we need cookies to add state to our web applications, but cookies (and therefore that state) are subject to interception and manipulation - how can we protect our users and our site?
Some common strategies are:
Using Secure HTTP helps prevent cookies from being intercepted during transit, as the request body and headers are encrypted before they move across the transport layer of the Internet. This does not protect cookies once they arrive at a user’s computer, however. Still, it is a great first step.
A good general strategy is to store as little of importance in the cookie as possible. This also helps keep the size of a site’s cookies down, which means less traffic across the network, and less to store on a user’s computer. The RFC suggests browsers support a minimum size of 4096 bytes per cookie - but this is not a requirement.
But where do we store the session information, if not in the cookie? This is the subject of the next section, https://textbooks.cs.ksu.edu/cis526/06-dynamic-web-servers/09-sessions/. This strategy usually entails storing nothing more than a session identifier in the cookie, and storing the actual data that corresponds to that session identifier on the server. Effectively, we make our server statefull instead of stateless.
Another common strategy is encrypting the value of a cookie using a reversible encryption algorithm before sending it to the client. This kind of encryption technique is a mathematical function that can easily be reversed, provided you know the key used during the encryption process. This key should be stored in the server and never shared, only used internally to encrypt outgoing cookies and decrypt incoming ones.
This strategy only works if you don’t need to know the cookie’s value on the client (as the client will not have the key). Also, be wary of sending any details of the encryption with the encrypted data - anything that helps identify the encryption strategy or provides information like initialization vectors can help an adversary break the encryption. Also, check what algorithms are considered strong enough by current standards; this is always a moving target.
A third common technique is signing the cookie with a hash. A hash is the result of a one-way cryptographic function - it is easy to perform but very difficult to reverse. How it works is you hash the value of the cookie, and then send both the original data’s value and the hashed value as cookies. When you receive the cookie back from the client, you re-hash the value found in the cookie, and compare it to the hashed value in the cookie. If the two values are different, then the cookie has been modified.
The above strategies only keep adversaries from modifying cookies. There is still the danger of valid cookies being captured and used by an adversary - a technique known as session hijacking. Using HTTPS can prevent session hijacking from within the network, but will not protect against cookies lifted from the client’s computer.
Making sessions expire quickly can help mitigate some of the risk, especially when the adversary is using physical access to the computer to retrieve cookies - you wouldn’t expect them to do this while the user is still using the computer.
But non-physical access (such as a compromised computer) can lift a cookie while it is in use. Regenerating a session identifier (assuming you are using the first strategy) on each login can help, especially if you prompt users to log in before allowing especially risky actions. Adding some additional tracking information like the originating IP address to the session and prompting the user to validate a session by logging back in when this changes can also help.
Be aware that these strategies can also be very frustrating for users who are prompted to sign in repeatedly. As always, you need to balance security concerns with user satisfaction for the kind of activities your application supports.
Clearly these strategies can be used in combination, and doing so will provide a better degree of safety for your clients. But the can also increase computation time, network traffic, and user frustration within your web application. Deciding just how much security your application needs is an important part of the design process.
If HTTP is stateless, how do e-commerce websites manage to keep track of the contents of your shopping cart as you navigate from page to page? The answer is the use of a session - a technique by which state is added to a web application.
The term session appears a lot in web development, and can mean different things in different contexts. But there is a common thread in each - a session is a form of connection between the client and server.
For example, when your web client make a request from a web server, it opens a Transmission Control Protocol (TCP) session to the server, and sends the HTTP request across this connection. The session stays open until all the packets of the request are sent, and those of the response are received. In HTTP 1.1, the session can stay open for more than a single request-response pair, as it is anticipated a HTML page request will be followed by requests for resources (CSS, JavaScript, images, etc.) embedded in the page. HTTP 2.0 takes this farther, allowing the server to push these additional resources to the client.
The sessions we are discussing here are implemented at a higher level than TCP sessions (though they are hosted by the TCP session), and represent a single website visitor interacting with the server.
A session therefore provides a mechanism for storing information between requests, and must be unique to a specific user. All session techniques begin with a cookie, so you should be familiar with that concept.
There are three basic session techniques you will likely encounter in web development. Let’s take a look at each.
In a cookie session, the session information is completely stored within the cookie. This has the benefit that no state information needs to be stored on the server, and it is easy to implement.
There are several downsides to the cookie session. The first is that it comes with a limited amount of reliable storage (the standard suggests that browsers support a minimum cookie size of 4096 bytes per cookie, but there is no hard requirement). Second, cookies are somewhat vulnerable, as they can be intercepted in-transit, and they can also be recovered from a browser’s cookie storage by a knowledgeable adversary.
A second approach is to store the session data on the server using some form of memory cache. A straightforward implementation for a Node server would be to use an object, i.e.:
var sessions = {}Each time a new visitor comes to the website, a unique ID is generated, and used as the the key for their session, and sent to the client as a cookie, i.e.:
var sessionID = [some unique id];
res.setHeader("Set-Cookie", `session-id=${sessionID}; lang=en-US`);
sessions[sessionID] = {
    // session data here
}
On subsequent requests, the cookie can be retrieved from the request and used to retrieve the session data:
var cookie = req.headers["cookie"];
var sessionID = /session-id=([^;])/.match(cookie);
var session = sessions[sessionID];
Because the session data is never sent in its raw form to the client, it is more secure. However, the session can still be hijacked by a malicious user who copies the cookie or guesses a valid session id. To counter this, all requests should be updated to use secure protocol (https) and the cookie should be encrypted.
Also, in-memory sessions are lost when the server reboots (as they are held in volatile memory). They should also be cleaned out periodically, as each session consumes working memory, and if a session is more than an hour old it probably will not be used again.
When a website is backed by a database (as we’ll cover soon), storing the session in that database becomes an option. Functionally, it is similar to an In-Memory session, except that the database becomes the storage mechanism. Because the database offers persistent storage, the session also could be persistent (i.e. you remain “logged on” every time you visit from the same computer). Still, database sessions typically are cleaned out periodically to keep the sessions table from growing overlarge.
Database sessions are a good choice if your website is already using a database. For a website with registered users, the session id can be the user’s id, as defined in the database schema.
While skilled programmers may have chafed at the restrictions imposed by server pages, there was one aspect that came to be greatly valued - the ability to embed script directly in HTML, and have it evaluated and concatenated into the HTML text.
This is where template libraries come in. A template library allows you to write your HTML content as HTML in a separate file with a special syntax to inject dynamic programming script. This is often some variation of <> or {}. This approach allows you to validate the HTML, as the script portions are ignored as unknown tags (when using <>) or as static text.
When the server is running, these templates are rendered, evaluating any code and supplying the applicable variables. This process generates the HTML snippet.
This is similar to what server pages do. However, server pages represent an integrated approach - the server page framework defined all aspects of how you could interact with the OS, the web server, and other programs. In contrast, a template library provides the option of using templates within any project - obviously for generating HTML as part of a dynamic website, but potentially for other kinds of applications as well.
Thus, a template rendering library gives us a lot of flexibility in how and when we use it. For example, in using the Embedded JavaScript template library, we could rewrite our directory listing as:
<!doctype html>
<html>
    <head>
        <title>Directory Listing</title>
    </head>
    <body>
        <h2>Directory Listing for <%= pathname %></h2>
        <div style="display: flex; flex-direction: column; padding: 2rem 0">
        <% entries.forEach((entry) =>{ %>
            <a href="<%= path.posix.join(pathname, entry) %>">
                <%= entry %>
            </a>
        <% }) %>
        </div>
        <% if (pathname !== "/") { %>
            <a href="<%= path.dirname(pathname) %>">
                Parent directory
            </a>
        <% } %>
    </body>
</html>
Notice how we can embed the JavaScript directly into the file. In a Node server, we can use this template to render html:
// Build the dynamic HTML snippets
var data = {
    pathname: pathname,
    entries: entries,
    path: path
};
ejs.renderFile("templates/directory-listing.ejs", data, function(err, html){
    // TODO: render the HTML in the string variable html
});
While this may seem like just as much work as the concatenation approach, where it really shines is the ability to combine multiple templates, separating parts of the pages out into different, reusable template files. These are typically separated into two categories based on how they are used, partials and layouts.
A partial is simply a part of a larger page. For example, the entries we are rendering in the listing could be defined in their own template file, directory-listing-entry.ejs:
<a href="<%= path %">
    <%= entry %>
</a>
And then included in the directory-listing.ejs template:
<!doctype html>
<html>
    <head>
        <title>Directory Listing</title>
    </head>
    <body>
        <h2>Directory Listing for <%= pathname %></h2>
        <div style="display: flex; flex-direction: column; padding: 2rem 0">
        <% entries.forEach((entry) =>{ %>
            <%- include('directory-listing-entry' {entry: entry, path: path.posix.join(pathname, entry) }) %>
        <% }) %>
        </div>
        <% if (pathname !== "/") { %>
            <a href="<%= path.dirname(pathname) %>">
                Parent directory
            </a>
        <% } %>
    </body>
</html>
While this may seem overkill for this simple example, it works incredibly well for complex objects. It also makes our code far more modular - we can use the same partial in many parts of our web application.
A second common use of templates is to define a layout - the parts that every page holds in common. Consider this template file, layout.ejs:
<!doctype html>
<html>
    <head>
        <title><%= title %></title>
    </head>
    <body>
        <%- include('header') %>
        <%- content %>
        <%- include('footer') %>
    </body>
</html>
Now our directory listing can focus entirely on the directory listing:
<h2>Directory Listing for <%= pathname %></h2>
<div style="display: flex; flex-direction: column; padding: 2rem 0">
<% entries.forEach((entry) =>{ %>
    <%- include('directory-listing-entry' {entry: entry, path: path.posix.join(pathname, entry) }) %>
<% }) %>
</div>
<% if (pathname !== "/") { %>
    <a href="<%= path.dirname(pathname) %>">
        Parent directory
    </a>
<% } %>
And we can render our page using the layout:
// Build the dynamic HTML snippets
var data = {
    pathname: pathname,
    entries: entries,
    path: path
};
ejs.renderFile("templates/directory-listing.ejs", data, function(err, content){
    if(err) {
        // TODO: handle error
        return;
    }
    ejs.renderFile("templates/layout.ejs", {content: content}, function(err, html) {
        // TODO: render the HTML in the string variable html
    });
});
This layout can be re-used by all pages within our site, allowing us to write the HTML shared in common by the whole website once.
Also, while these examples show reading the template files as the response is being generated, most template engines support compiling the templates into a function that can be called at any time. This effectively caches the template, and also speeds up the rendering process dramatically.
Some template libraries have leveraged the compilation idea to provide a more concise syntax for generating HTML code. For example, the directory listing written using Pug templates would be:
doctype html
html(lang="en")
    head
        title= Directory Listing
    body
        h2= 'Directory Listing for ' + pathname
        div(style="display: flex; flex-direction: column; padding: 2rem 0")
        each entry in entries
            a(href=path.posix.join(pathname, entry)) entry
        if pathname !== "/"
            a(href=path.dirname(pathname))
                Parent directory
Concise templating languages can significantly reduce the amount of typing involved in creating web pages, but they come with a trade-off. As you can see from the code above, learning Pug effectively requires you to learn a new programming language, including its own iteration and conditional syntax.
EJS is just one template library available in JavaScript. Some of the most popular ones include:
It is useful to compare how these different libraries approach templates as there are often large differences, not only in syntax but also in function.
A newer approach, popularized by the React framework, emphasizes building components rather than pages. A component can be thought of as a single control or widget on a page. While conceptually similar to the partials described above, it organizes its structure, styling, and scripting into a cohesive and reuseable whole.
This represents a move away from the separation of concerns we described earlier. It often incorporates aspects of declarative programming rather than thinking of programming in terms of control flow. This component-based approach also lends itself to developing progressive web applications, which only download the script needed to run the portion of the app the user is interacting with at a given time.
As this approach is significantly different from the more traditional templating libraries, we’ll discuss these ideas in a later chapter.
Whenever we render content created by users, we open the door to script injection, a kind of attack where a malicious user adds script tags to the content they are posting. Consider this form:
<form action="post">
   <label for="comment">
      <textarea name="comment"></textarea>
    </label>
    <input type="submit"/>
</form>
The intent is to allow the user to post comments on the page. But a malicious user could enter something like:
What an awesome site <script src="http://malic.ous/dangerous-script.js"></script>If we concatenate this string directly into the webpage, we will serve the <script> tag the user included, which means that dangerous-script.js will run on our page! That means it can potentially access our site’s cookies, and make AJAX requests from our site. This script will run on the page for all visitors!
This attack is known as script injection, and is something you MUST prevent. So how can we prevent it? There are several strategies:
The simplest is to “escape” html tags by replacing the < and > characters with their html code equivalents, < (less than symbol) and > (greater than symbol). By replacing the opening and closing brackets with the equivalent HTML code, the browser will render the tags as ordinary strings, instead of as HTML. Thus, the above example will render on the page as:
What an awesome site <script src=“http://malic.ous/dangerous-script.js"></script>
This can be accomplished in JavaScript with the String.prototype.replace() method:
sanitizedHtmlString = htmlString.replace(/</g, '<').replace(/>/g, '>');The replace() method takes either a regular expression or string to search for - and a string to replace the occurrences with. Here we use regular expressions with the global flag, so that all occurrences will be replaced. We also take advantage of the fact that it returns the modified string to do method chaining, invoking a second replace() call on the string returned from the first call.
The downside to this approach is that all html in the string is reinterpreted as plain text. This means our comments won’t support HTML codes like <b> and <i>, limiting the ability of users to customize their responses.
Allow lists (also called “whitelists”) are a technique to allow only certain tags to be embedded into the page. This approach is more involved, as we must first parse the HTML string the same way a browser would to determine what tags it contains, and then remove any tags that don’t appear in our allow list.
Instead of writing your own code to do this, it is common practice to use a well-maintained and tested open-source library. For example, the NPM package sanitize-html provides this ability.
Block lists (also called “blacklists”) are a similar technique, but rather than specifying a list of allowed tags, you specify a list of disallowed tags. These are then stripped from html strings. This approach is slightly less robust, as new tags are added to the HTML standard will need to be evaluated and potentially added to the block list.
A final option is to have users write their contributions using Markdown or another markup language which is transformed into JavaScript. Markdown (used by GitHub and many other websites) is probably the best-known of these, and provides equivalents to bold, italic, headings, links, and images:
# This is transformed into a h1 element
## This is transformed into a h2 element
> This is transformed into a blockquote
_this is italicized_ *as is this*
__this is bold__ **as is this**
* this
* is
* an
* unordered
* list
1. this
2. is
3. a
4. numbered
5. list
As it does not have conversions for <script> and other dangerous tags, HTML generated from it is relatively “safe” (it is still necessary to escape HTML in the original markup string though).
As with allow/block lists, Markdown and the like are usually processed with an outside library, like markdown-js. There are similar libraries for most modern programming languages.
Server pages represented one approach to tackling the dynamic web server challenge, and one that was especially suitable for those web developers who primarily worked with static HTML, CSS, and JavaScript backgrounds.
For those that were already skilled programmers, the custom server approach provided less confinement and greater control. But it came at a cost - the programmer had to author the entire server. Writing a server from scratch is both a lot of work, and also introduces many more points where design issues can lead to poor performance and vulnerable web apps.
Thus, a third approach was developed, which leveraged existing and well-suited technologies to handle some aspects of the web app needs. We can separate the needed functionality into three primary areas, each of which is tackled with a different technology:
We’ve already discussed file servers extensively, and even discussed some options for optimizing their performance - like caching the most frequently requested files. There are a number of software packages that have been developed and optimized for this task. Some of the best known are:
Creating and serving dynamic content is typically done by writing a custom application. As pointed out above, this can be done using any programming language. The strategies employed in such web server designs depend greatly upon the choice of language - for example, Node webservers rely heavily on asynchronous operation.
Some interpreted programming languages are typically managed by a web server like Apache, which utilizes plug-ins to run PHP, Ruby, or Python. Similarly, IIS runs ASP.NET program scripts written in C# or Visual Basic. This helps offset some of the time penalty incurred by creating the dynamic content with an interpreted programming language, as static content benefits from the server optimizations.
In contrast, other languages are more commonly used to write a web server that handles both static and dynamic content. This includes more system-oriented languages like C/C++, Java, and Go and more interpreted languages like Node.js.
In either case, the programming language is often combined with a framework written in that language that provides support for building a web application. Some of the best-known frameworks (and their languages) are:
While a file system is the traditional route for persistent storage of data in files, as we saw in our discussion of static file servers, holding data in memory can vastly improve server performance. However, memory is volatile (it is flushed when the hardware is powered down), so an ideal system combines long-term, file-based storage with in-memory caching. Additionally, structured access to that data (allowing it to be queried systematically and efficiently) can also greatly improve performance of a webserver.
This role is typically managed by some flavor of database application. Relational databases like the open-source MySQL and PostgresSQL, and closed-source SQL Server and Oracle Database remain popular options. However, NoSQL databases like MongoDB and CouchDB are gaining a greater market share and are ideal for certain kinds of applications. Cloud-based persistence solutions like Google Firebase are also providing new alternatives.
This combination of software, programming language, along with the operating system running them have come to be referred to as a stack. Web developers who understood and worked with all of the parts came to be known as full-stack developers.
Clearly, there are a lot of possible combinations of technologies to create a stack, so it was important to know which stacks with which a developer was working. For convenience, the stacks often came to be referred to by acronyms. Some common stacks you will hear of are:
Microsoft has their own traditional stack ASP.NET, which is built on Windows Server (the OS), IIS (Internet Information Services, the webserver), a .NET language like C# or Visual Basic, and MSSQL. With the launch of .NET Core, you can now also build a .NET stack running on a Linux OS.
Additionally, frameworks like Django, Ruby on Rails, Express, Laravel, etc. often incorporate preferred stacks (though some parts, specifically the server and database, can typically be swapped out).
Somewhat confusingly, cloud technologies often replace the traditional webserver role completely, leaving the client-side JavaScript talking to a number of web services. We’ll discuss this approach in a few chapters.
In this chapter we have learned about several approaches to creating dynamic web servers, including server pages, custom web servers, and full stack development, often using a web development framework. We also learned how dynamic webservers can handle data and file uploads from HTML forms, as well as some security concerns involved. We also saw how state can be introduced to web apps using cookies and sessions.
In the next few chapters, we’ll explore these ideas in more detail.