Role-Based Authorization
Updated Authorized Roles Middleware
The authorized-roles.js file shown in the video is out of date. Refer to the code below for a corrected version. Corrections are discussed in the Errata chapter.
Token Middlewares
Now that we finally have a working authentication system, we can start to add role-based authorization to our application. This will ensure that only users with specific roles can perform certain actions within our RESTful API. To do this, we’ll need to create a couple of new Express middlewares to help load the contents of our JWT into the request, and also to verify that the authenticated user has the appropriate roles to perform an action.
First, let’s create a middleware to handle loading our JWT from an authorization header into the Express request object:
/**
 * @file Middleware for reading JWTs from the Bearer header and storing them in the request
 * @author Russell Feldhausen <russfeld@ksu.edu>
 * @exports tokenMiddleware the token middleware
 */

// Import Libraries
import jsonwebtoken from 'jsonwebtoken'

// Import configurations
import logger from '../configs/logger.js'

async function tokenMiddleware(req, res, next) {
  // Retrieve the token from the headers
  const authHeader = req.headers['authorization']
  const token = authHeader && authHeader.split(' ')[1]

  // If the token is null in the header, send 401 unauthorized
  if (token == null) {
    logger.debug('JWT in header is null')
    return res.status(401).end();
  }

  // Verify the token
  jsonwebtoken.verify(token, process.env.JWT_SECRET_KEY, async (err, token) => {

    // Handle common errors
    if (err) {
      if (err.name === 'TokenExpiredError') {
        // If the token is expired, send 401 unauthorized
        return res.status(401).end()
      } else {
        // If the token won't parse, send 403 forbidden
        logger.error("JWT Parsing Error!")
        logger.error(err)
        return res.sendStatus(403)
      }
    }

    // Attach token to request
    req.token = token;

    // Call next middleware
    next();
  });
}

export default tokenMiddleware;
This middleware will extract our JWT from the authorization: Bearer header that should be present in any request from our frontend single-page web application to our API. It then checks that the signature matches the expected signature and that the payload of the JWT has not been tampered with. It also makes sure the JWT has not expired. If all of those checks pass, then it simply attaches the contents of the JWT to the Express request object as req.token, so we can use it later in our application.
To use this middleware, we need to make a small change to the structure of our routes/api.js file to allow users to access the base API route without needing the token, but all other routes will require a valid token for access:
/**
 * @file API main router
 * @author Russell Feldhausen <russfeld@ksu.edu>
 * @exports router an Express router
 *
 * @swagger
 * tags:
 *   name: api
 *   description: API routes
 */

// Import libraries
import express from "express";

// Import middleware
import tokenMiddleware from "../middlewares/token.js";

// Import v1 routers
import rolesRouter from "./api/v1/roles.js";
import usersRouter from "./api/v1/users.js";

// Create Express router
const router = express.Router();

/**
 * Gets the list of API versions
 *
 * @param {Object} req - Express request object
 * @param {Object} res - Express response object
 * @param {Function} next - Express next middleware function
 *
 * @swagger
 * /api/:
 *   get:
 *     summary: list API versions
 *     tags: [api]
 *     responses:
 *       200:
 *         description: the list of users
 *         content:
 *           application/json:
 *             schema:
 *               type: array
 *               items:
 *                 type: object
 *                 properties:
 *                   version:
 *                     type: string
 *                   url:
 *                     type: string
 *             example:
 *               - version: "1.0"
 *                 url: /api/v1/
 */
router.get("/", function (req, res, next) {
  res.json([
    {
      version: "1.0",
      url: "/api/v1/",
    },
  ]);
});

// Use Token Middleware
router.use(tokenMiddleware);

// Use v1 routers after API route
router.use("/v1/roles", rolesRouter);
router.use("/v1/users", usersRouter);

export default router;
Here, we import our new middleware, and then we rearrange the contents of the file so that the single /api route comes first, then we add our middleware and the rest of the API routes at the end of the file. Remember that everything in Express is executed in the order it is attached to the application, so in this way any routes that occur before our middleware is attached can be accessed without a valid JWT, but any routes or routers added afterward will require a valid JWT for access.
Role Middleware
Next, we can create another middleware function that will check if a user has the appropriate roles to perform an operation via our API. However, instead of writing a simple function as our middleware, or even writing a number of different functions for each possible role, we can take advantage of one of the most powerful features of JavaScript - we can create a function that returns another function! Let’s take a look and see how it works:
/**
 * @file Middleware for role-based authorization
 * @author Russell Feldhausen <russfeld@ksu.edu>
 * @exports roleBasedAuth middleware
 */

// Import configurations
import logger from "../configs/logger.js";

/**
 * Build a middleware function to validate a user has one of a list of roles
 *
 * @param  {...any} roles a list of roles that are valid for this operation
 * @returns a middleware function for those roles.
 */
const roleBasedAuth = (...roles) => {
  return function roleAuthMiddleware (req, res, next) {
    logger.debug("Route requires roles: " + roles);
    logger.debug(
      "User " +
        req.token.username +
        " has roles: " +
        req.token.roles.map((r) => r.role).join(","),
    );
    let match = false;
    // loop through each role given
    roles.forEach((role) => {
      // if the user has that role, then they can proceed
      if (req.token.roles.some((r) => r.role === role)) {
        logger.debug("Role match!");
        if (!match) {
          match = true;
          return next();
        }
      }
    });
    if (!match) {
      // if no roles match, send an unauthenticated response
      logger.debug("No role match!");
      return res.status(401).send();
    }
  };
};

export default roleBasedAuth;
This file contains a function named roleBasedAuth that accepts a list of roles as parameters (they can be provided directly or as an array, but either way we can treat them like an array in our code). Then, we will return a new middleware function named roleAuthMiddleware that will check to see if the currently authenticated user (indicated by req.token) has at least one of the named roles. If so, then there is a match and the user should be able to perform the operation. If the user does not have any of the roles listed, then the user should not be able to perform the operation and a 401 Unauthorized response should be sent. This file also includes some helpful logging information to help ensure things are working properly.
Implementing Role-Based Authorization
Finally, let’s look at how we can use that middleware function to implement role-based authorization in our application. Let’s start simple - in this instance, we can update our GET /api/v1/roles/ operation to require the user to have the manage_users role in order to list all possible roles in the application. To do this, we can import our new middleware function in the routes/api/v1/roles.js file, and then call that function to create a new middleware function to use in that file:
/**
 * @file Roles router
 * @author Russell Feldhausen <russfeld@ksu.edu>
 * @exports router an Express router
 *
 * @swagger
 * tags:
 *   name: roles
 *   description: Roles Routes
 */

// Import libraries
import express from "express";

// Create Express router
const router = express.Router();

// Import models
import { Role } from "../../../models/models.js";

// Import logger
import logger from "../../../configs/logger.js";

// Import middlewares
import roleBasedAuth from "../../../middlewares/authorized-roles.js";

/**
 * Gets the list of roles
 *
 * @param {Object} req - Express request object
 * @param {Object} res - Express response object
 * @param {Function} next - Express next middleware function
 *
 * @swagger
 * /api/v1/roles:
 *   get:
 *     summary: roles list page
 *     description: Gets the list of all roles in the application
 *     tags: [roles]
 *     security:
 *       - bearerAuth:
 *         - 'manage_users'
 *     responses:
 *       200:
 *         description: the list of roles
 *         content:
 *           application/json:
 *             schema:
 *               type: array
 *               items:
 *                 $ref: '#/components/schemas/Role'
 */
router.get("/", roleBasedAuth("manage_users"), async function (req, res, next) {
  try {
    const roles = await Role.findAll();
    res.json(roles);
  } catch (error) {
    logger.error(error);
    res.status(500).end();
  }
});

export default router;
Notice here that we are calling the roleBasedAuth function when we add it to our endpoint, which in turn will return a new middleware function that will be called anytime this endpoint is accessed. It is a bit complicated and confusing at first, but hopefully it makes sense.
We also have added a new security item to our Open API documentation, which allows us to test this route by providing a JWT through the Open API documentation website. We can even include the specific roles that are able to access this endpoint, but as of this writing it is only part of the Open API 3.1 spec but is not supported by the swagger-ui library so it won’t appear on our documentation page.
Let’s test it now by starting our server in development mode:
$ npm run devOnce we have loaded our page, let’s go ahead and log in as the admin user by navigating to /auth/bypass?token=admin - this will return us to our home page, but now we have an active session we can use.
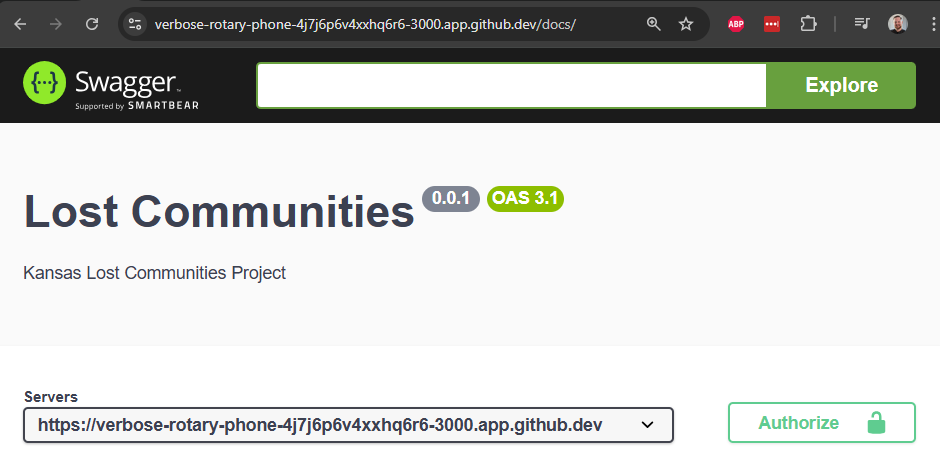
Once we have done that, we can now go to the /docs route to view our documentation. We should now notice that there is a new Authorize button at the top of the page:
In addition, if we scroll down to find our /api/v1/roles route, we should also see that it now has a lock icon next to it, showing that it requires authentication before we can access it:
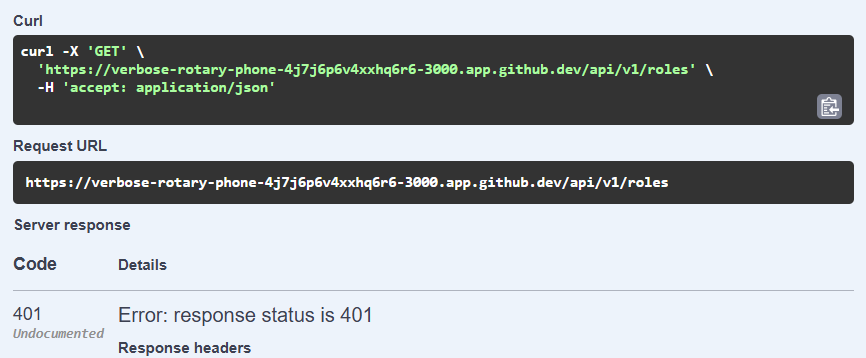
If we try to test that route now, even though we have a valid session cookie session, it should give us a 401 Unauthorized response because we aren’t providing a valid JWT as part of our request:
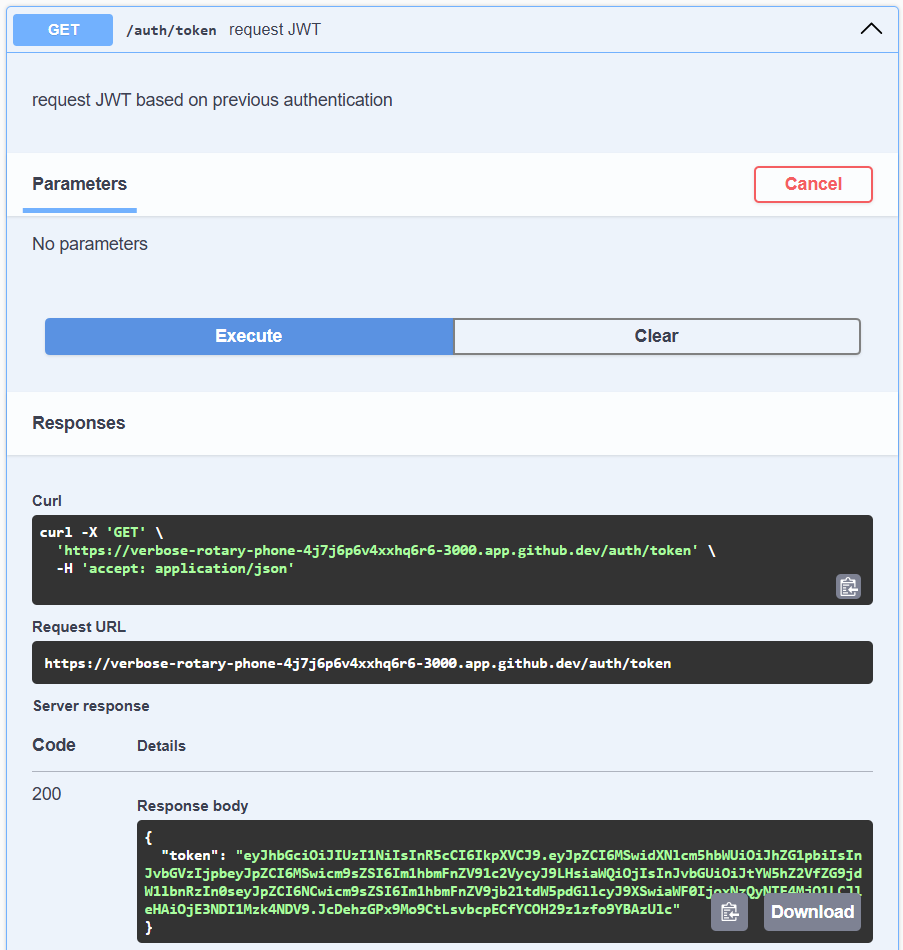
To fix this, we need to authorize our application using a valid JWT. Thankfully, we can request one by finding the /auth/token route in our documentation and executing that route:
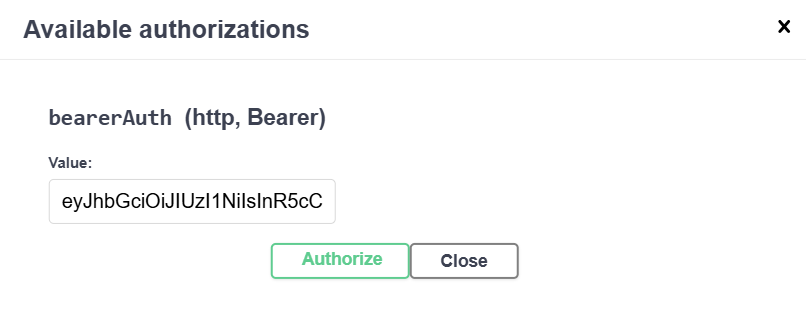
Once we have that, we can click the new Authorize button at the top, and paste the text of that token in the window that pops up. We just need the raw part of the JWT in quotes that is the value of the token property, without the quotes themselves included:
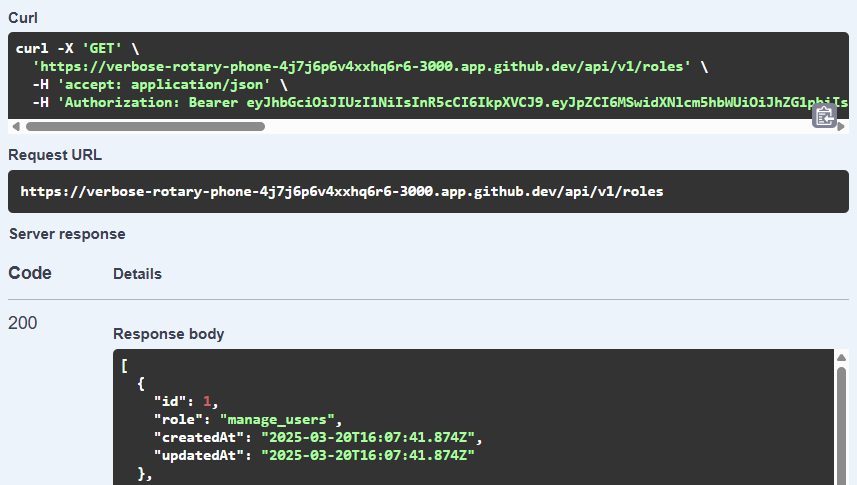
Finally, once that has been done, we can try the /api/v1/roles route again, and it should now let us access that route:
We can also see that it is properly using our role-based authorization by checking the debug output of our application:
[2025-03-21 12:54:14.085 AM] debug:     Route requires roles: manage_users
[2025-03-21 12:54:14.085 AM] debug:     User admin has roles: manage_users,manage_documents,manage_communities
[2025-03-21 12:54:14.086 AM] debug:     Role match!
[2025-03-21 12:54:14.087 AM] sql:       Executing (default): SELECT `id`, `role`, `createdAt`, `updatedAt` FROM `roles` AS `Role`;
[2025-03-21 12:54:14.090 AM] http:      GET /api/v1/roles 200 9.553 ms - 784
There we go! That is all it takes to add role-based authorization to our application. Next, we’ll look at how to update our unit tests to use our new authentication system and roles.
