Exploring Vue
YouTube VideoInstall the Vue Extension
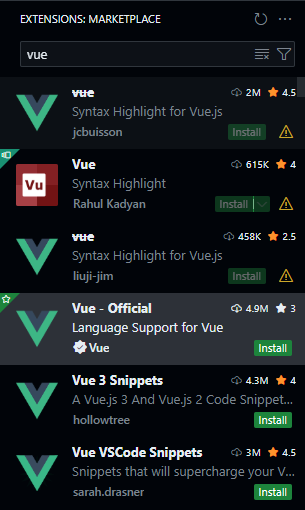
First, in our Visual Studio Code instance, we will want to install the Vue - Official extension. Make sure it is the correct, official plugin, since there are many that share a similar name in the VS Code extension marketplace:
As always, you can click the gear next to the install button to add it to the devcontainer.json file, so it will be installed in future devcontainers built using this repository. Once it is installed, you may have to restart VS Code or refresh the page in GitHub Codespaces to get it activated. Once it is, you should see syntax highlighting enabled in any files with the vue file extension.
Exploring the Source Code
Let’s take a quick look inside of the src folder to explore the structure of our application a bit more in detail.
assets- this folder contains the static assets used throughout our application, such as CSS files, SVG images, and other items that we want to include in the build pipeline of our application.components- this folder contains the individual components used to make up our application, as well as any associated tests. We can see that there are a few components already created in our application, includingHelloWorld.vue,TheWelcome.vue, andWelcomeItem.vue.router- this folder contains the Vue Router for our application. This is similar to the routers we’ve already used in our Express application, but instead of matching URLs to endpoints, this tool is used to match URLs to different views, or pages, within our application.stores- this folder contains the Pinia stores for our application. These stores are used to share data between components in our application, and also to connect back to our backend application through our RESTful API.views- this folder contains the overall views of our application, sometimes referred to as pages. As we can see, right now there is aHomeView.vueand anAboutView.vue, which correspond to the Home and About pages of our existing application.App.vue- this file contains the top-level Vue component of our entire web application. It contains items that are globally included on every page.main.js- this file is the “setup” file for the Vue application, very similar to theapp.jsfile in our Express backend application. This is where a variety of application settings and plugins can be installed and configured.
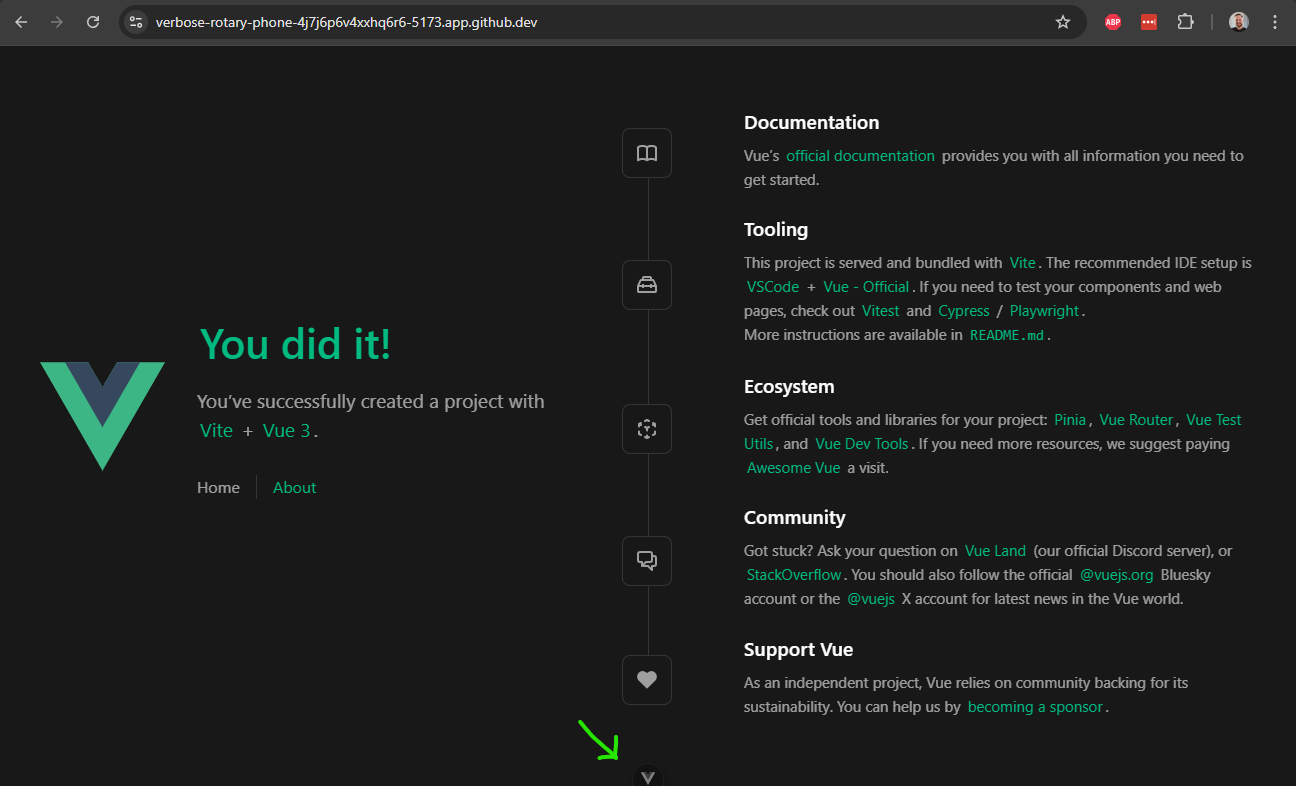
So, let’s look at our existing page in development mode. It includes a feature called Vue DevTools which is a great way to explore our application. That feature can be found by clicking the small floating button at the bottom of the page:
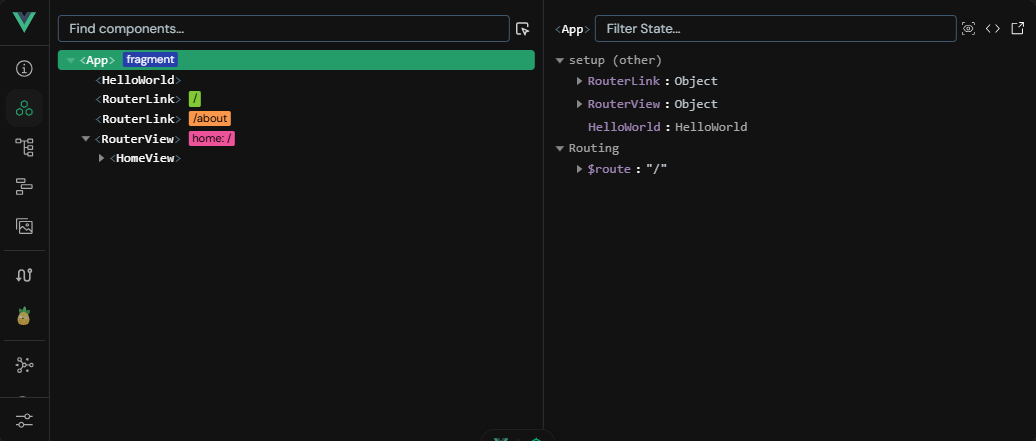
It will open a tool that allows us to explore the components loaded into our page, the various views available, router settings, Pinia stores, and so much more:
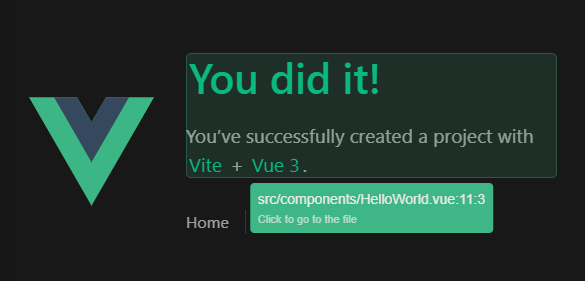
We can also use the component inspector (the button with the target icon that appears when we hover over the Vue DevTools button) to see how the individual components are laid out on our page, just by hovering over them:
As we work on this project, this tool will be a very helpful asset for debugging our application, or simply understanding how it works. Now is a great time to play around with this tool on our scaffolded starter page before we start building our own.
Cleaning Out the Starter Project
To start building our own application, let’s first start by clearing out the default content included in our scaffolded application. So, we can delete the following files:
assets\*- everything in theassetsfoldercomponents\*- everything in thecomponentsfolderstores\*- everything in thestoresfolder
Now, let’s customize a few files. First, we’ll update the index.html file to include our project’s title as the header:
<!DOCTYPE html>
<html lang="">
  <head>
    <meta charset="UTF-8">
    <link rel="icon" href="/favicon.ico">
    <meta name="viewport" content="width=device-width, initial-scale=1.0">
    <title>Example Project</title>
  </head>
  <body>
    <div id="app"></div>
    <script type="module" src="/src/main.js"></script>
  </body>
</html>
Next, we’ll update the two default views in our application to be simple components. First, let’s update the HomeView.vue:
<template>
  <main>
    This is a home page.
  </main>
</template>
And also the AboutView.vue:
<template>
  <main>
    This is an about page.
  </main>
</template>
Finally, we can update our base App.vue file to include a very simple format:
<script setup>
import { RouterLink, RouterView } from 'vue-router'
</script>

<template>
  <header>
    <div>
      This is a header
      <nav>
        <RouterLink to="/">Home</RouterLink>
        <RouterLink to="/about">About</RouterLink>
      </nav>
    </div>
  </header>

  <RouterView />
</template>
We’ll also need to update our main.js to remove the import for the base CSS file:
import { createApp } from 'vue'
import { createPinia } from 'pinia'

import App from './App.vue'
import router from './router'

const app = createApp(App)

app.use(createPinia())
app.use(router)

app.mount('#app')
Now, let’s take a look at our application in development mode to see what it looks like without all of the extra structure and style applied by the scaffolding:
$ npm run devAs we can see, our application is now much simpler - almost too simple! However, we can still click the links to move between the Home and About pages, and see our URL update accordingly:
This is a great baseline for our application. Now we can start building up a structure for an application that has the features we’d like to see.
Architecture of a Vue Page
The vast majority of the work we’ll be doing in Vue is creating Single File Components, which are the building blocks for larger views and pages within our application. We’ll be using the Composition API Style, which is a newer and more powerful API. It can be a bit daunting for new developers, but it provides a flexible way to define our components. It also differs from the API style used by React, making it a bit of a learning curve for experienced React developers. We can see more discussion in the Composition API FAQ document.
A Vue single file component using the Composition API style looks like this (taken from the Vue Documentation):
<script setup>
import { ref } from 'vue'
const count = ref(0)
</script>

<template>
  <button @click="count++">Count is: {{ count }}</button>
</template>

<style scoped>
button {
  font-weight: bold;
}
</style>
This file is divided into three important sections:
<script setup>- this section defines the functionality of the component, and is written using JavaScript syntax. It is the rough equivalent of the code you might put in a function called as the page begins to load in a traditional website. This code is used to configure all of the reactive elements of the user interface, as we’ll see later.<template>- this section defines the structure of the component, and uses a syntax similar to HTML. It gives the overall layout of the component and includes all sub-components and other HTML elements. It also shows where the reactive elements defined earlier appear on the page itself.<style>- this section defines the style of the component, and it is written using CSS. These style elements can be applied throughout the application, or we can use a<style scoped>section to ensure these styles are only applied within this component.
As we can see, Vue follows the concept of Separation of Concerns just like we’ve seen in our earlier projects. However, instead of having a global HTML template, a site-wide CSS file, and a single JavaScript file for an entire page, each component itself contains just the HTML, CSS, and JavaScript needed for that single component to function. In this way, we can treat each component as a stand-alone part of our application, and as we learn more about how to build useful and flexible components, we’ll see just how powerful this structure can be.
On the next page, we’ll start building our simple web application by using a few pre-built components from a Vue component library.


