API Proxy
Warning
The video adds an extra slash to the /auth route in the vite.config.js file when setting up a proxy. That slash should be removed.
Connecting to our RESTful API
Now that we have the basic structure of our application built and are becoming more familiar with both Vue and PrimeVue, let’s work on connecting to our backend RESTful API application and see if we can retrieve some data from our database. This is really the key feature that we want ensure works in our frontend application!
First, we need a way to run our backend application at the same time, and also we want to be able to connect to it directly through our frontend. So, let’s add a few features to our overall project to enable that connection.
VS Code Tasks
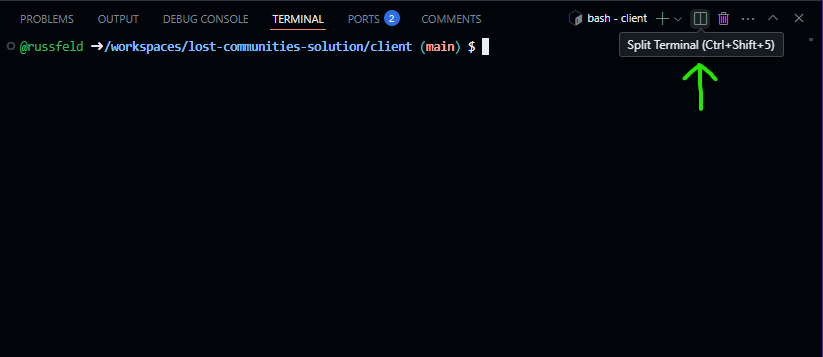
There are many ways that we can run both our frontend and backend applications simultaneously. One of the simplest is to open a second terminal in VS Code simply by clicking the “Split Terminal” button at the top right of the terminal, or by pressing CTRL+SHIFT+S to split our existing terminal.
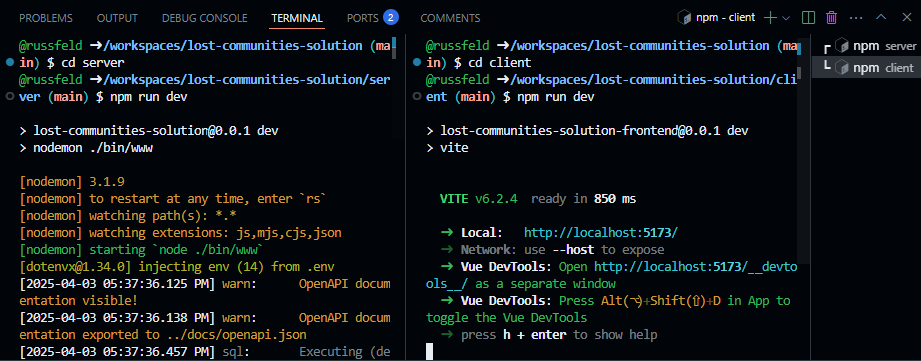
Once we have split the terminal window, we can run both parts of our application side-by-side by navigating to the correct directory and running the npm run dev command in each window:
However, that can get somewhat tedious to do all the time. Instead, we can just configure a VS Code Task that will handle this for us.
To do this, we should create a .vscode folder at the top level of our project (outside of the client and server folders we’ve been working on) if one doesn’t already exist. Inside of that folder, we’ll create a file called tasks.json with the following content:
// .vscode/tasks.json
{
  // See https://go.microsoft.com/fwlink/?LinkId=733558
  // for the documentation about the tasks.json format
  "version": "2.0.0",
  "tasks": [
    {
      "label": "Watch Server",
      "type": "shell",
      "command": "cd server && npm run dev",
      "group": "build",
      "presentation": {
        "group": "buildGroup",
        "reveal": "always",
        "panel": "new",
        "echo": false
      }
    },
    {
      "label": "Watch Client",
      "type": "shell",
      "command": "cd client && npm run dev",
      "group": "build",
      "presentation": {
        "group": "buildGroup",
        "reveal": "always",
        "panel": "new",
        "echo": false
      }
    },
    {
      "label": "Watch All",
      "dependsOn": [
        "Watch Server",
        "Watch Client"
      ],
      "group": "build",
      "runOptions": {
        "runOn": "folderOpen"
      }
    },
    {
      "label": "Lint and Format",
      "type": "shell",
      "command": "cd server && npm run lint && npm run format && cd ../client && npm run lint && npm run format",
      "group": "lint",
      "presentation": {
        "group": "lintGroup",
        "reveal": "always",
        "panel": "new",
        "echo": false
      },
      "problemMatcher": [
          "$eslint-compact",
          "$prettier"
      ]
    }
  ]
}
This file creates several tasks that we can use in our VS Code IDE:
Watch Server- this will run the backend Express server application.Watch Client- this will run the frontend Vue client application.Watch All- this will watch both the server and client in two new terminal windows.Lint and Format- this will run linting and formatting for both the server and client. This is a helpful command to run before committing any code to GitHub.
Once that file is created and saved, we may need to refresh our GitHub Codespace window or restart VS Code for the changes to take effect. When we do, we should see our new Watch All task run automatically, since it was given the "runOn": "folderOpen" option. In most cases, this is the most effective option - our server and client will always be running, and we can easily restart each of them by typing either rs for the server (running in Nodemon) or just r for the client (running in Vite) without closing those terminals.
We can also access these tasks anytime from the VS Code Command Palette by pressing CTRL+SHIFT+P and searching for the “Tasks: Run Task” menu option, then selecting whichever task we want to run.
Vite Proxy
The second major feature we need to configure for our application is a proxy that allows our frontend application to access our backend RESTful API directly. In many typical development scenarios, we typically run our backend application on one port (such as port 3000, which if how our app is currently configured), and then we run our frontend application in a development server on a different port (such as 5173, the default port used by Vite). However, in this scenario, our frontend must include a hard-coded IP address and port to access our backend server in development mode.
In production, our frontend application and backend RESTful API server are generally running on the same system, so they will use the same IP address and port. So, to simplify things now, we can simulate that setup by adding a Proxy configuration to our frontend application’s development server running in Vite. In this way, our frontend application can connect directly back to the port it is running on (port 5173 in this example), and if the connection matches one that should be sent to the backend API server instead, it will be proxied to that application (running on port 3000). This greatly simplifies developing our application, since we don’t have to worry about the configuration changing between development mode and production.
So, to configure a proxy for Vite, we must modify our vite.config.js file in our client folder by adding a few additional settings:
import { fileURLToPath, URL } from 'node:url'

import { defineConfig } from 'vite'
import vue from '@vitejs/plugin-vue'
import vueDevTools from 'vite-plugin-vue-devtools'
import tailwindcss from '@tailwindcss/vite'

// https://vite.dev/config/
export default defineConfig({
  plugins: [
    vue(),
    vueDevTools(),
    tailwindcss(),
  ],
  resolve: {
    alias: {
      '@': fileURLToPath(new URL('./src', import.meta.url))
    },
  },
  server: {
    proxy: {
      // Proxy all API requests
      '/api': {
        target: 'http://localhost:3000',
        changeOrigin: true,
        secure: false
      },
      // Proxy Open API Docs
      '/docs': {
        target: 'http://localhost:3000',
        changeOrigin: true,
        secure: false
      },
      // Proxy Authentication Requests
      '/auth': {
        target: 'http://localhost:3000',
        changeOrigin: true,
        secure: false
      }
    }
  }
})
In the new server section, we are including settings to proxy three different URL paths from our frontend to our backend:
/api- this will proxy all API requests/docs- this allows us to easily access the OpenAPI docs on our frontend in development mode/auth- this allows us to access the routes needed for authentication
As we can see, this covers pretty much all routes available on our backend RESTful API server. Also, we need to remember that these routes are unique to our backend server, so we cannot use these same URLs as virtual routes in our Vue router on the frontend; otherwise, we’ll have a conflict and our application may not work correctly.
So, let’s test this by running both our client and server applications simultaneously, and then access the frontend application using port 5173 (or whatever port Vite is currently running our frontend application on). Once there, we should try to access the /docs URL. If it works, we know that our proxy is working correctly!
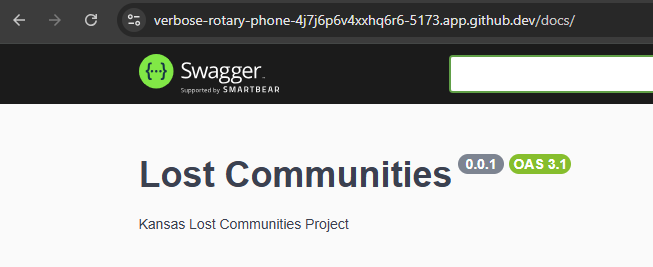
Notice in the screenshot above that the URL is running on port 5173 but it is able to access content that is running on port 3000 from our backend server. We can also see that it appears in the access logs on the backend server’s terminal, so we know it is working properly.
Making API Requests
Finally, let’s see how we can make an API request to our backend RESTful API server from our frontend application. First, we’ll need to install the Axios HTTP client library in our frontend application. While we can use the basic fetch commands that are available by default, we’ll quickly find that the extra features provided by Axios are worth adding an extra dependency to our application. So, let’s install it using npm in our client folder:
$ npm install axiosNext, let’s create a new Vue component we can use for simple testing. We’ll place this component in a file named TestApi.vue in the src/components/test folder:
<script setup>
/**
 * @file Test API Component
 * @author Russell Feldhausen <russfeld@ksu.edu>
 */

// Import Libraries
import { ref } from 'vue'
import axios from 'axios'
import Card from 'primevue/card'

// Create Reactive State
const api_versions = ref([])

// Load API versions
axios
  .get('/api')
  .then(function (response) {
    api_versions.value = response.data
  })
  .catch(function (error) {
    console.log(error)
  })
</script>

<template>
  <div>
    <Card v-for="api_version in api_versions" :key="api_version.version">
      <template #title>Version {{ api_version.version }}</template>
      <template #content>
        <p>URL: {{ api_version.url }}</p>
      </template>
    </Card>
  </div>
</template>
In this component, we start by creating a reactive state variable called api_versions that is initially set to an empty array. Then, we use the Axios library to send a request to the /api URL on our server, which is being proxied to the backend RESTful API. If we receive a response back, we’ll go to the then function, which simply stores the data attached to the response in the api_versions reactive state variable, which should update our application as soon as it receives data. If there are any errors, we’ll enter the catch function and log those errors to the browser’s console.
In our template, we chose to use a PrimeVue Card, which is a very simple building block for our website to use. Since we want to include one card per API version, we are using a v-for Vue directive to allow us to iterate through a list of objects. This is discussed in detail in the List Rendering section of the Vue documentation. We are also binding a unique key to each element, which in this case is the version attribute for each api_version element.
To use this component, let’s just add it to our AboutView.vue page for testing:
<script setup>
import TestApi from '../components/test/TestApi.vue'
</script>

<template>
  <main>This is an about page.</main>
  <TestApi />
</template>
Now, when we visit our application and click on the link for the About page, we should see a list of API versions appear:
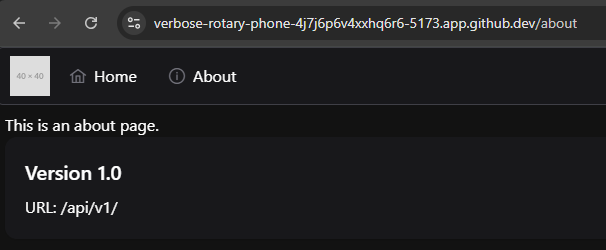
We can even test this by changing the API versions that are returned by our backend server and see the changes directly on our frontend application!
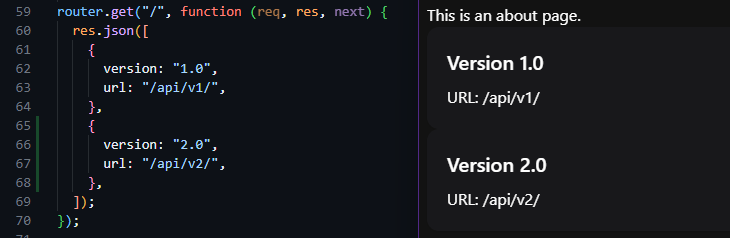
There we go! We can now request data from our backend RESTful API server, and it will provide a valid response. However, right now the only URL path that does not require authentication is the /api path, so we still need to add a way for users to authenticate themselves and get a valid JWT to access the rest of the API. We’ll cover that on the next part of this tutorial.