So far, we’ve mostly been dealing with data in our Vue components in one of two ways:
It is requested directly from the RESTful API for the component (as in the UsersList and UserEdit components)
It is passed in from a parent component, especially if it is a small helper component (as in the RoleChip and TextField components)
The only exception is the user’s JSON Web Token (JWT), which we have stored in a Pinia store. However, we didn’t spend much time talking about why we stored that token in a Pinia store instead of just making it a global reactive state component and passing that state down the component tree using props.
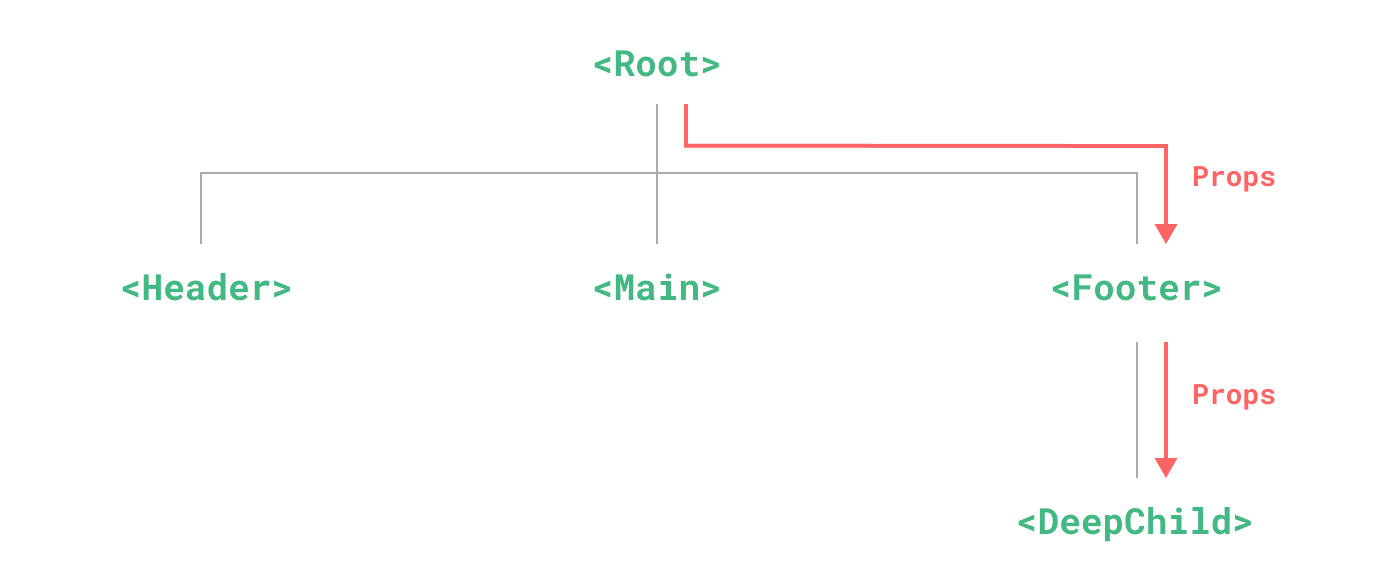
The concept of passing props down through components, especially between many layers of components, is known as Prop Drilling
While this method can work well, it can also make an application very complicated with the sheer number of props that must be passed through each component. For example, imagine if each page and component needed access to the user’s JWT to determine which actions to allow (a very real example from the project we are working). In that case, each component may need to be aware of the token as an incoming prop, and may also need to pass it along to any child components that may need it, even if it is three or four layers deep.
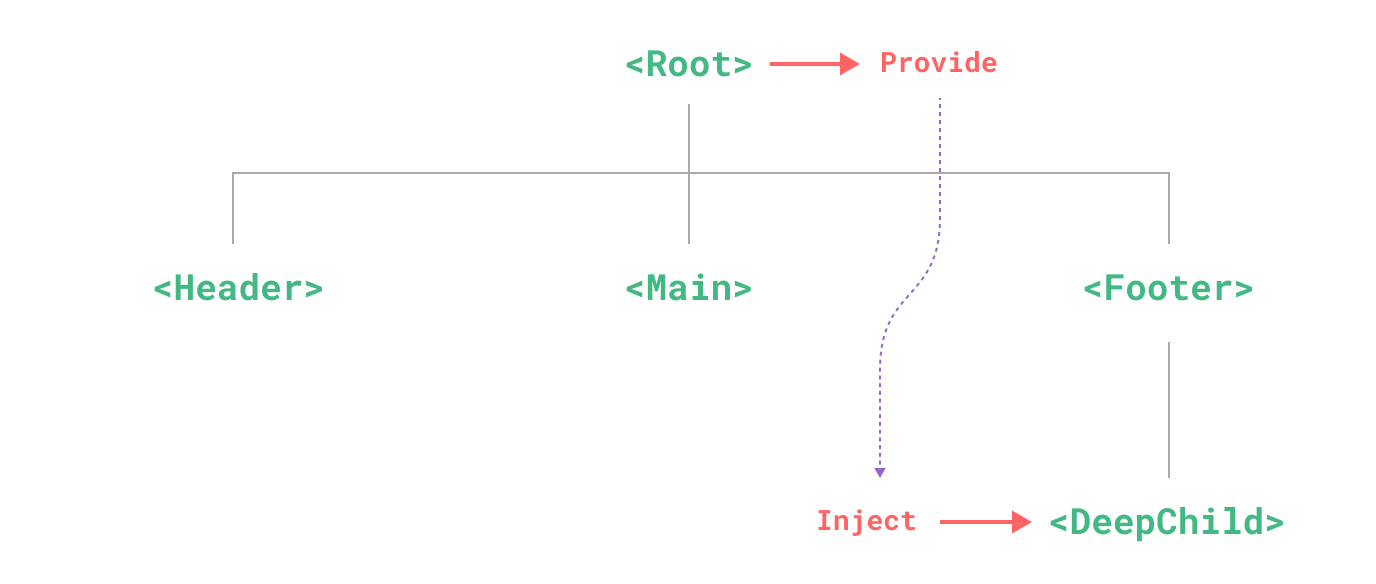
Provide / Inject
The Vue framework itself does have a solution to this problem, which is the Provide / Inject interface. In effect, a component can declare a reactive state item and add it to a global dictionary of state items that are available using the provide method along with a unique key for that item, and any other component can receive a reference to that state item using the inject method with the same key.
This is a bit of an improvement, but still has many issues that are discussed in the documentation. For example, it is best to only modify the state at the top-level component that is providing the state, so an additional function may need to be provided to enable proper editing of the state. In addition, for large apps it can be very difficult to ensure that each key is unique, and having hundreds or thousands of keys to keep track of can be a huge burden for programmers.
Pinia
The Pinia library tries to solve all of these issues by providing convenient stores for different types of information in the application. Each store is typically oriented toward a specific type of data (such as users or documents), and it contains all the methods needed to read and modify the state as needed. Then, each component that needs access to the state can simply request a reference to the stores it needs, and everything is nicely compartmentalized and easy to maintain.
To see how this can help simplify our application, let’s look at how we can create a Users store to interface with our RESTful API and maintain a globally-accessible store for data about our users.
Creating a Pinia Store
To create a Pinia store, we can create a new file src/stores/User.js with the following initial content:
/**
* @file User Store
* @author Russell Feldhausen <russfeld@ksu.edu>
*/// Import Libraries
import { ref } from'vue'import { defineStore } from'pinia'import { api } from'@/configs/api'// Define Store
exportconstuseUserStore=defineStore('user', () => {
// State Properties
// Getters
// Actions
// Return all state, getters, and actions
return { }
})
This is a nice starting structure for a store. At the bare minimum, we use the defineStore method from Pinia to create the store. Inside of that method is a lambda function that actually defines the contents of the store itself, which we’ll iteratively build over time. We’ve also imported a few useful library functions, including our pre-built Axios API interface to make it easy to send requests to our API.
Properties
The first items we should add to our Pinia store are the state properties that we’ll be tracking. These can be anything from simple values all the way up to entire arrays of objects full of data. In most cases, it makes sense to have each Pinia store track data in a format similar to what our application will need. For this example, we’ll use this store to track both the users and roles that are available in our system. So, we’ll need to create two reactive state variables using the ref() function from Vue to store that data as state in our Pinia store:
// -=-=- other code omitted here -=-=-
// Define Store
exportconstuseUserStore=defineStore('user', () => {
// State Properties
constusers=ref([])
constroles=ref([])
// Getters
// Actions
// Return all state, getters, and actions
return { users, roles }
})
Each state property in Pinia is just a reactive state variable from Vue that can be shared across our entire application. So, we’ll just initialize each one to an empty array for now.
Actions - Hydrate
Before we tackle any getters, let’s look at how we can actually get this data from our RESTful API. In many web development frameworks, the process of loading data from the AI is sometimes referred to as Hydration. So, let’s write a method we can use the hydrate these two state variables by making a request to our RESTful API. Most of this code is lifted directly from our existing UsersList component:
// -=-=- other code omitted here -=-=-
// Define Store
exportconstuseUserStore=defineStore('user', () => {
// -=-=- other code omitted here -=-=-
// Actions
/**
* Load users and roles from the API
*/asyncfunctionhydrate() {
api .get('/api/v1/users')
.then(function (response) {
users.value=response.data })
.catch(function (error) {
console.log(error)
})
api .get('/api/v1/roles')
.then(function (response) {
roles.value=response.data })
.catch(function (error) {
console.log(error)
})
}
// Return all state, getters, and actions
return { users, roles, hydrate }
})
As we can see, this function will make two asynchronous requests to the RESTful API to load both the users and roles, and when those requests are resolved it will store the data in the appropriate state variable.
Getters
For this Pinia store, we won’t need any individual getters. Instead, we’ll just use some functions in the component as needed to extract data from the store.
Actions - Save & Delete
Finally, let’s add two more actions to allow us to both save and delete a user through our RESTful API. The code for the save function is mostly taken from our UserEdit component, while the code to delete a user comes from the UserList component, both with minor changes.
// -=-=- other code omitted here -=-=-
// Define Store
exportconstuseUserStore=defineStore('user', () => {
// -=-=- other code omitted here -=-=-
// Actions
// -=-=- other code omitted here -=-=-
/**
* Save a user
*/asyncfunctionsaveUser(id, user) {
letmethod='post'leturl='/api/v1/users'if (id) {
method='put'url=url+'/'+id }
returnapi({
method:method,
url:url,
data:user.value,
})
.then(function (response) {
// rehydrate data
hydrate()
returnresponse })
.catch(function (error) {
console.log("Error saving user!")
console.log(error)
throwerror })
}
/**
* Delete a user
*/asyncfunctiondeleteUser(id) {
returnapi .delete('/api/v1/users/'+id)
.then(function (response) {
// rehydrate data
hydrate()
returnresponse })
.catch(function (error) {
console.log("Error deleting user!")
console.log(error)
throwerror;
})
}
// Return all state, getters, and actions
return { users, roles, hydrate, saveUser, deleteUser }
})
As we can see in the code above, after each successful API call, we immediately call the hydrate method to update the contents of our users and roles list before passing the response back to the calling method. This ensures that our data is always in sync with the RESTful API backend anytime we make a change. In addition, we are carefully logging any errors we receive here, but we are still throwing the errors back to the calling method so they can be handled there as well.
That is the basic contents of our Users store, which we can use throughout our application.
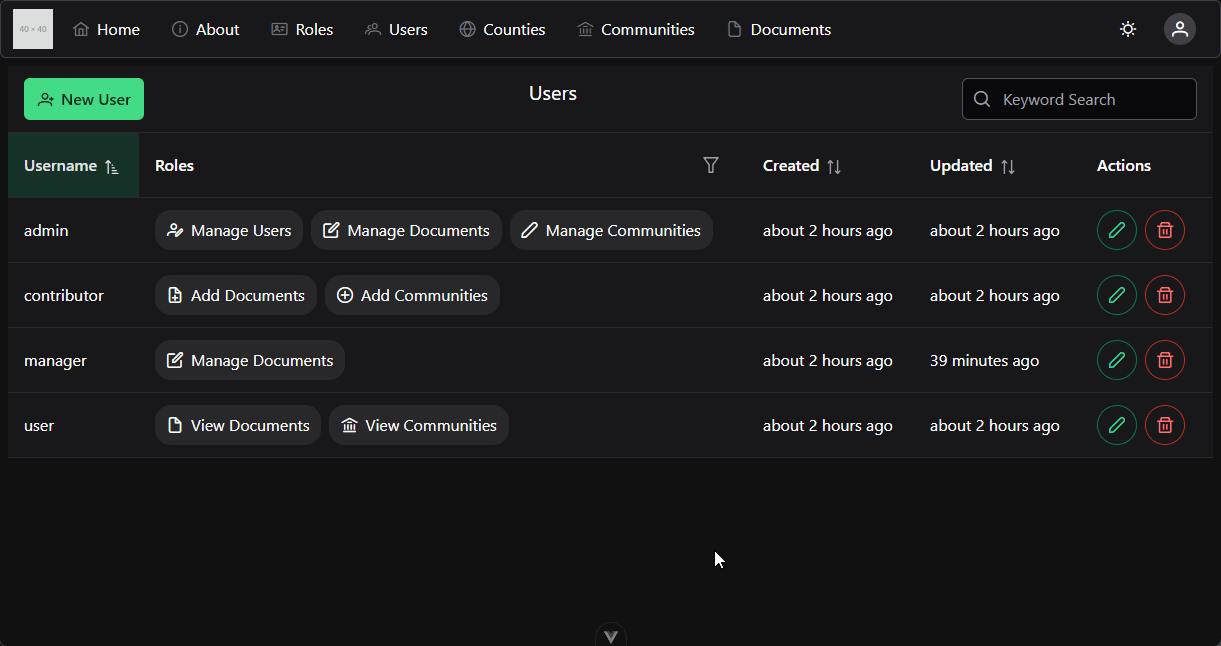
Using a Store - UsersList
Now, let’s look at how we can use our store in our various components that require data from the Users and Roles APIs. First, we can take a look at our existing UsersList component - there are many lines that we’ll remove or change within the component. Each change is highlighted and described below, with removed lines commented out.
<script>
// -=-=- other code omitted here -=-=-
// Create Reactive State
// const users = ref([])
// const roles = ref([])
// Stores
import { storeToRefs } from'pinia'import { useUserStore } from'@/stores/User'constuserStore=useUserStore();
const { users, roles } =storeToRefs(userStore)
// -=-=- other code omitted here -=-=-
</script>
First, we replace the two reactive state variables for users and roles with the same state variables that are extracted from the Pinia store using the storeToRefs() function, which will Destructure the Store and make the variables directly available to our code.
Next, we can replace all of the code used to load the users and roles on the page to a simple call to the hydrate method in the store itself.
<script>
// -=-=- other code omitted here -=-=-
// Delete User
constdeleteUser=function (id) {
// api
// .delete('/api/v1/users/' + id)
userStore.deleteUser(id)
.then(function (response) {
if (response.status===200) {
toast.add({
severity:'success',
summary:'Success',
detail:response.data.message,
life:5000,
})
// Remove that element from the reactive array
// users.value.splice(
// users.value.findIndex((u) => u.id == id),
// 1,
// )
}
})
.catch(function (error) {
toast.add({ severity:'error', summary:'Error', detail:error, life:5000 })
})
}
// -=-=- other code omitted here -=-=-
</script>
Finally, in the method to delete a user, we can replace the API call with a call to the deleteUser method inside of the Pinia store to handle deleting the user with the selected ID. We can also remove the code that will remove the user from the list, since we no longer need to do that here; instead, the Pinia store will query the updated data from the RESTful API, and the user should no longer be present in that data when it is received.
Those are all of the changes needed to switch the UsersList component to use the store. The template itself remains exactly the same.
Using a Store - UserEdit
We can also update our UserEdit component in a similar way:
<script>
// Import Libraries
import { ref, computed, inject } from'vue'// -=-=- other code omitted here -=-=-
// Declare State
// const user = ref({})
// const roles = ref([])
consterrors=ref([])
// Stores
import { storeToRefs } from'pinia'import { useUserStore } from'@/stores/User'constuserStore=useUserStore();
const { users, roles } =storeToRefs(userStore)
// Find single user or a blank user
constuser=computed(() => {
return (users.value.find((u) => u.id==props.id) || { username:"", roles: [] })
})
// -=-=- other code omitted here -=-=-
</script>
First, we can replace the reactive state variables with the same variables from the Users store. To get a single user, we can create a computed state variable that will find the user in the list that matches the incoming props.id. If a user can’t be found, it will generate a blank User object that can be used to create a new user.
Likewise, we can remove all of the code that loads users and roles and replace that with a hydrate function call in our Pinia store:
<script>
// -=-=- other code omitted here -=-=-

// Load Users
// if (props.id) {
//   api
//     .get('/api/v1/users/' + props.id)
//     .then(function (response) {
//       user.value = response.data
//     })
//     .catch(function (error) {
//       console.log(error)
//     })
// } else {
//   // Empty Value for User Object
//   user.value = {
//     username: '',
//     roles: [],
//   }
// }

// Load Roles
// api
//   .get('/api/v1/roles')
//   .then(function (response) {
//     roles.value = response.data
//   })
//   .catch(function (error) {
//     console.log(error)
//   })

userStore.hydrate()

// -=-=- other code omitted here -=-=-
</script>
Finally, we can replace the call to the api library to save the user with a call to the saveUser method in the UserStore:
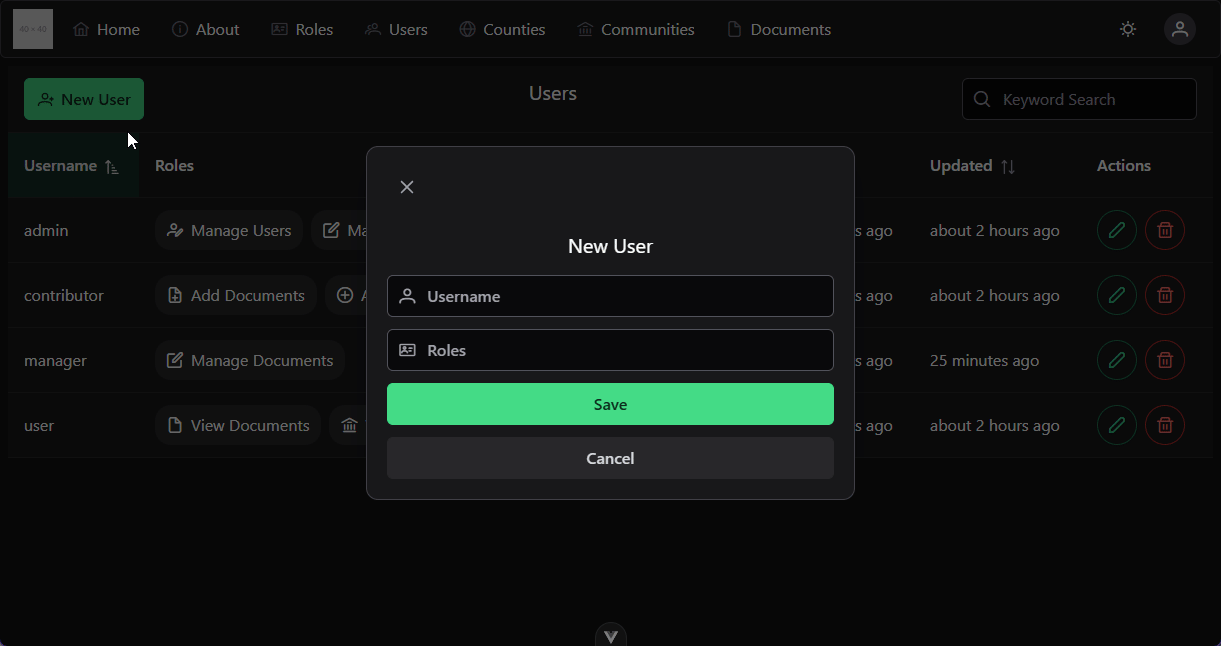
One of the many amazing features of a front-end framework such as Vue is the ability to reuse components in very powerful ways. For example, right now our application uses an entirely separate view and component to handle editing and updating users, but that means that we have to constantly jump back and forth between two views when working with users. Now that those views are using a shared Pinia store, we can use a PrimeVue DynamicDialog component to allow us to open the UserEdit component in a popup dialog on our UsersList component.
Installing DynamicDialog
To begin, we must install the service for this component in our src/main.js along with the other services for PrimeVue components:
Notice in the dialog.open function call, we are including the userEditComponent that we are loading asynchronously in the background using the defineAsyncComponent function in Vue. This allows us to load the main UsersList component fully first, and then in the background it will load the UserEdit component as needed. We are also passing along the id of the user to be edited as part of the data that is sent to the component.
Finally, in the template, we just replace the click handlers for the New and Edit buttons to call this new editDialog function:
Now, when we click those buttons, it will open the EditUser component in a modal popup dialog instead of directing users to a new route. Of course, on some pages, we may need to check that the user has specific roles before allowing the user to actually load the popup, just like we have to check for those roles before the user navigates to those routes. Since we are now bypassing the Vue Router, any logic in the router may need to be recreated here.
Updating UserEdit Component
Finally, we must make a few minor tweaks to the UserEdit component so that it can run seamlessly in both a stand-alone view as well as part of a popup dialog. The major change comes in the way the incoming data is received, and what should happen when the user is successfully saved.
The PrimeVue DynamicDialog service uses Vue’s Provide / Inject interface to send data to the component loaded in a dialog. So, in our component, we must declare a few additional state variables, as well as small piece of code to detect whether it is running in a dialog or as a standalone component in a view.
<scriptsetup>
// Import Libraries
import { ref, computed, inject } from'vue'// -=-=- other code omitted here -=-=-
// Declare State
consterrors=ref([])
constisDialog=ref(false)
constuserId=ref()
// Detect Dialog
constdialogRef=inject('dialogRef')
if(dialogRef&&dialogRef.value.data) {
// running in a dialog
isDialog.value=trueuserId.value=dialogRef.value.data.id} else {
// running in a view
userId.value=props.id}
// -=-=- other code omitted here -=-=-
</script>
For this component, we have created a new isDialog reactive state variable that will be set to true if the component detects it has been loaded in a dynamic dialog. It does this by checking for the status of the dialogRef injected state variable. We are also now storing the ID of the user to be edited in a new userId reactive state variable instead of relying on the props.id variable, which will not be present when the component is loaded in a dialog.
So, we simply need to replace all references to props.id to use userId instead. We can also change the action that occurs when the user is successfully saved - if the component is running in a dialog, it should simply close the dialog instead of using the router to navigate back to the previous page.
<scriptsetup>
// -=-=- other code omitted here -=-=-
// Find Single User
constuser=computed(() => {
returnusers.value.find((u) => u.id==userId.value) || { username:'', roles: [] }
})
// -=-=- other code omitted here -=-=-
// Save User
constsave=function () {
errors.value= []
userStore .saveUser(userId.value, user)
.then(function (response) {
if (response.status===201) {
toast.add({
severity:'success',
summary:'Success',
detail:response.data.message,
life:5000,
})
leave()
}
})
.catch(function (error) {
if (error.status===422) {
toast.add({
severity:'warn',
summary:'Warning',
detail:error.response.data.error,
life:5000,
})
errors.value=error.response.data.errors } else {
toast.add({ severity:'error', summary:'Error', detail:error, life:5000 })
}
})
}
// Leave Component
constleave=function() {
if (isDialog.value) {
dialogRef.value.close()
} else {
router.push({ name:'users' })
}
}
</script>
Finally, we can make a minor update to the template to also use the userId value instead of props.id
That’s all it takes! Now, when we click the New User or Edit User buttons on our UsersList component, we’ll see a pop-up dialog that contains our UserEdit component instead of being taken to an entirely new page.
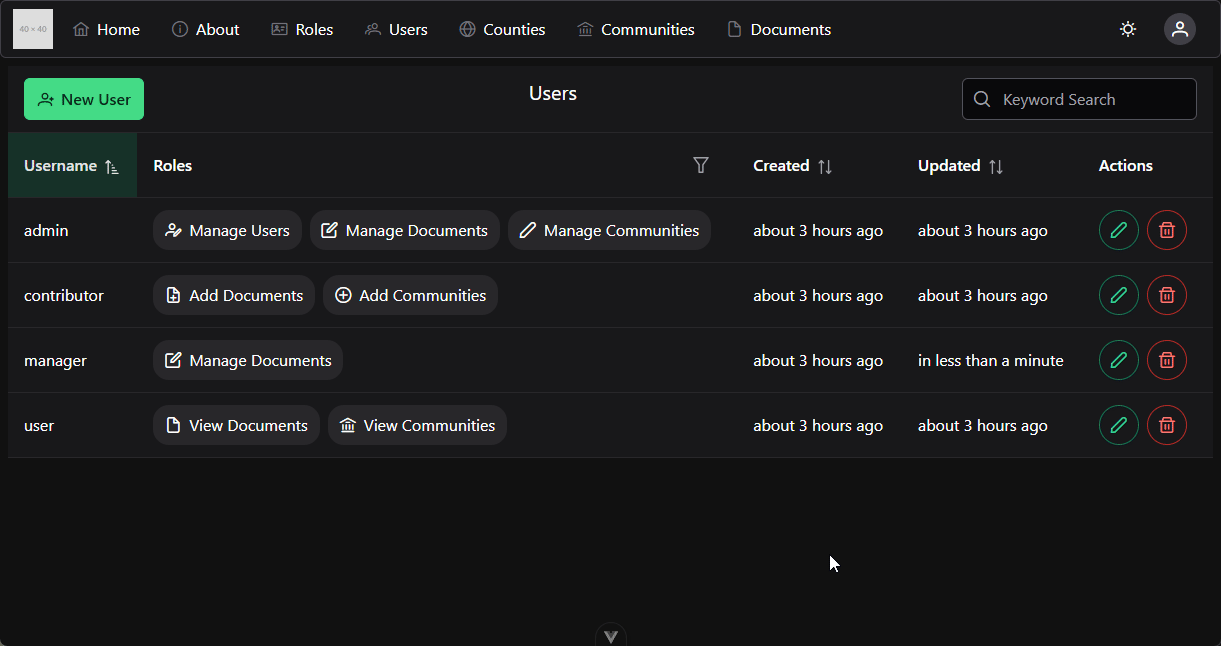
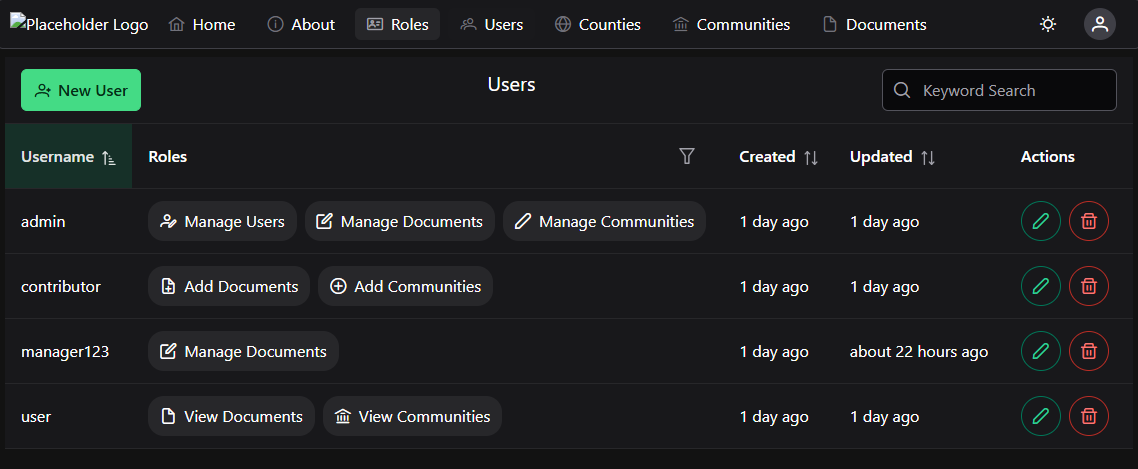
A Bug! Reactive State Across Components
A very keen eye may notice a bug in the implementation of this component already - what if the user changes a value but then clicks the Cancel button on the modal dialog? Let’s see what that looks like:
As we can see, the edits made in the UserEdit dialog are immediately reflected in the contents of the UsersList component as well. This is because they are both using the same Pinia store and referencing the same list of users in both components. So, this can present all sorts of strange issues in our program.
There are at least a couple of different ways we can go about fixing this:
When the dialog closes, we can call userStore.hydrate() from the UsersList component to ensure that it has the latest version of the data from the server. However, if we do this, we could end up calling it twice when a user is saved, since the User store already does this.
In our EditUser component, we can make sure we are editing a deep copy of our user, and not the same user reference as the one in our Pinia store.
Let’s implement the second solution. Thankfully, it is as simple as using JSON.parse and JSON.stringify to create a quick deep copy of the user we are editing. We can do this in our computed Vue state variable in that component:
// -=-=- other code omitted here -=-=-
// Find Single User
constuser=computed(() => {
returnJSON.parse(
JSON.stringify(users.value.find((u) => u.id==userId.value) || { username:'', roles: [] }),
)
})
// -=-=- other code omitted here -=-=-
With that change in place, we no longer see the bug in our output:
At this point, we have a pretty well developed application, so let’s start preparing for deployment. Our end goal is to build a single Docker container that contains our application, as well as the ability to deploy it along with a production database like Postgres.
To begin, we need to create a finalized version of our Vue frontend that can be embedded into our backend application directly.
Building in Vue
To create a deployment build of our Vue application, we can simply run the following command in the client folder of our application:
$ npm run build
When we run that command, we get lots of output about the different parts of our application that are put together to make the final version. We may also get some warnings about chunks being larger than the cutoff, which we won’t worry about for now.
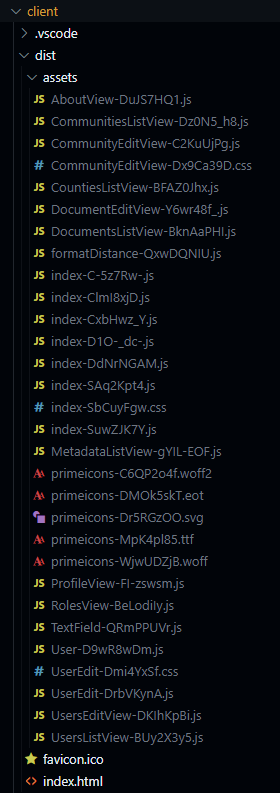
The final version of our application can be found in a new dist folder inside of our client folder, with a long list of contents:
The assets folder contains a large number of items that are all compiled and assembled by the Vite build tool for our application. The key file, however, is the index.html file, which is placed there to serve as the starting point for our application.
Testing the Built Application
To fully test this application, we can simply copy the entire contents of the client/dist folder into the server/public folder, overwriting the existing index.html file in that location.
In addition, if we’ve changed any of the settings in the .env file to refer to the client in development mode, such as the CAS_SERVICE_URL or OPENAPI_HOST, we’ll need to change those back to using our server port.
Now, all we have to do is run the server in development mode, but we don’t need to start the client at all:
$ npm run dev
When the application loads, we can open our web browser on port 3000 (or whichever port our application is configured to use), and we should be greeted with a working version of our application!
However, we quickly notice that our placeholder image is no longer appearing in our top menu bar. A quick peek at the console in our browser gives us more information:
A bit of online searching can reveal this error - the helmet middleware we are using will prevent images from loading unless they are hosted on our own domain or if they are retrieved from memory using a data: URL. Since we want to allow our placeholder image to load, we can simply update the settings for helmet to allow this in our server/app.js file:
With that change in place, our placeholder image will now load since it is using an https URL. It will also allow us to properly upload files using the blob: URLs.
Another issue we’ll quickly run into is that anytime we refresh our application on any page other than the homepage, we’ll end up with a 404 error message! This is because the server does not know to properly redirect those requests back to the Vue application’s router. We can get around that by installing one more middleware, the connect-history-api-fallback
middleware in our server’s app.js file. We’ll also need to disable the indexRouter since it is no longer needed, and move the static files and this new middleware to after the authentication routes to allow our application to properly redirect to CAS.
$ npm install connect-history-api-fallback
// -=-=- other code omitted here -=-=-
// Import libraries
importcompressionfrom"compression";
importcookieParserfrom"cookie-parser";
importexpressfrom"express";
importhelmetfrom"helmet";
importpathfrom"path";
importswaggerUifrom"swagger-ui-express";
importfsfrom"node:fs/promises";
importpassportfrom"passport";
importhistoryfrom"connect-history-api-fallback";
// -=-=- other code omitted here -=-=-
// Use middlewares
app.use(requestLogger);
// Use routers
//app.use("/", indexRouter);
app.use("/api", apiRouter);
// Use sessions
app.use(sessions);
app.use(passport.authenticate("session"));
// Use auth routes
app.use("/auth", authRouter);
// Redirect other requests to Vue application
app.use(history())
// Use static files
app.use(express.static(path.join(import.meta.dirname, "public")));
// -=-=- other code omitted here -=-=-
Now, when we refresh our application on any route that is not recognized by the server, it will direct those requests to the Vue application.
Updating GitIgnore Files
Finally, we should double-check our .gitignore files on both the server and the client to ensure that the built version of our project is not committed to git. In the client/.gitignore file, we already see an entry for dist, so we know that the dist folder and all of its contents will not be committed to git already.
In the server/.gitignore file, we should add a line to ignore the public folder to the bottom of the file. Then, we can use git rm -r --cached public from within the server folder to remove it from our git index before committing.
At this point, we can do one last lint, format, commit, and push before we set up our application for deployment!
Ignoring Files in ESLint
We may run into issues with ESLint trying to clean up our production version of our code if it is stored in the public folder of our server directory. We can ignore it by adding a few lines to the server/eslint.config.js file:
We are now ready to create a Dockerfile that will build our application into a single Docker container that can be easily deployed in a variety of different infrastructures. Because our application is really two parts (the server and the client), we can use a Multi-Stage Build in Docker to make a very streamlined version of our image.
Docker Init
In this tutorial, we’ll go through building this Dockerfile manually. On systems that have Docker Desktop already installed, we can run docker init to scaffold some of this process. See the documentation for Docker Init for more details on how to use that tool.
Building the Client
We’ll start by creating a new Dockerfile outside of both the client and server folders, so it is at the top level of our project. At the top of the file, we’ll add a simple ARG entry to denote the version of Node.js we want to use:
# Node VersionARG NODE_VERSION=22
Next, we need to chose the Docker image we want to use to build our client. There are many different options to choose from, but we can look at the Official Docker Node package list to find the correct one fo our project. In this case, we’ll use the image 22-alpine as the basis for our Docker image. When building Docker images for deployment, we often look for images based on the Alpine Linux distribution, which is very lightweight and generally more secure since it only contains the bare minimum set of features needed for our application. We can read more about using Alpine Docker images in the Docker Blog
So, we’ll add a FROM entry to define the source of our build process, and we’ll name this container client to help us keep track of it.
# Node VersionARG NODE_VERSION=22# Client Base Image# See https://hub.docker.com/_/node/FROM node:${NODE_VERSION}-alpine as client
Now, we need to actually build our application. This usually involves 2 steps:
Copy our code to the container image
Run the build process to build our application
However, we can further optimize this by realizing that we can further separate this by installing all of our Node libraries first, then building our application. Since each step creates a new Docker Image Layer, we can make our images more efficient by spreading these steps out.
By doing so, if we make a change to the source code of our application, but we don’t change the underlying Node libraries, we can reuse that earlier image layer containing our libraries since we know that it hasn’t changed at all. We can read more about this in the Docker Documentation on optimizing builds by using caching.
In practice, the steps will look like this:
# Node VersionARG NODE_VERSION=22################################ STAGE 1 - BUILD CLIENT ################################# Client Base Image# See https://hub.docker.com/_/node/FROM node:${NODE_VERSION}-alpine as client# Use production node environment by defaultENV NODE_ENV production# Store files in /usr/src/appWORKDIR /usr/src/app# Download dependencies as a separate step to take advantage of Docker's caching.# Leverage a cache mount to /root/.npm to speed up subsequent builds.# Leverage a bind mounts to package.json and package-lock.json to avoid having to copy them into# into this layer.# See https://docs.docker.com/build/cache/optimize/RUN --mount=type=bind,source=client/package.json,target=package.json \
--mount=type=bind,source=client/package-lock.json,target=package-lock.json \
--mount=type=cache,target=/root/.npm \
npm ci --include=dev# Copy the rest of the source files into the image.COPY ./client .# Build the client applicationRUN npm run build
At the end of this process, we’ll have a Docker image named client that contains a completely compiled version of our application in the /usr/src/app/dist folder. That’s really the important outcome of this process.
Building the Server
On the server side of things, there are several files and folders we want to make sure are not included in our final Docker image. So, we can create a file server/.dockerignore with the following contents:
node_modules
coverage
.env
.env.example
.env.test
.prettierrc
database.sqlite
eslint.config.js
public
These are all folders and files that contain information we don’t want to include for a variety of security reasons.
Now, we can initiate the second stage of this build process, which will create a finalized version of our server to run our application. We’ll continue building this in the same Dockerfile below the first stage. The first few steps are mostly identical to the client, except this time we are referencing content in the server folder.
# -=-=- other code omitted here -=-=-################################ STAGE 2 - BUILD SERVER ################################# Server Base Image# See https://hub.docker.com/_/node/FROM node:${NODE_VERSION}-alpine as server# Use production node environment by defaultENV NODE_ENV production# Store files in /usr/src/appWORKDIR /usr/src/app# Download dependencies as a separate step to take advantage of Docker's caching.# Leverage a cache mount to /root/.npm to speed up subsequent builds.# Leverage a bind mounts to package.json and package-lock.json to avoid having to copy them into# into this layer.# See https://docs.docker.com/build/cache/optimize/RUN --mount=type=bind,source=server/package.json,target=package.json \
--mount=type=bind,source=server/package-lock.json,target=package-lock.json \
--mount=type=cache,target=/root/.npm \
npm ci --omit=dev# Copy the rest of the source files into the imageCOPY ./server .
Node Dev Dependencies
Notice that the client build step uses npm ci --include=dev to include the development dependencies for the Vue.js project. These dependencies include tools such as Vite that are actually required to build the project for production, so we have to make sure they are installed.
In the server build step, however, we are using npm ci --omit=dev to omit any development dependencies from being installed in the container. These dependencies should be tools such as Nodemon and ESLint, which we won’t need in the deployed version of our application.
If we run into errors at either of these steps, we may need to ensure that each Node dependency is properly included in the correct place of the respective package.json file for each project.
Once we have installed the libraries and copied the contents of the server folder into the server image, we can also copy the /usr/src/app/dist folder from the client image into the public folder of the server image.
# -=-=- other code omitted here -=-=-################################ STAGE 2 - BUILD SERVER ################################# Server Base Image# See https://hub.docker.com/_/node/FROM node:${NODE_VERSION}-alpine as server# Use production node environment by defaultENV NODE_ENV production# Store files in /usr/src/appWORKDIR /usr/src/app# Download dependencies as a separate step to take advantage of Docker's caching.# Leverage a cache mount to /root/.npm to speed up subsequent builds.# Leverage a bind mounts to package.json and package-lock.json to avoid having to copy them into# into this layer.# See https://docs.docker.com/build/cache/optimize/RUN --mount=type=bind,source=server/package.json,target=package.json \
--mount=type=bind,source=server/package-lock.json,target=package-lock.json \
--mount=type=cache,target=/root/.npm \
npm ci --omit=dev# Copy the rest of the source files into the imageCOPY ./server .# Copy the built version of the client into the imageCOPY --from=client /usr/src/app/dist ./public
Then, we’ll need to make a couple of directories in our container that we can use as volume mounts when we deploy it. These directories will contain our database and our uploaded files:
# -=-=- other code omitted here -=-=-################################ STAGE 2 - BUILD SERVER ################################# Server Base Image# See https://hub.docker.com/_/node/FROM node:${NODE_VERSION}-alpine as server# Use production node environment by defaultENV NODE_ENV production# Store files in /usr/src/appWORKDIR /usr/src/app# Download dependencies as a separate step to take advantage of Docker's caching.# Leverage a cache mount to /root/.npm to speed up subsequent builds.# Leverage a bind mounts to package.json and package-lock.json to avoid having to copy them into# into this layer.# See https://docs.docker.com/build/cache/optimize/RUN --mount=type=bind,source=server/package.json,target=package.json \
--mount=type=bind,source=server/package-lock.json,target=package-lock.json \
--mount=type=cache,target=/root/.npm \
npm ci --omit=dev# Copy the rest of the source files into the imageCOPY ./server .# Copy the built version of the client into the imageCOPY --from=client /usr/src/app/dist ./public# Make a directory for the database and make it writableRUN mkdir -p ./dataRUN chown -R node:node ./data# Make a directory for the uploads and make it writableRUN mkdir -p ./public/uploadsRUN chown -R node:node ./public/uploads
Finally, we’ll end by defining the user the container should use, the default port of our application, a command to check if the application in the container is healthy, and the command to start our application.
# -=-=- other code omitted here -=-=-################################ STAGE 2 - BUILD SERVER ################################# Server Base Image# See https://hub.docker.com/_/node/FROM node:${NODE_VERSION}-alpine as server# Use production node environment by defaultENV NODE_ENV production# Store files in /usr/src/appWORKDIR /usr/src/app# Download dependencies as a separate step to take advantage of Docker's caching.# Leverage a cache mount to /root/.npm to speed up subsequent builds.# Leverage a bind mounts to package.json and package-lock.json to avoid having to copy them into# into this layer.# See https://docs.docker.com/build/cache/optimize/RUN --mount=type=bind,source=server/package.json,target=package.json \
--mount=type=bind,source=server/package-lock.json,target=package-lock.json \
--mount=type=cache,target=/root/.npm \
npm ci --omit=dev# Copy the rest of the source files into the imageCOPY ./server .# Copy the built version of the client into the imageCOPY --from=client /usr/src/app/dist ./public# Make a directory for the database and make it writableRUN mkdir -p ./dataRUN chown -R node:node ./data# Make a directory for the uploads and make it writableRUN mkdir -p ./public/uploadsRUN chown -R node:node ./public/uploads# Run the application as a non-root user.USER node# Expose the port that the application listens on.EXPOSE 3000# Command to check for a healthy applicationHEALTHCHECK CMD wget --no-verbose --tries=1 --spider http://localhost:3000/api || exit 1# Run the application.CMD npm run start
There we go! That is what it takes to build a deployable version of this application. Notice that the Dockerfile we created here is very different from the devcontainer image we are using to develop our application in. A common misconception when using Docker is that we can use the same image for both development and deployment, but generally that is a very insecure and unsafe practice. It is much better to have a fully-featured image available for development, and then use a very secure and minimal image for deployment, often one that is built using a multi-stage build process that takes advantage of layer caching to make it much more efficient.
The last step in configuring our application for deployment is to create a GitHub Action that will automatically build our Docker container when we commit a release tag to GitHub. This process will ensure that our image is always up to date and available for users to download and use.
Learning how to build a GitHub Action script could be an entire course unto itself. For this project, we’ll run through the basic steps used to test and build our application’s Docker image, but there are many more steps that could be added. For example, we could have GitHub automatically run our test scripts before building the image, preventing any broken images if the tests aren’t passing. We can also add options to automatically deploy our image to our hosting service whenever it is updated. We can even have it send us a message on our messaging platform of choice when it is done building. Feel free to read up on all of the different actions available in the GitHub Actions Marketplace.
Build Docker Action
To create this GitHub action, we’ll place a file named build_docker.yml in the .github/workflows directory at the very top level of our project.
We’ll start with a name for the workflow, as well as a list of triggers that will start the workflow when a particular action is taken on our GitHub repository:
# Workflow namename: Build Docker# Run only on new tags being pushed# https://docs.github.com/en/actions/using-workflows/triggering-a-workflowon:
push:
tags:
- 'v*.*.*'
Next, we’ll define the jobs to be executed as part of this GitHub Action. In this case, we’ll only have a single job, build, which will build our Docker image. For that job, we’ll use GitHub’s Ubuntu Job Runner, but there are many different options available for us.
# Workflow namename: Build Docker# Run only on new tags being pushed# https://docs.github.com/en/actions/using-workflows/triggering-a-workflowon:
push:
tags:
- 'v*.*.*'# Define a single job named buildjobs:
build:
# Run job on Ubuntu runnerruns-on: ubuntu-latest
Following that, we’ll list the steps required to complete the job. Each step is documented with a link to the documentation for that step.
# Workflow namename: Build Docker# Run only on new tags being pushed# https://docs.github.com/en/actions/using-workflows/triggering-a-workflowon:
push:
tags:
- 'v*.*.*'# Define a single job named buildjobs:
build:
# Run job on Ubuntu runnerruns-on: ubuntu-latest# Job Stepssteps:
# Step 1 - Checkout the Repository# https://github.com/actions/checkout - name: 1 - Checkout Repositoryuses: actions/checkout@v4# Step 2 - Log In to GitHub Container Registry# https://github.com/docker/login-action - name: 2 - Login to GitHub Container Registryuses: docker/login-action@v3with:
registry: ghcr.iousername: ${{ github.repository_owner }}password: ${{ secrets.GITHUB_TOKEN }}# Step 3 - Build and Push Docker Image# https://github.com/docker/build-push-action - name: 3 - Build and Push Docker Imageuses: docker/build-push-action@v6with:
context: .push: truetags: | ghcr.io/${{ github.repository }}:${{ github.ref_name }}
ghcr.io/${{ github.repository }}:latest# Step 4 - Make Release on GitHub# https://github.com/softprops/action-gh-release - name: 4 - Releaseuses: softprops/action-gh-release@v2with:
generate_release_notes: true
As we can see, the basic steps are as follows:
Checkout the current GitHub repository code
Connect to the GitHub Container Registry to store the image
Build and Push the Docker Image to the GitHub Container Registry
Create a Release on GitHub with the version information
Handling Uppercase Repository Names
GitHub is case-preserving, and allows repository names and usernames to include uppercase letters. However, Docker tags must be lowercase, so any repository names with uppercase letters will cause issues with this process.
To solve this, we can add a new step to convert our repository name to lowercase:
Alternatively, much of this is also handled by the Docker Metadata Action, which can be used to automatically configure tags and labels attached to a Docker container built by a GitHub action. For larger-scale projects, adding the Docker Metadata Action to this process is a helpful step.
Triggering a Release
Before we can trigger this workflow, we should commit and push it to GitHub along with our Dockerfile from the previous page.
Once we have done that, we can create a new Semantic Versioning, or SemVer, style release tag and push it to GitHub:
$ git tag v0.0.1
$ git push --tags
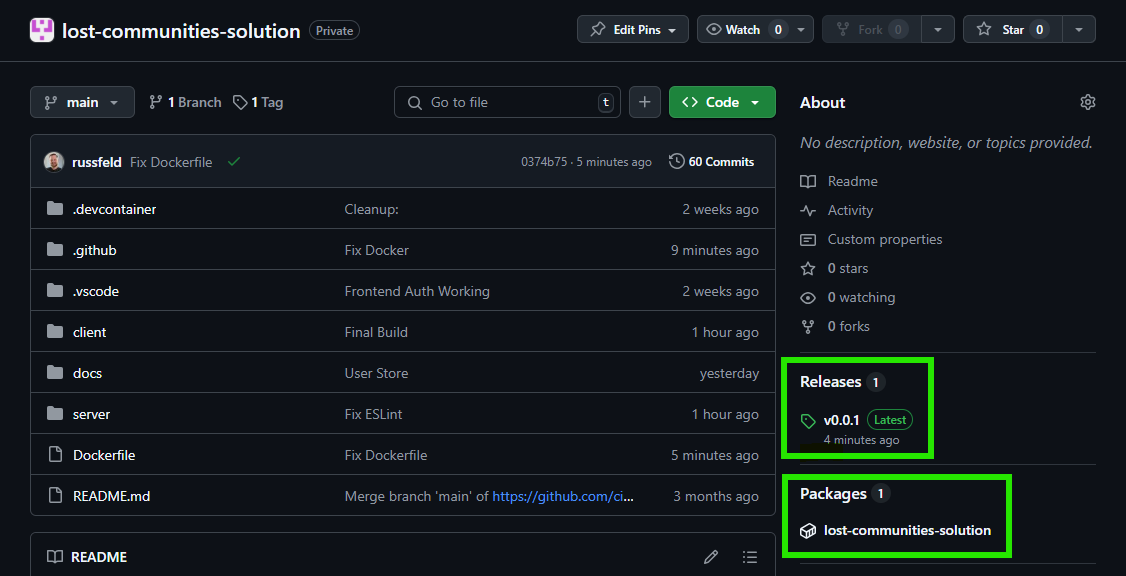
When we do so, we can go back to our GitHub repository and check for a small yellow circle to appear at the top of our code, which shows that the GitHub Action is executing
After a minute or so, we can refresh the page to see a green checkmark in its place, as well as additional information on the right side of the page showing the release version and a link to the newly built Docker container stored in the GitHub Container Registry.
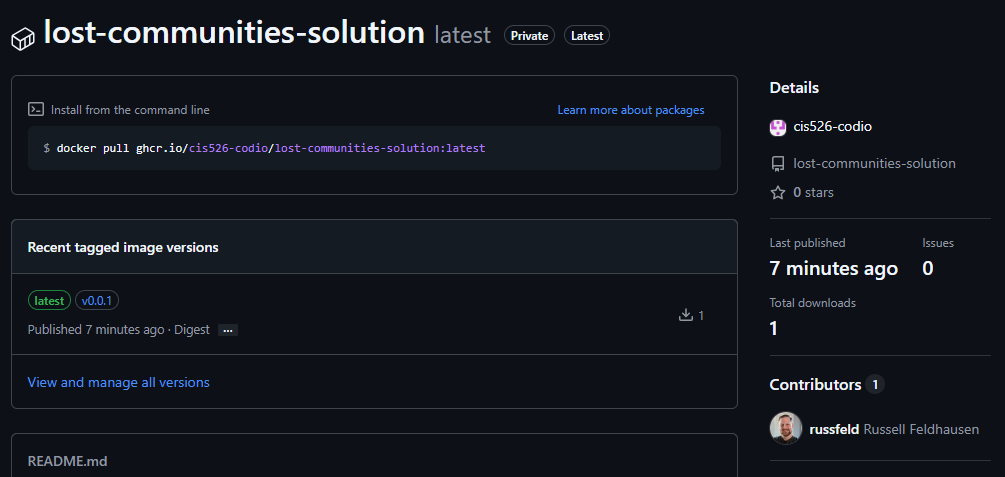
If we click on that link, we can find information about how to actually pull and use that Docker container in our deployment environment:
There we go! We now have a working Docker container for our application.
The last step we can take to make our application easier to deploy is to create a Docker Compose file that shows how to deploy this application easily within a Docker environment. It is becoming more and more popular for self-hosted projects and web applications to include a sample Docker Compose file to show how the application should be deployed in practice. So, let’s look at a quick example for our application.
We’ll place this file at the top-level of our application in a file named compose.yml with the following contents:
services:
####################################### Lost Communities Solution## Repository:# https://github.com/cis526-codio/lost-communities-solutionlostcommunities:
# Docker Imageimage: ghcr.io/cis526-codio/lost-communities-solution:latest# Container Namecontainer_name: lostcommunities# Restart Container Unless Stoppedrestart: unless-stopped# Network Portsports:
- "3000:3000"# Volumesvolumes:
- lostcommunities_data:/usr/src/app/data:rw - lostcommunities_uploads:/usr/src/app/public/uploads:rw# Environment Variablesenvironment:
# =+=+=+= REQUIRED VALUES =+=+=+=# These values must be configured for deployment# Session Secret KeySESSION_SECRET: 'thisisasupersecretkey'# JWT Secret KeyJWT_SECRET_KEY: 'thisisasupersecretkey'# Use Node and run `require('crypto').randomBytes(64).toString('hex')` to get a random value# CAS Authentication Settings# CAS Server URL (send users here to login)CAS_URL: 'https://testcas.cs.ksu.edu'# CAS Service URL (CAS returns users here; usually where this app is deployed)CAS_SERVICE_URL: 'http://localhost:3000'# Database File Name# Options: ':memory:' to use an in-memory database (not recommended), or any file name otherwiseDATABASE_FILE: 'data/database.sqlite'# Seed initial data on first startupSEED_DATA: 'true'# =+=+=+= OPTIONAL VALUES =+=+=+=# These values are set to reasonable defaults# but can be overridden. Default values are shown as comments# Log Level# Options: error | warn | info | http | verbose | debug | sql | silly#LOG_LEVEL: 'http'# Network Port#PORT: '3000'# =+=+=+= OTHER VALUES =+=+=+=# These values are not recommended for deployment but are available# Custom Session Cookie Name#SESSION_NAME: 'connect.sid'# Open API Documentation# Show OpenAPI Documentation at `/docs` path#OPENAPI_VISIBLE: 'false'# Open API Host for testing#OPENAPI_HOST: 'http://localhost:3000'# Export Open API JSON File#OPENAPI_EXPORT: 'false# Open API Export File Path#OPENAPI_EXPORT_PATH: 'openapi.json'# Enable Bypass Authentication# Use path `/auth/bypass?token=<username>` to log in as any user# DO NOT ENABLE IN PRODUCTION - THIS IS INSECURE!#BYPASS_AUTH: 'false'volumes:
lostcommunities_data:
lostcommunities_uploads:
Most of this file is pretty straightforward. The one unique bit to point out is the two volume mounts, which connect a Docker volume to both the data and the public/uploads folders of our container. The first folder was created to specifically store our database file, and the second one will store all uploaded files from the users. In our Docker Compose file we are simply storing these in Docker volumes, but an experienced system administrator could change these to link directly to a path on the host system, making it easy to access.
Update the Image Path
Remember to update the image path in the Docker Compose file to match the path where your own Docker image can be found on the GitHub Container Registry - you can find it in your repository by clicking the Package name on the right side of the page.
Using Docker Compose
To actually deploy this application, we can simply download a copy of this compose.yml file on any system with Docker installed, and then run the following command to deploy it:
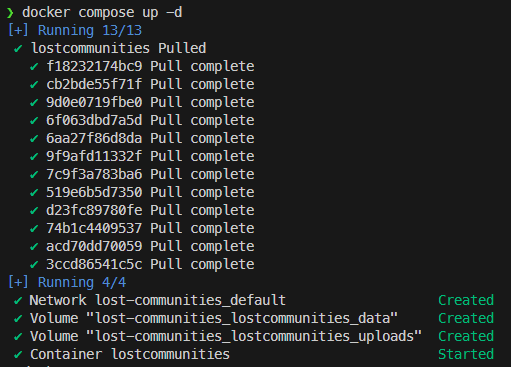
$ docker compose up -d
Authenticating with GitHub Container Registry
Since our Docker image is stored in a private repository on GitHub, we’ll need to authenticate with the GitHub Container Registry. Instructions for doing this with a GitHub Personal Access Token can be found in the GitHub Documentation.
If everything works correctly, we should see our application start in the terminal:
We can test it by going to http://localhost:3000 on our local system, or whatever URL is attached to the deployed container.
Finally, what if we’d like to update our application to connect to an external database? This could be very useful if we plan on using this application in production with a large amount of data, because an external database will be much faster and handle large amounts of data much better than our SQLite database stored in a single file.
For this example, we’ll update our application to be able to use Postgres. Most of this process can be discovered by reading the Sequelize Documentation to see how to connect other database types to our application.
Update Database Configuration
First, we need to update the database configuration for our application, which is in the configs/database.js file in our server folder. We’ll add several additional options to allow us to specify the dialect, hostname, username, and password for another database engine.
/**
* @file Configuration information for Sequelize database ORM
* @author Russell Feldhausen <russfeld@ksu.edu>
* @exports sequelize a Sequelize instance
*/// Import libraries
importSequelizefrom"sequelize";
// Import logger configuration
importloggerfrom"./logger.js";
// Create Sequelize instance
constsequelize=newSequelize({
// Supports "sqlite" or "postgres"
dialect:process.env.DATABASE_DIALECT||"sqlite",
// Only used by SQLite
storage:process.env.DATABASE_FILE||":memory:",
// Used by Postgres
host:process.env.DATABASE_HOST||"lostcommunities_db",
port:process.env.DATABASE_PORT||5432,
username:process.env.DATABASE_USERNAME||"lostcommunities",
password:process.env.DATABASE_PASSWORD||"lostcommunities",
database:process.env.DATABASE_NAME||"lostcommunities",
logging:logger.sql.bind(logger),
});
exportdefaultsequelize;
We’ll also need to install the appropriate database libraries in our server application:
$ npm install pg pg-hstore
Properly Update IDs after Seeding
In addition, we also must handle a bug where Postgres will not properly keep track of any IDs that are added during the seeding process, so in each of our seeds we need to update the internal sequence used by Postgres to keep track of the next ID to use:
// -=-=- other code omitted here -=-=-
exportasyncfunctionup({ context:queryInterface }) {
awaitqueryInterface.bulkInsert("users", users);
if (process.env.DATABASE_DIALECT=='postgres') {
awaitqueryInterface.sequelize.query("SELECT setval('users_id_seq', max(id)) FROM users;");
}
}
// -=-=- other code omitted here -=-=-
// -=-=- other code omitted here -=-=-
exportasyncfunctionup({ context:queryInterface }) {
awaitqueryInterface.bulkInsert("roles", roles);
if (process.env.DATABASE_DIALECT=='postgres') {
awaitqueryInterface.sequelize.query("SELECT setval('roles_id_seq', max(id)) FROM roles;");
}
awaitqueryInterface.bulkInsert("user_roles", user_roles);
}
// -=-=- other code omitted here -=-=-
We should also add these new environment variable entries to our .env.example file, including relocating the existing DATABASE_FILE entry to this section with the others. Since we aren’t using them in development or testing, we can leave them out of the other files for now.
# -=-=- other settings omitted here -=-=-# Database Settings# Options are "sqlite" or "postgres"DATABASE_DIALECT=sqlite
# File is specified for SQLiteDATABASE_FILE=database.sqlite
# Other settings are for PostgresDATABASE_HOST=localhost
DATABASE_PORT=5432DATABASE_USERNAME=lostcommunities
DATABASE_PASSWORD=lostcommunities
DATABASE_NAME=lostcommunities
Update Docker Compose
To test this, we’ll need a running Postgres instance. While we can create one in our GitHub Codespaces by adding some additional configuration files, it is a bit more complex. So, let’s just update our compose.yml file for deployment and test using another database there.
services:
####################################### Lost Communities Solution## Repository:# https://github.com/cis526-codio/lost-communities-solutionlostcommunities:
# Docker Imageimage: ghcr.io/cis526-codio/lost-communities-solution:latest# Container Namecontainer_name: lostcommunities# Restart Container Unless Stoppedrestart: unless-stopped# Networksnetworks:
- default - lostcommunities_network# Network Portsports:
- "3000:3000"# Volumesvolumes:
- lostcommunities_data:/usr/src/app/data:rw - lostcommunities_uploads:/usr/src/app/public/uploads:rw# Environment Variablesenvironment:
# =+=+=+= REQUIRED VALUES =+=+=+=# These values must be configured for deployment# Session Secret KeySESSION_SECRET: 'thisisasupersecretkey'# JWT Secret KeyJWT_SECRET_KEY: 'thisisasupersecretkey'# Use Node and run `require('crypto').randomBytes(64).toString('hex')` to get a random value# CAS Authentication Settings# CAS Server URL (send users here to login)CAS_URL: 'https://testcas.cs.ksu.edu'# CAS Service URL (CAS returns users here; usually where this app is deployed)CAS_SERVICE_URL: 'http://localhost:3000'# Database Options# Database Dialect# Options: 'sqlite' (default) or 'postgres'DATABASE_DIALECT: 'postgres'# For SQLite Only - Specify file location# Options: ':memory:' to use an in-memory database (not recommended), or any file name otherwise# DATABASE_FILE: 'data/database.sqlite'# For Postgres Only - Specify database informationDATABASE_HOST: lostcommunities_dbDATABASE_PORT: 5432DATABASE_USERNAME: lostcommunitiesDATABASE_PASSWORD: lostcommunitiesDATABASE_NAME: lostcommunities# Seed initial data on first startupSEED_DATA: 'true'# =+=+=+= OPTIONAL VALUES =+=+=+=# These values are set to reasonable defaults# but can be overridden. Default values are shown as comments# Log Level# Options: error | warn | info | http | verbose | debug | sql | silly#LOG_LEVEL: 'http'# Network Port Within the Container#PORT: '3000'# =+=+=+= OTHER VALUES =+=+=+=# These values are not recommended for deployment but are available# Custom Session Cookie Name#SESSION_NAME: 'connect.sid'# Open API Documentation# Show OpenAPI Documentation at `/docs` path#OPENAPI_VISIBLE: 'false'# Open API Host for testing#OPENAPI_HOST: 'http://localhost:3000'# Export Open API JSON File#OPENAPI_EXPORT: 'false# Open API Export File Path#OPENAPI_EXPORT_PATH: 'openapi.json'# Enable Bypass Authentication# Use path `/auth/bypass?token=<username>` to log in as any user# DO NOT ENABLE IN PRODUCTION - THIS IS INSECURE!#BYPASS_AUTH: 'false'####################################### Postgres Database## Image Location:# https://hub.docker.com/_/postgreslostcommunities_db:
# Docker Imageimage: postgres:17-alpine# Container Namecontainer_name: lostcommunities_db# Restart Container Unless Stoppedrestart: unless-stopped# Networksnetworks:
- lostcommunities_network# Volumesvolumes:
- lostcommunities_db_data:/var/lib/postgresql/data:rw# Environment Variablesenvironment:
POSTGRES_USER: lostcommunitiesPOSTGRES_PASSWORD: lostcommunitiesPOSTGRES_DB: lostcommunitiesvolumes:
lostcommunities_data:
lostcommunities_uploads:
lostcommunities_db_data:
networks:
lostcommunities_network:
internal: true
This Docker Compose file follows some best practices for deploying a Postgres container in the cloud, and even separates the database connection between our application container and the Postgres container in an internal Docker network to make it even more secure.
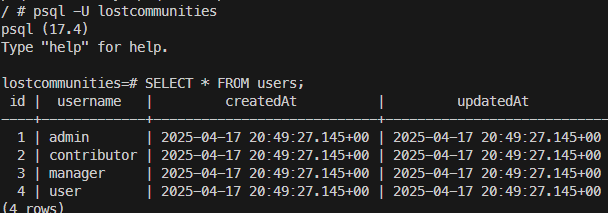
Once we deploy this application, we can even check that the Postgres server has our current data to ensure it is working properly:
Now our application is ready for a full deployment!