Example Projects
Example projects you can follow along with!
Example projects you can follow along with!
This example project is the first in a series toward building a complete full-stack web application using Node.js and Express to create a RESTful API on the backend that connects to a database, and then a Vue single page application on the frontend.
In doing so, we’ll explore some of the standard ways web developers use existing tools, frameworks, and libraries to perform many of the operations we’ve learned how to do manually throughout this course. In essence, you’ve already learned how to build these things from scratch, but now we’ll look at how professionals use dependencies to accomplish many of the same things.
We’ll also explore techniques for writing good, clean JavaScript code that includes documentation and API information, unit testing, and more.
Finally, we’ll learn how to do all of this using GitHub Codespaces, so everything runs directly in the web browser with no additional software or hardware needed. Of course, you can also do everything locally using Docker Desktop and Visual Studio Code as well.
At the end of this example, we will have a project with the following features:
Let’s get started!
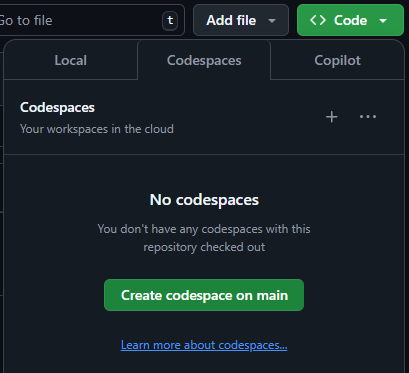
To begin, we will start with an empty GitHub repository. You can either create one yourself, or you may be working from a repository provided through GitHub Classroom.
At the top of the page, you may see either a Create a Codespace button in an empty repository, or a Code button that opens a panel with a Codespaces tab and a Create Codespace on main button in an initialized repository. Go ahead and click that button.

Once you do, GitHub will start creating a new GitHub Codespace for your project. This process may take a few moments.
Once it is done, you’ll be presented with a window that looks very similar to Visual Studio Code’s main interface. In fact - it is! It is just a version of Visual Studio Code running directly in a web browser. Pretty neat!
For the rest of this project, we’ll do all of our work here in GitHub Codespaces directly in our web browser.
If you would rather do this work on your own computer, you’ll need to install the following prerequisites:
For now, you’ll start by cloning your GitHub repository to your local computer, and opening it in Visual Studio Code. We’ll create some configuration files, and then reopen the project using a Dev Container in Docker. When looking in the Command Palette, just swap the “Codespaces” prefix with the “Dev Containers” prefix in the command names.
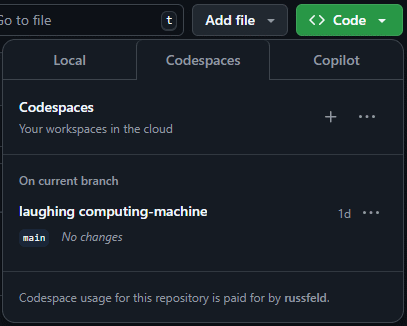
Once you’ve created your GitHub Codespace, you can always find it again by visiting the repository in your web browser, clicking the Code button and choosing the Codespaces tab.
When we first create a GitHub Codespace, GitHub will use a default dev container configuration. It includes many tools that are preinstalled for working on a wide variety of projects. Inside of the Codespace, you can run the following command in the terminal to get a URL that contains a list of all tools installed and their versions:
$ devcontainer-info content-urlThe current default configuration as of this writing can be found here.
In these example projects, we’ll prefix any terminal commands with a dollar sign $ symbol, representing the standard Linux terminal command prompt. You should not enter this character into the terminal, just the content after it. This makes it easy to see individual commands in the documentation, and also makes it easy to tell the difference between commands to be executed and the output produced by that command.
You can learn more in the Google Developer Documentation Style Guide.
For this project, we are going to configure our own dev container that just contains the tools we need for this project. This also allows us to use the same configuration both in GitHub Codespaces as well as locally on our own systems using Docker.
To configure our own dev container, we first must open the Visual Studio Code Command Palette. We can do this by pressing CTRL+SHIFT+P, or by clicking the top search bar on the page and choosing Show and Run Commands >.
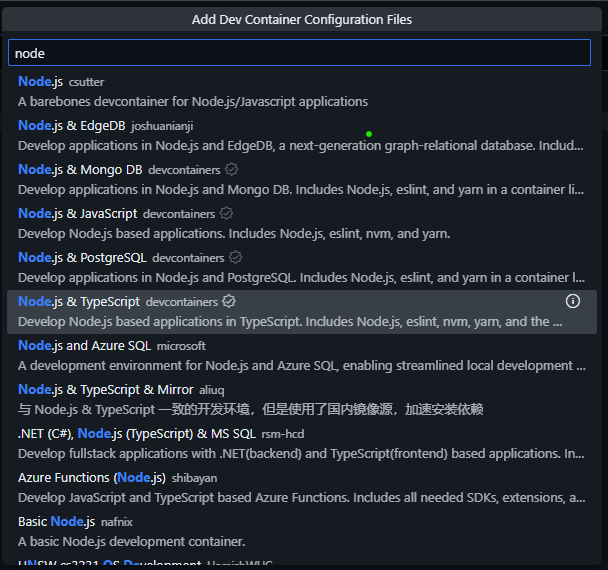
In the Command Palette, search for and choose the Codespaces: Add Dev Container Configuration Files… option, then choose Create a new configuration…. In the list that appears, search for “node” to find the container titled “Node.js & TypeScript” and choose that option.
You’ll then be prompted to choose a version to use. We’ll use 22-bookworm for this project. That refers to Node version 22 LTS running on a Debian Bookworm LTS Linux image. Both of these are current, long term supported (LTS) versions of the software, making them an excellent choice for a new project.
Finally, the last question will ask if we’d like to add any additional features to our dev container configuration. We’ll leave this blank for now, but in the future you may find some of these additional features useful and choose to add them here.
Once that is done, a .devcontainer folder will be created, with a devcontainer.json file inside of it. The content of that file should match what is shown below:
// For format details, see https://aka.ms/devcontainer.json. For config options, see the
// README at: https://github.com/devcontainers/templates/tree/main/src/typescript-node
{
	"name": "Node.js & TypeScript",
	// Or use a Dockerfile or Docker Compose file. More info: https://containers.dev/guide/dockerfile
	"image": "mcr.microsoft.com/devcontainers/typescript-node:1-22-bookworm"

	// Features to add to the dev container. More info: https://containers.dev/features.
	// "features": {},

	// Use 'forwardPorts' to make a list of ports inside the container available locally.
	// "forwardPorts": [],

	// Use 'postCreateCommand' to run commands after the container is created.
	// "postCreateCommand": "yarn install",

	// Configure tool-specific properties.
	// "customizations": {},

	// Uncomment to connect as root instead. More info: https://aka.ms/dev-containers-non-root.
	// "remoteUser": "root"
}
Over time, we’ll come back to this file to add additional features to our dev container. For now, we’ll just leave it as-is.
You may also see a second file, .github/dependabot.yml that is also created. This file is used by the GitHub Dependabot to keep your dev container configuration up to date. You may get occasional notices from GitHub in the future if there are any updates to software included in your dev container configuration.
At this point, we are ready to rebuilt our GitHub Codespace to use our new dev container configuration. To do this, open the Command Palette once again and look for the Codespaces: Rebuild Container option. Click that option, then select the Full Rebuild option in the popup window since we have completely changed our dev container configuration.
Now, we can sit back and be patient while GitHub Codespaces rebuilds our environment using the new configuration. This may take several minutes.
Once it is complete, we can confirm that Node.js is installed and running the correct version by running the following command and checking the output matches our expected version of Node.js:
$ node --version
v22.12.0
If that works, then our dev container environment in GitHub Codespaces should be set up and ready to go!
Now is a good time to commit our current work to git and push it to GitHub. Even though we are working in a GitHub Codespace, we still have to commit and push our work to get it saved. You can do this using the Source Control sidebar tab on the page, or using the classic terminal commands as shown below.
$ git add .
$ git commit -m "Dev Container"
$ git push -u origin main
For the rest of this exercise, we’ll assume that you are comfortable with git and GitHub and can take care of committing and pushing your work yourself, but we’ll give you several hints showing when we hit a good opportunity to save your work.
Now that we have our dev container configured, we can start setting up an Express application. The recommended method in the documentation is to use the Express application generator, so we’ll use that method. You may want to refer to the documentation for this command to see what options are available.
You may also want to bookmark the Express Documentation website as well, since it contains lots of helpful information about how Express works that may not be covered in this tutorial.
For this project, we’ll use the following command to build our application:
$ npx express-generator --no-view --git serverLet’s break down that command to see what it is doing:
npx - The npx command is included with Node.js and npm and allows us to run a command from an npm package, including packages that aren’t currently installed!. This is the preferred way to run commands that are available in any npm packages.express-generator - This is the express-generator package in npm that contains the command we are using to build our Express application.--no-view - This option will generate a project without a built-in view engine.--git - This option will add a .gitignore file to our projectserver - This is the name of the directory where we would like to create our application.When we run that command, we may be prompted to install the express-generator package, so we can press y to install it.
That command will produce a large amount of output, similar to what is shown below:
Need to install the following packages:
express-generator@4.16.1
Ok to proceed? (y) y

npm warn deprecated mkdirp@0.5.1: Legacy versions of mkdirp are no longer supported. Please update to mkdirp 1.x. (Note that the API surface has changed to use Promises in 1.x.)

   create : server/
   create : server/public/
   create : server/public/javascripts/
   create : server/public/images/
   create : server/public/stylesheets/
   create : server/public/stylesheets/style.css
   create : server/routes/
   create : server/routes/index.js
   create : server/routes/users.js
   create : server/public/index.html
   create : server/.gitignore
   create : server/app.js
   create : server/package.json
   create : server/bin/
   create : server/bin/www

   change directory:
     $ cd server

   install dependencies:
     $ npm install

   run the app:
     $ DEBUG=server:* npm start
As we can see, it created quite a few files for us! Let’s briefly review what each of these files and folders are for:
public - this folder contains the static HTML, CSS, and JavaScript files that will be served from our application. Much later down the road, we’ll place the compiled version of our Vue frontend application in this folder. For now, it just serves as a placeholder for where those files will be placed.routes - this folder contains the Express application routers for our application. There are currently only two routers, the index.js router connected to the / path, and the users.js router connected to the /users path..gitignore - this file tells git which files or folders can be ignored when committing to the repository. We’ll discuss this file in detail below.app.js - this is the main file for our Express application. It loads all of the libraries, configurations, and routers and puts them all together into a single Express application.package.json - this file contains information about the project, including some metadata, scripts, and the list of external dependencies. More information on the structure and content of that file can be found in the documentation.bin/www - this file is the actual entrypoint for our web application. It loads the Express application defined in app.js, and then creates an http server to listen for incoming connections and sends them to the Express application. It also handles figuring out which port the application should listen on, as well as some common errors.Since we are only building a RESTful API application, there are a few files that we can delete or quickly modify:
public folder except the file index.htmlpublic/index.html file, remove the line referencing the stylesheet: <link rel="stylesheet" href="/stylesheets/style.css"> since it has been deleted.At this point, we should also update the contents of the package.json file to describe our project. It currently contains information similar to this:
{
  "name": "server",
  "version": "0.0.0",
  "private": true,
  "scripts": {
    "start": "node ./bin/www"
  },
  "dependencies": {
    "cookie-parser": "~1.4.4",
    "debug": "~2.6.9",
    "express": "~4.16.1",
    "morgan": "~1.9.1"
  }
}
For now, let’s update the name and version entries to match our project:
{
  "name": "example-project",
  "version": "0.0.1",
  "private": true,
  "scripts": {
    "start": "node ./bin/www"
  },
  "dependencies": {
    "cookie-parser": "~1.4.4",
    "debug": "~2.6.9",
    "express": "~4.16.1",
    "morgan": "~1.9.1"
  }
}
In a stand-alone application like ours, these values really don’t matter, but if we do decide to publish this application as an npm module in the future, these values will be used to build the module itself.
Let’s quickly take a look at the contents of the app.js file to get an idea of what this application does:
var express = require('express');
var path = require('path');
var cookieParser = require('cookie-parser');
var logger = require('morgan');

var indexRouter = require('./routes/index');
var usersRouter = require('./routes/users');

var app = express();

app.use(logger('dev'));
app.use(express.json());
app.use(express.urlencoded({ extended: false }));
app.use(cookieParser());
app.use(express.static(path.join(__dirname, 'public')));

app.use('/', indexRouter);
app.use('/users', usersRouter);

module.exports = app;
At the top, the file loads several libraries, including cookie-parser for parsing cookies sent from the browser, and morgan for logging requests. It then also loads the two routers, index and users.
Next, we see the line var app = express() - this line actually creates the Express application and stores a reference to it in the app variable.
The next few lines add various middlewares to the Express application using the app.use() function. Each of these is effectively a function that is called each time the application receives a request, one after the other, until a response is generated and sent. See Using middleware in the Express documentation for more details.
The last line of that group uses the express.static middleware to serve static files from the public directory (it uses the path library and the __dirname global variable to construct the correct absolute path to those files). So, if the user requests any path that matches a static file, that file will be sent to the user. This will happen even if a static file matches an existing route, since this middleware is added to the application before the routes. So, there are some instances where we may want to connect this middleware to the application after adding some important routes - we’ll discuss that in the future as we continue to build this application.
After that, the two routers are added as well. Each router is given a base path - the index router is given the / path, then the users router is given the /users path. These are the URL paths that are used to determine where each incoming request should be sent in the application. See routing in the Express documentation for more details.
Finally, the Express application referenced in app is exported from this file. It is used by the bin/www file and attached to an http server to listen for incoming requests.
Because Express is a routing and middleware framework, the order in which you add middlewares and routers determines how the application functions. So, we must be very thoughtful about the order in which we add middlewares and routers to our application. In this example, notice, that we add the logger first, then parse any incoming JSON requests, then decode any URL encoded requests, then parse any cookies, before doing anything else.
This is a common error that trips up many first-time Express developers, so be mindful as you add and adjust content in this file!
Now that we’ve generated a basic Express web application, we need to install all of the dependencies. This is also the first step we’ll need to do anytime we clone this project for the first time or if we rebuild our GitHub codespace or dev container.
To do this, we need to go to the terminal and change directory to the server folder:
$ cd serverRemember that we can always see the current working directory by looking at the command prompt in the terminal, or by typing the pwd command:


Once inside of the server folder, we can install all our dependencies using the following command:
$ npm installWhen we run that command, we’ll see output similar to the following:
added 53 packages, and audited 54 packages in 4s

7 vulnerabilities (3 low, 4 high)

To address all issues, run:
  npm audit fix --force

Run `npm audit` for details.
It looks like we have some out of date packages and vulnerabilities to fix!
Thankfully, there is a very useful command called npm-check-updates that we can use to update our dependencies anytime there is a problem. We can run that package’s command using npx as we saw earlier:
$ npx npm-check-updatesAs before, we’ll be prompted to install the package if it isn’t installed already. Once it is done, we’ll see output like this:
Need to install the following packages:
npm-check-updates@17.1.14
Ok to proceed? (y) y

Checking /workspaces/example-project/server/package.json
[====================] 4/4 100%

 cookie-parser   ~1.4.4  →   ~1.4.7
 debug           ~2.6.9  →   ~4.4.0
 express        ~4.16.1  →  ~4.21.2
 morgan          ~1.9.1  →  ~1.10.0

Run npx npm-check-updates -u to upgrade package.json
When we run the command, it tells us which packages are out of date and lists a newer version of the package we can install.
In an actual production application, it is important to make sure your dependencies are kept up to date. At the same time, you’ll want to carefully read the documentation for these dependencies and test your project after any dependency updates, just to ensure that your application works correctly using the new versions.
For example, in the output above, we see this:
debug ~2.6.9 → ~4.4.0This means that the debug library is two major versions out of date (see Semantic Versioning for more information on how to interpret version numbers)! If we check the debug versions list on npm, we can see that version 2.6.9 was released in September 2017 - a very long time ago.
When a package undergoes a major version change, it often comes with incompatible API changes. So, we may want to consult the documentation for each major version or find release notes or upgrade guides to refer to. In this case, we can refer to the release notes for each version on GitHub:
We may even need to check some of the release notes for minor releases as well.
Thankfully, the latest version of the debug library is compatible with our existing code, and later in this project we’ll replace it with a better logging infrastructure anyway.
Now that we know which dependencies can be updated, we can use the same command with the -u option to update our package.json file easily:
$ npx npm-check-updates -uWe should see output similar to this:
Upgrading /workspaces/example-project/server/package.json
[====================] 4/4 100%

 cookie-parser   ~1.4.4  →   ~1.4.7
 debug           ~2.6.9  →   ~4.4.0
 express        ~4.16.1  →  ~4.21.2
 morgan          ~1.9.1  →  ~1.10.0

Run npm install to install new versions.
We can also check our package.json file to see the changes:
{
  "name": "example-project",
  "version": "0.0.1",
  "private": true,
  "scripts": {
    "start": "node ./bin/www"
  },
  "dependencies": {
    "cookie-parser": "~1.4.7",
    "debug": "~4.4.0",
    "express": "~4.21.2",
    "morgan": "~1.10.0"
  }
}
Finally, we can install those dependencies:
$ npm installNow when we run that command, we should see that everything is up to date!
added 36 packages, changed 24 packages, and audited 90 packages in 4s

14 packages are looking for funding
  run `npm fund` for details

found 0 vulnerabilities
There we go! We now have a sample Express application configured with updated dependencies.
At this point, we are ready to actually test our application. To do this, we can run the following command from within the server directory in our project:
$ npm startWhen we do, we’ll see a bit of information on the terminal:
> example-project@0.0.1 start
> node ./bin/www
We’ll also see a small popup in the bottom right corner of the screen, telling us that it has detected that our application is listening on port 3000.
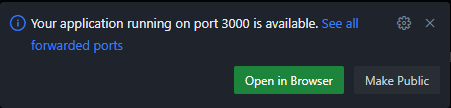
So, to access our application, we can click on the Open in Browser button on that popup. If everything works correctly, we should be able to see our application running in our web browser:
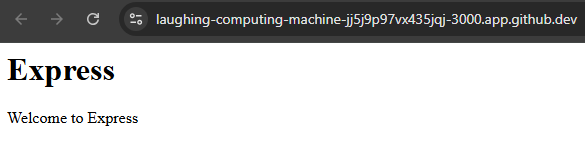
Take a look at the long URL in the browser - that URL includes the name of the GitHub Codespace (laughing-computing-machine in this example), followed by a random Codespace ID (jj5j9p97vx435jqj), followed by the port our application is listening on (3000). We’ll look at ways we can build this URL inside of our application in the future, but for now it is just worth noting.
If you didn’t see the popup appear, or you cannot find where your application is running, check the PORTS tab above the console in GitHub Codespaces:

We can click on the URL under the Forwarded Addresses heading to access the port in our web browser. We can also use this interface to configure additional ports that we want to be able to access outside of the GitHub Codespace.
We can also access any routes that are configured in our application. For example, the default Express application includes a /users route, so we can just add /users to the end of the URL in our web browser to access it. We should see this page when we do:

Great! It looks like our example application in running correctly.
Now is a great time to commit and push our project to GitHub. Before we do, however, we should double-check that our project has a proper server/.gitignore file. It should have been created by the Express application generator if we used the --git option, but it is always important to double-check that it is there before trying to commit a new project.
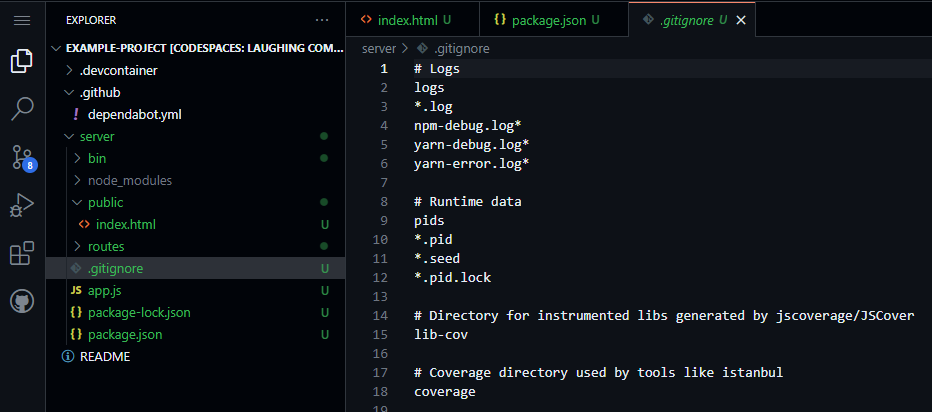
A .gitignore file is used to tell git which files should not be committed to a repository. For a project using Node.js, we especially don’t want to commit our node_modules folder. This folder contains all of the dependencies for our project, and can often be very large.
Why don’t we want to commit it? Because it contains lots of code that isn’t ours, and it is much better to just install the dependencies locally whenever we develop or use our application. That is the whole function of the package.json file and the npm command - it lets us focus on only developing our own code, and it will find and manage all other external dependencies for us.
So, as a general rule of thumb, we should NEVER commit the node_modules folder to our repository.
If your project does not have a .gitignore file, you can usually find one for the language or framework you are using in the excellent gitignore GitHub Repository. Just look for the appropriate file and add the contents to a .gitignore file in your project. For example, you can find a Node.gitignore file to use in this project.
At long last, we are ready to commit and push all of our changes to this project. If it works correctly, it should only commit the code files we’ve created, but none of the files that are ignored in the .gitignore file.
By default, the Express application generator creates an application using the CommonJS module format. This is the original way that JavaScript modules were packaged. However, many libraries and frameworks have been moving to the new ECMAScript module format (commonly referred to as ES modules), which is current official standard way of packaging JavaScript modules.
Since we want to build an industry-grade application, it would be best to update our application to use the new ES module format. This format will become more and more common over time, and many dependencies on npm have already started to shift to only supporting the ES module format. So, let’s take the time now to update our application to use that new format before we go any further.
To enable ES module support in our application, we must simply add "type": "module", to the package.json file:
{
  "name": "example-project",
  "version": "0.0.1",
  "type": "module",
  "private": true,
  "scripts": {
    "start": "node ./bin/www"
  },
  "dependencies": {
    "cookie-parser": "~1.4.7",
    "debug": "~4.4.0",
    "express": "~4.21.2",
    "morgan": "~1.10.0"
  }
}
Now, let’s try to run our application:
$ npm startWhen we do, we’ll get some errors:
> example-project@0.0.1 start
> node ./bin/www

file:///workspaces/example-project/server/bin/www:7
var app = require('../app');
          ^

ReferenceError: require is not defined in ES module scope, you can use import instead
    at file:///workspaces/example-project/server/bin/www:7:11
    at ModuleJob.run (node:internal/modules/esm/module_job:271:25)
    at async onImport.tracePromise.__proto__ (node:internal/modules/esm/loader:547:26)
    at async asyncRunEntryPointWithESMLoader (node:internal/modules/run_main:116:5)

Node.js v22.12.0
By changing that one line in package.json, the Node.js runtime is trying to load our project using ES modules instead of CommonJS modules, and it causes all sorts of errors. Thankfully, most of them are easy to fix! In most cases, we are simply making two updates:
require statements with import statementsmodule.exports statements with export default statements.Let’s go file by file and make these updates. We’ll only show the lines that are commented out and their replacements directly below - you’ll need to look carefully at each file, find the commented line, and replace it with the new line.
bin/www// var app = require('../app');
import app from '../app.js';
// var debug = require('debug')('server:server');
import debugLibrary from 'debug';
const debug = debugLibrary('server:server');
// var http = require('http');
import http from 'http';app.js// var express = require('express');
import express from 'express';
// var path = require('path');
import path from 'path';
// var cookieParser = require('cookie-parser');
import cookieParser from 'cookie-parser';
// var logger = require('morgan');
import logger from 'morgan';
// var indexRouter = require('./routes/index');
import indexRouter from './routes/index.js';
// var usersRouter = require('./routes/users');
import usersRouter from './routes/users.js';
// -=-=- other code omitted here -=-=-
//module.exports = app;
export default app;routes/index.js and routes/users.js// var express = require('express');
import express from 'express';
// var router = express.Router();
const router = express.Router();
// -=-=- other code omitted here -=-=-
// module.exports = router;
export default router;At this point, let’s test our application again to see if we’ve updated everything correctly:
$ npm startNow, we should get an error message similar to this:
file:///workspaces/example-project/server/app.js:25
app.use(express.static(path.join(__dirname, 'public')));
                                 ^

ReferenceError: __dirname is not defined in ES module scope
    at file:///workspaces/example-project/server/app.js:25:34
    at ModuleJob.run (node:internal/modules/esm/module_job:271:25)
    at async onImport.tracePromise.__proto__ (node:internal/modules/esm/loader:547:26)
    at async asyncRunEntryPointWithESMLoader (node:internal/modules/run_main:116:5)

Node.js v22.12.0
This is a bit trickier to debug, but a quick Google search usually leads to the correct answer. In this case, the __dirname variable is a global variable that is defined when Node.js is running a CommonJS module, as discussed in the documentation. However, when Node.js is running an ES module, many of these global variables have been relocated to the import.meta property, as shown in the documentation. So, we can just replace __dirname with the import.meta.dirname variable in app.js:
//app.use(express.static(path.join(__dirname, 'public')));
app.use(express.static(path.join(import.meta.dirname, 'public')));
Let’s try to run our application again - it should be able to start this time:
$ npm startUpdating a Node.js application to use ES modules is not terribly difficult, especially if it is done early in development. However, since we’ve made this change, we’ll have to be careful as we continue to develop our application. Many online tutorials, documentation, and references assume that any Node.js and Express application is still using CommonJS modules, so we may have to translate any code we find to match our new ES module setup.
This is a good point to commit and push our work!
Now that we have a basic Express application, let’s add some helpful tools for developers to make our application easier to work with and debug in the future. These are some great quality of life tweaks that many professional web applications include, but often new developers fail to add them early on in development and waste lots of time adding them later. So, let’s take some time now to add these features before we start developing any actual RESTful endpoints.
First, you may have noticed that the bin/www file includes the debug utility. This is a very common debugging module that is included in many Node.sj applications, and is modeled after how Node.js itself handles debugging internally. It is a very powerful module, and one that you should make use of anytime you are creating a Node.js library to be published on npm and shared with others.
Let’s quickly look at how we can use the debug utility in our application. Right now, when we start our application, we see very little output on the terminal:
$ npm startThat command produces this output:
> example-project@0.0.1 start
> node ./bin/www
As we access various pages and routes, we may see some additional lines of output appear, like this:
GET / 304 2.569 ms - -
GET /users 200 2.417 ms - 23
GET / 200 1.739 ms - 120
These lines come from the morgan request logging middleware, which we’ll discuss on the next page of this example.
To enable the debug library, we simply must set an environment variable in the terminal when we run our application, as shown here:
$ DEBUG=* npm startAn environment variable is a value that is present in memory in a running instance of an operating system. These generally give running processes information about the system, but may also include data and information provided by the user or system administrator. Environment variables are very common ways to configure applications that run in containers, like our application will when it is finally deployed. We’ll cover this in detail later in this course; for now, just understand that we are setting a variable in memory that can be accessed inside of our application.
Now, we’ll be provided with a lot of debugging output from all throughout our application:
> example-project@0.0.1 start
> node ./bin/www

  express:router:route new '/' +0ms
  express:router:layer new '/' +1ms
  express:router:route get '/' +0ms
  express:router:layer new '/' +1ms
  express:router:route new '/' +0ms
  express:router:layer new '/' +0ms
  express:router:route get '/' +0ms
  express:router:layer new '/' +0ms
  express:application set "x-powered-by" to true +1ms
  express:application set "etag" to 'weak' +0ms
  express:application set "etag fn" to [Function: generateETag] +0ms
  express:application set "env" to 'development' +0ms
  express:application set "query parser" to 'extended' +0ms
  express:application set "query parser fn" to [Function: parseExtendedQueryString] +0ms
  express:application set "subdomain offset" to 2 +0ms
  express:application set "trust proxy" to false +0ms
  express:application set "trust proxy fn" to [Function: trustNone] +1ms
  express:application booting in development mode +0ms
  express:application set "view" to [Function: View] +0ms
  express:application set "views" to '/workspaces/example-project/server/views' +0ms
  express:application set "jsonp callback name" to 'callback' +0ms
  express:router use '/' query +1ms
  express:router:layer new '/' +0ms
  express:router use '/' expressInit +0ms
  express:router:layer new '/' +0ms
  express:router use '/' logger +0ms
  express:router:layer new '/' +0ms
  express:router use '/' jsonParser +0ms
  express:router:layer new '/' +0ms
  express:router use '/' urlencodedParser +1ms
  express:router:layer new '/' +0ms
  express:router use '/' cookieParser +0ms
  express:router:layer new '/' +0ms
  express:router use '/' serveStatic +0ms
  express:router:layer new '/' +0ms
  express:router use '/' router +0ms
  express:router:layer new '/' +1ms
  express:router use '/users' router +0ms
  express:router:layer new '/users' +0ms
  express:application set "port" to 3000 +2ms
  server:server Listening on port 3000 +0ms
Each line of output starts with a package name, such as express:application showing the namespace where the logging message came from (which usually corresponds to the library or module it is contained in), followed by the message itself. The last part of the line looks like +0ms, and is simply a timestamp showing the time elapsed since the last debug message was printed.
At the very bottom we see the debug line server:server Listening on port 3000 +0ms - this line is what is actually printed in the bin/www file. Let’s look at that file and see where that comes from:
// -=-=- other code omitted here -=-=-

import debugLibrary from 'debug';
const debug = debugLibrary('server:server');

// -=-=- other code omitted here -=-=-

function onListening() {
  var addr = server.address();
  var bind = typeof addr === 'string'
    ? 'pipe ' + addr
    : 'port ' + addr.port;
  debug('Listening on ' + bind);
}
At the top of that file, we import the debug library, and then instantiate it using the name 'server:server'. This becomes the namespace for our debug messages printed using this instance of the debug library. Then, inside of the onListening() function, we call the debug function and provide a message to be printed.
When we run our application, we can change the value of the DEBUG environment variable to match a particular namespace to only see messages from that part of our application:
$ $ DEBUG=server:* npm startThis will only show output from our server namespace:
> example-project@0.0.1 start
> node ./bin/www

  server:server Listening on port 3000 +0ms
The debug utility is a very powerful tool for diagnosing issues with a Node.js and Express application. You can learn more about how to use and configure the debug utility in the documentation.
However, since we are focused on creating a web application and not a library, let’s replace debug with the more powerful winston logger. This allows us to create a robust logging system based on the traditional concept of severity levels of the logs we want to see.
To start, let’s install winston using the npm command (as always, we should make sure we are working in the server directory of our application):
$ npm install winstonWe should see output similar to the following:
added 28 packages, and audited 118 packages in 2s

15 packages are looking for funding
  run `npm fund` for details

found 0 vulnerabilitiesNotice how installing a single dependency actually installed 28 individual packages? This is a very useful feature of how Node.js and npm packages are structured, since each package can focus on doing only one task really well while reusing common tools and utilities that other packages may also use (thereby reducing the number of duplicated packages that may need to be installed). Unfortunately, this can also lead to situations where an issue with a single package can cause cascading failures and incompatibilities across the board. So, while it is very helpful to install these dependencies in our application, we always want to do so with caution and make sure are always using dependencies that are well maintained and actually add value to our application.
left-pad IncidentFor a vivid case study of the concerns around using unnecessary dependencies, look at the npm left-pad incident. The left-pad library was a simple utility that added padding to the left side of a string. The entire library itself was a single function that contained less than 10 lines of actual code. However, when the developer of that library removed access to it due to a dispute, it ended up nearly breaking the entire npm ecosystem. Core development tools such as Babel, Webpack and more all used that library as a dependency, and with the rise of automated build systems, each tool broke as soon as the next rebuild cycle was initiated. It also caused issues with major online platforms such as Facebook, PayPal, Netflix, and Spotify.
Even today, nearly 9 years after the incident, the left-pad library is still present on npm, even though it is listed as deprecated since JavaScript now includes a method String.prototype.padStart() that performs the same action. As of January 2025, there are still 540 libraries on npm that list left-pad as a dependency, and it is downloaded over 1 million times per week!
Now that we’ve installed winston, we should configure it. We could place all of the code to configure it inside of each file where it is used, but let’s instead create a standalone configuration file for winston that we can use throughout our application.
To do this, let’s create a new folder named configs inside of our server folder to house configurations for various dependencies, and then inside of that folder create a new file named logger.js for this configuration. In that file, we can place the following content:
import winston from 'winston';
const { combine, timestamp, printf, colorize, align, errors } = winston.format;

// Log Levels
//   error: 0
//   warn: 1
//   info: 2
//   http: 3
//   verbose: 4
//   debug: 5
//   silly: 6

function level () {
    if (process.env.LOG_LEVEL) {
      if (process.env.LOG_LEVEL === '0' || process.env.LOG_LEVEL === 'error') {
        return 'error';
      }
      if (process.env.LOG_LEVEL === '1' || process.env.LOG_LEVEL === 'warn') {
        return 'warn';
      }
      if (process.env.LOG_LEVEL === '2' || process.env.LOG_LEVEL === 'info') {
        return 'info';
      }
      if (process.env.LOG_LEVEL === '3' || process.env.LOG_LEVEL === 'http') {
        return 'http';
      }
      if (process.env.LOG_LEVEL === '4' || process.env.LOG_LEVEL === 'verbose') {
        return 'verbose';
      }
      if (process.env.LOG_LEVEL === '5' || process.env.LOG_LEVEL === 'debug') {
        return 'debug';
      }
      if (process.env.LOG_LEVEL === '6' || process.env.LOG_LEVEL === 'silly') {
        return 'silly';
      }
    }
    return 'http';
}

const logger = winston.createLogger({
    // call `level` function to get default log level
    level: level(),
    // Format configuration
    format: combine(
        colorize({ all: true }),
        errors({ stack: true}),
        timestamp({
            format: 'YYYY-MM-DD hh:mm:ss.SSS A',
        }),
        align(),
        printf((info) => `[${info.timestamp}] ${info.level}: ${info.stack ? info.message + "\n" + info.stack : info.message}`)
    ),
    // Output configuration
    transports: [new winston.transports.Console()]
})

export default logger;
At the top, we see a helpful comment just reminding us which log levels are available by default in winston. Then, we have a level function that determines what our desired log level should be based on an environment variable named LOG_LEVEL. We’ll set that variable a bit later in this tutorial. Based on that log level, our system will print any logs at that level or lower in severity level. Finally, we create an instance of the winston logger and provide lots of configuration information about our desired output format. All of this is highly configurable. To fully understand this configuration, take some time to review the winston documentation.
Now, let’s update our bin/www file to use this logger instead of the debug utility. Lines that have been changed are highlighted:
// -=-=- other code omitted here -=-=-

// var debug = require('debug')('server:server');
// import debugLibrary from 'debug';
// const debug = debugLibrary('server:server');
import logger from '../configs/logger.js';

// -=-=- other code omitted here -=-=-

function onError(error) {
  if (error.syscall !== 'listen') {
    throw error;
  }

  var bind = typeof port === 'string'
    ? 'Pipe ' + port
    : 'Port ' + port;

  // handle specific listen errors with friendly messages
  switch (error.code) {
    case 'EACCES':
      // console.error(bind + ' requires elevated privileges');
      logger.error(new Error(bind + ' requires elevated privileges'));
      process.exit(1);
      break;
    case 'EADDRINUSE':
      // console.error(bind + ' is already in use');
      logger.error(new Error(bind + ' is already in use'));
      process.exit(1);
      break;
    default:
      throw error;
  }
}

/**
 * Event listener for HTTP server "listening" event.
 */

function onListening() {
  var addr = server.address();
  var bind = typeof addr === 'string'
    ? 'pipe ' + addr
    : 'port ' + addr.port;
  // debug('Listening on ' + bind);
  logger.debug('Listening on ' + bind)
}
Basically, we’ve replaced all instances of the debug method with logger.debug. We’ve also replaced a couple of uses of console.error to instead use logger.error. They will also create new Error object, which will cause winston to print a stack trace as well.
With that change in place, we can now remove the debug utility from our list of dependencies:
$ npm uninstall debugNow, let’s run our program to see winston in action:
$ npm startWhen we run it, we should see this output:
> example-project@0.0.1 start
> node ./bin/www
Notice how winston didn’t print any debug messages? That is because we haven’t set our LOG_LEVEL environment variable. So, let’s do that by creating two different scripts in our package.json file - one to run the application with a default log level, and another to run it with the debug log level:
{
  "name": "example-project",
  "version": "0.0.1",
  "type": "module",
  "private": true,
  "scripts": {
    "start": "LOG_LEVEL=http node ./bin/www",
    "dev": "LOG_LEVEL=debug node ./bin/www"
  },
  "dependencies": {
    "cookie-parser": "~1.4.7",
    "express": "~4.21.2",
    "morgan": "~1.10.0",
    "winston": "^3.17.0"
  }
}
The npm run command can be used to run any of the scripts in the scripts section of our package.json file.
So, if we want to run our application so we can see the debug messages, we can use the following command:
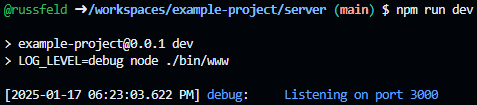
$ npm run devNow we should see some debug messages in the output:
> example-project@0.0.1 dev
> LOG_LEVEL=debug node ./bin/www

[2025-01-17 06:23:03.622 PM] info:      Listening on port 3000
Great! Notice how the logger outputs a timestamp, the log level, and the message, all on the same line? This matches the configuration we used in the configs/logger.js file. On most terminals, each log level will even be a different color!
Finally, since we really should make sure the message that the application is successfully listening on a port is printed by default, let’s change it to the info log level in our bin/www file:
// -=-=- other code omitted here -=-=-

function onListening() {
  var addr = server.address();
  var bind = typeof addr === 'string'
    ? 'pipe ' + addr
    : 'port ' + addr.port;
  // debug('Listening on ' + bind);
  logger.info('Listening on ' + bind)
}In many web applications written using Node.js and Express, you may have come across the NODE_ENV environment variable, which is often set to either development, production, or sometimes test to configure the application. While this may have made sense in the past, it is now considered an anti-pattern in Node.js. This is because there no fundamental difference between development and production in Node.js, and it is often very confusing if an application runs differently in different environments. So, it is better to directly configure logging via its own environment variable instead of using an overall variable that configures multiple services. See the Node.js Documentation for a deeper discussion of this topic.
This is a good point to commit and push our work!
Now that we have configured a logging utility, let’s use it to also log all incoming requests sent to our web application. This will definitely make it much easier to keep track of what is going on in our application and make sure it is working correctly.
The Express application generator already installs a library for this, called morgan. We have already seen output from morgan before:
GET / 304 2.569 ms - -
GET /users 200 2.417 ms - 23
GET / 200 1.739 ms - 120
While this is useful, let’s reconfigure morgan to use our new winston logger and add some additional detail to the output.
Since morgan is technically a middleware in our application, let’s create a new folder called middlewares to store configuration for our various middlewares, and then we can create a new middleware file named request-logger.js in that folder. Inside of that file, we can place the following configuration:
import morgan from 'morgan';
import logger from '../configs/logger.js';

// Override morgan stream method to use our custom logger
// Log Format
// :method :url :status :response-time ms - :res[content-length]
const stream = {
    write: (message) => {
        // log using the 'http' severity
        logger.http(message.trim())
    }
}

// See https://github.com/expressjs/morgan?tab=readme-ov-file#api
const requestLogger = morgan('dev', { stream });

export default requestLogger;
In effect, this file basically tells morgan to write output through the logger.http() method instead of just directly to the console. We are importing our winston configuration from configs/logger.js to accomplish this. We are also configuring morgan to use the dev logging format; more information on log formats can be found in the documentation.
Finally, let’s update our app.js file to use this new request logger middleware instead of morgan:
import express from 'express';
import path from 'path';
import cookieParser from 'cookie-parser';
// import logger from 'morgan';
import requestLogger from './middlewares/request-logger.js';

import indexRouter from './routes/index.js';
import usersRouter from './routes/users.js';

var app = express();

// app.use(logger('dev'));
app.use(requestLogger);
app.use(express.json());
app.use(express.urlencoded({ extended: false }));
app.use(cookieParser());
app.use(express.static(path.join(import.meta.dirname, 'public')));

// -=-=- other code omitted here -=-=-
Now, let’s run our application and access a few of the routes via our web browser:
$ npm run devWe should now see output from morgan included as http logs from winston:
> example-project@0.0.1 dev
> LOG_LEVEL=debug node ./bin/www

[2025-01-17 06:39:30.975 PM] info:      Listening on port 3000
[2025-01-17 06:39:37.430 PM] http:      GET / 200 3.851 ms - 120
[2025-01-17 06:39:40.665 PM] http:      GET /users 200 3.184 ms - 23
[2025-01-17 06:39:43.069 PM] http:      GET / 304 0.672 ms - -
[2025-01-17 06:39:45.424 PM] http:      GET /users 304 1.670 ms - -
When viewed on a modern terminal, they should even be colorized!
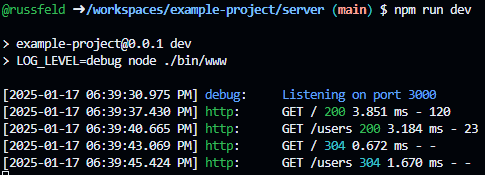
Here, we can see each log level is colorized, and also the HTTP status codes in our morgan log output are also colorized. The first time each page is accessed, the browser receives a 200 status code in green with the content. The second time, our application correctly sends back a 304 status code in light blue, indicating that the content has not been modified and that the browser can use the cached version instead.
This is a good point to commit and push our work!
Before we move on, let’s install a few other useful libraries that perform various tasks in our Express application.
The compression middleware library does exactly what it says it will - it compresses any responses generated by the server and sent through the network. This can be helpful in many situations, but not all. Recall that compression is really just trading more processing time in exchange for less network bandwidth, so we may need to consider which of those we are more concerned about. Thankfully, adding or removing the compression middleware library is simple.
First, let’s install it using npm:
$ npm install compressionThen, we can add it to our app.js file, generally early in the chain of middlewares since it will impact all responses after that point in the chain.
import express from 'express';
import path from 'path';
import cookieParser from 'cookie-parser';
import compression from 'compression';
import requestLogger from './middlewares/request-logger.js';

import indexRouter from './routes/index.js';
import usersRouter from './routes/users.js';

var app = express();

app.use(compression());
app.use(requestLogger);
app.use(express.json());
app.use(express.urlencoded({ extended: false }));
app.use(cookieParser());
app.use(express.static(path.join(import.meta.dirname, 'public')));

app.use('/', indexRouter);
app.use('/users', usersRouter);

export default app;
To test this library, we can run our application with all built-in debugging enabled through the debug library as documented in the Express Documentation:
$ DEBUG=* npm run devWe’ll see a bunch of output as our Express application is initialized. Once it is done, we can open the home page in our web browser to send an HTTP GET request to the server. This will produce the following log output:
  express:router dispatching GET / +1m
  express:router query  : / +0ms
  express:router expressInit  : / +1ms
  express:router compression  : / +0ms
  express:router logger  : / +0ms
  express:router urlencodedParser  : / +0ms
  body-parser:urlencoded skip empty body +1ms
  express:router cookieParser  : / +0ms
  express:router serveStatic  : / +0ms
  send stat "/workspaces/example-project/server/public/index.html" +0ms
  send pipe "/workspaces/example-project/server/public/index.html" +1ms
  send accept ranges +0ms
  send cache-control public, max-age=0 +0ms
  send modified Thu, 16 Jan 2025 23:17:14 GMT +0ms
  send etag W/"78-1947168173e" +1ms
  send content-type text/html +0ms
  compression no compression: size below threshold +1ms
  morgan log request +2ms
[2025-01-25 07:00:35.013 PM] http:      GET / 200 3.166 ms - 120
We can see in the highlighted line that the compression library did not apply any compression to the response because it was below the minium size threshold. This is set to 1kb by default according to the compression documentation.
So, to really see what it does, let’s generate a much larger response by adding some additional text to our public/index.html file (this text was generated using Lorem Ipsum):
<html>

<head>
  <title>Express</title>
</head>

<body>
  <h1>Express</h1>
  <p>Welcome to Express</p>

  <p>Lorem ipsum dolor sit amet, consectetur adipiscing elit. Aliquam sed arcu tincidunt, porttitor diam a, porta nibh. Duis pretium tellus euismod, imperdiet elit id, gravida turpis. Fusce vitae pulvinar tellus. Donec cursus pretium justo, sed vehicula erat iaculis lobortis. Mauris dapibus scelerisque aliquet. Nullam posuere, magna vitae viverra lacinia, sapien magna imperdiet erat, ac sagittis ante ante tristique eros. Phasellus eget fermentum mauris. Integer justo lorem, finibus a ullamcorper in, feugiat in nunc. Etiam ut felis a magna aliquam consectetur. Duis eu mauris ut leo vehicula fringilla scelerisque vel mi. Donec placerat quam nulla, at commodo orci maximus sit amet. Curabitur tincidunt euismod enim, non feugiat nulla eleifend sed. Sed finibus metus sit amet metus congue commodo. Cras ullamcorper turpis sed mi scelerisque porta.</p>

  <p>Sed maximus diam in blandit elementum. Integer diam ante, tincidunt in pulvinar at, luctus in dui. Fusce tincidunt hendrerit dolor in suscipit. Nullam vitae tellus at justo bibendum blandit a vel ligula. Nunc sed augue blandit, finibus nisi nec, posuere orci. Maecenas ut egestas diam. Donec non orci nec ex rhoncus malesuada at eget ante. Proin ultricies cursus nunc eu mollis. Donec vel ligula vel eros luctus pulvinar. Proin vitae dui imperdiet, rutrum risus non, maximus purus. Vivamus fringilla augue tincidunt, venenatis arcu eu, dictum nunc. Mauris eu ullamcorper orci. Cras efficitur egestas ligula. Maecenas a nisl bibendum turpis tristique lobortis.</p>

</body>

</html>
Now, when we request that file, we should see this line in our debug output:
express:router dispatching GET / +24s
express:router query : / +1ms
express:router expressInit : / +0ms
express:router compression : / +0ms
express:router logger : / +0ms
express:router urlencodedParser : / +0ms
body-parser:urlencoded skip empty body +0ms
express:router cookieParser : / +1ms
express:router serveStatic : / +0ms
send stat "/workspaces/example-project/server/public/index.html" +0ms
send pipe "/workspaces/example-project/server/public/index.html" +0ms
send accept ranges +0ms
send cache-control public, max-age=0 +0ms
send modified Sat, 25 Jan 2025 19:05:18 GMT +0ms
send etag W/"678-1949edaaa4c" +0ms
send content-type text/html +0ms
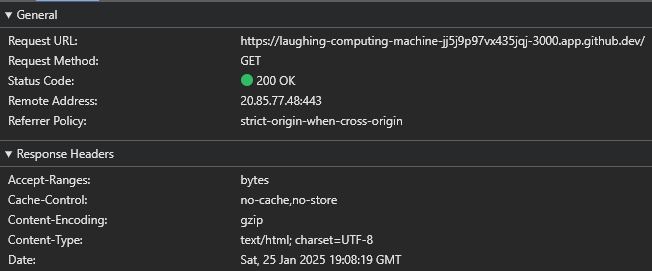
compression gzip compression +1ms
morgan log request +1ms
[2025-01-25 07:05:20.234 PM] http: GET / 200 1.232 ms - -As we can see, the compression middleware is now compressing the response before it is sent to the server using the gzip compression algorithm. We can also see this in our web browser’s debugging tools - in Google Chrome, we notice that the Content-Encoding header is set to gzip as shown below:
We’ll go ahead and integrate the compression middleware into our project for this course, but as discussed above, it is always worth considering whether the tradeoff of additional processing time to save network bandwidth is truly worth it.
Another very useful Express library is helmet. Helmet sets several headers in the HTTP response from an Express application to help improve security. This includes things such as setting an appropriate Content-Security-Policy and removing information about the web server that could be leaked in the X-Powered-By header.
To install helmet we can simply use npm as always:
$ npm install helmetSimilar to the compression library above, we can simply add helmet to our Express application’s app.js file:
import express from 'express';
import path from 'path';
import cookieParser from 'cookie-parser';
import compression from 'compression';
import helmet from 'helmet';
import requestLogger from './middlewares/request-logger.js';

import indexRouter from './routes/index.js';
import usersRouter from './routes/users.js';

var app = express();

app.use(helmet());
app.use(compression());
app.use(requestLogger);
app.use(express.json());
app.use(express.urlencoded({ extended: false }));
app.use(cookieParser());
app.use(express.static(path.join(import.meta.dirname, 'public')));

app.use('/', indexRouter);
app.use('/users', usersRouter);

export default app;
To really see what the helmet library does, we can examine the headers sent by the server with and without helmet enabled.
First, here are the headers sent by the server without helmet enabled:
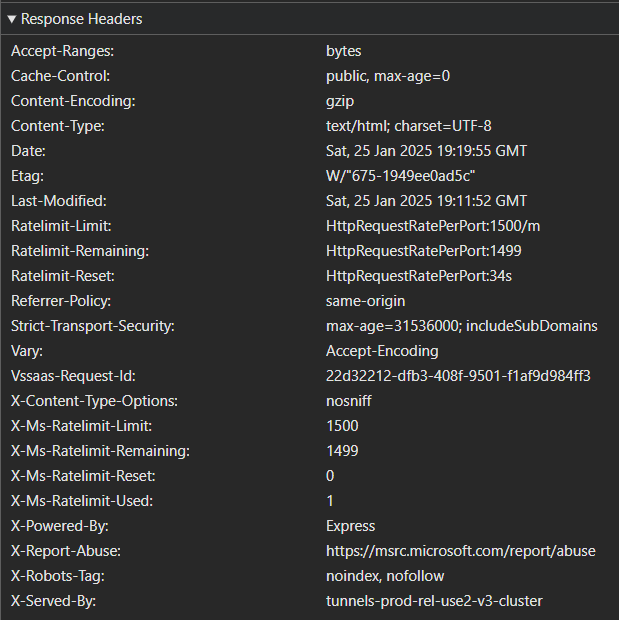
When helmet is enabled, we see an entirely different set of headers:
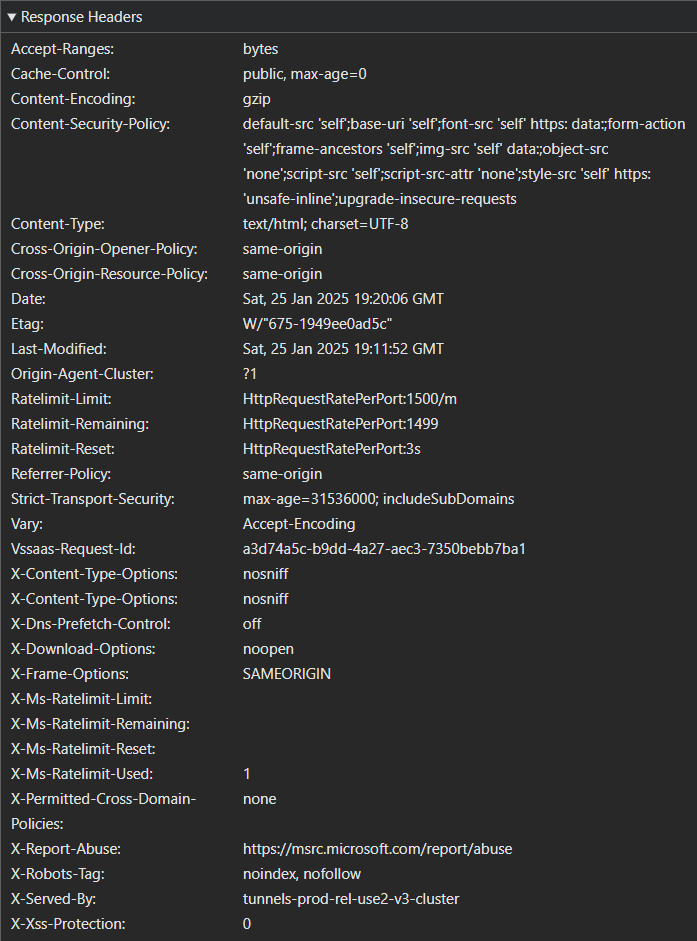
In the second screenshot, notice that the Content-Security-Policy header is now present, but the X-Powered-By header is not? Those changes, along with many others, are provided by the helmet library.
In general, it is always a good idea to review the security of the headers sent by our application. Installing helmet is a good start, but as we continue to develop applications we may learn additional ways we can configure helmet to provide even more security for our applications.
Finally, let’s also install the nodemon package to make developing our application a bit easier. At its core, nodemon is a simple tool that will auotmatically restart our application anytime it detects that a file has changed. In this way, we can just leave our application running in the background, and any changes we make to the code will immediately be availbale for us to test without having to manually restart the server.
To begin, let’s install nodemon as a development dependency using npm with the --save-dev flag:
$ npm install nodemon --save-devNotice that this will cause that library to be installed in a new section of our package.json file called devDependencies:
{
  ...
  "dependencies": {
    "compression": "^1.7.5",
    "cookie-parser": "~1.4.7",
    "express": "~4.21.2",
    "helmet": "^8.0.0",
    "morgan": "~1.10.0",
    "winston": "^3.17.0"
  },
  "devDependencies": {
    "nodemon": "^3.1.9"
  }
}
These dependencies are only installed by npm when we are developing our application. The default npm install command will install all dependencies, including development dependencies. However, we can instead either use npm install --omit=dev or set the NODE_ENV environment variable to production to avoid installing development dependencies.
Next, we can simply update our package.json file to use the nodemon command instead of node in the dev script:
{
  "name": "example-project",
  "version": "0.0.1",
  "type": "module",
  "private": true,
  "scripts": {
    "start": "LOG_LEVEL=http node ./bin/www",
    "dev": "LOG_LEVEL=debug nodemon ./bin/www"
  },
  ...
}
Now, when we execute our application:
$ npm run devWe should see additional output from nodemon to see that it is working:
> example-project@0.0.1 dev
> LOG_LEVEL=debug nodemon ./bin/www

[nodemon] 3.1.9
[nodemon] to restart at any time, enter `rs`
[nodemon] watching path(s): *.*
[nodemon] watching extensions: js,mjs,cjs,json
[nodemon] starting `node ./bin/www`
[2025-01-25 09:37:24.734 PM] info:      Listening on port 3000
Now, with our application running, we can make any change to a file in our application, such as app.js, and it will automatically restart our application:
[nodemon] restarting due to changes...
[nodemon] starting `node ./bin/www`
[2025-01-25 09:39:02.858 PM] info:      Listening on port 3000
We can also always manually type rs in the terminal to restart the application when it is running inside of nodemon.
In general, using nodemon to develop a Node.js application is recommended, but we don’t want to use that in a production environment. So, we are careful to install nodemon as a development dependency only.
This is a good point to commit and push our work!
As discussed earlier, an environment variable is a value present in memory in the operating system environment where a process is running. They contain important information about the system where the application is running, but they can also be configured by the user or system administrator to provide information and configuration to any processes running in that environment. This is especially used when working with containers like the dev container we built for this project.
To explore this, we can use the printenv command in any Linux terminal:
$ printenvWhen we run that command in our GitHub codespace, we’ll see output containing lines similar to this (many lines have been omitted as they contain secure information):
SHELL=/bin/bash
GITHUB_USER=russfeld
CODESPACE_NAME=laughing-computing-machine-jj5j9p97vx435jqj
HOSTNAME=codespaces-f1a983
RepositoryName=example-project
CODESPACES=true
YARN_VERSION=1.22.22
PWD=/workspaces/example-project/server
ContainerVersion=13
GITHUB_CODESPACES_PORT_FORWARDING_DOMAIN=app.github.dev
USER=node
NODE_VERSION=22.12.0
OLDPWD=/workspaces/example-project
TERM_PROGRAM=vscode
As we can see, the environment contains many useful variables, including a CODESPACES variable showing that the application is running in GitHub Codespaces. We can also find our GITHUB_USER, CODESPACE_NAME and even the NODE_VERSION all in the environment.
Because many web applications eventually run in a containerized environment anyway, it is very common practice to configure those applications through the use of environment variables. Thankfully, we can more easily control and configure our application through the use of a special library dotenvx that allows us to load a set of environment variables from a file named .env.
The dotenvx library is a newer version of the dotenv library that has been used for this purpose for many years. dotenvx was developed by the same developer, and is often recommended as a new, modern replacement to dotenv for most users. It includes features that allow us to create multiple environments and even encrypt values. So, for this project we’ll use the newer library to take advantage of some of those features.
To begin, let’s install dotenvx using npm:
$ npm install @dotenvx/dotenvxNext, we’ll need to import that library as early as possible in our application, since we want to make sure that the environment is properly loaded before any other configuration files are referenced, since they may require environment variables to work properly. In this case, we want to do that as the very first thing in app.js:
import '@dotenvx/dotenvx/config';
import express from 'express';
import path from 'path';
import cookieParser from 'cookie-parser';
import compression from 'compression';
import helmet from 'helmet';
import requestLogger from './middlewares/request-logger.js';

// -=-=- other code omitted here -=-=-
Now, when we run our application, we should get a helpful message letting us know that our environment file is missing:
> example-project@0.0.1 dev
> LOG_LEVEL=debug nodemon ./bin/www

[nodemon] 3.1.9
[nodemon] to restart at any time, enter `rs`
[nodemon] watching path(s): *.*
[nodemon] watching extensions: js,mjs,cjs,json
[nodemon] starting `node ./bin/www`
[MISSING_ENV_FILE] missing .env file (/workspaces/example-project/server/.env)
[MISSING_ENV_FILE] https://github.com/dotenvx/dotenvx/issues/484
[dotenvx@1.34.0] injecting env (0)
[2025-01-25 08:15:56.135 PM] info:      Listening on port 3000
This is one of the many benefits that comes from using the newer dotenvx library - it will helpfully remind us when we are running without an environment file, just in case we forgot to create one.
So, now let’s create the .env file in the server folder of our application, and add an environment variable to that file:
LOG_LEVEL=errorThis should set the logging level of our application to error, meaning that only errors will be logged to the terminal. So, let’s run our application and see what it does:
$ npm run devHowever, when we do, we notice that we are still getting http logging in the output:
> example-project@0.0.1 dev
> LOG_LEVEL=debug nodemon ./bin/www

[nodemon] 3.1.9
[nodemon] to restart at any time, enter `rs`
[nodemon] watching path(s): *.*
[nodemon] watching extensions: js,mjs,cjs,json
[nodemon] starting `node ./bin/www`
[dotenvx@1.34.0] injecting env (0) from .env
[2025-01-25 08:20:17.438 PM] info:      Listening on port 3000
[2025-01-25 08:23:56.896 PM] http:      GET / 304 3.405 ms -
This is because we are already setting the LOG_LEVEL environment variable directly in our package.json file:
{
  "name": "example-project",
  "version": "0.0.1",
  "type": "module",
  "private": true,
  "scripts": {
    "start": "LOG_LEVEL=http node ./bin/www",
    "dev": "LOG_LEVEL=debug nodemon ./bin/www"
  },
  ...
}
This is actually a great feature! The dotenvx library will not override any existing environment variables - so, if the environment is already configured, or we want to override anything that may be present in our .env file, we can just set it in the environment before running our application, and those values will take precedence!
For now, let’s go ahead and remove that variable from the dev script in our package.json file:
{
  "name": "example-project",
  "version": "0.0.1",
  "type": "module",
  "private": true,
  "scripts": {
    "start": "LOG_LEVEL=http node ./bin/www",
    "dev": "nodemon ./bin/www"
  },
  ...
}
Now, when we run our program, we should not see any logging output (unless we can somehow cause the server to raise an error, which is unlikely right now):
> example-project@0.0.1 dev
> nodemon ./bin/www

[nodemon] 3.1.9
[nodemon] to restart at any time, enter `rs`
[nodemon] watching path(s): *.*
[nodemon] watching extensions: js,mjs,cjs,json
[nodemon] starting `node ./bin/www`
[dotenvx@1.34.0] injecting env (1) from .env
Finally, let’s go ahead and set the value in our .env file back to the debug setting:
LOG_LEVEL=debugNow, when we run our application, we can see that it is following that configuration:
> example-project@0.0.1 dev
> nodemon ./bin/www

[nodemon] 3.1.9
[nodemon] to restart at any time, enter `rs`
[nodemon] watching path(s): *.*
[nodemon] watching extensions: js,mjs,cjs,json
[nodemon] starting `node ./bin/www`
[dotenvx@1.34.0] injecting env (1) from .env
[2025-01-25 08:28:54.587 PM] info:      Listening on port 3000
[2025-01-25 08:28:58.625 PM] http:      GET / 200 3.475 ms - -
Great! We now have a powerful way to configure our application using a .env file.
Right now, our program only uses one other environment variable, which can be found in the bin/www file:
#!/usr/bin/env node

import app from '../app.js';
import logger from '../configs/logger.js';
import http from 'http';

/**
 * Get port from environment and store in Express.
 */
var port = normalizePort(process.env.PORT || '3000');
app.set('port', port);

// -=-=- other code omitted here -=-=-
The code process.env.PORT || '3000' is a commonly used shorthand in JavaScript to check for the presence of a variable. Basically, if process.env.PORT is set, then that code will resolve to that value. If not, then the or operator || will use the second option, which is the value '3000' that is just hard-coded into our application.
So, we can set that value explicitly in our .env file:
LOG_LEVEL=debug
PORT=3000
In general, it is always good practice to explicitly list all configurable values in the .env file when developing an application, since it helps us keep track of them.
However, each value should also have a logical default value if no configuration is provided. Ideally, our application should be able to run correctly with minimal configuration, or it should at least provide clear errors to the user when a configuration value is not provided. For example, we can look back at the level() function in configs/logger.js to see that it will set the logging level to http if it cannot find an appropriate LOG_LEVEL environment variable.
Storing the configuration for our application in a .env file is a great option, and it is even included as item 3 of the twelve-factor methodology for developing modern web applications.
Unfortunately, this can present one major security flaw - often, the information stored in the .env file is very sensitive, since it may include database passwords, encryption keys, and more. So, we want to make absolutely sure that our .env file is never committed to git or GitHub, and it should never be shared between developers.
We can enforce this by ensuring that our .gitignore file inside of our server folder includes a line that prevents us from accidentally committing the .env file. Thankfully, both the .gitignore produced by the Express application generator, as well as the one in the GitHub gitignore repository both already include that line.
Instead, it is common practice to create a second file called .env.example (or similar) that contains a list of all configurable environment variables, along with safe default values for each. So, for this application, we might create a .env.example file that looks like this:
LOG_LEVEL=http
PORT=3000
This file can safely be committed to git and stored in GitHub. When a new developer or user clones our project, they can easily copy the .env.example file to .env and update it to match their desired configuration.
As we continue to add environment variables to our .env file, we should also make sure the .env.example file is kept up to date.
This is a good point to commit and push our work, but be extra sure that our .env file DOES NOT get committed to git!
There are many different ways to document the features of a RESTful web application. One of the most commonly used methods is the OpenAPI Specification (OAS). OpenAPI was originally based on the Swagger specification, so we’ll sometimes still see references to the name Swagger in online resources.
At its core, the OpenAPI Specification defines a way to describe the functionality of a RESTful web application in a simple document format, typically structured as a JSON or YAML file. For example, we can find an example YAML file for a Petstore API that is commonly cited as an example project for understanding the OpenAPI Specification format.
That file can then be parsed and rendered as an interactive documentation website for developers and users of the API itself. So, we can find a current version of the Petstore API Documentation online and compare it to the YAML document to see how it works.
For more information on the OpenAPI Specification, consult their Getting Started page.
For our project, we are going to take advantage of two helpful libraries to automatically generate and serve OpenAPI documentation for our code using documentation comments:
First, let’s install both of those libraries into our project:
$ npm install swagger-jsdoc swagger-ui-expressNext, we should create a configuration file for the swagger-jsdoc library that contains some basic information about our API. We can store that in the configs/openapi.js file with the following content:
import swaggerJSDoc from 'swagger-jsdoc'

function url() {
  if (process.env.OPENAPI_HOST) {
    return process.env.OPENAPI_HOST
  } else {
    const port = process.env.PORT || '3000'
    return`http://localhost:${port}`
  }
}

const options = {
  definition: {
    openapi: '3.1.0',
    info: {
      title: 'Example Project',
      version: '0.0.1',
      description: 'Example Project',
    },
    servers: [
      {
        url: url(),
      },
    ],
  },
  apis: ['./routes/*.js'],
}

export default swaggerJSDoc(options)
Let’s look at a few items in this file to see what it does:
url() - this function checks for the OPENAPI_HOST environment variable. If that is set, then it will use that value. Otherwise, it uses a sensible default value of http://localhost:3000 or whatever port is set in the environment.options - the options object is used to configure the swagger-jsdoc library. We can read more about how to configure that library in the documentation. At a minimum, it provides some basic information about the API, as well as the URL where the API is located, and a list of source files to read information from. For now, we only want to read from the routes stored in the routes folder, so we include that path along with a wildcard filename.We should also take a minute to add the OPENAPI_HOST environment variable to our .env and .env.example files. If we are running our application locally, we can figure out what this value should be pretty easily (usually it will look similar to http://localhost:3000 or similar). However, when we are running in GitHub Codespaces, our URL changes each time. Thankfully, we can find all the information we need in the environment variables provided by GitHub Codespaces (see the previous page for a full list).
So, the item we need to add to our .env file will look something like this:
LOG_LEVEL=debug
PORT=3000
OPENAPI_HOST=https://$CODESPACE_NAME-$PORT.$GITHUB_CODESPACES_PORT_FORWARDING_DOMAIN
This is one of the key features of the dotenvx library we are using - it will expand environment variables based on the existing environment. So, we are using the values stored in the CODESPACE_NAME, PORT, and GITHUB_CODESPACES_PORT_FORWARDING_DOMAIN environment variables to construct the appropriate URL for our application.
In our .env.example file, we might want to make a note of this in a comment, just to be helpful for future developers. Comments in the .env file format are prefixed with hashes #.
LOG_LEVEL=debug
PORT=3000
OPENAPI_HOST=http://localhost:3000
# For GitHub Codespaces
# OPENAPI_HOST=https://$CODESPACE_NAME-$PORT.$GITHUB_CODESPACES_PORT_FORWARDING_DOMAIN
Once that configuration is created, we can add it to our app.js file, along with a few lines to actually make the documentation visible:
import '@dotenvx/dotenvx/config';
import express from 'express';
import path from 'path';
import cookieParser from 'cookie-parser';
import compression from 'compression';
import helmet from 'helmet';
import requestLogger from './middlewares/request-logger.js';
import logger from './configs/logger.js';
import openapi from './configs/openapi.js'
import swaggerUi from 'swagger-ui-express'

import indexRouter from './routes/index.js';
import usersRouter from './routes/users.js';

var app = express();

app.use(helmet());
app.use(compression());
app.use(requestLogger);
app.use(express.json());
app.use(express.urlencoded({ extended: false }));
app.use(cookieParser());
app.use(express.static(path.join(import.meta.dirname, 'public')));

app.use('/', indexRouter);
app.use('/users', usersRouter);

if (process.env.OPENAPI_VISIBLE === 'true') {
    logger.warn('OpenAPI documentation visible!');
    app.use('/docs', swaggerUi.serve, swaggerUi.setup(openapi, {explorer: true}));
}

export default app;
Notice that we are using the OPENAPI_VISIBLE environment variable to control whether the documentation is visible or not, and we print a warning to the terminal if it is enabled. This is because it is often considered very insecure to make the details of our API visible to users unless that is the explicit intent, so it is better to be cautious.
Of course, to make the documentation appear, we’ll have to set the OPENAPI_VISIBLE value to true in our .env file, and also add a default entry to the .env.example file as well:
LOG_LEVEL=debug
PORT=3000
OPENAPI_HOST=https://$CODESPACE_NAME-$PORT.$GITHUB_CODESPACES_PORT_FORWARDING_DOMAIN
OPENAPI_VISIBLE=true
Now, let’s run our application and see what happens:
$ npm run devWe should see the following output when our application initializes:
> example-project@0.0.1 dev
> nodemon ./bin/www

[nodemon] 3.1.9
[nodemon] to restart at any time, enter `rs`
[nodemon] watching path(s): *.*
[nodemon] watching extensions: js,mjs,cjs,json
[nodemon] starting `node ./bin/www`
[dotenvx@1.34.0] injecting env (4) from .env
[2025-01-25 09:10:37.646 PM] warn:      OpenAPI documentation visible!
[2025-01-25 09:10:37.649 PM] info:      Listening on port 3000
Now, let’s load our application in a web browser, and go to the /docs path. We should see our OpenAPI Documentation website!
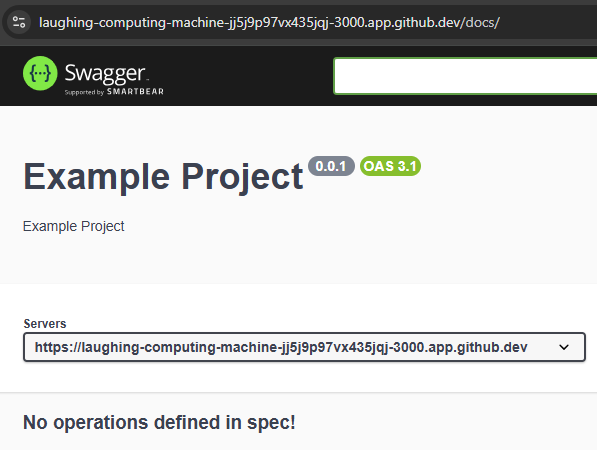
Notice that the Servers URL matches the URL at the top of the page! That means our complex OPENAPI_HOST environment variable is working correctly.
However, we notice that our server does not have any operations defined yet, so we need to add those before we can really make use of this documentation website.
To document our routes using the OpenAPI Specification, we can add a simple JSDoc comment above each route function with some basic information, prefixed by the @swagger tag.
/**
 * @swagger
 * tags:
 *   name: index
 *   description: Index Routes
 */
import express from 'express';

const router = express.Router();

/**
 * @swagger
 * /:
 *   get:
 *     summary: index page
 *     description: Gets the index page for the application
 *     tags: [index]
 *     responses:
 *       200:
 *         description: success
 */
router.get('/', function(req, res, next) {
  res.render('index', { title: 'Express' });
});

export default router;/**
* @swagger
* tags:
* name: users
* description: Users Routes
*/
import express from 'express';
const router = express.Router();
/**
* @swagger
* /users:
* get:
* summary: users list page
* description: Gets the list of all users in the application
* tags: [users]
* responses:
* 200:
* description: a resource
*/
router.get('/', function(req, res, next) {
res.send('respond with a resource');
});
export default router;Now, when we run our application and view the documentation, we see two operations:
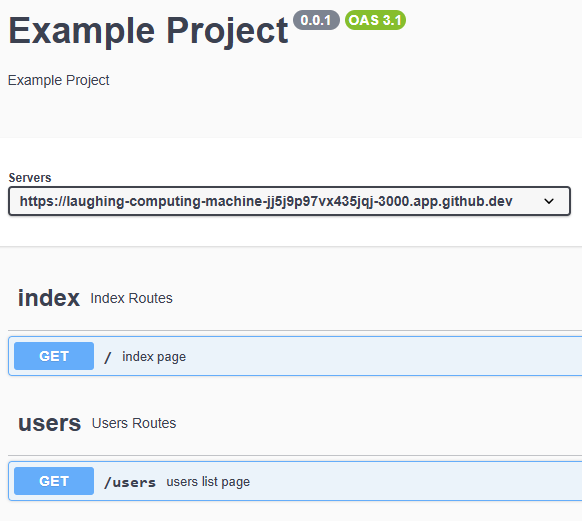
We can expand the operation to learn more about it, and even test it on a running server if our URL is set correctly:
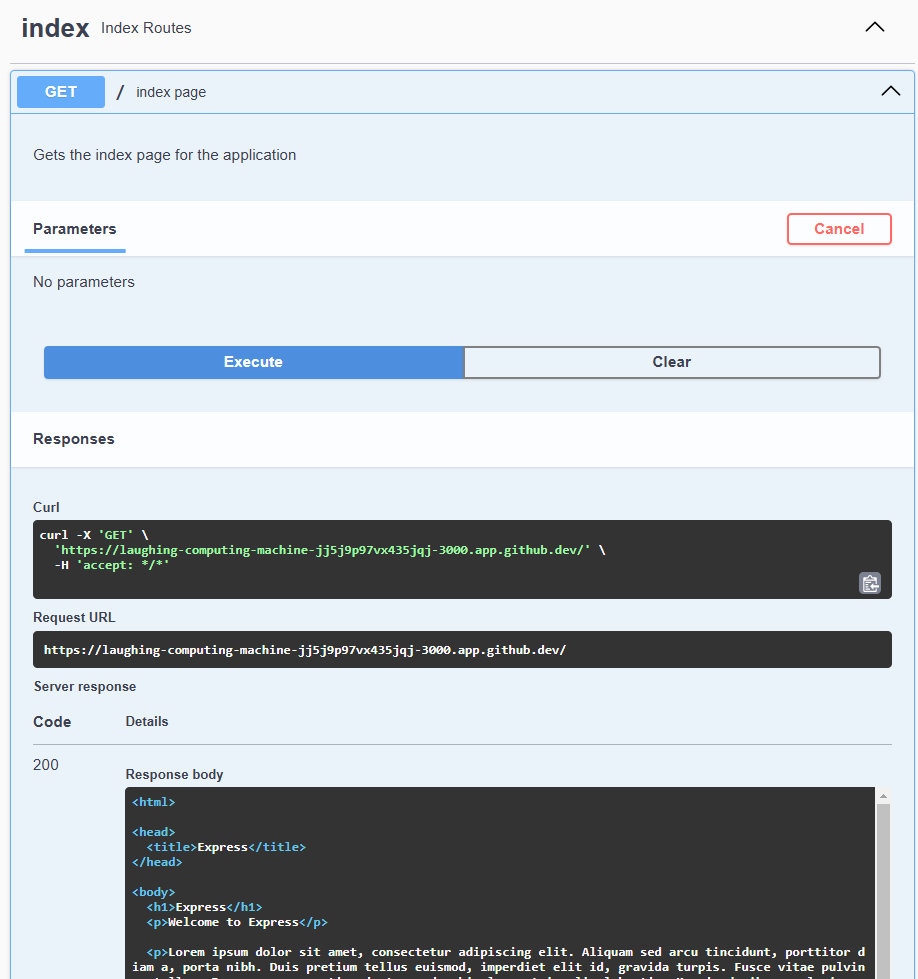
As we develop our RESTful API, this documentation tool will be a very powerful way for us to understand our own API’s design, and it will help us communicate easily with other developers who wish to use our API as well.
This is a good point to commit and push our work!
It is also considered good practice to add additional documentation to all of the source files we create for this application. One common standard is JSDoc, which is somewhat similar to the JavaDoc comments we may have seen in previous courses. JSDoc can be used to generate documentation, but we won’t be using that directly in this project. However, we will be loosely following the JSDoc documentation standard to give our code comments some consistency. We can find a full list of the tags in the JSDoc Documentation.
For example, we can add a file header to the top of each source file with a few important tags. We may also want to organize our import statements and add notes for each group. We can also document individual functions, such as the normalizePort function in the bin/www file. Here’s a fully documented and commented version of that file:
/**
 * @file Executable entrypoint for the web application
 * @author Russell Feldhausen <russfeld@ksu.edu>
 */

// Import libraries
import http from 'http';

// Import Express application
import app from '../app.js';

// Import logging configuration
import logger from '../configs/logger.js';

// Get port from environment and store in Express
var port = normalizePort(process.env.PORT || '3000');
app.set('port', port);

// Create HTTP server
var server = http.createServer(app);

// Listen on provided port, on all network interfaces
server.listen(port);

// Attach event handlers
server.on('error', onError);
server.on('listening', onListening);

/**
 * Normalize a port into a number, string, or false.
 *
 * @param {(string|number)} val - a value representing a port to connect to
 * @returns {(number|string|boolean)} the port or `false`
 */
function normalizePort(val) {
  var port = parseInt(val, 10);

  if (isNaN(port)) {
    // named pipe
    return val;
  }

  if (port >= 0) {
    // port number
    return port;
  }

  return false;
}

/**
 * Event listener for HTTP server "error" event.
 *
 * @param {error} error - the HTTP error event
 * @throws error if the error cannot be determined
 */
function onError(error) {
  if (error.syscall !== 'listen') {
    throw error;
  }

  var bind = typeof port === 'string'
    ? 'Pipe ' + port
    : 'Port ' + port;

  // handle specific listen errors with friendly messages
  switch (error.code) {
    case 'EACCES':
      logger.error(new Error(bind + ' requires elevated privileges'));
      process.exit(1);
      break;
    case 'EADDRINUSE':
      logger.error(new Error(bind + ' is already in use'));
      process.exit(1);
      break;
    default:
      throw error;
  }
}

/**
 * Event listener for HTTP server "listening" event.
 */
function onListening() {
  var addr = server.address();
  var bind = typeof addr === 'string'
    ? 'pipe ' + addr
    : 'port ' + addr.port;
  logger.info('Listening on ' + bind)
}
Here is another example of a cleaned up, reorganized, and documented version of the app.js file. Notice that it also includes an @export tag at the top to denote the type of object that is exported from this file.
/**
 * @file Main Express application
 * @author Russell Feldhausen <russfeld@ksu.edu>
 * @exports app Express application
 */

// Load environment (must be first)
import '@dotenvx/dotenvx/config';

// Import libraries
import compression from 'compression';
import cookieParser from 'cookie-parser';
import express from 'express';
import helmet from 'helmet';
import path from 'path';
import swaggerUi from 'swagger-ui-express'

// Import configurations
import logger from './configs/logger.js';
import openapi from './configs/openapi.js'

// Import middlewares
import requestLogger from './middlewares/request-logger.js';

// Import routers
import indexRouter from './routes/index.js';
import usersRouter from './routes/users.js';

// Create Express application
var app = express();

// Use libraries
app.use(helmet());
app.use(compression());
app.use(express.urlencoded({ extended: false }));
app.use(cookieParser());
app.use(express.json());

// Use middlewares
app.use(requestLogger);

// Use static files
app.use(express.static(path.join(import.meta.dirname, 'public')));

// Use routers
app.use('/', indexRouter);
app.use('/users', usersRouter);

// Use SwaggerJSDoc router if enabled
if (process.env.OPENAPI_VISIBLE === 'true') {
    logger.warn('OpenAPI documentation visible!');
    app.use('/docs', swaggerUi.serve, swaggerUi.setup(openapi, {explorer: true}));
}

export default app;
Finally, here is a fully documented routes/index.js file, showing how routes can be documented both with JSDoc tags as well as OpenAPI Specification items:
/**
 * @file Index router
 * @author Russell Feldhausen <russfeld@ksu.edu>
 * @exports router an Express router
 *
 * @swagger
 * tags:
 *   name: index
 *   description: Index Routes
 */

// Import libraries
import express from "express";

// Create Express router
const router = express.Router();

/**
 * Gets the index page for the application
 *
 * @param {Object} req - Express request object
 * @param {Object} res - Express response object
 * @param {Function} next - Express next middleware function
 *
 * @swagger
 * /:
 *   get:
 *     summary: index page
 *     description: Gets the index page for the application
 *     tags: [index]
 *     responses:
 *       200:
 *         description: success
 */
router.get('/', function(req, res, next) {
  res.render('index', { title: 'Express' });
});

export default router;
Now is a great time to document all of the JavaScript files in our application following the JSDoc standard.
This is a good point to commit and push our work!
Finally, let’s look at two other tools that will help us write clean and maintainable JavaScript code. The first tool is eslint, which is a linting tool to find bugs and issues in JavaScript code by performing some static analysis on it. This helps us avoid any major issues in our code that can be easily detected just by looking at the overall style and structure of our code.
To begin, we can install eslint following the recommended process in their documentation:
$ npm init @eslint/config@latestIt will install the package and ask several configuration questions along the way. We can follow along with the answers shown in the output below:
Need to install the following packages:
@eslint/create-config@1.4.0
Ok to proceed? (y) y

@eslint/create-config: v1.4.0

✔ How would you like to use ESLint? · problems
✔ What type of modules does your project use? · esm
✔ Which framework does your project use? · none
✔ Does your project use TypeScript? · javascript
✔ Where does your code run? · node
The config that you've selected requires the following dependencies:

eslint, globals, @eslint/js
✔ Would you like to install them now? · No / Yes
✔ Which package manager do you want to use? · npm
☕️Installing...

added 70 packages, and audited 273 packages in 5s

52 packages are looking for funding
  run `npm fund` for details

found 0 vulnerabilities
Successfully created /workspaces/example-project/server/eslint.config.js file.
Once it is installed, we can run eslint using the following command:
$ npx eslint --fix .When we do, we’ll probably get a couple of errors:
/workspaces/example-project/server/routes/index.js
  35:36  error  'next' is defined but never used  no-unused-vars

/workspaces/example-project/server/routes/users.js
  35:36  error  'next' is defined but never used  no-unused-vars

✖ 2 problems (2 errors, 0 warnings)
In both of our routes files, we have included the next parameter, but it is unused. We could remove it, but it is often considered good practice to include that parameter in case we need to explicitly use it. So, in our eslint.config.js we can add an option to ignore that parameter (pay careful attention to the formatting; for some reason the file by default does not have much spacing between the curly braces):
import globals from "globals";
import pluginJs from "@eslint/js";

/** @type {import('eslint').Linter.Config[]} */
export default [
  {
    languageOptions: { globals: globals.node },
    rules: {
      'no-unused-vars': [
        'error',
        {
          argsIgnorePattern: 'next'
        }
      ]
    }
  },
  pluginJs.configs.recommended,
];
Now, when we run that command, we should not get any output!
$ npx eslint --fix .To make this even easier, let’s add a new script to the scripts section of our package.json file for this tool:
{
  ...
  "scripts": {
    "start": "LOG_LEVEL=http node ./bin/www",
    "dev": "LOG_LEVEL=debug nodemon ./bin/www",
    "lint": "npx eslint --fix ."
  },
  ...
}
Now we can just run this command to check our project for errors:
$ npm run lintAnother commonly used tool for JavaScript developers is prettier. Prettier will reformat our JavaScript code to match a defined coding style, making it much easier to read and maintain.
First, let’s install prettier using npm as a development dependency:
$ npm install prettier --save-devWe also need to create a .prettierrc configuration file that just contains an empty JavaScript object for now:
{}There are many options that can be placed in that configuration file - see the Prettier Documentation for details. For now, we’ll just leave it blank.
We can now run the prettier command on our code:
$ npx prettier . --writeWhen we do, we’ll see output listing all of the files that have been changed:
.prettierrc 34ms
app.js 34ms
configs/logger.js 19ms
configs/openapi.js 7ms
eslint.config.js 5ms
middlewares/request-logger.js 5ms
package-lock.json 111ms (unchanged)
package.json 2ms (unchanged)
public/index.html 29ms
routes/index.js 4ms
routes/users.js 3ms
Notice that nearly all of the files have been updated in some way. Many times it simply aligns code and removes extra spaces, but other times it will rewrite long lines.
Just like with eslint, let’s add a new script to package.json to make this process simpler as well:
{
  ...
  "scripts": {
    "start": "LOG_LEVEL=http node ./bin/www",
    "dev": "LOG_LEVEL=debug nodemon ./bin/www",
    "lint": "npx eslint --fix .",
    "format": "npx prettier . --write"
  },
  ...
}
With that script in place, we can clean up our code anytime using this command:
$ npm run formatNow that we have installed both eslint and prettier, it is always a good practice to run both tools before committing any code to git and pushing to GitHub. This ensures that your codebase is always clean, well formatted, and free of errors or bugs that could be easily spotted by these tools.
This is a good point to commit and push our work!
In this example project, we created an Express application with the following features:
This example project makes a great basis for building robust RESTful web APIs and other Express applications.
As you work on projects built from this framework, we welcome any feedback or additions to be made. Feel free to submit requests to the course instructor for updates to this project.
This example project builds on the previous Express Starter Project by adding a database. A database is a powerful way to store and retrieve the data used by our web application.
To accomplish this, we’ll learn about different libraries that interface between our application and a database. Once we’ve installed a library, we’ll discover how to use that library to create database tables, add initial data to those tables, and then easily access them within our application.
At the end of this example, we will have a project with the following features:
This project picks up right where the last one left off, so if you haven’t completed that one yet, go back and do that before starting this one.
Let’s get started!
To begin, we must first select a library to use when interfacing with our database. There are many different types of libraries, and many different options to choose from.
First and foremost, we can always just write raw SQL queries directly in our code. This is often very straightforward, but also can lead to very complex code and security issues. It also doesn’t offer many of the more advanced features such as mapping database results to object types and automatically managing database schemas.
Another option is an SQL query library, such as Knex.js or Kysely. These libraries provide a helpful abstraction on top of SQL, allowing developers to build queries using syntax that is more comfortable and familiar to them. These libraries also have additional features to manage database schemas and sample data
The final option is an Object-Relational Mapping (ORM) library such as Objection or Sequelize. These libraries provide the most abstraction away from raw SQL, often allowing developers to store and retrieve data in a database as if it were stored in a list or dictionary data structure.
For this project, we’re going to use the Sequelize ORM, coupled with the Umzug migration tool. Both of these libraries are very commonly used in Node.js projects, and are actively maintained.
We also have many choices for the database engine we want to use for our web projects. Some common options include PostgreSQL, MySQL, MariaDB, MongoDB, Firebase, and many more.
For this project, we’re going to use SQLite. SQLite is unique because it is a database engine that only requires a single file, so it is self-contained and easy to work with. It doesn’t require any external database servers or software, making it perfect for a small development project. In fact, SQLite may be one of the most widely deployed software modules in the whole world!
Naturally, if wer plan on growing a web application beyond a simple hobby project with a few users, we should spend some time researching a reliable database solution. Thankfully, the Sequelize ORM supports many different database engines so it is easy to switch.
To begin, let’s install both sequelize as well as the sqlite3 library using npm:
$ npm install sqlite3 sequelizeOnce those libraries are installed, we can now configure sequelize following the information in the Sequelize Documentation. Let’s create a new file configs/database.js to store our database configuration:
/**
 * @file Configuration information for Sequelize database ORM
 * @author Russell Feldhausen <russfeld@ksu.edu>
 * @exports sequelize a Sequelize instance
 */

// Import libraries
import Sequelize from 'sequelize';

// Import logger configuration
import logger from "./logger.js";

// Create Sequelize instance
const sequelize = new Sequelize({
    dialect: 'sqlite',
    storage: process.env.DATABASE_FILE || ":memory:",
    logging: logger.sql.bind(logger)
})

export default sequelize;
This file creates a very simple configuration for sequelize that uses the sqlite dialect. It uses the DATABASE_FILE environment variable to control the location of the database in the file system, and it also uses the logger.sql log level to log any data produced by the library. If a DATABASE_FILE environment variable is not provided, it will default to storing data in the SQLite In-Memory Database, which is great for testing and quick development.
Of course, a couple of those items don’t actually exist yet, so let’s add those in before we move on! First, we need to add a DATABASE_FILE environment variable to both our .env and .env.example files:
LOG_LEVEL=debug
PORT=3000
OPENAPI_HOST=https://$CODESPACE_NAME-$PORT.$GITHUB_CODESPACES_PORT_FORWARDING_DOMAIN
OPENAPI_VISIBLE=true
DATABASE_FILE=database.sqliteLOG_LEVEL=debug
PORT=3000
OPENAPI_HOST=http://localhost:3000
# For GitHub Codespaces
# OPENAPI_HOST=https://$CODESPACE_NAME-$PORT.$GITHUB_CODESPACES_PORT_FORWARDING_DOMAIN
OPENAPI_VISIBLE=false
DATABASE_FILE=database.sqliteWe also need to add a new logging level called sql to our logger configuration in configs/logger.js. This is a bit more involved, because it means we have to now list all intended logging levels explicitly. See the highlighted lines below for what has been changed, but the entire file is included for convenience:
/**
 * @file Configuration information for Winston logger
 * @author Russell Feldhausen <russfeld@ksu.edu>
 * @exports logger a Winston logger object
 */

// Import libraries
import winston from "winston";

// Extract format options
const { combine, timestamp, printf, colorize, align, errors } = winston.format;

/**
 * Determines the correct logging level based on the Node environment
 *
 * @returns {string} the desired log level
 */
function level () {
  if (process.env.LOG_LEVEL) {
    if (process.env.LOG_LEVEL === '0' || process.env.LOG_LEVEL === 'error') {
      return 'error';
    }
    if (process.env.LOG_LEVEL === '1' || process.env.LOG_LEVEL === 'warn') {
      return 'warn';
    }
    if (process.env.LOG_LEVEL === '2' || process.env.LOG_LEVEL === 'info') {
      return 'info';
    }
    if (process.env.LOG_LEVEL === '3' || process.env.LOG_LEVEL === 'http') {
      return 'http';
    }
    if (process.env.LOG_LEVEL === '4' || process.env.LOG_LEVEL === 'verbose') {
      return 'verbose';
    }
    if (process.env.LOG_LEVEL === '5' || process.env.LOG_LEVEL === 'debug') {
      return 'debug';
    }
    if (process.env.LOG_LEVEL === '6' || process.env.LOG_LEVEL === 'sql') {
      return 'sql';
    }
    if (process.env.LOG_LEVEL === '7' || process.env.LOG_LEVEL === 'silly') {
      return 'silly';
    }
  }
  return 'http';
}

// Custom logging levels for the application
const levels = {
  error: 0,
  warn: 1,
  info: 2,
  http: 3,
  verbose: 4,
  debug: 5,
  sql: 6,
  silly: 7
}

// Custom colors
const colors = {
  error: 'red',
  warn: 'yellow',
  info: 'green',
  http: 'green',
  verbose: 'cyan',
  debug: 'blue',
  sql: 'gray',
  silly: 'magenta'
}

winston.addColors(colors)

// Creates the Winston instance with the desired configuration
const logger = winston.createLogger({
  // call `level` function to get default log level
  level: level(),
  levels: levels,
  // Format configuration
  // See https://github.com/winstonjs/logform
  format: combine(
    colorize({ all: true }),
    errors({ stack: true }),
    timestamp({
      format: "YYYY-MM-DD hh:mm:ss.SSS A",
    }),
    align(),
    printf(
      (info) =>
        `[${info.timestamp}] ${info.level}: ${info.stack ? info.message + "\n" + info.stack : info.message}`,
    ),
  ),
  // Output configuration
  transports: [new winston.transports.Console()],
});

export default logger;
We have added a new sql logging level that is now part of our logging setup. One of the unique features of sequelize is that it will actually allow us to log all SQL queries run against our database, so we can enable and disable that level of logging by adjusting the LOG_LEVEL environment variable as desired.
There! We now have a working database configuration. Before we can make use of it, however, we need to add additional code to create and populate our database. So, we’ll need to continue on in this tutorial before we can actually test our application.
Now that we have a database configured in our application, we need to create some way to actually populate that database with the tables and information our app requires. We could obviously do that manually, but that really makes it difficult (if not impossible) to automatically build, test, and deploy this application.
Thankfully, most database libraries also have a way to automate building the database structure. This is known as schema migration or often just migration. We call it migration because it allows us to update the database schema along with new versions of the application, effectively migrating our data to new versions as we go.
The sequelize library recommends using another library, named Umzug, as the preferred way to manage database migrations. It is actually completely framework agnostic, and would even work with ORMs other than Sequelize.
To begin, let’s install umzug using npm:
$ npm install umzugNext, we can create a configuration file to handle our migrations, named configs/migrations.js, with the following content as described in the Umzug Documentation:
/**
 * @file Configuration information for Umzug migration engine
 * @author Russell Feldhausen <russfeld@ksu.edu>
 * @exports umzug an Umzug instance
 */

// Import Libraries
import { Umzug, SequelizeStorage } from 'umzug';

// Import database configuration
import database from "./database.js";
import logger from "./logger.js";

// Create Umzug instance
const umzug = new Umzug({
    migrations: {glob: 'migrations/*.js'},
    context: database.getQueryInterface(),
    storage: new SequelizeStorage({
        sequelize: database,
        modelName: 'migrations'
    }),
    logger: logger
})

export default umzug;
Notice that this configuration uses our existing sequelize database configuration, and also uses an instance of our logger as well. It is set to look for any migrations stored in the migrations/ folder.
The umzug library also has a very handy way to run migrations directly from the terminal using a simple JavaScript file, so let’s create a new file named migrate.js in the root of the server directory as well with this content:
// Load environment (must be first)
import "@dotenvx/dotenvx/config";

// Import configurations
import migrations from './configs/migrations.js'

// Run Umzug as CLI application
migrations.runAsCLI();
This file will simply load our environment configuration as well as the umzug instance for migrations, and then instruct it to run as a command-line interface (CLI) application. This is very handy, as we’ll see shortly.
Now we can create a new migration to actually start building our database structure for our application. For this simple example, we’ll build a users table with four fields:
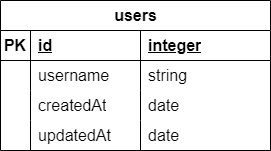
We can refer to both the Umzug Documentation and Examples as well as the Sequelize Documentation. So, let’s create a new folder named migrations to match our configuration above, then a new file named 00_users.js to hold the migration for our users table:
/**
 * @file Users table migration
 * @author Russell Feldhausen <russfeld@ksu.edu>
 * @exports up the Up migration
 * @exports down the Down migration
 */

// Import Libraries
import {Sequelize} from 'sequelize';

/**
 * Apply the migration
 *
 * @param {queryInterface} context the database context to use
 */
export async function up({context: queryInterface}) {
    await queryInterface.createTable('users', {
        id: {
            type: Sequelize.INTEGER,
            primaryKey: true,
            autoIncrement: true,
        },
        username: {
            type: Sequelize.STRING,
            unique: true,
            allowNull: false,
        },
        createdAt: {
            type: Sequelize.DATE,
            allowNull: false,
        },
        updatedAt: {
            type: Sequelize.DATE,
            allowNull: false,
        },
    })
}

/**
 * Roll back the migration
 *
 * @param {queryInterface} context the database context to use
 */
export async function down({context: queryInterface}) {
    await queryInterface.dropTable('users');
}
A migration consists of two functions. First, the up function is called when the migration is applied, and it should define or modify the database structure as desired. In this case, since this is the first migration, we can assume we are starting with a blank database and go from there. The other function, down, is called whenever we want to undo, or rollback, the migration. It should effectively undo any changes made by the up function, leaving the database in the state it was before the migration was applied.
Most migration systems, including umzug, apply the migrations in order according to the filenames of the migrations. Some systems automatically append a timestamp to the name of the migration file when it is created, such as 20250203112345_users.js. For our application, we will simply number them sequentially, starting with 00.
Finally, we can use the migrate.js file we created to run umzug from the command line to apply the migration:
$ node migrate upIf everything works correctly, we should receive some output showing that our migration succeeded:
[dotenvx@1.34.0] injecting env (5) from .env
[2025-02-03 10:59:35.066 PM] info:      { event: 'migrating', name: '00_users.js' }
[2025-02-03 10:59:35.080 PM] info:      { event: 'migrated', name: '00_users.js', durationSeconds: 0.014 }
[2025-02-03 10:59:35.080 PM] info:      applied 1 migrations.
We should also see a file named database.sqlite added to our file structure. If desired, we can install the SQLite Viewer extension in VS Code to explore the contents of that file to confirm it is working correctly.
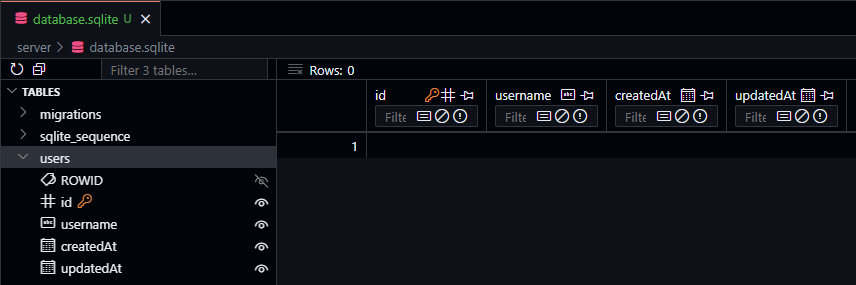
When installing a VS Code extension, we can also choose to have it added directly to our devcontainer.json file so it is available automatically whenever we close this repository into a new codespace or dev container. Just click the gear icon on the marketplace page and choose “Add to devcontainer.json” from the menu!
If we need to roll back that migration, we can use a similar command:
$ node migrate downThere are many more commands available to apply migrations individually and more. Check the Umzug Documentation for more details.
Another useful task that umzug can handle is adding some initial data to a new database. This process is known as seeding the database. Thankfully, the process for seeding is nearly identical to the process for migrations - in fact, it uses the same operations in different ways! So, let’s explore how to set that up.
First, we’ll create a new configuration file at configs/seeds.js that contains nearly the same content as configs/migrations.js with a couple of important changes on the highlighted lines:
/**
 * @file Configuration information for Umzug seed engine
 * @author Russell Feldhausen <russfeld@ksu.edu>
 * @exports umzug an Umzug instance
 */

// Import Libraries
import { Umzug, SequelizeStorage } from 'umzug';

// Import database configuration
import database from "./database.js";
import logger from "./logger.js";

// Create Umzug instance
const umzug = new Umzug({
    migrations: {glob: 'seeds/*.js'},
    context: database.getQueryInterface(),
    storage: new SequelizeStorage({
        sequelize: database,
        modelName: 'seeds'
    }),
    logger: logger
})

export default umzug;
All we really have to do is change the folder where the migrations (in this case, the seeds) are stored, and we also change the name of the model, or table, where that information will be kept in the database.
Next, we’ll create a seed.js file that allows us to run the seeds from the command line. Again, this file is nearly identical to the migrate.js file from earlier, with a couple of simple changes:
// Load environment (must be first)
import "@dotenvx/dotenvx/config";

// Import configurations
import seeds from './configs/seeds.js'

// Run Umzug as CLI application
seeds.runAsCLI();
Finally, we can create a new folder seeds to store our seeds, and then create the first seed also called 00_users.js to add a few default users to our database:
/**
 * @file Users seed
 * @author Russell Feldhausen <russfeld@ksu.edu>
 * @exports up the Up migration
 * @exports down the Down migration
 */

// Timestamp in the appropriate format for the database
const now = new Date().toISOString().slice(0, 23).replace("T", " ") + " +00:00";

// Array of objects to add to the database
const users = [
    {
        id: 1,
        username: 'admin',
        createdAt: now,
        updatedAt: now
    },
    {
        id: 2,
        username: 'contributor',
        createdAt: now,
        updatedAt: now
    },
    {
        id: 3,
        username: 'manager',
        createdAt: now,
        updatedAt: now
    },
    {
        id: 4,
        username: 'user',
        createdAt: now,
        updatedAt: now
    },
];

/**
 * Apply the seed
 *
 * @param {queryInterface} context the database context to use
 */
export async function up({context: queryInterface}) {
    await queryInterface.bulkInsert('users', users);
}

/**
 * Roll back the seed
 *
 * @param {queryInterface} context the database context to use
 */
export async function down({context: queryInterface}) {
    await queryInterface.bulkDelete("users", {}, { truncate: true });
}
This seed will add 4 users to the database. Notice that we are setting both the createdAt and updatedAt fields manually - while the sequelize library will manage those for us in certain situations, we must handle them manually when doing a bulk insert directly to the database.
At this point we can insert our seeds into the database using the command line interface:
$ node seed up[dotenvx@1.34.0] injecting env (5) from .env
[2025-02-04 02:47:20.702 PM] info: { event: 'migrating', name: '00_users.js' }
[2025-02-04 02:47:20.716 PM] info: { event: 'migrated', name: '00_users.js', durationSeconds: 0.013 }
[2025-02-04 02:47:20.716 PM] info: applied 1 migrations.Now, once we’ve done that, we can go back to the SQLite Viewer extension in VS Code to confirm that our data was properly inserted into the database.
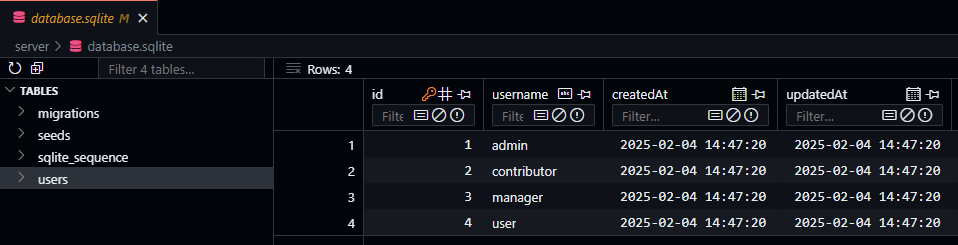
One common mistake that is very easy to do is to try and seed the database without first migrating it.
[2025-02-04 02:51:39.452 PM] info:      { event: 'migrating', name: '00_users.js' }

Error: Migration 00_users.js (up) failed: Original error: SQLITE_ERROR: no such table: users
Thankfully umzug gives a pretty helpful error in this case.
Another common error is to forget to roll back seeds before rolling back and resetting any migrations. In that case, when you try to apply your seeds again, they will not be applied since the database thinks the data is still present. So, remember to roll back your seeds before rolling back any migrations!
We’re almost ready to test our app! The last step is to create a model for our data, which we’ll cover on the next page.
Now that we have our database table structure and sample data set up, we can finally configure sequelize to query our database by defining a model representing that data. At its core, a model is simply an abstraction that represents the structure of the data in a table of our database. We can equate this to a class in object-oriented programming - each row or record in our database can be thought of as an instance of our model class. You can learn more about models in the Sequelize Documentation
To create a model, let’s first create a models folder in our app, then we can create a file user.js that contains the schema for the User model, based on the users table.
By convention, model names are usually singular like “user” while table names are typically pluralized like “users.” This is not a rule that must be followed, but many web frameworks use this convention so we’ll also follow it.
The User model schema should look very similar to the table definition used in the migration created earlier in this example:
/**
 * @file User schema
 * @author Russell Feldhausen <russfeld@ksu.edu>
 * @exports UserSchema the schema for the User model
 */

// Import libraries
import Sequelize from 'sequelize';

const UserSchema = {
    id: {
        type: Sequelize.INTEGER,
        primaryKey: true,
        autoIncrement: true,
    },
    username: {
        type: Sequelize.STRING,
        unique: true,
        allowNull: false,
    },
    createdAt: {
        type: Sequelize.DATE,
        allowNull: false,
    },
    updatedAt: {
        type: Sequelize.DATE,
        allowNull: false,
    },
}

export default UserSchema
At a minimum, a model schema defines the attributes that are stored in the database, but there are many more features that can be added over time, such as additional computed fields (for example, a fullName field that concatenates the giveName and familyName fields stored in the database). We’ll explore ways to improve our models in later examples.
Once we have the model schema created, we’ll create a second file named models.js that will pull together all of our schemas and actually build the sequelize models that can be used throughout our application.
/**
 * @file Database models
 * @author Russell Feldhausen <russfeld@ksu.edu>
 * @exports User a Sequelize User model
 */

// Import database connection
import database from "../configs/database.js";

// Import Schemas
import UserSchema from './user.js';

// Create User Model
const User = database.define(
    // Model Name
    'User',
    // Schema
    UserSchema,
    // Other options
    {
        tableName: 'users'
    }
)

export {
    User
}
It is also important to note that we can define the name of the table that stores instances of the model in the tableName option.
We will see why it is important to use this models.js file (instead of just defining the model itself and not just the schema in the users.js file) once we start adding relations between the models. For now, we’ll start with this simple scaffold that we can expand upon in the future.
One of the more interesting features of sequelize is that it can use just the models themselves to define the structure of the tables in the database. It has features such as Model Synchronization to keep the database structure updated to match the given models.
However, even in the documentation, sequelize recommends using migrations for more complex database structures. So, in our application, the migrations will represent the incremental steps required over time to construct our application’s database tables, whereas the models will represent the full structure of the database tables at this point in time. As we add new features to our application, this difference will become more apparent.
Finally, we are at the point where we can actually use our database in our application! So, let’s update the route for the users endpoint to actually return a list of the users of our application in a JSON format:
/**
 * @file Users router
 * @author Russell Feldhausen <russfeld@ksu.edu>
 * @exports router an Express router
 *
 * @swagger
 * tags:
 *   name: users
 *   description: Users Routes
 */

// Import libraries
import express from "express";

// Create Express router
const router = express.Router();

// Import models
import { User } from '../models/models.js'

/**
 * Gets the list of users
 *
 * @param {Object} req - Express request object
 * @param {Object} res - Express response object
 * @param {Function} next - Express next middleware function
 *
 * @swagger
 * /users:
 *   get:
 *     summary: users list page
 *     description: Gets the list of all users in the application
 *     tags: [users]
 *     responses:
 *       200:
 *         description: a resource
 */
router.get("/", async function (req, res, next) {
  const users = await User.findAll();
  res.json(users)
});

export default router;
The only change we need to make is to import our User model we just created in the models/models.js file, and then use the User.findAll() query method inside of our first route method. A full list of all the querying functions in sequelize can be found in the Sequelize Documentation
Now, let’s start our application and see if it works! We should make sure we have migrated and seeded the database recently before starting. If everything works correctly, we should be able to navigate to the /users path and see the following JSON output on the page:
[
  {
    "id": 1,
    "username": "admin",
    "createdAt": "2025-02-04T15:36:32.000Z",
    "updatedAt": "2025-02-04T15:36:32.000Z"
  },
  {
    "id": 2,
    "username": "contributor",
    "createdAt": "2025-02-04T15:36:32.000Z",
    "updatedAt": "2025-02-04T15:36:32.000Z"
  },
  {
    "id": 3,
    "username": "manager",
    "createdAt": "2025-02-04T15:36:32.000Z",
    "updatedAt": "2025-02-04T15:36:32.000Z"
  },
  {
    "id": 4,
    "username": "user",
    "createdAt": "2025-02-04T15:36:32.000Z",
    "updatedAt": "2025-02-04T15:36:32.000Z"
  }
]
Awesome! We have now developed a basic web application that is able to query a database and present data to the user in a JSON format. This is the first big step toward actually building a RESTful API application.
This is a good point to commit and push our work!
One thing we might notice is that our database.sqlite file is in the list of files to be committed to our GitHub repository for this project. In many cases, you may or may not want to do this, depending on what type of data you are storing in the database and how you are using it.
For this application, and the projects in this course, we’ll go ahead and commit our database to GitHub since that is the simplest way to share that information.
Before we move ahead, let’s quickly take a minute to add some documentation to our models using the Open API specification. The details can be found in the Open API Specification Document
First, let’s update our configuration in the configs/openapi.js file to include the models directory:
// -=-=- other code omitted here -=-=-

// Configure SwaggerJSDoc options
const options = {
  definition: {
    openapi: "3.1.0",
    info: {
      title: "Example Project",
      version: "0.0.1",
      description: "Example Project",
    },
    servers: [
      {
        url: url(),
      },
    ],
  },
  apis: ["./routes/*.js", "./models/*.js"],
};

// -=-=- other code omitted here -=-=-
Next, at the top of our models/user.js file, we can add information in an @swagger tag about our newly created User model, usually placed right above the model definition itself:
// -=-=- other code omitted here -=-=-

/**
 * @swagger
 * components:
 *   schemas:
 *     User:
 *       type: object
 *       required:
 *         - username
 *       properties:
 *         id:
 *           type: integer
 *           description: autogenerated id
 *         username:
 *           type: string
 *           description: username for the user
 *         createdAt:
 *           type: string
 *           format: date-time
 *           description: when the user was created
 *         updatedAt:
 *           type: string
 *           format: date-time
 *           description: when the user was last updated
 *       example:
 *           id: 1
 *           username: admin
 *           createdAt: 2025-02-04T15:36:32.000Z
 *           updatedAt: 2025-02-04T15:36:32.000Z
 */
const UserSchema = {

// -=-=- other code omitted here -=-=-
Finally, we can now update our route in the routes/users.js file to show that it is outputting an array of User objects:
// -=-=- other code omitted here -=-=-

/**
 * Gets the list of users
 *
 * @param {Object} req - Express request object
 * @param {Object} res - Express response object
 * @param {Function} next - Express next middleware function
 *
 * @swagger
 * /users:
 *   get:
 *     summary: users list page
 *     description: Gets the list of all users in the application
 *     tags: [users]
 *     responses:
 *       200:
 *         description: the list of users
 *         content:
 *           application/json:
 *             schema:
 *               type: array
 *               items:
 *                 $ref: '#/components/schemas/User'
 */
router.get("/", async function (req, res, next) {
  const users = await User.findAll();
  res.json(users)
});

// -=-=- other code omitted here -=-=-
With all of that in place, we can start our application with the Open API documentation enabled, then navigate to the /docs route to see our updated documentation. We should now see our User model listed as a schema at the bottom of the page:
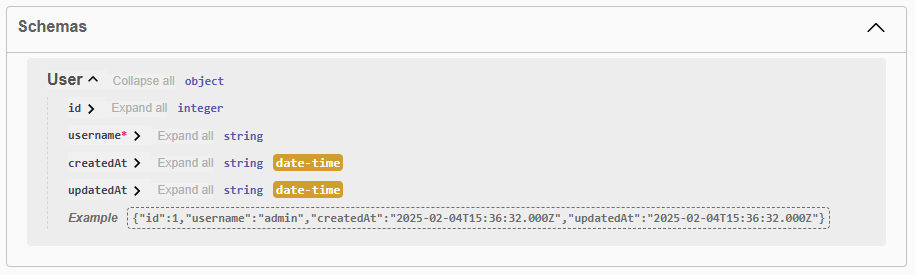
In addition, we can see that the /users route has also been updated to show that it returns an array of User objects, along with the relevant data:
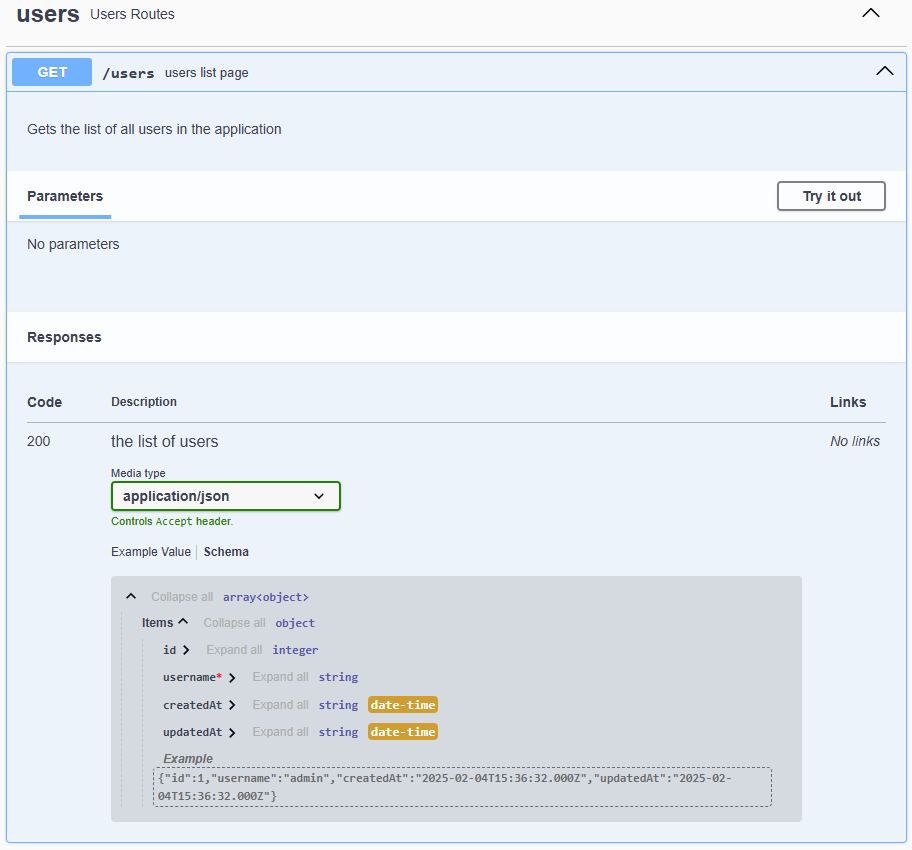
As we continue to add models and routes to our application, we should also make sure our Open API documentation is kept up to date with the latest information.
This is a good point to commit and push our work!
One very helpful feature we can add to our application is the ability to automatically migrate and seed the database when the application first starts. This can be especially helpful when deploying this application in a container.
To do this, let’s add some additional code to our bin/www file that is executed when our project starts:
/**
 * @file Executable entrypoint for the web application
 * @author Russell Feldhausen <russfeld@ksu.edu>
 */

// Import libraries
import http from 'http';

// Import Express application
import app from '../app.js';

// Import configurations
import database from '../configs/database.js';
import logger from '../configs/logger.js';
import migrations from '../configs/migrations.js';
import seeds from '../configs/seeds.js';

// Get port from environment and store in Express.
var port = normalizePort(process.env.PORT || '3000');
app.set('port', port);

// Create HTTP server.
var server = http.createServer(app);

// Attach event handlers
server.on('error', onError);
server.on('listening', onListening);

// Call startup function
startup();

/**
 * Server startup function
 */
function startup() {
  try {
    // Test database connection
    database.authenticate().then(() => {
      logger.debug("Database connection successful")
      // Run migrations
      migrations.up().then(() => {
        logger.debug("Database migrations complete")
        if (process.env.SEED_DATA === 'true') {
          logger.warn("Database data seeding is enabled!")
          seeds.up().then(() => {
            logger.debug("Database seeding complete")
            server.listen(port)
          })
        } else {
          // Listen on provided port, on all network interfaces.
          server.listen(port)
        }
      })
    })
  } catch (error){
    logger.error(error)
  }
}

// -=-=- other code omitted here -=-=-
We now have a new startup function that will first test the database connection, then run the migrations, and finally it will seed the database if the SEED_DATA environment variable is set to true. Once all that is done, it will start the application by calling server.listen using the port.
Notice that this code uses the then() function to resolve promises instead of the async and await keywords. This is because it is running at the top level, and cannot include any await keywords.
To enable this, let’s add the SEED_DATA environment variable to both .env and .env.example:
LOG_LEVEL=debug
PORT=3000
OPENAPI_HOST=https://$CODESPACE_NAME-$PORT.$GITHUB_CODESPACES_PORT_FORWARDING_DOMAIN
OPENAPI_VISIBLE=true
DATABASE_FILE=database.sqlite
SEED_DATA=trueLOG_LEVEL=debug
PORT=3000
OPENAPI_HOST=http://localhost:3000
# For GitHub Codespaces
# OPENAPI_HOST=https://$CODESPACE_NAME-$PORT.$GITHUB_CODESPACES_PORT_FORWARDING_DOMAIN
OPENAPI_VISIBLE=false
DATABASE_FILE=database.sqlite
SEED_DATA=falseTo test this, we can delete the database.sqlite file in our repository, then start our project:
$ npm run devIf it works correctly, we should see that our application is able to connect to the database, migrate the schema, and add the seed data, before fully starting:
> example-project@0.0.1 dev
> nodemon ./bin/www

[nodemon] 3.1.9
[nodemon] to restart at any time, enter `rs`
[nodemon] watching path(s): *.*
[nodemon] watching extensions: js,mjs,cjs,json
[nodemon] starting `node ./bin/www`
[dotenvx@1.34.0] injecting env (6) from .env
[2025-02-04 06:56:11.823 PM] warn:      OpenAPI documentation visible!
[2025-02-04 06:56:12.163 PM] debug:     Database connection successful
[2025-02-04 06:56:12.208 PM] info:      { event: 'migrating', name: '00_users.js' }
[2025-02-04 06:56:12.265 PM] info:      { event: 'migrated', name: '00_users.js', durationSeconds: 0.058 }
[2025-02-04 06:56:12.266 PM] debug:     Database migrations complete
[2025-02-04 06:56:12.266 PM] warn:      Database data seeding is enabled!
[2025-02-04 06:56:12.296 PM] info:      { event: 'migrating', name: '00_users.js' }
[2025-02-04 06:56:12.321 PM] info:      { event: 'migrated', name: '00_users.js', durationSeconds: 0.024 }
[2025-02-04 06:56:12.321 PM] debug:     Database seeding complete
[2025-02-04 06:56:12.323 PM] info:      Listening on port 3000
There we go! Our application will now always make sure the database is properly migrated, and optionally seeded, before it starts. Now, when another developer or user starts our application, it will be sure to have a working database.
This is a good point to commit and push our work!
Now that we have a working database, let’s explore what it takes to add a new table to our application to represent additional models and data in our database.
We’ve already created a users table, which contains information about the users of our application. Now we want to add a roles table to contain all of the possible roles that our users can hold. In addition, we need some way to associate a user with a number of roles. Each user can have multiple roles, and each role can be assigned to multiple users. This is known as a many to many database relation, and requires an additional junction table to implement it properly. The end goal is to create the database schema represented in this diagram:
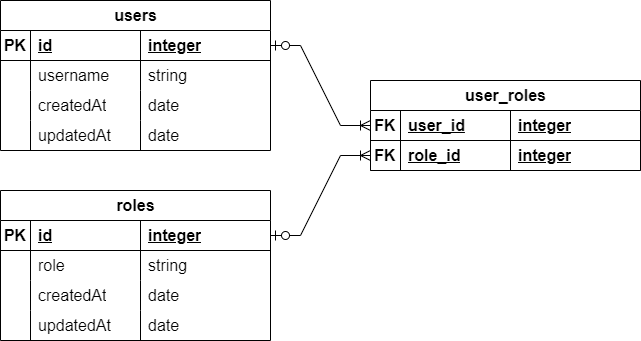
To do this, we’ll go through three steps:
First, we need to create a new migration to modify the database schema to include the two new tables. So, we’ll create a file named 01_roles.js in the migrations folder and add content to it to represent the two new tables we need to create:
/**
 * @file Roles table migration
 * @author Russell Feldhausen <russfeld@ksu.edu>
 * @exports up the Up migration
 * @exports down the Down migration
 */

// Import Libraries
import {Sequelize} from 'sequelize';

/**
 * Apply the migration
 *
 * @param {queryInterface} context the database context to use
 */
export async function up({context: queryInterface}) {
    await queryInterface.createTable('roles', {
        id: {
            type: Sequelize.INTEGER,
            primaryKey: true,
            autoIncrement: true,
        },
        role: {
            type: Sequelize.STRING,
            allowNull: false,
        },
        createdAt: {
            type: Sequelize.DATE,
            allowNull: false,
        },
        updatedAt: {
            type: Sequelize.DATE,
            allowNull: false,
        },
    })

    await queryInterface.createTable('user_roles', {
        user_id: {
            type: Sequelize.INTEGER,
            primaryKey: true,
            references: { model: 'users', key: 'id' },
            onDelete: "cascade"
        },
        role_id: {
            type: Sequelize.INTEGER,
            primaryKey: true,
            references: { model: 'roles', key: 'id' },
            onDelete: "cascade"
        }
    })
}

/**
 * Roll back the migration
 *
 * @param {queryInterface} context the database context to use
 */
export async function down({context: queryInterface}) {
    await queryInterface.dropTable('user_roles');
    await queryInterface.dropTable('roles');
}
In this migration, we are creating two tables. The first, named roles, stores the list of roles in the application. The second, named user_roles, is the junction table used for the many-to-many relationship between the users and roles table. Notice that we have to add the tables in the correct order, and also in the down method we have to remove them in reverse order. Finally, it is important to include the onDelete: "cascade" option for each of our reference fields in the user_roles table, as that will handle deleting associated entries in the junction table when a user or role is deleted.
The user_roles table also includes a great example for adding a foreign key reference between two tables. More information can be found in the Sequelize Documentation.
Next, we need to create two models to represent these tables. The first is the role model schema, stored in models/role.js with the following content:
/**
 * @file Role model
 * @author Russell Feldhausen <russfeld@ksu.edu>
 * @exports RoleSchema the schema for the Role model
 */

// Import libraries
import Sequelize from 'sequelize';

/**
 * @swagger
 * components:
 *   schemas:
 *     Role:
 *       type: object
 *       required:
 *         - role
 *       properties:
 *         id:
 *           type: integer
 *           description: autogenerated id
 *         role:
 *           type: string
 *           description: name of the role
 *         createdAt:
 *           type: string
 *           format: date-time
 *           description: when the user was created
 *         updatedAt:
 *           type: string
 *           format: date-time
 *           description: when the user was last updated
 *       example:
 *           id: 1
 *           role: manage_users
 *           createdAt: 2025-02-04T15:36:32.000Z
 *           updatedAt: 2025-02-04T15:36:32.000Z
 */
const RoleSchema = {
    id: {
        type: Sequelize.INTEGER,
        primaryKey: true,
        autoIncrement: true,
    },
    role: {
        type: Sequelize.STRING,
        allowNull: false,
    },
    createdAt: {
        type: Sequelize.DATE,
        allowNull: false,
    },
    updatedAt: {
        type: Sequelize.DATE,
        allowNull: false,
    },
}

export default RoleSchema
Notice that this file is very similar to the models/user.js file created earlier, with a few careful changes made to match the table schema.
We also need to create a model schema for the user_roles table, which we will store in the models/user_role.js file with the following content:
/**
 * @file User role junction model
 * @author Russell Feldhausen <russfeld@ksu.edu>
 * @exports RoleSchema the schema for the UserRole model
 */

// Import libraries
import Sequelize from 'sequelize';

const UserRoleSchema = {
    userId: {
        type: Sequelize.INTEGER,
        primaryKey: true,
        references: { model: 'User', key: 'id' },
        onDelete: "cascade"
    },
    roleId: {
        type: Sequelize.INTEGER,
        primaryKey: true,
        references: { model: 'Role', key: 'id' },
        onDelete: "cascade"
    }
}

export default UserRoleSchema
Finally, we can now update our models/models.js file to create the Role and UserRole models, and also to define the associations between them and the User model.
/**
 * @file Database models
 * @author Russell Feldhausen <russfeld@ksu.edu>
 * @exports User a Sequelize User model
 * @exports Role a Sequelize Role model
 * @exports UserRole a Sequelize UserRole model
 */

// Import database connection
import database from "../configs/database.js";

// Import Schemas
import UserSchema from './user.js';
import RoleSchema from "./role.js";
import UserRoleSchema from "./user_role.js";

// Create User Model
const User = database.define(
    // Model Name
    'User',
    // Schema
    UserSchema,
    // Other options
    {
        tableName: 'users'
    }
)

// Create Role Model
const Role = database.define(
    // Model Name
    'Role',
    // Schema
    RoleSchema,
    // Other options
    {
        tableName: 'roles'
    }
)

// Create UserRole Model
const UserRole = database.define(
    // Model Name
    'UserRole',
    // Schema
    UserRoleSchema,
    // Other options
    {
        tableName: 'user_roles',
        timestamps: false,
        underscored: true
    }
)

// Define Associations
Role.belongsToMany(User, { through: UserRole, unique: false, as: "users" })
User.belongsToMany(Role, { through: UserRole, unique: false, as: "roles" })

export {
    User,
    Role,
    UserRole,
}
Notice that this file contains two lines at the bottom to define the associations included as part of this table, so that sequelize will know how to handle it. This will instruct sequelize to add additional attributes and features to the User and Role models for querying the related data, as we’ll see shortly.
We also added the line timestamps: false to the other options for the User_roles table to disable the creation and management of timestamps (the createdAt and updatedAt attributes), since they may not be needed for this relation.
Finally, we added the underscored: true line to tell sequelize that it should interpret the userId and roleId attributes (written in camel case as preferred by Sequelize) as user_id and role_id, respectively (written in snake case as we did in the migration).
The choice of either CamelCase or snake_case naming for database attributes is a matter of preference. In this example, we show both methods, and it is up to each developer to select their own preferred style.
Finally, let’s create a new seed file in seeds/01_roles.js to add some default data to the roles and user_roles tables:
/**
 * @file Roles seed
 * @author Russell Feldhausen <russfeld@ksu.edu>
 * @exports up the Up migration
 * @exports down the Down migration
 */

// Timestamp in the appropriate format for the database
const now = new Date().toISOString().slice(0, 23).replace("T", " ") + " +00:00";

// Array of objects to add to the database
const roles = [
    {
        id: 1,
        role: 'manage_users',
        createdAt: now,
        updatedAt: now
    },
    {
        id: 2,
        role: 'manage_documents',
        createdAt: now,
        updatedAt: now
    },
    {
        id: 3,
        role: 'add_documents',
        createdAt: now,
        updatedAt: now
    },
    {
        id: 4,
        role: 'manage_communities',
        createdAt: now,
        updatedAt: now
    },
    {
        id: 5,
        role: 'add_communities',
        createdAt: now,
        updatedAt: now
    },
    {
        id: 6,
        role: 'view_documents',
        createdAt: now,
        updatedAt: now
    },
    {
        id: 7,
        role: 'view_communities',
        createdAt: now,
        updatedAt: now
    }
];

const user_roles = [
    {
        user_id: 1,
        role_id: 1
    },
    {
        user_id: 1,
        role_id: 2
    },
    {
        user_id: 1,
        role_id: 4
    },
    {
        user_id: 2,
        role_id: 3
    },
    {
        user_id: 2,
        role_id: 5
    },
    {
        user_id: 3,
        role_id: 2
    },
    {
        user_id: 3,
        role_id: 4
    },
    {
        user_id: 4,
        role_id: 6
    },
    {
        user_id: 4,
        role_id: 7
    }
]

/**
 * Apply the migration
 *
 * @param {queryInterface} context the database context to use
 */
export async function up({context: queryInterface}) {
    await queryInterface.bulkInsert('roles', roles);
    await queryInterface.bulkInsert('user_roles', user_roles);
}

/**
 * Roll back the migration
 *
 * @param {queryInterface} context the database context to use
 */
export async function down({context: queryInterface}) {
    await queryInterface.bulkDelete('user_roles', {} , { truncate: true });
  await queryInterface.bulkDelete("roles", {}, { truncate: true });
}
Once again, this seed is very similar to what we’ve seen before. Notice that we use the truncate option to remove all entries in the user_roles table when we undo this seed as well as the roles table.
It is also possible to seed the database from a CSV or other data file using a bit of JavaScript code. Here’s an example for seeding a table that contains all of the counties in Kansas using a CSV file with that data that is read with the convert-csv-to-json library:
// Import libraries
const csvToJson = import("convert-csv-to-json");

// Timestamp in the appropriate format for the database
const now = new Date().toISOString().slice(0, 23).replace("T", " ") + " +00:00";

export async function up({ context: queryInterface }) {
  // Read data from CSV file
  // id,name,code,seat,population,est_year
  // 1,Allen,AL,Iola,"12,464",1855
  let counties = (await csvToJson)
    .formatValueByType()
    .supportQuotedField(true)
    .fieldDelimiter(",")
    .getJsonFromCsv("./seeds/counties.csv");

  // append timestamps and parse fields
  counties.map((c) => {
    // handle parsing numbers with comma separators
    c.population = parseInt(c.population.replace(/,/g, ""));
    c.createdAt = now;
    c.updatedAt = now;
    return c;
  });

  // insert into database
  await queryInterface.bulkInsert("counties", counties);
}

export async function down({ context: queryInterface }) {
  await queryInterface.bulkDelete("counties", {}, { truncate: true });
}Finally, let’s update the User model schema to include related roles. At this point, we just have to update the Open API documentation to match:
// -=-=- other code omitted here -=-=-
/**
 * @swagger
 * components:
 *   schemas:
 *     User:
 *       type: object
 *       required:
 *         - username
 *       properties:
 *         id:
 *           type: integer
 *           description: autogenerated id
 *         username:
 *           type: string
 *           description: username for the user
 *         createdAt:
 *           type: string
 *           format: date-time
 *           description: when the user was created
 *         updatedAt:
 *           type: string
 *           format: date-time
 *           description: when the user was last updated
 *         roles:
 *           type: array
 *           items:
 *             $ref: '#/components/schemas/Role'
 *       example:
 *           id: 1
 *           username: admin
 *           createdAt: 2025-02-04T15:36:32.000Z
 *           updatedAt: 2025-02-04T15:36:32.000Z
 *           roles:
 *             - id: 1
 *               role: manage_users
 *             - id: 2
 *               role: manage_documents
 *             - id: 4
 *               role: manage_communities
 */
// -=-=- other code omitted here -=-=-
Now we can modify our route in routes/users.js to include the data from the related Role model in our query:
/**
 * @file Users router
 * @author Russell Feldhausen <russfeld@ksu.edu>
 * @exports router an Express router
 *
 * @swagger
 * tags:
 *   name: users
 *   description: Users Routes
 */

// Import libraries
import express from "express";

// Create Express router
const router = express.Router();

// Import models
import { User, Role } from '../models/models.js'

/**
 * Gets the list of users
 *
 * @param {Object} req - Express request object
 * @param {Object} res - Express response object
 * @param {Function} next - Express next middleware function
 *
 * @swagger
 * /users:
 *   get:
 *     summary: users list page
 *     description: Gets the list of all users in the application
 *     tags: [users]
 *     responses:
 *       200:
 *         description: the list of users
 *         content:
 *           application/json:
 *             schema:
 *               type: array
 *               items:
 *                 $ref: '#/components/schemas/User'
 */
router.get("/", async function (req, res, next) {
  const users = await User.findAll({
    include: {
      model: Role,
      as: "roles",
      attributes: ['id', 'role'],
      through: {
        attributes: [],
      },
    },
  });
  res.json(users)
});

export default router;
You can learn more about querying associations in the Sequelize Documentation.
If everything works, we should see our roles now included in our JSON output when we navigate to the /users route:
[
  {
    "id": 1,
    "username": "admin",
    "createdAt": "2025-01-28T23:06:01.000Z",
    "updatedAt": "2025-01-28T23:06:01.000Z",
    "roles": [
      {
        "id": 1,
        "role": "manage_users"
      },
      {
        "id": 2,
        "role": "manage_documents"
      },
      {
        "id": 4,
        "role": "manage_communities"
      }
    ]
  },
  {
    "id": 2,
    "username": "contributor",
    "createdAt": "2025-01-28T23:06:01.000Z",
    "updatedAt": "2025-01-28T23:06:01.000Z",
    "roles": [
      {
        "id": 3,
        "role": "add_documents"
      },
      {
        "id": 5,
        "role": "add_communities"
      }
    ]
  },
  {
    "id": 3,
    "username": "manager",
    "createdAt": "2025-01-28T23:06:01.000Z",
    "updatedAt": "2025-01-28T23:06:01.000Z",
    "roles": [
      {
        "id": 2,
        "role": "manage_documents"
      },
      {
        "id": 4,
        "role": "manage_communities"
      }
    ]
  },
  {
    "id": 4,
    "username": "user",
    "createdAt": "2025-01-28T23:06:01.000Z",
    "updatedAt": "2025-01-28T23:06:01.000Z",
    "roles": [
      {
        "id": 6,
        "role": "view_documents"
      },
      {
        "id": 7,
        "role": "view_communities"
      }
    ]
  }
]
That should also exactly match the schema and route information in our Open API documentation provided at the /docs route.
There we go! That’s a quick example of adding an additional table to our application, including a relationship and more.
As a last step before finalizing our code, we should run the lint and format commands and deal with any errors they find. Finally, we can commit and push our work.
This example project builds on the previous Adding a Database project by using that project to create a RESTful API. That API can be used to access and modify the data in the database. We’ll also add a suite of unit tests to explore our API and ensure that it is working correctly.
At the end of this example, we will have a project with the following features:
This project picks up right where the last one left off, so if you haven’t completed that one yet, go back and do that before starting this one.
Let’s get started!
There are many articles online that discuss best practices in API design. For this project, we’re going to follow a few of the most common recommendations:
Let’s start with the first one - we can easily add a version number to our API’s URL paths. This allows us to make breaking changes to the API in the future without breaking any of the current functionality.
Our current application contains data for both a User and a Role model. For this example, we’ll begin by adding a set of RESTful API routes to work with the Role model. In order to add proper versioning to our API, we will want these routes visible at the /api/v1/roles path.
First, we should create the folder structure inside of our routes folder to match the routes used in our API. This means we’ll create an api folder, then a v1 folder, and finally a roles.js file inside of that folder:
Before we create the content in that file, let’s also create a new file in the base routes folder named api.js that will become the base file for all of our API routes:
/**
 * @file API main router
 * @author Russell Feldhausen <russfeld@ksu.edu>
 * @exports router an Express router
 *
 * @swagger
 * tags:
 *   name: api
 *   description: API routes
 */

// Import libraries
import express from "express";

// Import v1 routers
import rolesRouter from "./api/v1/roles.js"

// Create Express router
const router = express.Router();

// Use v1 routers
router.use("/v1/roles", rolesRouter);

/**
 * Gets the list of API versions
 *
 * @param {Object} req - Express request object
 * @param {Object} res - Express response object
 * @param {Function} next - Express next middleware function
 *
 * @swagger
 * /api/:
 *   get:
 *     summary: list API versions
 *     tags: [api]
 *     responses:
 *       200:
 *         description: the list of API versions
 *         content:
 *           application/json:
 *             schema:
 *               type: array
 *               items:
 *                 type: object
 *                 properties:
 *                   version:
 *                     type: string
 *                   url:
 *                     type: string
 *             example:
 *               - version: "1.0"
 *                 url: /api/v1/
 */
router.get('/', function (req, res, next) {
  res.json([
    {
      version: "1.0",
      url: "/api/v1/"
    }
  ])
})

export default router
This file is very simple - it just outputs all possible API versions (in this case, we just have a single API version). It also imports and uses our new roles router. Finally, it includes some basic Open API documentation for the route it contains. Let’s quickly add some basic content to our roles router, based on the existing content in our users router from before:
/**
 * @file Roles router
 * @author Russell Feldhausen <russfeld@ksu.edu>
 * @exports router an Express router
 *
 * @swagger
 * tags:
 *   name: roles
 *   description: Roles Routes
 */

// Import libraries
import express from "express";

// Create Express router
const router = express.Router();

// Import models
import { Role } from "../../../models/models.js";

// Import logger
import logger from "../../../configs/logger.js"

/**
 * Gets the list of roles
 *
 * @param {Object} req - Express request object
 * @param {Object} res - Express response object
 * @param {Function} next - Express next middleware function
 *
 * @swagger
 * /api/v1/roles:
 *   get:
 *     summary: roles list page
 *     description: Gets the list of all roles in the application
 *     tags: [roles]
 *     responses:
 *       200:
 *         description: the list of roles
 *         content:
 *           application/json:
 *             schema:
 *               type: array
 *               items:
 *                 $ref: '#/components/schemas/Role'
 */
router.get("/", async function (req, res, next) {
  try {
    const roles = await Role.findAll();
    res.json(roles);
  } catch (error) {
    logger.error(error)
    res.status(500).end()
  }
});

export default router;
Notice that we have added an additional try and catch block to the route function. This will ensure any errors that are thrown by the database get caught and logged without leaking any sensitive data from our API. It is always a good practice to wrap each API method in a try and catch block.
For this particular application’s API design, we will only be creating the get all RESTful method for the Role model. This is because we don’t actually want any users of the application modifying the roles themselves, since those roles will eventually be used in the overall authorization structure of the application (to be added in a later example). However, when creating or updating users, we need to be able to access a full list of all available roles, which can be found using this particular API endpoint.
We’ll explore the rest of the RESTful API methods in the User model later in this example.
More complex RESTful API designs may include additional files such as controllers and services to add additional structure to the application. For example, there might be multiple API routes that access the same method in a controller, which then uses a service to perform business logic on the data before storing it in the database.
For this example project, we will place most of the functionality directly in our routes to simplify our structure.
You can read more about how to use controllers and services in the MDN Express Tutorial.
Since we are creating routes in a new subfolder, we also need to update our Open API configuration in configs/openapi.js so that we can see the documentation contained in those routes:
// -=-=- other code omitted here -=-=-

// Configure SwaggerJSDoc options
const options = {
  definition: {
    openapi: "3.1.0",
    info: {
      title: "Lost Communities",
      version: "0.0.1",
      description: "Kansas Lost Communities Project",
    },
    servers: [
      {
        url: url(),
      },
    ],
  },
  apis: ["./routes/*.js", "./models/*.js", "./routes/api/v1/*.js"],
};

export default swaggerJSDoc(options);
Now that we’ve created these two basic routers, let’s get them added to our app.js file so they are accessible to the application:
// -=-=- other code omitted here -=-=-

// Import routers
import indexRouter from "./routes/index.js";
import usersRouter from "./routes/users.js";
import apiRouter from "./routes/api.js";

// Create Express application
var app = express();

// Use libraries
app.use(express.json());
app.use(express.urlencoded({ extended: false }));
app.use(helmet());
app.use(compression());
app.use(cookieParser());

// Use middlewares
app.use(requestLogger);

// Use static files
app.use(express.static(path.join(import.meta.dirname, "public")));

// Use routers
app.use("/", indexRouter);
app.use("/users", usersRouter);
app.use("/api", apiRouter);

// -=-=- other code omitted here -=-=-
Now, with everything in place, let’s run our application and see if we can access that new route at /api/v1/roles:
$ npm run devIf everything is working correctly, we should see our roles listed in the output on that page:
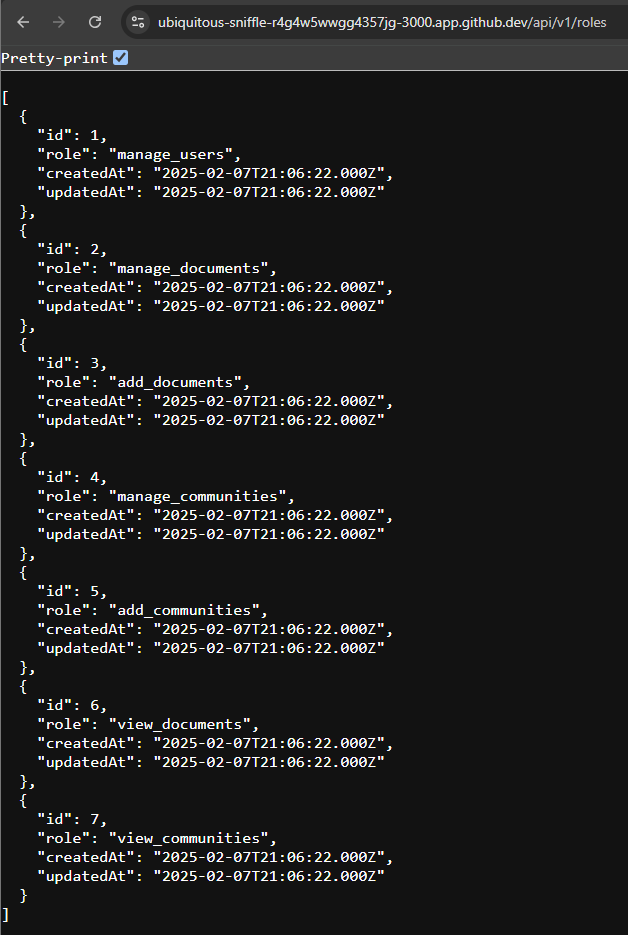
We should also be able to query the list of API versions at the path /api:
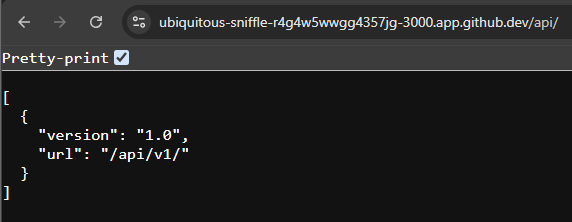
Finally, we should also check and make sure our Open API documentation at the /docs path is up to date and includes the new routes:
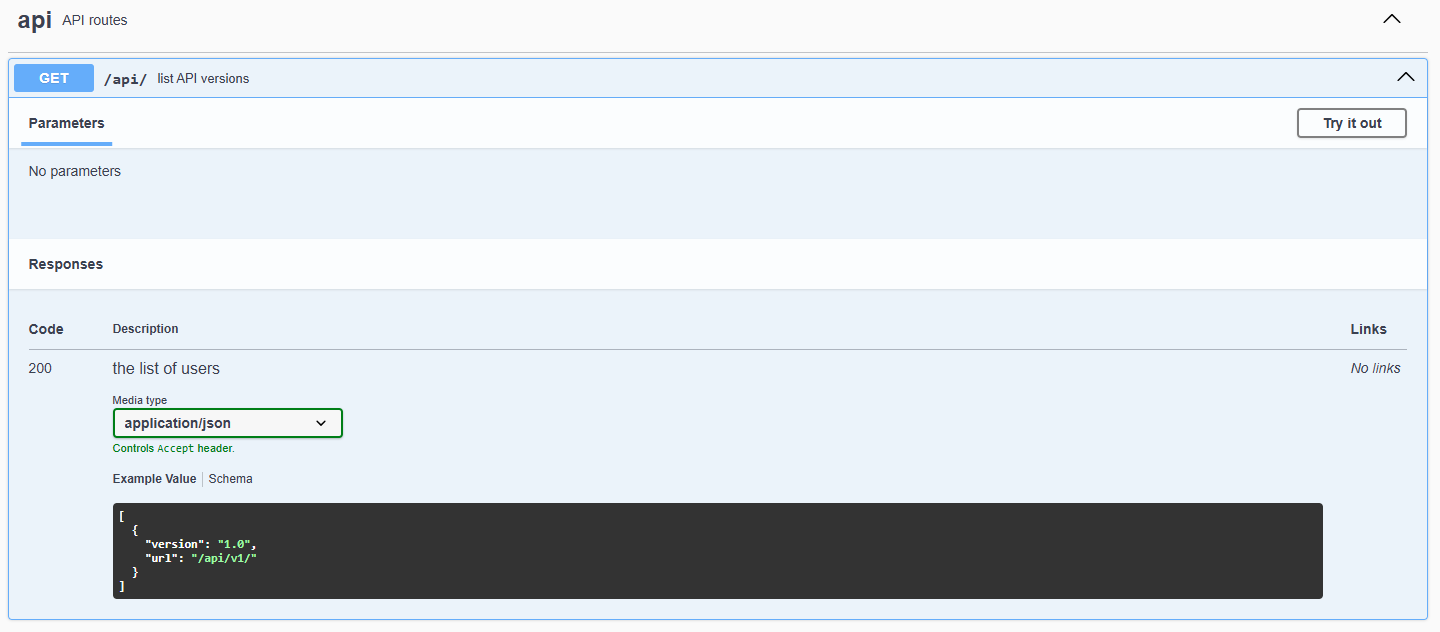
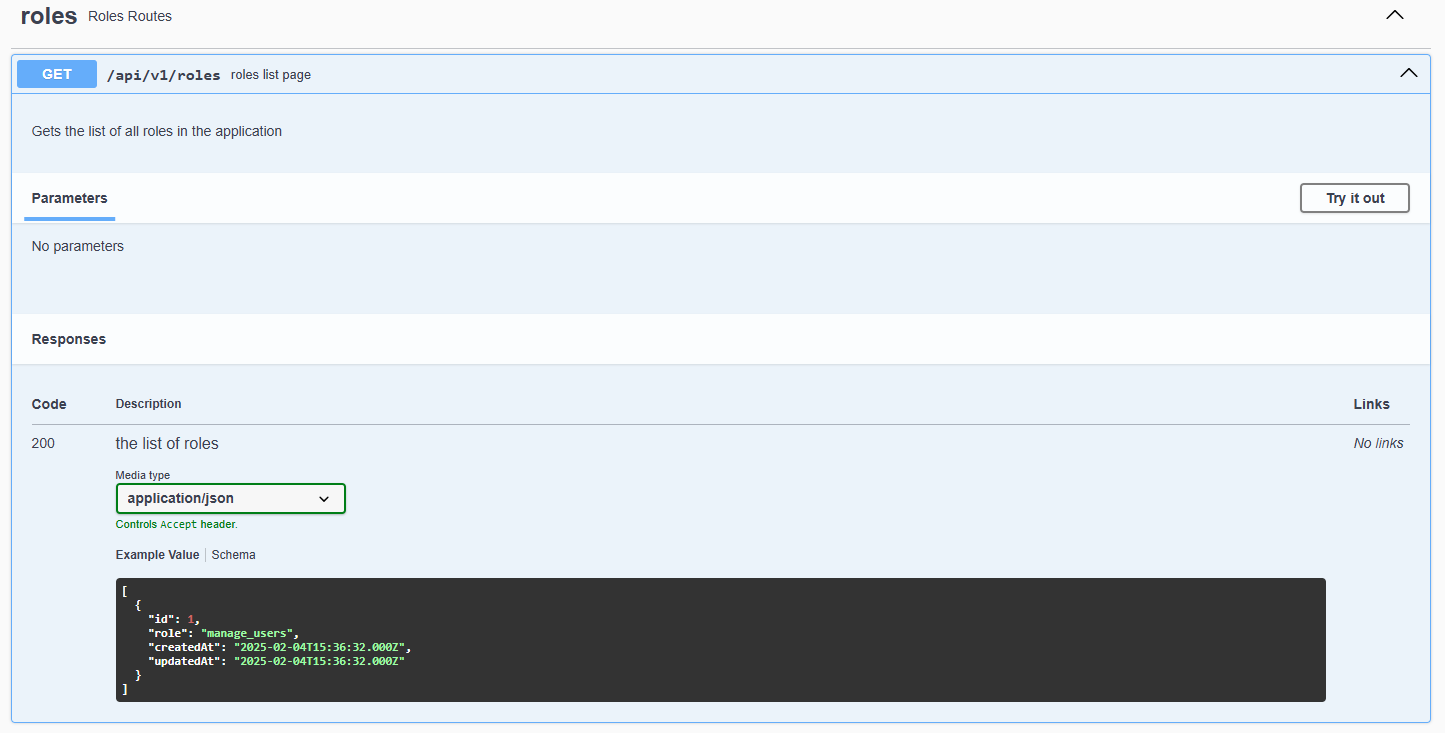
There! This gives us a platform to build our new API upon. We’ll continue throughout this example project to add additional routes to the API as well as related unit tests.
Now that we have created our first route in our RESTful API, we can start to write unit tests that will confirm our API works as intended. Adding unit testing early in the development process makes it much easier to keep up with unit tests as new features are added or even explore test-driven development!
There are many libraries that can be used to unit test a RESTful API using Node.js and Express. For this project, we’re going to use a number of testing libraries:
To begin, let’s install these libraries as development dependencies in our project using npm:
$ npm install --save-dev mocha chai supertest ajv chai-json-schema-ajv chai-shallow-deep-equalNow that we have those libraries in place, let’s make a few modifications to our project configuration to make testing more convenient.
To help with formatting and highlighting of our unit tests, we should update the content of our eslint.config.js to recognize items from mocha as follows:
import globals from "globals";
import pluginJs from "@eslint/js";

/** @type {import('eslint').Linter.Config[]} */
export default [
  {
    languageOptions: {
      globals: {
        ...globals.node,
        ...globals.mocha,
      },
    },
    rules: { "no-unused-vars": ["error", { argsIgnorePattern: "next" }] },
  },
  pluginJs.configs.recommended,
];
If working properly, this should also fix any errors visible in VS Code using the ESLint plugin!
In testing frameworks such as mocha, we can create hooks that contain actions that should be taken before each test is executed in a file. The mocha framework also has root-level hooks that are actions to be taken before each and every test in every file. We can use a root-level hook to manage setting up a simple database for unit testing, as well as configuring other aspects of our application for testing.
First, let’s create a new test directory in our server folder, and inside of that we’ll create a file hooks.js to contain the testing hooks for our application.
/**
 * @file Root Mocha Hooks
 * @author Russell Feldhausen <russfeld@ksu.edu>
 * @exports mochaHooks A Mocha Root Hooks Object
 */

// Load environment (must be first)
import dotenvx from "@dotenvx/dotenvx";
dotenvx.config({path: ".env.test"})

// Import configuration
import database from "../configs/database.js";
import migrations from '../configs/migrations.js';
import seeds from '../configs/seeds.js';

// Root Hook Runs Before Each Test
export const mochaHooks = {

  // Hook runs once before any tests are executed
  beforeAll(done) {
    // Test database connection
    database.authenticate().then(() => {
      // Run migrations
      migrations.up().then(() => {
        done()
      });
    });
  },

  // Hook runs before each individual test
  beforeEach(done) {
    // Seed the database
    seeds.up().then(() => {
      done();
    })
  },

  // Hook runs after each individual test
  afterEach(done) {
    // Remove all data from the database
    seeds.down({to: 0}).then(() => {
      done();
    });
  }
}
This file contains three hooks. First, the beforeAll hook, which is executed once before any tests are executed, is used to migrate the database. Then, we have the beforeEach() hook, which is executed before each individual test, which will seed the database with some sample data for us to use in our unit tests. Finally, we have an afterEach() hook that will remove any data from the database by undoing all of the seeds, which will truncate each table in the database.
Notice at the top that we are also loading our environment from a new environment file, .env.test. This allows us to use a different environment configuration when we perform testing. So, let’s create that file and populate it with the following content:
LOG_LEVEL=error
PORT=3000
OPENAPI_HOST=http://localhost:3000
OPENAPI_VISIBLE=false
DATABASE_FILE=:memory:
SEED_DATA=false
Here, the two major changes are to switch the log level to error so that we only see errors in the log output, and also to switch the database file to :memory: - a special filename that tells SQLite to create an in-memory database that is excellent for testing.
At this point, we can start writing our unit tests.
Let’s start with a very simple case - the /api route we created earlier. This is a simple route that only has a single method and outputs a single item, but it already clearly demonstrates how complex unit testing can become.
For these unit tests, we can create a file api.js in the test folder with the following content:
/**
 * @file /api Route Tests
 * @author Russell Feldhausen <russfeld@ksu.edu>
 */

// Load Libraries
import request from 'supertest'
import { use, should } from 'chai'
import chaiJsonSchemaAjv from 'chai-json-schema-ajv'
import chaiShallowDeepEqual from 'chai-shallow-deep-equal'
use(chaiJsonSchemaAjv.create({ verbose: true }))
use(chaiShallowDeepEqual)

// Import Express application
import app from '../app.js';

// Modify Object.prototype for BDD style assertions
should()
These lines will import the various libraries required for these unit tests. We’ll explore how they work as we build the unit tests, but it is also recommended to read the documentation for each library (linked above) to better understand how each one works together in the various unit tests.
Now, let’s write our first unit test, which can be placed right below those lines in the same file:
// -=-=- other code omitted here -=-=-

/**
 * Get all API versions
 */
const getAllVersions = () => {
  it('should list all API versions', (done) => {
    request(app)
      .get('/api/')
      .expect(200)
      .end((err, res) => {
        if (err) return done(err)
        res.body.should.be.an('array')
        res.body.should.have.lengthOf(1)
        done()
      })
  })
}

/**
 * Test /api route
 */
describe('/api', () => {
  describe('GET /', () => {
    getAllVersions()
  })
})
This code looks quite a bit different than the code we’ve been writing so far. This is because the mocha and chai libraries use the Behavior-Driven Development, or BDD, style for writing unit tests. The core idea is that the unit tests should be somewhat “readable” by anyone looking at the code. So, it defines functions such as it and describe that are used to structure the unit tests.
In this example, the getAllVersions function is a unit test function that uses the request library to send a request to our Express app at the /api/ path. When the response is received from that request, we expect the HTTP status code to be 200, and the body of that request should be an array with a length of 1. Hopefully it is clear to see all of that just by reading the code in that function.
The other important concept is the special done function, which is provided as an argument to any unit test function that is testing asynchronous code. Because of the way asynchronous code is handled, the system cannot automatically determine when all promises have been returned. So, once we are done with the unit test and are not waiting for any further async responses, we need to call the done() method. Notice that we call that both at the end of the function, but also in the if statement that checks for any errors returned from the HTTP request.
Finally, at the bottom of the file, we have a few describe statements that actually build the structure that runs each unit test. When the tests are executed, only functions called inside of the describe statements will be executed.
Now that we have created a simple unit test, let’s run it using the mocha test framework. To do this, we’ll add a new script to the package.json file with all of the appropriate options:
{
  ...
  "scripts": {
    "start": "LOG_LEVEL=http node ./bin/www",
    "dev": "nodemon ./bin/www",
    "lint": "npx eslint --fix .",
    "format": "npx prettier . --write",
    "test": "mocha --require test/hooks.js --recursive --parallel --timeout 2000 --exit"
  },
  ...
}
Here, we are using the mocha command with many options:
--require test/hooks.js - this requires the global hooks file to be used before each test--recursive - this will recursively look for any tests in subdirectories--parallel - this allows tests to run in parallel (this requires the SQLite in-memory database)--timeout 2000 - this will stop any test if it runs for more than 2 seconds--exit - this forces Mocha to stop after all tests have finishedSo, now let’s run our tests using that script:
$ npm run testIf everything is working correctly, we should get the following output:
> lost-communities-solution@0.0.1 test
> mocha --require test/hooks.js --recursive --parallel --timeout 2000 --exit

[dotenvx@1.34.0] injecting env (6) from .env.test

[dotenvx@1.34.0] injecting env (0) from .env.test
[dotenvx@1.34.0] injecting env (0) from .env

  /api
    GET /
      ✔ should list all API versions


  1 passing (880ms)
Great! It looks like our test already passed!
Just to be sure, let’s quickly modify our test to look for an array of size 2 so that it should fail:
// -=-=- other code omitted here -=-=-

/**
 * Get all API versions
 */
const getAllVersions = () => {
  it('should list all API versions', (done) => {
    request(app)
      .get('/api/')
      .expect(200)
      .end((err, res) => {
        if (err) return done(err)
        res.body.should.be.an('array')
        res.body.should.have.lengthOf(2)
        done()
      })
  })
}

// -=-=- other code omitted here -=-=-
Now, when we run the tests, we should clearly see a failure report instead:
> lost-communities-solution@0.0.1 test
> mocha --require test/hooks.js --recursive --parallel --timeout 2000 --exit

[dotenvx@1.34.0] injecting env (6) from .env.test

[dotenvx@1.34.0] injecting env (0) from .env.test
[dotenvx@1.34.0] injecting env (0) from .env

  /api
    GET /
      1) should list all API versions


  0 passing (910ms)
  1 failing

  1) /api
       GET /
         should list all API versions:

      Uncaught AssertionError: expected [ { version: '1.0', url: '/api/v1/' } ] to have a length of 2 but got 1
      + expected - actual

      -1
      +2

      at Test.<anonymous> (file:///workspaces/lost-communities-solution/server/test/api.js:31:30)
      at Test.assert (node_modules/supertest/lib/test.js:172:8)
      at Server.localAssert (node_modules/supertest/lib/test.js:120:14)
      at Object.onceWrapper (node:events:638:28)
      at Server.emit (node:events:524:28)
      at emitCloseNT (node:net:2383:8)
      at process.processTicksAndRejections (node:internal/process/task_queues:89:21)
Thankfully, anytime a test fails, we get a very clear and easy to follow error report that pinpoints exactly which line in the test failed, and how the assertion was not met.
Before moving on, let’s update our test so that it should pass again.
It is often helpful to examine the code coverage of our unit tests. Thankfully, there is an easy way to enable that in our project using the c8 library. So, we can start by installing it:
$ npm install --save-dev c8Once it is installed, we can simply add it to a new script in the package.json file that will run our tests with code coverage:
{
  ...
  "scripts": {
    "start": "LOG_LEVEL=http node ./bin/www",
    "dev": "nodemon ./bin/www",
    "lint": "npx eslint --fix .",
    "format": "npx prettier . --write",
    "test": "mocha --require test/hooks.js --recursive --parallel --timeout 2000 --exit",
    "cov": "c8 --reporter=html --reporter=text mocha --require test/hooks.js --recursive --parallel --timeout 2000 --exit"
  },
  ...
}
All we have to do is add the c8 command with a few options in front of our existing mocha command.
Now, we can run our tests with code coverage using this script:
$ npm run covThis time, we’ll see a bunch of additional output on the terminal
> lost-communities-solution@0.0.1 cov
> c8 --reporter=html --reporter=text mocha --require test/hooks.js --recursive --parallel --timeout 2000 --exit

[dotenvx@1.34.0] injecting env (6) from .env.test

[dotenvx@1.34.0] injecting env (0) from .env.test
[dotenvx@1.34.0] injecting env (0) from .env

  /api
    GET /
      ✔ should list all API versions


  1 passing (1s)

------------------------|---------|----------|---------|---------|-------------------------------------------
File                    | % Stmts | % Branch | % Funcs | % Lines | Uncovered Line #s
------------------------|---------|----------|---------|---------|-------------------------------------------
All files               |   93.53 |    83.33 |   55.55 |   93.53 |
 server                 |   88.52 |       50 |     100 |   88.52 |
  app.js                |   88.52 |       50 |     100 |   88.52 | 53-59
 server/configs         |   91.86 |    47.36 |     100 |   91.86 |
  database.js           |     100 |      100 |     100 |     100 |
  logger.js             |   85.56 |    30.76 |     100 |   85.56 | 24-25,27-28,30-31,33-34,36-37,39-40,42-43
  migrations.js         |     100 |      100 |     100 |     100 |
  openapi.js            |   92.85 |    66.66 |     100 |   92.85 | 19-21
  seeds.js              |     100 |      100 |     100 |     100 |
 server/middlewares     |     100 |      100 |     100 |     100 |
  request-logger.js     |     100 |      100 |     100 |     100 |
 server/migrations      |   96.07 |      100 |      50 |   96.07 |
  00_users.js           |   95.55 |      100 |      50 |   95.55 | 44-45
  01_roles.js           |   94.91 |      100 |      50 |   94.91 | 57-59
  02_counties.js        |   96.61 |      100 |      50 |   96.61 | 58-59
  03_communities.js     |   96.61 |      100 |      50 |   96.61 | 58-59
  04_metadata.js        |   96.66 |      100 |      50 |   96.66 | 88-90
  05_documents.js       |   95.71 |      100 |      50 |   95.71 | 68-70
 server/models          |     100 |      100 |     100 |     100 |
  community.js          |     100 |      100 |     100 |     100 |
  county.js             |     100 |      100 |     100 |     100 |
  document.js           |     100 |      100 |     100 |     100 |
  metadata.js           |     100 |      100 |     100 |     100 |
  metadata_community.js |     100 |      100 |     100 |     100 |
  metadata_document.js  |     100 |      100 |     100 |     100 |
  models.js             |     100 |      100 |     100 |     100 |
  role.js               |     100 |      100 |     100 |     100 |
  user.js               |     100 |      100 |     100 |     100 |
  user_role.js          |     100 |      100 |     100 |     100 |
 server/routes          |   68.72 |      100 |     100 |   68.72 |
  api.js                |     100 |      100 |     100 |     100 |
  index.js              |   97.43 |      100 |     100 |   97.43 | 36
  users.js              |    46.8 |      100 |     100 |    46.8 | 52-62,66-73,77-91,95-105,109-138
 server/routes/api/v1   |   87.71 |      100 |     100 |   87.71 |
  roles.js              |   87.71 |      100 |     100 |   87.71 | 48-54
 server/seeds           |   95.09 |      100 |      50 |   95.09 |
  00_users.js           |   96.36 |      100 |      50 |   96.36 | 54-55
  01_roles.js           |   97.36 |      100 |      50 |   97.36 | 112-114
  02_counties.js        |   95.83 |      100 |      50 |   95.83 | 47-48
  03_communities.js     |   95.65 |      100 |      50 |   95.65 | 45-46
  04_metadata.js        |   89.39 |      100 |      50 |   89.39 | 60-66
  05_documents.js       |   94.82 |      100 |      50 |   94.82 | 56-58
Right away we see that a large part of our application achieves 100% code coverage with a single unit test! This highlights both how tightly interconnected all parts of our application are (such that a single unit test exercises much of the code) but also that code coverage can be a very poor metric for unit test quality (seeing this result we might suspect our application is already well tested with just a single unit test).
We have also enabled the html reporter, so we can see similar results in a coverage folder that appears inside of our server folder. We can use various VS Code Extensions such as Live Preview to view that file in our web browser.
The Live Preview extension defaults to port 3000, so we recommend digging into the settings and changing the default port to something else before using it.
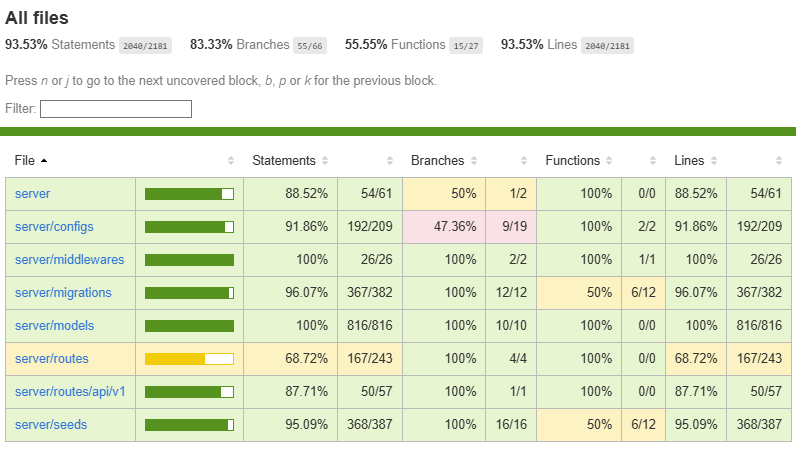
In either case, we can see that we’ve already reached 100% coverage on our routes/api.js file. However, as we’ll see in the next section, that doesn’t always mean that we are done writing our unit tests.
Let’s consider the scenario where our routes/api.js file was modified slightly to have some incorrect code in it:
// -=-=- other code omitted here -=-=-
router.get('/', function (req, res, next) {
  res.json([
    {
      versoin: "1.0",
      url: "/api/ver1/"
    }
  ])
})
In this example, we have misspelled the version attribute, and also used an incorrect URL for that version of the API. Unfortunately, if we actually make that change to our code, our existing unit test will not catch either error!
So, let’s look at how we can go about catching these errors and ensuring our unit tests are actually valuable.
First, it is often helpful to validate the schema of the JSON output by our API. To do that, we’ve installed the ajv JSON schema validator and a chai plugin for using it in a unit test. So, in our test/api.js file, we can add a new test:
// -=-=- other code omitted here -=-=-

/**
 * Check JSON Schema of API Versions
 */
const getAllVersionsSchemaMatch = () => {
  it('all API versions should match schema', (done) => {
    const schema = {
      type: 'array',
      items: {
        type: 'object',
        required: ['version', 'url'],
        properties: {
          version: { type: 'string' },
          url: { type: 'string' },
        },
        additionalProperties: false,
      },
    }
    request(app)
      .get('/api/')
      .expect(200)
      .end((err, res) => {
        if (err) return done(err)
        res.body.should.be.jsonSchema(schema)
        done()
      })
  })
}

/**
 * Test /api route
 */
describe('/api', () => {
  describe('GET /', () => {
    getAllVersions()
    getAllVersionsSchemaMatch()
  })
})
In this test, we create a JSON schema following the AJV Instructions that defines the various attributes that should be present in the output. It is especially important to include the additionalProperties: false line, which helps prevent leaking any unintended attributes.
Now, when we run our tests, we should see that this test fails:
  /api
    GET /
      ✔ should list all API versions
      1) all API versions should match schema


  1 passing (1s)
  1 failing

  1) /api
       GET /
         all API versions should match schema:
     Uncaught AssertionError: expected [ { versoin: '1.0', …(1) } ] to match json-schema
[ { instancePath: '/0', …(7) } ]
      at Test.<anonymous> (file:///workspaces/lost-communities-solution/server/test/api.js:59:28)
...
As we can see, the misspelled version attribute will not match the given schema, causing the test to fail! That shows the value of such a unit test in our code.
Let’s update our route to include the correct attributes, but also add an additional item that shouldn’t be present in the output:
// -=-=- other code omitted here -=-=-
router.get('/', function (req, res, next) {
  res.json([
    {
      version: "1.0",
      url: "/api/ver1/",
      secure_data: "This should not be shared!"
    }
  ])
})
This is an example of Broken Object Property Level Authorization, one of the top 10 most common API security risks according to OWASP. Often our database models will include attributes that we don’t want to expose to our users, so we want to make sure they aren’t included in the output by accident.
If we run our test again, it should also fail:
  /api
    GET /
      ✔ should list all API versions
      1) all API versions should match schema


  1 passing (1s)
  1 failing

  1) /api
       GET /
         all API versions should match schema:
     Uncaught AssertionError: expected [ { version: '1.0', …(2) } ] to match json-schema
[ { instancePath: '/0', …(7) } ]
      at Test.<anonymous> (file:///workspaces/lost-communities-solution/server/test/api.js:59:28)
...
However, if we remove the line additionalProperties: false from our JSON schema unit test, it will now succeed. So, it is always important for us to remember to include that line in all of our JSON schemas if we want to avoid this particular security flaw.
However, we still have not caught our incorrect value in our API output:
// -=-=- other code omitted here -=-=-
router.get('/', function (req, res, next) {
  res.json([
    {
      version: "1.0",
      url: "/api/ver1/",
      secure_data: "This should not be shared!"
    }
  ])
})
For this, we need to write one additional unit test to check the actual content of the output. For this, we’ll use a deep equality plugin for chai:
// -=-=- other code omitted here -=-=-

/**
 * Check API version exists in list
 */
const findVersion = (version) => {
  it('should contain specific version', (done) => {
    request(app)
      .get('/api/')
      .expect(200)
      .end((err, res) => {
        if (err) return done(err)
        const foundVersion = res.body.find((v) => v.version === version.version)
        foundVersion.should.shallowDeepEqual(version)
        done()
      })
  })
}

/**
 * Test /api route
 */
describe('/api', () => {
  describe('GET /', () => {
    getAllVersions()
    getAllVersionsSchemaMatch()
  })

  describe('version: 1.0', () => {
    const version = {
      version: "1.0",
      url: "/api/v1/"
    }

    describe('GET /', () => {
      findVersion(version)
    })
  })
})
The findVersion unit test will check the actual contents of the output received from the API and compare it to the version object that is provided as input. In our describe statements below, we can see how easy it is to define a simple version object that we can use to compare to the output.
One common mistake when writing these unit tests is to simply copy the object structure from the code that is being tested. This is considered bad practice since it virtually guarantee that any typos or mistakes are not caught. Instead, when constructing these unit tests, we should always go back to the original source document, typically a design document or API specification, and build our unit tests using that as a guide. This will ensure that our tests will actually catch things such as typos or missing data.
With that test in place, we should once again have a unit test that fails:
  /api
    GET /
      ✔ should list all API versions
      ✔ all API versions should match schema
    version: 1.0
      GET /
        1) should contain specific version


  2 passing (987ms)
  1 failing

  1) /api
       version: 1.0
         GET /
           should contain specific version:

      Uncaught AssertionError: Expected to have "/api/v1/" but got "/api/ver1/" at path "/url".
      + expected - actual

       {
      -  "url": "/api/ver1/"
      +  "url": "/api/v1/"
         "version": "1.0"
       }

      at Test.<anonymous> (file:///workspaces/lost-communities-solution/server/test/api.js:76:29)
Thankfully, in the output we clearly see the error, and it is easy to go back to our original design document to correct the error in our code.
While it may seem like we are using a very complex structure for these tests, there is actually a very important reason behind it. If done correctly, we can easily reuse most of our tests as we add additional data to the application.
Let’s consider the scenario where we add a second API version to our output:
// -=-=- other code omitted here -=-=-
router.get('/', function (req, res, next) {
  res.json([
    {
      version: "1.0",
      url: "/api/v1/"
    },
    {
      version: "2.0",
      url: "/api/v2/"
    }
  ])
})
To fully test this, all we need to do is update the array size in the getAllVersions and add an additional describe statement for the new version:
// -=-=- other code omitted here -=-=-

/**
 * Get all API versions
 */
const getAllVersions = () => {
  it('should list all API versions', (done) => {
    request(app)
      .get('/api/')
      .expect(200)
      .end((err, res) => {
        if (err) return done(err)
        res.body.should.be.an('array')
        res.body.should.have.lengthOf(2)
        done()
      })
  })
}

// -=-=- other code omitted here -=-=-

/**
 * Test /api route
 */
describe('/api', () => {
  describe('GET /', () => {
    getAllVersions()
    getAllVersionsSchemaMatch()
  })

  describe('version: 1.0', () => {
    const version = {
      version: "1.0",
      url: "/api/v1/"
    }

    describe('GET /', () => {
      findVersion(version)
    })
  })

  describe('version: 2.0', () => {
    const version = {
      version: "2.0",
      url: "/api/v2/"
    }

    describe('GET /', () => {
      findVersion(version)
    })
  })
})
With those minor changes, we see that our code now passes all unit tests:
  /api
    GET /
      ✔ should list all API versions
      ✔ all API versions should match schema
    version: 1.0
      GET /
        ✔ should contain specific version
    version: 2.0
      GET /
        ✔ should contain specific version
By writing reusable functions for our unit tests, we can often deduplicate and simplify our code.
Before moving on, let’s roll back our unit tests and the API to just have a single version. We should make sure all tests are passing before we move ahead!
Now that we’ve created a basic unit test for the /api route, we can now expand on that to test our other existing route, the /api/v1/roles route. Once again, there is only one method inside of this route, the GET ALL method, so the unit tests should be similar between these two routes. The only difference here is this route is now reading from the database instead of just returning a static JSON array.
We can begin by creating a new api folder inside of the test folder, and then a v1 folder inside of that, and finally a new roles.js file to contain our tests. By doing this, the path to our tests match the path to the routes themselves, making it easy to match up the tests with the associated routers.
Inside of that file, we can place the first unit test for the roles routes:
/**
 * @file /api/v1/roles Route Tests
 * @author Russell Feldhausen <russfeld@ksu.edu>
 */

// Load Libraries
import request from "supertest";
import { use, should } from "chai";
import chaiJsonSchemaAjv from "chai-json-schema-ajv";
import chaiShallowDeepEqual from "chai-shallow-deep-equal";
use(chaiJsonSchemaAjv.create({ verbose: true }));
use(chaiShallowDeepEqual);

// Import Express application
import app from "../../../app.js";

// Modify Object.prototype for BDD style assertions
should();

/**
 * Get all Roles
 */
const getAllRoles = () => {
  it("should list all roles", (done) => {
    request(app)
      .get("/api/v1/roles")
      .expect(200)
      .end((err, res) => {
        if (err) return done(err);
        res.body.should.be.an("array");
        res.body.should.have.lengthOf(7);
        done();
      });
  });
};


/**
 * Test /api/v1/roles route
 */
describe("/api/v1/roles", () => {
  describe("GET /", () => {
    getAllRoles();
  });
});
Just like before, this unit test will simply send an HTTP GET request to the /api/v1/roles and expect to receive a response that contains an array of 7 elements, which matches the 7 roles defined in the seeds/01_roles.js file.
Next, we can create a test to confirm that the structure of that response matches our expectation:
// -=-=- other code omitted here -=-=-

/**
 * Check JSON Schema of Roles
 */
const getRolesSchemaMatch = () => {
  it("all roles should match schema", (done) => {
    const schema = {
      type: "array",
      items: {
        type: "object",
        required: ["id", "role"],
        properties: {
          id: { type: "number" },
          role: { type: "string" },
          createdAt: { type: "string" },
          updatedAt: { type: "string" }
        },
        additionalProperties: false,
      },
    };
    request(app)
      .get("/api/v1/roles")
      .expect(200)
      .end((err, res) => {
        if (err) return done(err);
        res.body.should.be.jsonSchema(schema);
        done();
      });
  });
};


/**
 * Test /api/v1/roles route
 */
describe("/api/v1/roles", () => {
  describe("GET /", () => {
    getAllRoles();
    getRolesSchemaMatch();
  });
});
However, as we write that test, we might notice that the createdAt and updatedAt fields are just defined as strings, when really they should be storing a timestamp. Thankfully, the AJV Schema Validator has an extension called AJV Formats that adds many new formats we can use. So, let’s install it as a development dependency using npm:
$ npm install --save-dev ajv-formatsThen, we can add it to AJV at the top of our unit tests and use all of the additional types in the AJV Formats documentation in our tests:
/**
 * @file /api/v1/roles Route Tests
 * @author Russell Feldhausen <russfeld@ksu.edu>
 */

// Load Libraries
import request from "supertest";
import { use, should } from "chai";
import Ajv from 'ajv'
import addFormats from 'ajv-formats';
import chaiJsonSchemaAjv from "chai-json-schema-ajv";
import chaiShallowDeepEqual from "chai-shallow-deep-equal";

// Import Express application
import app from "../../../app.js";

// Configure Chai and AJV
const ajv = new Ajv()
addFormats(ajv)
use(chaiJsonSchemaAjv.create({ ajv, verbose: true }));
use(chaiShallowDeepEqual);

// Modify Object.prototype for BDD style assertions
should();

// -=-=- other code omitted here -=-=-

/**
 * Check JSON Schema of Roles
 */
const getRolesSchemaMatch = () => {
  it("all roles should match schema", (done) => {
    const schema = {
      type: "array",
      items: {
        type: "object",
        required: ["id", "role"],
        properties: {
          id: { type: "number" },
          role: { type: "string" },
          createdAt: { type: "string", format: "iso-date-time" },
          updatedAt: { type: "string", format: "iso-date-time"  }
        },
        additionalProperties: false,
      },
    };
    request(app)
      .get("/api/v1/roles")
      .expect(200)
      .end((err, res) => {
        if (err) return done(err);
        res.body.should.be.jsonSchema(schema);
        done();
      });
  });
};

// -=-=- other code omitted here -=-=-
Now we can use the iso-date-time string format to confirm that the createdAt and updatedAt fields match the expected format. The AJV Formats package supports a number of helpful formats, such as email, uri, uuid, and more.
Finally, we should also check that each role we expect to be included in the database is present and accounted for. We can write a single unit test function for this, but we’ll end up calling it several times with different roles:
// -=-=- other code omitted here -=-=-

/**
 * Check Role exists in list
 */
const findRole = (role) => {
  it("should contain '" + role.role + "' role", (done) => {
    request(app)
      .get("/api/v1/roles")
      .expect(200)
      .end((err, res) => {
        if (err) return done(err);
        const foundRole = res.body.find(
          (r) => r.id === role.id,
        );
        foundRole.should.shallowDeepEqual(role);
        done();
      });
  });
};

// List of all expected roles in the application
const roles = [
  {
    id: 1,
    role: "manage_users"
  },
  {
    id: 2,
    role: "manage_documents"
  },
  {
    id: 3,
    role: "add_documents"
  },
  {
    id: 4,
    role: "manage_communities"
  },
  {
    id: 5,
    role: "add_communities"
  },
  {
    id: 6,
    role: "view_documents"
  },
  {
    id: 7,
    role: "view_communities"
  }
]

/**
 * Test /api/v1/roles route
 */
describe("/api/v1/roles", () => {
  describe("GET /", () => {
    getAllRoles();
    getRolesSchemaMatch();

    roles.forEach( (r) => {
      findRole(r)
    })
  });
});
Here we are creating a simple array of roles, which looks similar to the one that is already present in our seeds/01_roles.js seed file, but importantly it is not copied from that file! Instead, we should go back to the original design documentation for this application, if any, and read the roles from there to make sure they are all correctly added to the database. In this case we don’t have an original design document so we won’t worry about that here.
With all of that in place, let’s run our unit tests and confirm they are working:
$ npm run testIf everything is correct, we should find the following in our output showing all tests are successful:
  /api/v1/roles
    GET /
      ✔ should list all roles
      ✔ all roles should match schema
      ✔ should contain 'manage_users' role
      ✔ should contain 'manage_documents' role
      ✔ should contain 'add_documents' role
      ✔ should contain 'manage_communities' role
      ✔ should contain 'add_communities' role
      ✔ should contain 'view_documents' role
      ✔ should contain 'view_communities' role
There we go! We now have working unit tests for our roles. Now is a great time to lint, format, and then commit and push our work to GitHub before continuing. Below are a couple of important discussions on unit test structure and design that are highly recommended before continuing.
In this application, we are heavily basing our unit tests on the seed data we created in the seeds directory. This is a design choice, and there are many different ways to approach this in practice:
In this case, we believe it makes sense for the application we are testing to have a number of pre-defined roles and users that are populated via seed data when the application is tested and when it is deployed, so we chose to build our unit tests based on the assumption that the existing seed data will be used. However, other application designs may require different testing strategies, so it is always important to consider which method will work best for a given application!
A keen-eyed observer may notice that the three unit test functions in the test/api.js file are nearly identical to the functions included in the test/api/v1/roles.js file. This is usually the case in unit testing - there is often a large amount of repeated code used to test different parts of an application, especially a RESTful API like this one.
This leads to two different design options:
For this application, we will follow the second approach. We feel that unit tests are much more useful if the large majority of the test can be easily seen and understood in a single file. This also means that a change in one test method will not impact other tests, both for good and for bad. So, it may mean modifying and updating the entire test suite is a bit more difficult, but updating individual tests should be much simpler.
Again, this is a design choice that we feel is best for this application, and other applications may be better off with other structures. It is always important to consider these implications when writing unit tests for an application!
Now that we have written and tested the routes for the Role model, let’s start working on the routes for the User model. These routes will be much more complex, because we want the ability to add, update, and delete users in our database.
To do this, we’ll create several RESTful routes, which pair HTTP verbs and paths to the various CRUD operations that can be performed on the database. Here is a general list of the actions we want to perform on most models in a RESTful API, based on their associated CRUD operation:
As we build this new API router, we’ll see each one of these in action.
The first operation we’ll look at is the retrieve all operation, which is one we’re already very familiar with. To begin, we should start by copying the existing file at routes/users.js to routes/api/v1/users.js and modifying it a bit to contain this content:
/**
 * @file Users router
 * @author Russell Feldhausen <russfeld@ksu.edu>
 * @exports router an Express router
 *
 * @swagger
 * tags:
 *   name: users
 *   description: Users Routes
 */

// Import libraries
import express from "express";

// Create Express router
const router = express.Router();

// Import models
import {
  User,
  Role,
} from "../../../models/models.js";

// Import logger
import logger from "../../../configs/logger.js";

/**
 * Gets the list of users
 *
 * @param {Object} req - Express request object
 * @param {Object} res - Express response object
 * @param {Function} next - Express next middleware function
 *
 * @swagger
 * /api/v1/users:
 *   get:
 *     summary: users list page
 *     description: Gets the list of all users in the application
 *     tags: [users]
 *     responses:
 *       200:
 *         description: the list of users
 *         content:
 *           application/json:
 *             schema:
 *               type: array
 *               items:
 *                 $ref: '#/components/schemas/User'
 */
router.get("/", async function (req, res, next) {
  try {
    const users = await User.findAll({
      include: {
        model: Role,
        as: "roles",
        attributes: ["id", "role"],
        through: {
          attributes: [],
        },
      },
    });
    res.json(users);
  } catch (error) {
    logger.error(error);
    res.status(500).end();
  }
});

export default router;
This is very similar to the code we included in our roles route. The major difference is that the users route will also output the list of roles assigned to the user. There is a lot of great information in the Sequelize Documentation for how to properly query associated records.
We’ll also need to remove the line from our app.js file that directly imports and uses that router:
// -=-=- other code omitted here -=-=-

// Import routers
import indexRouter from "./routes/index.js";
import usersRouter from "./routes/users.js"; // delete this line
import apiRouter from "./routes/api.js";

// -=-=- other code omitted here -=-=-

// Use routers
app.use("/", indexRouter);
app.use("/users", usersRouter); // delete this line
app.use("/api", apiRouter);

// -=-=- other code omitted here -=-=-
Instead, we can now import and link the new router in our routes/api.js file:
// -=-=- other code omitted here -=-=-

// Import v1 routers
import rolesRouter from "./api/v1/roles.js";
import usersRouter from "./api/v1/users.js";

// Create Express router
const router = express.Router();

// Use v1 routers
router.use("/v1/roles", rolesRouter);
router.use("/v1/users", usersRouter);

// -=-=- other code omitted here -=-=-
Before moving on, let’s run our application and make sure that the users route is working correctly:
$ npm run devOnce it loads, we can navigate to the /api/v1/users URL to see the output:
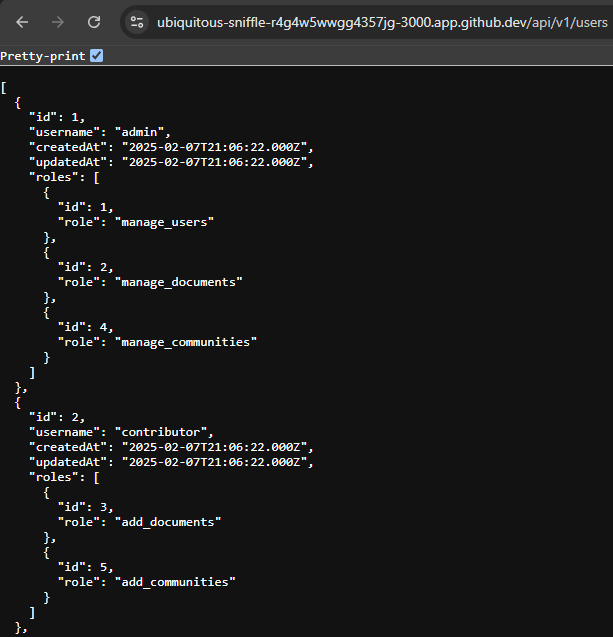
As we write each of these routes, we’ll also explore the related unit tests. The first three unit tests for this route are very similar to the ones we wrote for the roles routes earlier, so we won’t go into too much detail on these. As expected, we’ll place all of the unit tests for the users routes in the test/api/v1/users.js file:
/**
 * @file /api/v1/users Route Tests
 * @author Russell Feldhausen <russfeld@ksu.edu>
 */

// Load Libraries
import request from "supertest";
import { use, should } from "chai";
import Ajv from "ajv";
import addFormats from "ajv-formats";
import chaiJsonSchemaAjv from "chai-json-schema-ajv";
import chaiShallowDeepEqual from "chai-shallow-deep-equal";

// Import Express application
import app from "../../../app.js";

// Configure Chai and AJV
const ajv = new Ajv();
addFormats(ajv);
use(chaiJsonSchemaAjv.create({ ajv, verbose: true }));
use(chaiShallowDeepEqual);

// Modify Object.prototype for BDD style assertions
should();

// User Schema
const userSchema = {
  type: "object",
  required: ["id", "username"],
  properties: {
    id: { type: "number" },
    username: { type: "string" },
    createdAt: { type: "string", format: "iso-date-time" },
    updatedAt: { type: "string", format: "iso-date-time" },
    roles: {
      type: "array",
      items: {
          type: 'object',
          required: ['id', 'role'],
          properties: {
              id: { type: 'number' },
              role: { type: 'string' },
          },
      },
    }
  },
  additionalProperties: false,
};

/**
 * Get all Users
 */
const getAllUsers = () => {
  it("should list all users", (done) => {
    request(app)
      .get("/api/v1/users")
      .expect(200)
      .end((err, res) => {
        if (err) return done(err);
        res.body.should.be.an("array");
        res.body.should.have.lengthOf(4);
        done();
      });
  });
};

/**
 * Check JSON Schema of Users
 */
const getUsersSchemaMatch = () => {
  it("all users should match schema", (done) => {
    const schema = {
      type: "array",
      items: userSchema
    };
    request(app)
      .get("/api/v1/users")
      .expect(200)
      .end((err, res) => {
        if (err) return done(err);
        res.body.should.be.jsonSchema(schema);
        done();
      });
  });
};

/**
 * Check User exists in list
 */
const findUser = (user) => {
  it("should contain '" + user.username + "' user", (done) => {
    request(app)
      .get("/api/v1/users")
      .expect(200)
      .end((err, res) => {
        if (err) return done(err);
        const foundUser = res.body.find((u) => u.id === user.id);
        foundUser.should.shallowDeepEqual(user);
        done();
      });
  });
};

// List of all expected users in the application
const users = [
  {
    id: 1,
    username: "admin",
  },
  {
    id: 2,
    username: "contributor",
  },
  {
    id: 3,
    username: "manager",
  },
  {
    id: 4,
    username: "user",
  }
];

/**
 * Test /api/v1/users route
 */
describe("/api/v1/users", () => {
  describe("GET /", () => {
    getAllUsers();
    getUsersSchemaMatch();

    users.forEach((u) => {
      findUser(u);
    });
  });
});
The major difference to note is in the highlighted section, where we have to add some additional schema information to account for the roles associated attribute that is part of the users object. It is pretty self-explanatory; each object in the array has a set of attributes that match what we used in the unit test for the roles routes.
We also moved the schema for the User response object out of that unit test so we can reuse it in other unit tests, as we’ll see later in this example.
However, we also should add a couple of additional unit tests to confirm that each user has the correct roles assigned, since that is a major part of the security and authorization mechanism we’ll be building for this application. While we could do that as part of the findUser test, let’s go ahead and add separate tests for each of these, which is helpful in debugging anything that is broken or misconfigured.
/**
 * @file /api/v1/users Route Tests
 * @author Russell Feldhausen <russfeld@ksu.edu>
 */

// Load Libraries
import request from "supertest";
import { use, should, expect } from "chai";
import Ajv from "ajv";
import addFormats from "ajv-formats";
import chaiJsonSchemaAjv from "chai-json-schema-ajv";
import chaiShallowDeepEqual from "chai-shallow-deep-equal";

// -=-=- other code omitted here -=-=-

/**
 * Check that User has correct number of roles
 */
const findUserCountRoles = (username, count) => {
  it("user '" + username + "' should have " + count + " roles", (done) => {
    request(app)
      .get("/api/v1/users")
      .expect(200)
      .end((err, res) => {
        if (err) return done(err);
        const foundUser = res.body.find((u) => u.username === username);
        foundUser.roles.should.be.an("array");
        foundUser.roles.should.have.lengthOf(count);
        done();
      });
  });
};

/**
 * Check that User has specific role
 */
const findUserConfirmRole = (username, role) => {
  it("user '" + username + "' should have '" + role + "' role", (done) => {
    request(app)
      .get("/api/v1/users")
      .expect(200)
      .end((err, res) => {
        if (err) return done(err);
        const foundUser = res.body.find((u) => u.username === username);
        expect(foundUser.roles.some((r) => r.role === role)).to.equal(true)
        done();
      });
  });
};

// -=-=- other code omitted here -=-=-

// List of all users and expected roles
const user_roles = [
  {
    username: "admin",
    roles: ["manage_users", "manage_documents", "manage_communities"]
  },
  {
    username: "contributor",
    roles: ["add_documents", "add_communities"]
  },
  {
    username: "manager",
    roles: ["manage_documents", "manage_communities"]
  },
  {
    username: "user",
    roles: ["view_documents", "view_communities"]
  },
];

/**
 * Test /api/v1/users route
 */
describe("/api/v1/users", () => {
  describe("GET /", () => {

    // -=-=- other code omitted here -=-=-

    user_roles.forEach((u) => {
      // Check that user has correct number of roles
      findUserCountRoles(u.username, u.roles.length)
      u.roles.forEach((r) => {
        // Check that user has each expected role
        findUserConfirmRole(u.username, r)
      })
    });
  });
});
This code uses an additional assertion, expect, from the chai library, so we have to import it at the top on the highlighted line. These two tests will confirm that the user has the expected number of roles, and also explicitly confirm that each user has each of the expected roles.
When writing unit tests that deal with arrays, it is always important to not only check that the array contains the correct elements, but also that it ONLY contains those elements and no additional elements. A great way to do this is to explicitly check each element the array should contain is present, and then also check the size of the array so that it can only contain those listed elements. Of course, this assumes that each element is only present once in the array!
If we aren’t careful about how these unit tests are constructed, it is possible for arrays to contain additional items. In this case, it might mean that a user is assigned to more roles than they should be, which would be very bad for our application’s security!
With all of these tests in place, let’s go ahead and run them to confirm everything is working properly. Thankfully, with the mocha test runner, we can even specify a single file to run, as shown below:
$ npm run test test/api/v1/users.jsIf everything is correct, we should see that this file has 19 tests that pass:
  /api/v1/users
    GET /
      ✔ should list all users
      ✔ all users should match schema
      ✔ should contain 'admin' user
      ✔ should contain 'contributor' user
      ✔ should contain 'manager' user
      ✔ should contain 'user' user
      ✔ user 'admin' should have 3 roles
      ✔ user 'admin' should have 'manage_users' role
      ✔ user 'admin' should have 'manage_documents' role
      ✔ user 'admin' should have 'manage_communities' role
      ✔ user 'contributor' should have 2 roles
      ✔ user 'contributor' should have 'add_documents' role
      ✔ user 'contributor' should have 'add_communities' role
      ✔ user 'manager' should have 2 roles
      ✔ user 'manager' should have 'manage_documents' role
      ✔ user 'manager' should have 'manage_communities' role
      ✔ user 'user' should have 2 roles
      ✔ user 'user' should have 'view_documents' role
      ✔ user 'user' should have 'view_communities' role


  19 passing (1s)
Great! Now is a great time to lint, format, and then commit and push our work to GitHub before continuing.
Many RESTful web APIs also include the ability to retrieve a single object from a collection by providing the ID as a parameter to the route. So, let’s go ahead and build that route in our application as well.
While this route is an important part of many RESTful web APIs, it can often go unused since most frontend web applications will simply use the retrieve all endpoint to get a list of items, and then it will just cache that result and filter the list to show a user a single entry. However, there are some use cases where this route is extremely useful, so we’ll go ahead and include it in our backend code anyway.
In our routes/api/v1/users.js file, we can add a new route to retrieve a single user based on the user’s ID number:
// -=-=- other code omitted here -=-=-

/**
 * Gets a single user by ID
 *
 * @param {Object} req - Express request object
 * @param {Object} res - Express response object
 * @param {Function} next - Express next middleware function
 *
 * @swagger
 * /api/v1/users/{id}:
 *   get:
 *     summary: get single user
 *     description: Gets a single user from the application
 *     tags: [users]
 *     parameters:
 *       - in: path
 *         name: id
 *         required: true
 *         schema:
 *           type: integer
 *         description: user ID
 *     responses:
 *       200:
 *         description: a user
 *         content:
 *           application/json:
 *             schema:
 *               $ref: '#/components/schemas/User'
 */
router.get("/:id", async function (req, res, next) {
  try {
    const user = await User.findByPk(req.params.id, {
      include: {
        model: Role,
        as: "roles",
        attributes: ["id", "role"],
        through: {
          attributes: [],
        },
      },
    });
    // if the user is not found, return an HTTP 404 not found status code
    if (user === null) {
      res.status(404).end();
    } else {
      res.json(user);
    }
  } catch (error) {
    logger.error(error);
    res.status(500).end();
  }
});
In this route, we have included a new route parameter id in the path for the route, and we also documented that route parameter in the Open API documentation comment. We then use that id parameter, which will be stored as req.params.id by Express, in the findByPk method available in Sequelize. We can even confirm that our new method appears correctly in our documentation by visiting the /docs route in our application:
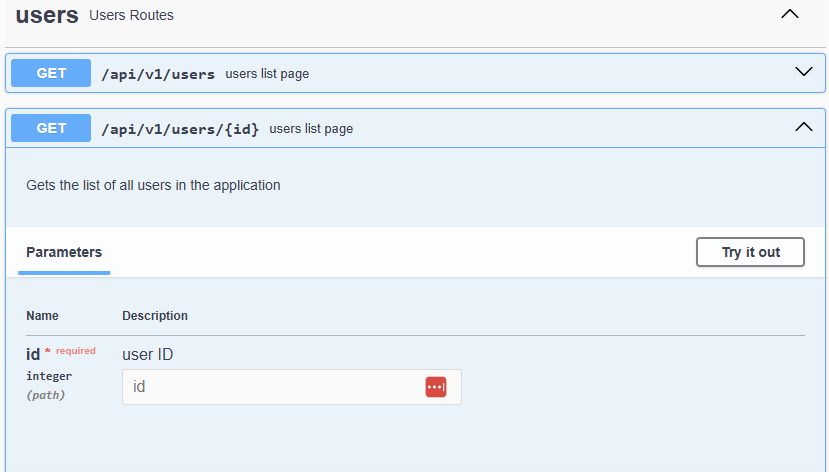
When we visit that route, we’ll need to include the ID of the user to request in the path, as in /api/v1/users/1. If it is working correctly, we should see data for a single user returned in the browser:
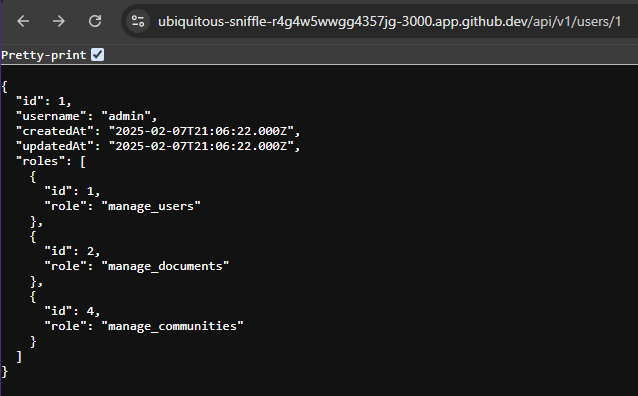
The unit tests for the route to retrieve a single object are nearly identical to the ones use for the retrieve all route. Since we have already verified that each user exists and has the correct roles, we may not need to be as particular when developing these tests.
// -=-=- other code omitted here -=-=-

/**
 * Get single user
 */
const getSingleUser = (user) => {
  it("should get user '" + user.username + "'", (done) => {
    request(app)
      .get("/api/v1/users/" + user.id)
      .expect(200)
      .end((err, res) => {
        if (err) return done(err);
        res.body.should.be.an("object");
        res.body.should.shallowDeepEqual(user);
        done();
      });
  });
};

/**
 * Get single user check schema
 */
const getSingleUserSchemaMatch = (user) => {
  it("user '" + user.username + "' should match schema", (done) => {
    request(app)
      .get("/api/v1/users/" + user.id)
      .expect(200)
      .end((err, res) => {
        if (err) return done(err);
        res.body.should.be.jsonSchema(userSchema);
        done();
      });
  });
};

// -=-=- other code omitted here -=-=-

/**
 * Test /api/v1/users route
 */
describe("/api/v1/users", () => {
  // -=-=- other code omitted here -=-=-

  describe("GET /{id}", () => {
    users.forEach((u) => {
      getSingleUser(u);
      getSingleUserSchemaMatch(u);
    })
  });
});
For these unit tests, we are once again simply checking that we can retrieve each individual user by ID, and also that the response matches the expected userSchema object we used in earlier tests.
However, these unit tests are only checking for the users that we expect the database to contain. What if we receive an ID parameter for a user that does not exist? We should also test that particular situation as well.
// -=-=- other code omitted here -=-=-

/**
 * Tries to get a user using an invalid id
 */
const getSingleUserBadId = (invalidId) => {
  it("should return 404 when requesting user with id '" + invalidId + "'", (done) => {
    request(app)
      .get("/api/v1/users/" + invalidId)
      .expect(404)
      .end((err) => {
        if (err) return done(err);
        done();
      });
  });
};

// -=-=- other code omitted here -=-=-

/**
 * Test /api/v1/users route
 */
describe("/api/v1/users", () => {
  // -=-=- other code omitted here -=-=-

  describe("GET /{id}", () => {
    users.forEach((u) => {
      getSingleUser(u);
      getSingleUserSchemaMatch(u);
    })

    getSingleUserBadId(0)
    getSingleUserBadId("test")
    getSingleUserBadId(-1)
    getSingleUserBadId(5)
  });
});
With this unit test, we can easily check that our API properly returns HTTP status code 404 for a number of invalid ID values, including 0, -1, "test", 5, and any others we can think of to try.
Now that we’ve explored the routes we can use to read data from our RESTful API, let’s look at the routes we can use to modify that data. The first one we’ll cover is the create route, which allows us to add a new entry to the database. However, before we do that, let’s create some helpful utility functions that we can reuse throughout our application as we develop more advanced routes.
One thing we’ll want to be able to do is send some well-formatted success messages to the user. While we could include this in each route, it is a good idea to abstract this into a utility function that we can write once and use throughout our application. By doing so, it makes it easier to restructure these messages as needed in the future.
So, let’s create a new utilities folder inside of our server folder, and then a new send-success.js file with the following content:
/**
 * @file Sends JSON Success Messages
 * @author Russell Feldhausen <russfeld@ksu.edu>
 * @exports sendSuccess a function to send JSON Success Messages
 */

/**
 * Send JSON Success Messages
 *
 * @param {string} message - the message to send
 * @param {integer} status - the HTTP status to use
 * @param {Object} res - Express response object
 *
 * @swagger
 * components:
 *   responses:
 *     Success:
 *       description: success
 *       content:
 *         application/json:
 *           schema:
 *             type: object
 *             required:
 *               - message
 *               - id
 *             properties:
 *               message:
 *                 type: string
 *                 description: the description of the successful operation
 *               id:
 *                 type: integer
 *                 description: the id of the saved or created item
 *             example:
 *               message: User successfully saved!
 */
function sendSuccess(message, id, status, res) {
  res.status(status).json({
    message: message,
    id: id
  });
}

export default sendSuccess;
In this file, we are defining a success message from our application as a JSON object with a message attribute, as well as the id of the object that was acted upon. The code itself is very straightforward, but we are including the appropriate Open API documentation as well, which we can reuse in our routes elsewhere.
To make the Open API library aware of these new files, we need to add it to our configs/openapi.js file:
// -=-=- other code omitted here -=-=-

const options = {
  definition: {
    openapi: "3.1.0",
    info: {
      title: "Lost Communities",
      version: "0.0.1",
      description: "Kansas Lost Communities Project",
    },
    servers: [
      {
        url: url(),
      },
    ],
  },
  apis: ["./routes/*.js", "./models/*.js", "./routes/api/v1/*.js", "./utilities/*.js"],
};Likewise, we may also want to send a well-structured message anytime our database throws an error, or if any of our model validation steps fails. So, we can create another file handle-validation-error.js with the following content:
/**
 * @file Error handler for Sequelize Validation Errors
 * @author Russell Feldhausen <russfeld@ksu.edu>
 * @exports handleValidationError a handler for Sequelize validation errors
 */

/**
 * Gracefully handle Sequelize Validation Errors
 *
 * @param {SequelizeValidationError} error - Sequelize Validation Error
 * @param {Object} res - Express response object
 *
 * @swagger
 * components:
 *   responses:
 *     Success:
 *     ValidationError:
 *       description: model validation error
 *       content:
 *         application/json:
 *           schema:
 *             type: object
 *             required:
 *               - error
 *             properties:
 *               error:
 *                 type: string
 *                 description: the description of the error
 *               errors:
 *                 type: array
 *                 items:
 *                    type: object
 *                    required:
 *                      - attribute
 *                      - message
 *                    properties:
 *                      attribute:
 *                        type: string
 *                        description: the attribute that caused the error
 *                      message:
 *                        type: string
 *                        description: the error associated with that attribute
 *             example:
 *               error: Validation Error
 *               errors:
 *                 - attribute: username
 *                   message: username must be unique
 */
function handleValidationError(error, res) {
  if (error.errors?.length > 0) {
    const errors = error.errors
    .map((e) => {
      return {attribute: e.path, message: e.message}
    })
    res.status(422).json({
      error: "Validation Error",
      errors: errors
    });
  } else {
    res.status(422).json({
      error: error.parent.message
    })
  }
}

export default handleValidationError;
Again, the code for this is not too complex. It builds upon the structure in the Sequelize ValidationError class to create a helpful JSON object that includes both an error attribute as well as an optional errors array that lists each attribute with a validation error, if possible. We also include the appropriate Open API documentation for this response type.
If we look at the code in the handle-validation-error.js file, it may seem like it came from nowhere, or it may be difficult to see how this was constructed based on what little is given in the Sequelize documentation.
In fact, this code was actually constructed using a trial and error process by iteratively submitting broken models and looking at the raw errors that were produced by Sequelize until a common structure was found. For the purposes of this example, we’re leaving out some of these steps, but we encourage exploring the output to determine the best method for any given application.
Now that we have created helpers for our route, we can add the code to actually create that new user when an HTTP POST request is received.
In our routes/api/v1/users.js file, let’s add a new route we can use to create a new entry in the users table:
// -=-=- other code omitted here -=-=-

// Import libraries
import express from "express";
import { ValidationError } from "sequelize";

// Create Express router
const router = express.Router();

// Import models
import { User, Role } from "../../../models/models.js";

// Import logger
import logger from "../../../configs/logger.js";

// Import database
import database from "../../../configs/database.js"

// Import utilities
import handleValidationError from "../../../utilities/handle-validation-error.js";
import sendSuccess from "../../../utilities/send-success.js";

// -=-=- other code omitted here -=-=-

/**
 * Create a new user
 *
 * @param {Object} req - Express request object
 * @param {Object} res - Express response object
 * @param {Function} next - Express next middleware function
 *
 * @swagger
 * /api/v1/users:
 *   post:
 *     summary: create user
 *     tags: [users]
 *     requestBody:
 *       description: user
 *       required: true
 *       content:
 *         application/json:
 *           schema:
 *             $ref: '#/components/schemas/User'
 *           example:
 *             username: newuser
 *             roles:
 *               - id: 6
 *               - id: 7
 *     responses:
 *       201:
 *         $ref: '#/components/responses/Success'
 *       422:
 *         $ref: '#/components/responses/ValidationError'
 */
router.post("/", async function (req, res, next) {
  try {
    // Use a database transaction to roll back if any errors are thrown
    await database.transaction(async t => {
      const user = await User.create(
        // Build the user object using body attributes
        {
          username: req.body.username,
        },
        // Assign to a database transaction
        {
          transaction: t
        }
      );

      // If roles are included in the body
      if (req.body.roles) {
        // Find all roles listed
        const roles = await Promise.all(
          req.body.roles.map(({ id, ...next }) => {
            return Role.findByPk(id);
          }),
        );

        // Attach roles to user
        await user.setRoles(roles, { transaction: t });
      }

      // Send the success message
      sendSuccess("User saved!", user.id, 201, res);
    })

  } catch (error) {
    if (error instanceof ValidationError) {
      handleValidationError(error, res);
    } else {
      logger.error(error);
      res.status(500).end();
    }
  }
});
At the top of the file, we have added several additional import statements:
ValidationError - we import the ValidationError type from the Sequelize librarydatabase - we import our Sequelize instance from configs/database.js so we can create a transactionhandleValidationError and sendSuccess - we import our two new utilities from the utilities folderThis route itself is quite a bit more complex that our previous routes, so let’s break down what it does piece by piece to see how it all works together.
// -=-=- other code omitted here -=-=-
    await database.transaction(async t => {

      // perform database operations here

    });
// -=-=- other code omitted here -=-=-
First, since we will be updating the database using multiple steps, we should use a database transaction to ensure that we only update the database if all operations will succeed. So, we use the Sequelize Transactions feature to create a new managed database transaction. If we successfully reach the end of the block of code contained in this statement, the database transaction will be committed to the database and the changes will be stored.
User itself// -=-=- other code omitted here -=-=-
const user = await User.create(
// Build the user object using body attributes
{
username: req.body.username,
},
// Assign to a database transaction
{
transaction: t
}
);
// -=-=- other code omitted here -=-=-
Next, we use the User model to create a new instance of the user and store it in the database. The Sequelize Create method will both build the new object in memory as well as save it to the database. This is an asynchronous process, so we must await the result before moving on. We also must give this method a reference to the current database transaction t in the second parameter.
// -=-=- other code omitted here -=-=-
      // If roles are included in the body
      if (req.body.roles) {
        // Find all roles listed
        const roles = await Promise.all(
          req.body.roles.map(({ id, ...next }) => {
            return Role.findByPk(id);
          }),
        );

        // Attach roles to user
        await user.setRoles(roles, { transaction: t });
      }
// -=-=- other code omitted here -=-=-
After that, we check to see if the roles attribute was provided as part of the body of the HTTP POST method. If it was, we need to associate those roles with the new user. Here, we are assuming that the submission includes the ID for each role at a minimum, but it may also include other data such as the name of the role. So, before doing anything else, we must first find each Role model in the database by ID using the findByPk method. Once we have a list of roles, then we can add those roles to the User object using the special setRoles method that is created as part of the Roles association on that model. If any roles are null and can’t be found, this will throw an error that we can catch later.
      // Send the success message
      sendSuccess("User saved!", user.id, 201, res);
Finally, if everything is correct, we can send the success message back to the user using the sendSuccess utility method that we created earlier.
// -=-=- other code omitted here -=-=-
  } catch (error) {
    if (error instanceof ValidationError) {
      handleValidationError(error, res);
    } else {
      logger.error(error);
      res.status(500).end();
    }
  }
// -=-=- other code omitted here -=-=-
Finally, at the bottom of the file we have a catch block that will catch any exceptions thrown while trying to create our User and associate the correct Role objects. Notice that this catch block is outside the database transaction, so any database changes will not be saved if we reach this block of code.
Inside, we check to see if the error is an instance of the ValidationError class from Sequelize. If so, we can use our new handleValidationError method to process that error and send a well-structured JSON response back to the user about the error. If not, we’ll simply log the error and send back a generic HTTP 500 response code.
Before we start unit testing this route, let’s quickly do some manual testing using the Open API documentation site. It is truly a very handy way to work with our RESTful APIs as we are developing them, allowing us to test them quickly in isolation to make sure everything is working properly.
So, let’s start our server:
$ npm run devOnce it starts, we can navigate to the /docs URL, and we should see the Open API documentation for our site, including a new POST route for the users section:
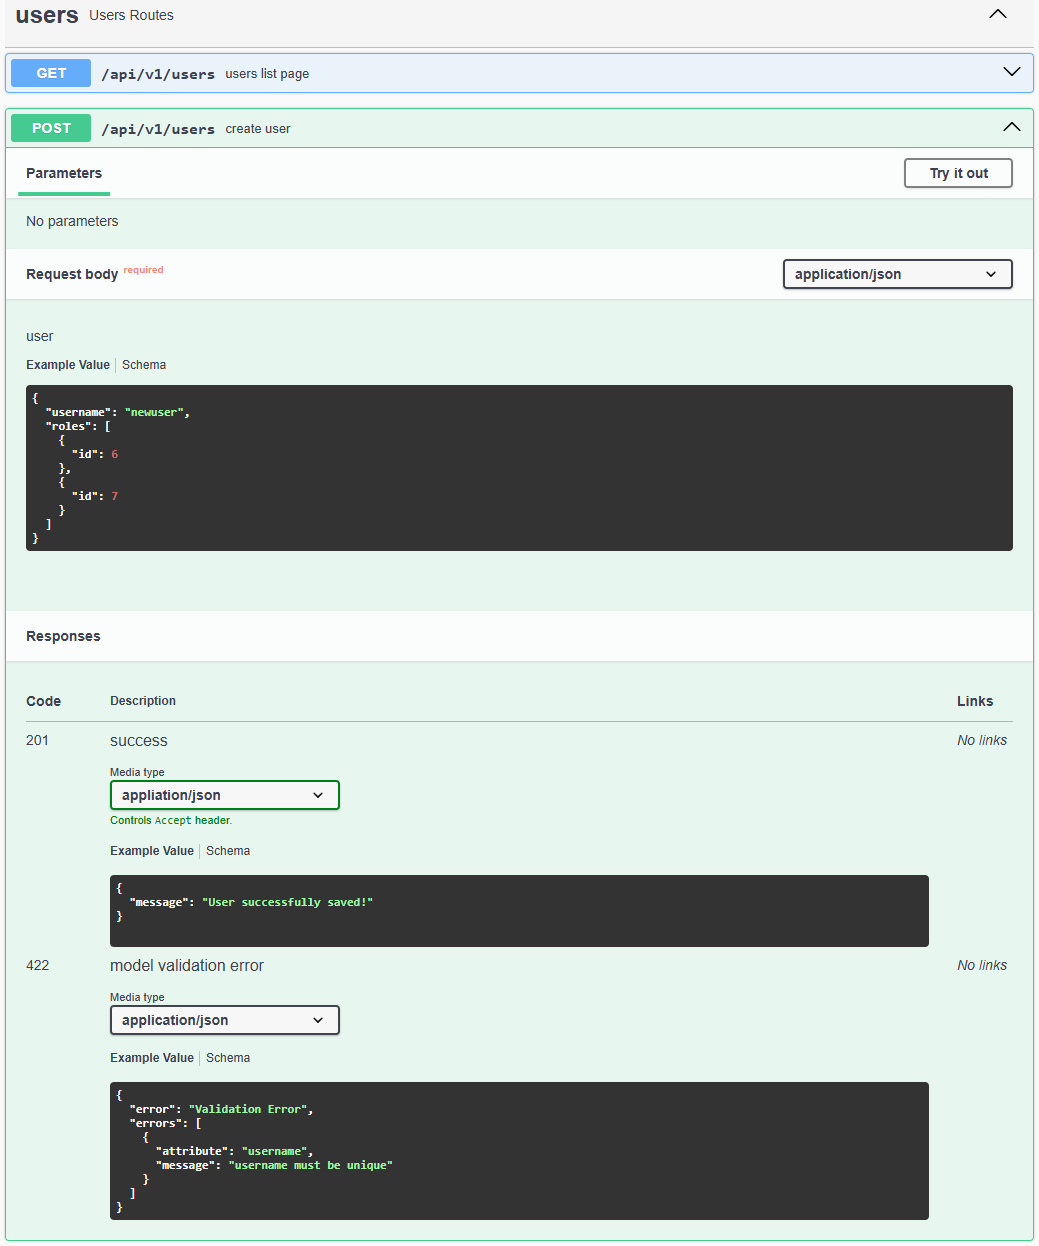
If we documented our route correctly, we can see that this documentation includes not only an example for what a new submission should look like, but also examples of the success and model validation error outputs should be. To test it, we can use the Try it out button on the page to try to create a new user.
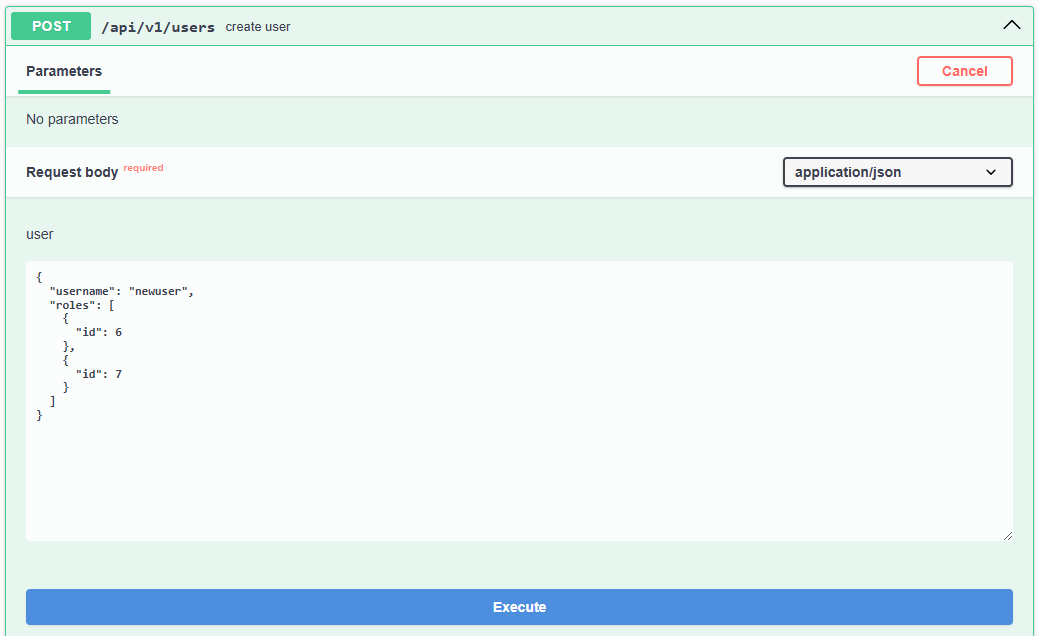
Let’s go ahead and try to create the user that is suggested by our example input, which should look like this:
{
  "username": "newuser",
  "roles": [
    {
      "id": 6
    },
    {
      "id": 7
    }
  ]
}
This would create a user with the username newuser and assign them to the roles with IDs 6 (view_documents) and 7 (view_communities). So, we can click the Execute button to send that request to the server and see if it works.
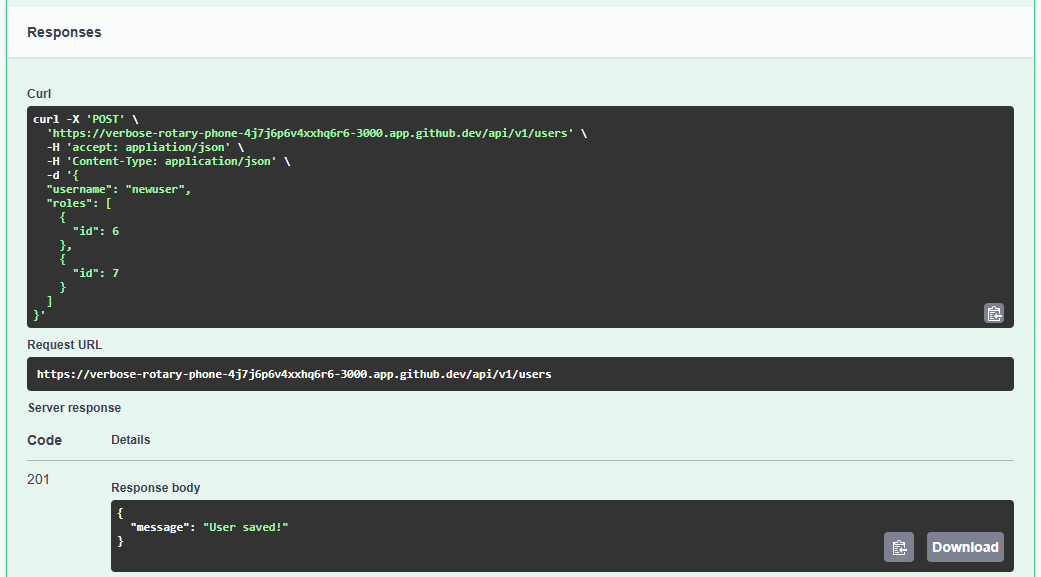
Excellent! We can see that it worked correctly, and we received our expected success message as part of the response. We can also scroll up and try the GET /api/v1/users API endpoint to see if that user appears in our list of all users in the system with the correct roles assigned. If we do, we should see this in the output:
  {
    "id": 6,
    "username": "newuser",
    "createdAt": "2025-02-21T18:34:54.725Z",
    "updatedAt": "2025-02-21T18:34:54.725Z",
    "roles": [
      {
        "id": 6,
        "role": "view_documents"
      },
      {
        "id": 7,
        "role": "view_communities"
      }
    ]
  }
From here, we can try a couple of different scenarios to see if our server is working properly.
First, what if we try and create a user with a duplicate username? To test this, we can simply resubmit the default example again and see what happens. This time, we get an HTTP 422 response code with a very detailed error message:
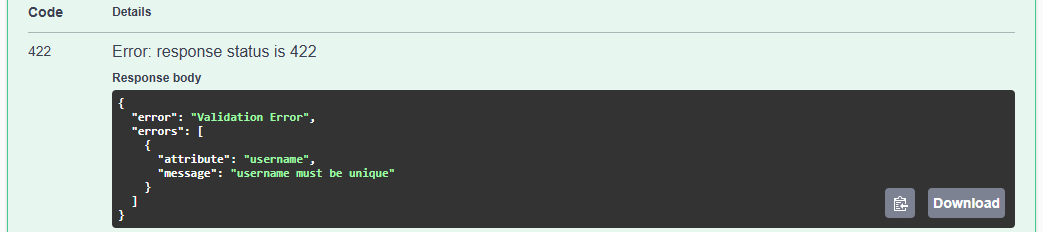
This is great! It tells us exactly what the error is. This is the output created by our handleValidationError utility function from the previous page.
We can also try to submit a new user, but this time we can accidentally leave out some of the attributes, as in this example:
{
  "user": "testuser"
}
Here, we have mistakenly renamed the username attribute to just user, and we’ve left off the roles list entirely. When we submit this, we also get a helpful error message:

Since the username attribute was not provided, it will be set to null and the database will not allow a null value for that attribute.
However, if we correct that, we do see that it will accept a new user without any listed roles! This is by design, since we may need to create users that don’t have any roles assigned.
Finally, what if we try to create a user with an invalid list of roles:
{
  "username": "baduser",
  "roles": [
    {
      "id": 6
    },
    {
      "id": 8
    }
  ]
}
In this instance, we’ll get another helpful error message:

Since there is no role with ID 8 in the database, it finds a null value instead and tries to associate that with our user. This causes an SQL constraint error, which we can send back to our user.
Finally, we should also double-check that our user baduser was not created using GET /api/v1/users API endpoint above. This is because we don’t want to create that user unless a list of valid roles are also provided.
Now that we have a good handle on how this endpoint works in practice, let’s write some unit tests to confirm that it works as expected in each of these cases. First, we should have a simple unit test that successfully creates a new user:
// -=-=- other code omitted here -=-=-

/**
 * Creates a user successfully
 */
const createUser = (user) => {
  it("should successfully create a user '" + user.username + "'", (done) => {
    request(app)
      .post("/api/v1/users/")
      .send(user)
      .expect(201)
      .end((err, res) => {
        if (err) return done(err);
        res.body.should.be.an("object");
        res.body.should.have.property("message");
        res.body.should.have.property("id")
        const created_id = res.body.id
        // Find user in list of all users
        request(app)
          .get("/api/v1/users")
          .expect(200)
          .end((err, res) => {
            if (err) return done(err);
            const foundUser = res.body.find(
              (u) => u.id === created_id,
            );
            foundUser.should.shallowDeepEqual(user);
            done();
          });
      });
  });
};

// -=-=- other code omitted here -=-=-

// New user structure for creating users
const new_user = {
  username: "test_user",
  roles: [
    {
      id: 6
    },
    {
      id: 7
    }
  ]
}

/**
 * Test /api/v1/users route
 */
describe("/api/v1/users", () => {
  // -=-=- other code omitted here -=-=-

  describe("POST /", () => {
    createUser(new_user);
  })
});
This first test is very straightforward since it just confirms that we can successfully create a new user in the system. It also confirms that the user now appears in the output from the get all route, which is helpful.
While this at least confirms that the route works as expected, we should write several more unit tests to confirm that the route works correctly even if the user provides invalid input.
First, we should confirm that the user will be created even with the list of roles missing. We can do this just by creating a second new_user object that is missing the list of roles.
// -=-=- other code omitted here -=-=-

// New user structure for creating users without roles
const new_user_no_roles = {
  username: "test_user_no_roles",
}

/**
 * Test /api/v1/users route
 */
describe("/api/v1/users", () => {
  // -=-=- other code omitted here -=-=-

  describe("POST /", () => {
    createUser(new_user);
    createUser(new_user_no_roles);
  })
});
We should also write a test to make sure the process will fail if any required attributes (in this case, just username) are missing. We can even check the output to make sure the missing attribute is listed:
// -=-=- other code omitted here -=-=-

/**
 * Fails to create user with missing required attribute
 */
const createUserFailsOnMissingRequiredAttribute = (user, attr) => {
  it("should fail when required attribute '" + attr + "' is missing", (done) => {
    // Create a copy of the user object and delete the given attribute
    const updated_user = {... user}
    delete updated_user[attr]
    request(app)
      .post("/api/v1/users/")
      .send(updated_user)
      .expect(422)
      .end((err, res) => {
        if (err) return done(err);
        res.body.should.be.an("object");
        res.body.should.have.property("error");
        res.body.should.have.property("errors")
        res.body.errors.should.be.an("array")
        // the error should be related to the deleted attribute
        expect(res.body.errors.some((e) => e.attribute === attr)).to.equal(true);
        done();
      });
  });
}

// -=-=- other code omitted here -=-=-

/**
 * Test /api/v1/users route
 */
describe("/api/v1/users", () => {
  // -=-=- other code omitted here -=-=-

  describe("POST /", () => {
    createUser(new_user);
    createUser(new_user_no_roles);

    createUserFailsOnMissingRequiredAttribute(new_user, "username");
  })
});We also should write a unit test that will make sure we cannot create a user with a duplicate username.
// -=-=- other code omitted here -=-=-

/**
 * Fails to create user with a duplicate username
 */
const createUserFailsOnDuplicateUsername = (user) => {
  it("should fail on duplicate username '" + user.username + "'", (done) => {
    request(app)
      .post("/api/v1/users/")
      .send(user)
      .expect(201)
      .end((err, res) => {
        if (err) return done(err);
        res.body.should.be.an("object");
        res.body.should.have.property("message");
        res.body.should.have.property("id")
        const created_id = res.body.id
        // Find user in list of all users
        request(app)
          .get("/api/v1/users")
          .expect(200)
          .end((err, res) => {
            if (err) return done(err);
            const foundUser = res.body.find(
              (u) => u.id === created_id,
            );
            foundUser.should.shallowDeepEqual(user);
            // Try to create same user again
            request(app)
              .post("/api/v1/users/")
              .send(user)
              .expect(422)
              .end((err, res) => {
                if (err) return done(err);
                res.body.should.be.an("object");
                res.body.should.have.property("error");
                res.body.should.have.property("errors");
                res.body.errors.should.be.an("array");
                // the error should be related to the username attribute
                expect(
                  res.body.errors.some((e) => e.attribute === "username"),
                ).to.equal(true);
                done();
              });
          });
      });
  });
};


// -=-=- other code omitted here -=-=-

/**
 * Test /api/v1/users route
 */
describe("/api/v1/users", () => {
  // -=-=- other code omitted here -=-=-

  describe("POST /", () => {
    createUser(new_user);
    createUser(new_user_no_roles);

    createUserFailsOnMissingRequiredAttribute(new_user, "username");
    createUserFailsOnDuplicateUsername(new_user);
  })
});
This test builds upon the previous createUser test by first creating the user, and then confirming that it appears in the output, before trying to create it again. This time, it should fail, so we can borrow some of the code from the createUserFailsOnMissingRequiredAttribute to confirm that it is failing because of a duplicate username.
Finally, we should write a unit test that makes sure a user won’t be created if any invalid role IDs are used, and also that the database transaction is properly rolled back so that the user itself isn’t created.
// -=-=- other code omitted here -=-=-

/**
 * Fails to create user with bad role ID
 */
const createUserFailsOnInvalidRole = (user, role_id) => {
  it("should fail when invalid role id '" + role_id + "' is used", (done) => {
    // Create a copy of the user object
    const updated_user = { ...user };
    // Make a shallow copy of the roles array
    updated_user.roles = [... user.roles]
    // Add invalid role ID to user object
    updated_user.roles.push({
      id: role_id,
    });
    request(app)
      .post("/api/v1/users/")
      .send(updated_user)
      .expect(422)
      .end((err, res) => {
        if (err) return done(err);
        res.body.should.be.an("object");
        res.body.should.have.property("error");
        // User with invalid roles should not be created
        request(app)
          .get("/api/v1/users")
          .expect(200)
          .end((err, res) => {
            if (err) return done(err);
            expect(res.body.some((u) => u.username === updated_user.username)).to.equal(
              false,
            );
            done();
          });
      });
  });
};


// -=-=- other code omitted here -=-=-

/**
 * Test /api/v1/users route
 */
describe("/api/v1/users", () => {
  // -=-=- other code omitted here -=-=-

  describe("POST /", () => {
    createUser(new_user);
    createUser(new_user_no_roles);

    createUserFailsOnMissingRequiredAttribute(new_user, "username");
    createUserFailsOnDuplicateUsername(new_user);

    createUserFailsOnInvalidRole(new_user, 0)
    createUserFailsOnInvalidRole(new_user, -1)
    createUserFailsOnInvalidRole(new_user, 8)
    createUserFailsOnInvalidRole(new_user, "test")
  })
});
This test will try to create a valid user, but it appends an invalid role ID to the list of roles to assign to the user. It also confirms that the user itself is not created by querying the get all endpoint and checking for a matching username.
There we go! We have a set of unit tests that cover most of the situations we can anticipate seeing with our route to create new users. If we run all of these tests at this point, they should all pass:
    POST /
      ✔ should successfully create a user 'test_user'
      ✔ should successfully create a user 'test_user_no_roles'
      ✔ should fail when required attribute 'username' is missing
      ✔ should fail on duplicate username 'test_user'
      ✔ should fail when invalid role id '0' is used
      ✔ should fail when invalid role id '-1' is used
      ✔ should fail when invalid role id '8' is used
      ✔ should fail when invalid role id 'test' is used
Great! Now is a great time to lint, format, and then commit and push our work to GitHub before continuing.
Next, let’s look at adding an additional route in our application that allows us to update a User model. This route is very similar to the route used to create a user, but there are a few key differences as well.
// -=-=- other code omitted here -=-=-

/**
 * Update a user
 *
 * @param {Object} req - Express request object
 * @param {Object} res - Express response object
 * @param {Function} next - Express next middleware function
 *
 * @swagger
 * /api/v1/users/{id}:
 *   put:
 *     summary: update user
 *     tags: [users]
 *     parameters:
 *       - in: path
 *         name: id
 *         required: true
 *         schema:
 *           type: integer
 *         description: user ID
 *     requestBody:
 *       description: user
 *       required: true
 *       content:
 *         application/json:
 *           schema:
 *             $ref: '#/components/schemas/User'
 *           example:
 *             username: updateduser
 *             roles:
 *               - id: 6
 *               - id: 7
 *     responses:
 *       201:
 *         $ref: '#/components/responses/Success'
 *       422:
 *         $ref: '#/components/responses/ValidationError'
 */
router.put("/:id", async function (req, res, next) {
  try {
    const user = await User.findByPk(req.params.id)

    // if the user is not found, return an HTTP 404 not found status code
    if (user === null) {
      res.status(404).end();
    } else {
      await database.transaction(async (t) => {
        await user.update(
          // Update the user object using body attributes
          {
            username: req.body.username,
          },
          // Assign to a database transaction
          {
            transaction: t,
          },
        );

        // If roles are included in the body
        if (req.body.roles) {
          // Find all roles listed
          const roles = await Promise.all(
            req.body.roles.map(({ id, ...next }) => {
              return Role.findByPk(id);
            }),
          );

          // Attach roles to user
          await user.setRoles(roles, { transaction: t });
        } else {
          // Remove all roles
          await user.setRoles([], { transaction: t });
        }

        // Send the success message
        sendSuccess("User saved!", user.id, 201, res);
      });
    }
  } catch (error) {
    if (error instanceof ValidationError) {
      handleValidationError(error, res);
    } else {
      logger.error(error);
      res.status(500).end();
    }
  }
});

// -=-=- other code omitted here -=-=-
As we can see, overall this route is very similar to the create route. The only major difference is that we must first find the user we want to update based on the query parameter, and then we use the update database method to update the existing values in the database. The rest of the work updating the related Roles models is exactly the same. We can also reuse the utility functions we created for the previous route.
Just like we did earlier, we can test this route using the Open API documentation website to confirm that it is working correctly before we even move on to testing it.
The unit tests for the route to update a user are very similar to the ones used for creating a user. First, we need a test that will confirm we can successfully update a user entry:
// -=-=- other code omitted here -=-=-

/**
 * Update a user successfully
 */
const updateUser = (id, user) => {
  it("should successfully update user ID '" + id + "' to '" + user.username + "'", (done) => {
    request(app)
      .put("/api/v1/users/" + id)
      .send(user)
      .expect(201)
      .end((err, res) => {
        if (err) return done(err);
        res.body.should.be.an("object");
        res.body.should.have.property("message");
        res.body.should.have.property("id");
        expect(res.body.id).equal(id)
        // Find user in list of all users
        request(app)
          .get("/api/v1/users")
          .expect(200)
          .end((err, res) => {
            if (err) return done(err);
            const foundUser = res.body.find(
              (u) => u.id === id,
            );
            foundUser.should.shallowDeepEqual(user);
            done();
          });
      });
  });
};

// -=-=- other code omitted here -=-=-

/**
 * Test /api/v1/users route
 */
describe("/api/v1/users", () => {
  // -=-=- other code omitted here -=-=-

  describe("PUT /{id}", () => {
    updateUser(3, new_user);
  });
});
Next, we also want to check that any updated users have the correct roles attached, including instances where the roles were completely removed:
// -=-=- other code omitted here -=-=-

/**
 * Update a user and roles successfully
 */
const updateUserAndRoles = (id, user) => {
  it("should successfully update user ID '" + id + "' roles", (done) => {
    request(app)
      .put("/api/v1/users/" + id)
      .send(user)
      .expect(201)
      .end((err, res) => {
        if (err) return done(err);
        res.body.should.be.an("object");
        res.body.should.have.property("message");
        res.body.should.have.property("id");
        expect(res.body.id).equal(id)
        // Find user in list of all users
        request(app)
          .get("/api/v1/users")
          .expect(200)
          .end((err, res) => {
            if (err) return done(err);
            const foundUser = res.body.find(
              (u) => u.id === id,
            );
            // Handle case where user has no roles assigned
            const roles = user.roles || []
            foundUser.roles.should.be.an("array");
            foundUser.roles.should.have.lengthOf(roles.length);
            roles.forEach((role) => {
              expect(foundUser.roles.some((r) => r.id === role.id)).to.equal(true);
            })
            done();
          });
      });
  });
};


// -=-=- other code omitted here -=-=-

/**
 * Test /api/v1/users route
 */
describe("/api/v1/users", () => {
  // -=-=- other code omitted here -=-=-

  describe("PUT /{id}", () => {
    updateUser(3, new_user);
    updateUserAndRoles(3, new_user);
    updateUserAndRoles(2, new_user_no_roles);
  });
});
We also should check that the username is unchanged if an update is sent with no username attribute, but the rest of the update will succeed. For this test, we can just create a new mock object with just roles and no username included.
// -=-=- other code omitted here -=-=-

// Update user structure with only roles
const update_user_only_roles = {
  roles: [
    {
      id: 6,
    },
    {
      id: 7,
    },
  ],
};

/**
 * Test /api/v1/users route
 */
describe("/api/v1/users", () => {
  // -=-=- other code omitted here -=-=-

  describe("PUT /{id}", () => {
    updateUser(3, new_user);
    updateUserAndRoles(3, new_user);
    updateUserAndRoles(2, new_user_no_roles);
    updateUserAndRoles(1, update_user_only_roles);
  });
});
Finally, we should include a couple of tests to handle the situation where a duplicate username is provided, or where an invalid role is provided. These are nearly identical to the tests used in the create route earlier in this example:
// -=-=- other code omitted here -=-=-

/**
 * Fails to update user with a duplicate username
 */
const updateUserFailsOnDuplicateUsername = (id, user) => {
  it("should fail on duplicate username '" + user.username + "'", (done) => {
    request(app)
      .put("/api/v1/users/" + id)
      .send(user)
      .expect(422)
      .end((err, res) => {
        if (err) return done(err);
        res.body.should.be.an("object");
        res.body.should.have.property("error");
        res.body.should.have.property("errors");
        res.body.errors.should.be.an("array");
        // the error should be related to the username attribute
        expect(
          res.body.errors.some((e) => e.attribute === "username"),
        ).to.equal(true);
        done();
      });
  });
};

/**
 * Fails to update user with bad role ID
 */
const updateUserFailsOnInvalidRole = (id, user, role_id) => {
  it("should fail when invalid role id '" + role_id + "' is used", (done) => {
    // Create a copy of the user object
    const updated_user = { ...user };
    // Make a shallow copy of the roles array
    updated_user.roles = [... user.roles]
    // Add invalid role ID to user object
    updated_user.roles.push({
      id: role_id,
    });
    request(app)
      .put("/api/v1/users/" + id)
      .send(updated_user)
      .expect(422)
      .end((err, res) => {
        if (err) return done(err);
        res.body.should.be.an("object");
        res.body.should.have.property("error");
        // User with invalid roles should not be updated
        request(app)
          .get("/api/v1/users")
          .expect(200)
          .end((err, res) => {
            if (err) return done(err);
            expect(res.body.some((u) => u.username === updated_user.username)).to.equal(
              false,
            );
            done();
          });
      });
  });
};

// -=-=- other code omitted here -=-=-

// Update user structure with duplicate username
const update_user_duplicate_username = {
  username: "admin",
};

/**
 * Test /api/v1/users route
 */
describe("/api/v1/users", () => {
  // -=-=- other code omitted here -=-=-

  describe("PUT /{id}", () => {
    updateUser(3, new_user);
    updateUserAndRoles(3, new_user);
    updateUserAndRoles(2, new_user_no_roles);
    updateUserAndRoles(1, update_user_only_roles);

    updateUserFailsOnDuplicateUsername(2, update_user_duplicate_username);
    updateUserFailsOnInvalidRole(4, new_user, 0);
    updateUserFailsOnInvalidRole(4, new_user, -1);
    updateUserFailsOnInvalidRole(4, new_user, 8);
    updateUserFailsOnInvalidRole(4, new_user, "test");
  })
});
There we go! We have a set of unit tests that cover most of the situations we can anticipate seeing with our route to update users. If we run all of these tests at this point, they should all pass:
    PUT /{id}
      ✔ should successfully update user ID '3' to 'test_user'
      ✔ should successfully update user ID '3' roles
      ✔ should successfully update user ID '2' roles
      ✔ should successfully update user ID '1' roles
      ✔ should fail on duplicate username 'admin'
      ✔ should fail when invalid role id '0' is used
      ✔ should fail when invalid role id '-1' is used
      ✔ should fail when invalid role id '8' is used
      ✔ should fail when invalid role id 'test' is used
Great! Now is a great time to lint, format, and then commit and push our work to GitHub before continuing.
Finally, the last route we need to add to our users routes is the delete route. This route is very simple - it will remove a user based on the given user ID if it exists in the database:
// -=-=- other code omitted here -=-=-

/**
 * Delete a user
 *
 * @param {Object} req - Express request object
 * @param {Object} res - Express response object
 * @param {Function} next - Express next middleware function
 *
 * @swagger
 * /api/v1/users/{id}:
 *   delete:
 *     summary: delete user
 *     tags: [users]
 *     parameters:
 *       - in: path
 *         name: id
 *         required: true
 *         schema:
 *           type: integer
 *         description: user ID
 *     responses:
 *       200:
 *         $ref: '#/components/responses/Success'
 */
router.delete("/:id", async function (req, res, next) {
  try {
    const user = await User.findByPk(req.params.id)

    // if the user is not found, return an HTTP 404 not found status code
    if (user === null) {
      res.status(404).end();
    } else {
      await user.destroy();

      // Send the success message
      sendSuccess("User deleted!", req.params.id, 200, res);
    }
  } catch (error) {
    console.log(error)
    logger.error(error);
    res.status(500).end();
  }
});

// -=-=- other code omitted here -=-=-
Once again, we can test this route using the Open API documentation website. Let’s look at how we can quickly unit test it as well.
The unit tests for this route are similarly very simple. We really only have two cases - the user is found and successfully deleted, or the user cannot be found and an HTTP 404 response is returned.
// -=-=- other code omitted here -=-=-

/**
 * Delete a user successfully
 */
const deleteUser = (id) => {
  it("should successfully delete user ID '" + id, (done) => {
    request(app)
      .delete("/api/v1/users/" + id)
      .expect(200)
      .end((err, res) => {
        if (err) return done(err);
        res.body.should.be.an("object");
        res.body.should.have.property("message");
        res.body.should.have.property("id")
        expect(res.body.id).to.equal(String(id))
        // Ensure user is not found in list of users
        request(app)
          .get("/api/v1/users")
          .expect(200)
          .end((err, res) => {
            if (err) return done(err);
            expect(res.body.some((u) => u.id === id)).to.equal(false);
            done();
          });
      });
  });
};

/**
 * Fail to delete a missing user
 */
const deleteUserFailsInvalidId= (id) => {
  it("should fail to delete invalid user ID '" + id, (done) => {
    request(app)
      .delete("/api/v1/users/" + id)
      .expect(404)
      .end((err) => {
        if (err) return done(err);
        done();
      });
  });
};

// -=-=- other code omitted here -=-=-

/**
 * Test /api/v1/users route
 */
describe("/api/v1/users", () => {
  // -=-=- other code omitted here -=-=-

  describe("DELETE /{id}", () => {
    deleteUser(4);
    deleteUserFailsInvalidId(0)
    deleteUserFailsInvalidId(-1)
    deleteUserFailsInvalidId(5)
    deleteUserFailsInvalidId("test")
  });
});
There we go! That will cover all of the unit tests for the users route. If we try to run all of our tests, we should see that they succeed!
DELETE /{id}
      ✔ should successfully delete user ID '4
      ✔ should fail to delete invalid user ID '0
      ✔ should fail to delete invalid user ID '-1
      ✔ should fail to delete invalid user ID '5
      ✔ should fail to delete invalid user ID 'test
All told, we write just 5 API routes (retrieve all, retrieve one, create, update, and delete) but wrote 53 different unit tests to fully test those routes.
Now is a great time to lint, format, and then commit and push our work to GitHub.
In the next example, we’ll explore how to add authentication to our RESTful API.
This example project builds on the previous RESTful API project by adding user authentication. This will ensure users are identified within the system and are only able to perform operations according to the roles assigned to their user accounts.
At the end of this example, we will have a project with the following features:
This project picks up right where the last one left off, so if you haven’t completed that one yet, go back and do that before starting this one.
Let’s get started!
There are many different authentication libraries and methods available for Node.js and Express. For this project, we will use the Passport.js library. It supports many different authentication strategies, and is a very common way that authentication is handled within JavaScript applications.
For our application, we’ll end up using several strategies to authenticate our users:
Let’s first set up our unique token strategy, which allows us to test our authentication routes before setting up anything else.
First, we’ll need to create a new route file at routes/auth.js to contain our authentication routes. We’ll start with this basic structure and work on filling in each method as we go.
/**
 * @file Auth router
 * @author Russell Feldhausen <russfeld@ksu.edu>
 * @exports router an Express router
 *
 * @swagger
 * tags:
 *   name: auth
 *   description: Authentication Routes
 * components:
 *   securitySchemes:
 *     bearerAuth:
 *       type: http
 *       scheme: bearer
 *       bearerFormat: JWT
 *   responses:
 *     AuthToken:
 *       description: authentication success
 *       content:
 *         application/json:
 *           schema:
 *             type: object
 *             required:
 *               - token
 *             properties:
 *               token:
 *                 type: string
 *                 description: a JWT for the user
 *             example:
 *               token: abcdefg12345
 */

// Import libraries
import express from "express";
import passport from "passport";

// Import configurations
import "../configs/auth.js";

// Create Express router
const router = express.Router();

/**
 * Authentication Response Handler
 *
 * @param {Object} req - Express request object
 * @param {Object} res - Express response object
 * @param {Function} next - Express next middleware function
 */
const authSuccess = function (req, res, next) {

};

/**
 * Bypass authentication for testing
 *
 * @param {Object} req - Express request object
 * @param {Object} res - Express response object
 * @param {Function} next - Express next middleware function
 *
 * @swagger
 * /auth/bypass:
 *   get:
 *     summary: bypass authentication for testing
 *     description: Bypasses CAS authentication for testing purposes
 *     tags: [auth]
 *     parameters:
 *       - in: query
 *         name: token
 *         required: true
 *         schema:
 *           type: string
 *         description: username
 *     responses:
 *       200:
 *         description: success
 */
router.get("/bypass", function (req, res, next) {

});

/**
 * CAS Authentication
 *
 * @param {Object} req - Express request object
 * @param {Object} res - Express response object
 * @param {Function} next - Express next middleware function
 *
 * @swagger
 * /auth/cas:
 *   get:
 *     summary: CAS authentication
 *     description:  CAS authentication for deployment
 *     tags: [auth]
 *     responses:
 *       200:
 *         description: success
 */
router.get("/cas", function (req, res, next) {

});

/**
 * Request JWT based on previous authentication
 *
 * @param {Object} req - Express request object
 * @param {Object} res - Express response object
 * @param {Function} next - Express next middleware function
 *
 * @swagger
 * /auth/token:
 *   get:
 *     summary: request JWT
 *     description: request JWT based on previous authentication
 *     tags: [auth]
 *     responses:
 *       200:
 *         $ref: '#/components/responses/AuthToken'
 */
router.get("/token", function (req, res, next) {

});

export default router;
This file includes a few items to take note of:
AuthToken response that we’ll send to the user when they request a token./auth/bypass and /auth/cas, for each of our authentication strategies. The last one, /auth/token will be used by our frontend to request a token to access the API.authSuccess function to handle actually sending the response to the user.Before moving on, let’s go ahead and add this router to our app.js file along with the other routers:
// -=-=- other code omitted here -=-=-

// Import routers
import indexRouter from "./routes/index.js";
import apiRouter from "./routes/api.js";
import authRouter from "./routes/auth.js";

// -=-=- other code omitted here -=-=-

// Use routers
app.use("/", indexRouter);
app.use("/api", apiRouter);
app.use("/auth", authRouter);

// -=-=- other code omitted here -=-=-
We’ll come back to this file once we are ready to link up our authentication strategies.
Next, let’s install both passport and the passport-unique-token authentication strategy:
$ npm install passport passport-unique-tokenWe’ll configure that strategy in a new configs/auth.js file with the following content:
/**
 * @file Configuration information for Passport.js Authentication
 * @author Russell Feldhausen <russfeld@ksu.edu>
 */

// Import libraries
import passport from "passport";
import { UniqueTokenStrategy } from "passport-unique-token";

// Import models
import { User, Role } from "../models/models.js";

// Import logger
import logger from "./logger.js";

/**
 * Authenticate a user
 *
 * @param {string} username the username to authenticate
 * @param {function} next the next middleware function
 */
const authenticateUser = function(username, next) {
  // Find user with the username
  User.findOne({
    attributes: ["id", "username"],
    include: {
      model: Role,
      as: "roles",
      attributes: ["id", "role"],
      through: {
        attributes: [],
      },
    },
    where: { username: username },
  })
  .then((user) => {
    // User not found
    if (user === null) {
      logger.debug("Login failed for user: " + username);
      return next(null, false);
    }

    // User authenticated
    logger.debug("Login succeeded for user: " + user.username);

    // Convert Sequelize object to plain JavaScript object
    user = JSON.parse(JSON.stringify(user))
    return next(null, user);
  });
}

// Bypass Authentication via Token
passport.use(new UniqueTokenStrategy(
  // verify callback function
  (token, next) => {
    return authenticateUser(token, next);
  }
))

// Default functions to serialize and deserialize a session
passport.serializeUser(function(user, done) {
  done(null, user);
});

passport.deserializeUser(function(user, done) {
  done(null, user);
});
In this file, we created an authenticateUser function that will look for a user based on a given username. If found, it will return that user by calling the next middleware function. Otherwise, it will call that function and provide false.
Below, we configure Passport.js using the passport.use function to define the various authentication strategies we want to use. In this case, we’ll start with the Unique Token Strategy, which uses a token provided as part of a query to the web server.
In addition, we need to implement some default functions to handle serializing and deserializing a user from a session. These functions don’t really have any content in our implementation; we just need to include the default code.
Finally, since Passport.js acts as a global object, we don’t even have to export anything from this file!
To test this authentication strategy, let’s modify routes/auth.js to use this strategy. We’ll update the /auth/bypass route and also add some temporary code to the authSuccess function:
// -=-=- other code omitted here -=-=-

// Import libraries
import express from "express";
import passport from "passport";

// Import configurations
import "../configs/auth.js";

// -=-=- other code omitted here -=-=-
const authSuccess = function (req, res, next) {
  res.json(req.user);
};

// -=-=- other code omitted here -=-=-
router.get("/bypass", passport.authenticate('token', {session: false}), authSuccess);

// -=-=- other code omitted here -=-=-
In the authSuccess function, right now we are just sending the content of req.user, which is set by Passport.js on a successful authentication (it is the value we returned when calling the next function in our authentication strategy earlier). We’ll come back to this later when we implement JSON Web Tokens (JWT) later in this tutorial.
The other major change is that now the /auth/bypass route calls the passport.authenticate method with the 'token' strategy specified. It also uses {session: false} as one of the options provided to Passport.js since we aren’t actually going to be using sessions. Finally, if that middleware is satisfied, it will call the authSuccess function to handle sending the response to the user. This takes advantage of the chaining that we can do in Express!
With all of that in place, we can test our server and see if it works:
$ npm run devOnce the page loads, we want to navigate to the /auth/bypass?token=admin path to see if we can log in as the admin user. Notice that we are including a query parameter named token to include the username in the URL.
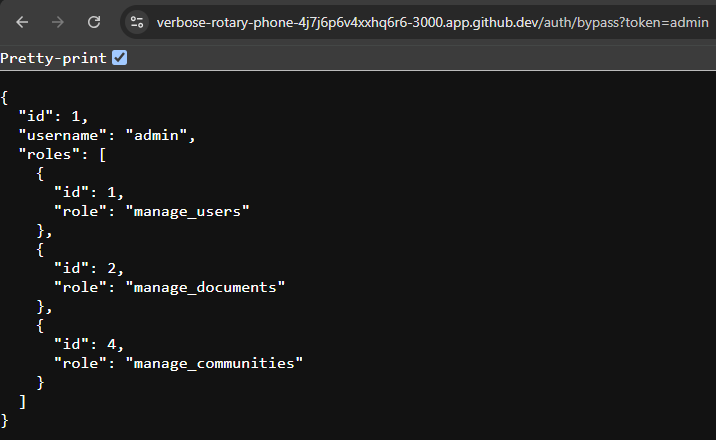
There we go! We see that it successfully finds our admin user and returns data about that user, including the roles assigned. This is what we want to see. We can also test this by providing other usernames to make sure it is working.
Of course, we don’t want to have this bypass authentication system available all the time in our application. In fact, we really only want to use it for testing and debugging; otherwise, our application will have a major security flaw! So, let’s add a new environment variable BYPASS_AUTH to our .env, .env.test and .env.example files. We should set it to TRUE in the .env.test file, and for now we’ll have it enabled in our .env file as well, but this option should NEVER be enabled in a production setting.
# -=-=- other settings omitted here -=-=-
BYPASS_AUTH=true
With that setting in place, we can add it to our configs/auth.js file to only allow bypass authentication if that setting is enabled:
// -=-=- other code omitted here -=-=-

// Bypass Authentication via Token
passport.use(new UniqueTokenStrategy(
  // verify callback function
  (token, next) => {
    // Only allow token authentication when enabled
    if (process.env.BYPASS_AUTH === "true") {
      return authenticateUser(token, next);
    } else {
      return next(null, false);
    }
  }
))
Before moving on, we should make sure we test both enabling and disabling this setting actually disables bypass authentication. We want to be absolutely sure it works as intended!

One of the most common methods for keeping track of users after they are authenticated is by setting a cookie on their browser that is sent with each request. We’ve already explored this method earlier in this course, so let’s go ahead and configure cookie sessions for our application, storing them in our existing database.
We’ll start by installing both the express-session middleware and the connect-session-sequelize library that we can use to store our sessions in a Sequelize database:
$ npm install express-session connect-session-sequelizeOnce those libraries are installed, we can create a configuration for sessions in a new configs/sessions.js file:
/**
 * @file Configuration for cookie sessions stored in Sequelize
 * @author Russell Feldhausen <russfeld@ksu.edu>
 * @exports sequelizeSession a Session instance configured for Sequelize
 */

// Import Libraries
import session from 'express-session'
import connectSession from 'connect-session-sequelize'

// Import Database
import database from './database.js'
import logger from './logger.js'

// Initialize Store
const sequelizeStore = connectSession(session.Store)
const store = new sequelizeStore({
    db: database
})

// Create tables in Sequelize
store.sync();

if (!process.env.SESSION_SECRET) {
    logger.error("Cookie session secret not set! Set a SESSION_SECRET environment variable.")
}

// Session configuration
const sequelizeSession = session({
    name: process.env.SESSION_NAME || 'connect.sid',
    secret: process.env.SESSION_SECRET,
    store: store,
    resave: false,
    proxy: true,
    saveUninitialized: false
})

export default sequelizeSession;
This file loads our Sequelize database connection and initializes the Express session middleware and the Sequelize session store. We also have a quick sanity check that will ensure there is a SESSION_SECRET environment variable set, otherwise an error will be printed. Finally, we export that session configuration to our application.
So, we’ll need to add a SESSION_NAME and SESSION_SECRET environment variable to our .env, .env.test and .env.example files. The SESSION_NAME is a unique name for our cookie, and the SESSION_SECRET is a secret key used to secure our cookies and prevent them from being modified.
There are many ways to generate a secret key, but one of the simplest is to just use the built in functions in Node.js itself. We can launch the Node.js REPL environment by just running the node command in the terminal:
$ nodeFrom there, we can use this line to get a random secret key:
> require('crypto').randomBytes(64).toString('hex')Just like we use $ as the prompt for Linux terminal commands, the Node.js REPL environment uses > so we will include that in our documentation. You should not include that character in your command.
If done correctly, we’ll get a random string that you can use as your secret key!

We can include that key in our .env file. To help remember how to do this in the future, we can even include the Node.js command as a comment above that line:
# -=-=- other settings omitted here -=-=-
SESSION_NAME=lostcommunities
# require('crypto').randomBytes(64).toString('hex')
SESSION_SECRET=46a5fdfe16fa710867102d1f0dbd2329f2eae69be3ed56ca084d9e0ad....
Finally, we can update our app.js file to use this session configuration. We’ll place this between the /api and /auth routes, since we only want to load cookie sessions if the user is accessing the authentication routes, to minimize the number of database requests:
// -=-=- other code omitted here -=-=-

// Import libraries
import compression from "compression";
import cookieParser from "cookie-parser";
import express from "express";
import helmet from "helmet";
import path from "path";
import swaggerUi from "swagger-ui-express";
import passport from "passport";

// Import configurations
import logger from "./configs/logger.js";
import openapi from "./configs/openapi.js";
import sessions from "./configs/sessions.js";

// -=-=- other code omitted here -=-=-

// Use routers
app.use("/", indexRouter);
app.use("/api", apiRouter);

// Use sessions
app.use(sessions);
app.use(passport.authenticate("session"));

// Use auth routes
app.use("/auth", authRouter);

// -=-=- other code omitted here -=-=-
There we go! Now we can enable cookie sessions in Passport.js by removing the {session: false} setting in our /auth/bypass route in the routes/auth.js file:
// -=-=- other code omitted here -=-=-
router.get("/bypass", passport.authenticate('token'), authSuccess);

// -=-=- other code omitted here -=-=-
Now, when we navigate to that route and authenticate, we should see our application set a session cookie as part of the response.

We can match the SID in the session cookie with the SID in the Sessions table in our database to confirm that it is working:
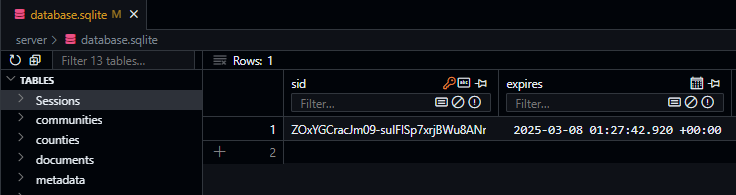
From here, we can use these sessions throughout our application to track users as they make additional requests.
Now that we have a working authentication system, the next step is to configure a method to request a valid JSON Web Token, or JWT, that contains information about the authenticated user. We’ve already learned a bit about JWTs in this course, so we won’t cover too many of the details here.
To work with JWTs, we’ll need to install the jsonwebtoken package from NPM:
$ npm install jsonwebtokenNext, we’ll need to create a secret key that we can use to sign our tokens. We’ll add this as the JWT_SECRET_KEY setting in our .env, .env.test and .env.example files. We can use the same method discussed on the previous page to generate a new random key:
# -=-=- other settings omitted here -=-=-
# require('crypto').randomBytes(64).toString('hex')
JWT_SECRET_KEY='46a5fdfe16fa710867102d1f0dbd2329f2eae69be3ed56ca084d9e0ad....'
Once we have the library and a key, we can easily create and sign a JWT in the /auth/token route in the routes/auth.js file:
// -=-=- other code omitted here -=-=-

// Import libraries
import express from "express";
import passport from "passport";
import jsonwebtoken from "jsonwebtoken"

// -=-=- other code omitted here -=-=-
router.get("/token", function (req, res, next) {
  // If user is logged in
  if (req.user) {
    const token = jsonwebtoken.sign(
      req.user,
      process.env.JWT_SECRET_KEY,
      {
        expiresIn: '6h'
      }
    )
    res.json({
      token: token
    })
  } else {
    // Send unauthorized response
    res.status(401).end()
  }
});
Now, when we visit the /auth/token URL on our working website (after logging in through the /auth/bypass route), we should receive a JWT as a response:
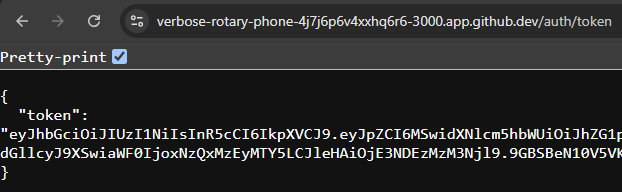
Of course, while that data may seem unreadable, we already know that JWTs are Base64 encoded, so we can easily view the content of the token. Thankfully, there are many great tools we can use to debug our tokens, such as Token.dev, to confirm that they are working correctly.
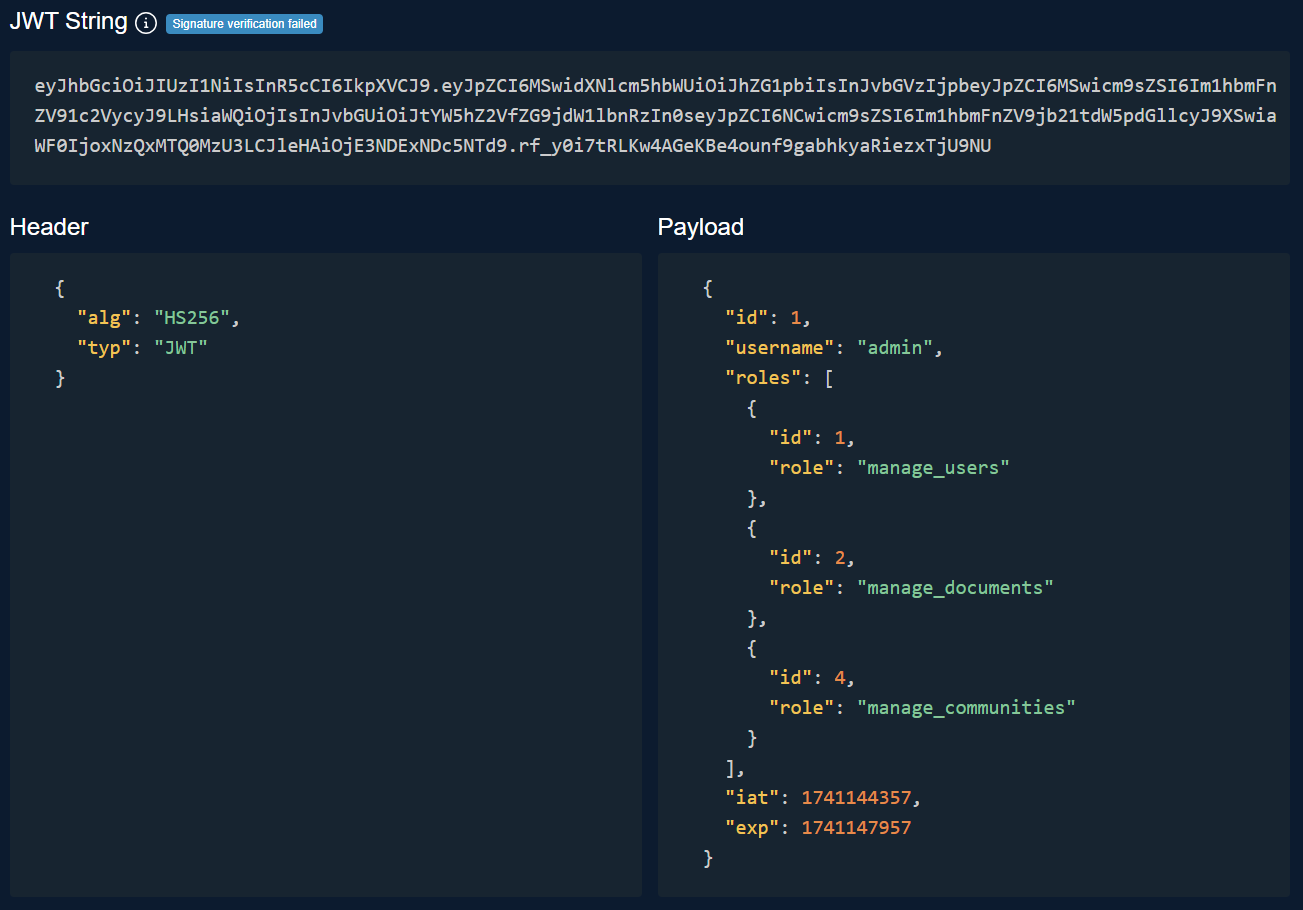
While sites like this will also help you confirm that your JWTs are properly signed by asking for your secret key, you SHOULD NOT share a secret key for a live production application with these sites. There is always a chance it has been compromised!
The last step we should take in our authentication system is to properly route users back to the index page after a successful login attempt. Since we will eventually be building a single-page application in Vue.js as our frontend for this application, we only need to worry about directing users back to the index page, which will load our frontend.
So, in our authSuccess method in routes/auth.js, we can update the response to redirect our users back to the index page:
// -=-=- other code omitted here -=-=-
const authSuccess = function (req, res, next) {
  res.redirect("/");
};

// -=-=- other code omitted here -=-=-
The res.redirect method will sent an HTTP 302 Found response back to the browser with a new location to navigate to. However, by that point, the authentication process will also send a cookie to the browser with the session ID, so the user will be logged in correctly:
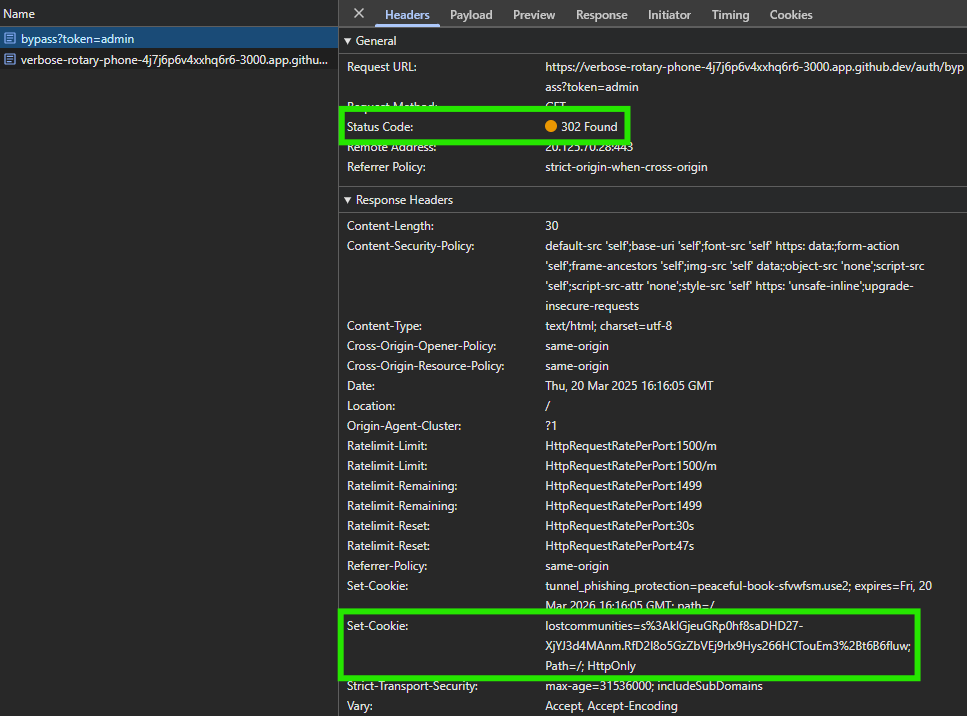
Finally, we should also add a logout route. This route will end any sessions created through Passport.js by removing the session from the database and also telling the browser to delete the session cookie. It uses the special req.logout() method that is added to each request by Passport.js. We’ll add our logout route to the bottom of the routes/auth.js file:
// -=-=- other code omitted here -=-=-

// Import configurations
import "../configs/auth.js";
import logger from "../configs/logger.js";

// -=-=- other code omitted here -=-=-

/**
 * Logout of a Passport.js session
 *
 * See https://www.initialapps.com/properly-logout-passportjs-express-session-for-single-page-app/
 *
 * @param {Object} req - Express request object
 * @param {Object} res - Express response object
 * @param {Function} next - Express next middleware function
 *
 * @swagger
 * /auth/logout:
 *   get:
 *     summary: logout current user
 *     description:  logout current user and end session
 *     tags: [auth]
 *     responses:
 *       200:
 *         description: success
 */
router.get('/logout', function (req, res, next) {
  res.clearCookie(process.env.SESSION_NAME || 'connect.sid');  // clear the session cookie
  req.logout(function(err) {       // logout of passport
    if (err) {
      logger.error(err);
    }
    req.session.destroy(function (err) {  // destroy the session
      if (err) {
        logger.error(err);
      }
      res.redirect('/');
    })
  });
})

// -=-=- other code omitted here -=-=-
Now, when we access this route with a valid session, we’ll see that the user is properly logged out.
We’ll also no longer be able to access the /auth/token route without logging in again.
However, this route WILL NOT invalidate any existing JWTs already issued to that user - they will still be valid until they expire. In our earlier example, we set the JWTs to have a 6 hour lifetime, so in theory a user could still access the application using a valid JWT up to 6 hours after logging out!
JSON Web Tokens (JWTs) are a very powerful authentication method for web APIs because they allow users to send requests without worrying about the need for a cookie session. In theory, a JWT issued by any instance of our API can be validated anywhere, making it much easier to horizontally scale this application in the future.
In addition, requests with a JWT generally don’t require a database access with each request to validate the session. Our current cookie sessions store the session data in the database, so now each incoming request containing a session cookie requires a database lookup to get information about the user before any work can be done.
However, this means that any user with a valid JWT will be able to access our application even if they have logged out. This may present a security issue for some applications.
There are some strategies to mitigate this risk:
We’ve already studied Central Authentication Service (CAS) as one method for authenticating users through a third party service. In this case, CAS is the service commonly used at K-State for authentication, which is why we like to cover it in our examples. So, let’s look at how to add CAS authentication to our application through Passport.
First, we’ll need to install a new Passport.js strategy for dealing with CAS authentication. Thankfully, the ALT+CS lab at K-State maintains an updated library for this, which can be installed as shown below:
$ npm install https://github.com/alt-cs-lab/passport-casUnfortunately, it is very difficult to find an updated Passport.js strategy for CAS authentication. This is partially due to the fact the CAS is not commonly used, and partially because many existing strategies have been written once and then abandoned by the developers. For this class, we sought out the most updated strategy available, then did our best to fix any known/existing bugs.
Next, we can configure our authentication strategy by adding a few items to the configs/auth.js file for our new CAS strategy:
// -=-=- other code omitted here -=-=-

// Import libraries
import passport from "passport";
import { UniqueTokenStrategy } from "passport-unique-token";
import { Strategy as CasStrategy } from '@alt-cs-lab/passport-cas';

// -=-=- other code omitted here -=-=-

// CAS authentication
passport.use(new CasStrategy({
    version: 'CAS2.0',
    ssoBaseURL: process.env.CAS_URL,
    serverBaseURL: process.env.CAS_SERVICE_URL + '/auth/cas'
  },
  (profile, next) => {
    if (profile.user) {
      return authenticateUser(profile.user, next)
    } else {
      logger.warn("CAS authentication succeeded but no user returned: " + JSON.stringify(profile));
      return next(null, false);
    }
  }
))

// -=-=- other code omitted here -=-=-
In this file, we are importing our new CAS authentication strategy, then using passport.use to tell Passport.js to use this authentication strategy when requested. Inside, we set up the various settings for our strategy, as well as the callback function when a user successfully authenticates. In this case, the CAS server will give us a profile object that should contain the user attribute with the user’s username, which we can send to our authenticateUser method we’ve already created. Finally, we also include a short catch to log any errors where the user is able to log in but a username is not provided.
In our .env file, we’ll need to add two more settings. The CAS_URL is the base URL for the CAS server itself, and the CAS_SERVICE_URL is the URL that users should be sent back to, along with a ticket, to complete the log in process. Since we are working in GitHub Codespaces, our CAS_SERVICE_URL will be the same as our OPENAPI_HOST.
# -=-=- other settings omitted here -=-=-
CAS_URL=https://testcas.cs.ksu.edu
CAS_SERVICE_URL=https://$CODESPACE_NAME-$PORT.$GITHUB_CODESPACES_PORT_FORWARDING_DOMAIN
Notice that we already add the /auth/cas route to the end of the CAS_SERVICE_URL in the configuration above - since that path won’t change, it makes sense to just include it there instead of having to remember to add it to the path in the .env file. We should also put sensible defaults in our .env.example and .env.test files as well.
Now, to use this authentication method, all we have to do is update our /auth/cas route in routes/auth.js to use this strategy:
/**
 * CAS Authentication
 *
 * @param {Object} req - Express request object
 * @param {Object} res - Express response object
 * @param {Function} next - Express next middleware function
 *
 * @swagger
 * /auth/cas:
 *   get:
 *     summary: CAS authentication
 *     description:  CAS authentication for deployment
 *     tags: [auth]
 *     responses:
 *       200:
 *         description: success
 */
router.get("/cas", passport.authenticate('cas'), authSuccess);

// -=-=- other code omitted here -=-=-
With that in place, we can start our application and test it by navigating to the /auth/cas route to see if our login attempt works:
$ npm run devIf everything works correctly, we should be directed to our CAS server to authenticate, then we’ll be sent back to our own server with a ticket to validate our authentication. Finally, once the ticket is validated, we’ll be redirected back to our home page with a session cookie set:
Finally, we’ll need to add a bit more logic to our logout process to properly log users out of both our application and the CAS server they originally logged in through. So, let’s update our /auth/logout route to include that:
// -=-=- other code omitted here -=-=-
router.get('/logout', function (req, res, next) {
  res.clearCookie(process.env.SESSION_NAME || 'connect.sid');  // clear the session cookie
  req.logout(function(err) {       // logout of passport
    if (err) {
      logger.error(err);
    }
    req.session.destroy(function (err) {  // destroy the session
      if (err) {
        logger.error(err);
      }
      const redirectURL = process.env.CAS_URL + "/logout?service=" + encodeURIComponent(process.env.CAS_SERVICE_URL)
      res.redirect(redirectURL);
    })
  });
});
// -=-=- other code omitted here -=-=-
Most CAS servers will automatically redirect the user back to the service request parameter, but not all of them. However, this will ensure that the CAS server knows the user has logged out and will invalidate any tickets for that user.
The test CAS server was updated recently to properly redirect users back to the service request parameter, so you will probably no longer see the Logout page from that server in your testing. This should make developing and testing with that server a bit more straightforward
What if a user logs in to our application through CAS, but we don’t have them in our database of users? Do we want to deny them access to the application? Or should we somehow gracefully add them to the list of users and give them some basic access to our application?
Since we are building a website meant to be open to a number of users, let’s go ahead and implement a strategy where a new user can be created in the event that a user logs on through one of our authentication strategies but isn’t found in the database.
Thankfully, to do this is really simple - all we must do is add a few additional lines to our authenticateUser function in the configs/auth.js file:
// -=-=- other code omitted here -=-=-
const authenticateUser = function(username, next) {
  // Find user with the username
  User.findOne({
    attributes: ["id", "username"],
    include: {
      model: Role,
      as: "roles",
      attributes: ["id", "role"],
      through: {
        attributes: [],
      },
    },
    where: { username: username },
  })
  .then((user) => {
    // User not found
    if (user === null) {
      // Create new user
      User.create({ username: username}).then((user) => {
        logger.debug("New user created via login: " + user.username);

        // Convert Sequelize object to plain JavaScript object
        user = JSON.parse(JSON.stringify(user))
        return next(null, user);
      })
    } else {
      // User authenticated
      logger.debug("Login succeeded for user: " + user.username);

      // Convert Sequelize object to plain JavaScript object
      user = JSON.parse(JSON.stringify(user))
      return next(null, user);
    }
  });
}

// -=-=- other code omitted here -=-=-
Now, when we try to log in using any username, we’ll either be logged in as an existing user, or a new user will be created. We can see this in our log output:
[2025-03-20 07:15:17.256 PM] http:      GET /auth/cas 302 0.697 ms - 0
[2025-03-20 07:15:23.525 PM] debug:     New user created via login: russfeld
[2025-03-20 07:15:23.564 PM] http:      GET /auth/cas?ticket=aac12881-9bea-449c-bf13-b981525cc8db 302 218.923 ms - 30
[2025-03-20 07:15:23.721 PM] http:      GET / 200 1.299 ms - -
That’s all there is to it! Of course, we can also configure this process to automatically assign roles to our newly created user, but for right now we won’t worry about that.
Now that we have our authentication system working for our application, let’s write some unit tests to confirm that it works as expected in a variety of situations.
As part of these tests, we’ll end up creating a test double of one part of our authentication system to make it easier to test. To do this, we’ll use the Sinon library, so let’s start by installing it as a development dependency:
$ npm install --save-dev sinonWe’ll store these tests in the test/auth.js file, starting with this content including the libraries we’ll need to use:
/**
 * @file /auth Route Tests
 * @author Russell Feldhausen <russfeld@ksu.edu>
 */

// Load Libraries
import request from "supertest";
import { use, should, expect } from "chai";
import chaiJsonSchemaAjv from "chai-json-schema-ajv";
import chaiShallowDeepEqual from "chai-shallow-deep-equal";
import sinon from "sinon";
import jsonwebtoken from "jsonwebtoken";
use(chaiJsonSchemaAjv.create({ verbose: true }));
use(chaiShallowDeepEqual);

// Import Express application
import app from "../app.js";

// Import Database
import { User, Role } from "../models/models.js";

// Modify Object.prototype for BDD style assertions
should();
We’ll continue to build out tests below that content in the same file.
First, let’s look at some tests for the /auth/bypass route, since that is the simplest. The first test is a very simple one to confirm that bypass authentication works, and also that it sets the expected cookie in the browser when it redirects the user back to the home page:
// -=-=- other code omitted here -=-=-

// Regular expression to match the expected cookie
const regex_valid = "^" + process.env.SESSION_NAME + "=\\S*; Path=/; HttpOnly$";

/**
 * Test Bypass authentication
 */
const bypassAuth = (user) => {
  it("should allow bypass login with user " + user, (done) => {
    const re = new RegExp(regex_valid, "gm");
    request(app)
      .get("/auth/bypass?token=" + user)
      .expect(302)
      .expect("Location", "/")
      .expect("set-cookie", re)
      .end((err) => {
        if (err) return done(err);
        done();
      });
  });
};

// List of existing users to be tested
const users = ["admin", "contributor", "manager", "user"];

/**
 * Test /auth/ routes
 */
describe("/auth", () => {
  describe("GET /bypass", () => {
    users.forEach((user) => {
      bypassAuth(user);
    });
  });
});
Notice that we are using a regular expression to help us verify that the cookie being sent to the user is using the correct name and has the expected content.
Next, we also should test to make sure that using bypass authentication with any unknown username will create that user:
// -=-=- other code omitted here -=-=-

/**
 * Test Bypass authentication creates user
 */
const bypassAuthCreatesUser = (user) => {
  it("should allow bypass login with new user " + user, (done) => {
    const re = new RegExp(regex_valid, "gm");
    request(app)
      .get("/auth/bypass?token=" + user)
      .expect(302)
      .expect("Location", "/")
      .expect("set-cookie", re)
      .end((err) => {
        if (err) return done(err);
        User.findOne({
          attributes: ["id", "username"],
          where: { username: user },
        }).then((found_user) => {
          expect(found_user).to.not.equal(null);
          found_user.should.have.property("username");
          expect(found_user.username).to.equal(user);
          done();
        });
      });
  });
};

// -=-=- other code omitted here -=-=-

/**
 * Test /auth/ routes
 */
describe("/auth", () => {
  describe("GET /bypass", () => {
    users.forEach((user) => {
      bypassAuth(user);
    });
    bypassAuthCreatesUser("testuser");
  });
});
This test will first log the user in, then it will directly check the database to ensure that the user has been created successfully. Alternatively, we could also use the API, but we’re trying to keep our tests independent, so in this case it makes the most sense to query the database directly in our test instead of any other method.
Next, let’s write the tests for our CAS authentication strategy. These are similar to the ones we’ve already written, but they have some key differences as well.
First, we can write a simple test just to show that any user who visits the /auth/cas route will be properly redirected to the correct CAS server:
// -=-=- other code omitted here -=-=-

/**
 * Test CAS authentication redirect
 */
const casAuthRedirect = () => {
  it("should redirect users to CAS server", (done) => {
    const expectedURL =
      process.env.CAS_URL +
      "/login?service=" +
      encodeURIComponent(process.env.CAS_SERVICE_URL + "/auth/cas");
    request(app)
      .get("/auth/cas")
      .expect(302)
      .expect("Location", expectedURL)
      .end((err) => {
        if (err) return done(err);
        done();
      });
  });
};

// -=-=- other code omitted here -=-=-

/**
 * Test /auth/ routes
 */
describe("/auth", () => {
  // -=-=- other code omitted here -=-=-

  describe("GET /cas", () => {
    casAuthRedirect();
  });
});
In this test, we are building the URL that the user should be redirected to, based on the settings we have already set in our environment file. Then, we simply check that the returned response is an HTTP 302 Found response with the correct location indicated.
The next two tests are much more complex, because they require us to mock the step where our server confirms that the user is authenticated with the CAS server by sending a request with a ticket attached, and then getting a response for that ticket. We can do this using a bit of clever coding and the Sinon library.
First, we need to mock up a response object that mimics what the server would respond with. This is mocked just so it will be understood by our CAS authentication library and may not work in all cases:
// -=-=- other code omitted here -=-=-

/**
 * Helper function to generate a valid mock CAS 2.0 Ticket
 */
const validTicket = (user, ticket) => {
  return {
    text: () => {
      return `<cas:serviceResponse xmlns:cas='http://www.yale.edu/tp/cas'>
          <cas:authenticationSuccess>
              <cas:user>${user}</cas:user>
              <cas:ksuPersonWildcatID>${123456789}</cas:ksuPersonWildcatID>
              <cas:proxyGrantingTicket>${ticket}</cas:proxyGrantingTicket>
          </cas:authenticationSuccess>
        </cas:serviceResponse>`;
    },
  };
};

// -=-=- other code omitted here -=-=-
This function creates an object with a single method text() that will return a valid XML ticket for the given user and random ticket ID.
Right below that, we can create a unit test that will mock the global fetch function used by our CAS authentication strategy to contact the CAS server to validate the ticket, and instead it will respond with our mock response object created above:
// -=-=- other code omitted here -=-=-

/**
 * Test CAS with valid ticket
 */
const casAuthValidTicket = (user) => {
  it("should log in user " + user + " via CAS", (done) => {
    const ticket = "abc123";
    const fetchStub = sinon
      .stub(global, "fetch")
      .resolves(validTicket(user, ticket));
    const re = new RegExp(regex_valid, "gm");
    request(app)
      .get("/auth/cas?ticket=" + ticket)
      .expect(302)
      .expect("Location", "/")
      .expect("set-cookie", re)
      .end((err) => {
        if (err) return done(err);
        sinon.assert.calledOnce(fetchStub);
        expect(fetchStub.args[0][0]).to.contain("?ticket=" + ticket);
        done();
      });
  });
};

// -=-=- other code omitted here -=-=-

/**
 * Test /auth/ routes
 */
describe("/auth", () => {
  // -=-=- other code omitted here -=-=-

  describe("GET /cas", () => {
    casAuthRedirect();
    users.forEach((user) => {
      casAuthValidTicket(user);
    });
  });
});
In this test, we create a fetchStub object that is used by our CAS authentication strategy in place of fetch. It will confirm that the user has a valid ticket and can be authenticated, so we can perform the same steps as before and ensure that the cookie is properly set when the user is authenticated.
We also are checking that the fetch method we mocked was actually called once, and that it contained the ticket we provided as part of the URL. This is just a sanity check to make sure that we mocked up the correct part of our application!
We must also add a new item in the afterEach() hook for Mocha, which will reset all functions and objects that are mocked by Sinon after each test. This ensures we are always working with a clean slate. We’ll update the function in test/hooks.js with this new content:
// -=-=- other code omitted here -=-=-
// Import libraries
import sinon from "sinon";
// Root Hook Runs Before Each Test
export const mochaHooks = {
// -=-=- other code omitted here -=-=-
// Hook runs after each individual test
afterEach(done) {
// Restore Sinon mocks
sinon.restore();
// Remove all data from the database
seeds.down({ to: 0 }).then(() => {
done();
});
},
};Finally, we also should confirm that logging in via CAS will create a new user if the username is not recognized. This test builds upon the previous CAS test in a way similar to the one used for bypass authentication above:
// -=-=- other code omitted here -=-=-
/**
* Test CAS creates user
*/
const casAuthValidTicketCreatesUser = (user) => {
it("should create new user " + user + " via CAS", (done) => {
const ticket = "abc123";
const fetchStub = sinon
.stub(global, "fetch")
.resolves(validTicket(user, ticket));
const re = new RegExp(regex_valid, "gm");
request(app)
.get("/auth/cas?ticket=" + ticket)
.expect(302)
.expect("Location", "/")
.expect("set-cookie", re)
.end((err) => {
if (err) return done(err);
sinon.assert.calledOnce(fetchStub);
expect(fetchStub.args[0][0]).to.contain("?ticket=" + ticket);
User.findOne({
attributes: ["id", "username"],
where: { username: user },
}).then((found_user) => {
expect(found_user).to.not.equal(null);
found_user.should.have.property("username");
expect(found_user.username).to.equal(user);
done();
});
});
});
};
// -=-=- other code omitted here -=-=-
/**
* Test /auth/ routes
*/
describe("/auth", () => {
// -=-=- other code omitted here -=-=-
describe("GET /cas", () => {
casAuthRedirect();
users.forEach((user) => {
casAuthValidTicket(user);
});
casAuthValidTicketCreatesUser("testuser");
});
});As before, this will log a user in via CAS, confirm that it works, and then check in the database to make sure that the new user is properly created.
Now that we’ve tested both ways to log into our application, we can write some tests to confirm that users can properly request a JWT to be used in our frontend later on. So, our first test simply checks to make sure a user with a valid session can request a token:
// -=-=- other code omitted here -=-=-
/**
* Test user can request a valid token
*/
const userCanRequestToken = (user) => {
it("should allow user " + user + " to request valid JWT", (done) => {
const re = new RegExp(regex_valid, "gm");
const agent = request.agent(app);
agent
.get("/auth/bypass?token=" + user)
.expect(302)
.expect("Location", "/")
.expect("set-cookie", re)
.end((err) => {
if (err) return done(err);
agent
.get("/auth/token")
.expect(200)
.end((err, res) => {
if (err) return done(err);
res.body.should.be.an("object");
res.body.should.have.property("token");
const token = jsonwebtoken.decode(res.body.token);
token.should.have.property("username");
token.username.should.be.equal(user);
done();
});
});
});
};
// -=-=- other code omitted here -=-=-
/**
* Test /auth/ routes
*/
describe("/auth", () => {
// -=-=- other code omitted here -=-=-
describe("GET /token", () => {
users.forEach((user) => {
userCanRequestToken(user);
});
userCanRequestToken("testuser");
});
});In this test, we must use a persistent browser agent to make our requests. This will ensure that any cookies or other settings are saved between requests. Thankfully, the Supertest library we are using already has that functionality, so all we have to do is create an agent for our testing as shown in the test above. Once we have successfully logged in, we can confirm that the /auth/token endpoint sends a valid JWT that contains information about the current user. For these tests, we are using bypass authentication for simplicity, but any authentication method could be used.
When we run the tests at the bottom of the file, notice that we are running this for all existing users, as well as a newly created user. Both types of users should be able to request a token for our application.
Next, let’s confirm that all of a user’s roles are listed in the JWT issued for that user. This is important because, later on in this example, we’ll be using those roles to implement role-based authorization in our application, so it is vital to make sure our JWTs include the correct roles:
// -=-=- other code omitted here -=-=-
/**
* Test user roles are correctly listed in token
*/
const userRolesAreCorrectInToken = (user) => {
it("should contain correct roles for user " + user + " in JWT", (done) => {
const re = new RegExp(regex_valid, "gm");
const agent = request.agent(app);
agent
.get("/auth/bypass?token=" + user)
.expect(302)
.expect("Location", "/")
.expect("set-cookie", re)
.end((err) => {
if (err) return done(err);
agent
.get("/auth/token")
.expect(200)
.end((err, res) => {
if (err) return done(err);
res.body.should.be.an("object");
res.body.should.have.property("token");
const token = jsonwebtoken.decode(res.body.token);
User.findOne({
attributes: ["id", "username"],
include: {
model: Role,
as: "roles",
attributes: ["id", "role"],
through: {
attributes: [],
},
},
where: { username: user },
}).then((user) => {
if (user.roles.length != 0) {
token.should.have.property("roles");
expect(token.roles.length).to.equal(user.roles.length);
user.roles.forEach((expected_role) => {
expect(
token.roles.some((role) => role.id == expected_role.id),
).to.equal(true);
});
} else {
token.should.not.have.property("roles");
}
done();
});
});
});
});
};
// -=-=- other code omitted here -=-=-
/**
* Test /auth/ routes
*/
describe("/auth", () => {
// -=-=- other code omitted here -=-=-
describe("GET /token", () => {
users.forEach((user) => {
userCanRequestToken(user);
userRolesAreCorrectInToken(user);
});
userCanRequestToken("testuser");
userRolesAreCorrectInToken("testuser");
});
});This test may seem very long and verbose, but it is very straightforward. We first login and request a token for a user, and then we also look up that user in the database including all associated roles. Then, we simply assert that the number of roles in the token is the same as the number of them in the database, and if there are any roles that each role is found as expected.
Finally, we should write one additional test, that simply confirms that the application will not allow anyone to request a token if they are not currently logged in:
// -=-=- other code omitted here -=-=-
/**
* User must have a valid session to request a token
*/
const mustBeLoggedInToRequestToken = () => {
it("should not allow a user to request a token without logging in", (done) => {
request(app)
.get("/auth/token")
.expect(401)
.end((err) => {
if (err) return done(err);
done();
});
});
};
// -=-=- other code omitted here -=-=-
/**
* Test /auth/ routes
*/
describe("/auth", () => {
// -=-=- other code omitted here -=-=-
describe("GET /token", () => {
users.forEach((user) => {
userCanRequestToken(user);
userRolesAreCorrectInToken(user);
});
userCanRequestToken("testuser");
userRolesAreCorrectInToken("testuser");
mustBeLoggedInToRequestToken();
});
});For this test, we simply check that the application returns an HTTP 401 response if the user tries to request a token without first being logged in.
Finally, we can write a few tests to make sure our logout process is also working as expected. The first test will confirm that the session cookie we are using is properly removed from the user’s browser when they log out:
// -=-=- other code omitted here -=-=-
// Regular expression to match deleting the cookie
const regex_destroy =
"^" +
process.env.SESSION_NAME +
"=; Path=/; Expires=Thu, 01 Jan 1970 00:00:00 GMT$";
/**
* Logout will remove the cookie
*/
const logoutDestroysCookie = (user) => {
it("should remove the cookie on logout", (done) => {
const re = new RegExp(regex_valid, "gm");
const re_destroy = new RegExp(regex_destroy, "gm");
const agent = request.agent(app);
agent
.get("/auth/bypass?token=" + user)
.expect(302)
.expect("Location", "/")
.expect("set-cookie", re)
.end((err) => {
if (err) return done(err);
agent
.get("/auth/logout")
.expect(302)
.expect("set-cookie", re_destroy)
.end((err) => {
if (err) return done(err);
done();
});
});
});
};
// -=-=- other code omitted here -=-=-
/**
* Test /auth/ routes
*/
describe("/auth", () => {
// -=-=- other code omitted here -=-=-
describe("GET /logout", () => {
logoutDestroysCookie("admin");
});
});In this test, we are looking for a second set-cookie header to be sent when the user logs out. This header will both contain an empty cookie, but also will set the cookie’s expiration date to the earliest date possible. So, we can simply look for that header to confirm our cookie is being properly removed and expired from the user’s browser when they log out. We only really have to test this for a single username, since the process is identical for all of them.
Next, we should also confirm that the logout process will redirect users to the CAS server as well and log them out of any existing CAS sessions.
// -=-=- other code omitted here -=-=-
// Regular expression for redirecting to CAS
const regex_redirect = "^" + process.env.CAS_URL + "/logout\\?service=\\S*$";
/**
* Logout redirects to CAS
*/
const logoutRedirectsToCas = (user) => {
it("should redirect to CAS on logout", (done) => {
const re = new RegExp(regex_valid, "gm");
const re_redirect = new RegExp(regex_redirect, "gm");
const agent = request.agent(app);
agent
.get("/auth/bypass?token=" + user)
.expect(302)
.expect("Location", "/")
.expect("set-cookie", re)
.end((err) => {
if (err) return done(err);
agent
.get("/auth/logout")
.expect(302)
.expect("Location", re_redirect)
.end((err) => {
if (err) return done(err);
done();
});
});
});
};
// -=-=- other code omitted here -=-=-
/**
* Test /auth/ routes
*/
describe("/auth", () => {
// -=-=- other code omitted here -=-=-
describe("GET /logout", () => {
logoutDestroysCookie("admin");
logoutRedirectsToCas("admin");
});
});Once again, we are simply checking the Location header of the HTTP 302 Found response received from our application. We are making use of regular expressions to ensure we are being properly redirected to the correct CAS server and the logout route on that server.
Finally, we should confirm that once a user has logged out, they are no longer able to request a new token from the application:
// -=-=- other code omitted here -=-=-
/**
* Logout prevents requesting a token
*/
const logoutPreventsToken = (user) => {
it("should prevent access to token after logging out", (done) => {
const re = new RegExp(regex_valid, "gm");
const agent = request.agent(app);
agent
.get("/auth/bypass?token=" + user)
.expect(302)
.expect("Location", "/")
.expect("set-cookie", re)
.end((err) => {
if (err) return done(err);
agent
.get("/auth/token")
.expect(200)
.end((err) => {
if (err) return done(err);
agent
.get("/auth/logout")
.expect(302)
.end((err) => {
if (err) return done(err);
agent
.get("/auth/token")
.expect(401)
.end((err) => {
if (err) return done(err);
done();
});
});
});
});
});
};
// -=-=- other code omitted here -=-=-
/**
* Test /auth/ routes
*/
describe("/auth", () => {
// -=-=- other code omitted here -=-=-
describe("GET /logout", () => {
logoutDestroysCookie("admin");
logoutRedirectsToCas("admin");
logoutPreventsToken("admin");
});
});In this test, we simply log in, request a token, then log out, and show that the application will no longer allow us to request a token, even though we are using the same user agent as before. This is a great way to confirm that our entire process is working!
Now is a great time to lint, format, and commit our code to GitHub before continuing!
The authorized-roles.js file shown in the video is out of date. Refer to the code below for a corrected version. Corrections are discussed in the Errata chapter.
Now that we finally have a working authentication system, we can start to add role-based authorization to our application. This will ensure that only users with specific roles can perform certain actions within our RESTful API. To do this, we’ll need to create a couple of new Express middlewares to help load the contents of our JWT into the request, and also to verify that the authenticated user has the appropriate roles to perform an action.
First, let’s create a middleware to handle loading our JWT from an authorization header into the Express request object:
/**
* @file Middleware for reading JWTs from the Bearer header and storing them in the request
* @author Russell Feldhausen <russfeld@ksu.edu>
* @exports tokenMiddleware the token middleware
*/
// Import Libraries
import jsonwebtoken from 'jsonwebtoken'
// Import configurations
import logger from '../configs/logger.js'
async function tokenMiddleware(req, res, next) {
// Retrieve the token from the headers
const authHeader = req.headers['authorization']
const token = authHeader && authHeader.split(' ')[1]
// If the token is null in the header, send 401 unauthorized
if (token == null) {
logger.debug('JWT in header is null')
return res.status(401).end();
}
// Verify the token
jsonwebtoken.verify(token, process.env.JWT_SECRET_KEY, async (err, token) => {
// Handle common errors
if (err) {
if (err.name === 'TokenExpiredError') {
// If the token is expired, send 401 unauthorized
return res.status(401).end()
} else {
// If the token won't parse, send 403 forbidden
logger.error("JWT Parsing Error!")
logger.error(err)
return res.sendStatus(403)
}
}
// Attach token to request
req.token = token;
// Call next middleware
next();
});
}
export default tokenMiddleware;This middleware will extract our JWT from the authorization: Bearer header that should be present in any request from our frontend single-page web application to our API. It then checks that the signature matches the expected signature and that the payload of the JWT has not been tampered with. It also makes sure the JWT has not expired. If all of those checks pass, then it simply attaches the contents of the JWT to the Express request object as req.token, so we can use it later in our application.
To use this middleware, we need to make a small change to the structure of our routes/api.js file to allow users to access the base API route without needing the token, but all other routes will require a valid token for access:
/**
* @file API main router
* @author Russell Feldhausen <russfeld@ksu.edu>
* @exports router an Express router
*
* @swagger
* tags:
* name: api
* description: API routes
*/
// Import libraries
import express from "express";
// Import middleware
import tokenMiddleware from "../middlewares/token.js";
// Import v1 routers
import rolesRouter from "./api/v1/roles.js";
import usersRouter from "./api/v1/users.js";
// Create Express router
const router = express.Router();
/**
* Gets the list of API versions
*
* @param {Object} req - Express request object
* @param {Object} res - Express response object
* @param {Function} next - Express next middleware function
*
* @swagger
* /api/:
* get:
* summary: list API versions
* tags: [api]
* responses:
* 200:
* description: the list of users
* content:
* application/json:
* schema:
* type: array
* items:
* type: object
* properties:
* version:
* type: string
* url:
* type: string
* example:
* - version: "1.0"
* url: /api/v1/
*/
router.get("/", function (req, res, next) {
res.json([
{
version: "1.0",
url: "/api/v1/",
},
]);
});
// Use Token Middleware
router.use(tokenMiddleware);
// Use v1 routers after API route
router.use("/v1/roles", rolesRouter);
router.use("/v1/users", usersRouter);
export default router;Here, we import our new middleware, and then we rearrange the contents of the file so that the single /api route comes first, then we add our middleware and the rest of the API routes at the end of the file. Remember that everything in Express is executed in the order it is attached to the application, so in this way any routes that occur before our middleware is attached can be accessed without a valid JWT, but any routes or routers added afterward will require a valid JWT for access.
Next, we can create another middleware function that will check if a user has the appropriate roles to perform an operation via our API. However, instead of writing a simple function as our middleware, or even writing a number of different functions for each possible role, we can take advantage of one of the most powerful features of JavaScript - we can create a function that returns another function! Let’s take a look and see how it works:
/**
* @file Middleware for role-based authorization
* @author Russell Feldhausen <russfeld@ksu.edu>
* @exports roleBasedAuth middleware
*/
// Import configurations
import logger from "../configs/logger.js";
/**
* Build a middleware function to validate a user has one of a list of roles
*
* @param {...any} roles a list of roles that are valid for this operation
* @returns a middleware function for those roles.
*/
const roleBasedAuth = (...roles) => {
return function roleAuthMiddleware (req, res, next) {
logger.debug("Route requires roles: " + roles);
logger.debug(
"User " +
req.token.username +
" has roles: " +
req.token.roles.map((r) => r.role).join(","),
);
let match = false;
// loop through each role given
roles.forEach((role) => {
// if the user has that role, then they can proceed
if (req.token.roles.some((r) => r.role === role)) {
logger.debug("Role match!");
if (!match) {
match = true;
return next();
}
}
});
if (!match) {
// if no roles match, send an unauthenticated response
logger.debug("No role match!");
return res.status(401).send();
}
};
};
export default roleBasedAuth;This file contains a function named roleBasedAuth that accepts a list of roles as parameters (they can be provided directly or as an array, but either way we can treat them like an array in our code). Then, we will return a new middleware function named roleAuthMiddleware that will check to see if the currently authenticated user (indicated by req.token) has at least one of the named roles. If so, then there is a match and the user should be able to perform the operation. If the user does not have any of the roles listed, then the user should not be able to perform the operation and a 401 Unauthorized response should be sent. This file also includes some helpful logging information to help ensure things are working properly.
Finally, let’s look at how we can use that middleware function to implement role-based authorization in our application. Let’s start simple - in this instance, we can update our GET /api/v1/roles/ operation to require the user to have the manage_users role in order to list all possible roles in the application. To do this, we can import our new middleware function in the routes/api/v1/roles.js file, and then call that function to create a new middleware function to use in that file:
/**
* @file Roles router
* @author Russell Feldhausen <russfeld@ksu.edu>
* @exports router an Express router
*
* @swagger
* tags:
* name: roles
* description: Roles Routes
*/
// Import libraries
import express from "express";
// Create Express router
const router = express.Router();
// Import models
import { Role } from "../../../models/models.js";
// Import logger
import logger from "../../../configs/logger.js";
// Import middlewares
import roleBasedAuth from "../../../middlewares/authorized-roles.js";
/**
* Gets the list of roles
*
* @param {Object} req - Express request object
* @param {Object} res - Express response object
* @param {Function} next - Express next middleware function
*
* @swagger
* /api/v1/roles:
* get:
* summary: roles list page
* description: Gets the list of all roles in the application
* tags: [roles]
* security:
* - bearerAuth:
* - 'manage_users'
* responses:
* 200:
* description: the list of roles
* content:
* application/json:
* schema:
* type: array
* items:
* $ref: '#/components/schemas/Role'
*/
router.get("/", roleBasedAuth("manage_users"), async function (req, res, next) {
try {
const roles = await Role.findAll();
res.json(roles);
} catch (error) {
logger.error(error);
res.status(500).end();
}
});
export default router;Notice here that we are calling the roleBasedAuth function when we add it to our endpoint, which in turn will return a new middleware function that will be called anytime this endpoint is accessed. It is a bit complicated and confusing at first, but hopefully it makes sense.
We also have added a new security item to our Open API documentation, which allows us to test this route by providing a JWT through the Open API documentation website. We can even include the specific roles that are able to access this endpoint, but as of this writing it is only part of the Open API 3.1 spec but is not supported by the swagger-ui library so it won’t appear on our documentation page.
Let’s test it now by starting our server in development mode:
$ npm run devOnce we have loaded our page, let’s go ahead and log in as the admin user by navigating to /auth/bypass?token=admin - this will return us to our home page, but now we have an active session we can use.
Once we have done that, we can now go to the /docs route to view our documentation. We should now notice that there is a new Authorize button at the top of the page:
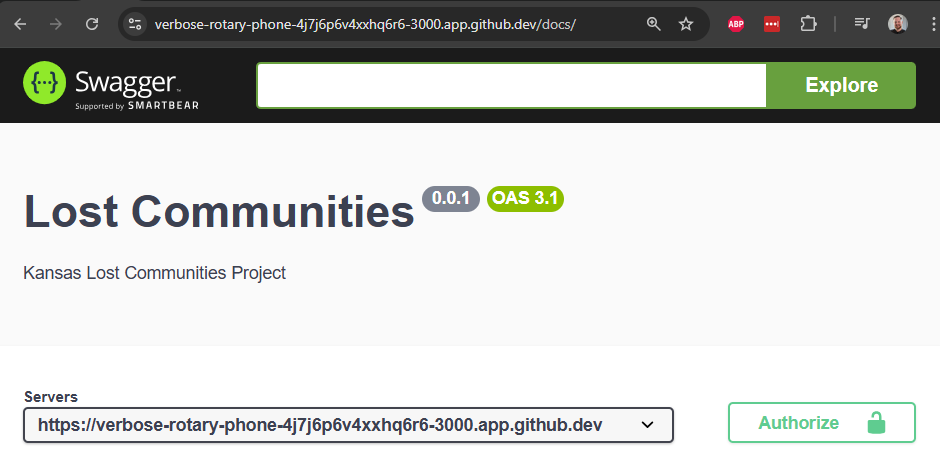
In addition, if we scroll down to find our /api/v1/roles route, we should also see that it now has a lock icon next to it, showing that it requires authentication before we can access it:

If we try to test that route now, even though we have a valid session cookie session, it should give us a 401 Unauthorized response because we aren’t providing a valid JWT as part of our request:

To fix this, we need to authorize our application using a valid JWT. Thankfully, we can request one by finding the /auth/token route in our documentation and executing that route:
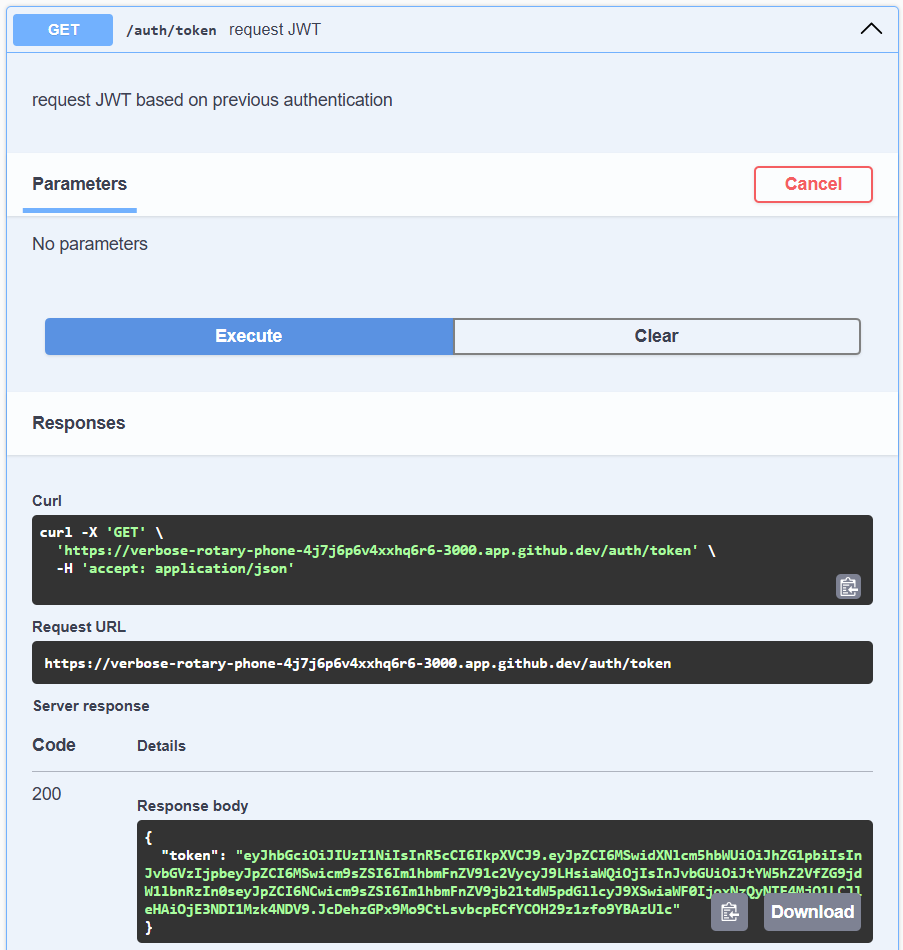
Once we have that, we can click the new Authorize button at the top, and paste the text of that token in the window that pops up. We just need the raw part of the JWT in quotes that is the value of the token property, without the quotes themselves included:
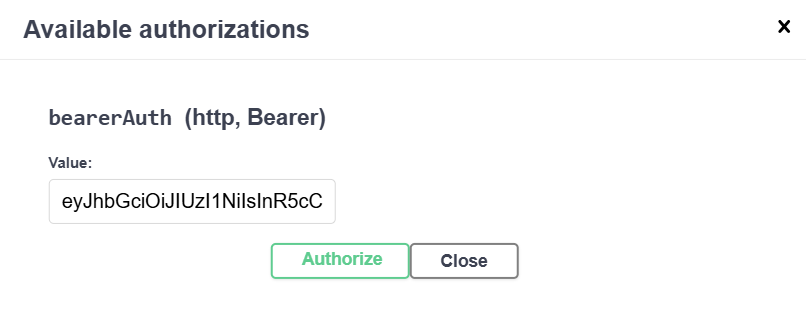
Finally, once that has been done, we can try the /api/v1/roles route again, and it should now let us access that route:
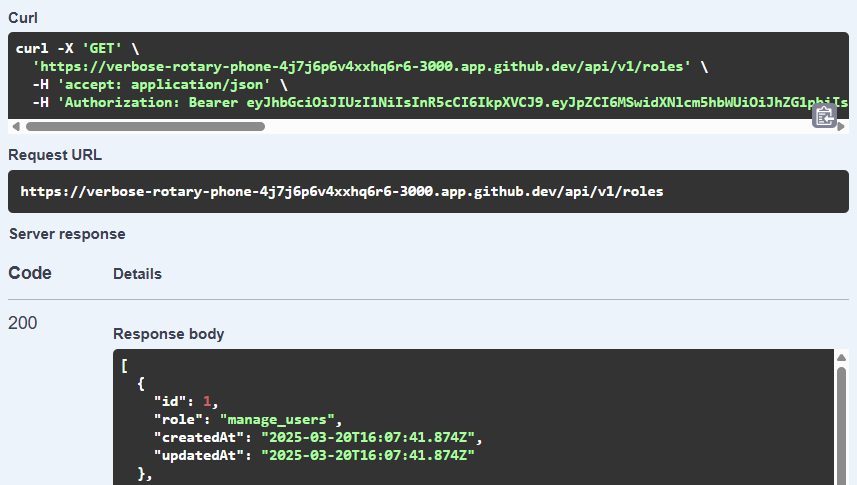
We can also see that it is properly using our role-based authorization by checking the debug output of our application:
[2025-03-21 12:54:14.085 AM] debug: Route requires roles: manage_users
[2025-03-21 12:54:14.085 AM] debug: User admin has roles: manage_users,manage_documents,manage_communities
[2025-03-21 12:54:14.086 AM] debug: Role match!
[2025-03-21 12:54:14.087 AM] sql: Executing (default): SELECT `id`, `role`, `createdAt`, `updatedAt` FROM `roles` AS `Role`;
[2025-03-21 12:54:14.090 AM] http: GET /api/v1/roles 200 9.553 ms - 784There we go! That is all it takes to add role-based authorization to our application. Next, we’ll look at how to update our unit tests to use our new authentication system and roles.
Of course, now that we’re requiring a valid JWT for all API routes, and adding role-based authorization for most routes, all of our existing API unit tests now longer work. So, let’s work on updating those tests to use our new authentication system.
First, let’s build a simple helper function we can use to easily log in as a user and request a token to use in our application. We’ll place this in a new file named test/helpers.js:
/**
* @file Unit Test Helpers
* @author Russell Feldhausen <russfeld@ksu.edu>
*/
// Import Libraries
import request from "supertest";
import app from "../app.js";
export const login = async (user) => {
const agent = request.agent(app);
return agent.get("/auth/bypass?token=" + user).then(() => {
return agent
.get("/auth/token")
.expect(200)
.then((res) => {
return res.body.token;
});
});
};This file is pretty straightforward - it simply uses the bypass login system to authenticate as a user, then it requests a token and returns it. It assumes that all other parts of the authentication process work properly - we can do this because we already have unit tests to check that functionality.
Now, let’s use this in our test/api/v1/roles.js file by adding a few new lines to each test. We’ll start with the simple getAllRoles test:
/**
* @file /api/v1/roles Route Tests
* @author Russell Feldhausen <russfeld@ksu.edu>
*/
// Load Libraries
import request from "supertest";
import { use, should } from "chai";
import Ajv from "ajv";
import addFormats from "ajv-formats";
import chaiJsonSchemaAjv from "chai-json-schema-ajv";
import chaiShallowDeepEqual from "chai-shallow-deep-equal";
// Import Express application
import app from "../../../app.js";
// Import Helpers
import { login } from "../../helpers.js"
// Configure Chai and AJV
const ajv = new Ajv();
addFormats(ajv);
use(chaiJsonSchemaAjv.create({ ajv, verbose: true }));
use(chaiShallowDeepEqual);
// Modify Object.prototype for BDD style assertions
should();
/**
* Get all Roles
*/
const getAllRoles = (state) => {
it("should list all roles", (done) => {
request(app)
.get("/api/v1/roles")
.set('Authorization', `Bearer ${state.token}`)
.expect(200)
.end((err, res) => {
if (err) return done(err);
res.body.should.be.an("array");
res.body.should.have.lengthOf(7);
done();
});
});
};
// -=-=- other code omitted here -=-=-
/**
* Test /api/v1/roles route
*/
describe("/api/v1/roles", () => {
describe("GET /", () => {
let state = {};
beforeEach(async () => {
state.token = await login("admin");
})
getAllRoles(state);
// -=-=- other code omitted here -=-=-
});
});To update this test, we have created a new state object that is present in our describe block at the bottom of the test. That state object can store various things we’ll use in our tests, but for now we’ll just use it to store a valid JWT for our application. Then, in a beforeEach Mocha hook, we use the login helper we created earlier to log in as the “admin” user and store a valid JWT for that user in the state.token property.
Then, we pass that state object to the getAllRoles test. Inside of that test, we use the state.token property to set an Authorization: Bearer header for our request to the API. If everything works correctly, this test should now pass.
We can make similar updates to the other tests in this file:
// -=-=- other code omitted here -=-=-
/**
* Check JSON Schema of Roles
*/
const getRolesSchemaMatch = (state) => {
it("all roles should match schema", (done) => {
const schema = {
type: "array",
items: {
type: "object",
required: ["id", "role"],
properties: {
id: { type: "number" },
role: { type: "string" },
createdAt: { type: "string", format: "iso-date-time" },
updatedAt: { type: "string", format: "iso-date-time" },
},
additionalProperties: false,
},
};
request(app)
.get("/api/v1/roles")
.set('Authorization', `Bearer ${state.token}`)
.expect(200)
.end((err, res) => {
if (err) return done(err);
res.body.should.be.jsonSchema(schema);
done();
});
});
};
/**
* Check Role exists in list
*/
const findRole = (state, role) => {
it("should contain '" + role.role + "' role", (done) => {
request(app)
.get("/api/v1/roles")
.set('Authorization', `Bearer ${state.token}`)
.expect(200)
.end((err, res) => {
if (err) return done(err);
const foundRole = res.body.find((r) => r.id === role.id);
foundRole.should.shallowDeepEqual(role);
done();
});
});
};
// -=-=- other code omitted here -=-=-
/**
* Test /api/v1/roles route
*/
describe("/api/v1/roles", () => {
describe("GET /", () => {
let state = {};
beforeEach(async () => {
state.token = await login("admin");
})
getAllRoles(state);
getRolesSchemaMatch(state);
roles.forEach((r) => {
findRole(state, r);
});
});
});This will ensure that each RESTful API action will work properly with an authenticated user, but it doesn’t test whether the user has the proper role to perform the action (in this instance, we are using the admin user which has the appropriate role already). On the next page, we’ll build a very flexible system to perform unit testing on our role-based authorization middleware.
Earlier in this example we created a generator function named roleBasedAuth (stored in middlewares/authorized-roles.js) that returns a middleware function named roleAuthMiddleware that we can use as a middleware in any of our RESTful API endpoints to ensure that only users with specific roles are able to perform each and every action in our API.
When it comes to testing, however, this can quickly become really complex. For example, if we have 15 routes and 6 user roles, we must write 120 tests just to test each combination of route and role in order to truly test this setup.
In addition, if we continue to use our current strategy of integration testing (where each test performs a full action on the API), the tests we write will need to be unique for each endpoint, so even if we simplify things, we’ll still need at least 2 tests per endpoint (one for roles that should have access, and another for roles that should not).
Instead, let’s look at a way we can deconstruct our Express application a bit to test two things directly:
roleAuthMiddleware present on each route?roleAuthMiddleware function allow the correct roles for each route?If we can confirm both of these for each route, we can assume that our role-based authorization is implemented correctly.
As you may recall, applications written in Express consist of an application that has middlewares and handlers attached in a specific order. In addition, we can create smaller components called routers that each have their own middlewares and handlers attached. Overall, we may end up with a structure similar to this one:
A more detailed explanation of the structure of Express applications can be found here: https://www.sohamkamani.com/nodejs/expressjs-architecture/
In code, each Express router has a stack variable that contains a list of layers, which can either be middleware functions or actual route handlers. Middleware layers will contain the name of the middleware function, whereas route handlers can be checked using a match function to determine if the handler matches a given path.
So, in our test/helpers.js file, we can write a new helper function to this for our tests:
// -=-=- other code omitted here -=-=-
/**
* Iterate through the router stack of an Express app to find a matching middleware function
* attached to a particular path and/or method
*
* @param {string} name the name of the function to find
* @param {string} path the path of the endpoint
* @param {string} method the HTTP method of the endpoint
* @param {Router} router The Express router to search
* @returns
*/
const findMiddlewareFunction = (name, path, method, router = app._router) => {
// Replace blank paths with the default / path
if (path.length == 0) {
path = "/"
}
for (const layer of router.stack) {
// Return if the middleware function is found
if (layer.name === name) {
return layer.handle;
} else {
if (layer.match(path)) {
// Recurse into a router
if (layer.name === "router" && layer.path.length > 0) {
// Remove matching portion of path
path = path.slice(layer.path.length);
return findMiddlewareFunction(name, path, method, layer.handle);
}
// Find matching handler
if (layer.route && layer.route.methods[method]) {
return findMiddlewareFunction(name, path, method, layer.route);
}
}
}
}
return null;
};
// -=-=- other code omitted here -=-=-
Starting with Express version 5.0, app._router has been moved to app.router to make accessing the built-in router easier. This should be updated in the code above if you are running Express 5.0 or later. Changelog
Using that function, we can now write another function to actually test our middleware using some mock objects:
// -=-=- other code omitted here -=-=-
// Import Libraries
import request from "supertest";
import { expect } from "chai";
import sinon from "sinon";
// -=-=- other code omitted here -=-=-
/**
* Test if a role is able to access the route via the roleAuthMiddleware function
*
* @param {string} path the path of the endpoint
* @param {string} method the HTTP method of the endpoint
* @param {string} role the role to search for
* @param {boolean} allowed whether the role should be allowed to access the route
*/
export const testRoleBasedAuth = (path, method, role, allowed) => {
it(
"should role '" + role + "' access '" + method + " " + path + "': " + allowed,
(done) => {
// Mock Express Request object with token attached
const req = {
token: {
username: "test",
roles: [
{
role: role,
},
],
},
};
// Mock Express Response object
const res = {
status: sinon.stub(),
send: sinon.stub(),
};
res.status.returns(res);
// Mock Express Next Middleware function
const next = sinon.stub();
// Find the middleware function in the router stack for the given path and method
const middleware = findMiddlewareFunction(
"roleAuthMiddleware",
path,
method,
);
expect(middleware).to.not.equal(null);
// Call the middleware function
middleware(req, res, next);
if (allowed) {
// If allowed, expect the `next` function to be called
expect(next.calledOnce).to.equal(true);
} else {
// Otherwise, it should send a 401 response
expect(res.status.calledWith(401)).to.equal(true);
}
done();
},
);
};The comments in the function describe how it works pretty clearly. Most of the code is just setting up barebones mock objects using Sinon for the Express request req, response res, and next middleware function. Once it finds our roleAuthMiddleware function in the router stack using the helper function above, it will call it and observe the response to determine if the user was allowed to access the desired endpoint or not.
The last thing we’ll add to our test/helpers.js file is a helpful list of all of the roles available in the application, which we can use for our testing:
// -=-=- other code omitted here -=-=-
// List of global roles
export const all_roles = [
"manage_users",
"manage_documents",
"add_documents",
"manage_communities",
"add_communities",
"view_documents",
"view_communities",
];With those helpers in place, we can now add a few lines to our test/api/v1/roles.js test file to check whether each and every role can access the endpoint in that router.
// -=-=- other code omitted here -=-=-
// Import Helpers
import { login, testRoleBasedAuth, all_roles } from "../../helpers.js";
// -=-=- other code omitted here -=-=-
/**
* Test /api/v1/roles route
*/
describe("/api/v1/roles", () => {
describe("GET /", () => {
// -=-=- other code omitted here -=-=-
const allowed_roles = ["manage_users"];
all_roles.forEach((r) => {
testRoleBasedAuth("/api/v1/roles", "get", r, allowed_roles.includes(r))
})
});
});This code does a couple of very nifty things. First, we clearly define which roles should be allowed to access the endpoint. This can be done as part of the unit testing file here, or we may have some global file in our test suite that documents each role and route that we can read from.
Below that, we iterate through the list of all roles exported from the test/helpers.js file, and call our testRoleBasedAuth method for each one of those roles. The last argument to that function is a boolean that determines whether the role should be able to access this route. To determine that, we simply see if the role from the list of global roles can also be found in the list of allowed roles. If so, that will be true and the function will check that the role can access the route. If not, it will be false and the function will confirm that the user is unable to access the route.
Now, when we run these tests, we’ll see that each role is explicitly checked:
/api/v1/roles
GET /
✔ should list all roles
✔ all roles should match schema
✔ should contain 'manage_users' role
✔ should contain 'manage_documents' role
✔ should contain 'add_documents' role
✔ should contain 'manage_communities' role
✔ should contain 'add_communities' role
✔ should contain 'view_documents' role
✔ should contain 'view_communities' role
✔ should role 'manage_users' access 'get /api/v1/roles': true
✔ should role 'manage_documents' access 'get /api/v1/roles': false
✔ should role 'add_documents' access 'get /api/v1/roles': false
✔ should role 'manage_communities' access 'get /api/v1/roles': false
✔ should role 'add_communities' access 'get /api/v1/roles': false
✔ should role 'view_documents' access 'get /api/v1/roles': false
✔ should role 'view_communities' access 'get /api/v1/roles': falseThere we go! We now have a very flexible way to test our role-based authorization.
Image Source: https://www.sohamkamani.com/nodejs/expressjs-architecture/ ↩︎
We should also add our role-based authorization middleware to our /api/v1/users routes. This can actually be done really simply, because we only want users with the manage_users role to be able to access any of these routes.
So, instead of attaching the middleware to each handler individually, we can attach it directly to the router before any handlers:
/**
* @file Users router
* @author Russell Feldhausen <russfeld@ksu.edu>
* @exports router an Express router
*
* @swagger
* tags:
* name: users
* description: Users Routes
*/
// Import libraries
import express from "express";
import { ValidationError } from "sequelize";
// Create Express router
const router = express.Router();
// Import models
import { User, Role } from "../../../models/models.js";
// Import logger
import logger from "../../../configs/logger.js";
// Import database
import database from "../../../configs/database.js";
// Import middlewares
import roleBasedAuth from "../../../middlewares/authorized-roles.js";
// Import utilities
import handleValidationError from "../../../utilities/handle-validation-error.js";
import sendSuccess from "../../../utilities/send-success.js";
// Add Role Authorization to all routes
router.use(roleBasedAuth("manage_users"));
// -=-=- other code omitted here -=-=-
That’s all it takes to add role-based authorization to an entire router! It is really simple.
We also should remember to add the new security section to our Open API documentation comments for each route to ensure that our documentation properly displays that each route requires authentication.
As part of our updates, we need to add authentication to each of our unit tests for the /api/v1/users routes. This is relatively straightforward based on what we did in the previous page - it just requires a few tweaks per test.
In short, we need to add a state variable that we can use that contains a token for a user, and then pass that along to each test. We can do this in the global describe section at the bottom:
/**
* @file /api/v1/users Route Tests
* @author Russell Feldhausen <russfeld@ksu.edu>
*/
// Load Libraries
import request from "supertest";
import { use, should, expect } from "chai";
import Ajv from "ajv";
import addFormats from "ajv-formats";
import chaiJsonSchemaAjv from "chai-json-schema-ajv";
import chaiShallowDeepEqual from "chai-shallow-deep-equal";
// Import Express application
import app from "../../../app.js";
// Import Helpers
import { login, testRoleBasedAuth, all_roles } from "../../helpers.js";
// -=-=- other code omitted here -=-=-
/**
* Test /api/v1/users route
*/
describe("/api/v1/users", () => {
let state = {};
beforeEach(async () => {
state.token = await login("admin");
});
// -=-=- other code omitted here -=-=-
});Notice that we are able to add that code outside of the describe sections for each API endpoint, greatly simplifying things. Of course, if we need to log in as multiple users, we can either add additional tokens to the state or move the state and beforeEach methods to other locations in the code.
Once we have our state, we can simply pass it on to the tests and update each test to use it correctly by setting an Authorization: Bearer header on each request:
// -=-=- other code omitted here -=-=-
/**
* Get all Users
*/
const getAllUsers = (state) => {
it("should list all users", (done) => {
request(app)
.get("/api/v1/users")
.set("Authorization", `Bearer ${state.token}`)
.expect(200)
.end((err, res) => {
if (err) return done(err);
res.body.should.be.an("array");
res.body.should.have.lengthOf(4);
done();
});
});
};
// -=-=- other code omitted here -=-=-
/**
* Test /api/v1/users route
*/
describe("/api/v1/users", () => {
let state = {};
beforeEach(async () => {
state.token = await login("admin");
});
describe("GET /", () => {
getAllUsers(state);
// -=-=- other code omitted here -=-=-
});
// -=-=- other code omitted here -=-=-
});We won’t exhaustively show each update to these tests here since there are so many. Take the time now to update all of the /api/v1/users unit tests to include authentication before continuing. They should all pass once authentication is enabled.
Finally, we should add additional unit tests to ensure that each endpoint in the /api/v1/users router is accessible only by users with the correct role. For that, we can simply add a block of code similar to what we did in the roles routes for each endpoint:
// -=-=- other code omitted here -=-=-
/**
* Test /api/v1/users route
*/
describe("/api/v1/users", () => {
let state = {};
beforeEach(async () => {
state.token = await login("admin");
});
describe("GET /", () => {
// -=-=- other code omitted here -=-=-
const allowed_roles = ["manage_users"];
all_roles.forEach((r) => {
testRoleBasedAuth("/api/v1/users", "get", r, allowed_roles.includes(r))
})
});
describe("GET /{id}", () => {
// -=-=- other code omitted here -=-=-
const allowed_roles = ["manage_users"];
all_roles.forEach((r) => {
testRoleBasedAuth("/api/v1/users/1", "get", r, allowed_roles.includes(r))
})
});
describe("POST /", () => {
// -=-=- other code omitted here -=-=-
const allowed_roles = ["manage_users"];
all_roles.forEach((r) => {
testRoleBasedAuth("/api/v1/users", "post", r, allowed_roles.includes(r))
})
});
describe("PUT /{id}", () => {
// -=-=- other code omitted here -=-=-
const allowed_roles = ["manage_users"];
all_roles.forEach((r) => {
testRoleBasedAuth("/api/v1/users/1", "put", r, allowed_roles.includes(r))
})
});
describe("DELETE /{id}", () => {
// -=-=- other code omitted here -=-=-
const allowed_roles = ["manage_users"];
all_roles.forEach((r) => {
testRoleBasedAuth("/api/v1/users/1", "delete", r, allowed_roles.includes(r))
})
});
});All told, there should now be 88 total unit test in that file alone - that is a lot of tests for just 5 API endpoints!
Now is a great time to lint, format, and then commit and push our work to GitHub.
That concludes the first set of tutorials for building a RESTful API. In the next set of tutorials, we’ll focus on building a Vue.js frontend for our application.
This example project builds on the previous RESTful API project by scaffolding a frontend application using Vue.js. This will become the basis for a full frontend for the application over the next few projects.
At the end of this example, we will have a project with the following features:
This project picks up right where the last one left off, so if you haven’t completed that one yet, go back and do that before starting this one.
Let’s get started!
Now that we’ve built a solid backend for our application through our RESTful API, we can now start on building the frontend application that our users will actually interface with. There are many techniques and tools for writing frontend applications that we’ve covered in this course, but for this project we’re going to introduce once more, called Vue. Vue is very similar to React, but uses a more streamlined syntax and structure. It also includes a lot of built-in features that make writing an interactive web application a very seamless experience. As with any tool we’ve introduced in this set of tutorials, it is always a good idea to review the Vue Documentation as we add features to our application.
To get started, we’ll use the create-vue application to help scaffold our project. This is very similar to the express-generator tool we used to create the initial version of our backend application.
So, in the base of our project directory (not in the server folder, but in the folder that contains the server folder), we’ll run the following command:
$ npm create vue@latestWhen we run this command, it will first install the package if it isn’t already installed, and then we’ll be asked a series of questions about what type of project we want to create. As of the writing of this tutorial, here are the current questions and the answers we’ll give:
client (this will place our code in the client directory; we’ll update our project name later)All told, we should end up with output that looks like this:
┌ Vue.js - The Progressive JavaScript Framework
│
◇ Project name (target directory):
│ client
│
◇ Select features to include in your project: (↑/↓ to navigate, space to select, a to toggle all, enter to confirm)
│ Router (SPA development), Pinia (state management), Vitest (unit testing), ESLint (error prevention), Prettier (code formatting)
│
◇ Install Oxlint for faster linting? (experimental)
│ No
Scaffolding project in /workspaces/lost-communities-solution/client...
│
└ Done. Now run:
cd client
npm install
npm run format
npm run dev
| Optional: Initialize Git in your project directory with:
git init && git add -A && git commit -m "initial commit"So, once we’ve created our project, we can follow the last few steps to install the libraries needed for our project and then run it. First, we’ll navigate to the client directory:
$ cd clientThen, we’ll install our libraries, run the code formatter, and then start our application in development mode:
$ npm install
$ npm run format
$ npm run devIf everything works correctly, we should see our application start on port 5173 (the default port used by Vite, which is the tool used to run our Vue application in development mode). We can click the “Open in Browser” button that appears at the bottom of the page to load our application:
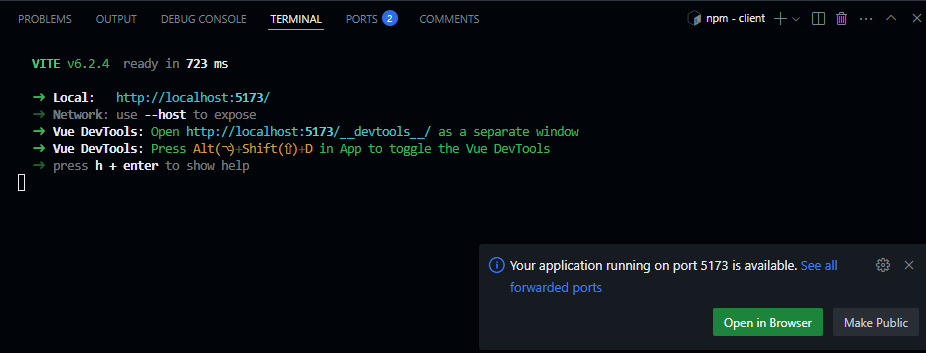
When we click that button to load our sample application, we should see the default Vue starter page appear in our browser:
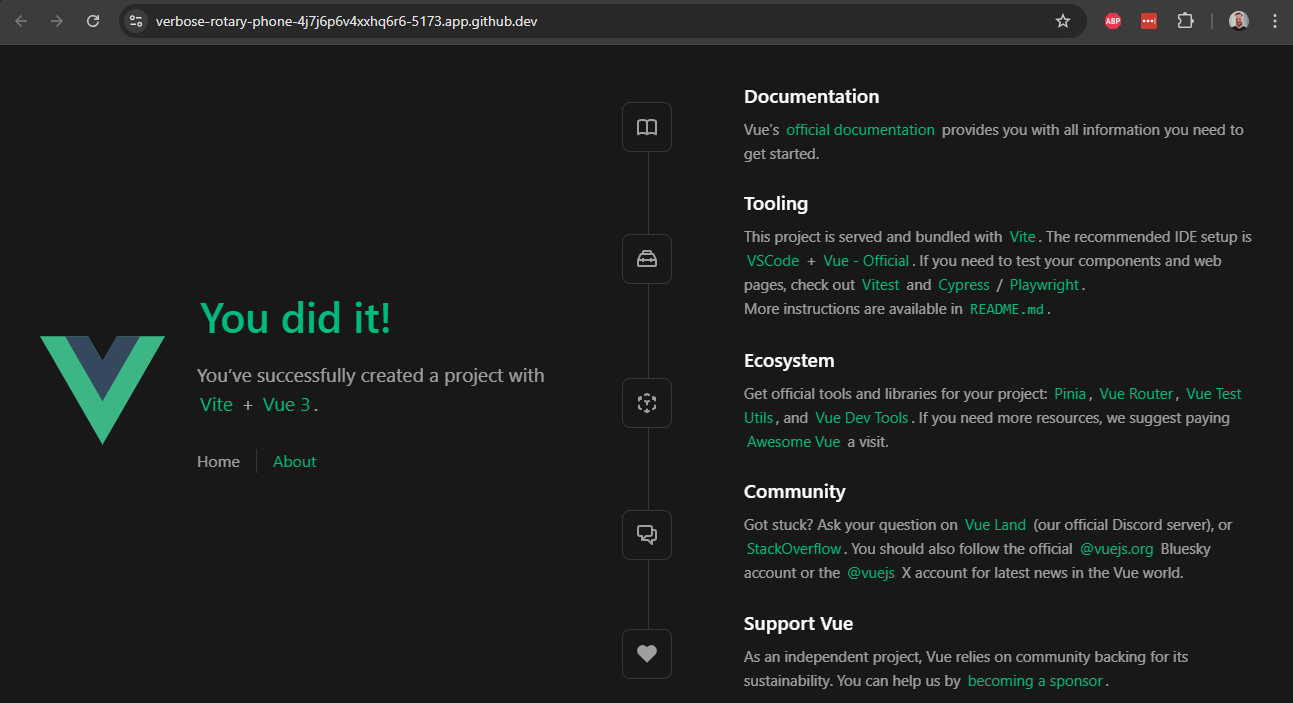
There we go! That’s the basic steps to install Vue and create a scaffolded application. Let’s take a look at some of the files it created and what they do.
As always, we can stop our running application using CTRL + C.
Our Vue application includes a lot of files and folders by default. Here’s a brief list of what we find:
.vscode - this folder contains settings specific to the VS Code IDE. However, since they are in a subfolder of our project, they aren’t actively being used. If we want to make use of these settings, we can move the folder up to the top level. We won’t do that for this project, but it is an option worth exploring to see what settings are recommended by the developers behind the Vue project.public - this folder contains all public resources for our application, such as images. Right now it just contains a default favicon.ico file.src - all of the code for our application is contained in this folder. We’ll explore this folder in depth throughout this tutorial..editorconfig - this contains some editor settings that can be recognized by various text editors and IDEs. To use this in VS Code, we can install the EditorConfig for VS Code extension. Again, we won’t do that for this project, but it is an option to explore..gitattributes and gitignore - these are settings files used by Git. We should already be familiar with the functionality provided by a .gitignore file!.prettierrc.json - this is the settings file for the Prettier code formatter. It includes some useful default settings for that tool.eslint.config.js - this is the settings file for the ESLint tool. Similar to Prettier, it includes some default settings.index.html - this is the actual index page for our final application. In general, we won’t need to make many changes to it unless we need to change some of the headers on that page.jsconfig.json - this file contains the settings used by the JavaScript language service used to build the project through Vite (we’ll look at this a bit later)package.json and package-lock.json - these are the familiar Node package files we’ve already seen in our backend application.vite.config.js - this is the configuration file for the Vite tool, which we use to run our application in development mode, and also the tool we’ll use to build the deployable version of our application.vitest.config.js - this is the configuration file for the Vitest testing framework, which we’ll cover a bit later as we develop our application.Before we move ahead, let’s update the contents of our package.json file to match the project we’re working on. We should at least set the name and version entries to the correct values, and also take a look at the various scripts available in our application:
{
"name": "example-project-frontend",
"version": "0.0.1",
"private": true,
"type": "module",
"scripts": {
"dev": "vite",
"build": "vite build",
"preview": "vite preview",
"test:unit": "vitest",
"lint": "eslint . --fix",
"format": "prettier --write src/"
},
// -=-=- other code omitted here -=-=-
}On the next page, we’ll start building our frontend application! As we add features, we’ll slowly modify some of these configuration files to make our application easier to develop and work with.
First, in our Visual Studio Code instance, we will want to install the Vue - Official extension. Make sure it is the correct, official plugin, since there are many that share a similar name in the VS Code extension marketplace:
As always, you can click the gear next to the install button to add it to the devcontainer.json file, so it will be installed in future devcontainers built using this repository. Once it is installed, you may have to restart VS Code or refresh the page in GitHub Codespaces to get it activated. Once it is, you should see syntax highlighting enabled in any files with the vue file extension.
Let’s take a quick look inside of the src folder to explore the structure of our application a bit more in detail.
assets - this folder contains the static assets used throughout our application, such as CSS files, SVG images, and other items that we want to include in the build pipeline of our application.components - this folder contains the individual components used to make up our application, as well as any associated tests. We can see that there are a few components already created in our application, including HelloWorld.vue, TheWelcome.vue, and WelcomeItem.vue.router - this folder contains the Vue Router for our application. This is similar to the routers we’ve already used in our Express application, but instead of matching URLs to endpoints, this tool is used to match URLs to different views, or pages, within our application.stores - this folder contains the Pinia stores for our application. These stores are used to share data between components in our application, and also to connect back to our backend application through our RESTful API.views - this folder contains the overall views of our application, sometimes referred to as pages. As we can see, right now there is a HomeView.vue and an AboutView.vue, which correspond to the Home and About pages of our existing application.App.vue - this file contains the top-level Vue component of our entire web application. It contains items that are globally included on every page.main.js - this file is the “setup” file for the Vue application, very similar to the app.js file in our Express backend application. This is where a variety of application settings and plugins can be installed and configured.So, let’s look at our existing page in development mode. It includes a feature called Vue DevTools which is a great way to explore our application. That feature can be found by clicking the small floating button at the bottom of the page:
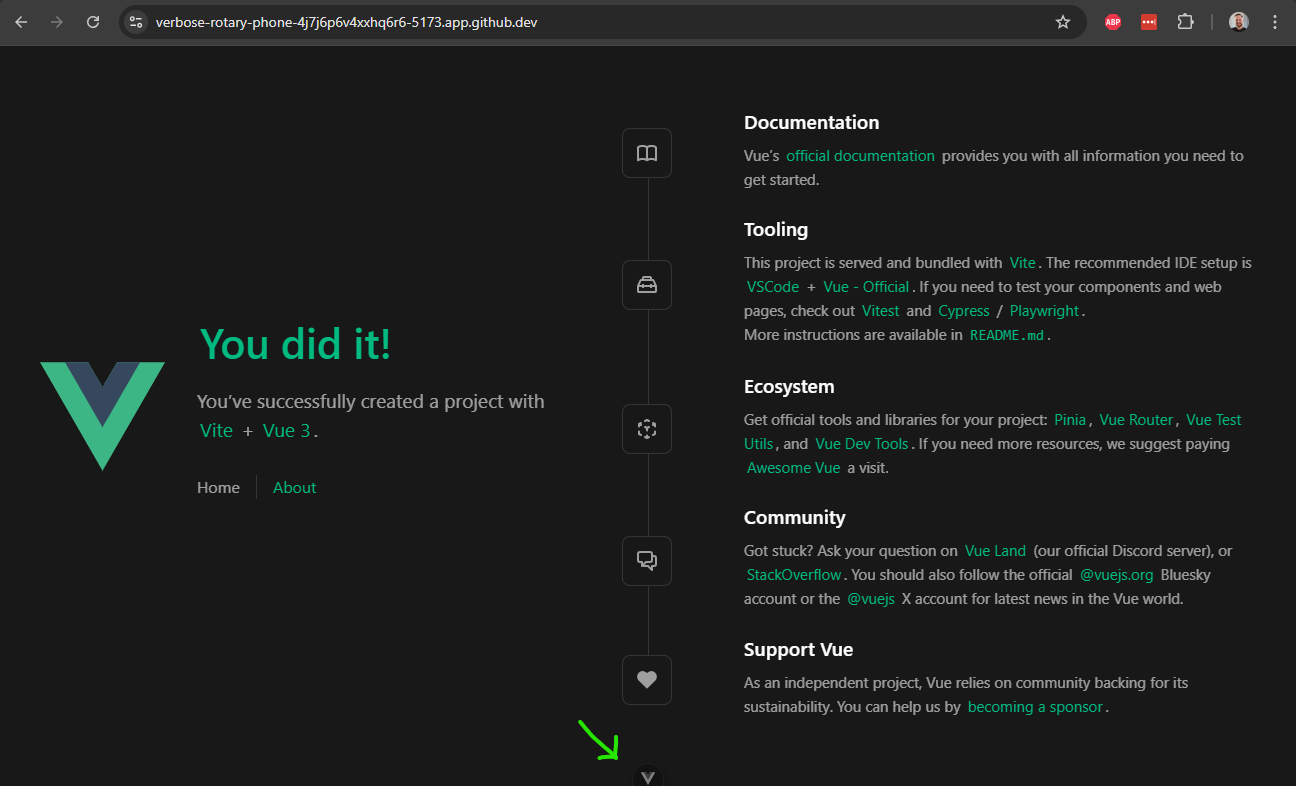
It will open a tool that allows us to explore the components loaded into our page, the various views available, router settings, Pinia stores, and so much more:
We can also use the component inspector (the button with the target icon that appears when we hover over the Vue DevTools button) to see how the individual components are laid out on our page, just by hovering over them:
As we work on this project, this tool will be a very helpful asset for debugging our application, or simply understanding how it works. Now is a great time to play around with this tool on our scaffolded starter page before we start building our own.
To start building our own application, let’s first start by clearing out the default content included in our scaffolded application. So, we can delete the following files:
assets\* - everything in the assets foldercomponents\* - everything in the components folderstores\* - everything in the stores folderNow, let’s customize a few files. First, we’ll update the index.html file to include our project’s title as the header:
<!DOCTYPE html>
<html lang="">
<head>
<meta charset="UTF-8">
<link rel="icon" href="/favicon.ico">
<meta name="viewport" content="width=device-width, initial-scale=1.0">
<title>Example Project</title>
</head>
<body>
<div id="app"></div>
<script type="module" src="/src/main.js"></script>
</body>
</html>Next, we’ll update the two default views in our application to be simple components. First, let’s update the HomeView.vue:
<template>
<main>
This is a home page.
</main>
</template>And also the AboutView.vue:
<template>
<main>
This is an about page.
</main>
</template>Finally, we can update our base App.vue file to include a very simple format:
<script setup>
import { RouterLink, RouterView } from 'vue-router'
</script>
<template>
<header>
<div>
This is a header
<nav>
<RouterLink to="/">Home</RouterLink>
<RouterLink to="/about">About</RouterLink>
</nav>
</div>
</header>
<RouterView />
</template>We’ll also need to update our main.js to remove the import for the base CSS file:
import { createApp } from 'vue'
import { createPinia } from 'pinia'
import App from './App.vue'
import router from './router'
const app = createApp(App)
app.use(createPinia())
app.use(router)
app.mount('#app')Now, let’s take a look at our application in development mode to see what it looks like without all of the extra structure and style applied by the scaffolding:
$ npm run dev
As we can see, our application is now much simpler - almost too simple! However, we can still click the links to move between the Home and About pages, and see our URL update accordingly:

This is a great baseline for our application. Now we can start building up a structure for an application that has the features we’d like to see.
The vast majority of the work we’ll be doing in Vue is creating Single File Components, which are the building blocks for larger views and pages within our application. We’ll be using the Composition API Style, which is a newer and more powerful API. It can be a bit daunting for new developers, but it provides a flexible way to define our components. It also differs from the API style used by React, making it a bit of a learning curve for experienced React developers. We can see more discussion in the Composition API FAQ document.
A Vue single file component using the Composition API style looks like this (taken from the Vue Documentation):
<script setup>
import { ref } from 'vue'
const count = ref(0)
</script>
<template>
<button @click="count++">Count is: {{ count }}</button>
</template>
<style scoped>
button {
font-weight: bold;
}
</style>This file is divided into three important sections:
<script setup> - this section defines the functionality of the component, and is written using JavaScript syntax. It is the rough equivalent of the code you might put in a function called as the page begins to load in a traditional website. This code is used to configure all of the reactive elements of the user interface, as we’ll see later.<template> - this section defines the structure of the component, and uses a syntax similar to HTML. It gives the overall layout of the component and includes all sub-components and other HTML elements. It also shows where the reactive elements defined earlier appear on the page itself.<style> - this section defines the style of the component, and it is written using CSS. These style elements can be applied throughout the application, or we can use a <style scoped> section to ensure these styles are only applied within this component.As we can see, Vue follows the concept of Separation of Concerns just like we’ve seen in our earlier projects. However, instead of having a global HTML template, a site-wide CSS file, and a single JavaScript file for an entire page, each component itself contains just the HTML, CSS, and JavaScript needed for that single component to function. In this way, we can treat each component as a stand-alone part of our application, and as we learn more about how to build useful and flexible components, we’ll see just how powerful this structure can be.
On the next page, we’ll start building our simple web application by using a few pre-built components from a Vue component library.
One of the first things we may want to install in our application is a library of ready-to-use components that we can use to build our application with. This can drastically cut down on the time it takes to build an application, and these libraries often come with a range of features that make our applications both user-friendly and very accessible.
While there are many different libraries to choose from, we’ll use the PrimeVue library. PrimeVue has a very large set of components to choose from, and it is very easy to install and configure. So, let’s follow the installation guide to install PrimeVue in a project that uses Vite as it’s build tool.
First, we’ll need to install the library through npm:
$ npm install primevue @primeuix/themesOnce that is installed, we need to configure the plugin by adding it to our main.js file. We’ve added some documentation comments to this file to make it easily readable, but the new lines added for PrimeVue are highlighted below:
/**
* @file Main Vue application
* @author Russell Feldhausen <russfeld@ksu.edu>
*/
// Import Libraries
import { createApp } from 'vue'
import { createPinia } from 'pinia'
import PrimeVue from 'primevue/config';
// Import Vue App
import App from './App.vue'
// Import Configurations
import router from './router'
// Create Vue App
const app = createApp(App)
// Install Libraries
app.use(createPinia())
app.use(router)
app.use(PrimeVue);
// Mount Vue App on page
app.mount('#app')There we go! Now we can use PrimeVue components anywhere in our application. So, let’s start building a basic framework for our application’s overall look and feel.
A good first step is to build the overall layout that all of our views, or pages, within our application will use. This is similar to the concept of template inheritance that we’ve explored already in this class. For this application, let’s assume we want to have a static menu bar at the top of the page that has links to other pages or views in our application across the top. On the left of that bar, we should have some settings buttons that allow the user to switch between light or dark mode, as well as a button to access their user profile and either login or logout of the system. A quick wireframe sketch of this site might look something like this:
As it just so happens, as we look through the PrimeVue list of components, we see a component named Menubar that has an example template that looks very similar to our existing wireframe:

So, let’s see if we can explore how to use this PrimeVue component and make it fit our desired website structure. Of course, there is always a little give and take to using these libraries; while we may have a very specific view or layout in mind, often it is best to let the component library guide us a bit by seeing that it already does well, and then adapting it for our needs.
In the PrimeVue documentation, each component comes with several example templates we can use. However, by default, the template code that is visible on the website is only a small part of the whole component that is actually displayed on the screen. So, we may first want to click the “Toggle Full Code” button that appears in the upper right corner of the code panel when we hover over it - that will show us the full example component:

Once we have that full code, we can explore how it works in greater detail, comparing the code shown in each example to the component we see placed above it.
For this component, we’ll build it up from scratch just to see how each part works. Once we are more familiar with PrimeVue components and how they are structured, we can copy these code examples easily into our own components and tweak them to fit our needs.
First, let’s create a new folder named layout in our src/components folder, and then inside of that we can create a new Vue component named TopMenu.vue. Let’s start by adding the two basic sections of any Vue component, the <script setup> and <template> sections:
<script setup>
/**
* @file Top menu bar of the entire application
* @author Russell Feldhausen <russfeld@ksu.edu>
*/
</script>
<template>
<div>
Content Here
</div>
</template>Next, we can import the PrimeVue Menubar component in the <script setup> section of our component, and place it in the <template> section:
<script setup>
/**
* @file Top menu bar of the entire application
* @author Russell Feldhausen <russfeld@ksu.edu>
*/
// Import Components
import Menubar from 'primevue/menubar';
</script>
<template>
<div>
<Menubar :model="items" />
</div>
</template>In the documentation, it says that we need to include a collection of menu items as the model of the component. A component’s model can be thought of as the viewmodel part of the Model View ViewModel architecture pattern we may already be familiar with. In effect, PrimeVue components take care of the view part of this pattern, and we must adapt our existing data model by providing a viewmodel reference that fits the structure expected by the component.
In this instance, we want our menubar to include links to the home and about pages, or views, of our application, so those will be the items we’ll include. To do this, we need to create a reactive state element in Vue using the ref() function. For more about how reactivity works in Vue, consult the Vue Documentation.
<script setup>
/**
* @file Top menu bar of the entire application
* @author Russell Feldhausen <russfeld@ksu.edu>
*/
// Import Libraries
import { ref } from "vue";
// Import Components
import Menubar from 'primevue/menubar';
// Declare State
const items = ref([
{
label: 'Home',
},
{
label: 'About',
}
])
</script>At this point we’ve created a basic structure for our TopMenu component, so let’s add it to our site and see what it looks like. To do this, we’ll import it into our App.vue file and add it to the template there (we’ll end up removing some content and libraries that were already included in that file, which is fine):
<script setup>
/**
* @file Main Vue Application
* @author Russell Feldhausen <russfeld@ksu.edu>
*/
// Import Components
import TopMenu from './components/layout/TopMenu.vue';
</script>
<template>
<header>
<TopMenu />
</header>
<RouterView />
</template>Now, let’s run our application in development mode and see what it looks like:
$ npm run devWhen we navigate to our page in the browser, we should see this layout:

While this page still seems very simple, we can use the Vue DevTools to explore the page and see that our components are present. However, they aren’t really styled the way we see in the PrimeVue examples. This is because we need to install a PrimeVue Theme that provides the overall look and feel of our application.
PrimeVue includes several built-in themes that we can choose from:
We can explore what each of these themes look like by selecting them on the PrimeVue documentation website - the whole website can be themed and styled based on any of the built-in options available in PrimeVue, which is a great way for us to see what is available and how it might look on our page.
For this application, we’ll use the Aura theme, so let’s install it in our main.js file:
/**
* @file Main Vue application
* @author Russell Feldhausen <russfeld@ksu.edu>
*/
// Import Libraries
import { createApp } from 'vue'
import { createPinia } from 'pinia'
import PrimeVue from 'primevue/config';
import Aura from '@primeuix/themes/aura';
// Import Vue App
import App from './App.vue'
// Import Configurations
import router from './router'
// Create Vue App
const app = createApp(App)
// Install Libraries
app.use(createPinia())
app.use(router)
app.use(PrimeVue, {
// Theme Configuration
theme: {
preset: Aura
}
});
// Mount Vue App on page
app.mount('#app')Now, when we restart our application and refresh the page, we should see a bit of a different look and feel on the page:

Now we see that our PrimeVue Menubar component is beginning to look like what we expect. We also notice that it is now using a dark theme, which is the default for the web browser this screenshot was taken from - we’ll explore how to add a toggle for light and dark themes later in this tutorial.
Many PrimeVue components include slots, which are specific locations within the template where additional components or HTML code can be added. For example, the Menubar component include two slots, #start and #end, which allow us to add content at the beginning and end of the Menubar, respectively. We can use these by simply adding a <template> inside of our Menubar component with the appropriate label. So, let’s do that now!
We know we want to add a logo to the beginning of the Menubar, so let’s start there. We don’t currently have a logo graphic for our application, but we can include a placeholder image for now.
<template>
<div>
<Menubar :model="items">
<template #start>
<img src="https://placehold.co/40x40" alt="Placeholder Logo" />
</template>
</Menubar>
</div>
</template>With that in place, we should now see an image included in our Menubar:
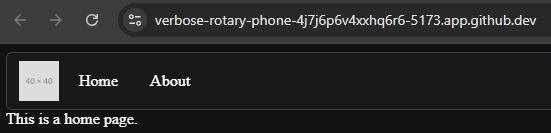
On the next page, we’ll continue to refine our Menubar by adding routing.
Our Vue project already includes an instance of the Vue Router, which is used to handle routing between the various views, or pages, within our application. So, let’s take a minute to explore how the Vue Router works and how we can integrate it into our Menubar so we can move between the various views in our application.
First, let’s take a look at the existing src/router/index.js file that is generated for our application. We’ve added some comments to the file to make it easier to follow:
/**
* @file Vue Router for the application
* @author Russell Feldhausen <russfeld@ksu.edu>
* @exports router a Vue Router
*/
// Import Libraries
import { createRouter, createWebHistory } from 'vue-router'
// Import Views
import HomeView from '../views/HomeView.vue'
const router = createRouter({
// Configure History Mode
history: createWebHistory(import.meta.env.BASE_URL),
// Configure routes
routes: [
{
path: '/',
name: 'home',
component: HomeView,
},
{
path: '/about',
name: 'about',
// route level code-splitting
// this generates a separate chunk (About.[hash].js) for this route
// which is lazy-loaded when the route is visited.
component: () => import('../views/AboutView.vue'),
},
],
})
export default routerThe major portion of this file we should look at is the routes array that is present inside of the createRouter function. Each object in the routes array matches a URL path with a Vue component, typically a view or page, that should be displayed at that route. We can also give each route a helpful name to make things simple.
At the bottom, we see an example of splitting the routes up into chunks, which allows parts of our application to be lazy-loaded as the user accesses them. This can make our application initially load faster, since the default chunk is smaller, but when the user accesses a part of the application that is lazy-loaded, it may pause briefly while it loads that chunk. We’ll go ahead and leave it as-is for this example, just to see what it looks like. We’ll revisit this when we build our application for production.
Finally, we also see that this file configures a History Mode for our application. This describes how the URL may change as users move through our application. We’ll leave this setting alone for now, but as we integrate this application into our backend, we may revisit this setting. The Vue Router documentation describes the different history modes and where they are most useful.
This file is imported in our main.js file and added to the Vue application so we can reference it throughout our application.
Now, let’s go back to our App.vue file, and see where it uses the Vue Router:
<script setup>
/**
* @file Main Vue Application
* @author Russell Feldhausen <russfeld@ksu.edu>
*/
// Import Components
import TopMenu from './components/layout/TopMenu.vue';
</script>
<template>
<header>
<TopMenu />
</header>
<RouterView />
</template>In the template, we see a RouterView element - this is where the different views are placed in our overall application. For example, when the user wants to navigate to the /about URL, the RouterView component here will contain the AboutView component that is referenced in the router’s routes array for that URL path. It is very straightforward!
While we’re here, let’s briefly update the structure of this page to match a proper HTML file:
<template>
<header></header>
<nav>
<!-- Navigation Menu -->
<TopMenu />
</nav>
<main>
<div>
<!-- Main Application View -->
<RouterView />
</div>
</main>
<footer></footer>
</template>This template structure properly includes a <header>, <nav>, <main>, and <footer> elements that make up the overall structure of the page. For right now, we are only using the <nav> and <main> elements, but we can always add additional content to this overall page layout over time.
Finally, let’s go back to our TopMenu component and add routing to each link. There are many ways to do this, but one simple way is to add a command property to each menu item, which is a callback function that is executed when the button on the menu is activated. This function can simply use the Vue router to navigate to the correct view:
<script setup>
/**
* @file Top menu bar of the entire application
* @author Russell Feldhausen <russfeld@ksu.edu>
*/
// Import Libraries
import { ref } from "vue";
import { useRouter } from "vue-router";
const router = useRouter();
// Import Components
import Menubar from 'primevue/menubar';
// Declare State
const items = ref([
{
label: 'Home',
command: () => {
router.push({ name: 'home' })
}
},
{
label: 'About',
command: () => {
router.push({ name: 'about' })
}
}
])
</script>Now, when we run our application, we should be able to click the buttons in our menu and navigate between the two views, or pages, of our application!
While PrimeVue includes many helpful components we can use in our application, we may still need to adjust the layout a bit to match our expected style. For example, right now the content of each of our views has no margins or padding around it:
While we can easily write our own CSS directives to handle this, now is a good time to look at one of the more modern CSS libraries to see how to make this process much easier. Tailwind CSS is a utility-based CSS framework that works really well with component libraries such as PrimeVue. So, let’s integrate it into our application and use it to help provide some additional style and structure to our application.
First, we’ll follow the installation guide to install Tailwind CSS with Vite by installing the library and the Vite plugin for Tailwind using npm:
$ npm install tailwindcss @tailwindcss/viteNext, we’ll need to add the Tailwind CSS plugin to our Vite configuration file vite.config.js:
import { fileURLToPath, URL } from 'node:url'
import { defineConfig } from 'vite'
import vue from '@vitejs/plugin-vue'
import vueDevTools from 'vite-plugin-vue-devtools'
import tailwindcss from '@tailwindcss/vite'
// https://vite.dev/config/
export default defineConfig({
plugins: [
vue(),
vueDevTools(),
tailwindcss(),
],
resolve: {
alias: {
'@': fileURLToPath(new URL('./src', import.meta.url))
},
},
})Since we are using PrimeVue, we should also install the PrimeVue Tailwind Plugin as well:
$ npm install tailwindcss-primeuiNow that Tailwind is installed, we need to reference it in a global CSS file that is part of our application. So, let’s create a file main.css in our src/assets folder with the following content:
@import "tailwindcss";
@import "tailwindcss-primeui";We’ll also need to reference that file in our main.js file:
/**
* @file Main Vue application
* @author Russell Feldhausen <russfeld@ksu.edu>
*/
// Import Libraries
import { createApp } from 'vue'
import { createPinia } from 'pinia'
import PrimeVue from 'primevue/config';
import Aura from '@primeuix/themes/aura';
// Import CSS
import './assets/main.css'
// Import Vue App
import App from './App.vue'
// -=-=- other code omitted here -=-=-
Finally, with all of that in place, we can restart our application in development mode and begin using Tailwind CSS to style our application:
$ npm run devLet’s look back at our App.vue file and add a simple margin to the <div> containing our application using the Tailwind CSS Margin utility. To do this, we simply add a class="m-2" attribute to that <div> element:
<template>
<header></header>
<nav>
<!-- Navigation Menu -->
<TopMenu />
</nav>
<main>
<div class="m-2">
<!-- Main Application View -->
<RouterView />
</div>
</main>
<footer></footer>
</template>Now, when we reload that page, we should see that the <div> inside of the <main> element of our page has a small margin around it. We can confirm this using the inspector tool in our browser:
There we go! Now we have full access to Tailwind CSS in our application, which will allow us to easily control the layout and spacing of the various components in our application.
Many applications today include two default themes, a “light-mode” and a “dark-mode,” and users can choose which theme they receive by default through settings made either in their browser or their operating system. However, we can easily provide functionality in our application for users to override that setting if desired. The instructions for configuring a proper dark mode setup can be found in the Tailwind CSS Documentation, the PrimeVue Documentation, and a helpful article describing how to detect the user’s preference and store it in the browser’s local storage. We’ll integrate all three of these together into our component.
To begin, we need to configure both PrimeVue and Tailwind to look for a specific CSS class applied to the base <html> element to control whether the page is viewed in dark mode or light mode. For this application, we’ll use the class app-dark-mode. So, let’s start by adding it to the PrimeVue configuration in main.js:
// -=-=- other code omitted here -=-=-
// Install Libraries
app.use(createPinia())
app.use(router)
app.use(PrimeVue, {
// Theme Configuration
theme: {
preset: Aura,
options: {
darkModeSelector: '.app-dark-mode',
}
}
});
// -=-=- other code omitted here -=-=-
Next, we’ll use the same class in a setting for Tailwind in the base main.css file:
@import 'tailwindcss';
@import 'tailwindcss-primeui';
@custom-variant dark (&:where(.app-dark-mode, .app-dark-mode *)); //dark mode configurationAt this point, when we refresh our page in development mode, it should switch back to the light mode view.
However, if we manually add the app-dark-mode class to the <html> element in our index.html file, it will switch to dark mode. Let’s give it a try:
<!DOCTYPE html>
<html lang="" class="app-dark-mode">
<head>
<meta charset="UTF-8">
<link rel="icon" href="/favicon.ico">
<meta name="viewport" content="width=device-width, initial-scale=1.0">
<title>Lost Communities Solution</title>
</head>
<body>
<div id="app"></div>
<script type="module" src="/src/main.js"></script>
</body>
</html>After we add that class to our <html> element, the page should immediately refresh if we are running in development mode, and now it should be using dark mode:
Let’s go ahead and remove that class from the index.html file so that our default is still light mode. Instead, we’ll learn how to control it programmatically!
<!DOCTYPE html>
<html lang="">
<head>
<meta charset="UTF-8">
<link rel="icon" href="/favicon.ico">
<meta name="viewport" content="width=device-width, initial-scale=1.0">
<title>Lost Communities Solution</title>
</head>
<body>
<div id="app"></div>
<script type="module" src="/src/main.js"></script>
</body>
</html>Let’s create a component we can use in our website to control dark mode. That allows the user to easily switch between light and dark modes, and we can even save their preference for later. So, let’s start by creating a component in the file src/components/layout/ThemeToggle.vue with the following content:
<script setup>
/**
* @file Button to toggle light/dark theme
* @author Russell Feldhausen <russfeld@ksu.edu>
*/
// Import Libraries
import { ref } from 'vue'
// Declare State
const theme = ref('light-theme')
const toggleDarkMode = function() {
if (theme.value == 'light-theme') {
theme.value = 'dark-theme'
document.documentElement.classList.add('app-dark-mode');
} else {
theme.value = 'light-theme'
document.documentElement.classList.remove('app-dark-mode');
}
}
</script>
<template>
<div>
<a @click="toggleDarkMode">
<span v-if="theme == 'light-theme'" v-tooltip.bottom="'Toggle Dark Mode'">Dark</span>
<span v-else v-tooltip.bottom="'Toggle Light Mode'">Light</span>
</a>
</div>
</template>There is a lot going on in this component, so let’s break it down piece by piece to see how it works. First, here are the three major components of the <script setup> section.
ref function from Vue. This is the function that allows us to create reactive state variables in our application. A reactive state variable stores data that will be updated as our application runs, and each update will cause the user interface to be updated and redrawn for the user. Therefore, by storing our data in these reactive state variables, it allows our web application to react to changes in state. We can learn more about this in the Reactivity Fundamentals page of the Vue Documentationtheme that initially stores the string 'light-theme'. We’ll use this variable to keep track of the current theme being used by our site.toggleDarkMode that does exactly what the name implies. First, it looks at the value of the theme reactive state variable. Notice that we must call the value property to access or update the value stored in the reactive state variable in our <script setup> section. Then, based on the value it finds, it will swap the theme by updating the value of the theme variable itself, and also either adding or removing the app-dark-mode class to the document.documentElement part of our page. According to the MDN Web Docs, that is typically the root element of the document, so in our case, it is the <html> element at the top level of our application.Next, here is how the template is structured:
<div>. While this is not strictly necessary, it helps to ensure everything inside of the component is properly isolated. We can also apply Tailwind CSS classes to this outermost <div> in order to adjust the size, layout, or spacing of our component.<a> element, which we should remember represents a clickable link. However, instead of including an href attribute, we instead use the Vue @click attribute to attach a click handler to the element. This is covered in the Event Handling section of the Vue documentation. So, when this link is clicked, it will call the toggleDarkMode function to switch between light and dark mode.<a> element, we have two <span> elements. The first one uses a v-if directive to check and see if the theme is currently set to the 'light-theme' value. This is an example of Conditional Rendering, one of the most powerful features of a web framework such as Vue. Effectively, if that statement resolves to true, this element will be rendered on the page. If it is false, the element will not be rendered at all. Likewise, the following span containing a v-else directive will be rendered if the first one is not, and vice-versa. Effectively, only one of these two <span> elements will be visible, based on whether the theme is currently set to 'light-theme' or 'dark-theme'.As we can see, there is a lot going on even in this very simple component!
Now that we’ve created our ThemeToggle component, let’s add it to our existing menu bar by updating the code in our TopMenu.vue component:
<script setup>
// -=-=- other code omitted here -=-=-
// Import Components
import Menubar from 'primevue/menubar'
import ThemeToggle from './ThemeToggle.vue'
// -=-=- other code omitted here -=-=-
</script>
<template>
<div>
<Menubar :model="items">
<template #start>
<img src="https://placehold.co/40x40" alt="Placeholder Logo" />
</template>
<template #end>
<ThemeToggle />
</template>
</Menubar>
</div>
</template>To add a component, we first must import it in our <script setup> section. Then, we can add it to our template just like any other HTML element. In this case, we want it at the end of our menu bar, so we are adding it to the #end slot of that PrimeVue component.
Now, if we load our page, we should see a button in the upper right that allows us to switch between light and dark theme!
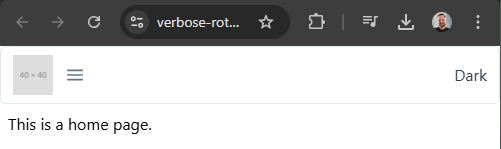
Let’s quickly improve our dark theme toggle by adding two additional features:
So, let’s update the code in our ThemeToggle.vue component to handle these cases by adding a few more functions:
<script setup>
/**
* @file Button to toggle light/dark theme
* @author Russell Feldhausen <russfeld@ksu.edu>
*/
// Import Libraries
import { ref } from 'vue'
// Declare State
const theme = ref('light-theme')
// Get Theme from Local Storage
const getTheme = function() {
return localStorage.getItem('user-theme')
}
// Get Theme from User Preference
const getMediaPreference = function() {
const hasDarkPreference = window.matchMedia('(prefers-color-scheme: dark)').matches
if (hasDarkPreference) {
return 'dark-theme'
} else {
return 'light-theme'
}
}
// Set theme and store
const setTheme = function() {
console.log("Setting theme to " + theme.value)
if (theme.value == 'light-theme') {
document.documentElement.classList.remove('app-dark-mode');
} else {
document.documentElement.classList.add('app-dark-mode');
}
localStorage.setItem('user-theme', theme.value)
}
// Toggle theme value
const toggleDarkMode = function() {
if (theme.value == 'light-theme') {
theme.value = 'dark-theme'
} else {
theme.value = 'light-theme'
}
setTheme()
}
theme.value = getTheme() || getMediaPreference()
setTheme()
</script>Let’s go through the updates to this code and explore how it works:
getTheme that will read a value from our browser’s Local Storage. This allows our application to save some settings that will be stored across browser sessions, as long as the user does not clear their browser’s cache. For this application, we will store the user’s chosen theme using the 'user-theme' key in local storage.prefers-color-scheme entry in the browser’s settings. If it finds that the setting is set to dark it will return our dark-theme option; otherwise it will default to the light-theme.setTheme function that will set the theme to whatever value is stored currently in the theme reactive state variable. It does so by adding or removing the class from the <html> element, and then it stores the current theme in the users’s local storage. We added a console.log statement so we can debug this setup using our browser’s console.toggleDarkMode function to just change the value stored in the theme reactive state variable, and then it calls the new setTheme() function to actually update the theme.<script setup> section are two lines of code that actually call these functions to determine the correct theme and set it. First, we call getTheme() to see if the user has a theme preference stored in local storage. If so, that value is returned and stored in the theme reactive state. However, if there is no entry in the browser’s local storage, that function will return a null value, and the or || operator will move on to the second function, getMediaPreference() which will try to determine if the user has system preference set. That function will always return a value. Finally, once we’ve determined the correct theme to use, the setTheme function is called to update the browser. It will also store the theme in the browser’s local storage, so the user’s setting will be remembered going forward.With all of that put together, our application should now seamlessly switch between light and dark themes, and remember the user’s preference in local storage so that, even if they refresh the page, their theme preference will be remembered. We can see this setup in action below, showing both the page and the browser’s local storage. Notice that the browser prefers a dark theme, so the first time the page is refreshed, it will automatically switch to dark mode. From there, the user can change the theme and refresh the page, and it will remember the previous setting.
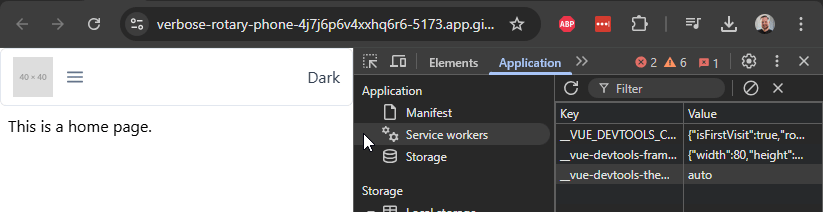
Finally, if we want our dark mode selector button to look like it belongs on our menubar, we can add a few PrimeVue CSS classes so that it matches the existing buttons. These are all explained on the Menubar Theming tab of the PrimeVue documentation.
<template>
<div class="p-menubar-item">
<div class="p-menubar-item-content">
<a @click="toggleDarkMode" class="p-menubar-item-link">
<span v-if="theme == 'light-theme'" v-tooltip.bottom="'Toggle Dark Mode'" class="p-menubar-item-label">Dark</span>
<span v-else v-tooltip.bottom="'Toggle Light Mode'" class="p-menubar-item-label">Light</span>
</a>
</div>
</div>
</template>All of the PrimeVue CSS classes are prefixed with a p-, so they are easy to find and remember. So, even if we create our own components, we can still easily style them to match the other PrimeVue components by paying close attention to the CSS classes used.
One thing we included in the template above is the v-tooltip.bottom directive, which will give a small popup for the user letting them know a bit more information about what that button does. To enable it, we need to import that PrimeVue feature into our main.js file:
/**
* @file Main Vue application
* @author Russell Feldhausen <russfeld@ksu.edu>
*/
// Import Libraries
import { createApp } from 'vue'
import { createPinia } from 'pinia'
import PrimeVue from 'primevue/config'
import Aura from '@primeuix/themes/aura'
import Tooltip from 'primevue/tooltip';
// Import CSS
import './assets/main.css'
// Import Vue App
import App from './App.vue'
// Import Configurations
import router from './router'
// Create Vue App
const app = createApp(App)
// Install Libraries
app.use(createPinia())
app.use(router)
app.use(PrimeVue, {
// Theme Configuration
theme: {
preset: Aura,
options: {
darkModeSelector: '.app-dark-mode',
},
},
})
// Install Directives
app.directive('tooltip', Tooltip);
// Mount Vue App on page
app.mount('#app')We’ll see this in action as we hover over the button to toggle between dark and light mode.
One of the best ways to make a web user interface very accessible and easy to use is by using globally recognized icons to represent certain actions, such as logging in, returning to the homepage, and editing items. Thankfully, there is an easy to use icon package that works directly with PrimeVue called PrimeIcons that we can use in our project. So, let’s quickly install that icon pack and see how we can use it in our application.
PrimeVue also supports using other icon packs, such as FontAwesome as described in the PrimeVue Custom Icons documentation. For this project, we’ll keep things simple by only using PrimeIcons, but it is relatively easy to add additional icons from other sources as needed.
First, let’s install the PrimeIcons package using npm:
$ npm install primeiconsNext, we can simply import the required CSS file in our src/assets/main.css file:
@import 'tailwindcss';
@import 'tailwindcss-primeui';
@custom-variant dark (&:where(.my-app-dark, .my-app-dark *));
@import 'primeicons/primeicons.css';With those two changes in place, we can start to use icons throughout our application! We can find a full list of icons available in the PrimeIcons Documentation.
Let’s start by adding a couple of icons to our menu bar links. Thankfully, the PrimeVue Menubar Component recognizes an icon attribute that we can add to each of the menu items, so this is an easy update to make:
<script setup>
// -=-=- other code omitted here -=-=-
// Declare State
const items = ref([
{
label: 'Home',
icon: 'pi pi-home',
command: () => {
router.push({ name: 'home' })
},
},
{
label: 'About',
icon: 'pi pi-info-circle',
command: () => {
router.push({ name: 'about' })
},
},
])
</script>With that change, we now see those icons appear next to our buttons on the menu bar:
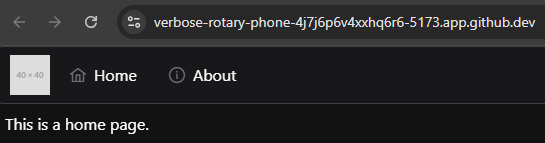
We can also update our button to toggle the theme to just use icons! All we have to do is update the template to use icons instead of text:
<template>
<div class="p-menubar-item">
<div class="p-menubar-item-content">
<a @click="toggleDarkMode" class="p-menubar-item-link">
<span
v-if="theme == 'light-theme'"
v-tooltip.bottom="'Toggle Dark Mode'"
class="p-menubar-item-label pi pi-moon"
></span>
<span
v-else
v-tooltip.bottom="'Toggle Light Mode'"
class="p-menubar-item-label pi pi-sun"
></span>
</a>
</div>
</div>
</template>Here, we remove the text from within the <span> elements, and instead add the classes pi pi-moon for the button to switch to dark mode, and pi pi-sun to switch to light mode, respectively. Since we have enabled tooltips, it is still pretty easy for our users to figure out what these buttons do and how they work!
![]()
![]()
As we can see, adding some icons to our website makes it feel much simpler and easier to use, without a bunch of text cluttering up the interface!
Now is a great time to lint, format, and then commit and push our work!
The video adds an extra slash to the /auth route in the vite.config.js file when setting up a proxy. That slash should be removed.
Now that we have the basic structure of our application built and are becoming more familiar with both Vue and PrimeVue, let’s work on connecting to our backend RESTful API application and see if we can retrieve some data from our database. This is really the key feature that we want ensure works in our frontend application!
First, we need a way to run our backend application at the same time, and also we want to be able to connect to it directly through our frontend. So, let’s add a few features to our overall project to enable that connection.
There are many ways that we can run both our frontend and backend applications simultaneously. One of the simplest is to open a second terminal in VS Code simply by clicking the “Split Terminal” button at the top right of the terminal, or by pressing CTRL+SHIFT+S to split our existing terminal.
Once we have split the terminal window, we can run both parts of our application side-by-side by navigating to the correct directory and running the npm run dev command in each window:
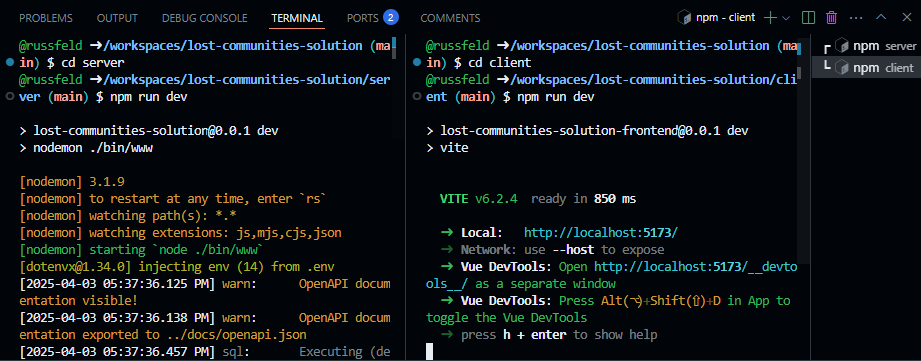
However, that can get somewhat tedious to do all the time. Instead, we can just configure a VS Code Task that will handle this for us.
To do this, we should create a .vscode folder at the top level of our project (outside of the client and server folders we’ve been working on) if one doesn’t already exist. Inside of that folder, we’ll create a file called tasks.json with the following content:
// .vscode/tasks.json
{
// See https://go.microsoft.com/fwlink/?LinkId=733558
// for the documentation about the tasks.json format
"version": "2.0.0",
"tasks": [
{
"label": "Watch Server",
"type": "shell",
"command": "cd server && npm run dev",
"group": "build",
"presentation": {
"group": "buildGroup",
"reveal": "always",
"panel": "new",
"echo": false
}
},
{
"label": "Watch Client",
"type": "shell",
"command": "cd client && npm run dev",
"group": "build",
"presentation": {
"group": "buildGroup",
"reveal": "always",
"panel": "new",
"echo": false
}
},
{
"label": "Watch All",
"dependsOn": [
"Watch Server",
"Watch Client"
],
"group": "build",
"runOptions": {
"runOn": "folderOpen"
}
},
{
"label": "Lint and Format",
"type": "shell",
"command": "cd server && npm run lint && npm run format && cd ../client && npm run lint && npm run format",
"group": "lint",
"presentation": {
"group": "lintGroup",
"reveal": "always",
"panel": "new",
"echo": false
},
"problemMatcher": [
"$eslint-compact",
"$prettier"
]
}
]
}This file creates several tasks that we can use in our VS Code IDE:
Watch Server - this will run the backend Express server application.Watch Client - this will run the frontend Vue client application.Watch All - this will watch both the server and client in two new terminal windows.Lint and Format - this will run linting and formatting for both the server and client. This is a helpful command to run before committing any code to GitHub.Once that file is created and saved, we may need to refresh our GitHub Codespace window or restart VS Code for the changes to take effect. When we do, we should see our new Watch All task run automatically, since it was given the "runOn": "folderOpen" option. In most cases, this is the most effective option - our server and client will always be running, and we can easily restart each of them by typing either rs for the server (running in Nodemon) or just r for the client (running in Vite) without closing those terminals.
We can also access these tasks anytime from the VS Code Command Palette by pressing CTRL+SHIFT+P and searching for the “Tasks: Run Task” menu option, then selecting whichever task we want to run.
The second major feature we need to configure for our application is a proxy that allows our frontend application to access our backend RESTful API directly. In many typical development scenarios, we typically run our backend application on one port (such as port 3000, which if how our app is currently configured), and then we run our frontend application in a development server on a different port (such as 5173, the default port used by Vite). However, in this scenario, our frontend must include a hard-coded IP address and port to access our backend server in development mode.
In production, our frontend application and backend RESTful API server are generally running on the same system, so they will use the same IP address and port. So, to simplify things now, we can simulate that setup by adding a Proxy configuration to our frontend application’s development server running in Vite. In this way, our frontend application can connect directly back to the port it is running on (port 5173 in this example), and if the connection matches one that should be sent to the backend API server instead, it will be proxied to that application (running on port 3000). This greatly simplifies developing our application, since we don’t have to worry about the configuration changing between development mode and production.
So, to configure a proxy for Vite, we must modify our vite.config.js file in our client folder by adding a few additional settings:
import { fileURLToPath, URL } from 'node:url'
import { defineConfig } from 'vite'
import vue from '@vitejs/plugin-vue'
import vueDevTools from 'vite-plugin-vue-devtools'
import tailwindcss from '@tailwindcss/vite'
// https://vite.dev/config/
export default defineConfig({
plugins: [
vue(),
vueDevTools(),
tailwindcss(),
],
resolve: {
alias: {
'@': fileURLToPath(new URL('./src', import.meta.url))
},
},
server: {
proxy: {
// Proxy all API requests
'/api': {
target: 'http://localhost:3000',
changeOrigin: true,
secure: false
},
// Proxy Open API Docs
'/docs': {
target: 'http://localhost:3000',
changeOrigin: true,
secure: false
},
// Proxy Authentication Requests
'/auth': {
target: 'http://localhost:3000',
changeOrigin: true,
secure: false
}
}
}
})In the new server section, we are including settings to proxy three different URL paths from our frontend to our backend:
/api - this will proxy all API requests/docs - this allows us to easily access the OpenAPI docs on our frontend in development mode/auth - this allows us to access the routes needed for authenticationAs we can see, this covers pretty much all routes available on our backend RESTful API server. Also, we need to remember that these routes are unique to our backend server, so we cannot use these same URLs as virtual routes in our Vue router on the frontend; otherwise, we’ll have a conflict and our application may not work correctly.
So, let’s test this by running both our client and server applications simultaneously, and then access the frontend application using port 5173 (or whatever port Vite is currently running our frontend application on). Once there, we should try to access the /docs URL. If it works, we know that our proxy is working correctly!
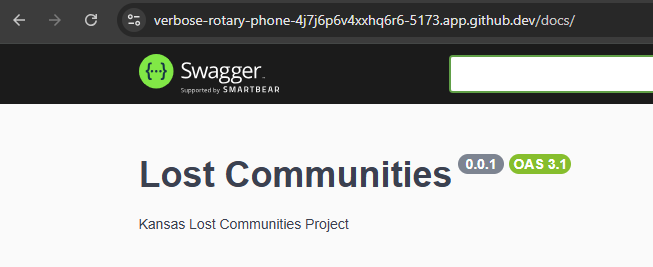
Notice in the screenshot above that the URL is running on port 5173 but it is able to access content that is running on port 3000 from our backend server. We can also see that it appears in the access logs on the backend server’s terminal, so we know it is working properly.
Finally, let’s see how we can make an API request to our backend RESTful API server from our frontend application. First, we’ll need to install the Axios HTTP client library in our frontend application. While we can use the basic fetch commands that are available by default, we’ll quickly find that the extra features provided by Axios are worth adding an extra dependency to our application. So, let’s install it using npm in our client folder:
$ npm install axiosNext, let’s create a new Vue component we can use for simple testing. We’ll place this component in a file named TestApi.vue in the src/components/test folder:
<script setup>
/**
* @file Test API Component
* @author Russell Feldhausen <russfeld@ksu.edu>
*/
// Import Libraries
import { ref } from 'vue'
import axios from 'axios'
import Card from 'primevue/card'
// Create Reactive State
const api_versions = ref([])
// Load API versions
axios
.get('/api')
.then(function (response) {
api_versions.value = response.data
})
.catch(function (error) {
console.log(error)
})
</script>
<template>
<div>
<Card v-for="api_version in api_versions" :key="api_version.version">
<template #title>Version {{ api_version.version }}</template>
<template #content>
<p>URL: {{ api_version.url }}</p>
</template>
</Card>
</div>
</template>In this component, we start by creating a reactive state variable called api_versions that is initially set to an empty array. Then, we use the Axios library to send a request to the /api URL on our server, which is being proxied to the backend RESTful API. If we receive a response back, we’ll go to the then function, which simply stores the data attached to the response in the api_versions reactive state variable, which should update our application as soon as it receives data. If there are any errors, we’ll enter the catch function and log those errors to the browser’s console.
In our template, we chose to use a PrimeVue Card, which is a very simple building block for our website to use. Since we want to include one card per API version, we are using a v-for Vue directive to allow us to iterate through a list of objects. This is discussed in detail in the List Rendering section of the Vue documentation. We are also binding a unique key to each element, which in this case is the version attribute for each api_version element.
To use this component, let’s just add it to our AboutView.vue page for testing:
<script setup>
import TestApi from '../components/test/TestApi.vue'
</script>
<template>
<main>This is an about page.</main>
<TestApi />
</template>Now, when we visit our application and click on the link for the About page, we should see a list of API versions appear:
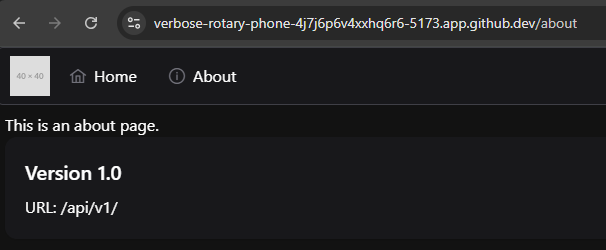
We can even test this by changing the API versions that are returned by our backend server and see the changes directly on our frontend application!
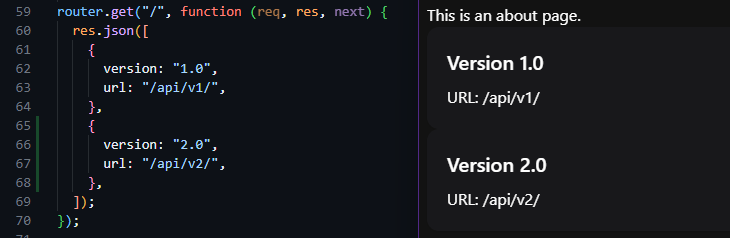
There we go! We can now request data from our backend RESTful API server, and it will provide a valid response. However, right now the only URL path that does not require authentication is the /api path, so we still need to add a way for users to authenticate themselves and get a valid JWT to access the rest of the API. We’ll cover that on the next part of this tutorial.
The time has come for us to finally handle user authentication on our frontend application. There are several different pieces that need to work together seamlessly for this to work properly, so let’s explore what that looks like and see what it takes to get our users properly authenticated so they can access secure data in our application.
First, since we want the user to be able to request a JWT that can be used throughout our application, it would make the most sense to store that token in a Pinia store, instead of storing it directly in any individual component. This way we can easily access the token anywhere we need it in our application, and Pinia will handle making sure it is accessible and updated as needed.
First, we’ll need to install a library that we can use to decode a JWT and read the contents. Thankfully, we can easily use the jwt-decode library available on npm for this task:
$ npm install jwt-decodeSo, let’s create a new store called Token.js in the src/stores folder with the following code:
/**
* @file JWT Token Store
* @author Russell Feldhausen <russfeld@ksu.edu>
*/
// Import Libraries
import { ref, computed } from "vue";
import { defineStore } from "pinia";
import { jwtDecode } from "jwt-decode";
import axios from "axios";
// Define Store
export const useTokenStore = defineStore('token', () => {
// State properties
const token = ref('')
// Getters
const username = computed(() => token.value.length > 0 ? jwtDecode(token.value)['username'] : '')
const has_role = computed(() =>
(role) => token.value.length > 0 ? jwtDecode(token.value)['roles'].some((r) => r.role == role) : false,
)
// Actions
/**
* Get a token for the user.
*
* If this fails, redirect to authentication page if parameter is true
*
* @param redirect if true, redirect user to login page on failure
*/
async function getToken(redirect = false) {
console.log('token:get')
try {
const response = await axios.get('/auth/token', { withCredentials: true })
token.value = response.data.token
} catch (error) {
token.value = ''
// If the response is a 401, the user is not logged in
if (error.response && error.response.status === 401) {
console.log('token:get user not logged in')
if (redirect) {
console.log('token:get redirecting to login page')
window.location.href = '/auth/cas'
}
} else {
console.log('token:get error' + error)
}
}
}
/**
* Log the user out and clear the token
*/
function logout() {
token.value = ''
window.location.href = '/auth/logout'
}
// Return all state, getters, and actions
return {token, username, has_role, getToken, logout }
})Let’s take a look at each part of this Pinia store to understand how it works.
export const useTokenStore = defineStore('token', () => { - this first line creates a store with the unique name of token and exports a function that is used to make the store available in any component. We’ll use this function later on this page to access the token in the store.const token = ref('') - next, we have a section that defines the state variables we actually want to keep in this Pinia store. Each of these are reactive state variables, just like we’ve worked with before. In this store, we’re just going to store the JWT we receive from our RESTful API backend server in the token variable here.const username = computed(() =>... - following the state, we have a couple of Computed Properties that act as getters for our store. The first one will decode the JWT and extra the user’s username for us to use in our application.const has_role = computed(() =>... - this getter will allow us to check if the user’s token has a given role listed. This will help us make various parts of the application visible to the user, depending on which roles they have. This getter is unique in that it is an anonymous function that returns an anonymous function!async function getToken(redirect = false) - finally, we have a couple of actions, which are functions that can be called as part of the store, typically to retrieve the state from the server or perform some other operation on the state. The getToken function will use the Axios library to try and retrieve a token from the server. We have to include the {withCredentials: true} to direct Axios to also send along any cookies available in the browser for this request. If we receive a response, we store it in the token state for this store, showing that the user is correctly logged in. If not, we check and see if the response is an HTTP 401 response, letting us know that the user is not correctly logged in. If not, we can optionally redirect the user to the login page, or we can just silently fail. We’ll see how both options are useful a bit later on this page. This function is written using async/await so we can optionally choose to await this function if we want to make sure a user is logged in before doing any other actions.function logout() - of course, the logout function does exactly what it says - it simply removes the token and then redirects the user to the logout route on the backend server. This is important to do, because it will tell the backend server to clear the cookie and also redirect us to the CAS server to make sure all of our sessions are closed.Finally, at the bottom, we have to remember to return every single state, getter, or action that is part of this Pinia store.
Now that we’ve created a Pinia store to handle our JWT for our user, we can create a Vue component to work with the store to make it easy for the user to log in, log out, and see their information.
For this, we’re going to create a new Vue component called UserProfile.vue and store it in the src/components/layout folder. It will contain the following content:
<script setup>
/**
* @file User Profile menu option
* @author Russell Feldhausen <russfeld@ksu.edu>
*/
// Import Libraries
import { ref } from 'vue'
import { storeToRefs } from 'pinia'
import { Avatar, Menu } from 'primevue'
import { useRouter } from 'vue-router'
const router = useRouter()
// Stores
import { useTokenStore } from '@/stores/Token'
const tokenStore = useTokenStore()
const { token, username } = storeToRefs(tokenStore)
// Declare State
const items = ref([
{
label: username,
icon: 'pi pi-cog',
command: () => {
router.push({ name: 'profile' })
},
},
{
label: 'Logout',
icon: 'pi pi-sign-out',
command: tokenStore.logout,
},
])
// Menu Popup State
const menu = ref()
// Menu Toggle Button Handler
const toggle = function (event) {
menu.value.toggle(event)
}
</script>
<template>
<div class="p-menubar-item">
<!-- If the token is empty, show the login button -->
<div v-if="token.length == 0" class="p-menubar-item-content">
<a class="p-menubar-item-link" @click="tokenStore.getToken(true)">
<span class="p-menubar-item-icon pi pi-sign-in" />
<span class="p-menu-item-label">Login</span>
</a>
</div>
<!-- Otherwise, assume the user is logged in -->
<div v-else class="p-menubar-item-content">
<a
class="p-menubar-item-link"
id="user-icon"
@click="toggle"
aria-haspopup="true"
aria-controls="profile_menu"
>
<Avatar icon="pi pi-user" shape="circle" />
</a>
<Menu ref="menu" id="profile_menu" :model="items" :popup="true" />
</div>
</div>
</template>
<style scoped>
#user-icon {
padding: 0px 12px;
}
</style>As we can see, our components are slowly becoming more and more complex, but we can easily break down this component into several parts to see how it works.
// Stores
import { useTokenStore } from '@/stores/Token'
const tokenStore = useTokenStore()
const { token } = storeToRefs(tokenStore)First, these three lines in the <script setup> portion will load our token store we created earlier. We first import it, then we call the useTokenStore function to make it accessible. Finally, we are using the storeToRefs function to extract any state and getters from the store and make them direct reactive state variables we can use in our component.
// Declare State
const items = ref([
{
label: 'Profile',
icon: 'pi pi-cog',
command: () => {
router.push({ name: 'profile' })
},
},
{
label: 'Logout',
icon: 'pi pi-sign-out',
command: tokenStore.logout,
},
])Next, we are setting up the menu items that will live in the submenu that is available when a user is logged on. These use the same menu item format that we used previously in our top-level menu bar.
// Menu Popup State
const menu = ref()
// Menu Toggle Button Handler
const toggle = function (event) {
menu.value.toggle(event)
}Finally, we have a reactive state variable and a click handler function to enable our popup menu to appear and hide as users click on the profile button.
Now, let’s break down the content in the <template> section as well.
<!-- If the token is empty, show the login button -->
<div v-if="token.length == 0" class="p-menubar-item-content">
<a class="p-menubar-item-link" @click="tokenStore.getToken(true)">
<span class="p-menubar-item-icon pi pi-sign-in" />
<span class="p-menu-item-label">Login</span>
</a>
</div>Our template consists of two different parts. First, if the token store has an empty token, we can assume that the user is not logged in. In that case, instead of showing any user profile information, we should just show a login button for the user to click. This button is styled using some PrimeVue CSS classes to match other buttons available in the top-level menu bar.
<!-- Otherwise, assume the user is logged in -->
<div v-else class="p-menubar-item-content">
<a
class="p-menubar-item-link"
id="user-icon"
@click="toggle"
aria-haspopup="true"
aria-controls="profile_menu"
>
<Avatar icon="pi pi-user" shape="circle" />
</a>
<Menu ref="menu" id="profile_menu" :model="items" :popup="true" />
</div>However, if the user is logged in, we instead can show a clickable link that will open a submenu with a couple of options. To display the user’s profile information, we are using a PrimeVue Avatar component with a default user icon, but we can easily replace that with a user’s profile image if one exists in our application. We are also using a PrimeVue Menu component to create a small popup menu if the user clicks on their profile icon. That menu includes options to view the user’s profile,and also to log out of the application by calling the logout method in the token store.
We also see our first instance of a scoped CSS directive in this component:
<style scoped>
#user-icon {
padding: 0px 12px;
}
</style>In effect, the Avatar component from PrimeVue is a bit taller than the rest of the items in the top-level menu bar. By default, the p-menuvar-item-content class has a lot of padding above and below the element, but we’ve chosen to remove that padding by overriding the padding CSS directive on the <a> element with the ID #user-icon. This is a very powerful way to make little tweaks to the overall look and feel of our application to keep it consistent.
Now we can add our new UserProfile component to our TopMenu component to make it visible in our application:
// -=-=- other code omitted here -=-=-
// Import Components
import Menubar from 'primevue/menubar'
import ThemeToggle from './ThemeToggle.vue'
import UserProfile from './UserProfile.vue'
// -=-=- other code omitted here -=-=-
</script>
<template>
<div>
<Menubar :model="items">
<template #start>
<img src="https://placehold.co/40x40" alt="Placeholder Logo" />
</template>
<template #end>
<div class="flex items-center gap-1">
<ThemeToggle />
<UserProfile />
</div>
</template>
</Menubar>
</div>
</template>As we’ve already seen before, we are simply importing the component into our file in the <script setup> section, and then adding it like any other HTML element in the <template> section. To help with layout, we’ve wrapped the items in the <template #end> slot in a <div> of their own, and applied a few CSS classes from Tailwind to handle Flex Layout, Item Alignment, and Gap Spacing.
Finally, before we can test our authentication system, we must make one change to our website’s configuration. Right now, our CAS authentication system is set to redirect users back to port 3000, which is where our backend server is running. However, we now want users to be sent back to our frontend, which is running on port 5173. So, in our server folder, we need to update one entry in our .env file:
# -=-=- other settings omitted here -=-=-
CAS_SERVICE_URL=https://$CODESPACE_NAME-5173.$GITHUB_CODESPACES_PORT_FORWARDING_DOMAINNow, instead of referencing the $PORT setting, we have simply hard-coded the port 5173 used by Vite for now. Once we’ve changed this setting, we must remember to manually restart our backend server by either stopping and restarting it in the terminal, or by typing rs in the running terminal window so Nodemon will restart it.
At this point, we are finally ready to test our authentication setup. So, we’ll need to make sure both our frontend and backend applications are running. Then, we can load our frontend application and try to click on the login button. If it works correctly, it should redirect us to the CAS server to log in. Once we have logged in, we’ll be sent back to our frontend application, but the login button will still be visible. This time, however, if we click it, our frontend will be able to successfully get a token from the backend (since we are already logged in and have a valid cookie), and our frontend application will switch to show the user’s profile option in the menu.
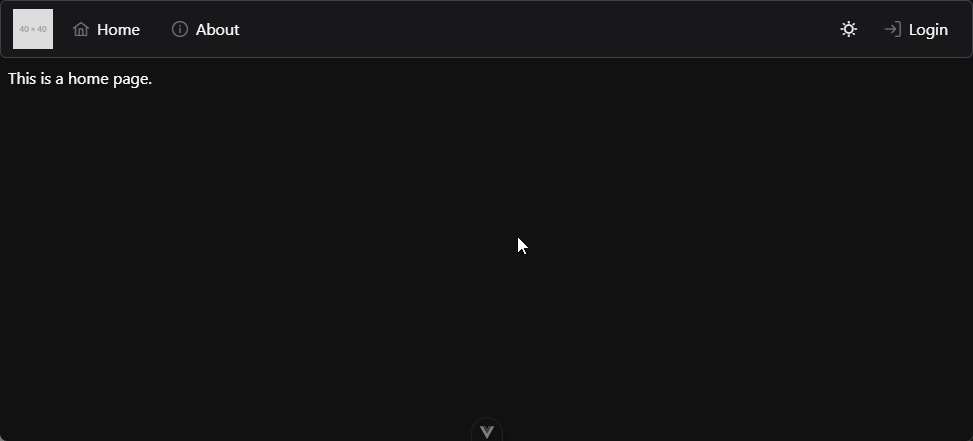
If everything is working correctly, our website should act like the example animation above! Now we just have to add a few more features to streamline this process a bit and actually request data from the server.
Let’s take a step back to examine the complexity of the authentication process for our application as it stands currently:
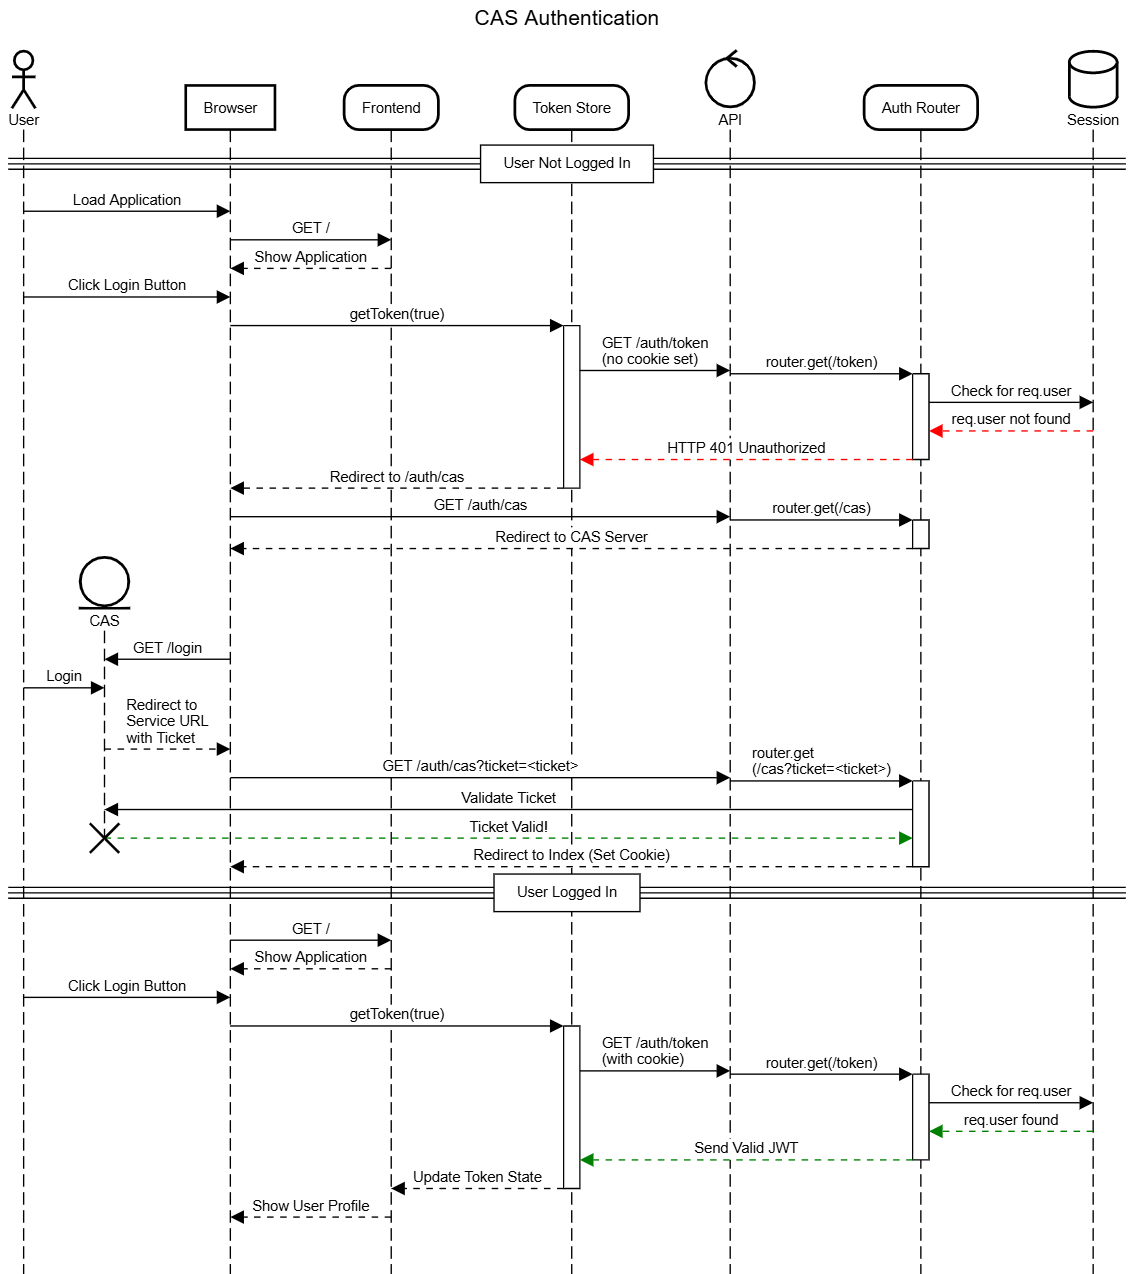
As we can see, there are lots of steps involved! It is always good to create diagrams like this in mind when developing an application - they can often be very helpful when we have to debug a complicated process like authentication.
In this video, the new api.js file was accidentally created in the router folder. It should be moved to the configs folder, which is shown in the next video.
One thing we may quickly realize as we use our application as it currently stands is that the user has to click the “Login” button twice to actually get logged into the system. That seems a bit counterintuitive, so we should take a minute to try and fix that.
Effectively, we want our application to try and request a token on behalf of the user behind the scenes as soon as the page is loaded. If a token can be received, we know the user is actually logged in and we can update the user interface accordingly. There are several approaches to do this:
App.vue file - this will ensure it runs when any part of the web application is loadedSo, let’s add a global navigation guard to our router, ensuring that we only have a single place that requests a token when the user first lands on the page.
To do this, we need to edit the src/router/index.js to add a special beforeEach function to the router:
/**
* @file Vue Router for the application
* @author Russell Feldhausen <russfeld@ksu.edu>
* @exports router a Vue Router
*/
// Import Libraries
import { createRouter, createWebHistory } from 'vue-router'
// Import Stores
import { useTokenStore } from '@/stores/Token'
// Import Views
import HomeView from '../views/HomeView.vue'
const router = createRouter({
// Configure History Mode
history: createWebHistory(import.meta.env.BASE_URL),
// Configure routes
routes: [
{
path: '/',
name: 'home',
component: HomeView,
},
{
path: '/about',
name: 'about',
// route level code-splitting
// this generates a separate chunk (About.[hash].js) for this route
// which is lazy-loaded when the route is visited.
component: () => import('../views/AboutView.vue'),
},
],
})
//Global Route Guard
router.beforeEach(async (to) => {
// Load Token Store
const tokenStore = useTokenStore();
// Allow access to 'home' and 'about' routes automatically
const noLoginRequired = ['home', 'about']
if (noLoginRequired.includes(to.name)) {
// If there is no token already
if(!tokenStore.token.length > 0) {
// Request a token in the background
tokenStore.getToken()
}
// For all other routes
} else {
// If there is no token already
if(!tokenStore.token.length > 0) {
// Request a token and redirect if not logged in
await tokenStore.getToken(true)
}
}
})
export default routerIn this navigation guard, we have identified two routes, 'home' and 'about' that don’t require the user to log in first. So, if the route matches either of those, we request a token in the background if we don’t already have one, but we don’t await that function since we don’t need it in order to complete the process. However, for all other routes that we’ll create later in this project, we will await on the tokenStore.getToken() function to ensure that the user has a valid token available before allowing the application to load the next page. As we continue to add features to our application, we’ll see that this is a very powerful way to keep track of our user and ensure they are always properly authenticated.
We can also simplify one other part of our application by automatically configuring Axios with a few additional settings that will automatically inject the Authorization: Bearer header into each request, as well as silently requesting a new JWT token if ours appears to have expired.
For this, we’ll create a new folder called src/configs and place a new file api.js inside of that folder with the following content:
/**
* @file Axios Configuration and Interceptors
* @author Russell Feldhausen <russfeld@ksu.edu>
*/
// Import Libraries
import axios from 'axios'
// Import Stores
import { useTokenStore } from '@/stores/Token'
// Axios Instance Setup
const api = axios.create({
headers: {
Accept: 'application/json',
'Content-Type': 'application/json',
},
})
// Add Interceptors
const setupAxios = function() {
// Configure Requests
api.interceptors.request.use(
(config) => {
// If we are not trying to get a token or API versions, send the token
if (config.url !== '/auth/token' && config.url !== '/api') {
const tokenStore = useTokenStore()
if (tokenStore.token.length > 0) {
config.headers['Authorization'] = 'Bearer ' + tokenStore.token
}
}
return config
},
// If we receive any errors, reject with the error
(error) => {
return Promise.reject(error)
}
)
// Configure Response
api.interceptors.response.use(
// Do not modify the response
(res) => {
return res
},
// Gracefully handle errors
async (err) => {
// Store original request config
const config = err.config
// If we are not trying to request a token but we get an error message
if(config.url !== '/auth/token' && err.response) {
// If the error is a 401 unauthorized, we might have a bad token
if (err.response.status === 401) {
// Prevent infinite loops by tracking retries
if (!config._retry) {
config._retry = true
// Try to request a new token
try {
const tokenStore = useTokenStore();
await tokenStore.getToken();
// Retry the original request
return api(config)
} catch (error) {
return Promise.reject(error)
}
} else {
// This is a retry, so force an authentication
const tokenStore = useTokenStore();
await tokenStore.getToken(true);
}
}
}
// If we can't handle it, return the error
return Promise.reject(err)
}
)
}
export { api, setupAxios }This file configures an Axios instance to only accept application/json requests, which makes sense for our application. Then, in the setupAxios function, it will add some basic interceptors to modify any requests sent from this instance as well as responses received:
/auth/token and /api, we’ll assume that the user is accessing a route that requires a valid bearer token. So, we can automatically inject that into our request./auth/token URL, we can assume that we might have an invalid token. So, we’ll quickly try to request one in the background, and then retry the original request once. If it fails a second time, we’ll redirect the user back to the login page so they can re-authenticate with the system.To use these interceptors, we must first enable them in the src/main.js file:
/**
* @file Main Vue application
* @author Russell Feldhausen <russfeld@ksu.edu>
*/
// Import Libraries
import { createApp } from 'vue'
import { createPinia } from 'pinia'
import PrimeVue from 'primevue/config'
import Aura from '@primeuix/themes/aura'
import Tooltip from 'primevue/tooltip'
// Import CSS
import './assets/main.css'
// Import Vue App
import App from './App.vue'
// Import Configurations
import router from './router'
import { setupAxios } from './configs/api'
// Create Vue App
const app = createApp(App)
// Install Libraries
app.use(createPinia())
app.use(router)
app.use(PrimeVue, {
// Theme Configuration
theme: {
preset: Aura,
options: {
darkModeSelector: '.app-dark-mode',
},
},
})
// Install Directives
app.directive('tooltip', Tooltip)
// Setup Interceptors
setupAxios()
// Mount Vue App on page
app.mount('#app')Now, anytime we want to request data from a protected route, we can use the api instance of Axios that we configured!
Finally, let’s see what it takes to actually access data that is available in our RESTful API using a properly authenticated request. For this example, we’re going to create a simple ProfileView page that the user can access by clicking the Profile button available after they’ve logged in. This page is just a test, but it will quickly demonstrate what we can do with our existing setup.
So, let’s start by creating the TestUser component we plan on using on that page. We’ll place it in our src/components/test folder.
<script setup>
/**
* @file Test User Component
* @author Russell Feldhausen <russfeld@ksu.edu>
*/
// Import Libraries
import { ref } from 'vue'
import { api } from '@/configs/api'
import { Card, Chip } from 'primevue'
// Create Reactive State
const users = ref([])
// Load Users
api.get('/api/v1/users')
.then(function(response) {
users.value = response.data
})
.catch(function (error) {
console.log(error)
})
</script>
<template>
<div>
<Card v-for="user in users" :key="user.id">
<template #title>Username: {{ user.username }}</template>
<template #content>
<Chip v-for="role in user.roles" :label="role.role" :key="role.id" />
</template>
</Card>
</div>
</template>We should be easily able to compare the contents of this file to the TestApi component we developed earlier. In this case, however, we are using the api instance of Axios we created earlier to load our users. That instance will automatically send along the user’s JWT to authenticate the request. We’re also using the PrimeVue Chip component to list the roles assigned to each user.
Next, we can create our new ProfileView.vue page in our src/views folder with the following content:
<script setup>
import TestUser from '../components/test/TestUser.vue'
</script>
<template>
<TestUser />
</template>This is nearly identical to our other views, so nothing is really new here.
Finally, we need to add this page to our Vue Router in src/router/index.js:
/**
* @file Vue Router for the application
* @author Russell Feldhausen <russfeld@ksu.edu>
* @exports router a Vue Router
*/
// Import Libraries
import { createRouter, createWebHistory } from 'vue-router'
// Import Stores
import { useTokenStore } from '@/stores/Token'
// Import Views
import HomeView from '../views/HomeView.vue'
const router = createRouter({
// Configure History Mode
history: createWebHistory(import.meta.env.BASE_URL),
// Configure routes
routes: [
{
path: '/',
name: 'home',
component: HomeView,
},
{
path: '/about',
name: 'about',
// route level code-splitting
// this generates a separate chunk (About.[hash].js) for this route
// which is lazy-loaded when the route is visited.
component: () => import('../views/AboutView.vue'),
},
{
path: '/profile',
name: 'profile',
component: () => import('../views/ProfileView.vue')
}
],
})
// -=-=- other code omitted here -=-=-
Again, adding a route is as simple as giving it a name, a path, and listing the component that should be loaded.
Now, with all of that in place, we should be able to click on the Profile link on the menu under the user’s profile image to access this page:
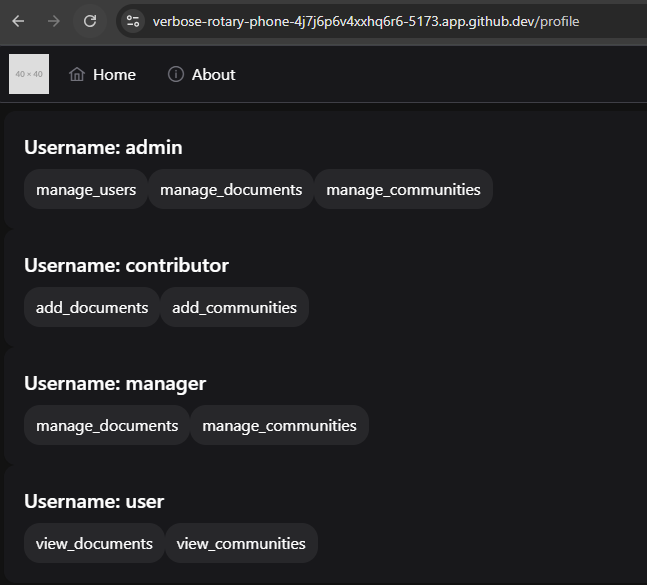
This is the power of having a really well structured frontend application framework to build upon. Now that we’ve spent all of this time configuring routing, authentication, components, and more, it becomes very straightforward to add new features to our application.
We can even refresh this page and it should reload properly without losing access! As long as we still have a valid cookie from our backend RESTful API server, our application will load, request a token, and then request the data, all seamlessly without any interruptions.
At this point, all that is left is to lint and format our code, then commit and push to GitHub!
This example project builds on the previous Vue.js starter project by scaffolding a CRUD frontend for the basic users and roles tables.
At the end of this example, we will have a project with the following features:
manage_users role. Roles are not editable.manage_users role.This project picks up right where the last one left off, so if you haven’t completed that one yet, go back and do that before starting this one.
Let’s get started!
To start this project, let’s add a new view and a new component to explore the roles available in our application.
First, let’s create a simple component skeleton in a new src/components/roles/ folder. We’ll name it the RolesList component:
<script setup>
/**
* @file Roles List Component
* @author Russell Feldhausen <russfeld@ksu.edu>
*/
// Import Libraries
import { ref } from 'vue'
import { api } from '@/configs/api'
import { Card } from 'primevue'
// Create Reactive State
const roles = ref([])
// Load Roles
api
.get('/api/v1/roles')
.then(function (response) {
roles.value = response.data
})
.catch(function (error) {
console.log(error)
})
</script>
<template>
<div>
<Card v-for="role in roles" :key="role.id">
<template #title>Role: {{ role.role }}</template>
</Card>
</div>
</template>This component should look very familiar - it is based on the TestUser component we developed in the previous tutorial.
Next, we should create a RolesView.vue component in the src/views folder to load that component on a page:
<script setup>
import RolesList from '../components/roles/RolesList.vue'
</script>
<template>
<RolesList />
</template>After that, we should add this page to our router:
// -=-=- other code omitted here -=-=-
const router = createRouter({
// Configure History Mode
history: createWebHistory(import.meta.env.BASE_URL),
// Configure routes
routes: [
{
path: '/',
name: 'home',
component: HomeView,
},
{
path: '/about',
name: 'about',
// route level code-splitting
// this generates a separate chunk (About.[hash].js) for this route
// which is lazy-loaded when the route is visited.
component: () => import('../views/AboutView.vue'),
},
{
path: '/profile',
name: 'profile',
component: () => import('../views/ProfileView.vue'),
},
{
path: '/roles',
name: 'roles',
component: () => import('../views/RolesView.vue'),
},
],
})
// -=-=- other code omitted here -=-=-
Finally, let’s also add it to our list of menu options in the TopMenu component:
<script setup>
// -=-=- other code omitted here -=-=-
// Declare State
const items = ref([
{
label: 'Home',
icon: 'pi pi-home',
command: () => {
router.push({ name: 'home' })
},
},
{
label: 'About',
icon: 'pi pi-info-circle',
command: () => {
router.push({ name: 'about' })
},
},
{
label: 'Roles',
icon: 'pi pi-id-card',
command: () => {
router.push({ name: 'roles' })
},
},
])
</script>With those changes in place, we should be able to view the list of available roles in our application by clicking the new Roles link in the top menu bar:
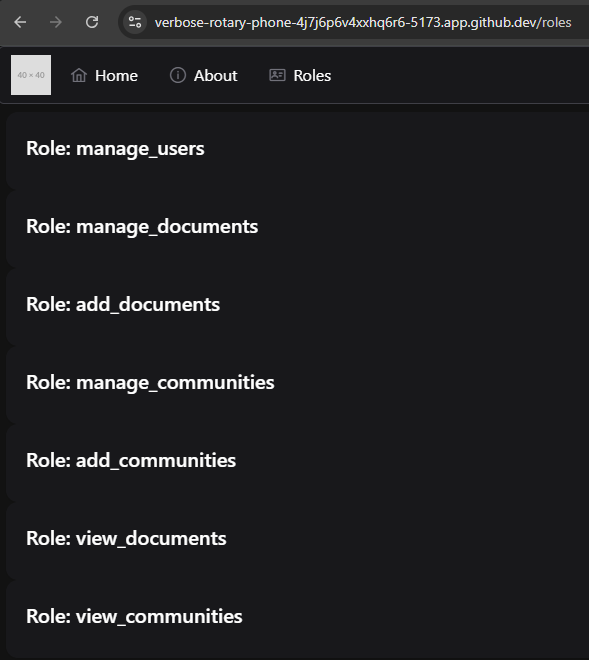
Our application will even redirect users to the CAS server to authenticate if they aren’t already logged in!
However, what if we log in using the user username instead of admin? Will this page still work? Unfortunately, because the /api/v1/roles API route requires a user to have the manage_users role, it will respond with an HTTP 401 error. We can see these errors in the console of our web browser:
So, we need to add some additional code to our application to make sure that users only see the pages and links the are actually able to access.
First, let’s explore how we can hide various menu items from our top menu bar based on the roles assigned to our users. To enable this, we can tag each item in the menu that has restricted access with a list of roles that are able to access that page:
<script setup>
// -=-=- other code omitted here -=-=-
// Declare State
const items = ref([
{
label: 'Home',
icon: 'pi pi-home',
command: () => {
router.push({ name: 'home' })
},
},
{
label: 'About',
icon: 'pi pi-info-circle',
command: () => {
router.push({ name: 'about' })
},
},
{
label: 'Roles',
icon: 'pi pi-id-card',
command: () => {
router.push({ name: 'roles' })
},
roles: ['manage_users']
},
])
// -=-=- other code omitted here -=-=-
</script>Then, we can create a Vue Computed Property to filter the list of items used in the template:
<script setup>
/**
* @file Top menu bar of the entire application
* @author Russell Feldhausen <russfeld@ksu.edu>
*/
// Import Libraries
import { ref, computed } from 'vue'
import { useRouter } from 'vue-router'
const router = useRouter()
// Import Components
import Menubar from 'primevue/menubar'
import ThemeToggle from './ThemeToggle.vue'
import UserProfile from './UserProfile.vue'
// Stores
import { useTokenStore } from '@/stores/Token'
const tokenStore = useTokenStore()
// -=-=- other code omitted here -=-=-
const visible_items = computed(() => {
return items.value.filter((item) => {
// If the item lists any roles
if (item.roles) {
// Assume the user must be logged in to view it
if (tokenStore.token.length > 0) {
// If the roles is a string containing an asterisk
if (item.roles == "*") {
// Allow all roles to view
return true;
} else {
// Otherwise, check if any role matches a role the user has
return item.roles.some((r) => tokenStore.has_role(r))
}
} else {
// If not logged in, hide item
return false;
}
} else {
// If no roles listed, show item even if not logged in
return true;
}
})
})
</script>In this function, we are filtering the the menu items based on the roles. If they have a set of roles listed, we check to see if it is an asterisk - if so, all roles are allowed. Otherwise, we assume that it is a list of roles, and check to see if at least one role matches a role that the user has by checking the token store’s has_role getter method. Finally, if no roles are listed, we assume that the item should be visible to users even without logging in.
To use this new computed property, we just replace the items entry in the template with the new computed_items property:
<template>
<div>
<Menubar :model="visible_items">
<template #start>
<img src="https://placehold.co/40x40" alt="Placeholder Logo" />
</template>
<template #end>
<div class="flex items-center gap-1">
<ThemeToggle />
<UserProfile />
</div>
</template>
</Menubar>
</div>
</template>That should properly hide menu items from the user based on their roles. Feel free to try it out!
Of course, hiding the item from the menu does not prevent the user from manually typing in the route path in the URL and trying to access the page that way. So, we must also add some additional logic to our router to ensure that user’s can’t access. For that, we can add a Per-Route Guard following a very similar approach. In our src/router/index.js file, we can add a new generator function to create a route guard based on roles, and then apply that guard as the beforeEnter property for a route:
// -=-=- other code omitted here -=-=-
/**
* Router Guard Function to check for role before entering route
*
* @param roles a list of roles permitted to enter the route
* @return boolean true if the navigation is permitted, else returns to the home page
*/
const requireRoles = (...roles) => {
return () => {
const tokenStore = useTokenStore()
const allow = roles.some((r) => tokenStore.has_role(r))
if (allow) {
// allow navigation
return true;
} else {
// redirect to home
return { name: 'home'}
}
}
}
const router = createRouter({
// Configure History Mode
history: createWebHistory(import.meta.env.BASE_URL),
// Configure routes
routes: [
{
path: '/',
name: 'home',
component: HomeView,
},
{
path: '/about',
name: 'about',
// route level code-splitting
// this generates a separate chunk (About.[hash].js) for this route
// which is lazy-loaded when the route is visited.
component: () => import('../views/AboutView.vue'),
},
{
path: '/profile',
name: 'profile',
component: () => import('../views/ProfileView.vue'),
},
{
path: '/roles',
name: 'roles',
component: () => import('../views/RolesView.vue'),
beforeEnter: requireRoles("manage_users")
},
],
})
// -=-=- other code omitted here -=-=-
Now, even if we try to type the /roles path into the address bar in our web browser, it won’t allow us to reach that page unless we are logged in to a user account that has the correct role.
We can also use Tailwind to add some reactive style to our components. For example, we can use the Grid layout options to place the components in a grid view:
<template>
<div class="grid grid-cols-1 xl:grid-cols-4 lg:grid-cols-3 sm:grid-cols-2 gap-2">
<Card v-for="role in roles" :key="role.id">
<template #title>Role: {{ role.role }}</template>
</Card>
</div>
</template>This will give us a responsive layout that adjusts the number of columns based on the width of the screen:
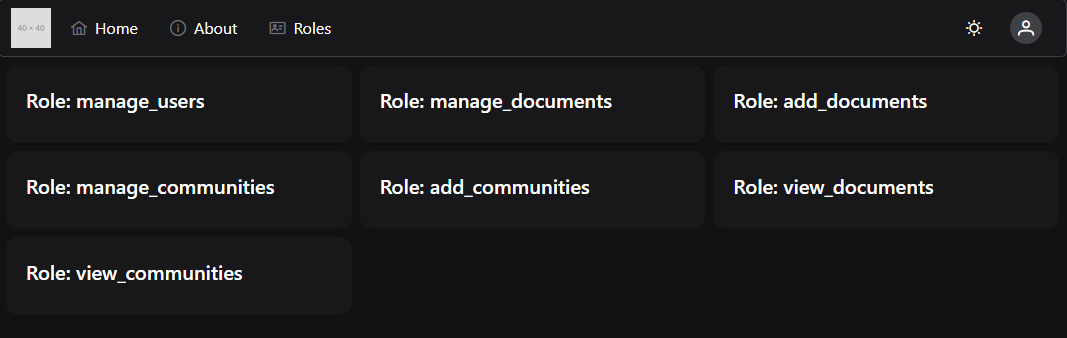
Now that we have explored the basics of adding new menu items and routes to our application, let’s start working on the components to view and edit the users available in our application. To begin, we’ll work on the *GET ALL route, which will allow us to view all of the users on our system. For this, we’ll use the PrimeVue DataTable component, which is one of the most powerful components available in the PrimeVue library.
First, before we can do that, we must set up our new view and a route to get there, as well as a menu option. So, let’s go through that really quickly.
First, we’ll add a new route to the Vue router:
// -=-=- other code omitted here -=-=-
const router = createRouter({
// Configure History Mode
history: createWebHistory(import.meta.env.BASE_URL),
// Configure routes
routes: [
// -=-=- other code omitted here -=-=-
{
path: '/users',
name: 'users',
component: () => import('../views/UsersListView.vue'),
beforeEnter: requireRoles("manage_users")
}
],
})
// -=-=- other code omitted here -=-=-
We’ll also add that route as a menu item in our TopMenu.vue component:
<script setup>
// -=-=- other code omitted here -=-=-
// Declare State
const items = ref([
// -=-=- other code omitted here -=-=-
{
label: 'Users',
icon: 'pi pi-users',
command: () => {
router.push({ name: 'users' })
},
roles: ['manage_users']
},
])
// -=-=- other code omitted here -=-=-
</script>Then, we’ll create a new view named UsersListView.vue that will contain our table component:
<script setup>
import UsersList from '../components/users/UsersList.vue'
</script>
<template>
<UsersList />
</template>Finally, we’ll create a new UsersList component to store our code:
<script setup>
/**
* @file Users List Component
* @author Russell Feldhausen <russfeld@ksu.edu>
*/
</script>
<template>
Users List Here
</template>With all of that in place, we should now be able to click on the Users button at the top of our page and get to the UsersList component on the appropriate view:

From here, we can start to build our table view.
To use the PrimeVue DataTable component, we first need to get our data from the API so we can easily display it in our component. So, let’s use the Axios api instance to query the API and get our list of users. This is nearly the exact same code we used previously to get the list of users:
<script setup>
/**
* @file Users List Component
* @author Russell Feldhausen <russfeld@ksu.edu>
*/
// Import Libraries
import { ref } from 'vue'
import { api } from '@/configs/api'
// Create Reactive State
const users = ref([])
// Load Users
api
.get('/api/v1/users')
.then(function (response) {
users.value = response.data
})
.catch(function (error) {
console.log(error)
})
</script>Now that we have that list, we can start to construct our DataTable. First, we’ll need to import the required components in our <script setup> section:
<script setup>
/**
* @file Users List Component
* @author Russell Feldhausen <russfeld@ksu.edu>
*/
// Import Libraries
import { ref } from 'vue'
import { api } from '@/configs/api'
import DataTable from 'primevue/datatable';
import Column from 'primevue/column';
// -=-=- other code omitted here -=-=-
</script>Now, in the <template> section, we can build a basic DataTable by including the data we want to view and the columns that should be included:
<template>
<DataTable :value="users">
<Column field="username" header="Username" />
<Column field="roles" header="Roles" />
<Column field="createdAt" header="Created" />
<Column field="updatedAt" header="Updated" />
</DataTable>
</template>Each <Column> component includes a field name for that column, as well as a header value. With that in place, we should see a simple page with lots of helpful information about our users:
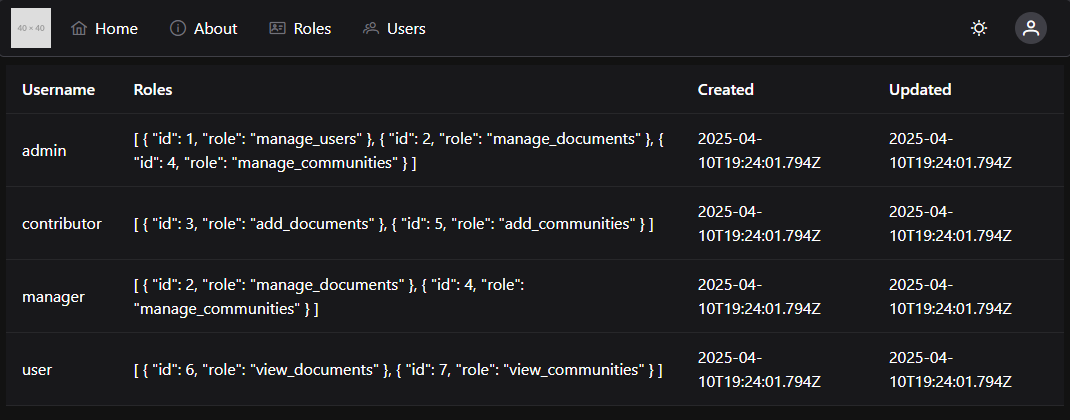
This is a great start, but we can clean this up to make it much easier for our users to read and digest the information.
First, let’s create a couple of custom templates for columns. First, we notice that the Roles column is just outputting the entire JSON list of roles, but this is not very helpful. So, let’s modify that column to present a list of Chips representing the roles:
<script setup>
/**
* @file Users List Component
* @author Russell Feldhausen <russfeld@ksu.edu>
*/
// Import Libraries
import { ref } from 'vue'
import { api } from '@/configs/api'
import DataTable from 'primevue/datatable';
import Column from 'primevue/column';
import Chip from 'primevue/chip';
// -=-=- other code omitted here -=-=-
</script>
<template>
<DataTable :value="users">
<Column field="username" header="Username" />
<Column field="roles" header="Roles">
<template #body="{ data }">
<div class="flex gap-2">
<Chip v-for="role in data.roles" :key="role.id" :label="role.role" />
</div>
</template>
</Column>
<Column field="createdAt" header="Created" />
<Column field="updatedAt" header="Updated" />
</DataTable>
</template>Inside of the <Column> component, we place a <template> for the #body slot, and we also provide a link to the data of the <Column> component so we can access that data.
With this change, our table now looks like this:
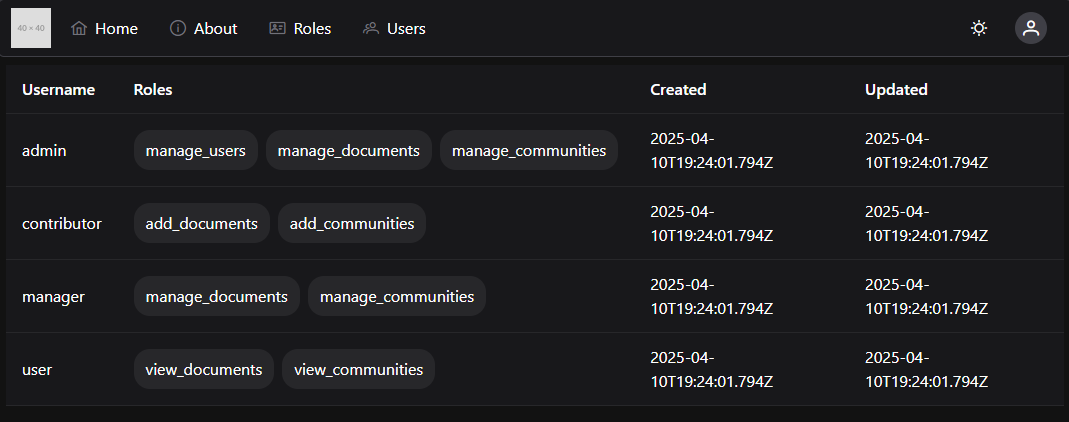
However, we can improve on that a bit by adding some additional information to our application that helps us display these roles in a bit cleaner format. Let’s create a new custom RoleChip component that will display the roles properly, along with some additional information.
<script setup>
/**
* @file Roles Chip
* @author Russell Feldhausen <russfeld@ksu.edu>
*/
// Import Libraries
import Chip from 'primevue/chip';
// Incoming Props
const props = defineProps({
// Role Object
role: Object
})
// Lookup Table
const roles = {
1: {
name: "Manage Users",
icon: "pi pi-user-edit"
},
2: {
name: "Manage Documents",
icon: "pi pi-pen-to-square"
},
3: {
name: "Add Documents",
icon: "pi pi-file-plus"
},
4: {
name: "Manage Communities",
icon: "pi pi-pencil"
},
5: {
name: "Add Communities",
icon: "pi pi-plus-circle"
},
6: {
name: "View Documents",
icon: "pi pi-file"
},
7: {
name: "View Communities",
icon: "pi pi-building-columns"
}
}
</script>
<template>
<Chip :label="roles[props.role.id].name" :icon="roles[props.role.id].icon" />
</template>This component includes a constant lookup table that provides some additional information about each role, based on the role’s ID. This allows us to assign a user-friendly name and icon to each role in our frontend application. In fact, if we are internationalizing this application, we could also use this component to translate the role names into localized forms here.
We are also seeing a great example of Vue Props in this component. Props allow us to pass data from one component down into another sub-component. It is a one-way data connection, which is very important to remember.
We can update our UsersList.vue component to use this new RoleChip component very easily:
<script setup>
/**
* @file Users List Component
* @author Russell Feldhausen <russfeld@ksu.edu>
*/
// Import Libraries
import { ref } from 'vue'
import { api } from '@/configs/api'
import DataTable from 'primevue/datatable';
import Column from 'primevue/column';
import RoleChip from '../roles/RoleChip.vue';
// -=-=- other code omitted here -=-=-
</script>
<template>
<DataTable :value="users">
<Column field="username" header="Username" />
<Column field="roles" header="Roles">
<template #body="{ data }">
<div class="flex gap-2">
<RoleChip v-for="role in data.roles" :key="role.id" :role="role" />
</div>
</template>
</Column>
<Column field="createdAt" header="Created" />
<Column field="updatedAt" header="Updated" />
</DataTable>
</template>Now we have a much cleaner view of the roles each user is assigned, with helpful icons to help us remember what each one does.
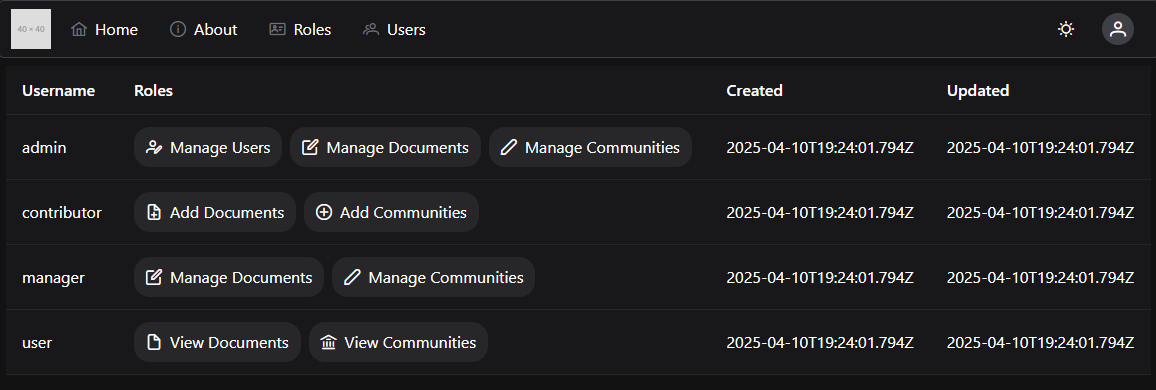
Let’s also clean up the Created and Updated columns by rendering the dates into a more useful format. For this, we can use the date-fns library to help us format and display times easily in our project. First, we’ll need to install it:
$ npm install date-fnsThen, in our component, we can use it to format our dates by computing the distance in the past that the event occurred:
<script setup>
/**
* @file Users List Component
* @author Russell Feldhausen <russfeld@ksu.edu>
*/
// Import Libraries
import { ref } from 'vue'
import { api } from '@/configs/api'
import { formatDistance } from 'date-fns';
import DataTable from 'primevue/datatable';
import Column from 'primevue/column';
import RoleChip from '../roles/RoleChip.vue';
// -=-=- other code omitted here -=-=-
</script>
<template>
<DataTable :value="users">
<Column field="username" header="Username" />
<Column field="roles" header="Roles">
<template #body="{ data }">
<div class="flex gap-2">
<RoleChip v-for="role in data.roles" :key="role.id" :role="role" />
</div>
</template>
</Column>
<Column field="createdAt" header="Created">
<template #body="{ data }">
<span v-tooltip.bottom="new Date(data.createdAt).toLocaleString()">
{{ formatDistance(new Date(data.createdAt), new Date(), { addSuffix: true }) }}
</span>
</template>
</Column>
<Column field="updatedAt" header="Updated">
<template #body="{ data }">
<span v-tooltip.bottom="new Date(data.updatedAt).toLocaleString()">
{{ formatDistance(new Date(data.updatedAt), new Date(), { addSuffix: true }) }}
</span>
</template>
</Column>
</DataTable>
</template>With that in place, we can more easily see how long ago each user’s account was created or updated:
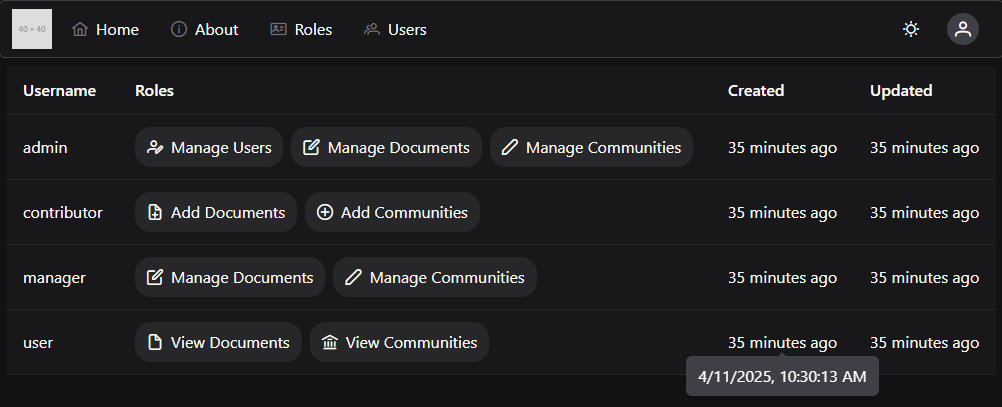
We can even hover over one of the formatted dates to see the actual date in a tooltip.
We can also enable Sorting in our PrimeVue DataTable by simply adding the sortable property to any columns we’d like to sort. For this example, let’s add that to the username, createdAt and updatedAt fields:
<template>
<DataTable :value="users">
<Column field="username" header="Username" sortable />
<Column field="roles" header="Roles">
<template #body="{ data }">
<div class="flex gap-2">
<RoleChip v-for="role in data.roles" :key="role.id" :role="role" />
</div>
</template>
</Column>
<Column field="createdAt" header="Created" sortable >
<template #body="{ data }">
<span v-tooltip.bottom="new Date(data.createdAt).toLocaleString()">
{{ formatDistance(new Date(data.createdAt), new Date(), { addSuffix: true }) }}
</span>
</template>
</Column>
<Column field="updatedAt" header="Updated" sortable >
<template #body="{ data }">
<span v-tooltip.bottom="new Date(data.updatedAt).toLocaleString()">
{{ formatDistance(new Date(data.updatedAt), new Date(), { addSuffix: true }) }}
</span>
</template>
</Column>
</DataTable>
</template>
We can even define a default column and sort order for our table:
<template>
<DataTable :value="users" sortField="username" :sortOrder="1">
<!-- other code omitted here -->
</DataTable>
</template>Another great feature of PrimeVue’s DataTable is the ability to quickly add Filtering features. We can define a global filter to allow us to search for a user by the username by simply defining a global filter set and a list of fields to search. We should also add a quick search box to the top of our DataTable template to accept this input.
<script setup>
/**
* @file Users List Component
* @author Russell Feldhausen <russfeld@ksu.edu>
*/
// Import Libraries
import { ref } from 'vue'
import { api } from '@/configs/api'
import { formatDistance } from 'date-fns';
import DataTable from 'primevue/datatable';
import Column from 'primevue/column';
import { IconField, InputIcon, InputText } from 'primevue';
import { FilterMatchMode } from '@primevue/core/api';
import RoleChip from '../roles/RoleChip.vue';
// -=-=- other code omitted here -=-=-
// Setup Filters
const filters = ref({
global: { value: null, matchMode: FilterMatchMode.CONTAINS },
})
</script>
<template>
<DataTable
:value="users"
v-model:filters="filters"
:globalFilterFields="['username']"
filterDisplay="menu"
sortField="username"
:sortOrder="1"
>
<template #header>
<div class="flex justify-end">
<IconField>
<InputIcon>
<i class="pi pi-search" />
</InputIcon>
<InputText v-model="filters['global'].value" placeholder="Keyword Search" />
</IconField>
</div>
</template>
<!-- other code omitted here -->
</DataTable>
</template>With this in place, we can now type in any username and filter the table for that username:
We can also do more advanced filtering, such as allowing users to select roles that they’d like to search for. This is a bit more complex, as it requires us to first write our own custom filter function, and then we also have to add a small template for setting the filter options.
First, let’s create a new custom filter function in our <script setup> section. We’ll also need to get a list of the available roles in our system, so we can add that to this section as well.:
<script setup>
/**
* @file Users List Component
* @author Russell Feldhausen <russfeld@ksu.edu>
*/
// Import Libraries
import { ref } from 'vue'
import { api } from '@/configs/api'
import { formatDistance } from 'date-fns';
import DataTable from 'primevue/datatable';
import Column from 'primevue/column';
import { IconField, InputIcon, InputText } from 'primevue';
import { FilterMatchMode, FilterService } from '@primevue/core/api';
import RoleChip from '../roles/RoleChip.vue';
// Create Reactive State
const users = ref([])
const roles = ref([])
// Load Users
api
.get('/api/v1/users')
.then(function (response) {
users.value = response.data
})
.catch(function (error) {
console.log(error)
})
// Load Roles
api
.get('/api/v1/roles')
.then(function (response) {
roles.value = response.data
})
.catch(function (error) {
console.log(error)
})
// Custom Filter
FilterService.register("filterArrayOfObjectsById", (targetArray, sourceArray) => {
if (!sourceArray || sourceArray.length == 0) {
return true
}
let found = true
sourceArray.forEach((s) => {
found = found && targetArray.some((o) => o.id === s.id)
})
return found
})
// Setup Filters
const filters = ref({
global: { value: null, matchMode: FilterMatchMode.CONTAINS },
roles: { value: null, matchMode: "filterArrayOfObjectsById"}
})
</script>The filterArrayOfObjectsById function should look somewhat familiar - we have an array of roles we want to search for, and we want to ensure that the user has all of these roles (this is different than some of our other functions that look like this, where we want the user to have at least one of the roles).
Now, to make this visible in our template, we add a special <template #filter> slot to the Column that is displaying the roles. We also set the filterDisplay option on the top-level DataTable component to "menu" to allow us to have pop-up menus for filtering. For this menu, we’re going to use the PrimeVue Multiselect component, so we’ll need to import it:
<script setup>
/**
* @file Users List Component
* @author Russell Feldhausen <russfeld@ksu.edu>
*/
// Import Libraries
import { ref } from 'vue'
import { api } from '@/configs/api'
import { formatDistance } from 'date-fns';
import DataTable from 'primevue/datatable';
import Column from 'primevue/column';
import { IconField, InputIcon, InputText, MultiSelect } from 'primevue';
import { FilterMatchMode, FilterService } from '@primevue/core/api';
import RoleChip from '../roles/RoleChip.vue';
// -=-=- other code omitted here -=-=-
</script>
<template>
<DataTable
:value="users"
v-model:filters="filters"
:globalFilterFields="['username']"
filterDisplay="menu"
sortField="username"
:sortOrder="1"
>
<!-- other code omitted here -->
<Column filterField="roles" :showFilterMatchModes="false" header="Roles">
<template #body="{ data }">
<div class="flex gap-2">
<RoleChip v-for="role in data.roles" :key="role.id" :role="role" />
</div>
</template>
<template #filter="{ filterModel }">
<MultiSelect
v-model="filterModel.value"
:options="roles"
optionLabel="role"
placeholder="Any"
>
<template #option="slotProps">
<RoleChip :role="slotProps.option" />
</template>
</MultiSelect>
</template>
</Column>
<!-- other code omitted here -->
</DataTable>
</template>With all of this in place, we can now filter based on roles as well:
Finally, let’s work on adding some buttons to our table that will allow us to create new users, edit existing users, and delete users.
First, let’s add a simple button to create a new user at the top of our DataTable component. We’ll use a PrimeVue Button component for this, and we’ll also need to import the Vue Router so we can route to a different view when this is clicked.
<script setup>
/**
* @file Users List Component
* @author Russell Feldhausen <russfeld@ksu.edu>
*/
// Import Libraries
import { ref } from 'vue'
import { api } from '@/configs/api'
import { formatDistance } from 'date-fns'
import DataTable from 'primevue/datatable'
import Column from 'primevue/column'
import { IconField, InputIcon, InputText, MultiSelect } from 'primevue'
import { FilterMatchMode, FilterService } from '@primevue/core/api'
import RoleChip from '../roles/RoleChip.vue'
import Button from 'primevue/button'
import { useRouter } from 'vue-router'
const router = useRouter()
// -=-=- other code omitted here -=-=-
</script>
<template>
<DataTable
:value="users"
v-model:filters="filters"
:globalFilterFields="['username']"
filterDisplay="menu"
sortField="username"
:sortOrder="1"
>
<template #header>
<div class="flex justify-between">
<Button
label="New User"
icon="pi pi-user-plus"
severity="success"
@click="router.push({ name: 'newuser' })"
/>
<IconField>
<InputIcon>
<i class="pi pi-search" />
</InputIcon>
<InputText v-model="filters['global'].value" placeholder="Keyword Search" />
</IconField>
</div>
</template>
<!-- other code omitted here -->
</DataTable>
</template>When we click on this button, we’ll be sent to the newuser route in our application. This route doesn’t currently exist, but we’ll add it later in this tutorial.
Likewise, we want to add buttons to allow us to edit and delete each user’s account, so let’s add a new column to our DataTable with those buttons as well.
<template>
<DataTable
:value="users"
v-model:filters="filters"
:globalFilterFields="['username']"
filterDisplay="menu"
sortField="username"
:sortOrder="1"
>
<!-- other code omitted here -->
<Column header="Actions" style="min-width: 8rem">
<template #body="slotProps">
<div class="flex gap-2">
<Button
icon="pi pi-pencil"
outlined
rounded
@click="router.push({ name: 'edituser', params: { id: slotProps.data.id } })"
v-tooltip.bottom="'Edit'"
/>
<Button
icon="pi pi-trash"
outlined
rounded
severity="danger"
@click="router.push({ name: 'deleteuser', params: { id: slotProps.data.id } })"
v-tooltip.bottom="'Delete'"
/>
</div>
</template>
</Column>
</DataTable>
</template>These buttons will direct us to the edituser and deleteuser routes, and they even include the ID of the user to be edited or deleted in the route parameters. We’ll work on adding these features as well later in this tutorial. With these changes in place, our final DataTable for our users should look something like this:
For the rest of this tutorial, we’ll work on adding additional functionality to handle creating, editing, and deleting user accounts.
The next major feature we can add to our frontend application is the ability to edit a user. To do this, we’ll need to create a view and a component that contains the form fields for editing a user, as well as the logic to communicate any changes back to the API.
As always, we’ll start by adding a route to our src/router/index.js file for this route:
// -=-=- other code omitted here -=-=-
const router = createRouter({
// Configure History Mode
history: createWebHistory(import.meta.env.BASE_URL),
// Configure routes
routes: [
// -=-=- other code omitted here -=-=-
{
path: '/users/:id/edit',
name: 'edituser',
component: () => import('../views/UsersEditView.vue'),
beforeEnter: requireRoles('manage_users'),
props: true
}
],
})
// -=-=- other code omitted here -=-=-
In this route, we are using :id to represent a Route Parameter, which is the same syntax we saw earlier in our Express backend. Since we want that route parameter to be passed as a Vue prop to our view component, we also add the props: true entry to this route definition.
Next, we’ll create a simple UsersEditView.vue component in our src/views folder to contain the new view:
<script setup>
import UserEdit from '../components/users/UserEdit.vue'
</script>
<template>
<UserEdit />
</template>Finally, we’ll create our new component in the src/components/users/UserEdit.vue file with the following default content:
<script setup>
/**
* @file User Edit Component
* @author Russell Feldhausen <russfeld@ksu.edu>
*/
</script>
<template>
Edit User Here
</template>To begin, let’s get the user’s data from our API. We know that this component will have a Vue prop for the user’s id available, because it is the only element on the UsersEditView page, so the property will Fallthrough to this element. So, we can declare it at the top of our component, and use it to request data about a single user in our component as a reactive state variable.
<script setup>
/**
* @file User Edit Component
* @author Russell Feldhausen <russfeld@ksu.edu>
*/
// Import Libraries
import { ref } from 'vue';
import { api } from '@/configs/api'
// Incoming Props
const props = defineProps({
// User ID
id: String,
})
// Declare State
const user = ref({})
// Load Users
api
.get('/api/v1/users/' + props.id)
.then(function (response) {
user.value = response.data
})
.catch(function (error) {
console.log(error)
})
</script>With this data in hand, we can start building a form to allow us to edit our user.
Our User account has two fields that we want to be able to edit: the username field and the list of roles assigned to the user. Let’s tackle the username field first. PrimeVue includes many different components that can be used in a form. One of the simplest is their InputText field that accepts textual input from the user. However, we can also add things like an IconField to show an icon inside of the field, and a FloatLabel to easily include a descriptive label that floats over our field. One really cool feature is the ability to combine several of these into an Icon Field with a Floating Label as shown in the PrimeVue examples. However, because we know we plan on creating multiple forms with text input fields, let’s create our own custom component that combines all of these items together.
We’ll create a new component in the src/components/forms/TextField.vue with the following content:
<script setup>
/**
* @file Custom Text Form Field Component
* @author Russell Feldhausen <russfeld@ksu.edu>
*/
// Import Libraries
import { InputIcon, IconField, FloatLabel, InputText } from 'primevue';
// Incoming Props
const props = defineProps({
// Field Name
field: String,
// Field Label
label: String,
// Field Icon
icon: String,
// Disable Editing
disabled: {
type: Boolean,
default: false
}
})
// V-model of the field to be edited
const model = defineModel()
</script>
<template>
<FloatLabel variant="on">
<IconField>
<InputIcon :class="props.icon" />
<InputText :id="props.field" :disabled="props.disabled" v-model="model" />
</IconField>
<label :for="props.field">{{ props.label }}</label>
</FloatLabel>
</template>This component includes a number of props that define the form field we want to create, and then puts them all together following the model provided in the PrimeVue documentation.
With that component in place, we can use it our UserEdit component to edit the user’s username:
<script setup>
/**
* @file User Edit Component
* @author Russell Feldhausen <russfeld@ksu.edu>
*/
// Import Libraries
import { ref } from 'vue';
import { api } from '@/configs/api'
import TextField from '../forms/TextField.vue'
// -=-=- other code omitted here -=-=-
</script>
<template>
<span>{{ user }}</span>
<TextField v-model="user.username" field="username" label="Username" icon="pi pi-user" />
</template>For this example, we’ve also added a <span> element showing the current contents of the user reactive state variable, just so we can see our form field in action. As we edit the data in the field, we can also see our user state variable update!

Since we can easily just edit the user’s username without changing any other fields, we can test this by adding a Save and Cancel button to our page:
<script setup>
/**
* @file User Edit Component
* @author Russell Feldhausen <russfeld@ksu.edu>
*/
// Import Libraries
import { ref } from 'vue';
import { api } from '@/configs/api'
import { Button } from 'primevue'
import TextField from '../forms/TextField.vue'
import { useRouter } from 'vue-router'
const router = useRouter()
// -=-=- other code omitted here -=-=-
</script>
<template>
<span>{{ user }}</span>
<TextField v-model="user.username" field="username" label="Username" icon="pi pi-user" />
<Button severity="success" @click="save" label="Save" />
<Button severity="secondary" @click="router.push({ name: 'users' })" label="Cancel" />
</template>The functionality of the Cancel button is pretty straightforward; it just uses the Vue Router to send the user back to the /users route. For the Save button, however, we need to implement a custom save function in our component to save the updated user:
<script setup>
// -=-=- other code omitted here -=-=-
// Save User
const save = function() {
api
.put('/api/v1/users/' + props.id, user.value)
.then(function (response) {
if (response.status === 201) {
router.push({ name: "users"})
}
})
.catch(function (error) {
console.log(error)
})
}
</script>With that code in place, we can click the Save button, and it should save our edit to the user’s username and redirect us back to the /users route.
However, there is no obvious visual cue that shows us the user was successfully saved, so our users may not really know if it worked or not. For that, we can use the PrimeVue Toast component to display messages to our users. To install it, we have to add a few lines to our src/main.js file:
/**
* @file Main Vue application
* @author Russell Feldhausen <russfeld@ksu.edu>
*/
// Import Libraries
import { createApp } from 'vue'
import { createPinia } from 'pinia'
import PrimeVue from 'primevue/config'
import Aura from '@primeuix/themes/aura'
import Tooltip from 'primevue/tooltip'
import ToastService from 'primevue/toastservice';
// Import CSS
import './assets/main.css'
// Import Vue App
import App from './App.vue'
// Import Configurations
import router from './router'
import { setupAxios } from './configs/api'
// Create Vue App
const app = createApp(App)
// Install Libraries
app.use(createPinia())
app.use(router)
app.use(PrimeVue, {
// Theme Configuration
theme: {
preset: Aura,
options: {
darkModeSelector: '.app-dark-mode',
},
},
})
app.use(ToastService);
// Install Directives
app.directive('tooltip', Tooltip)
// Setup Interceptors
setupAxios()
// Mount Vue App on page
app.mount('#app')Then, we can add our <Toast> element to the top-level App.vue page so it is available throughout our application:
<script setup>
/**
* @file Main Vue Application
* @author Russell Feldhausen <russfeld@ksu.edu>
*/
// Import Components
import Toast from 'primevue/toast';
import TopMenu from './components/layout/TopMenu.vue'
</script>
<template>
<header></header>
<nav>
<!-- Navigation Menu -->
<TopMenu />
</nav>
<main>
<div class="m-2">
<!-- Main Application View -->
<RouterView />
</div>
</main>
<footer></footer>
<Toast position="bottom-right"/>
</template>With that in place, we can use the ToastService to display messages to our user from our UserEdit component:
<script setup>
/**
* @file User Edit Component
* @author Russell Feldhausen <russfeld@ksu.edu>
*/
// Import Libraries
import { ref } from 'vue';
import { api } from '@/configs/api'
import { Button } from 'primevue'
import TextField from '../forms/TextField.vue'
import { useRouter } from 'vue-router'
const router = useRouter()
import { useToast } from 'primevue/usetoast';
const toast = useToast();
// -=-=- other code omitted here -=-=-
// Save User
const save = function() {
api
.put('/api/v1/users/' + props.id, user.value)
.then(function (response) {
if (response.status === 201) {
toast.add({ severity: 'success', summary: "Success", detail: response.data.message, life: 5000 })
router.push({ name: "users"})
}
})
.catch(function (error) {
console.log(error)
})
}
</script>Now, when we successfully edit a user, we’ll see a pop-up message on the lower right of our screen showing that the user was successfully saved!
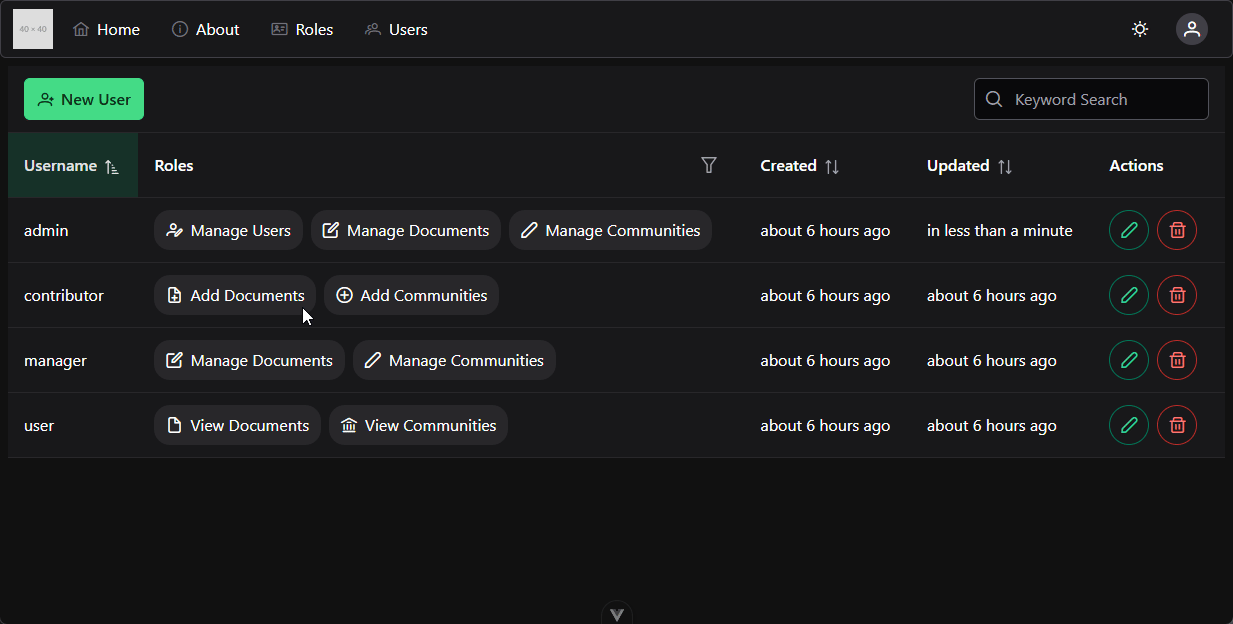
What if we try to edit our user and end up receiving an error from the server? What should we do in that instance?
Thankfully, our backend RESTful API is already configured to send helpful, well-structured error messages when things go wrong. So, we can take advantage of that in our frontend application to display errors for the user.
To use these error messages, in our UserEdit component, we just need to grab them and store them in a new reactive state variable that we share with all of our form components:
<script setup>
// -=-=- other code omitted here -=-=-
// Declare State
const user = ref({})
const errors = ref([])
// -=-=- other code omitted here -=-=-
// Save User
const save = function() {
errors.value = []
api
.put('/api/v1/users/' + props.id, user.value)
.then(function (response) {
if (response.status === 201) {
toast.add({ severity: 'success', summary: "Success", detail: response.data.message, life: 5000 })
router.push({ name: "users"})
}
})
.catch(function (error) {
if (error.status === 422) {
toast.add({ severity: 'warn', summary: "Warning", detail: error.response.data.error, life: 5000 })
errors.value = error.response.data.errors
} else {
toast.add({ severity: 'error', summary: "Error", detail: error, life: 5000 })
}
})
}
</script>
<template>
<span>{{ user }}</span>
<TextField v-model="user.username" field="username" label="Username" icon="pi pi-user" :errors="errors" />
<Button severity="success" @click="save" label="Save" />
<Button severity="secondary" @click="router.push({ name: 'users' })" label="Cancel" />
</template>Recall that these errors will have a standard structure, such as this:
{
"error": "Validation Error",
"errors": [
{
"attribute": "username",
"message": "username must be unique"
}
]
}So, in our TextField.vue component, we can look for any errors that match the field that the component is responsible for, and we can present those to the user.
<script setup>
/**
* @file Custom Text Form Field Component
* @author Russell Feldhausen <russfeld@ksu.edu>
*/
// Import Libraries
import { computed } from 'vue';
import { InputIcon, IconField, FloatLabel, InputText, Message } from 'primevue';
// Incoming Props
const props = defineProps({
// Field Name
field: String,
// Field Label
label: String,
// Field Icon
icon: String,
// Disable Editing
disabled: {
type: Boolean,
default: false
},
errors: Array
})
// Find Error for Field
const error = computed(() => {
return props.errors.find((e) => e.attribute === props.field)
})
// V-model of the field to be edited
const model = defineModel()
</script>
<template>
<div>
<FloatLabel variant="on">
<IconField>
<InputIcon :class="props.icon" />
<InputText :id="props.field" :disabled="props.disabled" :invalid="error" v-model="model" />
</IconField>
<label :for="props.field">{{ props.label }}</label>
</FloatLabel>
<!-- Error Text -->
<Message v-if="error" severity="error" variant="simple" size="small">{{ error.message }}</Message>
</div>
</template>Now, when we enter an invalid username, we’ll clearly see the error on our form:
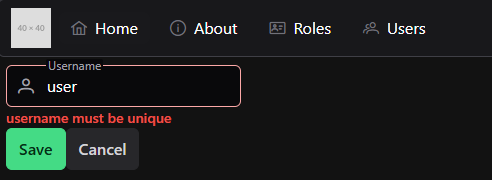
There are many different ways to edit the list of roles assigned to each user as well. One of the smoothest ways to select from a list of options is the PrimeVue AutoComplete component. Just like before, we can build our own version of this component that includes everything we included previously:
<script setup>
/**
* @file Custom Autocomplete Multiple Field Component
* @author Russell Feldhausen <russfeld@ksu.edu>
*/
// Import Libraries
import { computed, ref } from 'vue'
import { InputIcon, IconField, FloatLabel, AutoComplete, Message } from 'primevue'
// Incoming Props
const props = defineProps({
// Field Name
field: String,
// Field Label
label: String,
// Field Icon
icon: String,
// Disable Editing
disabled: {
type: Boolean,
default: false,
},
//Values to choose from
values: Array,
// Value Label
valueLabel: {
type: String,
default: 'name',
},
errors: Array,
})
// Find Error for Field
const error = computed(() => {
return props.errors.find((e) => e.attribute === props.field)
})
// V-model of the field to be edited
const model = defineModel()
// State variable for search results
const items = ref([])
// Search method
const search = function (event) {
console.log(event)
items.value = props.values.filter((v) => v[props.valueLabel].includes(event.query))
console.log(items.value)
}
</script>
<template>
<div>
<FloatLabel variant="on">
<IconField>
<InputIcon :class="props.icon" />
<AutoComplete
:optionLabel="props.valueLabel"
:id="props.field"
:disabled="props.disabled"
:invalid="error"
v-model="model"
forceSelection
multiple
fluid
:suggestions="items"
@complete="search"
/>
</IconField>
<label :for="props.field">{{ props.label }}</label>
</FloatLabel>
<!-- Error Text -->
<Message v-if="error" severity="error" variant="simple" size="small">{{
error.message
}}</Message>
</div>
</template>This component is very similar to the previous one, but it includes a couple of extra props to control the value that is displayed to the user as well as a function to help search through the list of values.
To use it, we’ll need to load all of the available roles in our UserEdit.vue component so we can pass that along to the new AutoCompleteMultipleField component:
<script setup>
/**
* @file User Edit Component
* @author Russell Feldhausen <russfeld@ksu.edu>
*/
// Import Libraries
import { ref } from 'vue'
import { api } from '@/configs/api'
import { Button } from 'primevue'
import TextField from '../forms/TextField.vue'
import AutoCompleteMultipleField from '../forms/AutoCompleteMultipleField.vue'
import { useRouter } from 'vue-router'
const router = useRouter()
import { useToast } from 'primevue/usetoast'
const toast = useToast()
// Incoming Props
const props = defineProps({
// User ID
id: String,
})
// Declare State
const user = ref({})
const roles = ref([])
const errors = ref([])
// -=-=- other code omitted here -=-=-
// Load Roles
api
.get('/api/v1/roles')
.then(function (response) {
roles.value = response.data
})
.catch(function (error) {
console.log(error)
})
// -=-=- other code omitted here -=-=-
</script>
<template>
{{ user }}
<TextField
v-model="user.username"
field="username"
label="Username"
icon="pi pi-user"
:errors="errors"
/>
<AutoCompleteMultipleField
v-model="user.roles"
field="roles"
label="Roles"
icon="pi pi-id-card"
:errors="errors"
:values="roles"
valueLabel="role"
/>
<Button severity="success" @click="save" label="Save" />
<Button severity="secondary" @click="router.push({ name: 'users' })" label="Cancel" />
</template>With that in place, we can now see a new field to edit a user’s roles:
As we can see, however, the AutoComplete field for PrimeVue doesn’t quite support having an icon in front of it. Thankfully, we can easily fix that in our CSS by just finding the offset used in the other fields:
Once we have that, we can add it to our new AutoComplete component in a <style scoped> section that references the correct class:
<style scoped>
:deep(.p-autocomplete > ul) {
padding-inline-start: calc((var(--p-form-field-padding-x) * 2) + var(--p-icon-size));
}
</style>That will fix the padding for our icon to show up properly!
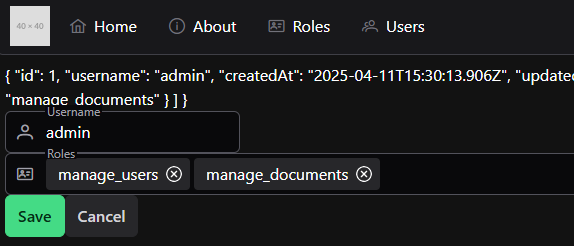
At this point, we can easily add and remove roles for this user. We can even click the save button and it should work as intended! No extra code is needed. So, we can remove the extra line in the <template> of our UserEdit.vue component to remove the debugging information.
Finally, we can use some quick CSS styling to update the content of our UserEdit.vue page to be a bit easier to follow.
<template>
<div class="flex flex-col gap-3 max-w-xl justify-items-center">
<h1 class="text-xl text-center m-1">Edit User</h1>
<TextField
v-model="user.username"
field="username"
label="Username"
icon="pi pi-user"
:errors="errors"
/>
<AutoCompleteMultipleField
v-model="user.roles"
field="roles"
label="Roles"
icon="pi pi-id-card"
:errors="errors"
:values="roles"
valueLabel="role"
/>
<Button severity="success" @click="save" label="Save" />
<Button severity="secondary" @click="router.push({ name: 'users' })" label="Cancel" />
</div>
</template>We can also add a w-full class to our TextField component to expand that field to fit the surrounding components:
<template>
<div>
<FloatLabel variant="on">
<IconField>
<InputIcon :class="props.icon" />
<InputText
:id="props.field"
:disabled="props.disabled"
:invalid="error"
v-model="model"
class="w-full"
/>
</IconField>
<label :for="props.field">{{ props.label }}</label>
</FloatLabel>
<!-- Error Text -->
<Message v-if="error" severity="error" variant="simple" size="small">{{
error.message
}}</Message>
</div>
</template>With all of that in place, we have a nice looking form to edit our users!
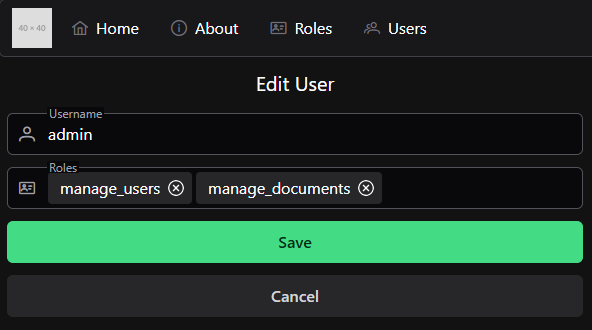
Now that we have a nice way to edit a user account, we’d like to also have a way to create a new user account. While we could easily duplicate our work in the UserEdit component and create a UserNew component, we can also add a bit more logic to our UserEdit component to handle both cases. So, let’s look at how we can do that!
First, we’ll need to add a route to our project to get us to the correct place. So, we’ll update our Vue Router:
// -=-=- other code omitted here -=-=-
const router = createRouter({
// Configure History Mode
history: createWebHistory(import.meta.env.BASE_URL),
// Configure routes
routes: [
// -=-=- other code omitted here -=-=-
{
path: '/users/new',
name: 'newuser',
component: () => import('../views/UsersEditView.vue'),
beforeEnter: requireRoles('manage_users'),
},
],
})
// -=-=- other code omitted here -=-=-
This route will take us to the UsersEditView view, but without a prop giving the ID of the user to edit. When we get to that page without a prop, we’ll assume that the user is intending to create a new user instead. So, we’ll need to change some of our code in that component to handle this gracefully.
Thankfully, we can just look at the value of props.id for this - if it is a falsy value, then we know that it wasn’t provided and we are creating a new user. If one is provided, then we are editing a user instead.
So, at the start, if we are creating a new user, we want to set our user reactive state variable to a reasonable default value for a user. If we are editing a user, we’ll request that user’s data from the server.
<script setup>
// -=-=- other code omitted here -=-=-
// Load Users
if (props.id) {
api
.get('/api/v1/users/' + props.id)
.then(function (response) {
user.value = response.data
})
.catch(function (error) {
console.log(error)
})
} else {
// Empty Value for User Object
user.value = {
username: '',
roles: []
}
}
// -=-=- other code omitted here -=-=-
</script>Then, we need to change the code for saving a user to handle both situations. Thankfully, we can adjust both the method (either POST or PUT) as well as the URL easily in Axios using the Axios API.
<script setup>
// -=-=- other code omitted here -=-=-
// Save User
const save = function () {
errors.value = []
let method = 'post'
let url = '/api/v1/users'
if (props.id) {
method = 'put'
url = url + '/' + props.id
}
api({
method: method,
url: url,
data: user.value
}).then(function (response) {
if (response.status === 201) {
toast.add({
severity: 'success',
summary: 'Success',
detail: response.data.message,
life: 5000,
})
router.push({ name: 'users' })
}
})
.catch(function (error) {
if (error.status === 422) {
toast.add({
severity: 'warn',
summary: 'Warning',
detail: error.response.data.error,
life: 5000,
})
errors.value = error.response.data.errors
} else {
toast.add({ severity: 'error', summary: 'Error', detail: error, life: 5000 })
}
})
}
</script>Since both the POST and PUT operations will return the same style of errors, the rest of the code is identical!
Finally, in our template, we can include a bit of conditional rendering to display whether we are creating a new user or editing an existing user:
<template>
<div class="flex flex-col gap-3 max-w-xl justify-items-center">
<h1 class="text-xl text-center m-1">{{ props.id ? "Edit User" : "New User" }}</h1>
<!-- other code omitted here -->
</div>
</template>That’s really all the changes we need to make to allow our UserEdit component to gracefully handle both editing existing users and creating new users!
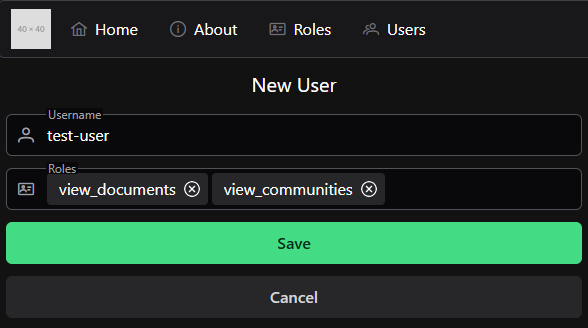
Finally, let’s look at what it takes to delete a user. As with anything in frontend development, there are many different ways to go about this. We could follow the model we used for creating and editing users by adding a new view, route, and component for these actions. However, we can also just add a quick pop-up dialog directly to our UsersList component that will confirm the deletion before sending the request to the backend.
For this operation, we’re going to use the PrimeVue ConfirmDialog component. So, to begin, we need to install the ConfirmationService for these dialogs in our application by editing the main.js file:
/**
* @file Main Vue application
* @author Russell Feldhausen <russfeld@ksu.edu>
*/
// Import Libraries
import { createApp } from 'vue'
import { createPinia } from 'pinia'
import PrimeVue from 'primevue/config'
import Aura from '@primeuix/themes/aura'
import Tooltip from 'primevue/tooltip'
import ToastService from 'primevue/toastservice'
import ConfirmationService from 'primevue/confirmationservice'
// Import CSS
import './assets/main.css'
// Import Vue App
import App from './App.vue'
// Import Configurations
import router from './router'
import { setupAxios } from './configs/api'
// Create Vue App
const app = createApp(App)
// Install Libraries
app.use(createPinia())
app.use(router)
app.use(PrimeVue, {
// Theme Configuration
theme: {
preset: Aura,
options: {
darkModeSelector: '.app-dark-mode',
},
},
})
app.use(ToastService)
app.use(ConfirmationService)
// Install Directives
app.directive('tooltip', Tooltip)
// Setup Interceptors
setupAxios()
// Mount Vue App on page
app.mount('#app')In addition, we’ll add the component itself to the App.vue top-level component alongside the Toast component, so it is visible throughout our application:
<script setup>
/**
* @file Main Vue Application
* @author Russell Feldhausen <russfeld@ksu.edu>
*/
// Import Components
import Toast from 'primevue/toast'
import ConfirmDialog from 'primevue/confirmdialog'
import TopMenu from './components/layout/TopMenu.vue'
</script>
<template>
<header></header>
<nav>
<!-- Navigation Menu -->
<TopMenu />
</nav>
<main>
<div class="m-2">
<!-- Main Application View -->
<RouterView />
</div>
</main>
<footer></footer>
<Toast position="bottom-right" />
<ConfirmDialog />
</template>Now, in our UsersList component, we can configure a confirmation dialog in our <script setup> section along with a function to actually handle deleting the user from our data:
<script setup>
/**
* @file Users List Component
* @author Russell Feldhausen <russfeld@ksu.edu>
*/
// Import Libraries
import { ref } from 'vue'
import { api } from '@/configs/api'
import { formatDistance } from 'date-fns'
import DataTable from 'primevue/datatable'
import Column from 'primevue/column'
import { IconField, InputIcon, InputText, MultiSelect } from 'primevue'
import { FilterMatchMode, FilterService } from '@primevue/core/api'
import RoleChip from '../roles/RoleChip.vue'
import Button from 'primevue/button'
import { useRouter } from 'vue-router'
const router = useRouter()
import { useToast } from 'primevue/usetoast'
const toast = useToast()
import { useConfirm } from 'primevue'
const confirm = useConfirm();
// -=-=- other code omitted here -=-=-
// Delete User
const deleteUser = function (id) {
api
.delete('/api/v1/users/' + id)
.then(function (response) {
if (response.status === 200) {
toast.add({
severity: 'success',
summary: 'Success',
detail: response.data.message,
life: 5000,
})
// Remove that element from the reactive array
users.value.splice(
users.value.findIndex((u) => u.id == id),
1,
)
}
})
.catch(function (error) {
toast.add({ severity: 'error', summary: 'Error', detail: error, life: 5000 })
})
}
// Confirmation Dialog
const confirmDelete = function (id) {
confirm.require({
message: 'Are you sure you want to delete this user?',
header: 'Delete User',
icon: 'pi pi-exclamation-triangle',
rejectProps: {
label: 'Cancel',
severity: 'secondary',
outlined: true,
},
acceptProps: {
label: 'Delete',
severity: 'danger',
},
accept: () => {
deleteUser(id)
},
})
}
</script>In this code, the deleteUser function uses the Axios API instance to delete the user with the given ID. Below that, we have a function that will create a confirmation dialog that follows an example given in the PrimeVue ConfirmDialog documentation for an easy to use dialog for deleting an element from a list.
Finally, to use this dialog, we can just update our button handler for the delete button in our template to call this confirmDelete function with the ID provided:
<template>
<DataTable
:value="users"
v-model:filters="filters"
:globalFilterFields="['username']"
filterDisplay="menu"
sortField="username"
:sortOrder="1"
>
<!-- other code omitted here -->
<Column header="Actions" style="min-width: 8rem">
<template #body="slotProps">
<div class="flex gap-2">
<Button
icon="pi pi-pencil"
outlined
rounded
@click="router.push({ name: 'edituser', params: { id: slotProps.data.id } })"
v-tooltip.bottom="'Edit'"
/>
<Button
icon="pi pi-trash"
outlined
rounded
severity="danger"
@click="confirmDelete(slotProps.data.id)"
v-tooltip.bottom="'Delete'"
/>
</div>
</template>
</Column>
</DataTable>
</template>Now, we can easily delete users from our users list by clicking the Delete button and confirming the deletion in the popup dialog!

At this point, our application is now able to perform all of the basic CRUD operations for the users in our application. We can get a list of existing users, create new users, update the existing users, and delete any users we want to delete. All that is left at this point is to lint and format our code, then commit and push!
This particular example exposes one of the things we must be extremely careful about when working in JavaScript. Even though it may be more straightforward to use direct function calls in our code, there are times where we must use a lambda function that itself calls the function we want to use, especially when dealing with the event-driven design of many user interface libraries.
A great example is the confirmation dialog code in this component. The accept property lists the function that should be called when the user clicks the button to accept the change. Right now it is a lambda function that calls our deleteUser function, but what if we change it to just call the deleteUser function directly?
<script setup>
// -=-=- other code omitted here -=-=-
// Confirmation Dialog
const confirmDelete = function (id) {
confirm.require({
message: 'Are you sure you want to delete this user?',
header: 'Delete User',
icon: 'pi pi-exclamation-triangle',
rejectProps: {
label: 'Cancel',
severity: 'secondary',
outlined: true,
},
acceptProps: {
label: 'Delete',
severity: 'danger',
},
// don't do this
accept: deleteUser(id),
})
}
</script>Unfortunately, what will happen is this function will be called as soon as the dialog is created, but BEFORE the user has clicked the button to accept the change. We can see this in the animation below - the user is deleted from the list even before we click the button in the popup dialog:
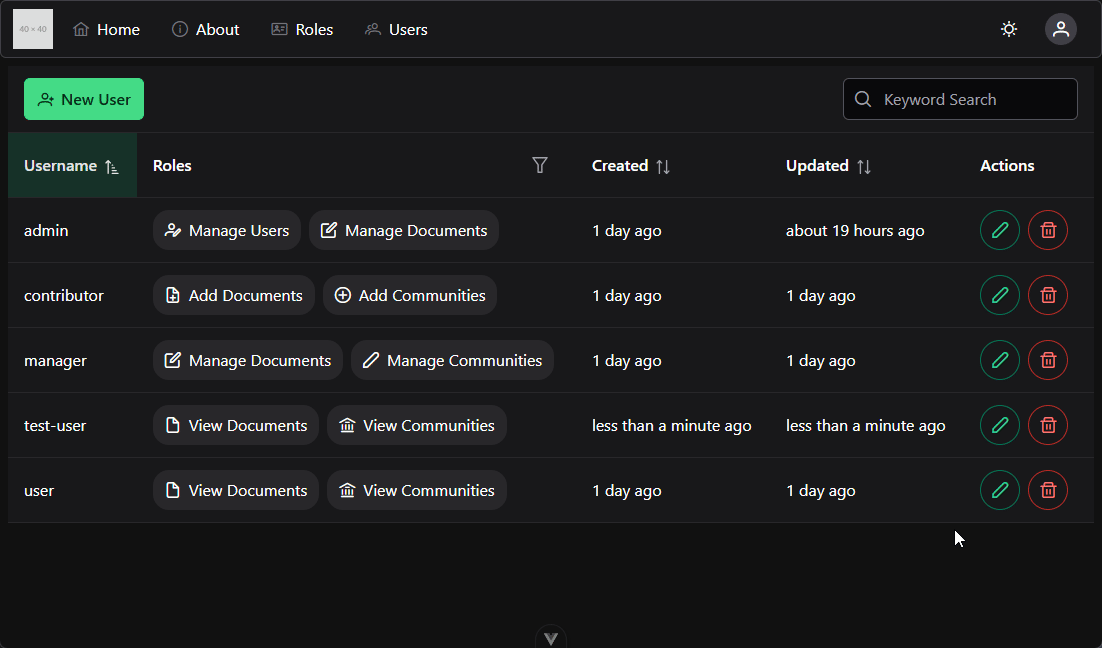
This happens because the confirmDelete function is trying to get a function pointer for the accept property, so it executes the code inside of that property, expecting it to return a function. Instead, however, it just deletes the user from the list!
So, we need to remember to wrap that function in a lambda function that will return a pointer to the function we want to use, complete with the parameter of id already populated.
<script setup>
// -=-=- other code omitted here -=-=-
// Confirmation Dialog
const confirmDelete = function (id) {
confirm.require({
message: 'Are you sure you want to delete this user?',
header: 'Delete User',
icon: 'pi pi-exclamation-triangle',
rejectProps: {
label: 'Cancel',
severity: 'secondary',
outlined: true,
},
acceptProps: {
label: 'Delete',
severity: 'danger',
},
// use a lambda here
accept: () => {
deleteUser(id)
},
})
}
</script>This example project builds on the previous Vue.js CRUD app by discussing some more advanced topics related to web application development.
At the end of this example, we will have a project with the following features:
This project picks up right where the last one left off, so if you haven’t completed that one yet, go back and do that before starting this one.
Let’s get started!
So far, we’ve mostly been dealing with data in our Vue components in one of two ways:
UsersList and UserEdit components)RoleChip and TextField components)The only exception is the user’s JSON Web Token (JWT), which we have stored in a Pinia store. However, we didn’t spend much time talking about why we stored that token in a Pinia store instead of just making it a global reactive state component and passing that state down the component tree using props.
The concept of passing props down through components, especially between many layers of components, is known as Prop Drilling
While this method can work well, it can also make an application very complicated with the sheer number of props that must be passed through each component. For example, imagine if each page and component needed access to the user’s JWT to determine which actions to allow (a very real example from the project we are working). In that case, each component may need to be aware of the token as an incoming prop, and may also need to pass it along to any child components that may need it, even if it is three or four layers deep.
The Vue framework itself does have a solution to this problem, which is the Provide / Inject interface. In effect, a component can declare a reactive state item and add it to a global dictionary of state items that are available using the provide method along with a unique key for that item, and any other component can receive a reference to that state item using the inject method with the same key.
This is a bit of an improvement, but still has many issues that are discussed in the documentation. For example, it is best to only modify the state at the top-level component that is providing the state, so an additional function may need to be provided to enable proper editing of the state. In addition, for large apps it can be very difficult to ensure that each key is unique, and having hundreds or thousands of keys to keep track of can be a huge burden for programmers.
The Pinia library tries to solve all of these issues by providing convenient stores for different types of information in the application. Each store is typically oriented toward a specific type of data (such as users or documents), and it contains all the methods needed to read and modify the state as needed. Then, each component that needs access to the state can simply request a reference to the stores it needs, and everything is nicely compartmentalized and easy to maintain.
To see how this can help simplify our application, let’s look at how we can create a Users store to interface with our RESTful API and maintain a globally-accessible store for data about our users.
To create a Pinia store, we can create a new file src/stores/User.js with the following initial content:
/**
* @file User Store
* @author Russell Feldhausen <russfeld@ksu.edu>
*/
// Import Libraries
import { ref } from 'vue'
import { defineStore } from 'pinia'
import { api } from '@/configs/api'
// Define Store
export const useUserStore = defineStore('user', () => {
// State Properties
// Getters
// Actions
// Return all state, getters, and actions
return { }
})This is a nice starting structure for a store. At the bare minimum, we use the defineStore method from Pinia to create the store. Inside of that method is a lambda function that actually defines the contents of the store itself, which we’ll iteratively build over time. We’ve also imported a few useful library functions, including our pre-built Axios API interface to make it easy to send requests to our API.
The first items we should add to our Pinia store are the state properties that we’ll be tracking. These can be anything from simple values all the way up to entire arrays of objects full of data. In most cases, it makes sense to have each Pinia store track data in a format similar to what our application will need. For this example, we’ll use this store to track both the users and roles that are available in our system. So, we’ll need to create two reactive state variables using the ref() function from Vue to store that data as state in our Pinia store:
// -=-=- other code omitted here -=-=-
// Define Store
export const useUserStore = defineStore('user', () => {
// State Properties
const users = ref([])
const roles = ref([])
// Getters
// Actions
// Return all state, getters, and actions
return { users, roles }
})Each state property in Pinia is just a reactive state variable from Vue that can be shared across our entire application. So, we’ll just initialize each one to an empty array for now.
Before we tackle any getters, let’s look at how we can actually get this data from our RESTful API. In many web development frameworks, the process of loading data from the AI is sometimes referred to as Hydration. So, let’s write a method we can use the hydrate these two state variables by making a request to our RESTful API. Most of this code is lifted directly from our existing UsersList component:
// -=-=- other code omitted here -=-=-
// Define Store
export const useUserStore = defineStore('user', () => {
// -=-=- other code omitted here -=-=-
// Actions
/**
* Load users and roles from the API
*/
async function hydrate() {
api
.get('/api/v1/users')
.then(function (response) {
users.value = response.data
})
.catch(function (error) {
console.log(error)
})
api
.get('/api/v1/roles')
.then(function (response) {
roles.value = response.data
})
.catch(function (error) {
console.log(error)
})
}
// Return all state, getters, and actions
return { users, roles, hydrate }
})As we can see, this function will make two asynchronous requests to the RESTful API to load both the users and roles, and when those requests are resolved it will store the data in the appropriate state variable.
For this Pinia store, we won’t need any individual getters. Instead, we’ll just use some functions in the component as needed to extract data from the store.
Finally, let’s add two more actions to allow us to both save and delete a user through our RESTful API. The code for the save function is mostly taken from our UserEdit component, while the code to delete a user comes from the UserList component, both with minor changes.
// -=-=- other code omitted here -=-=-
// Define Store
export const useUserStore = defineStore('user', () => {
// -=-=- other code omitted here -=-=-
// Actions
// -=-=- other code omitted here -=-=-
/**
* Save a user
*/
async function saveUser(id, user) {
let method = 'post'
let url = '/api/v1/users'
if (id) {
method = 'put'
url = url + '/' + id
}
return api({
method: method,
url: url,
data: user.value,
})
.then(function (response) {
// rehydrate data
hydrate()
return response
})
.catch(function (error) {
console.log("Error saving user!")
console.log(error)
throw error
})
}
/**
* Delete a user
*/
async function deleteUser(id) {
return api
.delete('/api/v1/users/' + id)
.then(function (response) {
// rehydrate data
hydrate()
return response
})
.catch(function (error) {
console.log("Error deleting user!")
console.log(error)
throw error;
})
}
// Return all state, getters, and actions
return { users, roles, hydrate, saveUser, deleteUser }
})As we can see in the code above, after each successful API call, we immediately call the hydrate method to update the contents of our users and roles list before passing the response back to the calling method. This ensures that our data is always in sync with the RESTful API backend anytime we make a change. In addition, we are carefully logging any errors we receive here, but we are still throwing the errors back to the calling method so they can be handled there as well.
That is the basic contents of our Users store, which we can use throughout our application.
Now, let’s look at how we can use our store in our various components that require data from the Users and Roles APIs. First, we can take a look at our existing UsersList component - there are many lines that we’ll remove or change within the component. Each change is highlighted and described below, with removed lines commented out.
<script>
// -=-=- other code omitted here -=-=-
// Create Reactive State
// const users = ref([])
// const roles = ref([])
// Stores
import { storeToRefs } from 'pinia'
import { useUserStore } from '@/stores/User'
const userStore = useUserStore();
const { users, roles } = storeToRefs(userStore)
// -=-=- other code omitted here -=-=-
</script>First, we replace the two reactive state variables for users and roles with the same state variables that are extracted from the Pinia store using the storeToRefs() function, which will Destructure the Store and make the variables directly available to our code.
<script>
// -=-=- other code omitted here -=-=-
// Load Users
//api
// .get('/api/v1/users')
// .then(function (response) {
// users.value = response.data
// })
// .catch(function (error) {
// console.log(error)
// })
// Load Roles
//api
// .get('/api/v1/roles')
// .then(function (response) {
// roles.value = response.data
// })
// .catch(function (error) {
// console.log(error)
// })
// Hydrate Store
userStore.hydrate()
// -=-=- other code omitted here -=-=-
</script>Next, we can replace all of the code used to load the users and roles on the page to a simple call to the hydrate method in the store itself.
<script>
// -=-=- other code omitted here -=-=-
// Delete User
const deleteUser = function (id) {
// api
// .delete('/api/v1/users/' + id)
userStore.deleteUser(id)
.then(function (response) {
if (response.status === 200) {
toast.add({
severity: 'success',
summary: 'Success',
detail: response.data.message,
life: 5000,
})
// Remove that element from the reactive array
// users.value.splice(
// users.value.findIndex((u) => u.id == id),
// 1,
// )
}
})
.catch(function (error) {
toast.add({ severity: 'error', summary: 'Error', detail: error, life: 5000 })
})
}
// -=-=- other code omitted here -=-=-
</script>Finally, in the method to delete a user, we can replace the API call with a call to the deleteUser method inside of the Pinia store to handle deleting the user with the selected ID. We can also remove the code that will remove the user from the list, since we no longer need to do that here; instead, the Pinia store will query the updated data from the RESTful API, and the user should no longer be present in that data when it is received.
Those are all of the changes needed to switch the UsersList component to use the store. The template itself remains exactly the same.
We can also update our UserEdit component in a similar way:
<script>
// Import Libraries
import { ref, computed, inject } from 'vue'
// -=-=- other code omitted here -=-=-
// Declare State
// const user = ref({})
// const roles = ref([])
const errors = ref([])
// Stores
import { storeToRefs } from 'pinia'
import { useUserStore } from '@/stores/User'
const userStore = useUserStore();
const { users, roles } = storeToRefs(userStore)
// Find single user or a blank user
const user = computed(() => {
return (users.value.find((u) => u.id == props.id) || { username: "", roles: [] })
})
// -=-=- other code omitted here -=-=-
</script>First, we can replace the reactive state variables with the same variables from the Users store. To get a single user, we can create a computed state variable that will find the user in the list that matches the incoming props.id. If a user can’t be found, it will generate a blank User object that can be used to create a new user.
Likewise, we can remove all of the code that loads users and roles and replace that with a hydrate function call in our Pinia store:
<script>
// -=-=- other code omitted here -=-=-
// Load Users
// if (props.id) {
// api
// .get('/api/v1/users/' + props.id)
// .then(function (response) {
// user.value = response.data
// })
// .catch(function (error) {
// console.log(error)
// })
// } else {
// // Empty Value for User Object
// user.value = {
// username: '',
// roles: [],
// }
// }
// Load Roles
// api
// .get('/api/v1/roles')
// .then(function (response) {
// roles.value = response.data
// })
// .catch(function (error) {
// console.log(error)
// })
userStore.hydrate()
// -=-=- other code omitted here -=-=-
</script>Finally, we can replace the call to the api library to save the user with a call to the saveUser method in the UserStore:
<script>
// -=-=- other code omitted here -=-=-
// Save User
const save = function () {
errors.value = []
userStore.saveUser(props.id, user)
.then(function (response) {
if (response.status === 201) {
toast.add({
severity: 'success',
summary: 'Success',
detail: response.data.message,
life: 5000,
})
router.push({ name: 'users' })
}
})
.catch(function (error) {
if (error.status === 422) {
toast.add({
severity: 'warn',
summary: 'Warning',
detail: error.response.data.error,
life: 5000,
})
errors.value = error.response.data.errors
} else {
toast.add({ severity: 'error', summary: 'Error', detail: error, life: 5000 })
}
})
}
</script>With those changes in place, we can also edit our users and create new users.
Finally, we can update our RolesList to also use the store:
<script setup>
// -=-=- other code omitted here -=-=-
// Stores
import { storeToRefs } from 'pinia'
import { useUserStore } from '@/stores/User'
const userStore = useUserStore();
const { roles } = storeToRefs(userStore)
// Hydrate Store
userStore.hydrate()
</script>At this point, all API calls to the users and roles endpoints should now be routed through our User Pinia store.
Image Source: Pinia Documentation ↩︎ ↩︎
One of the many amazing features of a front-end framework such as Vue is the ability to reuse components in very powerful ways. For example, right now our application uses an entirely separate view and component to handle editing and updating users, but that means that we have to constantly jump back and forth between two views when working with users. Now that those views are using a shared Pinia store, we can use a PrimeVue DynamicDialog component to allow us to open the UserEdit component in a popup dialog on our UsersList component.
To begin, we must install the service for this component in our src/main.js along with the other services for PrimeVue components:
/**
* @file Main Vue application
* @author Russell Feldhausen <russfeld@ksu.edu>
*/
// Import Libraries
import { createApp } from 'vue'
import { createPinia } from 'pinia'
import PrimeVue from 'primevue/config'
import Aura from '@primeuix/themes/aura'
import Tooltip from 'primevue/tooltip'
import ToastService from 'primevue/toastservice'
import ConfirmationService from 'primevue/confirmationservice'
import DialogService from 'primevue/dialogservice';
// -=-=- other code omitted here -=-=-
// Create Vue App
const app = createApp(App)
// Install Libraries
app.use(createPinia())
app.use(router)
app.use(PrimeVue, {
// Theme Configuration
theme: {
preset: Aura,
options: {
darkModeSelector: '.app-dark-mode',
},
},
})
app.use(ToastService)
app.use(ConfirmationService)
app.use(DialogService)
// -=-=- other code omitted here -=-=-
Then, we can add the single instance of the component to our top-level App.vue component along with the other service components:
<script setup>
/**
* @file Main Vue Application
* @author Russell Feldhausen <russfeld@ksu.edu>
*/
// Import Components
import Toast from 'primevue/toast'
import ConfirmDialog from 'primevue/confirmdialog'
import DynamicDialog from 'primevue/dynamicdialog'
import TopMenu from './components/layout/TopMenu.vue'
</script>
<template>
<header></header>
<nav>
<!-- Navigation Menu -->
<TopMenu />
</nav>
<main>
<div class="m-2">
<!-- Main Application View -->
<RouterView />
</div>
</main>
<footer></footer>
<Toast position="bottom-right" />
<ConfirmDialog />
<DynamicDialog />
</template>That’s all it takes to make this feature available throughout our application.
Now, in our UsersList component, we simply have to add a few imports as well as function to load the component in a dialog box:
// -=-=- other code omitted here -=-=-
// Import Libraries
import { ref, defineAsyncComponent } from 'vue'
import { formatDistance } from 'date-fns'
import DataTable from 'primevue/datatable'
import Column from 'primevue/column'
import { IconField, InputIcon, InputText, MultiSelect } from 'primevue'
import { FilterMatchMode, FilterService } from '@primevue/core/api'
import RoleChip from '../roles/RoleChip.vue'
import Button from 'primevue/button'
import { useRouter } from 'vue-router'
const router = useRouter()
import { useToast } from 'primevue/usetoast'
const toast = useToast()
import { useConfirm } from 'primevue'
const confirm = useConfirm()
import { useDialog } from 'primevue/usedialog';
const dialog = useDialog();
const userEditComponent = defineAsyncComponent(() => import('./UserEdit.vue'));
// -=-=- other code omitted here -=-=-
// Load Dialog
const editDialog = function (id) {
dialog.open(userEditComponent, {
props: {
style: {
width: '40vw',
},
modal: true
},
data: {
id: id
}
});
}
</script>Notice in the dialog.open function call, we are including the userEditComponent that we are loading asynchronously in the background using the defineAsyncComponent function in Vue. This allows us to load the main UsersList component fully first, and then in the background it will load the UserEdit component as needed. We are also passing along the id of the user to be edited as part of the data that is sent to the component.
Finally, in the template, we just replace the click handlers for the New and Edit buttons to call this new editDialog function:
<template>
<DataTable
:value="users"
v-model:filters="filters"
:globalFilterFields="['username']"
filterDisplay="menu"
sortField="username"
:sortOrder="1"
>
<template #header>
<div class="flex justify-between">
<Button
label="New User"
icon="pi pi-user-plus"
severity="success"
@click="editDialog()"
/>
<!-- other code omitted here -->
</div>
</template>
<!-- other code omitted here -->
<Column header="Actions" style="min-width: 8rem">
<template #body="slotProps">
<div class="flex gap-2">
<Button
icon="pi pi-pencil"
outlined
rounded
@click="editDialog(slotProps.data.id)"
v-tooltip.bottom="'Edit'"
/>
<Button
icon="pi pi-trash"
outlined
rounded
severity="danger"
@click="confirmDelete(slotProps.data.id)"
v-tooltip.bottom="'Delete'"
/>
</div>
</template>
</Column>
</DataTable>
</template>Now, when we click those buttons, it will open the EditUser component in a modal popup dialog instead of directing users to a new route. Of course, on some pages, we may need to check that the user has specific roles before allowing the user to actually load the popup, just like we have to check for those roles before the user navigates to those routes. Since we are now bypassing the Vue Router, any logic in the router may need to be recreated here.
Finally, we must make a few minor tweaks to the UserEdit component so that it can run seamlessly in both a stand-alone view as well as part of a popup dialog. The major change comes in the way the incoming data is received, and what should happen when the user is successfully saved.
The PrimeVue DynamicDialog service uses Vue’s Provide / Inject interface to send data to the component loaded in a dialog. So, in our component, we must declare a few additional state variables, as well as small piece of code to detect whether it is running in a dialog or as a standalone component in a view.
<script setup>
// Import Libraries
import { ref, computed, inject } from 'vue'
// -=-=- other code omitted here -=-=-
// Declare State
const errors = ref([])
const isDialog = ref(false)
const userId = ref()
// Detect Dialog
const dialogRef = inject('dialogRef')
if(dialogRef && dialogRef.value.data) {
// running in a dialog
isDialog.value = true
userId.value = dialogRef.value.data.id
} else {
// running in a view
userId.value = props.id
}
// -=-=- other code omitted here -=-=-
</script>For this component, we have created a new isDialog reactive state variable that will be set to true if the component detects it has been loaded in a dynamic dialog. It does this by checking for the status of the dialogRef injected state variable. We are also now storing the ID of the user to be edited in a new userId reactive state variable instead of relying on the props.id variable, which will not be present when the component is loaded in a dialog.
So, we simply need to replace all references to props.id to use userId instead. We can also change the action that occurs when the user is successfully saved - if the component is running in a dialog, it should simply close the dialog instead of using the router to navigate back to the previous page.
<script setup>
// -=-=- other code omitted here -=-=-
// Find Single User
const user = computed(() => {
return users.value.find((u) => u.id == userId.value) || { username: '', roles: [] }
})
// -=-=- other code omitted here -=-=-
// Save User
const save = function () {
errors.value = []
userStore
.saveUser(userId.value, user)
.then(function (response) {
if (response.status === 201) {
toast.add({
severity: 'success',
summary: 'Success',
detail: response.data.message,
life: 5000,
})
leave()
}
})
.catch(function (error) {
if (error.status === 422) {
toast.add({
severity: 'warn',
summary: 'Warning',
detail: error.response.data.error,
life: 5000,
})
errors.value = error.response.data.errors
} else {
toast.add({ severity: 'error', summary: 'Error', detail: error, life: 5000 })
}
})
}
// Leave Component
const leave = function() {
if (isDialog.value) {
dialogRef.value.close()
} else {
router.push({ name: 'users' })
}
}
</script>Finally, we can make a minor update to the template to also use the userId value instead of props.id
<template>
<div class="flex flex-col gap-3 max-w-xl justify-items-center">
<h1 class="text-xl text-center m-1">{{ userId ? 'Edit User' : 'New User' }}</h1>
<!-- other code omitted here -->
<Button severity="secondary" @click="leave" label="Cancel" />
</div>
</template>That’s all it takes! Now, when we click the New User or Edit User buttons on our UsersList component, we’ll see a pop-up dialog that contains our UserEdit component instead of being taken to an entirely new page.
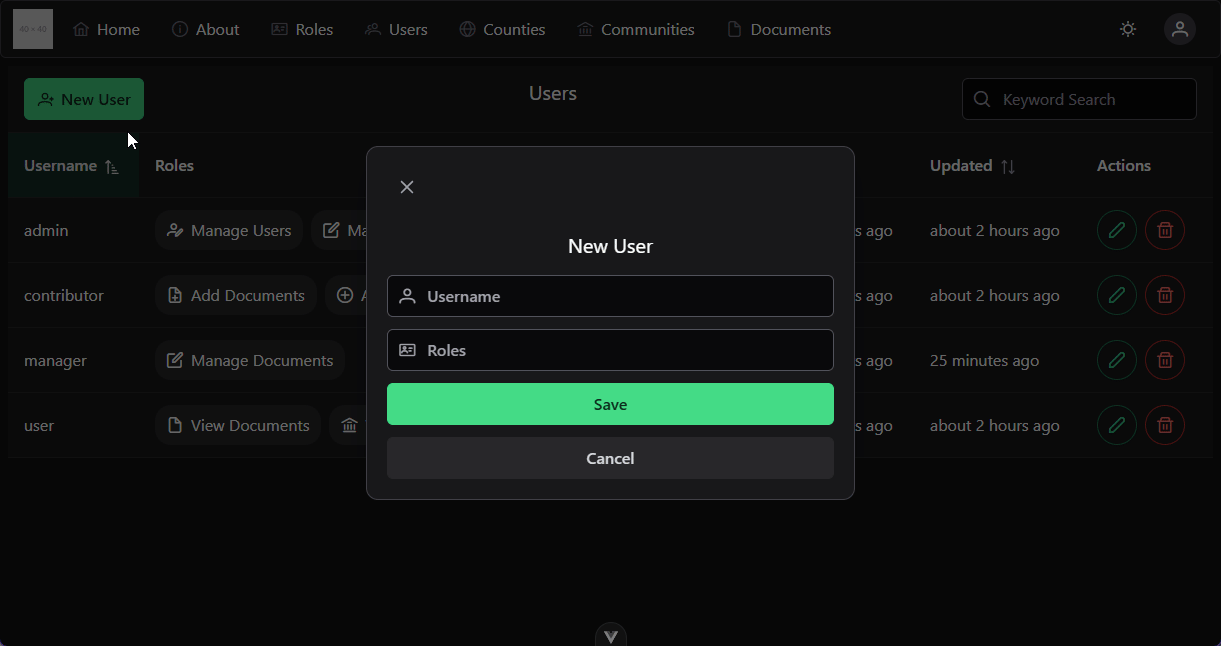
A very keen eye may notice a bug in the implementation of this component already - what if the user changes a value but then clicks the Cancel button on the modal dialog? Let’s see what that looks like:
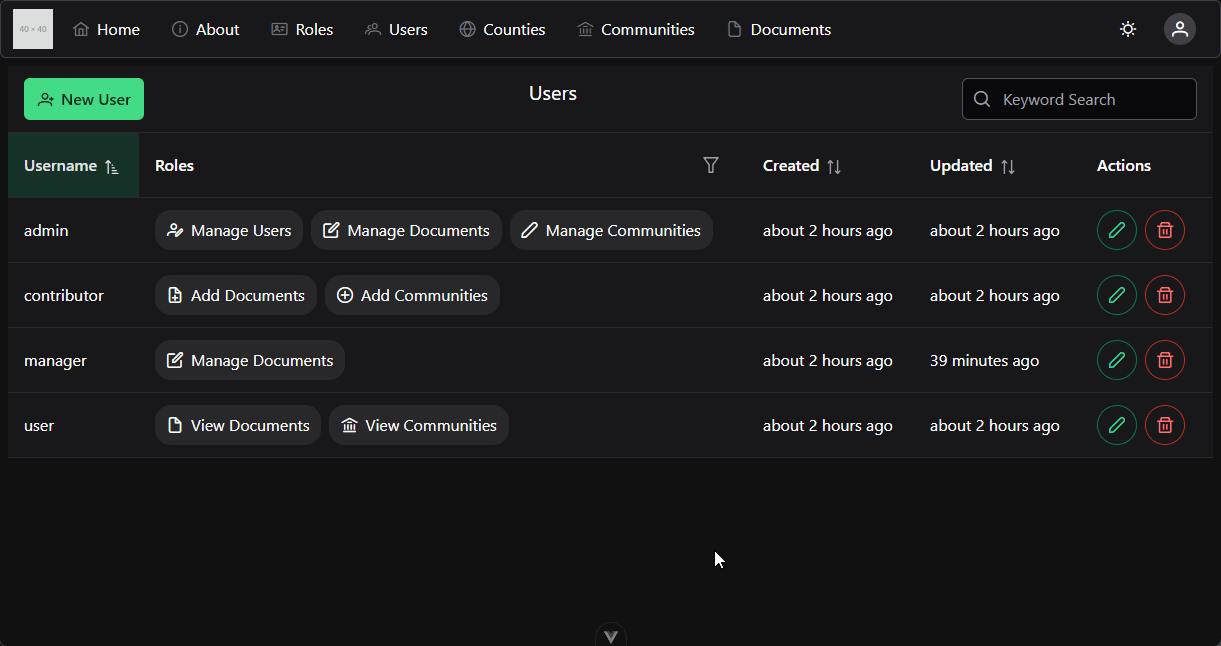
As we can see, the edits made in the UserEdit dialog are immediately reflected in the contents of the UsersList component as well. This is because they are both using the same Pinia store and referencing the same list of users in both components. So, this can present all sorts of strange issues in our program.
There are at least a couple of different ways we can go about fixing this:
userStore.hydrate() from the UsersList component to ensure that it has the latest version of the data from the server. However, if we do this, we could end up calling it twice when a user is saved, since the User store already does this.EditUser component, we can make sure we are editing a deep copy of our user, and not the same user reference as the one in our Pinia store.Let’s implement the second solution. Thankfully, it is as simple as using JSON.parse and JSON.stringify to create a quick deep copy of the user we are editing. We can do this in our computed Vue state variable in that component:
// -=-=- other code omitted here -=-=-
// Find Single User
const user = computed(() => {
return JSON.parse(
JSON.stringify(users.value.find((u) => u.id == userId.value) || { username: '', roles: [] }),
)
})
// -=-=- other code omitted here -=-=-With that change in place, we no longer see the bug in our output:
At this point, we have a pretty well developed application, so let’s start preparing for deployment. Our end goal is to build a single Docker container that contains our application, as well as the ability to deploy it along with a production database like Postgres.
To begin, we need to create a finalized version of our Vue frontend that can be embedded into our backend application directly.
To create a deployment build of our Vue application, we can simply run the following command in the client folder of our application:
$ npm run buildWhen we run that command, we get lots of output about the different parts of our application that are put together to make the final version. We may also get some warnings about chunks being larger than the cutoff, which we won’t worry about for now.
The final version of our application can be found in a new dist folder inside of our client folder, with a long list of contents:
The assets folder contains a large number of items that are all compiled and assembled by the Vite build tool for our application. The key file, however, is the index.html file, which is placed there to serve as the starting point for our application.
To fully test this application, we can simply copy the entire contents of the client/dist folder into the server/public folder, overwriting the existing index.html file in that location.
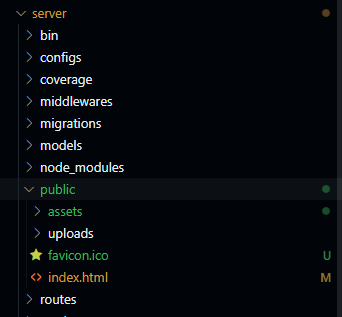
In addition, if we’ve changed any of the settings in the .env file to refer to the client in development mode, such as the CAS_SERVICE_URL or OPENAPI_HOST, we’ll need to change those back to using our server port.
Now, all we have to do is run the server in development mode, but we don’t need to start the client at all:
$ npm run devWhen the application loads, we can open our web browser on port 3000 (or whichever port our application is configured to use), and we should be greeted with a working version of our application!
However, we quickly notice that our placeholder image is no longer appearing in our top menu bar. A quick peek at the console in our browser gives us more information:

A bit of online searching can reveal this error - the helmet middleware we are using will prevent images from loading unless they are hosted on our own domain or if they are retrieved from memory using a data: URL. Since we want to allow our placeholder image to load, we can simply update the settings for helmet to allow this in our server/app.js file:
// Use libraries
app.use(express.json());
app.use(express.urlencoded({ extended: false }));
app.use(helmet({
contentSecurityPolicy: {
useDefaults: true,
directives: {
"img-src": ["'self'", "https:"],
"connect-src": ["'self'", "blob:"],
}
}
}));
app.use(compression());
app.use(cookieParser());With that change in place, our placeholder image will now load since it is using an https URL. It will also allow us to properly upload files using the blob: URLs.
Another issue we’ll quickly run into is that anytime we refresh our application on any page other than the homepage, we’ll end up with a 404 error message! This is because the server does not know to properly redirect those requests back to the Vue application’s router. We can get around that by installing one more middleware, the connect-history-api-fallback
middleware in our server’s app.js file. We’ll also need to disable the indexRouter since it is no longer needed, and move the static files and this new middleware to after the authentication routes to allow our application to properly redirect to CAS.
$ npm install connect-history-api-fallback// -=-=- other code omitted here -=-=-
// Import libraries
import compression from "compression";
import cookieParser from "cookie-parser";
import express from "express";
import helmet from "helmet";
import path from "path";
import swaggerUi from "swagger-ui-express";
import fs from "node:fs/promises";
import passport from "passport";
import history from "connect-history-api-fallback";
// -=-=- other code omitted here -=-=-
// Use middlewares
app.use(requestLogger);
// Use routers
//app.use("/", indexRouter);
app.use("/api", apiRouter);
// Use sessions
app.use(sessions);
app.use(passport.authenticate("session"));
// Use auth routes
app.use("/auth", authRouter);
// Redirect other requests to Vue application
app.use(history())
// Use static files
app.use(express.static(path.join(import.meta.dirname, "public")));
// -=-=- other code omitted here -=-=-
Now, when we refresh our application on any route that is not recognized by the server, it will direct those requests to the Vue application.
Finally, we should double-check our .gitignore files on both the server and the client to ensure that the built version of our project is not committed to git. In the client/.gitignore file, we already see an entry for dist, so we know that the dist folder and all of its contents will not be committed to git already.
In the server/.gitignore file, we should add a line to ignore the public folder to the bottom of the file. Then, we can use git rm -r --cached public from within the server folder to remove it from our git index before committing.
At this point, we can do one last lint, format, commit, and push before we set up our application for deployment!
We may run into issues with ESLint trying to clean up our production version of our code if it is stored in the public folder of our server directory. We can ignore it by adding a few lines to the server/eslint.config.js file:
import globals from "globals";
import pluginJs from "@eslint/js";
/** @type {import('eslint').Linter.Config[]} */
export default [
{
languageOptions: {
globals: {
...globals.node,
...globals.mocha,
},
},
rules: {
"no-unused-vars": ["error", { argsIgnorePattern: "next" }],
"no-console": "error",
},
},
{
ignores: ["public/*"],
},
pluginJs.configs.recommended,
];This will tell ESLint to ignore all files in the public directory.
We are now ready to create a Dockerfile that will build our application into a single Docker container that can be easily deployed in a variety of different infrastructures. Because our application is really two parts (the server and the client), we can use a Multi-Stage Build in Docker to make a very streamlined version of our image.
In this tutorial, we’ll go through building this Dockerfile manually. On systems that have Docker Desktop already installed, we can run docker init to scaffold some of this process. See the documentation for Docker Init for more details on how to use that tool.
We’ll start by creating a new Dockerfile outside of both the client and server folders, so it is at the top level of our project. At the top of the file, we’ll add a simple ARG entry to denote the version of Node.js we want to use:
# Node Version
ARG NODE_VERSION=22Next, we need to chose the Docker image we want to use to build our client. There are many different options to choose from, but we can look at the Official Docker Node package list to find the correct one fo our project. In this case, we’ll use the image 22-alpine as the basis for our Docker image. When building Docker images for deployment, we often look for images based on the Alpine Linux distribution, which is very lightweight and generally more secure since it only contains the bare minimum set of features needed for our application. We can read more about using Alpine Docker images in the Docker Blog
So, we’ll add a FROM entry to define the source of our build process, and we’ll name this container client to help us keep track of it.
# Node Version
ARG NODE_VERSION=22
# Client Base Image
# See https://hub.docker.com/_/node/
FROM node:${NODE_VERSION}-alpine as clientNow, we need to actually build our application. This usually involves 2 steps:
However, we can further optimize this by realizing that we can further separate this by installing all of our Node libraries first, then building our application. Since each step creates a new Docker Image Layer, we can make our images more efficient by spreading these steps out.
By doing so, if we make a change to the source code of our application, but we don’t change the underlying Node libraries, we can reuse that earlier image layer containing our libraries since we know that it hasn’t changed at all. We can read more about this in the Docker Documentation on optimizing builds by using caching.
In practice, the steps will look like this:
# Node Version
ARG NODE_VERSION=22
###############################
# STAGE 1 - BUILD CLIENT #
###############################
# Client Base Image
# See https://hub.docker.com/_/node/
FROM node:${NODE_VERSION}-alpine as client
# Use production node environment by default
ENV NODE_ENV production
# Store files in /usr/src/app
WORKDIR /usr/src/app
# Download dependencies as a separate step to take advantage of Docker's caching.
# Leverage a cache mount to /root/.npm to speed up subsequent builds.
# Leverage a bind mounts to package.json and package-lock.json to avoid having to copy them into
# into this layer.
# See https://docs.docker.com/build/cache/optimize/
RUN --mount=type=bind,source=client/package.json,target=package.json \
--mount=type=bind,source=client/package-lock.json,target=package-lock.json \
--mount=type=cache,target=/root/.npm \
npm ci --include=dev
# Copy the rest of the source files into the image.
COPY ./client .
# Build the client application
RUN npm run buildAt the end of this process, we’ll have a Docker image named client that contains a completely compiled version of our application in the /usr/src/app/dist folder. That’s really the important outcome of this process.
On the server side of things, there are several files and folders we want to make sure are not included in our final Docker image. So, we can create a file server/.dockerignore with the following contents:
node_modules
coverage
.env
.env.example
.env.test
.prettierrc
database.sqlite
eslint.config.js
publicThese are all folders and files that contain information we don’t want to include for a variety of security reasons.
Now, we can initiate the second stage of this build process, which will create a finalized version of our server to run our application. We’ll continue building this in the same Dockerfile below the first stage. The first few steps are mostly identical to the client, except this time we are referencing content in the server folder.
# -=-=- other code omitted here -=-=-
###############################
# STAGE 2 - BUILD SERVER #
###############################
# Server Base Image
# See https://hub.docker.com/_/node/
FROM node:${NODE_VERSION}-alpine as server
# Use production node environment by default
ENV NODE_ENV production
# Store files in /usr/src/app
WORKDIR /usr/src/app
# Download dependencies as a separate step to take advantage of Docker's caching.
# Leverage a cache mount to /root/.npm to speed up subsequent builds.
# Leverage a bind mounts to package.json and package-lock.json to avoid having to copy them into
# into this layer.
# See https://docs.docker.com/build/cache/optimize/
RUN --mount=type=bind,source=server/package.json,target=package.json \
--mount=type=bind,source=server/package-lock.json,target=package-lock.json \
--mount=type=cache,target=/root/.npm \
npm ci --omit=dev
# Copy the rest of the source files into the image
COPY ./server .Notice that the client build step uses npm ci --include=dev to include the development dependencies for the Vue.js project. These dependencies include tools such as Vite that are actually required to build the project for production, so we have to make sure they are installed.
In the server build step, however, we are using npm ci --omit=dev to omit any development dependencies from being installed in the container. These dependencies should be tools such as Nodemon and ESLint, which we won’t need in the deployed version of our application.
If we run into errors at either of these steps, we may need to ensure that each Node dependency is properly included in the correct place of the respective package.json file for each project.
Once we have installed the libraries and copied the contents of the server folder into the server image, we can also copy the /usr/src/app/dist folder from the client image into the public folder of the server image.
# -=-=- other code omitted here -=-=-
###############################
# STAGE 2 - BUILD SERVER #
###############################
# Server Base Image
# See https://hub.docker.com/_/node/
FROM node:${NODE_VERSION}-alpine as server
# Use production node environment by default
ENV NODE_ENV production
# Store files in /usr/src/app
WORKDIR /usr/src/app
# Download dependencies as a separate step to take advantage of Docker's caching.
# Leverage a cache mount to /root/.npm to speed up subsequent builds.
# Leverage a bind mounts to package.json and package-lock.json to avoid having to copy them into
# into this layer.
# See https://docs.docker.com/build/cache/optimize/
RUN --mount=type=bind,source=server/package.json,target=package.json \
--mount=type=bind,source=server/package-lock.json,target=package-lock.json \
--mount=type=cache,target=/root/.npm \
npm ci --omit=dev
# Copy the rest of the source files into the image
COPY ./server .
# Copy the built version of the client into the image
COPY --from=client /usr/src/app/dist ./publicThen, we’ll need to make a couple of directories in our container that we can use as volume mounts when we deploy it. These directories will contain our database and our uploaded files:
# -=-=- other code omitted here -=-=-
###############################
# STAGE 2 - BUILD SERVER #
###############################
# Server Base Image
# See https://hub.docker.com/_/node/
FROM node:${NODE_VERSION}-alpine as server
# Use production node environment by default
ENV NODE_ENV production
# Store files in /usr/src/app
WORKDIR /usr/src/app
# Download dependencies as a separate step to take advantage of Docker's caching.
# Leverage a cache mount to /root/.npm to speed up subsequent builds.
# Leverage a bind mounts to package.json and package-lock.json to avoid having to copy them into
# into this layer.
# See https://docs.docker.com/build/cache/optimize/
RUN --mount=type=bind,source=server/package.json,target=package.json \
--mount=type=bind,source=server/package-lock.json,target=package-lock.json \
--mount=type=cache,target=/root/.npm \
npm ci --omit=dev
# Copy the rest of the source files into the image
COPY ./server .
# Copy the built version of the client into the image
COPY --from=client /usr/src/app/dist ./public
# Make a directory for the database and make it writable
RUN mkdir -p ./data
RUN chown -R node:node ./data
# Make a directory for the uploads and make it writable
RUN mkdir -p ./public/uploads
RUN chown -R node:node ./public/uploadsFinally, we’ll end by defining the user the container should use, the default port of our application, a command to check if the application in the container is healthy, and the command to start our application.
# -=-=- other code omitted here -=-=-
###############################
# STAGE 2 - BUILD SERVER #
###############################
# Server Base Image
# See https://hub.docker.com/_/node/
FROM node:${NODE_VERSION}-alpine as server
# Use production node environment by default
ENV NODE_ENV production
# Store files in /usr/src/app
WORKDIR /usr/src/app
# Download dependencies as a separate step to take advantage of Docker's caching.
# Leverage a cache mount to /root/.npm to speed up subsequent builds.
# Leverage a bind mounts to package.json and package-lock.json to avoid having to copy them into
# into this layer.
# See https://docs.docker.com/build/cache/optimize/
RUN --mount=type=bind,source=server/package.json,target=package.json \
--mount=type=bind,source=server/package-lock.json,target=package-lock.json \
--mount=type=cache,target=/root/.npm \
npm ci --omit=dev
# Copy the rest of the source files into the image
COPY ./server .
# Copy the built version of the client into the image
COPY --from=client /usr/src/app/dist ./public
# Make a directory for the database and make it writable
RUN mkdir -p ./data
RUN chown -R node:node ./data
# Make a directory for the uploads and make it writable
RUN mkdir -p ./public/uploads
RUN chown -R node:node ./public/uploads
# Run the application as a non-root user.
USER node
# Expose the port that the application listens on.
EXPOSE 3000
# Command to check for a healthy application
HEALTHCHECK CMD wget --no-verbose --tries=1 --spider http://localhost:3000/api || exit 1
# Run the application.
CMD npm run startThere we go! That is what it takes to build a deployable version of this application. Notice that the Dockerfile we created here is very different from the devcontainer image we are using to develop our application in. A common misconception when using Docker is that we can use the same image for both development and deployment, but generally that is a very insecure and unsafe practice. It is much better to have a fully-featured image available for development, and then use a very secure and minimal image for deployment, often one that is built using a multi-stage build process that takes advantage of layer caching to make it much more efficient.
The last step in configuring our application for deployment is to create a GitHub Action that will automatically build our Docker container when we commit a release tag to GitHub. This process will ensure that our image is always up to date and available for users to download and use.
Learning how to build a GitHub Action script could be an entire course unto itself. For this project, we’ll run through the basic steps used to test and build our application’s Docker image, but there are many more steps that could be added. For example, we could have GitHub automatically run our test scripts before building the image, preventing any broken images if the tests aren’t passing. We can also add options to automatically deploy our image to our hosting service whenever it is updated. We can even have it send us a message on our messaging platform of choice when it is done building. Feel free to read up on all of the different actions available in the GitHub Actions Marketplace.
To create this GitHub action, we’ll place a file named build_docker.yml in the .github/workflows directory at the very top level of our project.
We’ll start with a name for the workflow, as well as a list of triggers that will start the workflow when a particular action is taken on our GitHub repository:
# Workflow name
name: Build Docker
# Run only on new tags being pushed
# https://docs.github.com/en/actions/using-workflows/triggering-a-workflow
on:
push:
tags:
- 'v*.*.*'Next, we’ll define the jobs to be executed as part of this GitHub Action. In this case, we’ll only have a single job, build, which will build our Docker image. For that job, we’ll use GitHub’s Ubuntu Job Runner, but there are many different options available for us.
# Workflow name
name: Build Docker
# Run only on new tags being pushed
# https://docs.github.com/en/actions/using-workflows/triggering-a-workflow
on:
push:
tags:
- 'v*.*.*'
# Define a single job named build
jobs:
build:
# Run job on Ubuntu runner
runs-on: ubuntu-latestFollowing that, we’ll list the steps required to complete the job. Each step is documented with a link to the documentation for that step.
# Workflow name
name: Build Docker
# Run only on new tags being pushed
# https://docs.github.com/en/actions/using-workflows/triggering-a-workflow
on:
push:
tags:
- 'v*.*.*'
# Define a single job named build
jobs:
build:
# Run job on Ubuntu runner
runs-on: ubuntu-latest
# Job Steps
steps:
# Step 1 - Checkout the Repository
# https://github.com/actions/checkout
- name: 1 - Checkout Repository
uses: actions/checkout@v4
# Step 2 - Log In to GitHub Container Registry
# https://github.com/docker/login-action
- name: 2 - Login to GitHub Container Registry
uses: docker/login-action@v3
with:
registry: ghcr.io
username: ${{ github.repository_owner }}
password: ${{ secrets.GITHUB_TOKEN }}
# Step 3 - Build and Push Docker Image
# https://github.com/docker/build-push-action
- name: 3 - Build and Push Docker Image
uses: docker/build-push-action@v6
with:
context: .
push: true
tags: |
ghcr.io/${{ github.repository }}:${{ github.ref_name }}
ghcr.io/${{ github.repository }}:latest
# Step 4 - Make Release on GitHub
# https://github.com/softprops/action-gh-release
- name: 4 - Release
uses: softprops/action-gh-release@v2
with:
generate_release_notes: trueAs we can see, the basic steps are as follows:
GitHub is case-preserving, and allows repository names and usernames to include uppercase letters. However, Docker tags must be lowercase, so any repository names with uppercase letters will cause issues with this process.
To solve this, we can add a new step to convert our repository name to lowercase:
# Step 3a - Get Lowercase Repository Name
# See https://github.com/orgs/community/discussions/27086
- name: 3a - Get Lowercase Repository Name
run: |
echo "REPO_LOWER=${GITHUB_REPOSITORY,,}" >> ${GITHUB_ENV}
# Step 3b - Build and Push Docker Image
# https://github.com/docker/build-push-action
- name: 3b - Build and Push Docker Image
uses: docker/build-push-action@v6
with:
context: .
push: true
tags: |
ghcr.io/${{ env.REPO_LOWER }}:${{ github.ref_name }}
ghcr.io/${{ env.REPO_LOWER }}:latestAlternatively, much of this is also handled by the Docker Metadata Action, which can be used to automatically configure tags and labels attached to a Docker container built by a GitHub action. For larger-scale projects, adding the Docker Metadata Action to this process is a helpful step.
Before we can trigger this workflow, we should commit and push it to GitHub along with our Dockerfile from the previous page.
Once we have done that, we can create a new Semantic Versioning, or SemVer, style release tag and push it to GitHub:
$ git tag v0.0.1
$ git push --tagsWhen we do so, we can go back to our GitHub repository and check for a small yellow circle to appear at the top of our code, which shows that the GitHub Action is executing
After a minute or so, we can refresh the page to see a green checkmark in its place, as well as additional information on the right side of the page showing the release version and a link to the newly built Docker container stored in the GitHub Container Registry.
If we click on that link, we can find information about how to actually pull and use that Docker container in our deployment environment:
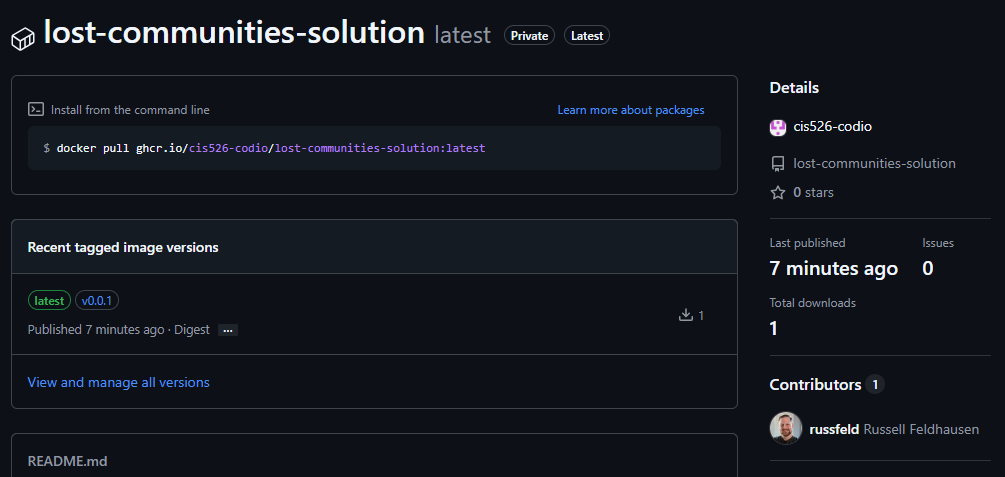
There we go! We now have a working Docker container for our application.
The last step we can take to make our application easier to deploy is to create a Docker Compose file that shows how to deploy this application easily within a Docker environment. It is becoming more and more popular for self-hosted projects and web applications to include a sample Docker Compose file to show how the application should be deployed in practice. So, let’s look at a quick example for our application.
We’ll place this file at the top-level of our application in a file named compose.yml with the following contents:
services:
######################################
# Lost Communities Solution
#
# Repository:
# https://github.com/cis526-codio/lost-communities-solution
lostcommunities:
# Docker Image
image: ghcr.io/cis526-codio/lost-communities-solution:latest
# Container Name
container_name: lostcommunities
# Restart Container Unless Stopped
restart: unless-stopped
# Network Ports
ports:
- "3000:3000"
# Volumes
volumes:
- lostcommunities_data:/usr/src/app/data:rw
- lostcommunities_uploads:/usr/src/app/public/uploads:rw
# Environment Variables
environment:
# =+=+=+= REQUIRED VALUES =+=+=+=
# These values must be configured for deployment
# Session Secret Key
SESSION_SECRET: 'thisisasupersecretkey'
# JWT Secret Key
JWT_SECRET_KEY: 'thisisasupersecretkey'
# Use Node and run `require('crypto').randomBytes(64).toString('hex')` to get a random value
# CAS Authentication Settings
# CAS Server URL (send users here to login)
CAS_URL: 'https://testcas.cs.ksu.edu'
# CAS Service URL (CAS returns users here; usually where this app is deployed)
CAS_SERVICE_URL: 'http://localhost:3000'
# Database File Name
# Options: ':memory:' to use an in-memory database (not recommended), or any file name otherwise
DATABASE_FILE: 'data/database.sqlite'
# Seed initial data on first startup
SEED_DATA: 'true'
# =+=+=+= OPTIONAL VALUES =+=+=+=
# These values are set to reasonable defaults
# but can be overridden. Default values are shown as comments
# Log Level
# Options: error | warn | info | http | verbose | debug | sql | silly
#LOG_LEVEL: 'http'
# Network Port
#PORT: '3000'
# =+=+=+= OTHER VALUES =+=+=+=
# These values are not recommended for deployment but are available
# Custom Session Cookie Name
#SESSION_NAME: 'connect.sid'
# Open API Documentation
# Show OpenAPI Documentation at `/docs` path
#OPENAPI_VISIBLE: 'false'
# Open API Host for testing
#OPENAPI_HOST: 'http://localhost:3000'
# Export Open API JSON File
#OPENAPI_EXPORT: 'false
# Open API Export File Path
#OPENAPI_EXPORT_PATH: 'openapi.json'
# Enable Bypass Authentication
# Use path `/auth/bypass?token=<username>` to log in as any user
# DO NOT ENABLE IN PRODUCTION - THIS IS INSECURE!
#BYPASS_AUTH: 'false'
volumes:
lostcommunities_data:
lostcommunities_uploads:Most of this file is pretty straightforward. The one unique bit to point out is the two volume mounts, which connect a Docker volume to both the data and the public/uploads folders of our container. The first folder was created to specifically store our database file, and the second one will store all uploaded files from the users. In our Docker Compose file we are simply storing these in Docker volumes, but an experienced system administrator could change these to link directly to a path on the host system, making it easy to access.
Remember to update the image path in the Docker Compose file to match the path where your own Docker image can be found on the GitHub Container Registry - you can find it in your repository by clicking the Package name on the right side of the page.
To actually deploy this application, we can simply download a copy of this compose.yml file on any system with Docker installed, and then run the following command to deploy it:
$ docker compose up -dSince our Docker image is stored in a private repository on GitHub, we’ll need to authenticate with the GitHub Container Registry. Instructions for doing this with a GitHub Personal Access Token can be found in the GitHub Documentation.
If everything works correctly, we should see our application start in the terminal:
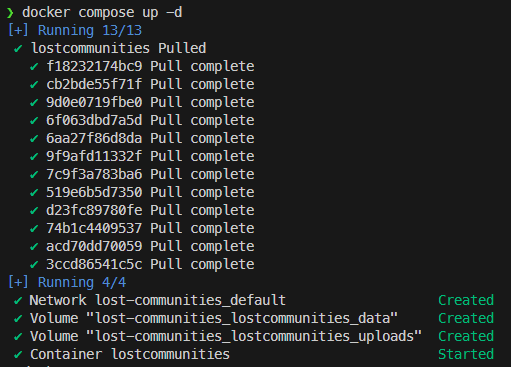
We can test it by going to http://localhost:3000 on our local system, or whatever URL is attached to the deployed container.
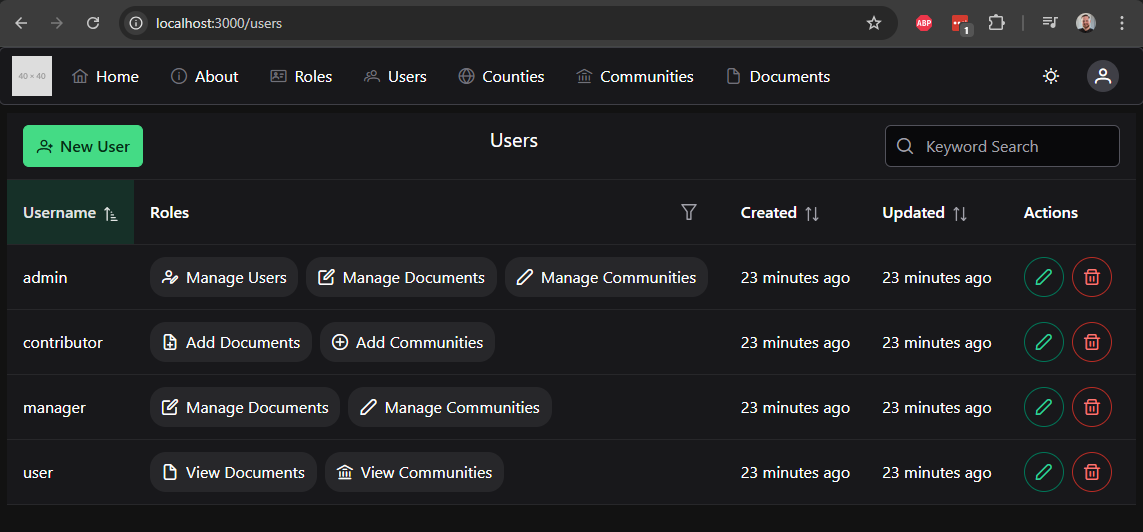
Finally, what if we’d like to update our application to connect to an external database? This could be very useful if we plan on using this application in production with a large amount of data, because an external database will be much faster and handle large amounts of data much better than our SQLite database stored in a single file.
For this example, we’ll update our application to be able to use Postgres. Most of this process can be discovered by reading the Sequelize Documentation to see how to connect other database types to our application.
First, we need to update the database configuration for our application, which is in the configs/database.js file in our server folder. We’ll add several additional options to allow us to specify the dialect, hostname, username, and password for another database engine.
/**
* @file Configuration information for Sequelize database ORM
* @author Russell Feldhausen <russfeld@ksu.edu>
* @exports sequelize a Sequelize instance
*/
// Import libraries
import Sequelize from "sequelize";
// Import logger configuration
import logger from "./logger.js";
// Create Sequelize instance
const sequelize = new Sequelize({
// Supports "sqlite" or "postgres"
dialect: process.env.DATABASE_DIALECT || "sqlite",
// Only used by SQLite
storage: process.env.DATABASE_FILE || ":memory:",
// Used by Postgres
host: process.env.DATABASE_HOST || "lostcommunities_db",
port: process.env.DATABASE_PORT || 5432,
username: process.env.DATABASE_USERNAME || "lostcommunities",
password: process.env.DATABASE_PASSWORD || "lostcommunities",
database: process.env.DATABASE_NAME || "lostcommunities",
logging: logger.sql.bind(logger),
});
export default sequelize;We’ll also need to install the appropriate database libraries in our server application:
$ npm install pg pg-hstoreIn addition, we also must handle a bug where Postgres will not properly keep track of any IDs that are added during the seeding process, so in each of our seeds we need to update the internal sequence used by Postgres to keep track of the next ID to use:
// -=-=- other code omitted here -=-=-
export async function up({ context: queryInterface }) {
await queryInterface.bulkInsert("users", users);
if (process.env.DATABASE_DIALECT == 'postgres') {
await queryInterface.sequelize.query("SELECT setval('users_id_seq', max(id)) FROM users;");
}
}
// -=-=- other code omitted here -=-=-
// -=-=- other code omitted here -=-=-
export async function up({ context: queryInterface }) {
await queryInterface.bulkInsert("roles", roles);
if (process.env.DATABASE_DIALECT == 'postgres') {
await queryInterface.sequelize.query("SELECT setval('roles_id_seq', max(id)) FROM roles;");
}
await queryInterface.bulkInsert("user_roles", user_roles);
}
// -=-=- other code omitted here -=-=-
This error is discussed at length in a Sequelize GitHub Issue.
We should also add these new environment variable entries to our .env.example file, including relocating the existing DATABASE_FILE entry to this section with the others. Since we aren’t using them in development or testing, we can leave them out of the other files for now.
# -=-=- other settings omitted here -=-=-
# Database Settings
# Options are "sqlite" or "postgres"
DATABASE_DIALECT=sqlite
# File is specified for SQLite
DATABASE_FILE=database.sqlite
# Other settings are for Postgres
DATABASE_HOST=localhost
DATABASE_PORT=5432
DATABASE_USERNAME=lostcommunities
DATABASE_PASSWORD=lostcommunities
DATABASE_NAME=lostcommunitiesTo test this, we’ll need a running Postgres instance. While we can create one in our GitHub Codespaces by adding some additional configuration files, it is a bit more complex. So, let’s just update our compose.yml file for deployment and test using another database there.
services:
######################################
# Lost Communities Solution
#
# Repository:
# https://github.com/cis526-codio/lost-communities-solution
lostcommunities:
# Docker Image
image: ghcr.io/cis526-codio/lost-communities-solution:latest
# Container Name
container_name: lostcommunities
# Restart Container Unless Stopped
restart: unless-stopped
# Networks
networks:
- default
- lostcommunities_network
# Network Ports
ports:
- "3000:3000"
# Volumes
volumes:
- lostcommunities_data:/usr/src/app/data:rw
- lostcommunities_uploads:/usr/src/app/public/uploads:rw
# Environment Variables
environment:
# =+=+=+= REQUIRED VALUES =+=+=+=
# These values must be configured for deployment
# Session Secret Key
SESSION_SECRET: 'thisisasupersecretkey'
# JWT Secret Key
JWT_SECRET_KEY: 'thisisasupersecretkey'
# Use Node and run `require('crypto').randomBytes(64).toString('hex')` to get a random value
# CAS Authentication Settings
# CAS Server URL (send users here to login)
CAS_URL: 'https://testcas.cs.ksu.edu'
# CAS Service URL (CAS returns users here; usually where this app is deployed)
CAS_SERVICE_URL: 'http://localhost:3000'
# Database Options
# Database Dialect
# Options: 'sqlite' (default) or 'postgres'
DATABASE_DIALECT: 'postgres'
# For SQLite Only - Specify file location
# Options: ':memory:' to use an in-memory database (not recommended), or any file name otherwise
# DATABASE_FILE: 'data/database.sqlite'
# For Postgres Only - Specify database information
DATABASE_HOST: lostcommunities_db
DATABASE_PORT: 5432
DATABASE_USERNAME: lostcommunities
DATABASE_PASSWORD: lostcommunities
DATABASE_NAME: lostcommunities
# Seed initial data on first startup
SEED_DATA: 'true'
# =+=+=+= OPTIONAL VALUES =+=+=+=
# These values are set to reasonable defaults
# but can be overridden. Default values are shown as comments
# Log Level
# Options: error | warn | info | http | verbose | debug | sql | silly
#LOG_LEVEL: 'http'
# Network Port Within the Container
#PORT: '3000'
# =+=+=+= OTHER VALUES =+=+=+=
# These values are not recommended for deployment but are available
# Custom Session Cookie Name
#SESSION_NAME: 'connect.sid'
# Open API Documentation
# Show OpenAPI Documentation at `/docs` path
#OPENAPI_VISIBLE: 'false'
# Open API Host for testing
#OPENAPI_HOST: 'http://localhost:3000'
# Export Open API JSON File
#OPENAPI_EXPORT: 'false
# Open API Export File Path
#OPENAPI_EXPORT_PATH: 'openapi.json'
# Enable Bypass Authentication
# Use path `/auth/bypass?token=<username>` to log in as any user
# DO NOT ENABLE IN PRODUCTION - THIS IS INSECURE!
#BYPASS_AUTH: 'false'
######################################
# Postgres Database
#
# Image Location:
# https://hub.docker.com/_/postgres
lostcommunities_db:
# Docker Image
image: postgres:17-alpine
# Container Name
container_name: lostcommunities_db
# Restart Container Unless Stopped
restart: unless-stopped
# Networks
networks:
- lostcommunities_network
# Volumes
volumes:
- lostcommunities_db_data:/var/lib/postgresql/data:rw
# Environment Variables
environment:
POSTGRES_USER: lostcommunities
POSTGRES_PASSWORD: lostcommunities
POSTGRES_DB: lostcommunities
volumes:
lostcommunities_data:
lostcommunities_uploads:
lostcommunities_db_data:
networks:
lostcommunities_network:
internal: trueThis Docker Compose file follows some best practices for deploying a Postgres container in the cloud, and even separates the database connection between our application container and the Postgres container in an internal Docker network to make it even more secure.
Once we deploy this application, we can even check that the Postgres server has our current data to ensure it is working properly:
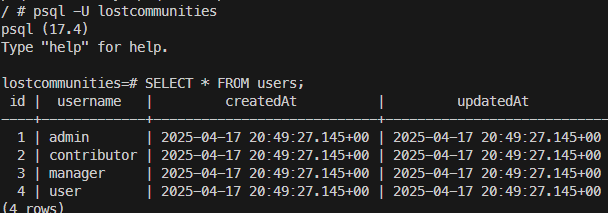
Now our application is ready for a full deployment!
This page lists all of the errors found and updates I have made to the basic project since this was released.
In my Vue code, I was often using tokenStore.token.length > 0 to determine if a user was logged in. This is a bit fragile - better to just make a computed value for this:
// Getters
const loggedIn = computed(() =>
token.value.length > 0
)This requires changing several other places in ths code where this is used - mainly I just searched for token.length and went from there.
I also chose to update it to store the decoded value directly as a state property, just to avoid decoding it multiple times. Finally, I fixed a bug where users with no role would cause issues. Here is the fully updated token store.
/**
* @file JWT Token Store
* @author Russell Feldhausen <russfeld@ksu.edu>
*/
// Import Libraries
import { ref, computed } from 'vue'
import { defineStore } from 'pinia'
import { jwtDecode } from 'jwt-decode'
import axios from 'axios'
// Define Store
export const useTokenStore = defineStore('token', () => {
// State properties
const token = ref('')
const decoded = ref({})
// Getters
const loggedIn = computed(() =>
token.value.length > 0
)
const username = computed(() =>
decoded.value.username ? decoded.value.username : decoded.value.email ? decoded.value.email : '',
)
const has_role = computed(
() => (role) =>
decoded.value.roles ? decoded.value.roles.some((r) => r.role == role) : false,
)
// Actions
/**
* Get a token for the user.
*
* If this fails, redirect to authentication page if parameter is true
*
* @param redirect if true, redirect user to login page on failure
*/
async function getToken(redirect = false) {
console.log('token:get')
try {
const response = await axios.get('/auth/token', { withCredentials: true })
token.value = response.data.token
decoded.value = jwtDecode(token.value)
} catch (error) {
token.value = ''
decoded.value = {}
// If the response is a 401, the user is not logged in
if (error.response && error.response.status === 401) {
console.log('token:get user not logged in')
if (redirect) {
console.log('token:get redirecting to login page')
window.location.href = '/auth/cas'
}
} else {
console.log('token:get error' + error)
}
}
}
/**
* Log the user out and clear the token
*/
function logout() {
token.value = ''
decoded.value = {}
window.location.href = '/auth/logout'
}
// Return all state, getters, and actions
return { token, loggedIn, username, has_role, getToken, logout }
})The date-fns library has an issue where an invalid date will cause an uncaught exception in the browser, which crashes the Vue application. This can happen when the date is rendered before the data is loaded, as would be the case anytime the data is loaded asynchronously when visiting the page. This was causing all sorts of strange errors in my code upon a refresh of specific pages.
I swapped to using Day.js instead, which provides many of the same features as date-fns but without unhandled exceptions. I especially use the Time from now feature in many places, such as my UsersList.vue component:
<Column field="createdAt" header="Created" sortable>
<template #body="{ data }">
<span v-tooltip.bottom="new Date(data.createdAt).toLocaleString()">
{{ dayjs(data.createdAt).fromNow() }}
</span>
</template>
</Column>On most of the data tables, I added a loading icon implementation, such as the UsersList.vue component:
<script setup>
// -=-=- other code omitted here -=-=-
// Loading State
const loading = ref(true)
// Hydrate Store
userStore.hydrate().then(() => {
loading.value = false
})
// -=-=- other code omitted here -=-=-
</script>
<template>
<DataTable
:value="users"
v-model:filters="filters"
:globalFilterFields="['username', 'email', 'name']"
filterDisplay="menu"
sortField="username"
:sortOrder="1"
:loading="loading"
loading-icon="pi pi-spin pi-spinner"
>
<!-- -=-=- other code omitted here -=-=- -->
</DataTable>
</template>This also requires the store to return the appropriate type so it can be handled asyncrhonously (in this case, the user store returns the promise from getting the user’s list, but the roles list can happen in the background):
async function hydrate() {
api
.get('/api/v1/roles')
.then(function (response) {
roles.value = response.data
})
.catch(function (error) {
console.log(error)
})
return api
.get('/api/v1/users')
.then(function (response) {
users.value = response.data
})
.catch(function (error) {
console.log(error)
})
}In several of the form components, I set the invalid attribute based on the error computed value. In theory, if error is null, then the invalid attribute will not be set. However, Vue properly tries to parse the error value into a Boolean, which will cause errors in the browser console.
To fix this, we can convert the presence (or absence) of the error object into a boolean using !!error. It works like this:
error is null, then !error is true, therefore !!error is false.error is not null, then !error is false, therefore !!error is true.To fix this, update the template in any form components in client/src/components/forms that use the invalid attribute as shown here, taken from the TextField.vue component:
<template>
<div>
<FloatLabel variant="on">
<IconField>
<InputIcon :class="props.icon" />
<InputText
:id="props.field"
:disabled="props.disabled"
:invalid="!!error"
v-model="model"
class="w-full"
/>
</IconField>
<label :for="props.field">{{ props.label }}</label>
</FloatLabel>
<!-- Error Text -->
<Message v-if="error" severity="error" variant="simple" size="small">{{
error.message
}}</Message>
</div>
</template>In my code, I added a try...catch block to each route handler. This can be good practice, but it is also inefficient. I have since removed all of them and switched to using this global error handler at the very end of my app.js code:
// Default Error Handler
app.use((err, req, res, next) => {
// If error already sent, disregard
if (res.headersSent) {
return next(err);
}
// Handle Validation Errors
if (err instanceof ValidationError) {
handleValidationError(err, res);
} else {
logger.error(err);
res.status(500).end();
}
});This greatly shortens and simplifies the code for each route, and makes coverage testing a bit more straightforward (since each route no longer has an error path that cannot be easily tested)
I also added a custom format to the Winston logger to better handle the exceptions generated by Sequelize. At the same time, I enabled Winston’s ability to catch and log unahndled exceptions and rejected promises:
// Import libraries
import winston from "winston";
import { format } from "winston";
/**
* Custom formatter for Sequelize Logs
*/
const sequelizeErrors = format((info) => {
// Adapted from https://github.com/sequelize/sequelize/issues/14807#issuecomment-1853514339
if (info instanceof Error && info.name.startsWith("Sequelize")) {
let { message } = info.parent;
if (info.sql) {
message += "\nSQL: " + info.sql;
}
if (info.parameters) {
const stringifiedParameters = JSON.stringify(info.parameters);
if (
stringifiedParameters !== "undefined" &&
stringifiedParameters !== "{}"
) {
message += "\nParameters: " + stringifiedParameters;
}
}
// Stack is already included in the error
// message += "\n" + info.stack;
// Update the message
info.message = info.message += "\n" + message
}
return info
})
// -=-=- other code omitted here -=-=-
// Creates the Winston instance with the desired configuration
const logger = winston.createLogger({
// call `level` function to get default log level
level: level(),
levels: levels,
// Format configuration
// See https://github.com/winstonjs/logform
format: combine(
sequelizeErrors(),
errors({ stack: true }),
colorize({ all: true }),
//shortFormat(),
timestamp({
format: "YYYY-MM-DD hh:mm:ss.SSS A",
}),
align(),
printf(
(info) =>
`[${info.timestamp}] ${info.level}: ${info.stack ? info.message + "\n" + info.stack : info.message}`,
),
),
// Output configuration
transports: [new winston.transports.Console()],
exceptionHandlers: [new winston.transports.Console()],
rejectionHandlers: [new winston.transports.Console()],
});This provides much more useful output whenever there are unhandled SQL exceptions such as violated validation constraints.
I updated the Passport user sessions to only store a user’s ID instead of a full user object. This is because we are only using the Passport sessions to issue a JWT (at least at this point), so a full user session is not needed. It also fixes issues where user data was not updated properly in the session after editing.
// -=-=- other code omitted here -=-=-
// Default functions to serialize and deserialize a session
passport.serializeUser(function (user, done) {
done(null, user.id);
});
passport.deserializeUser(function (user_id, done) {
// We could change this to look up the user in the database here in the future
// Instead, we make a dummy object that just contains the user's ID as a stand-in
done(null, {
id: user_id
});
});With this change, we now have to look up the user in the database each time we issue a token. This is preferred, as it will get the current user’s profile information and roles each time a token is issued.
router.get("/token", async function (req, res, next) {
// If user is logged in
if (req.user) {
// Load user from database
const user = await User.findByPk(id, {
attributes: [
"id",
"username",
],
include: {
model: Role,
as: "roles",
attributes: ["id", "role"],
through: {
attributes: [],
},
},
});
if (user) {
const token = jsonwebtoken.sign(user, process.env.JWT_SECRET_KEY, {
expiresIn: "6h",
});
res.json({
token: token,
});
} else {
// user not found - probably deleted recently
res.status(404).end()
}
} else {
// Send unauthorized response
res.status(401).end();
}
});The original authorized-roles.js middleware would accidentally call the next() handler for each matching role, instead of just the first one. The fix is to wrap the call in an if statement to confirm that a match has not already been found.
const roleBasedAuth = (...roles) => {
return function roleAuthMiddleware(req, res, next) {
// logger.debug("Route requires roles: " + roles);
// logger.debug(
// "User " +
// req.token.username +
// " has roles: " +
// req.token.roles.map((r) => r.role).join(","),
// );
let match = false;
// loop through each role given
roles.forEach((role) => {
// if the user has that role, then they can proceed
if (req.token.roles.some((r) => r.role === role)) {
// logger.debug("Role match!");
if (!match) {
match = true;
return next();
}
}
});
if (!match) {
// if no roles match, send an unauthenticated response
// logger.debug("No role match!");
return res.status(401).send();
}
};
};If you plan on developing this application in GitHub Codespaces with a secondary PostgreSQL container, you may also want to add the docker-outside-of-docker feature to your devcontainer.json file - this allows you to see and control containers that are created as part of the GitHub codespace:
// For format details, see https://aka.ms/devcontainer.json. For config options, see the
// README at: https://github.com/devcontainers/templates/tree/main/src/typescript-node
{
"name": "Node.js & TypeScript",
// Or use a Dockerfile or Docker Compose file. More info: https://containers.dev/guide/dockerfile
"image": "mcr.microsoft.com/devcontainers/typescript-node:1-22-bookworm",
"customizations": {
"vscode": {
"extensions": [
"qwtel.sqlite-viewer",
"ms-vscode.live-server",
"Vue.volar"
]
}
},
// Features to add to the dev container. More info: https://containers.dev/features.
"features": {
"ghcr.io/devcontainers/features/docker-outside-of-docker": {}
},
// Use 'forwardPorts' to make a list of ports inside the container available locally.
"forwardPorts": [3000]
// Use 'postCreateCommand' to run commands after the container is created.
// "postCreateCommand": "yarn install",
// Configure tool-specific properties.
// "customizations": {},
// Uncomment to connect as root instead. More info: https://aka.ms/dev-containers-non-root.
// "remoteUser": "root"
}After adding that line, rebuild the codespace, and then use docker ps to see running containers. All other docker commands should work for managing or restarting other containers.