Rendering a Textured Quad
While the point of a TriangleStrip is to optimize by reducing the number of vertices, in most cases it still will have repeats, and it is difficult to define a complex mesh out of a single strip. Thus, in addition to vertices, we can provide indices to specific vertices. The collection of indices contains nothing more than integers referencing vertices in the vertices collection. This means each unique vertex needs to be defined exactly once, and the indices take on the role of defining the triangles by giving the position of each successive vertex in the triangle list in the vertex array.
Defining a Textured Quad
Let’s give this a try by defining a Quad class with both vertices and indices:
/// <summary>
/// A class representing a quad (a rectangle composed of two triangles)
/// </summary>
public class Quad
{
    /// <summary>
    /// The vertices of the quad
    /// </summary>
    VertexPositionTexture[] vertices;

    /// <summary>
    /// The vertex indices of the quad
    /// </summary>
    short[] indices;

    /// <summary>
    /// The effect to use rendering the triangle
    /// </summary>
    BasicEffect effect;

    /// <summary>
    /// The game this cube belongs to
    /// </summary>
    Game game;
}
You will note that instead of our vertex structure being a VertexPositionColor, this time we’re using VertexPositionTexture. Instead of giving each vertex a color, this time we’ll be giving it a texture coordinate, and having our effect apply a texture to the face of the quad.
Note also that we use the short data type for our index array. As a quad has only four vertices (one in each corner), we only need four vertices to define one. If our vertices start at index 0, that means we only need to represent indices 1-4, so a short is more than sufficient. With a larger vertex array, we might need to use a larger type of integer.
Defining the Vertices
As with our triangle, we’ll initialize our vertices in a helper method, InitializeVertices:
    /// <summary>
    /// Initializes the vertices of our quad
    /// </summary>
    public void InitializeVertices() {
        vertices = new VertexPositionTexture[4];
        // Define vertex 0 (top left)
        vertices[0].Position = new Vector3(-1, 1, 0);
        vertices[0].TextureCoordinate = new Vector2(0, -1);
        // Define vertex 1 (top right)
        vertices[1].Position = new Vector3(1, 1, 0);
        vertices[1].TextureCoordinate = new Vector2(1, -1);
        // define vertex 2 (bottom right)
        vertices[2].Position = new Vector3(1, -1, 0);
        vertices[2].TextureCoordinate = new Vector2(1, 0);
        // define vertex 3 (bottom left)
        vertices[3].Position = new Vector3(-1, -1, 0);
        vertices[3].TextureCoordinate = new Vector2(0, 0);
    }
The quad is two by two, centered on the origin. The texture coordinates are expressed as floats that fall in the range [0 … 1]. The texture coordinate (0,0) is the upper-left hand corner of our texture, and (1, 1) is the lower-right corner.
Defining the Indices
Now let’s define our indices in their own helper method, InitializeIndices. Let’s assume we’re using a triangle list, so we’ll need to define all six vertices (with a triangle strip we could cut this to 4):
    /// <summary>
    /// Initialize the indices of our quad
    /// </summary>
    public void InitializeIndices() {
        indices = new short[6];

        // Define triangle 0
        indices[0] = 0;
        indices[1] = 1;
        indices[2] = 2;
        // define triangle 1
        indices[3] = 2;
        indices[4] = 3;
        indices[5] = 0;
    }
Initializing the Effect
And we’ll need to set up our effect, which we’ll again do in a method named InitializeEffect():
    /// <summary>
    /// Initializes the basic effect used to draw the quad
    /// </summary>
    public void InitializeEffect()
    {
        effect = new BasicEffect(game.GraphicsDevice);
        effect.World = Matrix.Identity;
        effect.View = Matrix.CreateLookAt(
            new Vector3(0, 0, 4), // The camera position
            new Vector3(0, 0, 0), // The camera target,
            Vector3.Up            // The camera up vector
        );
        effect.Projection = Matrix.CreatePerspectiveFieldOfView(
            MathHelper.PiOver4,                         // The field-of-view
            game.GraphicsDevice.Viewport.AspectRatio,   // The aspect ratio
            0.1f, // The near plane distance
            100.0f // The far plane distance
        );
        effect.TextureEnabled = true;
        effect.Texture = game.Content.Load<Texture2D>("monogame-logo");
    }
This looks almost identical to our triangle example. The only difference is in the last two lines - instead of setting effect.VertexColorEnabled, we’re setting effect.TextureEnabled to true, and providing the monogame-logo.png texture to the effect.
Draw() Method
Now let’s write our Draw() method:
    /// <summary>
    /// Draws the quad
    /// </summary>
    public void Draw()
    {
        effect.CurrentTechnique.Passes[0].Apply();
        game.GraphicsDevice.DrawUserIndexedPrimitives<VertexPositionTexture>(
            PrimitiveType.TriangleList,
            vertices,   // The vertex collection
            0,          // The starting index in the vertex array
            4,          // The number of indices in the shape
            indices,    // The index collection
            0,          // The starting index in the index array
            2           // The number of triangles to draw
        );
    }
The Quad Constructor
To wrap up the Quad, we’ll need to add a constructor that takes a parameter of type Game and invokes our initialization:
    /// <summary>
    /// Constructs the Quad
    /// </summary>
    /// <param name="game">The Game the Quad belongs to</param>
    public Quad(Game game)
    {
        this.game = game;
        InitializeVertices();
        InitializeIndices();
        InitializeEffect();
    }
Adding our Quad to Game1
Now let’s use our Quad in Game1. Add a field for the quad to the Game1 class:
    // The quad to draw
    Quad quad;
And construct it in our Game1.LoadContent(). We want to be sure the graphics device is set up before we construct our Quad, so this is a good spot:
    // Create the quad
    quad = new Quad(this);
And finally, let’s render it in our Game1.Draw() method:
    // Draw the quad
    quad.Draw();
If you run your code, you should now see the textured quad rendered:
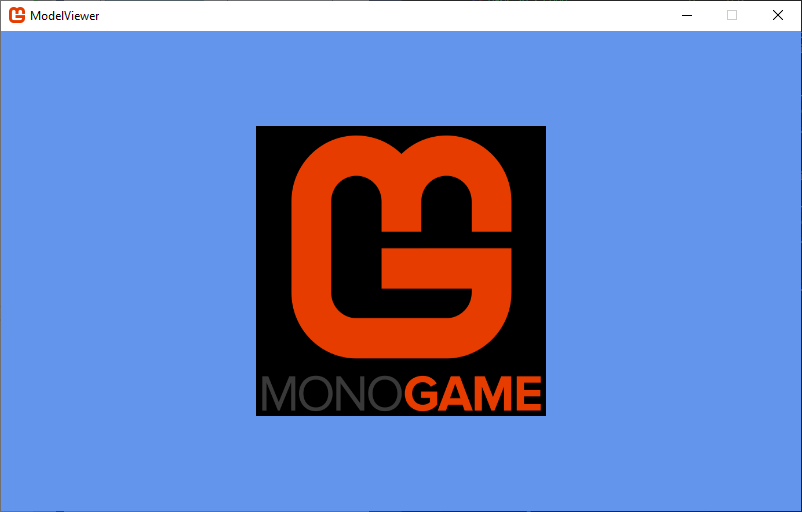
Notice that even though our texture has a transparent background, the background is rendered in black. Alpha blending is managed by the GraphicsDevice.BlendState, so we’ll need to tweak it before we draw the quad:
game.GraphicsDevice.BlendState = BlendState.AlphaBlend;Notice the BlendState class is the same one we used with SpriteBatch - and it works the same way.
If you run the game now, the logo’s background will be properly transparent.
Just as with the RasterizerState, it is a good idea to restore the old BlendState. So our final Quad.Draw() method might look like:
/// <summary>
/// Draws the quad
/// </summary>
public void Draw()
{
    // Cache the old blend state
    BlendState oldBlendState = game.GraphicsDevice.BlendState;

    // Enable alpha blending
    game.GraphicsDevice.BlendState = BlendState.AlphaBlend;

    // Apply our effect
    effect.CurrentTechnique.Passes[0].Apply();

    // Render the quad
    game.GraphicsDevice.DrawUserIndexedPrimitives<VertexPositionTexture>(
        PrimitiveType.TriangleList,
        vertices,   // The vertex collection
        0,          // The starting index in the vertex array
        4,          // The number of indices in the shape
        indices,    // The index collection
        0,          // The starting index in the index array
        2           // The number of triangles to draw
    );

    // Restore the old blend state
    game.GraphicsDevice.BlendState = oldBlendState;
}
This Quad is very similar to the sprites we’ve worked with already - in fact, the SpriteBatch is an optimized way of drawing a lot of textured quads. It also configures the graphics device and has its own effect, the SpriteEffect. Because of this optimization, in most cases, you’ll want to use the SpriteBatch for textured quads. But it is good to understand how it is drawing 2D sprites using the 3D pipeline.
Speaking of… so far we’ve only drawn 2D shapes in a 3D world. Let’s move on to an actual 3D shape next.