Particle Systems
One, Two, three, … BOOM!
One, Two, three, … BOOM!
Continuing our exploration of the SpriteBatch and Sprites, let’s turn our attention to particle systems. Particle systems leverage thousands of very small sprites to create the illusion of fire, smoke, explosions, precipitation, waterfalls, and many other interesting effects. They are a staple in modern game engines both to create ambience (i.e. fires and smoke) and to enhance gameplay (glowing sparkles around objects that can be interacted with). In this section, we’ll discuss the basics of how particle systems work, and iteratively build a particle system in MonoGame that can be used in your own games.
This approach is based on one that appeared in the original XNA samples, but has been modified for ease of use. You can see the original source updated for MonoGame on GithHub at https://github.com/CartBlanche/MonoGame-Samples/tree/master/ParticleSample
At the heart of a particle system is a collection of particles - tiny sprites that move independently of one another, but when rendered together, create the interesting effects we are after. To draw each individual particle, we need to know where on the screen it should appear, as well as the texture we should be rendering, and any color effects we might want to apply. Moreover, each frame our particles will be moving, so we’ll also want to be able to track information to make that process easier, like velocity, acceleration, and how long a particle has been “alive”.
With thousands of particles in a system, it behooves us to think on efficiency as we write this representation. The flyweight pattern is a great fit here - each particle in the system can be implemented as a flyweight. This means that we only store the information that is specific to that particle. Any information shared by all particles will instead be stored in the ParticleSystem class, which we’ll define separately.
We’ll start with a fairly generic properties that are used by most particle systems:
/// <summary>
/// A class representing a single particle in a particle system
/// </summary>
public class Particle
{
    /// <summary>
        /// The current position of the particle. Default (0,0).
        /// </summary>
        public Vector2 Position;

        /// <summary>
        /// The current velocity of the particle. Default (0,0).
        /// </summary>
        public Vector2 Velocity;

        /// <summary>
        /// The current acceleration of the particle. Default (0,0).
        /// </summary>
        public Vector2 Acceleration;

        /// <summary>
        /// The current rotation of the particle. Default 0.
        /// </summary>
        public float Rotation;

        /// <summary>
        /// The current angular velocity of the particle. Default 0.
        /// </summary>
        public float AngularVelocity;

        /// <summary>
        /// The current angular acceleration of the particle. Default 0.
        /// </summary>
        public float AngularAcceleration;

        /// <summary>
        /// The current scale of the particle.  Default 1.
        /// </summary>
        public float Scale = 1.0f;

        /// <summary>
        /// The current lifetime of the particle (how long it will "live").  Default 1s.
        /// </summary>
        public float Lifetime;

        /// <summary>
        /// How long this particle has been alive
        /// </summary>
        public float TimeSinceStart;

        /// <summary>
        /// The current color of the particle. Default White
        /// </summary>
        public Color Color = Color.White;

        /// <summary>
        /// If this particle is still alive, and should be rendered
        /// <summary>
        public bool Active => TimeSinceStart < Lifetime;
}
Here we’ve created fields to hold all information unique to the particle, both for updating and drawing it. Feel free to add or remove fields specific to your needs; this sampling represents only some of the most commonly used options. Note that we don’t define a texture here - all the particles in a particle system typically share a single texture (per the flyweight pattern), and that texture is maintained by the particle system itself.
We should also write an initialize function to initialize the values of a newly minted particle:
    /// <summary>
    /// Sets the particle up for first use, restoring defaults
    /// </summary>
    public void Initialize(Vector2 where)
    {
        this.Position = where;
        this.Velocity = Vector2.Zero;
        this.Acceleration = Vector2.Zero;
        this.Rotation = 0;
        this.AngularVelocity = 0;
        this.AngularAcceleration = 0;
        this.Scale = 1;
        this.Color = Color.White;
        this.Lifetime = 1;
        this.TimeSinceStart = 0f;
    }
We can also provide some overloads of this method to allow us to specify additional parameters (avoiding setting them twice - once to the default value and once to the expected value). An easy way to keep these under control is to provide default values. Unfortunately, we can only do this for values that can be determined at compile time (i.e. primitives), so the vectors cannot have a default value. Thus, we would need at least three overloads:
    /// <summary>
    /// Sets the particle up for first use
    /// </summary>
    public void Initialize(Vector2 position, Vector2 velocity, float lifetime = 1, float scale = 1, float rotation = 0, float angularVelocity = 0, float angularAcceleration = 0)
    {
        this.Position = position;
        this.Velocity = velocity;
        this.Acceleration = Vector2.Zero;
        this.Lifetime = lifetime;
        this.TimeSinceStart = 0f;
        this.Scale = scale;
        this.Rotation = rotation;
        this.AngularVelocity = angularVelocity;
        this.AngularAcceleration = angularAcceleration;
        this.Color = Color.White;
    }

    /// <summary>
    /// Sets the particle up for first use
    /// </summary>
    public void Initialize(Vector2 position, Vector2 velocity, Vector2 acceleration, float lifetime = 1, float scale = 1, float rotation = 0, float angularVelocity = 0, float angularAcceleration = 0)
    {
        this.Position = position;
        this.Velocity = velocity;
        this.Acceleration = acceleration;
        this.Lifetime = lifetime;
        this.TimeSinceStart = 0f;
        this.Scale = scale;
        this.Rotation = rotation;
        this.AngularVelocity = angularVelocity;
        this.AngularAcceleration = angularAcceleration;
        this.Color = Color.White;
    }

    /// <summary>
    /// Sets the particle up for first use
    /// </summary>
    public void Initialize(Vector2 position, Vector2 velocity, Vector2 acceleration, Color color, float lifetime = 1, float scale = 1, float rotation = 0, float angularVelocity = 0, float angularAcceleration = 0)
    {
        this.Position = position;
        this.Velocity = velocity;
        this.Acceleration = acceleration;
        this.Lifetime = lifetime;
        this.TimeSinceStart = 0f;
        this.Scale = scale;
        this.Rotation = rotation;
        this.AngularVelocity = angularVelocity;
        this.AngularAcceleration = angularAcceleration;
        this.Color = color;
    }
You might wonder why we don’t use a constructor for this initialization. The answer is because we’ll want to reuse the same Particle instance multiple times - we’ll see this soon, in the particle system. We’ll turn our attention to that next.
The next part of the particle system is the class representing the particle system itself. Like any other sprite-based strategy, this will involve both an Update() and Draw() method that must be invoked every time through the game loop. But ideally we’d like our particle systems to be an almost hands-off system - once it’s created, we can just let it do its thing without intervention. This is where the idea of game components from our architecture discussion can come into play - our particle system can inherit from the DrawableGameComponent class, which means it can be added to to our Game.Components list and the Game will handle invoking those methods for us every frame:
/// <summary>
/// A class representing a generic particle system
/// </summary>
public class ParticleSystem : DrawableGameComponent
{
    // TODO: Add fields, properties, and methods
}
Now we want to add generic functionality for a particle system, and in doing so, we want to make sure the system is as efficient as possible - remember, we may be updating and rendering thousands of sprites for each active particle system. We’ll keep this in mind throughout the design process. Let’s start by defining some fields that determine the behavior of the particle system. As we do this, we’ll stretch our use of the C# programming language in ways you may have not done so previously.
We’ll start by defining a couple of constants, AlphaBlendDrawOrder and AdditiveBlendDrawOrder:
    /// <summary>
    /// The draw order for particles using Alpha Blending
    /// </summary>
    /// <remarks>
    /// Particles drawn using additive blending should be drawn on top of
    /// particles that use regular alpha blending
    /// </remarks>
    public const int AlphaBlendDrawOrder = 100;

    /// <summary>
    /// The draw order for particles using Additive Blending
    /// </summary>
    /// <remarks>
    /// Particles drawn using additive blending should be drawn on top of
    /// particles that use regular alpha blending
    /// </remarks>
    public const int AdditiveBlendDrawOrder = 200;
Remember that the DrawOrder property of a DrawableGameComponent determines the order in which they are drawn. These constants represent values we can reference when setting that draw order, based on what kind of alpha blending we are using.
To use our particle systems, we’ll need both a ContentManager and SpriteBatch instance. We could create one for each particle system, but that creates a lot of unnecessary objects. Alternatively, we could share the ones created in our Game class, which would be the most efficient approach. However, that does mean those need to be made public, and we need to pass the derived class into this one. As a comfortable middle ground, we’ll create protected static fields for these, so that all particle systems share a single set:
    /// <summary>
    /// A SpriteBatch to share amongst the various particle systems
    /// </summary>
    protected static SpriteBatch spriteBatch;

    /// <summary>
    /// A ContentManager to share amongst the various particle systems
    /// </summary>
protected static ContentManager contentManager;This class needs to hold our collection of particles, and in keeping with the data locality pattern, we’d like these to be stored sequentially. An array is therefore a great fit. Add it as a private field to the class:
    /// <summary>
    /// The collection of particles
    /// </summary>
    Particle[] particles;
We’ll also use a Queue (from System.Collections.Generic) to hold references to unused particles. This way we can avoid re-creating particles and creating a glut in memory that will result in the garbage collector running often. We could store a reference directly to the particle location, or an index indicating its position in the array. We’ll opt for the former here, as it provides some benefits in usage:
    /// <summary>
    /// A Queue containing indices of unused particles in the Particles array
    /// </summary>
    Queue<Particle> freeParticles;
As we said in the discussion of the Particle class, in using the Flyweight Pattern the actual texture will be held by our ParticleSystem, so let’s add a private variable to hold that:
    /// <summary>
    /// The texture this particle system uses
    /// </summary>
    Texture2D texture;
We’ll also keep track of an origin vector for when we draw the textures:
    /// <summary>
    /// The origin when we're drawing textures
    /// </summary>
Vector2 origin;It can also be useful to know how many particles are currently available (free) in the system. We can expose this value with a public property:
    /// <summary>
    /// The available particles in the system
    /// </summary>
public int FreeParticleCount => freeParticles.Count;A slightly unique approach we’ll adopt here is defining a number of protected fields that essentially define the behavior of the particle system. These represent the information that is shared amongst all particles in the system. We make them protected so that derived particle systems can adjust them to suit the needs of the effect we are trying to create. For example the blendState determines how a texture is drawn, and the textureFilename helps define which texture to use:
    /// <summary>The BlendState to use with this particle system</summary>
    protected BlendState blendState = BlendState.AlphaBlend;

    /// <summary>The filename of the texture to use for the particles</summary>
    protected string textureFilename;
We’ll also use a min/max pair to determine the number of particles to activate in the system each time we add particles:
    /// <summary>The minimum number of particles to add when AddParticles() is called</summary>
    protected int minNumParticles;

    /// <summary>The maximum number of particles to add when AddParticles() is called</summary>
    protected int maxNumParticles;
Like the Particle class’ fields, these too could be tweaked to meet the needs of your game.
As the DrawableGameComponent has a constructor requiring a Game instance, we must provide our own constructor that passes that along by invoking base() (which runs the constructor of the base object). We’ll also want to initialize our particles array and freeParticles queue, which means we need to know the maximum number of particles we’ll allow in this particle system. Therefore, we’ll add that as a second parameter.
    /// <summary>
    /// Constructs a new instance of a particle system
    /// </summary>
    /// <param name="game"></param>
    public ParticleSystem(Game game, int maxParticles) : base(game)
    {
        // Create our particles
        particles = new Particle[maxParticles];
        for (int i = 0; i < particles.Length; i++)
        {
            particles[i] = new Particle();
        }
        // Add all free particles to the queue
        freeParticles = new Queue<Particle>(particles);
        // Run the InitializeConstants hook
        InitializeConstants();
    }
Since none of the particles are in use, we’ll also initialize our Queue with all the newly created particles. This has the helpful side effect of allocating enough memory to hold a reference to each particle in our array, ensuring we never need to re-allocate.
Finally, we invoke InitializeConstants(), a protected method that is intended to be used as a hook - a method that can be overridden to inject your own functionality into the class. Let’s look at this, and the other hook methods next
Now that we have the structure of the class put together, let’s start thinking about the functionality. We’ll write a couple of virtual hook methods to define the default behavior we expect from our particles - most notably setting those protected constant values, initializing new active particles to the particle system, and then updating those particles each frame. We’ll make these methods virtual so we can override them in derived classes, but also provide a base implementation when one makes sense. Let’s start with InitializeConstants() we invoked above:
    /// <summary>
    /// Used to do the initial configuration of the particle engine.  The
    /// protected constants `textureFilename`, `minNumParticles`, and `maxNumParticles`
    /// should be set in the override.
    /// </summary>
    protected virtual void InitializeConstants() { }
If the textureFilename is not set here, we’ll encounter a runtime error, so this must be overridden in the derived classes. As a possible way to emphasize this, we could instead declare this method, and the ParticleSystem class as abstract.
In contrast, the InitializeParticle() hook method will provide some logic that could potentially be used, but will also probably be overridden in most cases:
    /// <summary>
    /// InitializeParticle randomizes some properties for a particle, then
    /// calls initialize on it. It can be overridden by subclasses if they
    /// want to modify the way particles are created.
    /// </summary>
    /// <param name="p">the particle to initialize</param>
    /// <param name="where">the position on the screen that the particle should be
    /// </param>
    protected virtual void InitializeParticle(Particle p, Vector2 where)
    {
        // Initialize the particle with default values
        p.Initialize(where);
    }
Similarly, we will supply a default implementation for updating a particle. Our default approach is based on Newtonian physics:
    /// <summary>
    /// Updates the individual particles.  Can be overridden in derived classes
    /// </summary>
    /// <param name="particle">The particle to update</param>
    /// <param name="dt">The elapsed time</param>
    protected virtual void UpdateParticle(Particle particle, float dt)
    {
        // Update particle's linear motion values
        particle.Velocity += particle.Acceleration * dt;
        particle.Position += particle.Velocity * dt;

        // Update the particle's angular motion values
        particle.AngularVelocity += particle.AngularAcceleration * dt;
        particle.Rotation += particle.AngularVelocity * dt;

        // Update the time the particle has been alive
        particle.TimeSinceStart += dt;
    }
This implementation works for a wide variety of particle systems, but it can be overridden by a derived particle system if something different is needed.
Now we can tackle the methods from DrawableGameComponent, which we’ll need to replace with our own custom overrides. First, we’ll load the texture in our LoadContent:
    /// <summary>
    /// Override the base class LoadContent to load the texture. once it's
    /// loaded, calculate the origin.
    /// </summary>
    /// <throws>A InvalidOperationException if the texture filename is not provided</throws>
    protected override void LoadContent()
    {
        // create the shared static ContentManager and SpriteBatch,
        // if this hasn't already been done by another particle engine
        if (contentManager == null) contentManager = new ContentManager(Game.Services, "Content");
        if (spriteBatch == null) spriteBatch = new SpriteBatch(Game.GraphicsDevice);

        // make sure sub classes properly set textureFilename.
        if (string.IsNullOrEmpty(textureFilename))
        {
            string message = "textureFilename wasn't set properly, so the " +
                "particle system doesn't know what texture to load. Make " +
                "sure your particle system's InitializeConstants function " +
                "properly sets textureFilename.";
            throw new InvalidOperationException(message);
        }
        // load the texture....
        texture = contentManager.Load<Texture2D>(textureFilename);

        // ... and calculate the center. this'll be used in the draw call, we
        // always want to rotate and scale around this point.
        origin.X = texture.Width / 2;
        origin.Y = texture.Height / 2;

        base.LoadContent();
    }
In addition to loading the texture, we make sure that our shared ContentManager and SpriteBatch are created, and calculate the Origin for the texture.
Our Update() method iterates over the particles and updates each one, invoking our UpdateParticle() method:
    /// <summary>
    /// Overriden from DrawableGameComponent, Update will update all of the active
    /// particles.
    /// </summary>
    public override void Update(GameTime gameTime)
    {
        // calculate dt, the change in the since the last frame. the particle
        // updates will use this value.
        float dt = (float)gameTime.ElapsedGameTime.TotalSeconds;

        // go through all of the particles...
        foreach (Particle p in particles)
        {

            if (p.Active)
            {
                // ... and if they're active, update them.
                UpdateParticle(p, dt);
                // if that update finishes them, put them onto the free particles
                // queue.
                if (!p.Active)
                {
                    freeParticles.Enqueue(p);
                }
            }
        }

        base.Update(gameTime);
    }
Notice that we only update the active particles. And if a particle is no longer active after we update it, we add it to the freeParticles queue to be reused.
Similarly, our Draw() method draws only the active particles:
    /// <summary>
    /// Overriden from DrawableGameComponent, Draw will use the static
    /// SpriteBatch to render all of the active particles.
    /// </summary>
    public override void Draw(GameTime gameTime)
    {
        // tell sprite batch to begin, using the BlendState specified in
        // initializeConstants
        spriteBatch.Begin(blendState: blendState);

        foreach (Particle p in particles)
        {
            // skip inactive particles
            if (!p.Active)
                continue;

            spriteBatch.Draw(texture, p.Position, null, p.Color,
                p.Rotation, origin, 1, SpriteEffects.None, 0.0f);
        }

        spriteBatch.End();

        base.Draw(gameTime);
    }
Note that we provide a SpriteBlendState to the SpriteBatch.Begin() call, as different blend states can replicate different effects. We’ll see this in play soon.
Finally, we need some methods to add active particles into our system (otherwise, nothing will ever be drawn)! We’ll create two generic protected methods for doing this, which can be utilized by the derived particle system classes. We’ll start with one that adds particles at a specific position (defined by a Vector2):
    /// <summary>
    /// AddParticles's job is to add an effect somewhere on the screen. If there
    /// aren't enough particles in the freeParticles queue, it will use as many as
    /// it can. This means that if there not enough particles available, calling
    /// AddParticles will have no effect.
    /// </summary>
    /// <param name="where">where the particle effect should be created</param>
    protected void AddParticles(Vector2 where)
    {
        // the number of particles we want for this effect is a random number
        // somewhere between the two constants specified by the subclasses.
        int numParticles =
            RandomHelper.Next(minNumParticles, maxNumParticles);

        // create that many particles, if you can.
        for (int i = 0; i < numParticles && freeParticles.Count > 0; i++)
        {
            // grab a particle from the freeParticles queue, and Initialize it.
            Particle p = freeParticles.Dequeue();
            InitializeParticle(p, where);
        }
    }
This approach is especially useful for effects like explosions, which start with a bunch of particles, but don’t create more.
We may instead want to supply a region of screen space (say, a rectangle) to fill with particles:
    /// <summary>
    /// AddParticles's job is to add an effect somewhere on the screen. If there
    /// aren't enough particles in the freeParticles queue, it will use as many as
    /// it can. This means that if there not enough particles available, calling
    /// AddParticles will have no effect.
    /// </summary>
    /// <param name="where">where the particle effect should be created</param>
    protected void AddParticles(Rectangle where)
    {
        // the number of particles we want for this effect is a random number
        // somewhere between the two constants specified by the subclasses.
        int numParticles =
            RandomHelper.Next(minNumParticles, maxNumParticles);

        // create that many particles, if you can.
        for (int i = 0; i < numParticles && freeParticles.Count > 0; i++)
        {
            // grab a particle from the freeParticles queue, and Initialize it.
            Particle p = freeParticles.Dequeue();
            InitializeParticle(p, RandomHelper.RandomPosition(where));
        }
    }
This works well for something like rain and snow - we can add it just off-screen (say above the top of the screen) and let it flow over the screen based on its direction and speed.
To create a particle system, we’ll derive a class from the ParticleSystem class and override its InitializeConstants(), and possibly its InitializeParticle() and UpdateParticle() methods. Let’s look at some examples:
This is a simplistic implementation of rain that is spawned in a predefined rectangle and falls to the bottom of the screen. The texture we’ll use is this drop
We start by defining a class extending the ParticleSystem:
/// <summary>
/// A class embodying a particle system emulating rain
/// </summary>
public class RainParticleSystem : ParticleSystem
{
    // TODO: Add Implementation
}
Inside this class, we’ll define a private Rectangle field to represent where the rain begins:
    // The source of the rain
    Rectangle _source;
And a boolean property to start and stop the rain:
    /// <summary>
    /// Determines if it is currently raining or not
    /// </summary>
    public bool IsRaining { get; set; } = true;
We’ll add a constructor that must also invoke the ParticleSystem constructor. We’ll supply the Rectangle to use for the source, and hard-code a maximum amount of particles (this may need to be tweaked for larger/smaller rain effects - if there aren’t enough particles there will be gaps in the rain):
    /// <summary>
    /// Constructs the rain particle system
    /// </summary>
    /// <param name="game">The game this particle system belongs to</param>
    /// <param name="source">A rectangle defining where the raindrops start</param>
    public RainParticleSystem(Game game, Rectangle source) : base(game, 5000)
    {
        _source = source;
    }
We override the InitializeConstants() to set the number of particles that should be spawned with an AddParticles() method call, and the name of the texture to use:
    /// <summary>
    /// Initialize the particle system constants
    /// </summary>
    protected override void InitializeConstants()
    {
        // We'll use a raindrop texture
        textureFilename = "opaque-drop";

        // We'll spawn a large number of particles each frame
        minNumParticles = 10;
        maxNumParticles = 20;
    }
Then we override the InitializeParticle() method of the base ParticleSystem to provide custom behavior for our rain particles. Basically, they just fall straight down. However, you could expand on this to add wind, etc.:
    /// <summary>
    /// Initializes individual particles
    /// </summary>
    /// <param name="p">The particle to initialize</param>
    /// <param name="where">Where the particle appears</param>
    protected override void InitializeParticle(Particle p, Vector2 where)
    {
        base.InitializeParticle(p, where);

        // rain particles fall downward at the same speed
        p.Velocity = Vector2.UnitY * 260;

        // rain particles have already hit terminal velocity,
        // and do not spin, so we don't need to set the other
        // physics values (they default to 0)

        // we'll use blue for the rain
        p.Color = Color.Blue;

        // rain particles are small
        p.Scale = 0.1f;

        // rain particles need to reach the bottom of the screen
        // it takes about 3 seconds at current velocity/screen size
        p.Lifetime = 3;
    }
Finally, we’ll override the Update() method from DrawableGameComponent to add spawning new droplets every frame within our source rectangle:
    /// <summary>
    /// Override the default DrawableGameComponent.Update method to add
    /// new particles every frame.
    /// </summary>
    /// <param name="gameTime">An object representing the game time</param>
    public override void Update(GameTime gameTime)
    {
        base.Update(gameTime);

        // Spawn new rain particles every frame
        if(IsRaining) AddParticles(_source);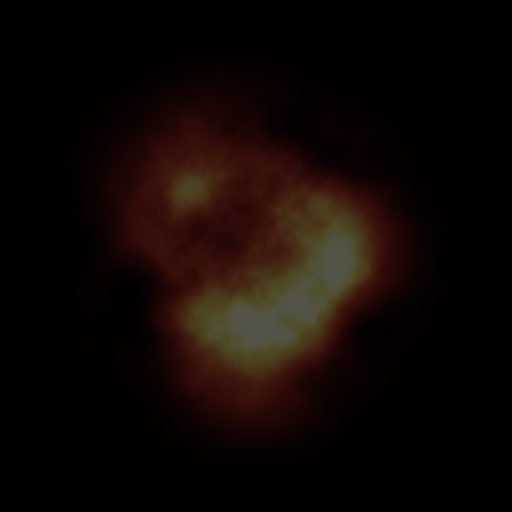
}Another particle effect we see often in games is explosions. Let’s create an effect that will let us create explosions at specific points on-screen as our game is running. We’ll use this explosion texture.
We again start by defining a new class derived from ParticleSystem:
/// <summary>
/// A GameComponent providing a particle system to render explosions in a game
/// </summary>
public class ExplosionParticleSystem : ParticleSystem
{
    // TODO: Add implementation
}
Our constructor will invoke the base ParticleSystem constructor, but we’ll also ask for the maximum number of anticipated explosions the system needs to handle. As each explosion needs 20-25 particles, we’ll multiply that value by 25 to determine how many particles the system needs to have:
    /// <summary>
    /// Constructs a new explosion particle system
    /// </summary>
    /// <param name="game">The game to render explosions in</param>
    /// <param name="maxExplosions">The anticipated maximum number of explosions on-screen at one time</param>
    public ExplosionParticleSystem(Game game, int maxExplosions)
        : base(game, maxExplosions * 25)
    {
    }
The explosion will use an explosion texture, 20-25 particles per explosion, and additive blending. This blend mode means if two particles overlap, their colors are added together. As more particle combine, the combined color gets closer to white, meaning the center of the explosion will be bright white, but as the particles spread out they will get redder (as the texture is red and yellow). We’ll set these up by overriding the ParticleSystem.InitializeConstants() method:
    /// <summary>
    /// Set up the constants that will give this particle system its behavior and
    /// properties.
    /// </summary>
    protected override void InitializeConstants()
    {
        textureFilename = "explosion";

        // We'll use a handful of particles for each explosion
        minNumParticles = 20;
        maxNumParticles = 25;

        // Additive blending is very good at creating fiery effects.
        blendState = BlendState.Additive;
        DrawOrder = AdditiveBlendDrawOrder;
    }
We’ll also override ParticleSystem.InitializeParticle() to provide the default starting state for all particles:
    /// <summary>
    /// Initializes the particle <paramref name="p"/>
    /// </summary>
    /// <param name="p">The particle to initialize</param>
    /// <param name="where">Where the particle begins its life</param>
    protected override void InitializeParticle(Particle p, Vector2 where)
    {
        base.InitializeParticle(p, where);

        // Explosion particles move outward from the point of origin in all directions,
        // at varying speeds
        p.Velocity = RandomHelper.RandomDirection() * RandomHelper.NextFloat(40, 500);

        // Explosions should be relatively short lived
        p.Lifetime = RandomHelper.NextFloat(0.5f, 1.0f);

        // Explosion particles spin at different speeds
        p.AngularVelocity = RandomHelper.NextFloat(-MathHelper.PiOver4, MathHelper.PiOver4);

        // Explosions move outwards, then slow down and stop because of air resistance.
        // Let's set acceleration so that when the particle is at max lifetime, the velocity
        // will be zero.

        // We'll use the equation vt = v0 + (a0 * t). (If you're not familiar with
        // this, it's one of the basic kinematics equations for constant
        // acceleration, and basically says:
        // velocity at time t = initial velocity + acceleration * t)
        // We'll solve the equation for a0, using t = p.Lifetime and vt = 0.
        p.Acceleration = -p.Velocity / p.Lifetime;
    }
And we’ll also override the ParticleSystem.Update() method, so we can use custom logic to change the color and scale of the particle over its lifetime:
    /// <summary>
    /// We override the UpdateParticle() method to scale and colorize
    /// explosion particles over time
    /// </summary>
    /// <param name="particle">the particle to update</param>
    /// <param name="dt">the time elapsed between frames</param>
    protected override void UpdateParticle(Particle particle, float dt)
    {
        base.UpdateParticle(particle, dt);

        // normalized lifetime is a value from 0 to 1 and represents how far
        // a particle is through its life. 0 means it just started, .5 is half
        // way through, and 1.0 means it's just about to be finished.
        // this value will be used to calculate alpha and scale, to avoid
        // having particles suddenly appear or disappear.
        float normalizedLifetime = particle.TimeSinceStart / particle.Lifetime;

        // we want particles to fade in and fade out, so we'll calculate alpha
        // to be (normalizedLifetime) * (1-normalizedLifetime). this way, when
        // normalizedLifetime is 0 or 1, alpha is 0. the maximum value is at
        // normalizedLifetime = .5, and is
        // (normalizedLifetime) * (1-normalizedLifetime)
        // (.5)                 * (1-.5)
        // .25
        // since we want the maximum alpha to be 1, not .25, we'll scale the
        // entire equation by 4.
        float alpha = 4 * normalizedLifetime * (1 - normalizedLifetime);
        particle.Color = Color.White * alpha;

        // make particles grow as they age. they'll start at 75% of their size,
        // and increase to 100% once they're finished.
        particle.Scale = particle.Scale * (.75f + .25f * normalizedLifetime);
    }
And finally, we need to allow the game to place explosion effects, so we’ll add a public method to do so:
    /// <summary>
    /// Places an explosion at location <paramref name="where"/>
    /// </summary>
    /// <param name="where">The location of the explosion</param>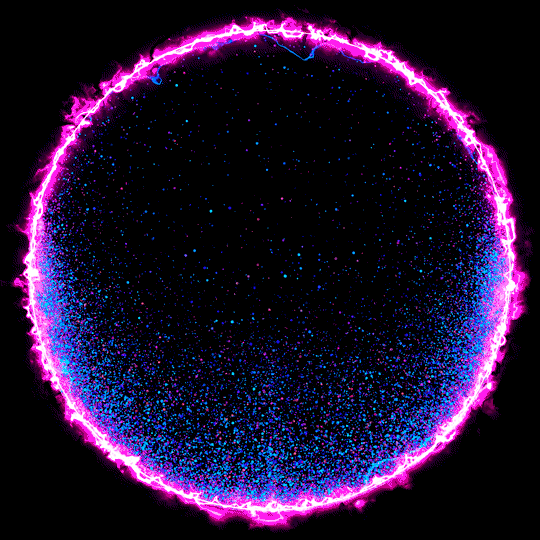
public void PlaceExplosion(Vector2 where) => AddParticles(where);Another common use for particle systems is to have them emitted from an object in the game - i.e. the player, an enemy, or something the player can interact with. Let’s explore this idea by making a particle system that emits colored sparks that fall to the ground, like pixie dust. For this particle system, we’ll use this particle texture with a circular gradient.
Let’s start by defining an interface that can serve as our emitter representation. With an emitter, the particle starts in the same place as the emitter, so need to know its location in the game world, so a Vector2 we’ll name Position. Also, if the emitter is moving, we need to know the velocity it is moving at, as the particle will also start with that as its initial velocity, so we’ll add a second Vector2 named Velocity:
/// <summary>
/// An interface for the emitter of a particle system
/// </summary>
public interface IParticleEmitter
{
    /// <summary>
    /// The position of the emitter in the world
    /// </summary>
    public Vector2 Position { get; }

    /// <summary>
    /// The velocity of the emitter in the world
    /// </summary>
    public Vector2 Velocity { get; }
}
Then we start the particle system the same way as before, by defining a class that inherits from ParticleSystem:
/// <summary>
/// A particle system that drops "pixie dust" from an emitter
/// </summary>
public class PixieParticleSystem : ParticleSystem
{
    // TODO: Add implementation
}
We’ll want a list of emitters of our IParticleEmitter class so we know where to spawn those particles (this way we can have multiple pixies!):
    /// <summary>
    /// The emitter for this particle system
    /// </summary>
    public List<IParticleEmitter> Emitters { get; } = new List<IParticleEmitter>();
And we’ll construct our particle system with an expected number of pixies to support (with each using around 200 particles):
    /// <summary>
    /// Constructs a new PixieParticleSystem to support up to <paramref name="maxPixies"/> pixies
    /// </summary>
    /// <param name="game">The game this system belongs to</param>
    /// <param name="maxPixies">The maximum number of pixies to support</param>
    public PixieParticleSystem(Game game, int maxPixies): base(game, 200 * maxPixies) { }
We override ParticleSystem.InitializeConstants() to set up the particle system values:
    /// <summary>
    /// Set up the constants that will give this particle system its behavior and
    /// properties.
    /// </summary>
    protected override void InitializeConstants()
    {
        textureFilename = "particle";

        minNumParticles = 2;
        maxNumParticles = 5;

        blendState = BlendState.Additive;
        DrawOrder = AdditiveBlendDrawOrder;
    }
And ParticleSystem.InitializeParticle() to initialize individual particles:
    /// <summary>
    /// Initialize the particles
    /// </summary>
    /// <param name="p">The particle to initialize</param>
    /// <param name="where">Where the particle initially appears</param>
    protected override void InitializeParticle(Particle p, Vector2 where)
    {
        base.InitializeParticle(p, where);

        // The particle's initial velocity is the same as the emitter's
        p.Velocity = _emitter.Velocity;

        // The particle is affected by gravity
        p.Acceleration.Y = 400;

        // Randomize the particle size
        p.Scale = RandomHelper.NextFloat(0.1f, 0.5f);

        // Randomize the lifetime of the particles
        p.Lifetime = RandomHelper.NextFloat(0.1f, 1.0f);

        // The particle also is affected by air resistance;
        // lets' scale its X acceleration so it stops moving horizontally by the time it dies
        p.Acceleration.X = -p.Velocity.X / p.Lifetime;

    }
Since we’ll just use the build-in physics, we don’t need to override ParticleSystem.UpdateParticle(). But we will need to add new particles every frame, so we’ll override GameComponent.Update() to do so:
    /// <summary>
    /// Override Update() to add some particles each frame
    /// </summary>
    /// <param name="gameTime">An object representing game time</param>
    public override void Update(GameTime gameTime)
    {
        base.Update(gameTime);

        // Add particles at the emitter position
        AddParticles(_emitter.Position);
    }
This particle system can now be attached to any object implementing the IParticleEmitter interface, and the particles will be spawned wherever that emitter is in the game world!
Now that we’ve defined some example particle systems, let’s see how we can put them into use.
Let’s start with our RainParticleSystem, and add rain that runs down the screen. Since we don’t need to start/stop the rain for this simple example, all we need to do is construct the particle system and add it to the Game.Components list in the Game.Initialize() method:
    RainParticleSystem rain = new RainParticleSystem(this, new Rectangle(100, -10, 500, 10));
Components.Add(rain);Because the RainParticleSystem inherits from DrawableGameComponent, we can add it to the Game.Components list. This means the game will automatically call its LoadContent(), Update() and Draw() methods for us. We could instead not add it to the components list, and manually invoke these ourselves.
Let’s say we want an explosion to appear on-screen wherever we click our mouse. We’ll use the ExplosionParticleSystem from the previous section to accomplish this.
First, because we will need to access this system in multiple methods of Game we’ll need to create a field to represent it in our Game class. We’ll also want to keep track of the previous mouse state:
    ExplosionParticleSystem explosions;
    MouseState oldMouseState;
And initialize it in our Game.Initialize() method:
    explosions = new ExplosionParticleSystem(this, 20);
    Components.Add(explosions);
We set the particle system to use up to 20 explosions on-screen at a time (as it takes about a second for an explosion to finish, this is probably more than enough, unless we have a very explosive game).
Next, we add some logic to our Update() method to update the mouse state, and determine if we need to place an explosion:
    MouseState newMouseState = Mouse.GetState();
    Vector2 mousePosition = new Vector2(mouseState.X, mouseState.Y);

    if(newMouseState.Left == ButtonState.Down && oldMouseState.Left == ButtonState.Up)
    {
        explosions.PlaceExplosion(mousePosition);
    }
Now, whenever we click our mouse, we’ll see an explosion spawn!
Rather than declare a class to represent the mouse and go through that effort, let’s just implement the IParticleEmitter interface directly on our Game. Thus, we need to implement Position and Velocity properties:
    public Vector2 Position { get; set; }

    public Vector2 Velocity { get; set; }
We’ll set these in the Game.Update() method, based on our mouse state:
    Velocity = mousePosition - Position;
    Position = mousePosition;
And we’ll need to add the particle system in the Game.Initialize() method, and set its emitter to the Game instance:
    PixieParticleSystem pixie = new PixieParticleSystem(this, this);
    Components.Add(pixie);
Now the mouse should start dripping a trail of sparks!
In this chapter we examined the idea of particle systems, which draw a large number of sprites to create visual effects within the game. We also went over the design of such a system we can use with MonoGame, leveraging the DrawableGameComponent base class and design approaches like hook methods, to make a relatively hands-off but flexible approach to create new custom particle systems. We also created three example particle systems to emulate rain, explosions, and a trail of sparks. You can use these as a starting point for creating your own custom particle systems to meet the needs of your games.