Git Commit & Push
tl;dr
If you are familiar with using Git, here is the short version:
git status
git add .
# check that the correct files are added
git status
# update the commit message below
git commit -m "Commit Message Here"
git push
That will commit and push your changes to GitHub, which can now be found in the repository for this assignment.
At this point, we’ve written some code for our application. Now is a great time to save that code to our git repository and push it to GitHub in the cloud. By doing so, we’ll make sure that our code is not accidentally lost, but we can also make it quick and easy to restore a previous version of our code at any time.
Git
At this point, you might be pretty confused about Git, GitHub, repositories, cloning, and everything that we’ve done so far. That’s fine! We’ve found that one of the best ways to learn how to use Git and GitHub is simply by doing it and observing what it does, then slowly building up your knowledge by trying new things. However, let’s take a few minutes to explain some of the basics so you know what we are talking about.
Git is the name of a “distributed version control system” that was created initially by Linus Torvalds (the originator of the Linux operating system kernel). It was meant to solve a lot of the problems that he experienced when working with other version control systems of the time, such as Subversion and Mercurial.
Git stores data in several different places, and there are several Git commands to transfer the data between those places. It is best summarized in this diagram:
 ^[https://commons.wikimedia.org/w/index.php?title=File:Git_data_flow_simplified.svg&oldid=511614601]
Let’s look at Git from the bottom up and see how it works.
Working Directory
For this project, our working directory in Git is the java folder where we’ve been storing all of our code. This is the folder that we cloned our initial repository from GitHub Classroom into, and its where we’re actually doing all of the coding. At this point, we’ve created several new files and directories, but we’ve not added them to our local Git repository yet. Before we can do that, we must discuss one other thing - the .gitignore file.
.gitignore File
You may have noticed already that Gradle created a special file called .gitignore in the java directory, or in the root of our working directory for Git. That file contains information that tells Git what files we want to “ignore” - files that Git shouldn’t try to save. Typically we only want Git to store the source code for our program, and not any compiled classes, reports, or temporary files.
Currently, our .gitignore file contains the following content:
# Ignore Gradle project-specific cache directory
.gradle

# Ignore Gradle build output directory
build
These are simply the names of files or folders, but may also include wildcards like an asterisk * as well. Anytime we want to ignore anything in our project we can just add its file or folder name or path to this file, and Git will dutifully ignore it. So, let’s add one more entry to this file, which may be useful later:
# Ignore Gradle project-specific cache directory
.gradle

# Ignore Gradle build output directory
build

# Ignore project files
.project
Sometimes Gradle will create files named .project in our code, we want Git to ignore them. So, we can just add that entry to our .gitignore file to handle that.
Screenshot Inconsistencies
Some of the screenshots in this section were taken later in the creation of this project, so the exact files listed may be a bit different in your version. That’s fine - just use these as a baseline for the overall look and feel of the process, and feel free to ask questions if you aren’t sure things are correct.
Adding to the Index
The next level of Git is the index, sometimes referred to as the stage. The index contains a list of files that we’ve modified and would like to store in our local repository. We can add and remove items from the index at any time, and it won’t affect our working directory.
To see what is in the index, we can use the following command from within the java folder:
git statusYou should see output similar to this:
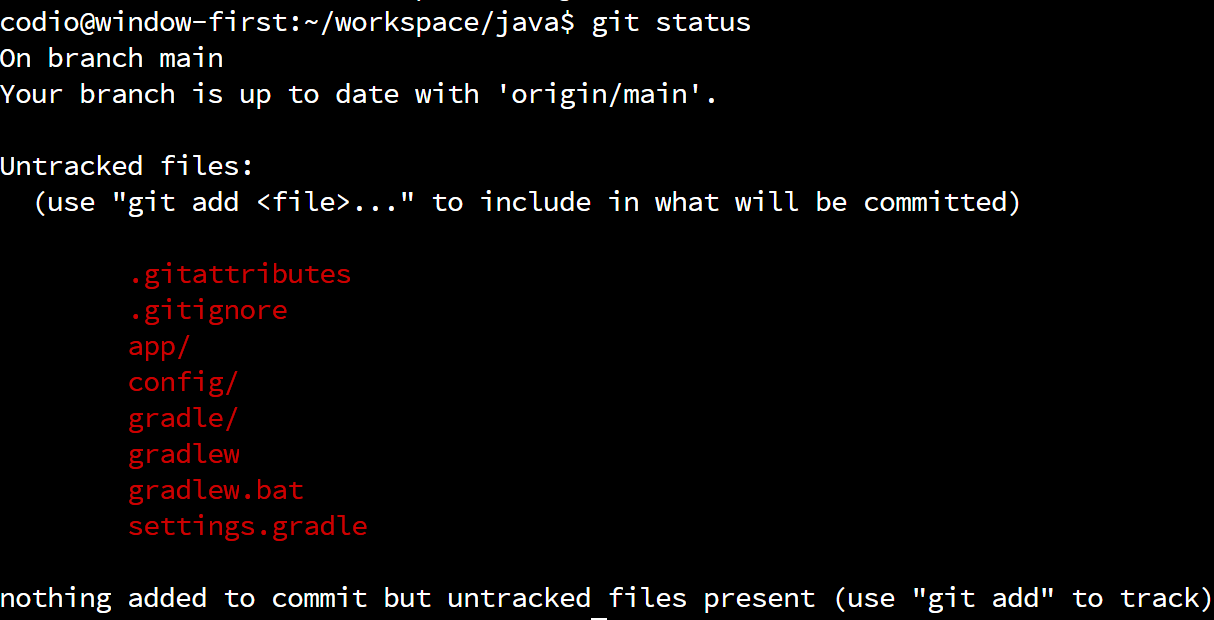
At this point, all of the files are “untracked” and listed in red, which means that they aren’t part of the index. So, we need to add files to the index before we can commit them. To do that, we can use the git add command, followed by the files we’d like to add to the index. Of course, naming each file individually can be time consuming, so we can use the following shortcut to add all of the untracked files in our working directory to the index:
git add .In Linux, a single period . on the command line refers to the current working directory, so in this case it will add all of the files in the java folder to the Git index. When we run that command, we won’t see any output. But, if we run this command again:
git statusWe should now see a whole bunch of files listed as “Changes to be committed”:
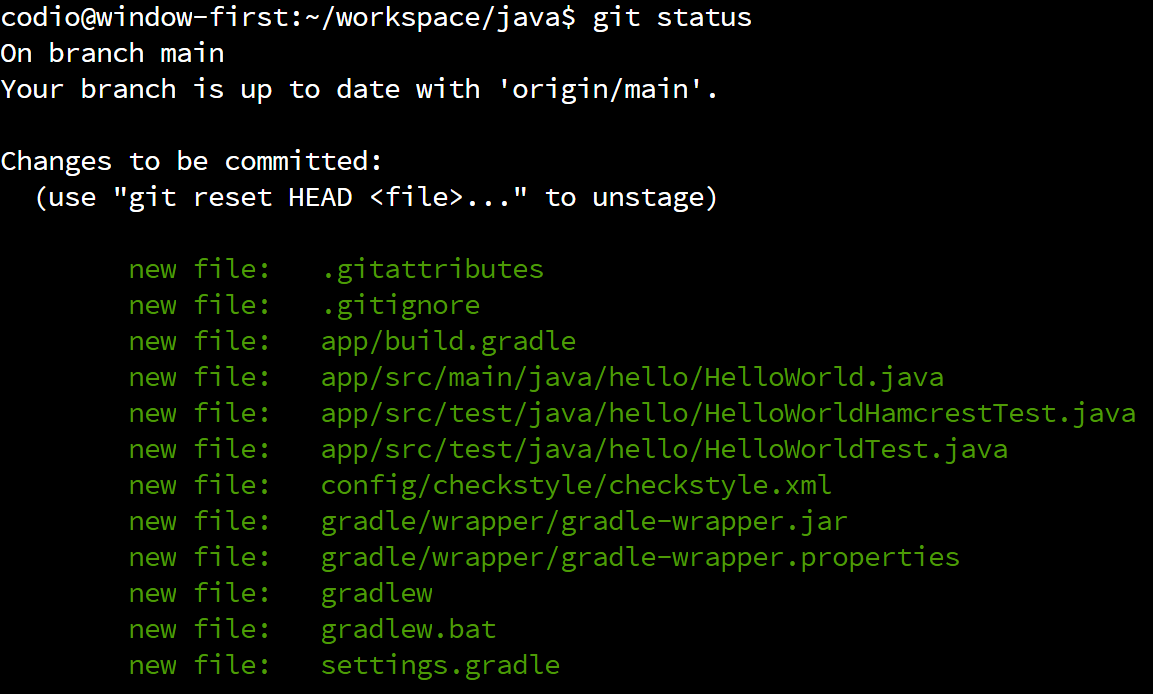
Those files listed in green are now “staged” and ready to commit to our local repository. So, before we move on to the next step, we’ll want to make sure that all the files we changed are included in the list of files to be committed. In this case, we see our HelloWorld.java file, as well as the build.gradle file we modified in the previous step. We may also see additional files that were created by Gradle - we’ll want to make sure those are included as well.
Committing to the Local Repository
Once we’ve added the new and updated files to the index, the next step is to commit, or save, those files in our local repository. This will permanently^[There are ways to undo a commit once it is made, but in general it is poor practice to do so unless a major mistake has been made. For now, we’ll consider it permanent.] save these changes in our local repository, helping us keep track of the changes we’ve made to the code.
To commit to the local repository, we will use the git commit command. When committing to a repository, you are required to include a message describing the changes you made to the code. At this point, the commit message is just for your use, but it is always a good idea to make your commit messages very concise and descriptive so that it is helpful for you later on if you need to go back and restore this version of the code.
There are two ways to use the git commit command. Let’s briefly cover both of them, just so you can choose your preferred method.
Using Nano
The first method just calls for you to execute the following command:
git commitWhen you do, your terminal will open a text editor program called Nano, which you can use to place your commit message at the top of the file. It will look something like this:
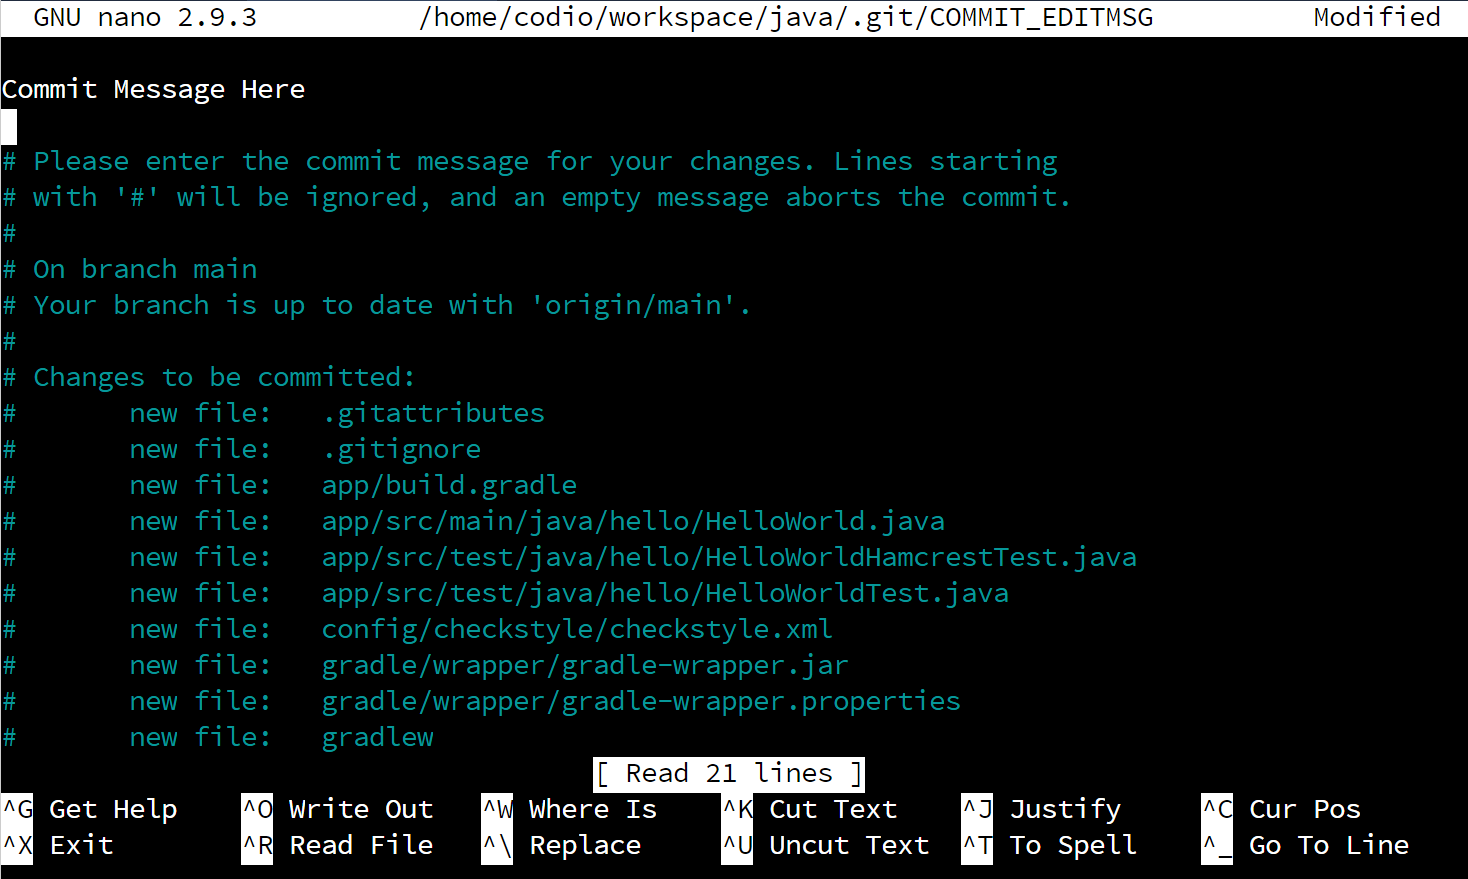
As you can see, we’ve already entered the message “Commit Message Here” at the top of the file. Once we’ve done that, we need to save and close the file. To do that, follow these steps:
- Press CTRL+X to exit Nano. That will open a message at the bottom that says “Save modified buffer?”
- Press Y to respond “yes”. That will change the message to “File Name to Write:”
- Press ENTER to save the file using the name given.
Using the Command Line
Commit messages can also be specified directly on the terminal using the -m command line option. For example, if we wish for our commit message to be “Commit Message Here” we would use the following command:
git commit -m "Commit Message Here"This is a quick and easy way to add a commit message to our commit without using a text editor.
Successful Commit
Once we’ve specified our commit message, Git will commit our changes to the local repository. We should see output similar to this if it was successful:
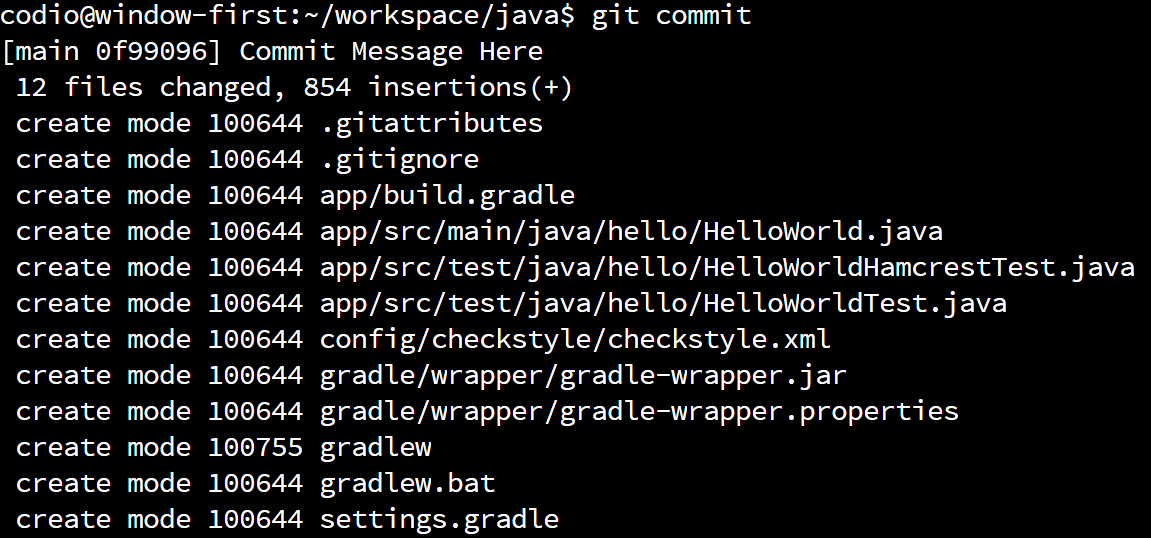
If so, we’ve just made our first commit to our local repository. Now, if we ever need to restore our code back to that point, we can! As we continue to work with Git in this course, we’ll explore some of these more advanced features. For now, we’ll just us it to track our work.
Pushing to a Remote
The last step we can take is to push our local repository to a remote location, called a remote. GitHub is a great example of a remote that works with Git, but there are many others as well. For this course, since we are using GitHub Classroom, we’ll be using GitHub as our remote.
Thankfully, because we’ve already cloned this assignment from GitHub Classroom, we don’t have to do anything to be able to use it. In Git, cloning is the term we use for the first time we download a remote repository and store it on our computer. Once we’ve downloaded it the first time, we can get access to any changes by pulling from the remote.
So, to push a copy of our local repository to the remote, we can run this command:
git pushWe should then get output that looks like this:
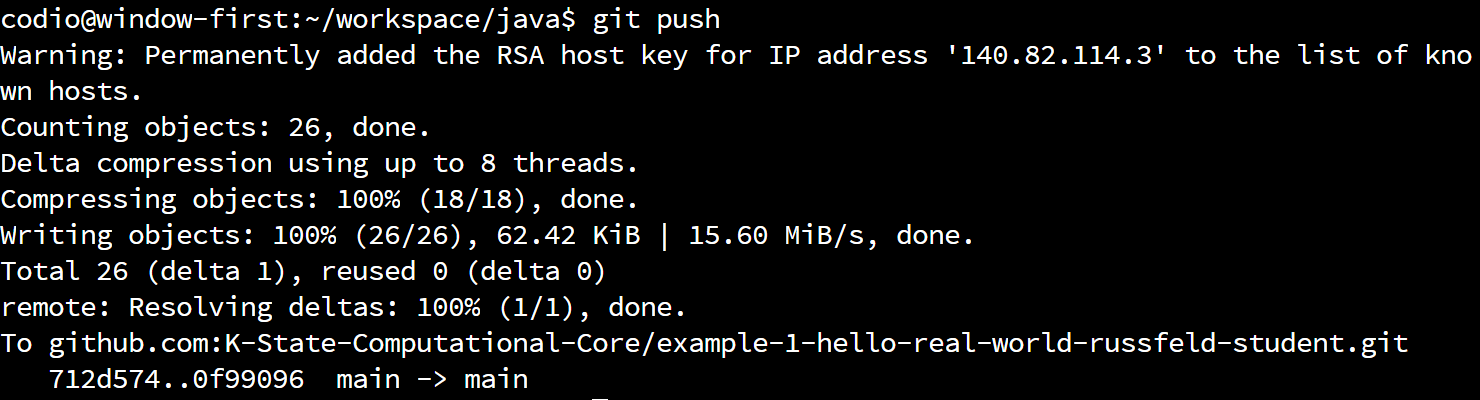
There we go! We’ve now pushed our code to GitHub. Now, let’s go check it out. So, navigate to your repository on GitHub classroom, and refresh the page if needed to see your changes. For me, it now looks like this:
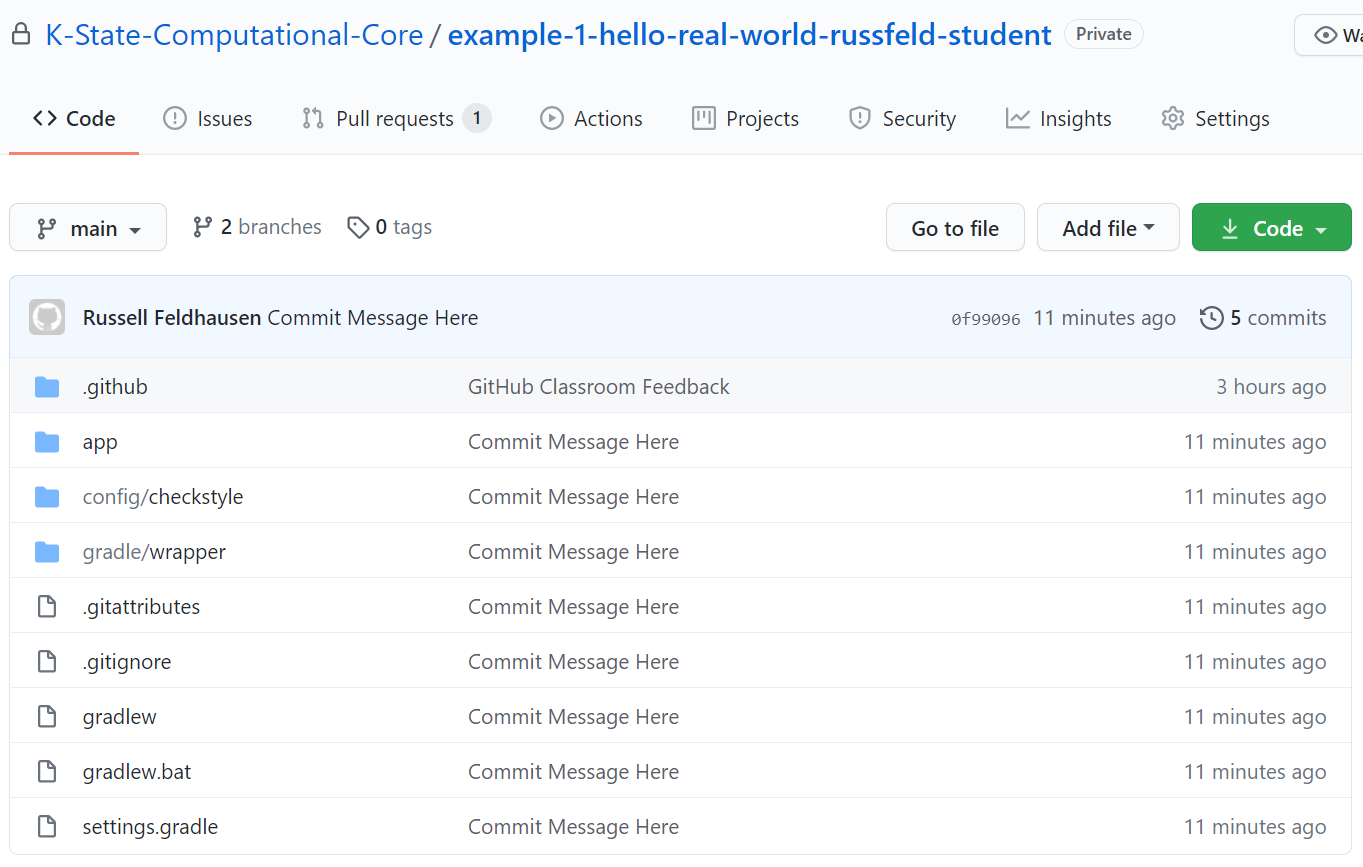
Now all of our code is visible on GitHub, and we can see our commit message next to all of the files that have changed. As we continue to make commits and push them to GitHub, we can use this website to explore the different versions of each file. In addition, the instructors for this course can explore your repository and help you resolve errors and assign grades based on your work here.
At the end of this example project, you’ll create a release on GitHub to signify that you are done with the assignment. We’ll cover how to do that later in this example. For now, let’s forge ahead and learn about unit tests.