Flake8
Finally, we’re at the point that we’ve written our application, a couple of unit tests, verified that the unit tests achieve a high level of code coverage, and we’ve written helpful documentation comments in our code. That’s a lot of content we’ve written, especially in our source code files. Now let’s see how good our coding style is by checking it using a linter.
Flake8
There are many different tools that can be used to check the style of source code. Python has a very thorough style guide available in PEP 8 that most developers follow. In addition, we’ve already looked at the Google Style Guide for Python. So, we’ll want to find a tool that can help us follow the style guide of our choice.
There are many different linters available for Python. One of the most commonly used tools is called Flake8. Flake8 is a very powerful linter that can be configured to perform all sorts of style checks on our code.
Installing Flake8
As expected, we can install Flake8 by simply adding it to our requirements.txt file. We’ll also add a few additional plugins for Flake8 that allow us to perform additional checks and generate a helpful HTML report. So, let’s update our requirements.txt to look like this:
coverage
flake8
flake8-docstrings
flake8-html
pdoc3
pep8-naming
pytest
pytest-html
tox
This will install several new items:
- flake8 - the base library for Flake8
- flake8-docstrings - an extension for Flake8 to validate the structure of docstrings
- flake8-html - a plugin to create HTML reports of the violations found by Flake8
- pep8-naming - a plugin to enforce naming conventions described in PEP 8
Once we’ve updated requirements.txt, we can install those libraries by opening a Linux terminal, navigating to the python folder, and running this command:
pip3 install -r requirements.txtAfter that command executes, we should see that those libraries are now installed:

Running Flake8
Once we’ve installed Flake8, we can execute it and see what errors are contained in our code. So, to do this, we can use the following command from within the python directory:
python3 -m flake8 --docstring-convention google --format=html --htmldir=reports/flakeLet’s look at this command and see what it does:
python3 -m flake8- as always, we’ll execute Flake8 as a module using Python 3.--docstring-convention google- this will configure theflake-docstringsextension to enforce the docstring format specified in the Google Style Guide for Python.--format=html --htmldir=reports/flake- these two arguments will create an HTML report in thereports/flakedirectory.
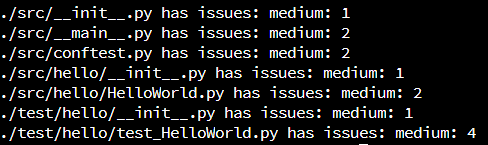
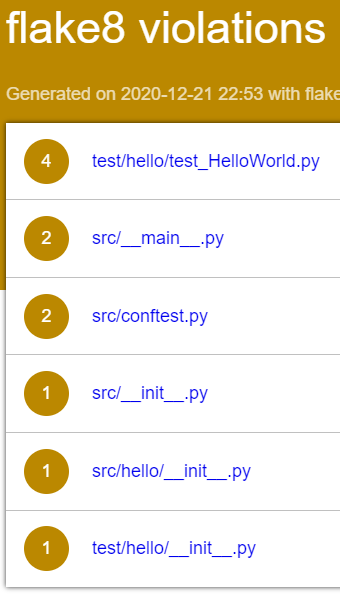
Once we run that command, we’ll probably get a bunch of output that looks like this:
Resolving Flake8 Errors
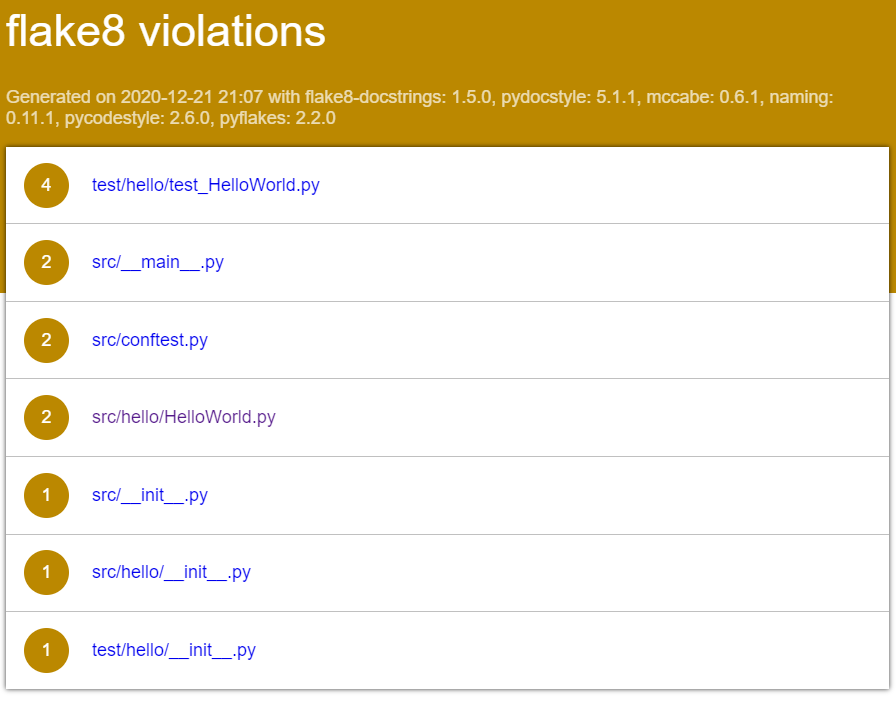
As we can see, our code has several errors in it. So, let’s look at the errors in our HelloWorld.py file and see if we can resolve them. To view the errors, we can right-click the reports/flake/index.html file and select Preview Static to view it as a webpage:
By clicking on the links on that page and expanding the code, we can clearly see the errors in our HelloWorld.py file:
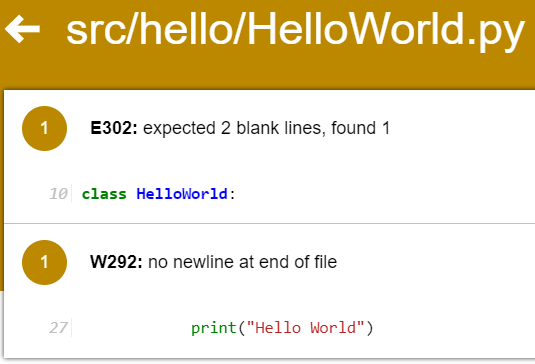
It looks like there are two errors:
- On line 10, it expects to find 2 blank lines but only found 1.
- On line 27, it expects to find a newline at the end of the file, but didn’t find one.
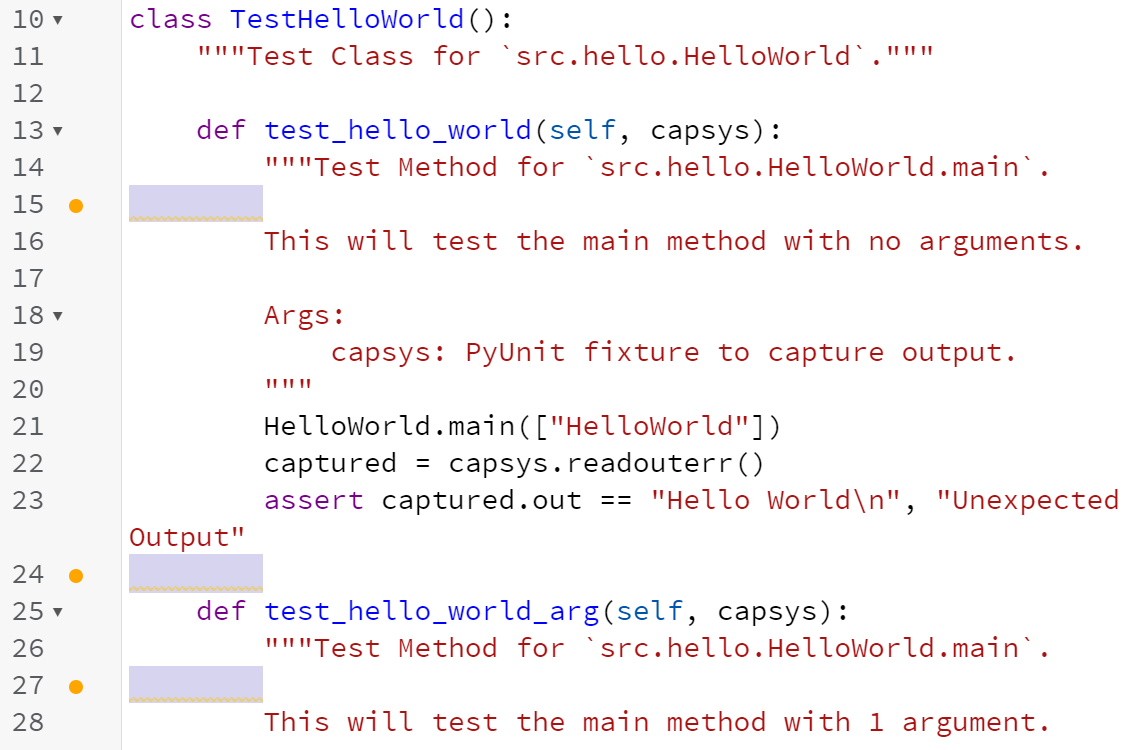
If we open that file in the Codio editor, we may also see similar errors:
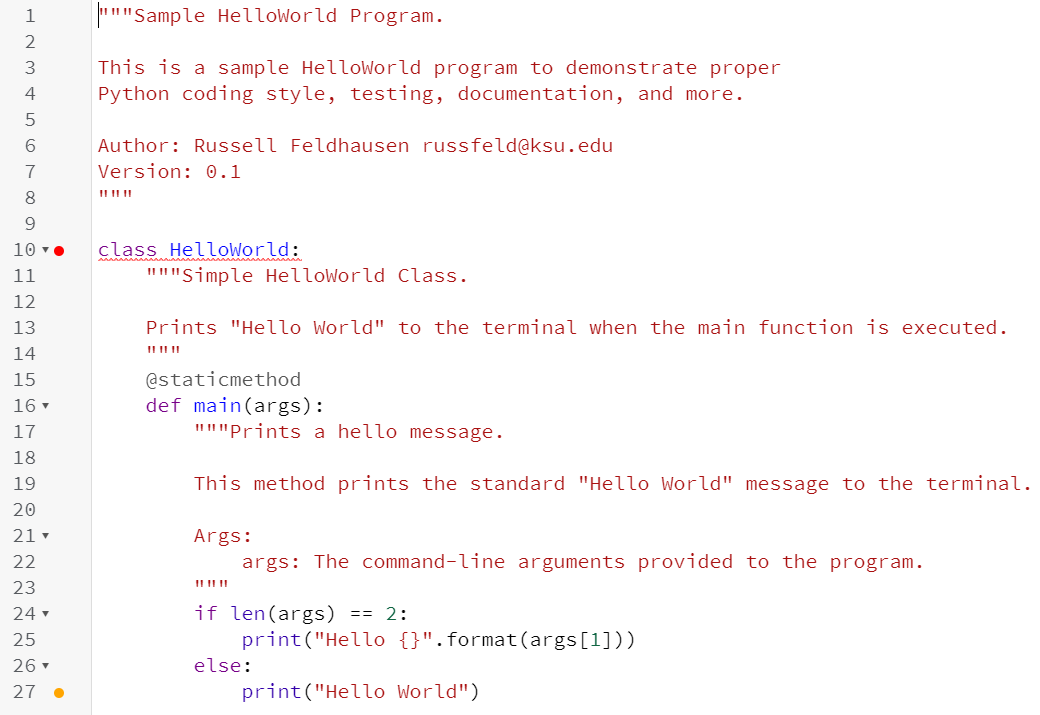
Thankfully, the Codio editor includes a feature that performs many of the same checks as Flake8, so we can see many of the same messages by looking for yellow or red dots to the left of the code. Of course, Codio isn’t guaranteed to find the same errors as Flake8, so we always have to use the Flake8 tool to be sure we found all the errors.
In this case, we need to resolve two things:
- The Python coding standard requires 2 blank lines before a class definition if there is anything above it. So, we’ll need to add an extra blank line at line 10. See Blank Lines in PEP 8.
- Likewise, all Python files should end with a newline. In this case, we see that the last line of the file contains text, so we need to add a newline at the end by pressing enter.
Once we’ve made those changes, we can rerun Flake8:
python3 -m flake8 --docstring-convention google --format=html --htmldir=reports/flakeand then check the report to see if we fixed the problems:
Yup! Since the file is no longer listed, we are good to go.
One other error that is very common with Python code is this one:
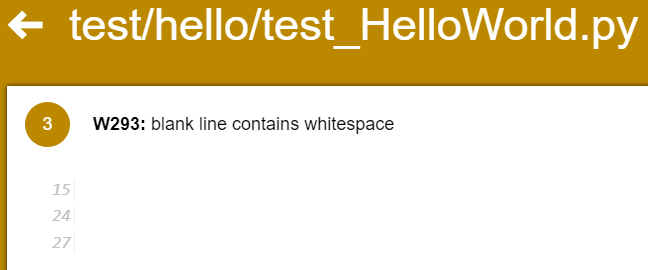
Our Python style guide requires that blank lines be completely blank, without any whitespace in them. However, the Codio editor (and many other IDEs) will try to be helpful and automatically indent a blank line for us, which causes these errors. The Codio editor even highlights them to tell us that it is wrong, but it still does it:
So, we’ll also have to remember to completely remove any whitespace from blank lines in our files in order to pass the Flake8 style checker. Before moving on with this example, modify the code in the various Python source files to ensure that everything is able to pass the Flake8 tool. In many professional software development roles, you aren’t even able to save your code unless it passes a style checking tool, so it is a very good habit to get into. In this course, part of your grade will depend on your code following the appropriate style!
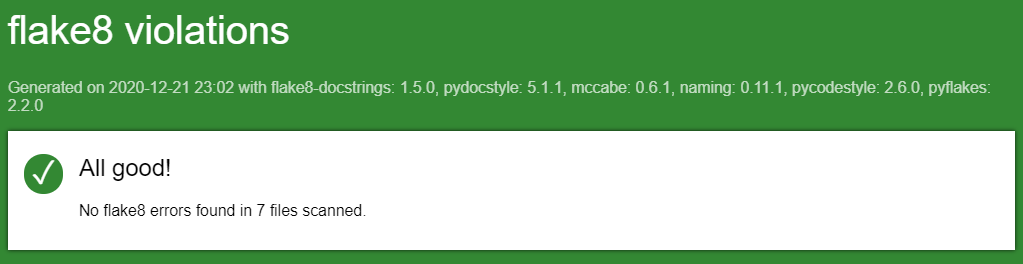
Once you’ve resolved all the errors, you should get the following message in the Flake8 report:
Integrating Flake8 with tox
As we’ve already seen, integrating Flake8 with tox is as simple as adding the command to the list of commands in our tox.ini file:
commands = python3 -m coverage run --source src -m pytest --html=reports/pytest/index.html
           python3 -m coverage html -d reports/coverage
           python3 -m flake8 --docstring-convention google --format=html --htmldir=reports/flake
           python3 -m pdoc --html --force --output-dir reports/doc .
In this case, notice that we placed the Flake8 command before pdoc - we want to make sure that our code passes all style checks before generating our documentation. If the Flake8 command exits with any errors, it will stop executing the tests and prevent the documentation from being generated.
As before, we can then rerun tox using the -r flag to reset the virtual environment and install the new libraries:
tox -rThat should allow us to run our tests, check the style of our code, and regenerate our documentation quickly and easily.
Git Commit and Push
This is a good point to stop and commit our code to our Git repository. So, like before, we’ll start by checking the status of our Git repository to see the files we’ve changed:
git statusIn that list, we should see everything we’ve updated listed in red. Next, we’ll add them to our index using this command:
git add .And then we can review our changes using the status command again:
git statusIf we are satisfied that everything looks correctly, we can commit our changes using this command:
git commit -m "Unit Tests and Code Coverage"And finally, we can push those changes to the remote repository on GitHub using this command:
git pushThere we go! We’ve updated our repository once again.