Unit Tests
At this point, we’ve written the basic code for our “Hello World” program. However, how can we automatically verify that the source code works properly? To do that, we’ll need to create some unit tests that verify our code.
pytest
There are many different libraries that can be used to create unit tests for Python. Python itself includes a package called unittest that can serve this purpose. However, many Python developers choose to use an external application called pytest for unit testing. There are many reasons for this, some of which are discussed in this blog post.
To use pytest, we’ll need to install it.
Installing External Python Libraries
Before we do that, let’s take a step back and discuss installing external libraries via Python. One of the major selling points of the Python programming language is the number of external libraries that can be easily installed. These range from simple game engines all the way to popular scientific and machine learning libraries such as SciPy and scikit-learn.
Thankfully, nearly every external library available for Python can be downloaded and installed from the Python Package Index, also known as PyPI. To do this, we use a tool that is included with Python called the Package Installer for Python or pip.
So, when we find an external library we’d like to use in Python, usually all we have to do to install it is to find the library’s name on PyPI, and then use the pip tool to install it. In fact, most libraries include those instructions as part of their documentation, as we can see in the Installation Instructions for pytest.
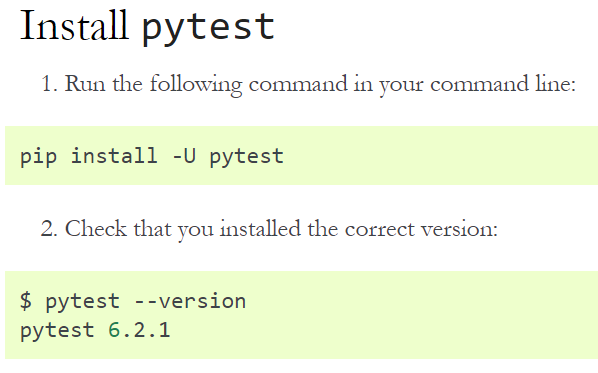
Install pytest
So, to install pytest, we should run the following command:
pip3 install pytestNotice that this is a little bit different than the command given in the pytest Installation Instructions. First, we will use the command pip3 instead of pip to ensure that we are installing pytest for Python version 3. If we use the pip command instead, it will install pytest for Python 2, which we don’t want.
Additionally, the -U command line flag shown in the documentation simply tells pip to upgrade the package if it is already installed. Since we know it isn’t installed in this case, we’ll just omit it.
When we execute that command, we should get output similar to the following:
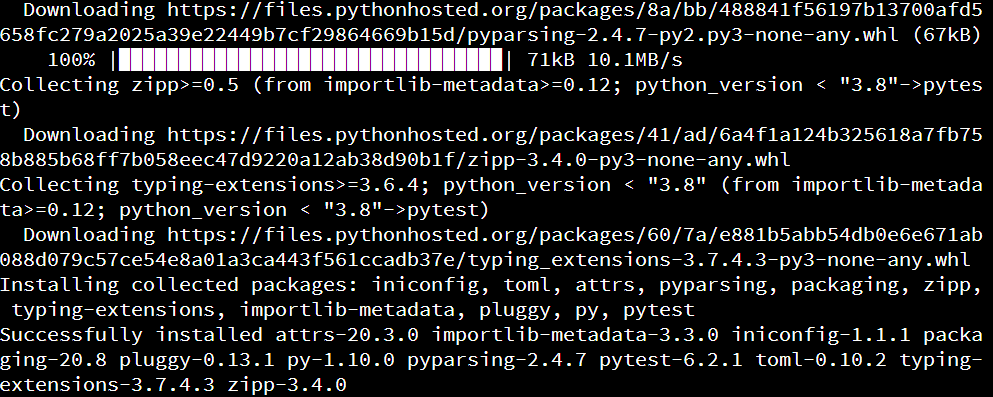
The pip tool will automatically install any additional libraries that are required for pytest, so we might see several items listed. At the bottom of the output, it will list all of the libraries installed. Since we see pytest in that list, we have successfully installed it.
Linux Command Prefixes
One point of confusion for many new developers is the inconsistent way Linux terminal commands are denoted in the documentation of various tools. For example, in the pytest documentation, Linux terminal commands are sometimes, but not always, prefixed by a dollar sign $:
In other documentation, you might see either a pound sign # or a greater than sign >, as seen in this example:

However, when we execute those commands, we shouldn’t include the greater-than symbol or dollar sign. Why is that? Many places that include documentation for the Linux terminal helpfully include either the last symbol of the command prompt before the command, or some other symbol like an arrow, indicating that this is a command to be entered in the terminal. Linux typically uses two different types of command prompts:
- Dollar sign
$- indicating that the terminal is logged in to a normal user account - Pound sign
#- indicating that the terminal is logged in with administrator permissions (root)
Documentation also often uses the > symbol in front of commands to be entered by the user. So, in general, when you see a Linux terminal command in documentation that starts with a >, $ or #, you should omit that character when executing the command. This can be very confusing and frustrating to get used to, especially since it is not standardized. As we’ll learn later in this course, standardized documentation is a very important part of being a good programmer!
Create Unit Test Package
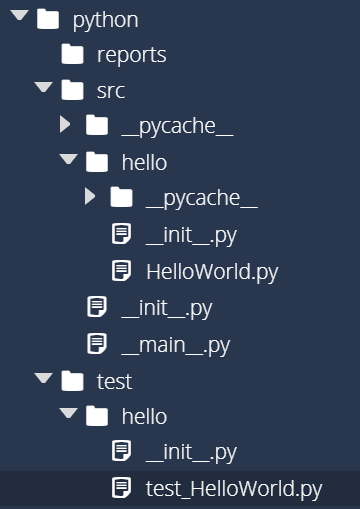
Now that we’ve installed pytest, let’s create a unit test for our “Hello World” application. As you might guess, we’ll use the test directory we created earlier to store all of our unit tests. It is typically good practice to have packages in our unit tests that match the packages in our source code, so we’ll start by creating a package named hello in that directory. To do that, we’ll need to do the following:
- Create a folder named
helloin thetestfolder - Create a file named
__init__.pyin the newtest/hellofolder - Place the code
print("In /test/hello/__init__.py")in thetest/hello/__init__.pyfile
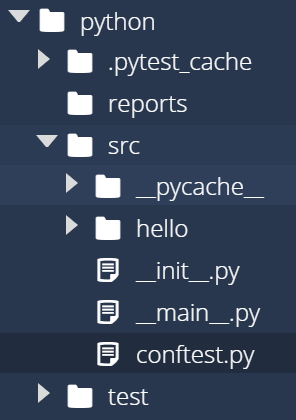
Once we are done, we should see the following structure in our python folder:

Write Unit Test
Next, let’s create a file called test_HelloWorld.py in our test/hello package. Our file structure should now include that file:
Let’s put some code in the test_HelloWorld.py file to test our “Hello World” application. Here’s a sample of what a unit test for this might look like:
from src.hello.HelloWorld import HelloWorld


class TestHelloWorld():

    def test_hello_world(self, capsys):
        HelloWorld.main(["HelloWorld"])
        captured = capsys.readouterr()
        assert captured.out == "Hello World\n", "Unexpected Output"
We can break this code down line by line to discuss what it does and how it works.
from src.hello.HelloWorld import HelloWorld- in our unit tests, we can import our other packages using thesrcmeta package we created earlierclass TestHelloWorld():- unlike Java, Python allows us to create classes with names that differ from the filename. For unit tests, our class names should begin with the wordTestdef test_hello_world(self, capsys):- Likewise, our test methods should begin withtest_. Thecapsysargument tells pytest that we’d like to capture output printed to the terminal. This is documented in the pytest Documentation.HelloWorld.main(["HelloWorld"])- this line executes themainmethod of ourHelloWorldclass. We must provide a list of strings that represent the expected command line arguments for the program. Recall that Python always includes the name of the script as the first command line argument, so we should simulate that in our unit tests. More about that convention can be found in the Python Documentationcaptured = capsys.readouterr()- this allows us to get the output printed to the terminal by our program. See the pytest Documentation.
Then, we reach the most important line of the program: assert captured.out == "Hello World\n", "Unexpected Output". This line is called an assertion, and it is the basis of most unit tests. In this line, we are stating that the output we receive from the program, stored in captured.out, should exactly match "Hello World\n" in order for the test to pass. If it doesn’t, then we can share a helpful error message, in this case “Unexpected Output” when the test fails.
Typically, most unit tests contain several of these assertions, and there are many different assertion methods we can use, but for right now we’ll just use the assert method.
There we go! That’s all it takes to write a simple unit test. However, as you’ve probably noticed, the code for a unit test is much more complex than the code that we are testing. That’s actually pretty typical - many times it is much more difficult to write tests that ensure the code works than writing the code itself. However, the usefulness of those tests will often outweigh the cost, as it can be even more costly to constantly fix bugs and errors that would have been caught by a proper set of unit tests.
pytest Naming Conventions
One important aspect of the pytest tool is how it uses naming conventions to easily find files that contain unit tests. The naming conventions are fully described in the pytest Documentation. In short, any Python file that matches either test_*.py or *_test.py will be included. For this course, we’ll use the test_*.py convention.
Then, inside of those files, it will look for classes that begin with the name Test, and methods inside of that class that begin with test. This is an example of a convention that dictates how the program functions. So, we’ll need to make sure our unit tests follow this pattern.
Running Unit Tests
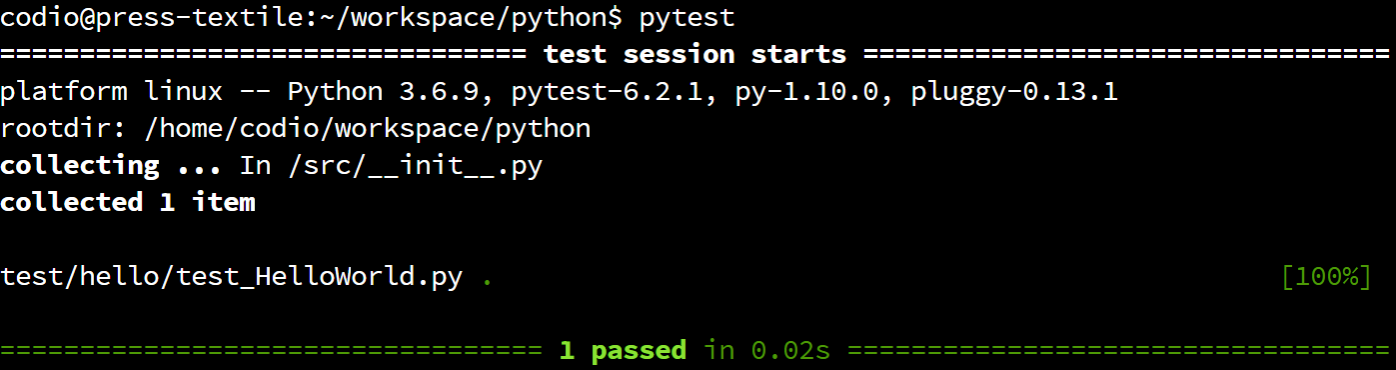
Now that we’ve written our unit tests, let’s see if we can execute them. First, we’ll need to open a Linux terminal. Then, we’ll need to navigate to the python directory. Once we are there, we can run pytest using the following command:
pytestWhen we do, we’ll probably get output that looks like this:
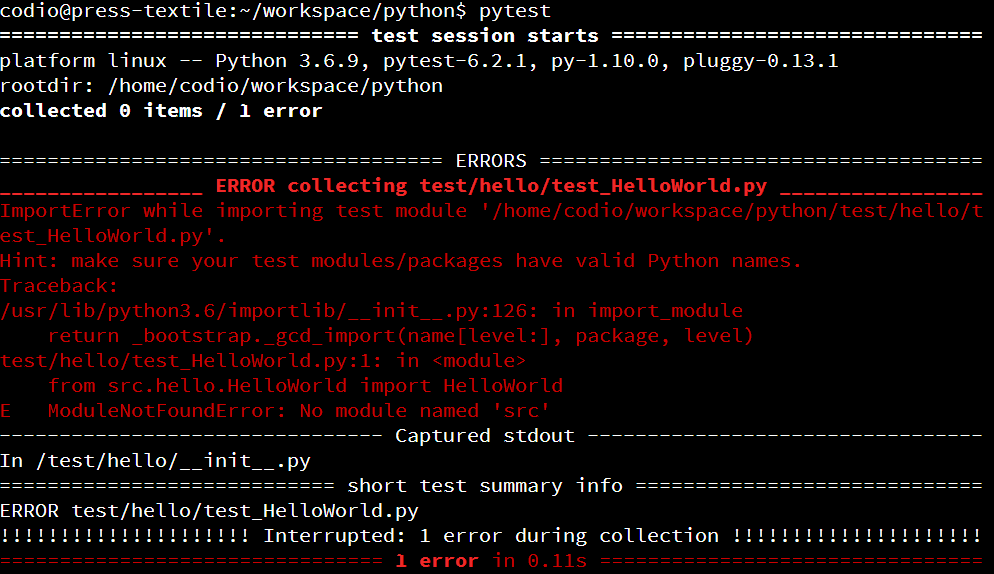
If we read this error closely, we’ll see that it is unable to find our src.hello.HelloWorld class. That’s strange - we were able to find it earlier. Let’s dive into that and see what’s going on.
Since pytest is installed as a library in Python, there is another way we can execute it. Let’s try that and see what happens:
python3 -m pytestWhen we do that, we’ll see that our tests work properly:
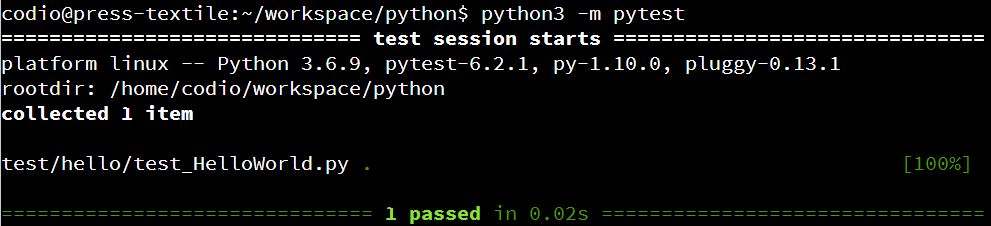
What’s going on here? Well, this gets a bit complicated, but in short the pytest command does not include the current directory as part of the PYTHONPATH, which is a set of locations where Python should look for additional code. However, when we launch pytest using the standard python3 command, Python will add the current directory to the PYTHONPATH. That means that our src meta package will get included, and pytest is able to find it.
Thankfully, there are a number of ways to fix this. The simplest is actually a bit of a “hack” that involves creating a blank file named conftest.py in the src package. This will tell pytest to include this directory in the PYTHONPATH correctly. This is well described in this StackOverflow Post So, let’s go ahead and create that file:
Then, in that file, we should put a note that explains what’s going on. So, let’s put the following comment in that file:
"""Sample test configuration file.

This file is used to configure testing parameters for PyTest. It is included
as a hack to get PyTest to recognize and include this directory in the Python
path. See https://stackoverflow.com/q/34466027.

Author: Russell Feldhausen russfeld@ksu.edu
Version: 0.1
"""
That will help us remember what that file is for.
Now, let’s try to run our tests again using this command:
pytestIf everything is configured correctly, we should see output similar to this:
That means our unit tests are working! However, we aren’t getting any useful feedback beyond the number of tests that were executed and whether they succeed.
Pytest Cache
You might also have noticed a .pytest_cache directory appear after running pytest for the first time. This is simply a folder that pytest uses to cache data that it needs, and you can safely ignore it.
Unit Test Reports
Thankfully, we can install another Python library, pytest-html that will allow us to create HTML reports from our unit test results. So, in a Linux terminal, we can install that library using pip with the following command:
pip3 install pytest-htmlThen, from within the python directory, we can run our tests using this new command to generate a report:
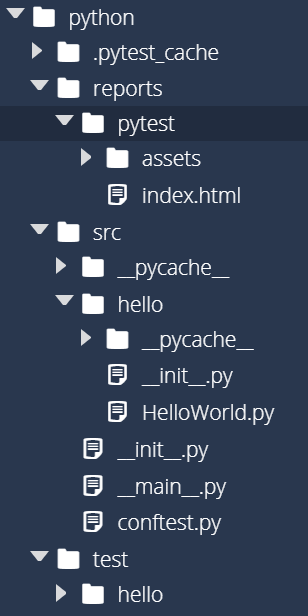
pytest --html=reports/pytest/index.htmlIn that command, we have specified that the report should be created in the reports/pytest/index.html file. So, after running that command, we should see the following folder structure:
So, find that file in the Codio file tree to the left and open it. When you do, you’ll see a file full of HTML like this one:
That’s really difficult to read, isn’t it? Thankfully, we can tell Codio to open that HTML file as a webpage by right-clicking on it and selecting Preview Static:

If done correctly, you should see a webpage that looks like this:
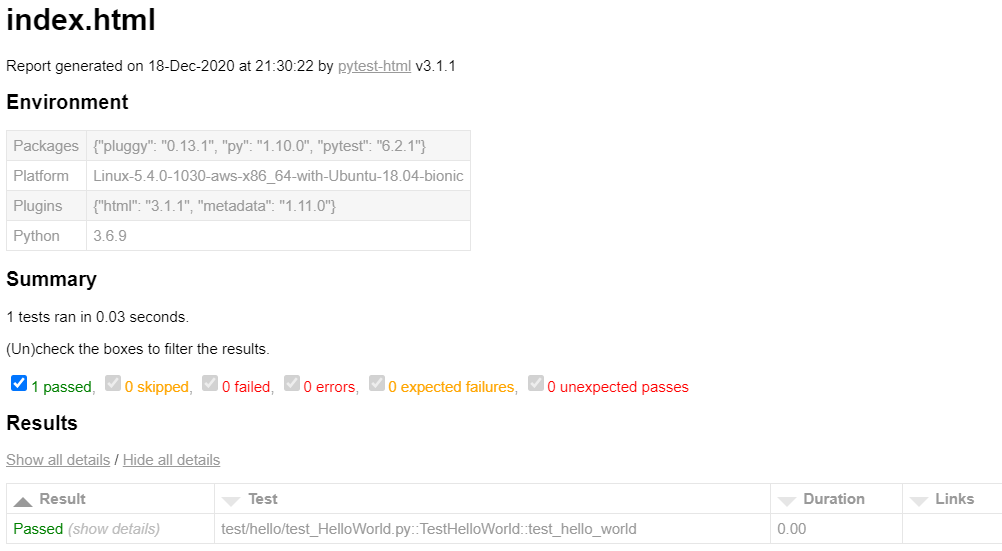
Hopefully, we should see that our code passed the test!
On the next page, we’ll explore how to expand the usefulness of our unit tests and automate this process a bit more.