Type Checking
One of the major selling points of Python is that it is dynamically typed. This means that the data type of variables is determined at runtime, and a single variable can store multiple data types throughout the execution of the program.
While this can make development seem quick and easy, it can also cause programmers to make mistakes related to the handling of various data types that wouldn’t be present in statically typed languages such as Java, C++, or C#. Those languages require compilation before they can be executed, and one step that the compiler performs is type checking. Type checking is a process that makes sure each value that is ever assigned to a variable has the correct type - otherwise the program won’t compile properly.
Thankfully, with the addition of type hinting in Python, we can use a tool to perform type checking on our code as well. Let’s see what that would look like!
Type Hinting in Python
Let’s review our existing code in HelloWorld.py and see what it would look like with type hints added. The code is shown here without any docstrings just to make it easier to read:
class HelloWorld:

    @staticmethod
    def main(args):
        if len(args) == 2:
            print("Hello {}".format(args[1]))
        else:
            print("Hello World")
To add type hinting, we need to add information to each variable and function at a bare minimum. So, let’s look at the function first.
Recall that functions can return a value using the return keyword. We don’t see that in our main function, so it doesn’t return a value, right? In fact, any Python function that doesn’t explicitly return a value within the code actually returns the value None by default. So, we would say that the “return type” of the function main is None
To annotate that with a type hint, we would modify the code to look like this:
class HelloWorld:

    @staticmethod
    def main(args) -> None:
        if len(args) == 2:
            print("Hello {}".format(args[1]))
        else:
            print("Hello World")
Notice that we simply added -> None after the function name and arguments, but before the colon :. That’s all it takes!
Likewise, we should annotate each variable, including all of the function parameters. So, in our function, we are expecting a parameter named args. What type of data would be stored in args?
Recall that args is a stand in for sys.argv, which are the command line arguments provided to Python when the program is executed. sys.argv is a list of strings, so the type of args would also be a list of strings. Therefore, we can annotate it in this way:
from typing import List


class HelloWorld:

    @staticmethod
    def main(args: List[str]) -> None:
        if len(args) == 2:
            print("Hello {}".format(args[1]))
        else:
            print("Hello World")
In this case, we added two things:
- For some special types, such as collections like lists, we’ll need to import the proper type from the
typinglibrary. - After each variable is named, we can place a colon followed by the type of the variable. In the case of
args, we set the type toList[str], which represents a list of strings.
There we go! We’ve added type hints to our source code. If you want to learn more about how to add type hints to your code, here are some great resources:
- Typing in the Python Documentation
- Python Type Checking Guide from Real Python
- Type Hints Cheat Sheet from Mypy
- Type System Reference from Mypy
Codio IDE and Type Hinting
Unfortunately, the Codio IDE does not properly deal with type hinting in Python, and will tell us that our code contains a syntax error:

We can safely ignore that error, provided that our code passes the Flake8 style checker itself.
Type Checking with Mypy
Now that we’ve added some type hints to our code, how can we check to make sure our code doesn’t violate those hints? To do that, we can use a static type checker called Mypy. [Mypy] is a powerful tool that allows us to quickly and easily spot typing errors in our Python code. However, it has one major caveat - it will only catch type errors for variables or functions that include type hints. It will not report all type errors in code that does not include type hints, nor will it tell us if some type hints are missing. So, it is up to us as developers to include all of the appropriate type hints ourselves!
To install Mypy, we can simply add the appropriate line to our requirements.txt file. We’ll also install the lxml library, so we can generate HTML reports from Mypy. Once we’ve added those lines, our requirements file should now look like this:
coverage
flake8
flake8-docstrings
flake8-html
lxml
mypy
pdoc3
pep8-naming
pytest
pytest-html
tox
Then, we can make sure those libraries are installed by running this command from within the python directory:
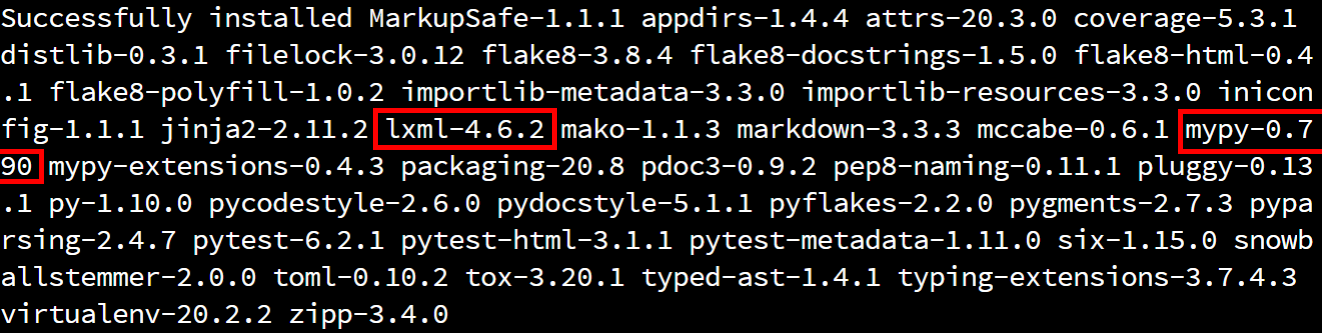
pip3 install -r requirements.txtAs always, once we’ve run that command we can verify that the library was installed by looking at the output:
Running Mypy
Once we’ve installed Mypy, we can execute it using the following command from within the python directory:
python3 -m mypy -p src --strict --html-report reports/mypyAs always, let’s break this command down into its separate parts:
python3 -m mypy- we want to run the Mypy library as a Python module-p src- this tells Mypy to execute the code in oursrcmeta package, which will include all source code files inside of that directory.--strict- we want to enable all optional checks that Mypy can perform--html-report reports/mypy- this will create an HTML report in thereports/mypydirectory
If everything is working correctly, we should get the following output:

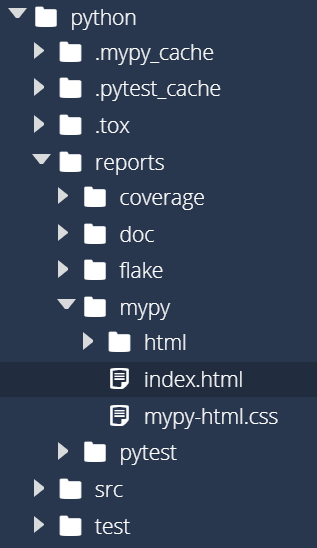
We may notice a new .mypy_cache folder, which can be safely ignored just like the .pytest_cache folder next to it. We can also find an HTML report in reports/mypy/index.html:
To open that file, simply right-click on it and select Preview Static. When we do that, we should get a report that looks like this:
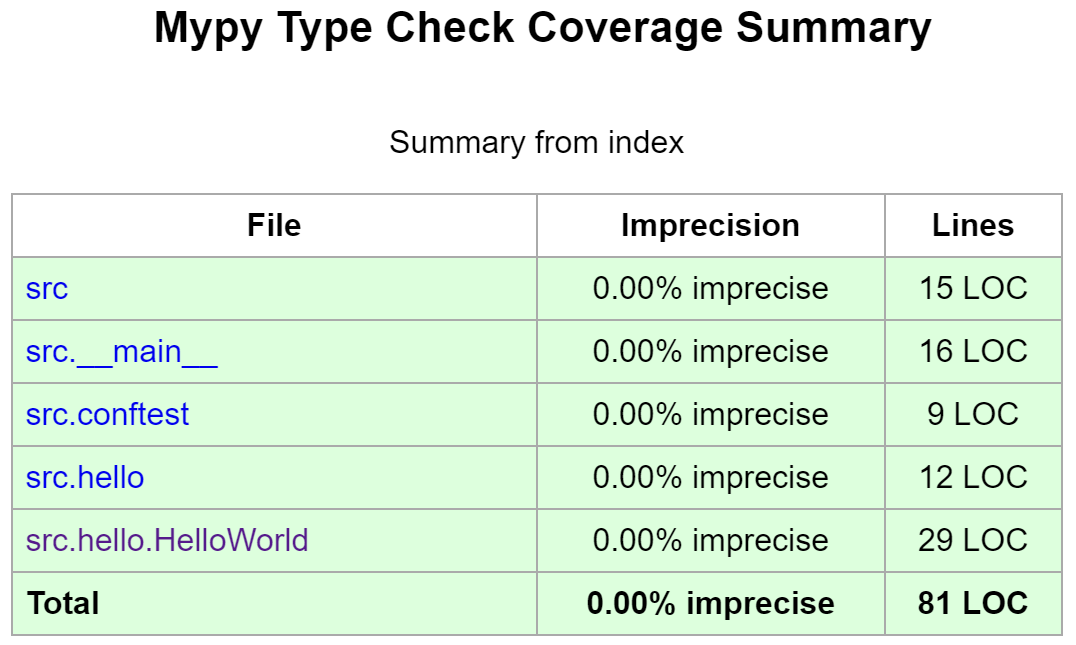
As we can see, Mypy shows that we’ve properly type hinted all of the code! That’s great!
Integrating with Tox
We can also integrate Mypy with tox by simply adding the command above to the tox.ini file in the commands section, which should now look like this:
commands = python3 -m mypy -p src --strict --html-report reports/mypy
           python3 -m coverage run --source src -m pytest --html=reports/pytest/index.html
           python3 -m coverage html -d reports/coverage
           python3 -m flake8 --docstring-convention google --format=html --htmldir=reports/flake
           python3 -m pdoc --html --force --output-dir reports/doc .
Notice that the Mypy command is now first in the list of commands. This mimics what most other programming languages would do - the code must pass the type checker in the compiler before the unit tests can be executed. So, we’ll do the same with our Python code here.
Once we’ve updated tox.ini, we can rerun tox using this command:
tox -rThat should now run all of our test commands at once!
Type Checking Unit Tests
Now, let’s briefly review how to type check our unit tests. This is a much more difficult task, since our unit tests build upon several external libraries. Thankfully, the Mypy library includes a way for us to explore the types that it is able to infer.
So, in our test_HelloWorld.py file, let’s add the line reveal_locals() to the bottom of one of our test methods. We’ll also need to annotate the function’s return type so that Mypy will analyze it, so we’ll set it to None as we did above. As before, the docstrings have been omitted from this code:
from src.hello.HelloWorld import HelloWorld


class TestHelloWorld():

    def test_hello_world(self, capsys) -> None:
        HelloWorld.main(["HelloWorld"])
        captured = capsys.readouterr()
        assert captured.out == "Hello World\n", "Unexpected Output"
        reveal_locals()
Mypy Expressions
The line reveal_locals() is a handy expression for adding type checking to our Python code. However, the Python interpreter itself won’t recognize that line as valid Python code, so we’ll have to remove it before we can actually execute our tests again. We’re just using it temporarily to help us determine the types that Mypy finds for the variables in our code
Now, let’s analyze the code in our test folder using Mypy:
python3 -m mypy --strict testNotice that we are just giving it the name of the directory test instead of loading it as a Python meta package. This is because we didn’t include an __init__.py file inside of the test directory itself. Don’t worry - Mypy is able to handle it just fine! When we run that command, we’ll see output like this:

In that output, we’ll see that the Mypy library was not able to determine the type of the capsys and captured variables. Instead, it just reports that they could be Any type, which is a special type annotation that matches any possible type. This is due to the fact that we didn’t actually have to import the pytest library to use those variables. This is a powerful feature of Python, but it makes it more difficult to perform proper type checking. It will also complain that we now have method arguments that are missing annotations, so let’s see if we can resolve that.
Read the Source, Luke
Unfortunately, figuring out the rest of this required lots of poking around the pytest source code, specifically in the file for capturing system output. Static type checking in Python is simply more difficult than in other languages because of the way it handles dynamic typing and library imports at runtime.
We’ll go ahead and explore what it takes to properly add type hinting to unit tests here, but you will not be required to be this thorough in your own unit tests in this course. That is simply asking too much!
So, let’s import those libraries by adding them to the top of the file. We’ll start by importing the CaptureFixture class from pytest, as well as the AnyStr type from the typing library. Then, we can annotate the capsys parameter with the appropriate type, which is CaptureFixture[Any]:
from pytest import CaptureFixture
from typing import Any
from src.hello.HelloWorld import HelloWorld


class TestHelloWorld():

    def test_hello_world(self, capsys: CaptureFixture[Any]) -> None:
        HelloWorld.main(["HelloWorld"])
        captured = capsys.readouterr()
        assert captured.out == "Hello World\n", "Unexpected Output"
        reveal_locals()
Once that is in place, we can rerun our Mypy check and should get the following output:

That’s closer! Now Mypy is finding the correct types for capsys and was able to use the information in the pytest library to infer the type of the captured variable, which is returned from the capsys.readouterr() function call. So, let’s annotate that variable as well. To do that, we’ll need to import the CaptureResult class from the _pytest.capture library. As you might guess by the underscore at the beginning of the library name, we are importing a class that is meant to be internal to pytest. This is generally considered bad practice, but it helps for type checking, so we’ll do it for now. Our updated code looks like this:
from pytest import CaptureFixture
from _pytest.capture import CaptureResult
from typing import Any
from src.hello.HelloWorld import HelloWorld


class TestHelloWorld():

    def test_hello_world(self, capsys: CaptureFixture[Any]) -> None:
        HelloWorld.main(["HelloWorld"])
        captured: CaptureResult[Any] = capsys.readouterr()
        assert captured.out == "Hello World\n", "Unexpected Output"
        reveal_locals()
Notice that we can easily add a type hint to a variable in the same way we added type hints to method parameters - we just place a colon : after the variable name and then add the type. Now, when we run the Mypy command, we should get the same output, which confirms that we have the correct type hints:

Once we’ve done that, we can remove the reveal_locals() line to make sure the tests will still execute.
Feel free to add the appropriate type hints to your unit tests if you’d like. However you are not required to include type hints in your unit tests, due to the complexity that we encountered here.