Creating GitHub Release
The last step in this project is to create a GitHub release containing the completed version of your assignment. This is a common part of the software development process - once we are completely ready to go, we can package our code and make it available for others. We’ll cover the process of actually packaging our code for deployment later in this chapter, but for now we’ll learn to create a release on GitHub that we can submit for this project.
Git Commit and Push
Before we create a release, let’s make sure our code is completely up to date. So, like before, we’ll start by checking the status of our Git repository to see the files we’ve changed:
git statusIn that list, we should see everything we’ve updated listed in red. Next, we’ll add them to our index using this command:
git add .And then we can review our changes using the status command again:
git statusIf we are satisfied that everything looks correctly, we can commit our changes using this command:
git commit -m "Unit Tests and Code Coverage"And finally, we can push those changes to the remote repository on GitHub using this command:
git pushThere we go! We’ve updated our repository once again, and are ready to create a release
GitHub Release
To create a release on GitHub, we can click the handy link to the right of our repository that is labeled “Create a new release”:
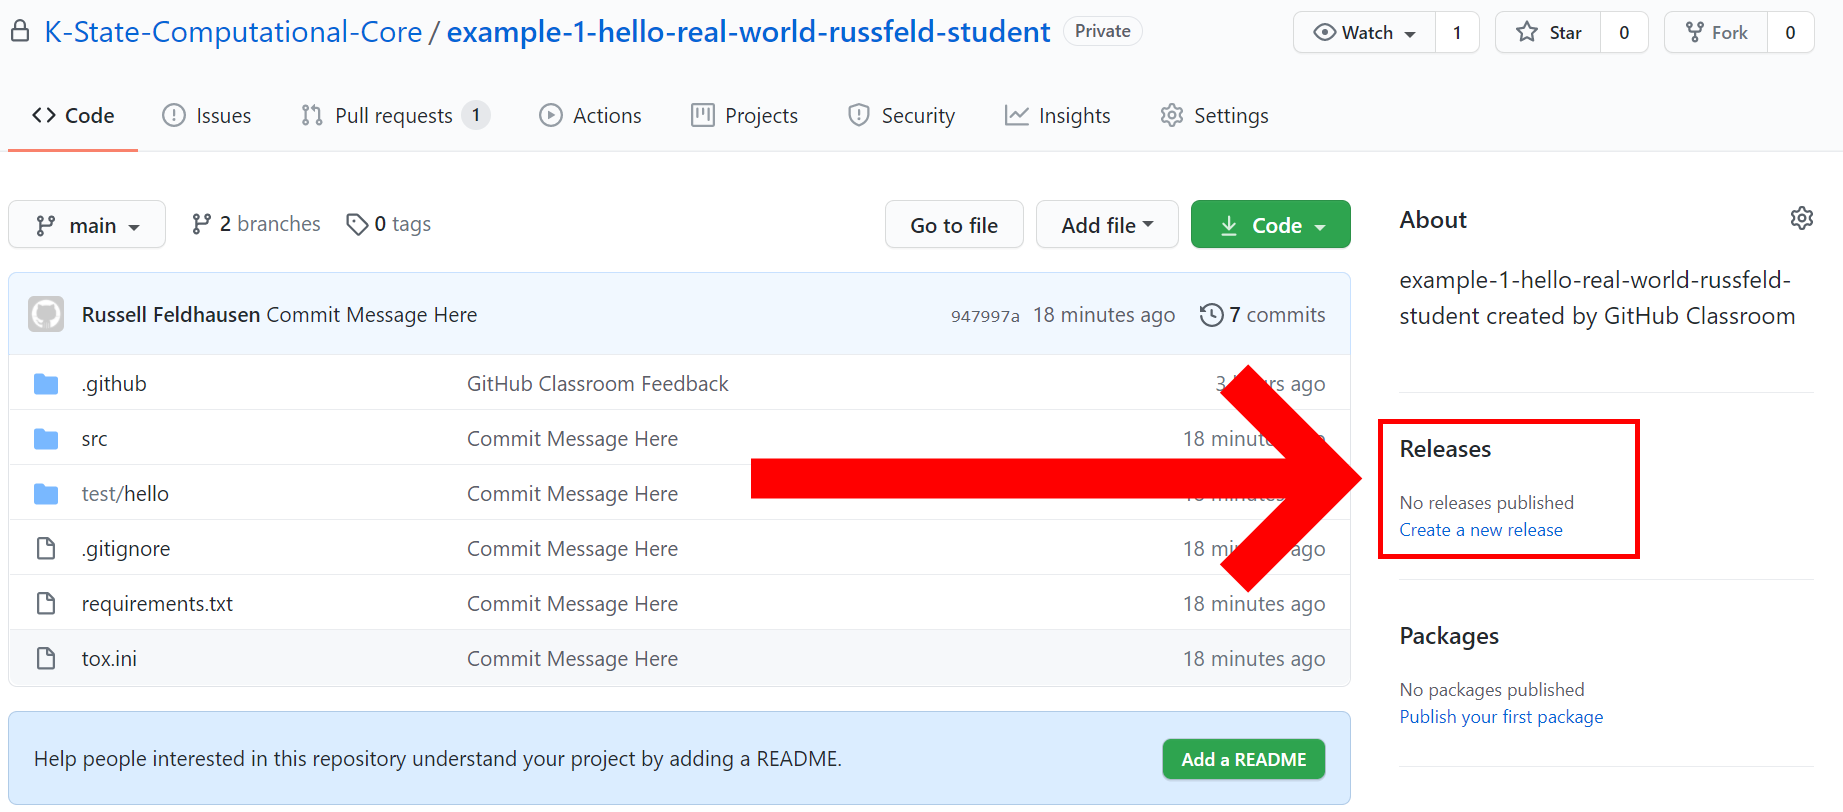
So, let’s click that link to create a new release. On the page that appears, we have a few things to fill out:
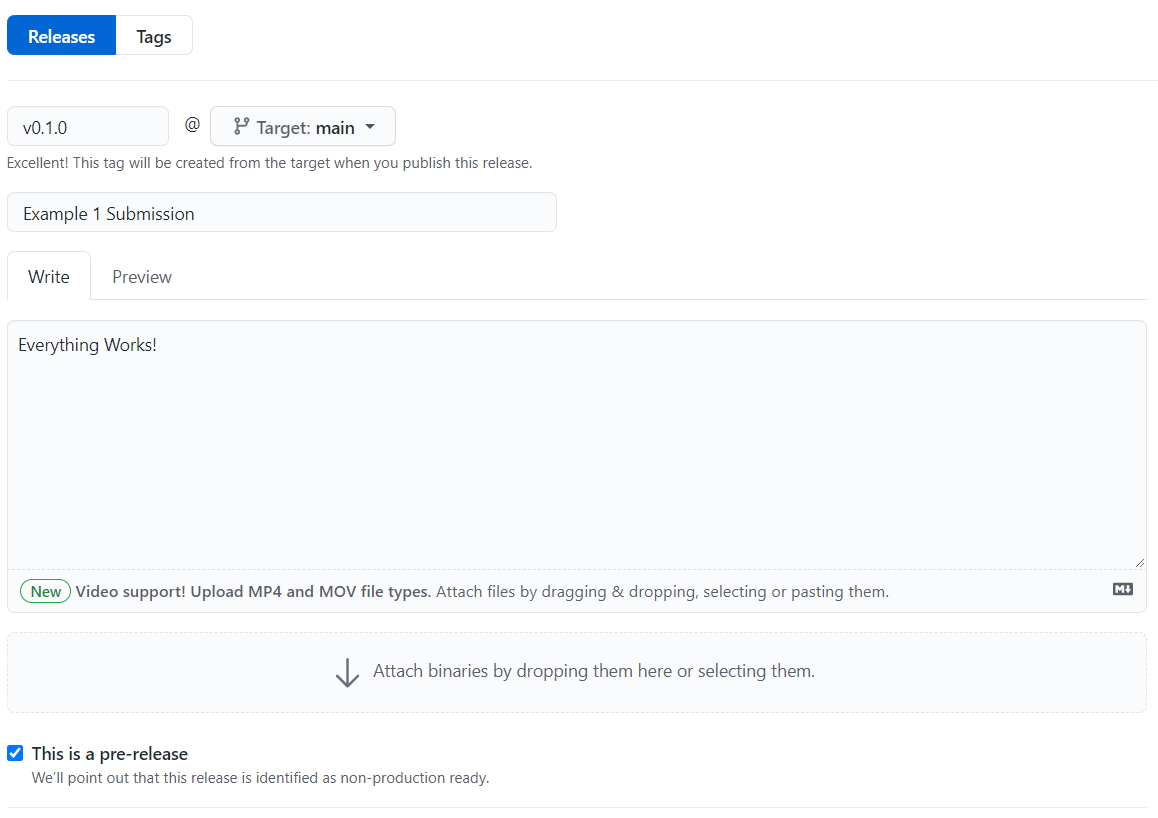
- Tag Version: GitHub support the use of “tags” which can be assigned to individual commits to make them easy to find. GitHub requires each release to be associated with a tag, so we can create one here. See the discussion below for thoughts on good versioning practice. For now, we’ll use “v0.1.0”
- Release Title: This is the title for this release. It can be anything, but it is recommended to be easy to understand. In this case, we’ll use “Example 1 Submission”
- Describe This Release: The description can have more information about the release, such as any known bugs or issues. This is a place where you can add comments for the instructor and anyone else who will be reviewing your releases. For now, we’ll just put “Everything works!”
- This is a pre-release: Since we don’t intend for this program to be used officially, we should always checkmark this box on our projects.
Once we’ve filled out that page, it will look like this:
Finally, we can click the Publish Release button to create our release!
Semantic Versioning
Creating version numbers is actually an important topic to discuss in software development. As we continually make changes to our code, how can we keep track of changes that are compatible with previous versions, or major updates that break old functionality?
One way is through the use of Semantic Versioning. Semantic versioning involves creating a three-part version number that looks like this:
MAJOR.MINOR.PATCHSo, when we used “v0.1.0” in our tag, we are stating that our code is at MAJOR version 0, MINOR version 1, and PATCH 0.
Then, following the rules outlined on the Semantic Versioning website, we would increment those numbers following these rules:
- MAJOR version when you make incompatible API changes,
- MINOR version when you add functionality in a backwards compatible manner, and
- PATCH version when you make backwards compatible bug fixes.
So, let’s say we realize we made a mistake in our project and want to resubmit it. When we create that new release, we would use “v0.1.1” to denote that it is a bug fix on a previous release. As we add new features in new projects, we would increment the MINOR version number. Finally, if we completely restructure the project and make it so that old functionality no longer works, we would increment the MAJOR version number.
Throughout this course, we’ll use Semantic Versioning to help us keep track of the progress of our various projects.
Submitting the Release
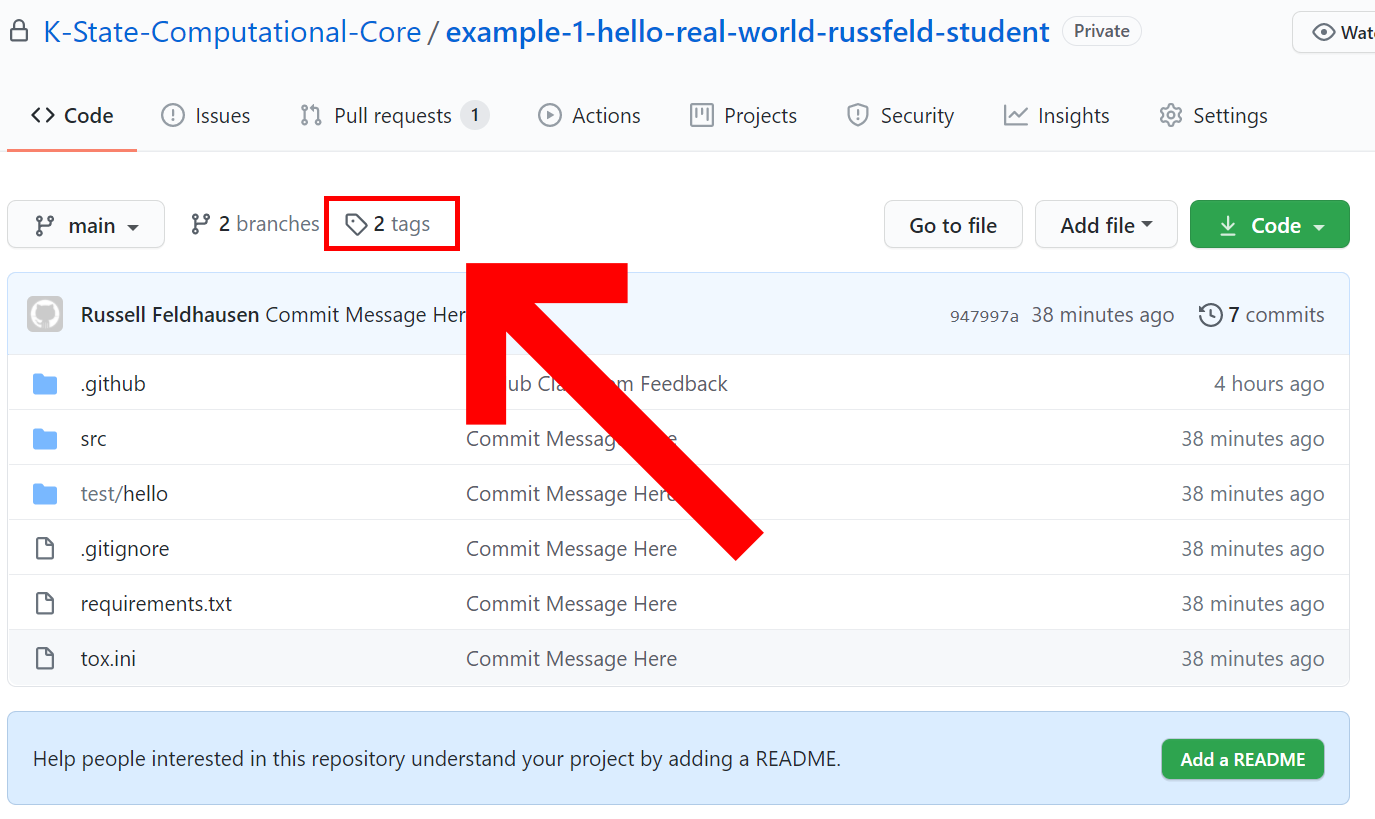
Finally, we are ready to submit this project! To do that, all we have to do is copy the URL from GitHub that includes our release tag. To find that, we can click on the Tags link at the top of the page:
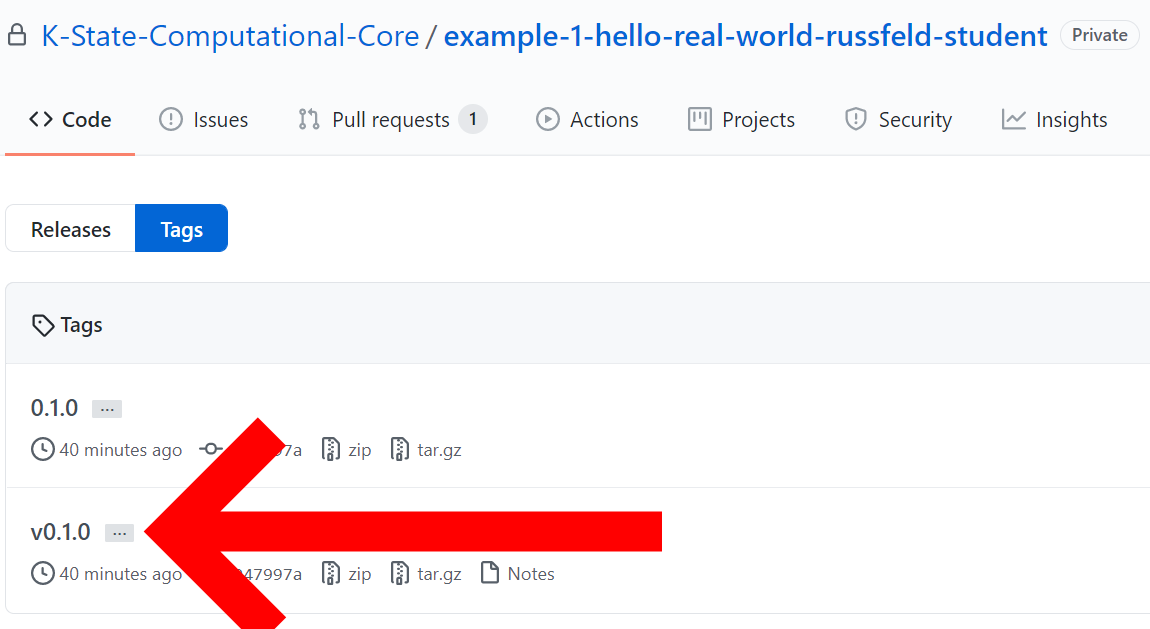
Then, we can click on our release tag from the list:
That should take us to a page containing the release. From there, we’ll need to copy the URL from our web browser. For me, my URL looked like this:
https://github.com/K-State-Computational-Core/example-1-hello-real-world-russfeld-student/releases/tag/v0.1.0Notice that it has the “v0.1.0” tag at the end - that’s the URL we need!
Then, we can find this assignment in Canvas, and submit the URL as our project. That’s all we need to do! From there, the instructors and TAs will be able to access our work via GitHub, and we can continue to work in Codio if we need to make a change and resubmit it later.
We may also need to mark one or more items as “done” in the Canvas modules list to get access to the next content.
Milestone Requirements
However, before we get too exited, there is one more page to review. This next page will give you an idea of what the actual milestone requirements for a project in this class might look like. So, review the next page and make sure your project meets the requirements listed before finalizing your submission. You can always create a new release and submit a new entry in Canvas until the assignment is locked.