Adding Lights
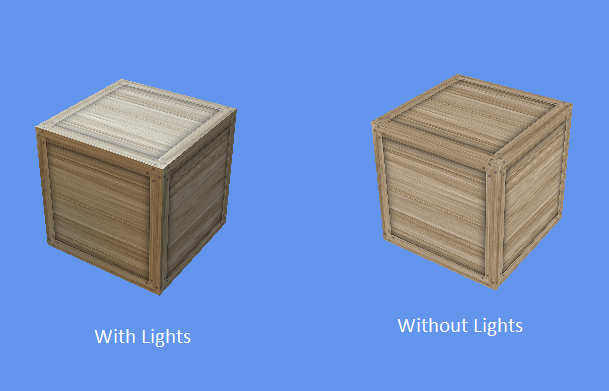
Well, we have a crate. Let’s make it more interesting by adding some lights. To start with, we’ll use the BasicEffect’s default lights. Add the line:
effect.EnableDefaultLighting();Into your Crate.IntializeEffect() method. Then run the program again. Notice a difference?
 .
.
The default lighting is useful to quickly see what our object will look like illuminated, but ultimately, we’ll want to define our own lights and how they interact with our objects.
Lighting Calculations
The BasicEffect uses the Phong shading model (named after its inventor, Bui Tuong Phong). This model approximates shading accounting for the smoothness of the object. It uses an equation to calculate the color of each pixel. This equation appears in the image below:
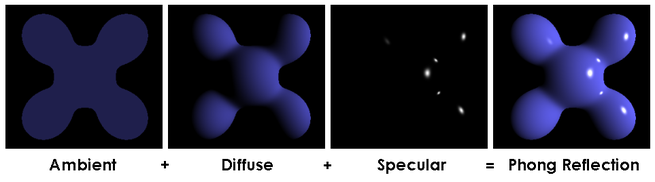
Essentailly, the Phong approach calculates three different lighting values, and combines them into shading values to apply to a model. Each of these is based on the behavior of light, which is a particle (and a wave) that travels in (largely) stright lines. We can think of these lines as rays.
The first is ambient light, which reprsents light that has been bouncing around the scene so much that it is hitting our object from all directions. Rather than try to capture that chaos, the Phong model simply substitutes a single flat value that is applied to all surfaces in the scene. In a brightly lit scene, this might be a high value; for a creepy night scene, we would use a very low value to provide only dim illumination away from light sources.
The second is diffuse light, which is the light that strikes a surface and scatters. We choose the strength of this light based on the characteristics of the material. Rough materials have more diffuse light, as the light striking the surface bounces off in all directions, so only some of it is toward the observer.
The third is specular light, which is also light that strikes a surface and bounces off, and is chosen by the properties of the material. However, high specular light corresponds to smooth surfaces - because they are smooth, light rays that strike near one another tend to bounce the same direction. Hence, light that is striking at the right angle will all bounce towards the veiwer, creating “hot spots” of very bright color.
These calculations are based on the angle between the surface and the viewer - this is why we need to provide a normal, as well as a direction the camera is looking and a direction the light is coming from; the angles between these vectors are used in calculating these lighting components.
The BasicEffect uses the DirectionalLight class to represent lights. You define the diffuse and specular color as Vector3 objects (where the x,y,and z correspond to rgb values, within the range [0..1] where 0 is no light, and 1 is full light). You also define a direction the light is coming from as a Vector3. Since ambient light doesn’t have a direction, you simply represent it with a color Vector3. When the object is rendered, the shader combines those color contributions of each light additively with the colors sampled from the texture(s) that are being applied. We can define up to three directional light sources with the BasicEffect.
Customizing our Crate Lighting
Let’s see this in action. Delete the effect.EnableDefaultLighting() line in your Crate.InitializeEffect() and replace it with:
    // Turn on lighting
    effect.LightingEnabled = true;
    // Set up light 0
    effect.DirectionalLight0.Enabled = true;
    effect.DirectionalLight0.Direction = new Vector3(1f, 0, 1f);
    effect.DirectionalLight0.DiffuseColor = new Vector3(0.8f, 0, 0);
    effect.DirectionalLight0.SpecularColor = new Vector3(1f, 0.4f, 0.4f);
Notice the difference? We’re shining a red light onto our crate from an oblique angle, above and to the left.
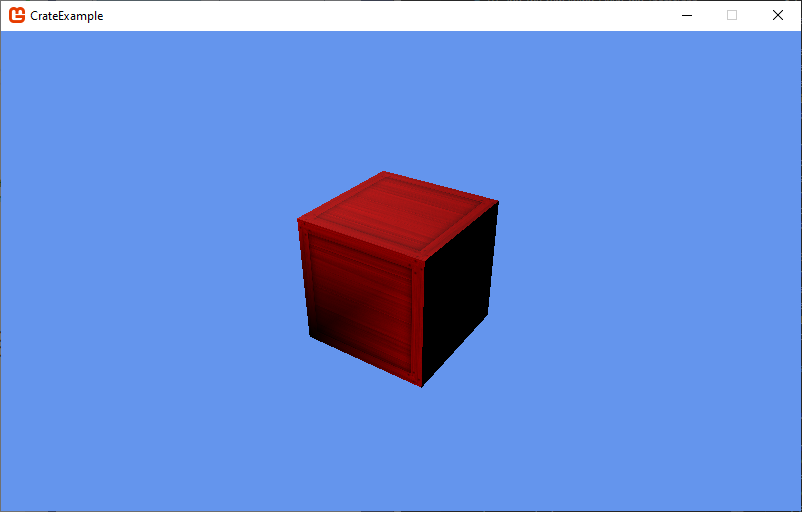
Notice how one face of the crate is in complete shadow? Let’s add some ambient light with the command:
effect.AmbientLightColor = new Vector3(0.3f, 0.3f, 0.3f);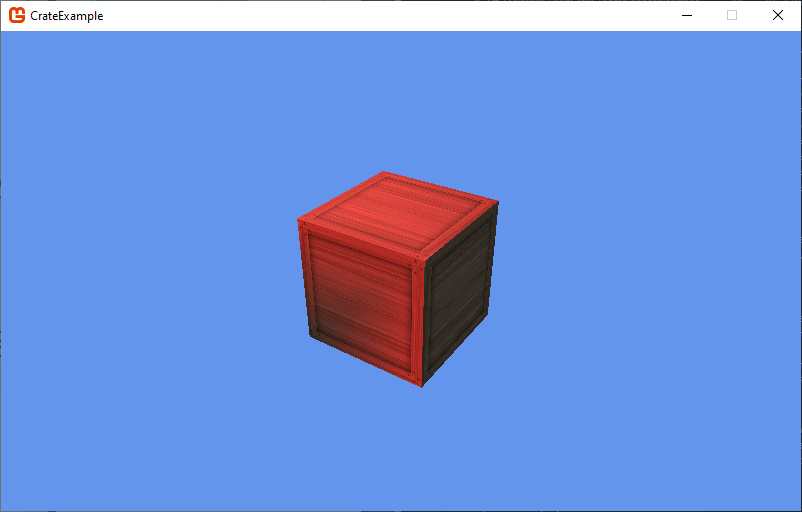
Notice how the shadowed face is now somewhat visible?
Go ahead and try tweaking the values for AmbientLightColor and DirectionalLight0, and see how that changes the way your crate looks. You can also set the properties of DirectionalLight1 and DirectionalLight2.