Tank Class
Instead of using the Model class directly, let’s wrap it in our own custom class, Tank. As with many of our classes, let’s hold onto a Game reference. In addition, let’s have a reference to the Model of the tank, and its position and orentation in the world:
/// <summary>
/// A class representing a tank in the game
/// </summary>
public class Tank
{
    // The game this tank belongs to
    Game game;

    // The tank's model
    Model model;

    // The tank's position in the world
    Vector3 position = Vector3.Zero;

    // The direction the tank is facing
    float facing = 0;

}
We set the initial position to (0,0,0) and facing to 0. Alternatively, we could pass the intial values for these fields through the constructor.
Properties
As the last comments suggests, we’re going to allow our tank to move through the world. We might add a Speed property so our game can control how fast it moves:
    /// <summary>
    /// Gets or sets the speed of the tank
    /// </summary>
    public float Speed { get; set; } = 0.1f;
Constructor
Constructing the tank is rather simple - just saving the Game instance and loading the model:
    /// <summary>
    /// Constructs a new Tank instance
    /// </summary>
    /// <param name="game">The game this tank belongs to</param>
    public Tank(Game game)
    {
        this.game = game;
        model = game.Content.Load<Model>("tank");
    }
Update Method
In our update, let’s control our movement with the WASD keys. Let’s also assume the tank has a zero turning radius, so it can effectively spin in place. Accordingly, we’ll handle rotation and forward/backward movement separately.
    /// <summary>
    /// Updates the tank, moving it based on player input
    /// </summary>
    /// <param name="gameTime">The current GameTime</param>
    public void Update(GameTime gameTime)
    {
        var keyboard = Keyboard.GetState();

        // TODO: Forward/Backward Movement

        // TODO: Rotation Movement
    }
Forward/Backward Movement
Before we can move forward or backward, we first need to determine just what direction that is. An easy way to do so is to rotate a unit vector facing forward by the facing angle:
var direction = Vector3.Transform(Vector3.Forward, Matrix.CreateRotationY(facing));We can then subtract this facing vector, multiplied by our speed, to the tank’s position when it is moving forward:
    if (keyboard.IsKeyDown(Keys.W))
    {
        position -= Speed * direction;
    }
And add it when we’re moving backward:
    if (keyboard.IsKeyDown(Keys.S))
    {
        position += Speed * direction;
    }
Rotational Movement
Rotation is even more straightforward; we’ll just add or subtract the speed from the facing angle, depending on which key is pressed:
    if(keyboard.IsKeyDown(Keys.A))
    {
        facing += Speed;
    }
    if(keyboard.IsKeyDown(Keys.D))
    {
        facing -= Speed;
    }
Drawing the Tank
For now, we’ll stick with using the Model.Draw() method. We’ll need to supply it with the View and Projection matrices from our camera, and the World matrix will be determined by the facing angle and position vector:
    /// <summary>
    /// Draws the tank in the world
    /// </summary>
    /// <param name="camera">The camera used to render the world</param>
    public void Draw(ICamera camera)
    {
        Matrix world = Matrix.CreateRotationY(facing) * Matrix.CreateTranslation(position);

        Matrix view = camera.View;

        Matrix projection = camera.Projection;

        model.Draw(world, view, projection);
    }
Refactoring Game1
Of course, to see our tank in action, we’ll need to refactor Game to use it. Change the tank field to have type Tank:
    // A class representing our tank model
    Tank tank;
Swap Content.Load<Model>("tank") for our constructor in the Game1.LoadContent() method:
    // Create the tank
    tank = new Tank(this);
We’ll need to add a call to Tank.Update() in our Game1.Update() method to process user input:
    // Update the tank
    tank.Update(gameTime);
And switch the arguments to Tank.Draw() in our Game1.Draw() method to the camera:
    // Draw the tank
    tank.Draw(Matrix.Identity, camera.View, camera.Projection);
If you run the game now, you should be able to drive your tank through the terrain. Quite literally through.
Getting on Top of the Terrain
Rather than have our tank plow through the ground unrelistically, let’s get it to set on top of the terrain. To do so, we’ll need to have access to the terrain from within our Tank class. Let’s add a HeightMap property to it:
    /// <summary>
    /// Gets or sets the IHeightMap this tank is driving upon
    /// </summary>
    public IHeightMap HeightMap { get; set; }
We can then use the IHeightMap.GetHeightAt() method in our Tank.Update() to set the tank to the height of the terrain where it is currently at:
    // Set the tank's height based on the HeightMap
    if (HeightMap != null)
    {
        position.Y = HeightMap.GetHeightAt(position.X, position.Z);
    }
Of course, we don’t want to do this if the HeightMap property hasn’t been set.
Refactoring Game1.cs
That setting is accomplished in Game1.LoadContent, after we’ve created both the tank and the terrain:
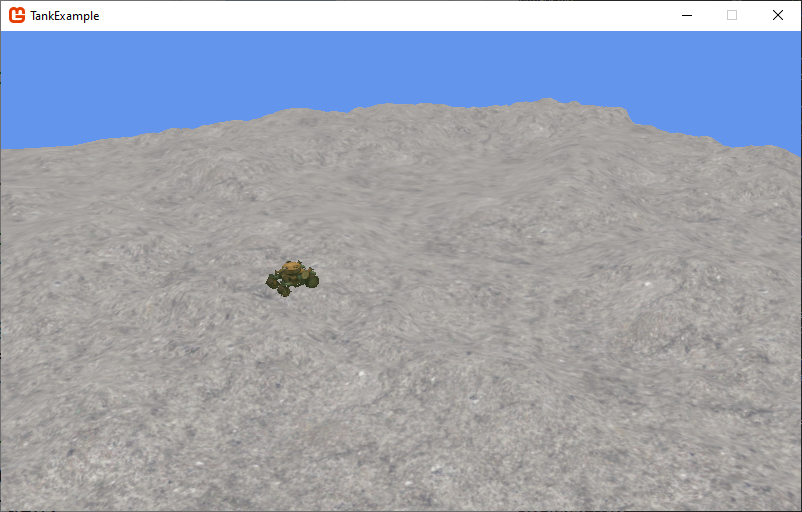
tank.HeightMap = terrain;Now if you run the game, the tank rises and falls with the land it travels over: