Python Lists
Resources
The first collection we’ll review in Python is the list. A list in Python allows us to store many individual values, or elements, in a single variable. To keep track of the elements, each one is assigned an index, which is an integer that uniquely identifies the element’s position in the list. In Python, just like in many other programming languages, the indexes begin at $0$ and count up from there.
Creating a List
There are many ways to create a list in Python. The simplest is to simply use an empty set of square brackets [] to represent an empty list, and then store that in a variable using an assignment statement:
list_1 = []If we know what values we want to store in the list, we can include them inside of the square brackets. For multiple items, we can separate them by commas:
list_2 = [1, 2, 3]We can store any value in a list, including strings, numbers, Boolean values, and even other lists. We won’t cover lists inside of lists in this course, but it is important to know that it can be done.
Adding New Items to a List
Once we’ve created a list, there are two ways to add items to a list. First, if we want to add a new item to the list and expand it’s size by one, we can use the append() method. For example, we can start with a list containing three items and then add a fourth item:
list_2 = [1, 2, 3]
list_2.append(4)
Accessing List Items
To access existing items in a list, we can use the index of the item inside of square brackets after the name of the list. Consider this example:
list_2 = [1, 2, 3]
print(list_2[0])    # 1
print(list_2[1])    # 2
print(list_2[2])    # 3
The list stored in list_2 initially contains the items 1, 2, and 3. To access the first item, we can use index $0$, as in list_2[0]. We can similarly use index $1$ and $2$ to access the other items.
Updating List Items
We can also use the index to update a value stored in a particular location of the list. In effect, each location in the list can be treated just like a variable in an assignment statement.
list_2 = [1, 2, 3]
list_2[1] = 5
print(list_2)       # [1, 5, 3]
In this example, we are replacing the value 2, at index $1$ in the list, with the new value 5. As we can also see in that example, we can even print an entire list at once in a print statement!
Lists in Python Tutor
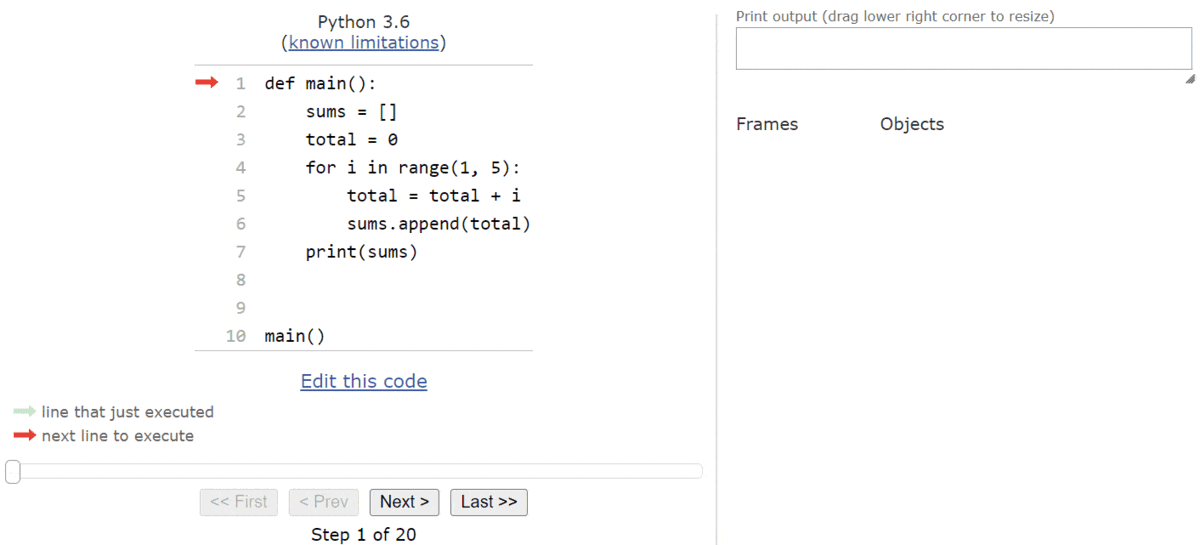
Thankfully, tools like Python Tutor make it very easy to work with lists in Python and understand what is happening in memory on the computer itself. Let’s walk through a brief example program that includes lists in Python Tutor:
def main():
    sums = []
    total = 0
    for i in range(1, 5):
        total = total + i
        sums.append(total)
    print(sums)


main()
As always, we can copy this code to the tutor.py file in Codio, or click this Python Tutor
link to open it in a web browser. We can skip ahead a few steps to the point where the execution pointer enters the main() function and we see this state:
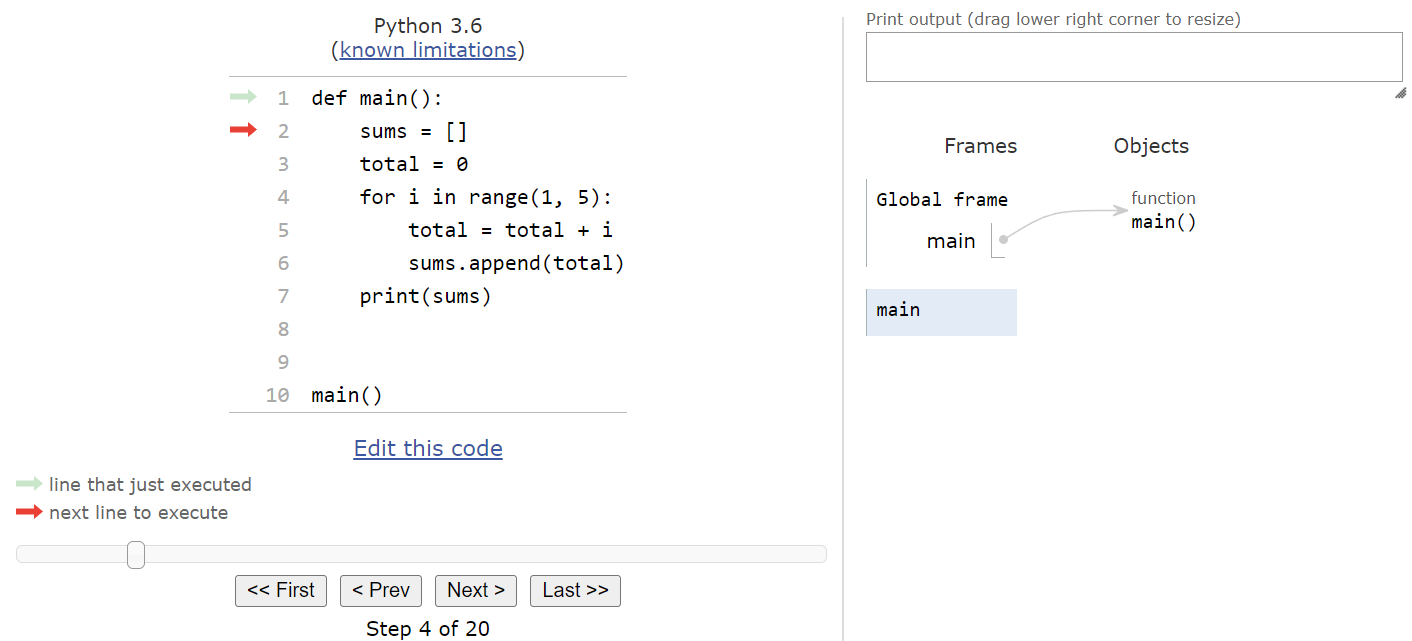
The very first line of code in the main() function will create a new list and store it in the sums variable. So, when we execute that line of code, we’ll see some new information appear in the frames and objects area in Python Tutor:
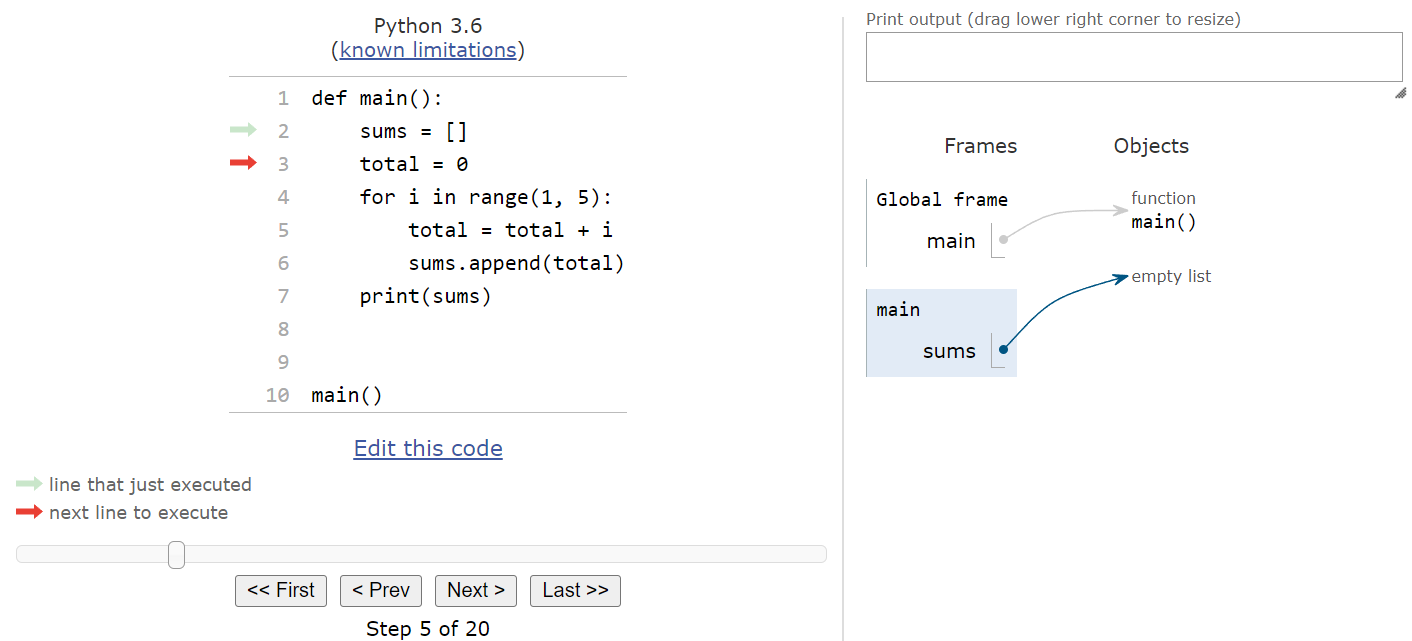
As we can see, in Python lists are treated like objects, so the sums variable in the main() function’s frame points to an empty list object in the objects list. As we add elements to the list, they’ll show up in the object itself. We’ll come back to this concept later in this lab to show why it is important to know that Python treats lists like objects instead of other variables.
The next line creates the total variable, setting it equal to $0$, and then we’ll reach the for loop:
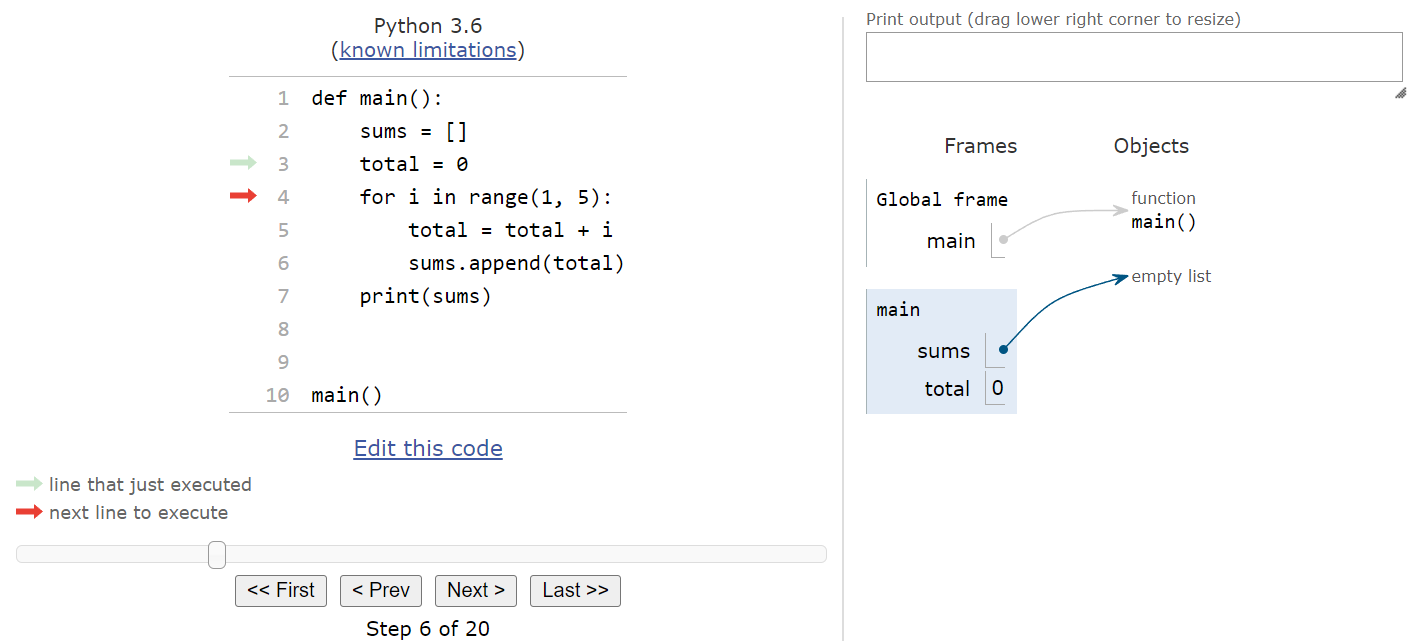
This for loop iterates four times, from $1$ up to but not including $5$. So, we’ll enter the loop with i storing the value $1$.
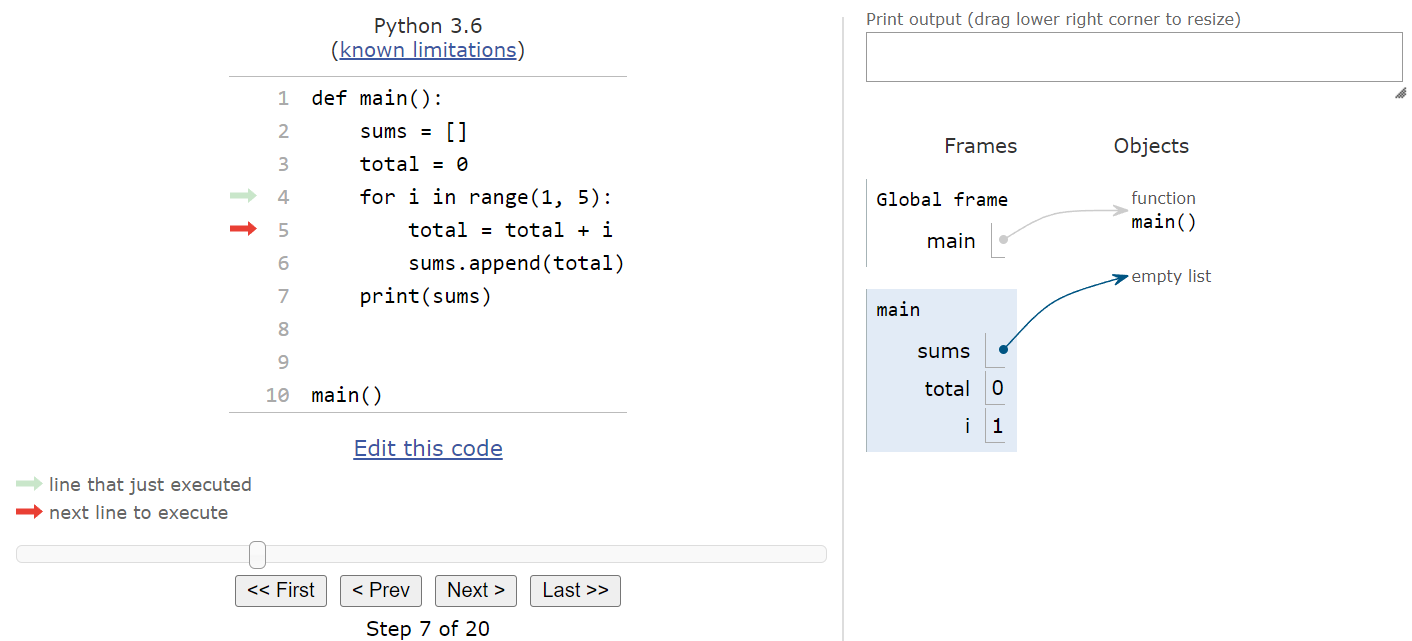
Inside of the loop, we’ll add the value of i to the total:

Then, we’ll append that new value in total to the end of the sums list. Since that list is empty, it will become the first item in the list, as we can see here:
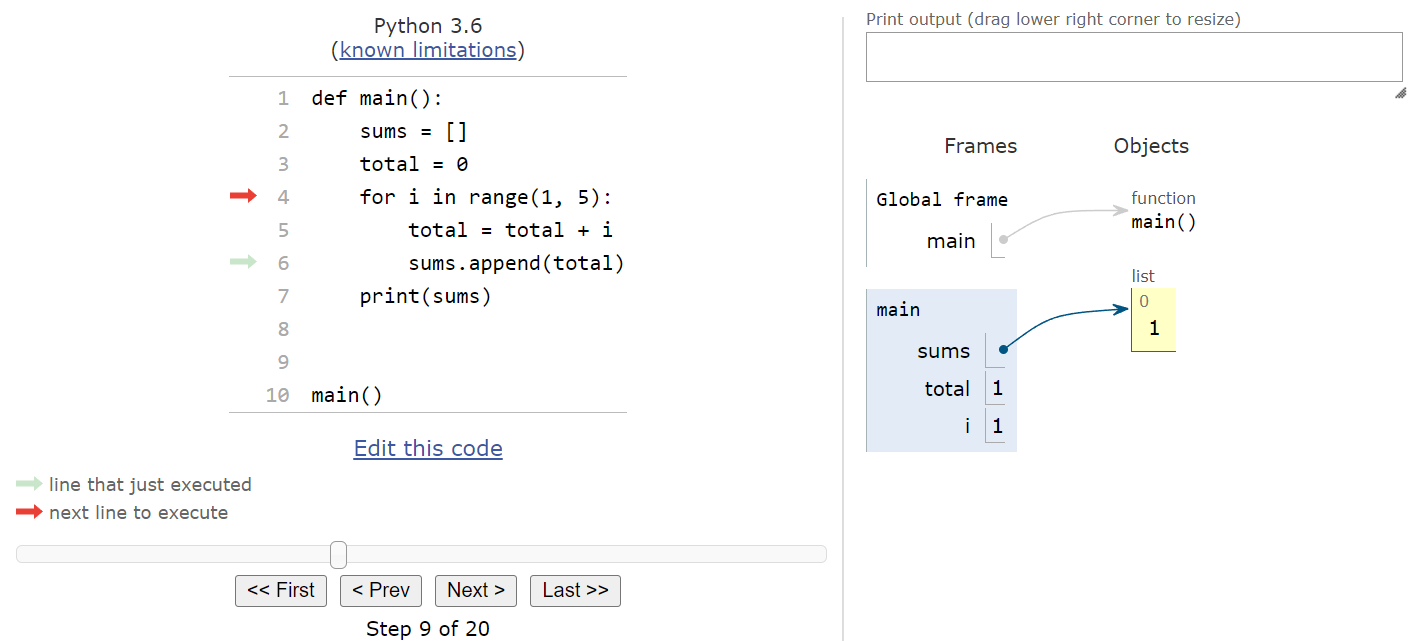
Notice that the list in the object area now includes a single element. On that element, we can see a small $0$ at the top of the box, which is the index of that element. Then, at the bottom and in a larger font, we see the value stored in that element, $1$. Just like with other variables, even though the assignment statement references the total variable, we are actually storing the value in the list, not a reference to the variable.
At this point, we’ve looped back to the top of the for loop, so we’ll increment i by one and enter the loop again:

Inside of the loop, we’ll add the new value of i to total, and then append that value to the sums list. After both of those steps, we should see the following state in Python Tutor:
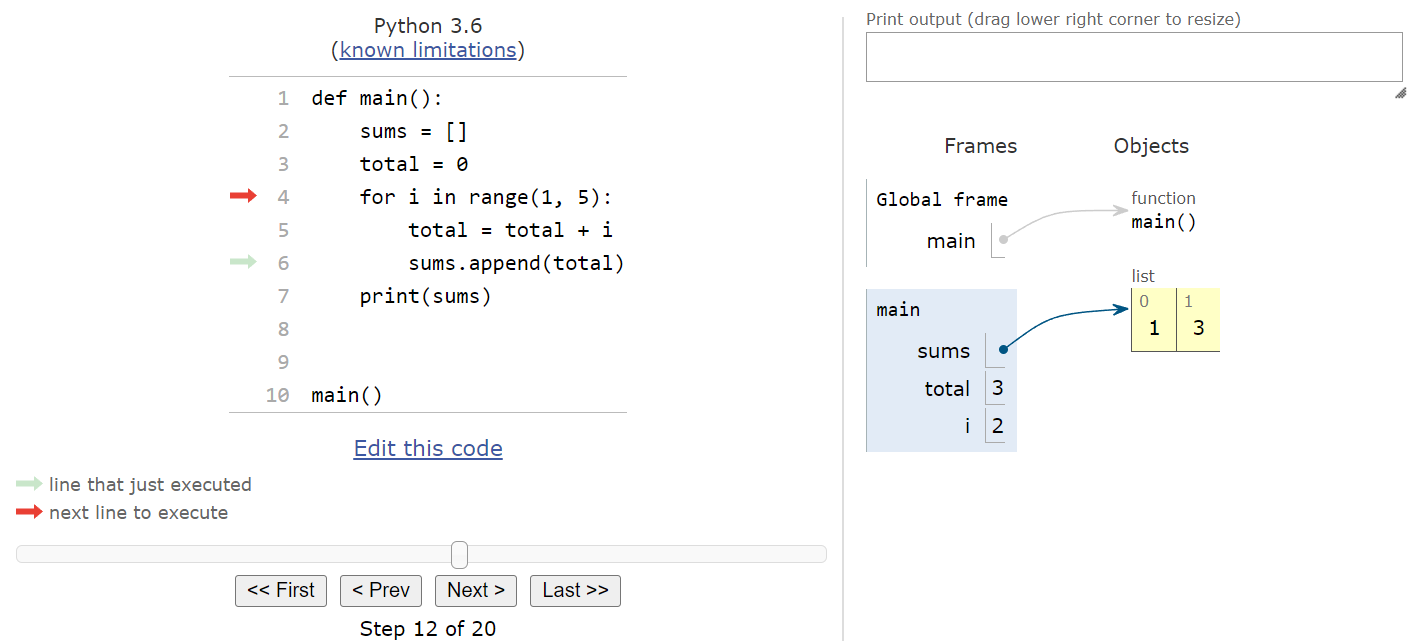
Notice that we now have two elements in the list. The first item, at index $0$, is still $1$, but now we’ve appended a second element at index $1$ that stores the value $3$. We’ve reached the top of the loop, so we’ll increment i and repeat those steps again. After the next loop iteration, we’ll see this state:
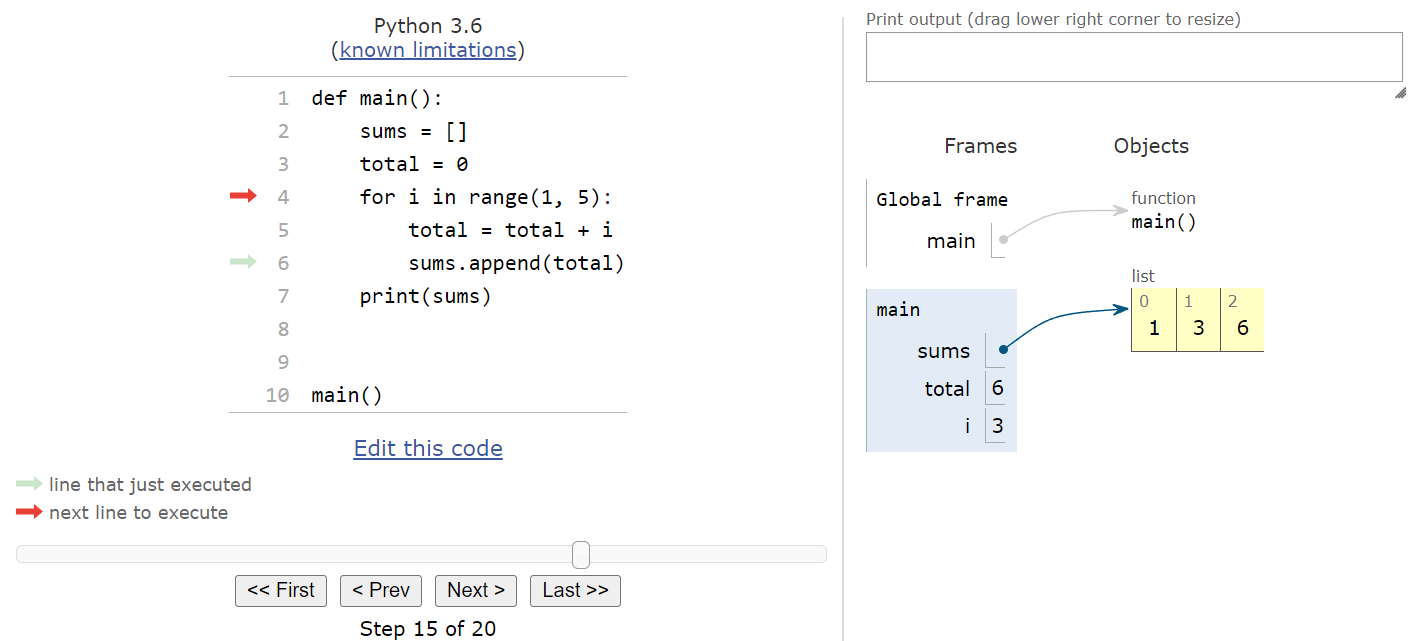
The process repeats one more time, leading to this state at the end of the for loop:
Notice that each time the loop iterates, we get a new value added to the sums list. Finally, we’re out of items to iterate over in the range, so we’ll jump to the bottom of the for loop and continue executing code from there:
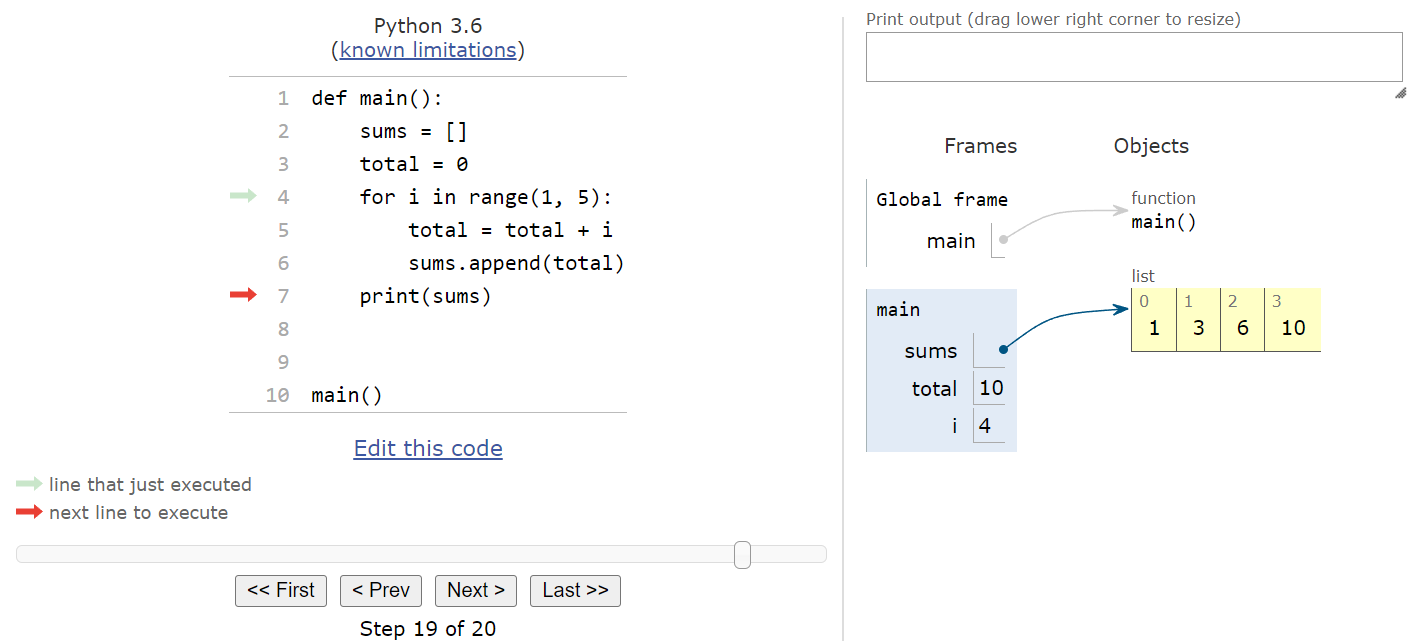
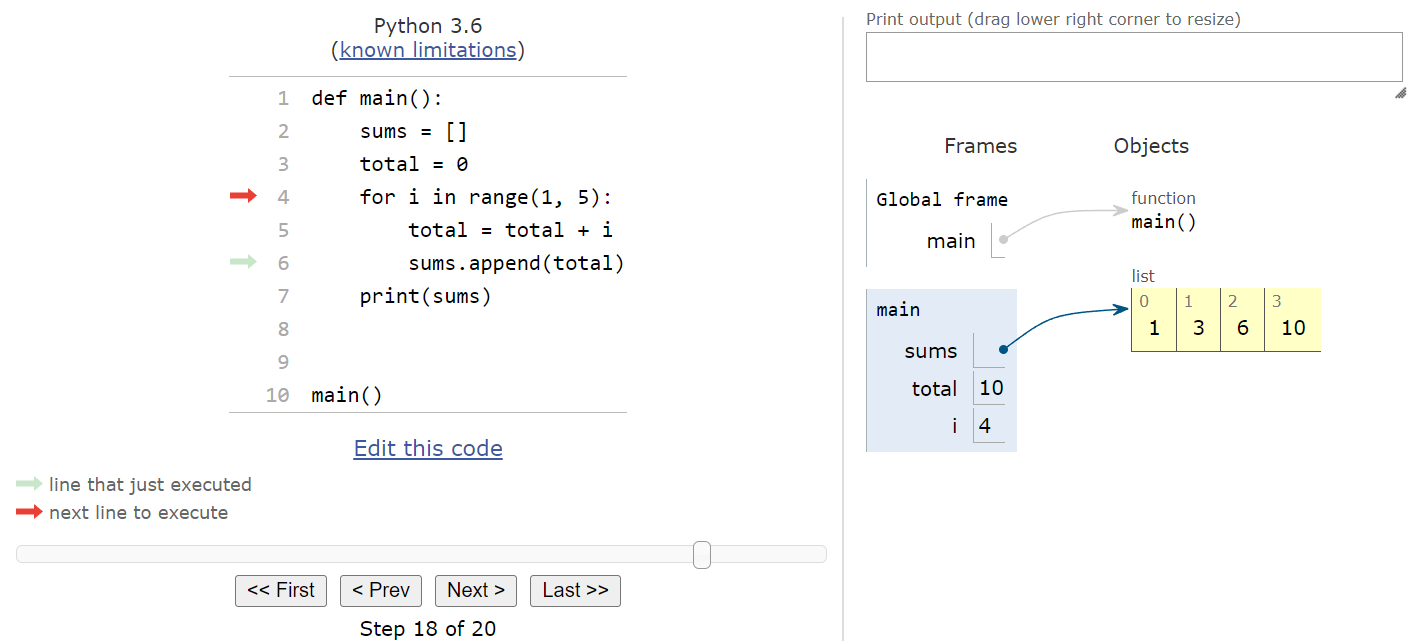
This last line of code will print the current contents of the sums list to the terminal. Python does a great job of formatting lists on the terminal so they are easy to read and understand. So, when we execute this line, we should see the following state, with output added in the print output section at the upper-right of the screen:
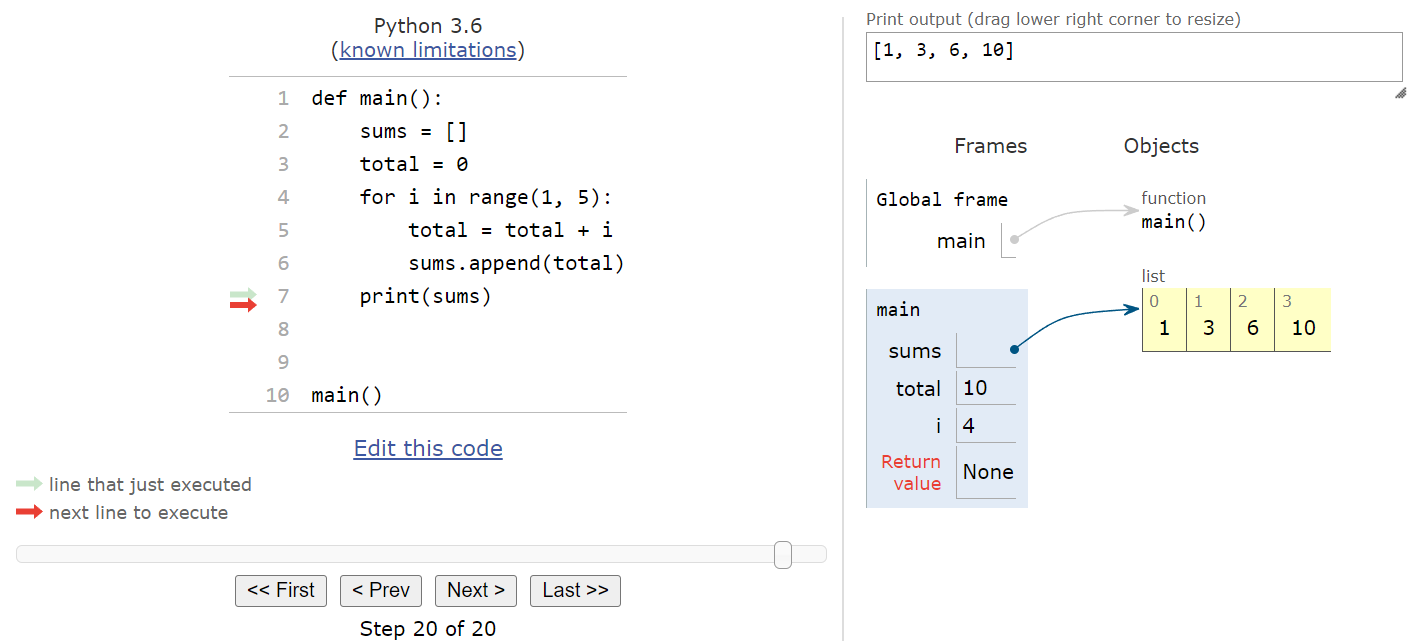
As we can see, adding elements to a list using a for loop works very easily, and Python Tutor does a great job showing us how Python will store that data in memory. The image below shows a full animation of this entire program.
Later in this lab, we’ll see why this particular structure is used and why it is important.