Pseudocode If
Resources
Now that we understand how to use Boolean values in our pseudocode programs, it’s time to put those values to use. One way to think of the result of a Boolean expression is that it helps us make a decision in our programs. For example, if we want to do something special in our program when the user inputs the value $42$ into the variable x, then we can write the Boolean expression x = 42 to help us decide if the user input the correct value.
Once we have that decision made, we need some way to tell our program to run a different piece of code based on the outcome of that decision. In pseudocode, as well as most other programming languages, we can use a special construct called an if statement to do this. If statements are one example of a conditional statement in programming.
In an if statement, we start with a Boolean expression. Then, if that Boolean expression evaluates to the value true, we run the code inside of the if statement. Otherwise, we just skip that code and continue executing the rest of the program.
The general structure of an if statement in pseudocode is shown here:
IF(<boolean expression>)
{
    <block of statements>
}
In this structure, the <boolean expression> is any expression that results in a Boolean value. Typically, we use Boolean comparators and operators to construct the statement, along with any variables that are needed. Likewise, the <block of statements> is just like a block of statements inside of a procedure - it consists of one or more statements or lines of code, which can be executed.
To see how an if statement works, let’s go through a couple of code traces in an example program.
Code Tracing Example - False
For this example, consider the following program in pseudocode:
PROCEDURE main()
{
    DISPLAY("Enter a number: ")
    x <- NUMBER(INPUT())
    IF(x = 42)
    {
        DISPLAY("You found the secret!\n")
    }
    DISPLAY("Thanks for playing!\n")
}

main()
Let’s run trace through this program a couple of times to see how an if statement works in pseudocode. As always, we’ll start our code trace as shown below:
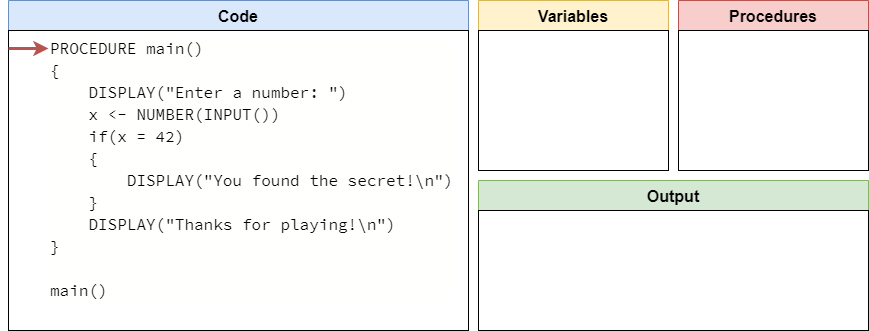
Next, we’ll process through the code, finding our main() procedure. At the end, we’ll reach the call for the main() procedure:
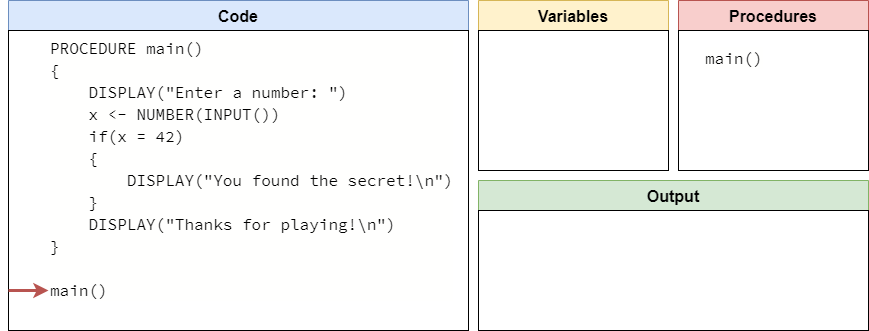
So, we’ll enter the main() procedure here.

The first line of code will display a prompt to the user:
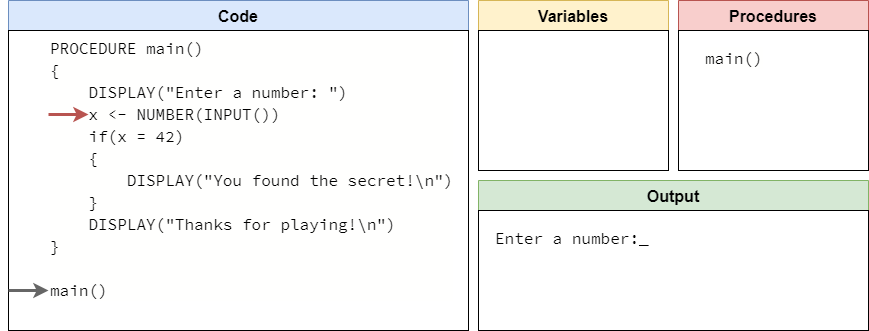
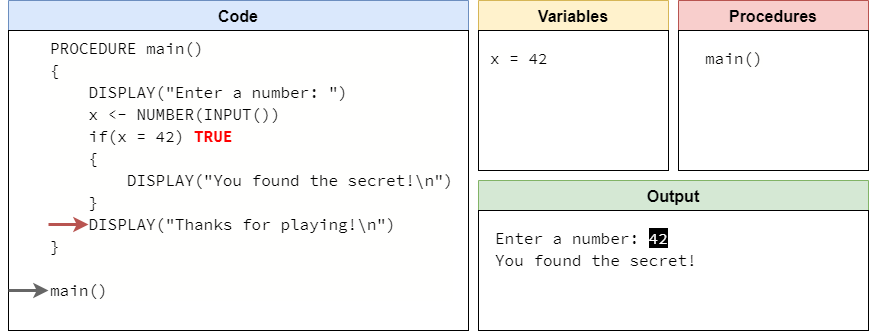
Then, we’ll read the input from the user and convert it to a number. In this example, let’s assume the user inputs the value "16" at the prompt. So, we’ll store the number value $16$ in the variable x.
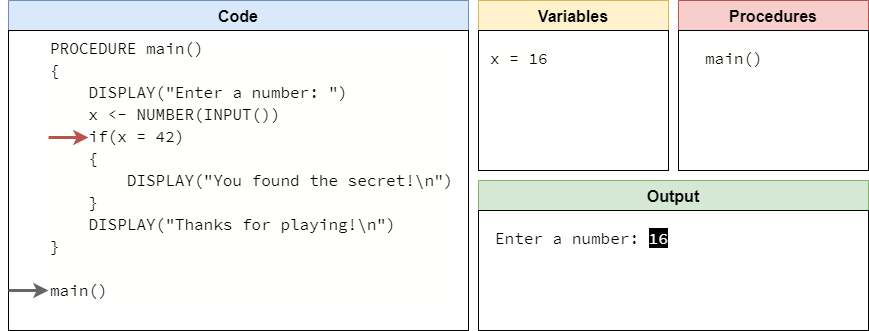
Now we have reached the beginning of the if statement in our code. When we evaluate an if statement, the first thing we need to do is evaluate the Boolean expression inside the parentheses. In this example, we are evaluating the expression x = 42. Since x is $16$, this evaluates to false:
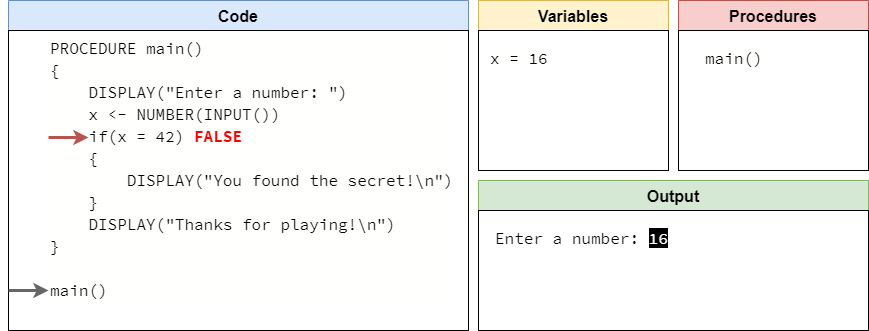
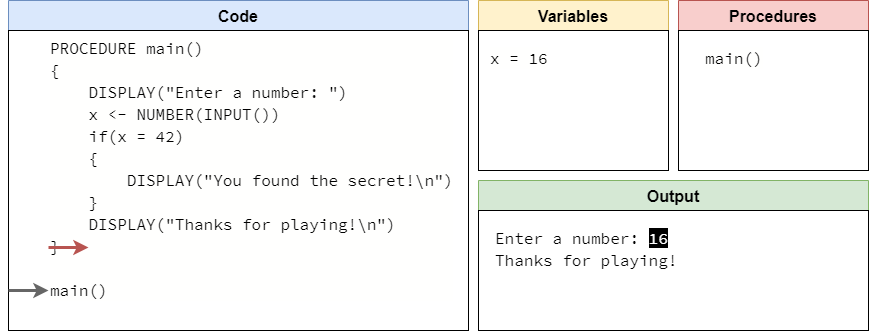
When the Boolean expression is false, we don’t execute the code inside of the if statement’s curly braces {}. So, we’ll just skip to the bottom of the statement, and execute the next line:

This line simply displays a message to the user, and then the program ends:
This entire process is shown in the animation below:

Code Tracing Example - True
Now let’s go back a few steps in the program to the point where it is expecting user input:
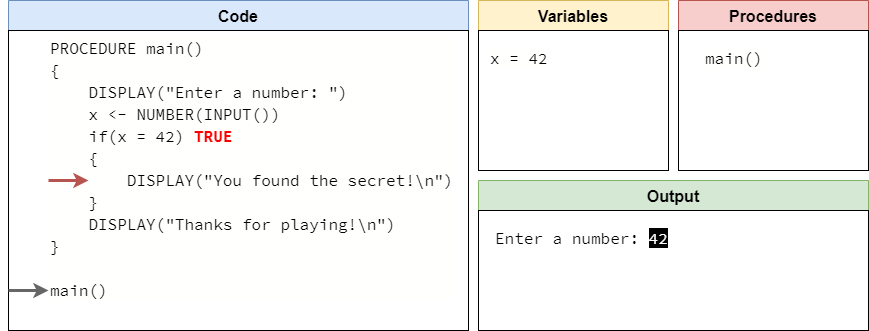
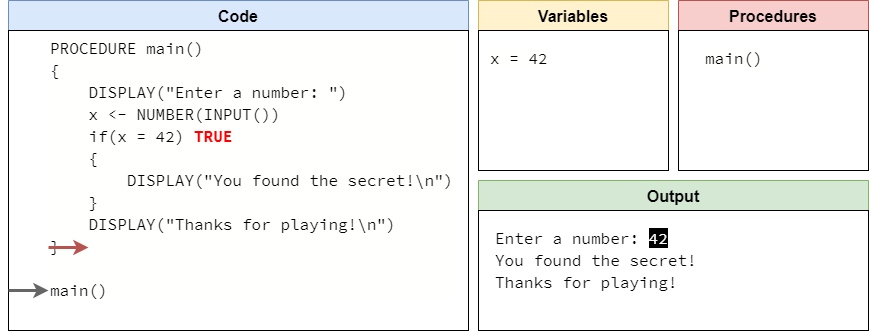
This time, let’s assume the user inputs the value "42" at the prompt. So, that means that the variable x will now store the value $42$ as shown here:

Now, when we reach the beginning of the if statement, we’ll evaluate the expression x = 42 again, but this time the result will be true since x is indeed storing the value $42$:

When the Boolean expression is true in an if statement, we should execute the code inside its curly braces {}. So, we’ll move the arrow down to that line:
This line will print out special output for the user, as shown here:
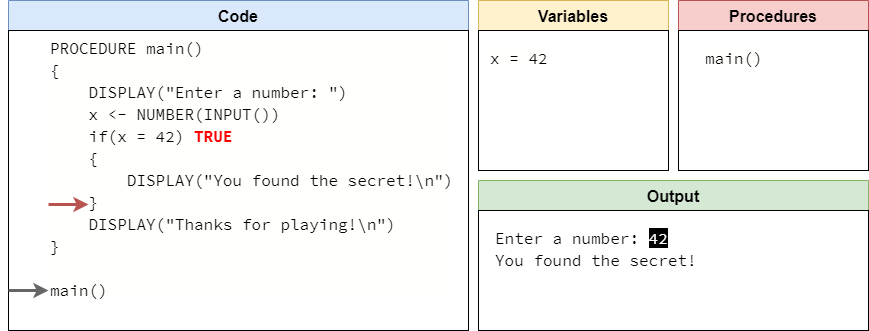
Once we’ve reached the end of the block of statements inside of the if statement, we’ll just continue through the program starting with the next line of code after the if statement:
This line will print a message as well, and then the program will end:
This entire process is shown in the animation below:

As we can see, an if statement is a powerful construct in our program. We can use any variables to create a Boolean expression using comparators and operators, and then we can use that result to make a decision about whether to run a special piece of code or not.
If Statement Flowchart
Another way to visualize an if statement is using a flowchart. Consider the following pseudocode:
x <- NUMBER(INPUT())
IF(x > 0)
{
    DISPLAY(x)
}
DISPLAY("Goodbye")
This pseudocode can also be represented as the flowchart shown below:
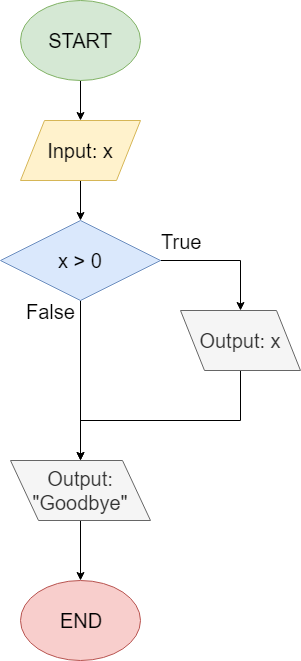
When we read flowcharts like this, we typically go from top to bottom, starting with the circle labeled “START”. The first step is to read input from the user, and store that value in the variable x.
Then, we reach a decision node, which uses a diamond shape. This node asks if the value in the variable x is greater than 0. Notice that there are two lines coming from the decision node: one labeled “True” and another labeled “False”. They correspond to the possible values that can result from evaluating the Boolean expression x > 0. So, if the result of that expression is true, then we’ll follow the path that exits the diamond from the side labeled “True”, and we’ll output the value x to the terminal. Once that is done, we can follow that path around to the next box that will output the string "Goodbye".
If that result is false, then we’ll follow the downward path labeled “False” and skip the path to the side. Instead, we’ll just reach the line that prints "Goodbye" and then end the program.
As we learn how to use if statements in our code, we might find it easier to use flowcharts or other tools to help understand exactly what our program will do. The path that a program takes through a flowchart like this is called the control flow of the program. We’ll discuss that topic a bit more toward the end of this lab.